
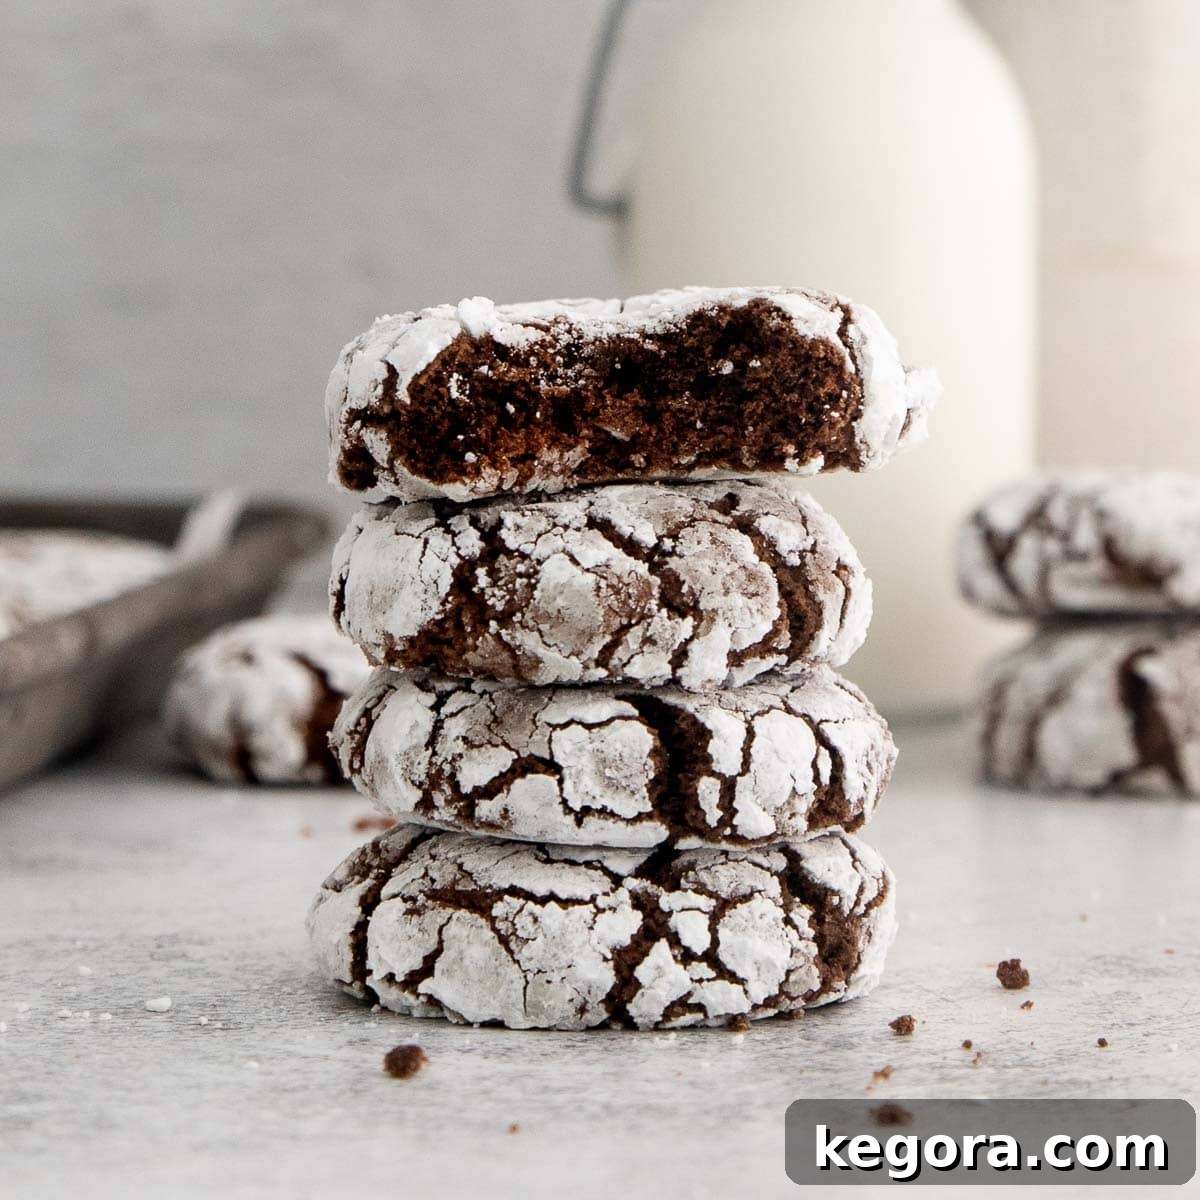
Irresistible Gluten-Free Chocolate Crinkle Cookies: A Holiday Must-Bake
There’s nothing quite like a homemade cookie to spread cheer, especially during the festive season. And when a Christmas cookie can be both incredibly simple to make and absolutely irresistibly delicious, you’ve found a true gem. These gluten-free chocolate crinkle cookies are precisely that – a magical combination of ease and exquisite flavor that will delight everyone who tries them.
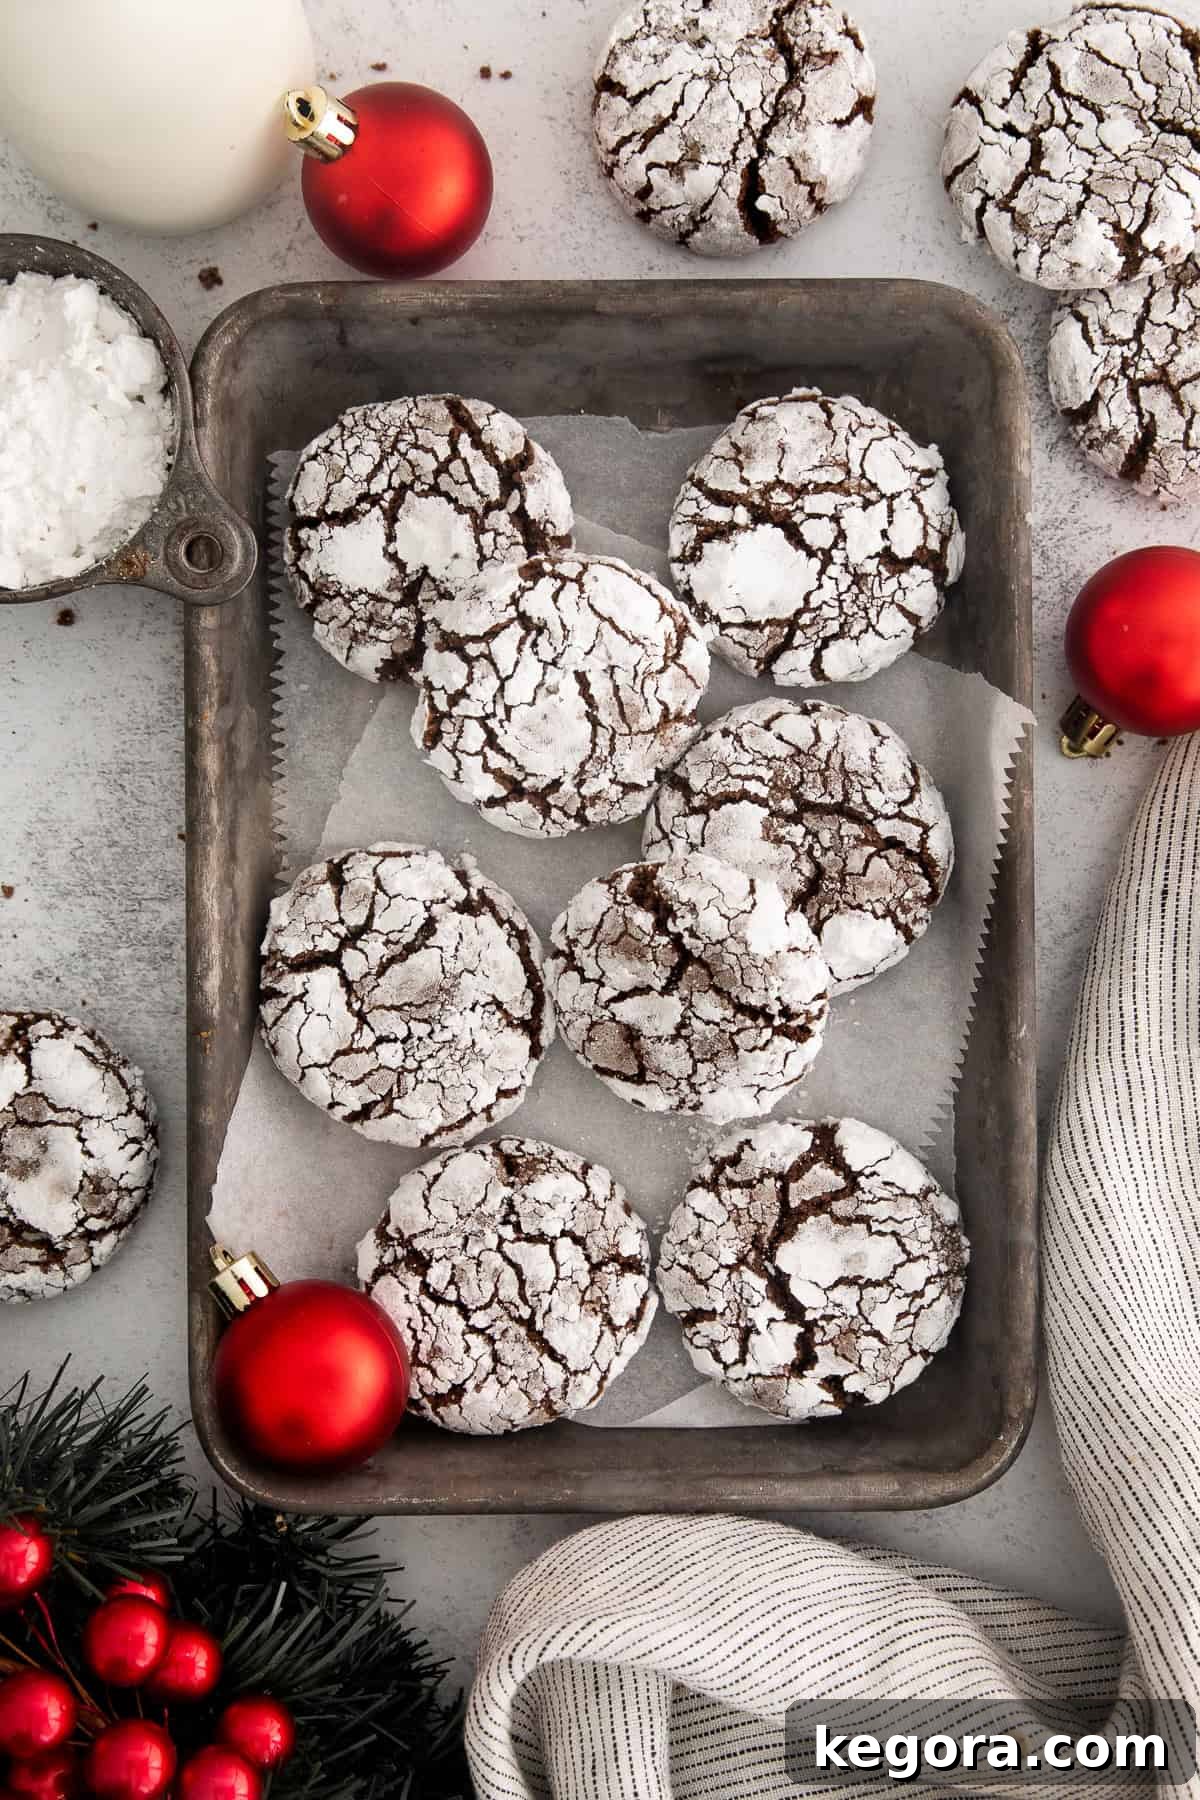
This recipe consistently ranks as one of my all-time favorite holiday cookie recipes. Their soft, fudgy texture and striking crackled appearance make them a standout on any dessert spread. I love preparing a big batch to assemble beautiful holiday cookie plates for thoughtful gifts to neighbors and friends, or to add a touch of elegance to a festive party spread. They truly embody the spirit of joyful baking and sharing.
Why You’ll Adore These Gluten-Free Chocolate Crinkle Cookies
These aren’t just any chocolate cookies; they are a delightful experience from the first glance to the last bite. You’ll fall in love with them for several compelling reasons:
- Effortless Elegance: Despite their sophisticated appearance, these cookies are surprisingly easy to whip up using standard pantry ingredients. No complicated techniques or obscure items are needed, making them perfect for bakers of all skill levels.
- Fudgy, Soft Texture: Imagine the richest, chewiest brownie, but in cookie form. That’s exactly what you get with every bite. The interior is wonderfully moist and tender, melting in your mouth.
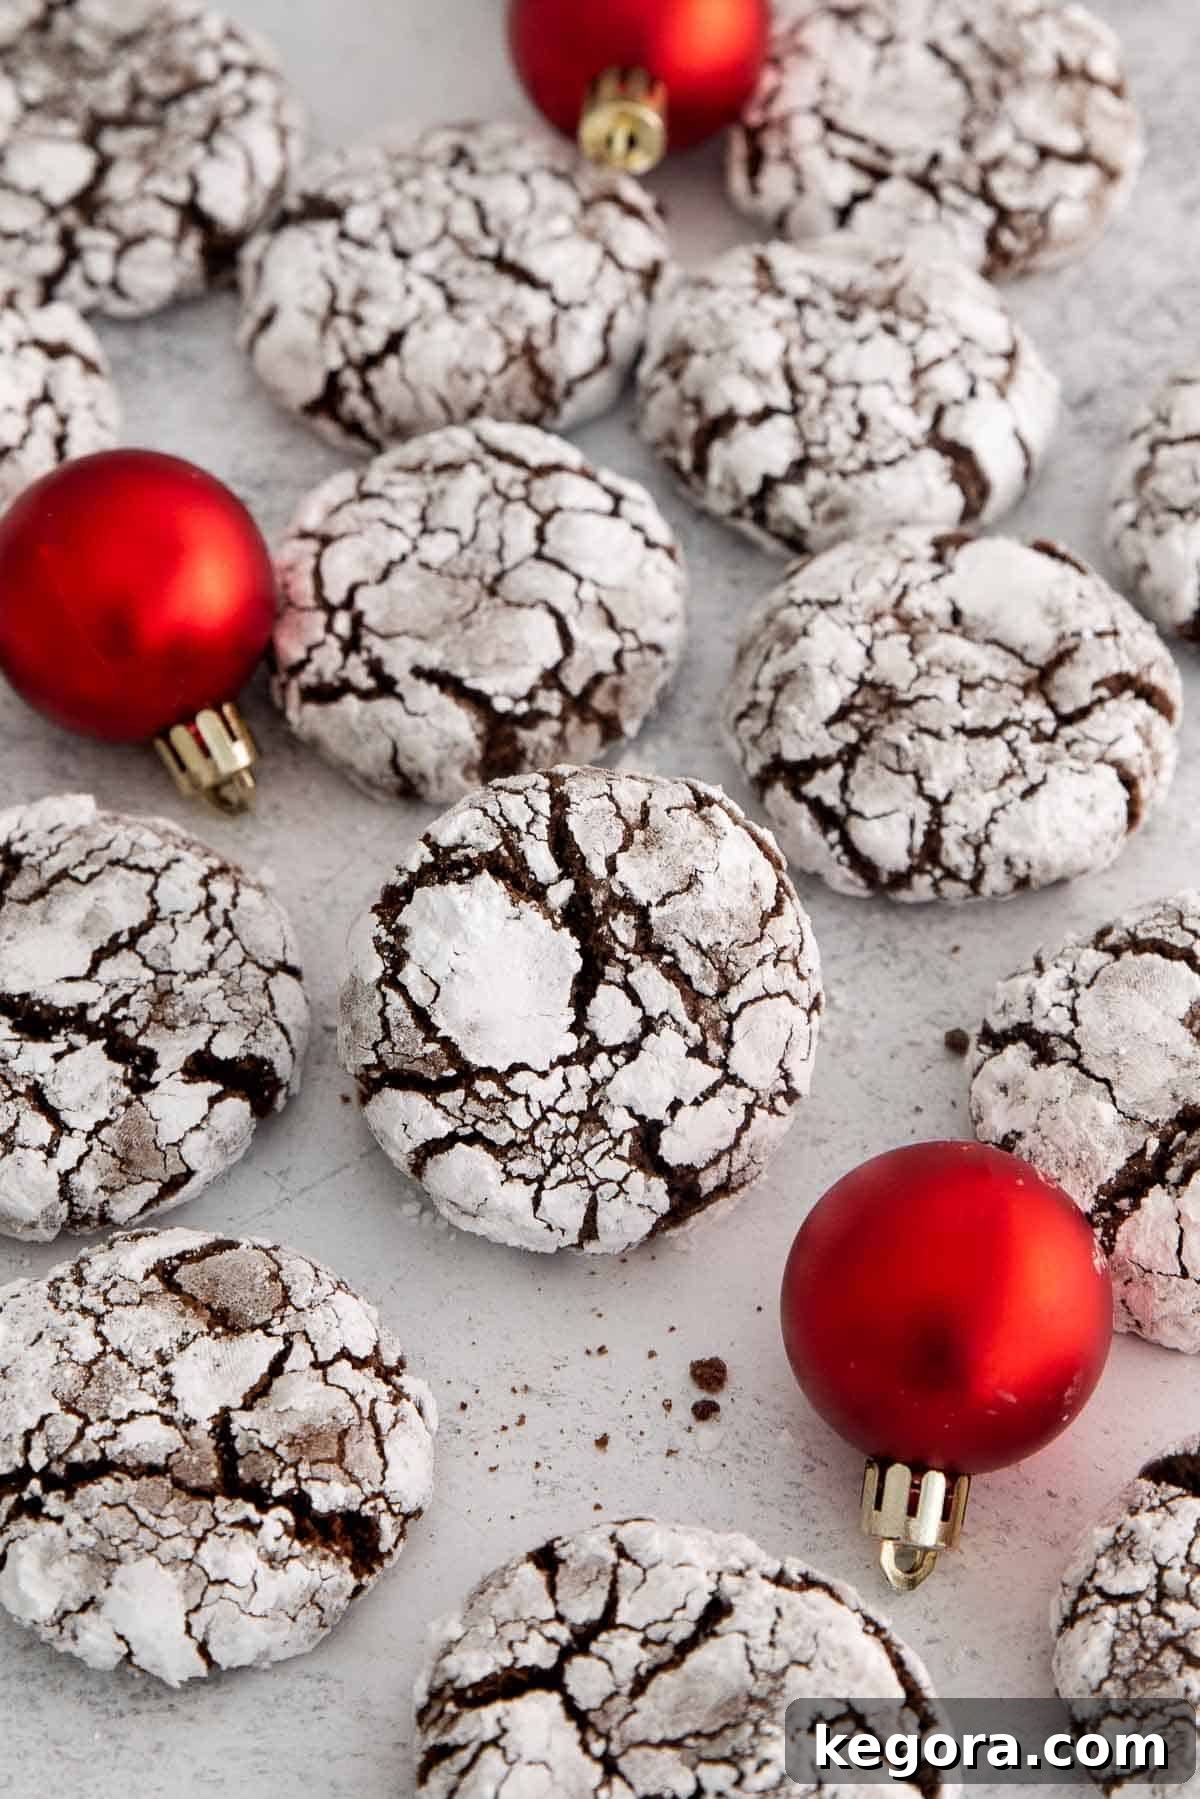
- Signature Crackly Coating: The unique powdered sugar coating creates a beautiful, snowy “crinkle” effect as the cookies bake and expand. This visual appeal is what makes them instantly recognizable and so festive.
- Intense Chocolate Flavor: Made with natural cocoa powder, these cookies deliver a deep, satisfying chocolate punch that’s incredibly satisfying without being overly sweet. It’s truly hard to stop at just one!
- Holiday Favorite: Their festive look and classic flavor profile make them a staple for Christmas cookie exchanges, holiday parties, or simply enjoying with a warm cup of cocoa by the fire.
Essential Tips for Perfect Gluten-Free Crinkle Cookies
Achieving that iconic crinkle and perfect texture is simple when you follow a few key tips:
- The Double Roll Method: For the best, most lasting powdery coating, roll your chilled cookie dough balls first in granulated sugar. This layer helps the powdered sugar adhere better and protects it from absorbing into the dough too quickly. Then, roll generously in powdered sugar, ensuring a thick, even coat. This ensures a stunning crackle that holds up beautifully during baking.
- Chill Your Dough: Don’t skip the refrigeration step! Chilling the dough for at least 2 hours (or up to 3 days) is crucial. It allows the flour to fully hydrate, prevents excessive spreading, and makes the dough much easier to handle for rolling. It also deepens the chocolate flavor.
- Room Temperature Ingredients: Ensure your butter and eggs are at room temperature. This allows them to cream together more effectively with the sugars, creating an emulsified, airy base for your cookie dough, which contributes to their soft, fudgy texture.
- Don’t Overbake: These cookies are best when slightly underbaked. They should look set around the edges but still appear soft and slightly puffy in the center. They will continue to firm up as they cool on the baking sheet. Overbaking will result in dry, less fudgy cookies.
- Parchment Paper is Your Friend: Always line your baking sheets with parchment paper or silicone baking mats. This prevents sticking, ensures even baking, and makes for easy cleanup.
If you’re looking to expand your repertoire of delicious gluten-free holiday treats, be sure to explore more of my favorites! You might love these gluten-free chocolate marshmallow cookies for an extra decadent bite, classic gluten-free Christmas sugar cookies for decorating fun, aromatic gluten-free gingerbread cookies, buttery gluten-free shortbread cookies, or sophisticated gluten-free biscotti.
xoxo erin
Featured Comment
From Julia: “These are so delicious!! You can’t even tell they’re GF. And taste test approved by non GF family and friends!”
💬55 more comments
Key Ingredients for Gluten-Free Chocolate Crinkle Cookies
Crafting the perfect gluten-free chocolate crinkle cookies begins with understanding the role of each ingredient. Here are a few notes on the key components that give these cookies their signature flavor and texture. For precise quantities, you can always jump to the full recipe card below.
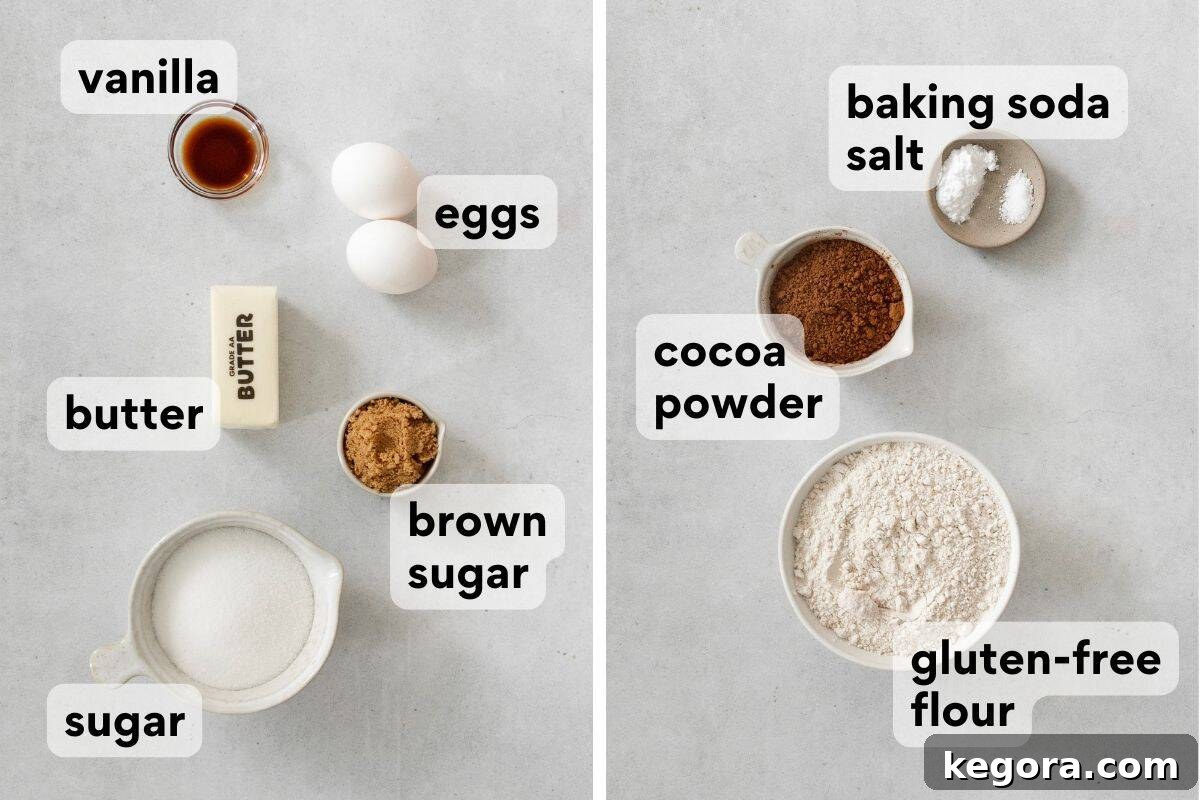
- Gluten-Free Measure-for-Measure Flour Blend: This is the cornerstone of our gluten-free baking. For consistently excellent results, I highly recommend using a high-quality gluten-free measure-for-measure flour blend that already contains xanthan gum. Xanthan gum acts as a binder and thickener, mimicking the elasticity and structure that gluten provides in traditional flour. My personal favorite, King Arthur’s Gluten-Free Measure for Measure Flour, consistently delivers the best texture and prevents crumbling.
- Unsweetened Natural Cocoa Powder: The type of cocoa powder you choose significantly impacts the flavor profile. I recommend using natural cocoa powder in this recipe. Its slightly acidic nature reacts beautifully with the baking soda, contributing to the cookies’ lift and creating that distinct, deep chocolate flavor. Dutch-processed cocoa, which is less acidic, would produce a different result here, so stick to natural for the best texture and taste.
- Granulated Sugar and Brown Sugar: Our recipe utilizes a combination of both white and brown sugars, each playing a crucial role. The granulated sugar contributes to the cookies’ spread during baking, which is essential for developing those beautiful crinkles, and also adds a touch of crispness to the edges. Brown sugar, on the other hand, adds moisture, ensuring a delightfully chewy and fudgy interior. You can use either light or dark brown sugar; both will yield delicious results, with dark brown sugar offering a slightly richer molasses flavor.
- Unsalted Butter, at Room Temperature: Softened butter is key for proper creaming with the sugars, creating a light and airy base for the dough. This aeration is vital for the cookies’ texture. If your butter is too cold, it won’t cream properly; if it’s melted, your cookies may spread too much.
- Large Eggs: Eggs provide structure, richness, and act as a binder, helping to hold the cookies together. Using large eggs at room temperature ensures they incorporate smoothly into the batter without curdling.
- Vanilla Extract: A touch of pure vanilla extract enhances the chocolate flavor, adding depth and complexity to these already delicious cookies.
- Baking Soda and Kosher Salt: Baking soda works with the natural cocoa powder to provide leavening, contributing to the soft, cake-like interior. Kosher salt balances the sweetness and brings out the full intensity of the chocolate flavor.
For those who love gluten-free chocolate in all its forms, don’t miss these other fantastic recipes: the ultimate gluten-free chocolate chip cookies, wonderfully rich flourless chocolate cookies, classic gluten-free chocolate cookies, and a decadent gluten-free chocolate cake.
Crafting Your Own Gluten-Free Chocolate Crinkle Cookies: A Step-by-Step Guide
Baking these delightful cookies is a straightforward process, ensuring fantastic results even for novice bakers. Below is an overview of the key steps. For complete, detailed instructions and ingredient measurements, remember you can always jump to the full recipe card!
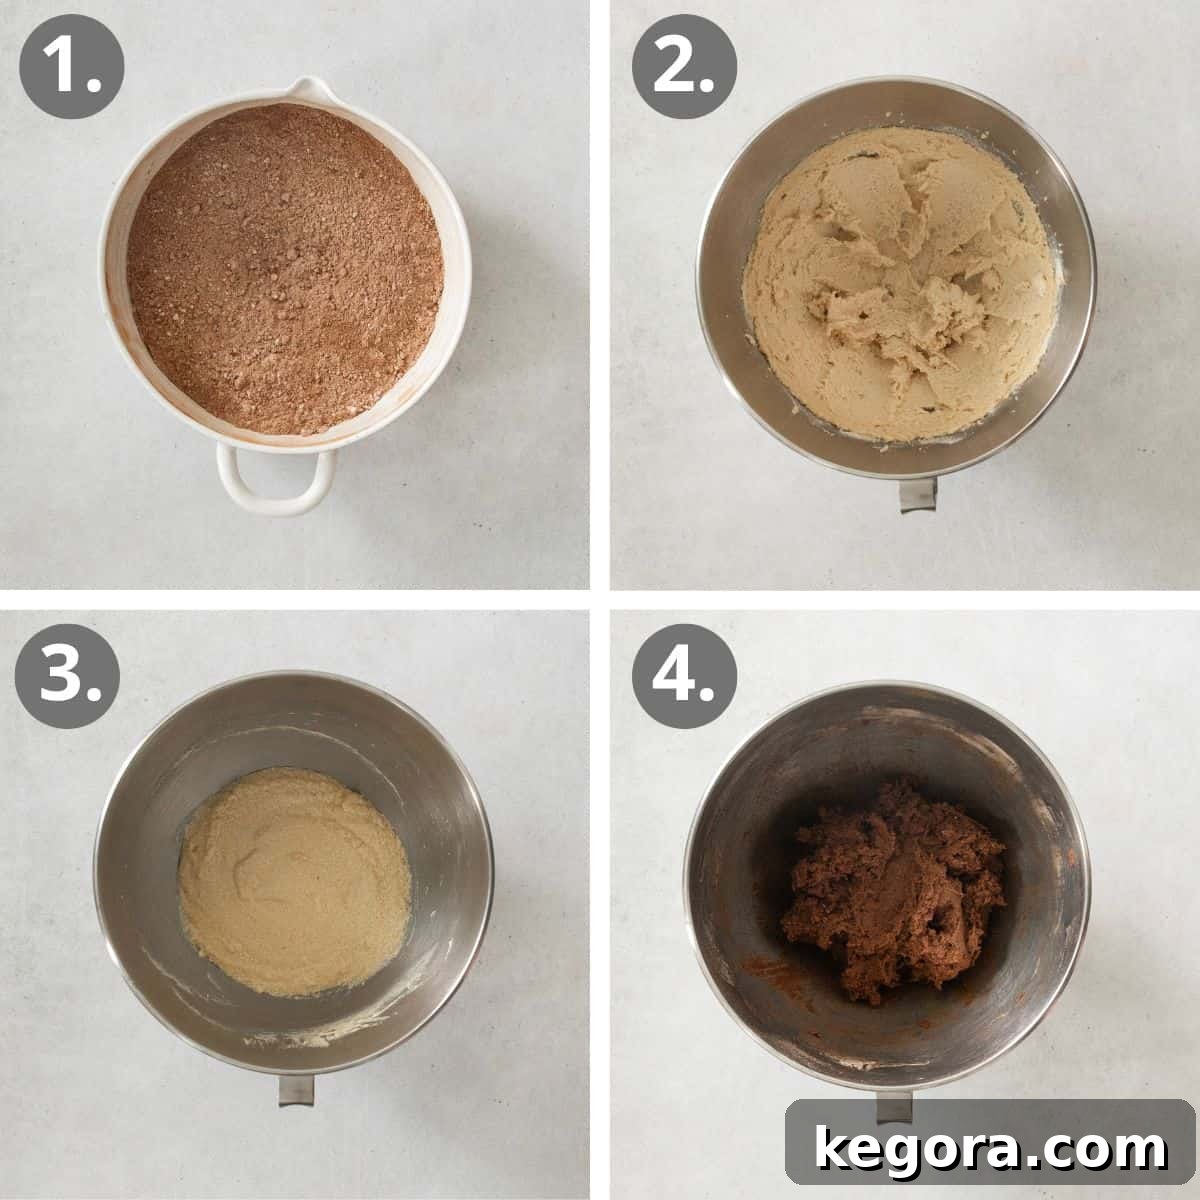
Step 1: Prepare Your Dry Ingredients. In a medium-sized mixing bowl, whisk together your gluten-free flour blend, unsweetened cocoa powder, baking soda, and kosher salt. Whisking ensures that the leavening agent and salt are evenly distributed throughout the flour, which is critical for consistent texture and flavor in every cookie. Once combined, set this bowl aside.
Step 2: Cream Butter and Sugars. In the bowl of a stand mixer fitted with the paddle attachment (or using a hand mixer and a large bowl), beat the softened room-temperature butter with both granulated sugar and brown sugar until the mixture is light, fluffy, and smooth. This creaming process incorporates air into the butter and sugar, which contributes significantly to the cookies’ tender texture. It typically takes about 2-3 minutes of beating.
Step 3: Incorporate Eggs and Vanilla. Add the two large room-temperature eggs, one at a time, beating well after each addition until fully incorporated. Follow with the vanilla extract and continue to beat the mixture on medium speed for another 2-3 minutes. This step creates a beautifully light and fluffy base, ensuring your cookies have that desirable richness and structure.
Step 4: Combine Wet and Dry Mixtures. Gradually add the whisked dry ingredients to the wet ingredients in the mixer bowl. Mix on low speed until just combined. Be careful not to overmix, as this can lead to tougher cookies, especially with gluten-free flours. Halfway through mixing, pause to scrape down the sides and bottom of the bowl with a spatula to ensure all ingredients are thoroughly incorporated. Once the dough comes together, cover the bowl tightly with plastic wrap and refrigerate for a minimum of 2 hours. This chilling time is essential for the dough to firm up, making it easier to roll, and it also allows the flavors to meld beautifully.
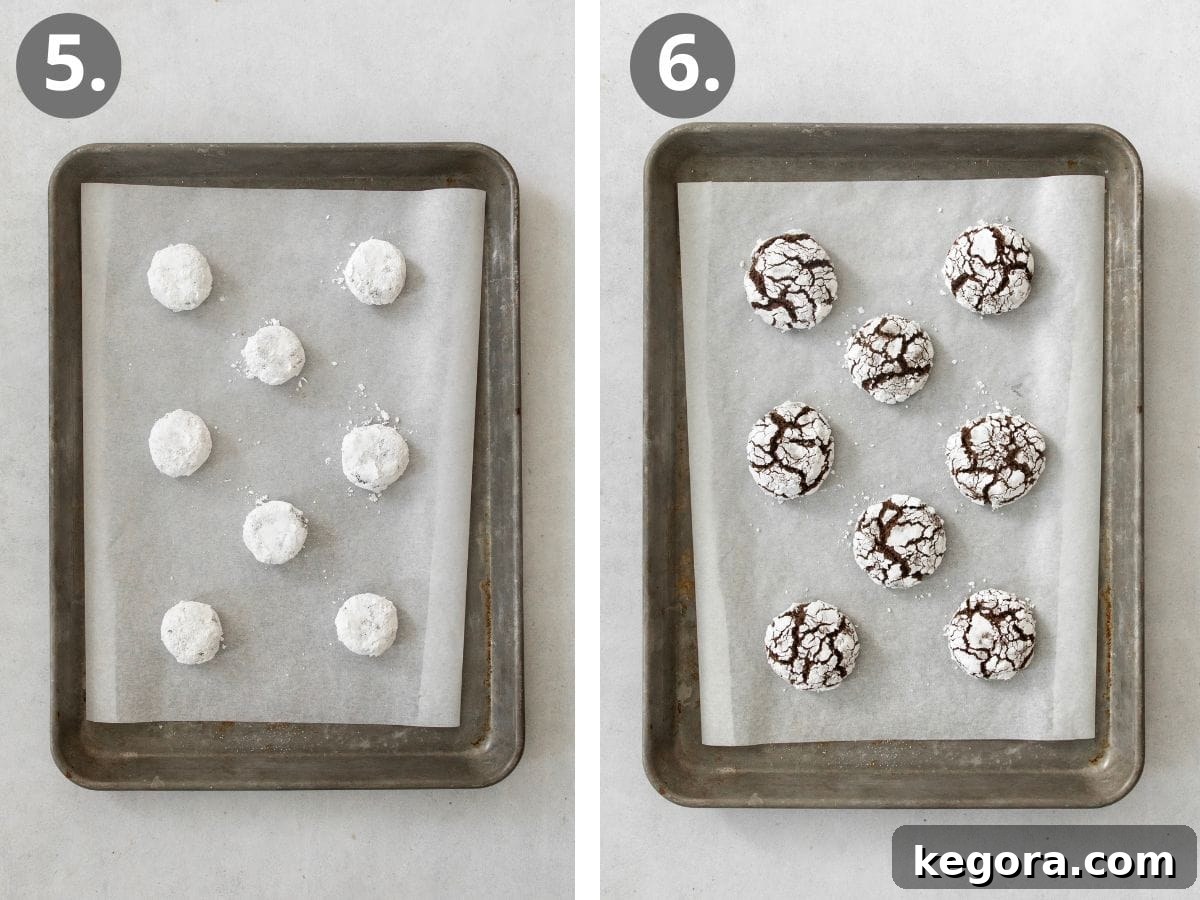
Step 5: Scoop, Roll, and Coat. Once your dough is sufficiently chilled, it’s time to create those signature crinkles! Using a cookie scoop, portion the dough into uniform balls. I find that approximately 2 tablespoons of dough per ball is the ideal size for a perfect cookie. First, roll each dough ball thoroughly in granulated sugar. This initial coating helps create a barrier and allows the powdered sugar to adhere better. Then, roll each ball generously in powdered sugar, ensuring it’s completely coated on all sides. This double-rolling technique is crucial for achieving that distinct, snow-dusted, crackled appearance that these cookies are famous for.
Step 6: Arrange and Bake. Place the coated cookie dough balls on your prepared baking sheet (lined with parchment paper), ensuring about 2 inches of space between each cookie. This allows them ample room to spread and develop their beautiful crinkles without merging into one another. Bake in your preheated oven until the edges are just set but the centers still look soft and slightly gooey. This usually takes about 10-12 minutes, but oven temperatures can vary, so keep a close eye on them. It’s important not to overbake; remember, cookies continue to firm up as they cool, so a slightly soft center is actually a sign of perfection for that ultimate fudgy texture!
Step 7: Cool and Enjoy. Once baked, remove the cookies from the oven and let them cool on the hot baking sheet for about 5 minutes. This allows them to set further without breaking. After 5 minutes, carefully transfer them to a wire rack to cool completely. Cooling on a wire rack ensures air circulation, preventing soggy bottoms and completing the setting process. Once fully cooled, these gorgeous, fudgy gluten-free chocolate crinkle cookies are ready to be savored!
★★★★★
Gluten-Free Chocolate Crinkle Cookies
Erin Collins
20
10
2
2
30
24
cookies
Be sure to add these incredible cookies to your Christmas cookie tray this year for the best gluten-free dessert experience that everyone will enjoy, whether they’re gluten-free or not!
Comments
Print Recipe
Ingredients
Dry Ingredients
- 1¾ cups (262g) gluten-free measure-for-measure flour blend
- ½ cup (41g) unsweetened natural cocoa powder
- 1 teaspoon baking soda
- ½ teaspoon kosher salt
Wet Ingredients & Flavor
- ½ cup (113g) unsalted butter at room temperature
- ¾ cup (150g) granulated sugar
- ¼ cup (53g) light or dark brown sugar
- 2 large eggs at room temperature
- 2 teaspoons pure vanilla extract
For Rolling
- ½ cup (100g) granulated sugar
- ½ cup (60g) powdered sugar
Instructions
-
In a medium bowl, thoroughly whisk together the gluten-free flour blend, cocoa powder, baking soda, and salt. Set the bowl aside for later use.
-
In the bowl of a stand mixer (or using a hand mixer), beat the room-temperature butter with both the granulated sugar and brown sugar until the mixture is light, fluffy, and perfectly smooth. This should take approximately 2-3 minutes.
-
Add the large eggs one at a time, beating well after each addition. Stir in the vanilla extract, then continue beating on medium speed for another 2-3 minutes until the mixture is visibly light and airy.
-
Gradually add the prepared dry ingredients to the wet ingredients. Mix on low speed until just combined, being careful not to overmix. Make sure to scrape down the bottom and sides of the bowl halfway through to ensure everything is evenly incorporated.
-
Cover the bowl containing the cookie dough with plastic wrap and refrigerate for a minimum of 2 hours. For optimal results and flavor development, you can chill it for up to 3 days.
-
When ready to bake, preheat your oven to 350°F (175°C). Line large baking sheets with parchment paper or silicone baking mats.
-
Scoop the chilled cookie dough into round balls, using about 2 tablespoons per ball. First, roll each dough ball thoroughly in the granulated sugar, ensuring a good coating. Then, roll each ball generously in the powdered sugar until fully coated.
-
Place the prepared dough balls on the lined baking sheets, leaving approximately 2 inches of space between each cookie to allow for spreading and crinkling.
-
Bake for 10-12 minutes, or until the edges are just set and the centers still appear soft. Remember, these cookies continue to firm up as they cool, so avoid overbaking.
-
Remove the baking sheets from the oven and let the cookies cool on the sheets for 5 minutes. This allows them to set sufficiently. After 5 minutes, transfer them to a wire rack to cool completely.
Recipe Notes & Expert Tips
Making them Dairy-Free: Transforming these into dairy-free chocolate crinkle cookies is simple! Just substitute the unsalted butter with your favorite dairy-free butter alternative. Look for plant-based butters that are specifically designed for baking, as they tend to have the right fat content and moisture balance.
Naturally Nut-Free: One of the best features of this recipe is that these cookies are inherently nut-free, making them a safe and delicious option for those with nut allergies or for school events where allergens are a concern.
Make-Ahead Mastery: This recipe is a dream for meal prep and holiday baking! You can prepare the cookie dough up to 3 days in advance. Simply cover the bowl tightly with plastic wrap and store it in the refrigerator. When you’re ready to bake, let it sit at room temperature for about 10-15 minutes to soften slightly before scooping and rolling.
Storing Baked Cookies: Once completely cooled, store your baked gluten-free chocolate crinkle cookies in an airtight container at room temperature. They will maintain their freshness, soft texture, and fudgy goodness for up to 5 days, though they rarely last that long!
Freezing Cookie Dough for Later: For ultimate convenience, freeze the dough! Shape the dough into balls as directed in the recipe, then place them on a parchment-lined baking sheet and freeze until solid (about 1-2 hours). Once firm, transfer the frozen dough balls to a freezer-safe bag or airtight container. They can be frozen for up to 3 months. When you’re ready to bake, you can bake them directly from frozen; just add a few extra minutes to the baking time (12-15 minutes total).
Freezing Baked Cookies: If you’ve baked a large batch and want to save some for later, these cookies freeze beautifully once baked. Allow them to cool completely on a wire rack. Then, transfer them to a freezer-safe bag or an airtight container, separating layers with parchment paper if stacking. Freeze for up to 3 months. To enjoy, simply thaw them at room temperature for an hour or two.
Don’t Forget the Double Roll: As mentioned, the double roll in granulated sugar THEN powdered sugar is crucial for that perfect snowy crinkle. Don’t skimp on the powdered sugar!
Variations to Explore: Feel free to get creative! A hint of peppermint extract (½ teaspoon) can be added with the vanilla for a mint chocolate twist. A teaspoon of orange zest can brighten the chocolate flavor. You could also sprinkle a pinch of flaky sea salt on top of the baked cookies for a gourmet touch.
Serving Suggestions: These cookies are fantastic on their own, but they also pair wonderfully with a cold glass of milk, a warm cup of coffee or tea, or alongside a scoop of vanilla bean ice cream for an extra special dessert. They make a thoughtful homemade gift packaged in a decorative tin.
Nutrition Information (per serving, approx. 1 cookie)
Carbohydrates: 23g |
Protein: 2g |
Fat: 5g |
Saturated Fat: 3g |
Polyunsaturated Fat: 0.3g |
Monounsaturated Fat: 1g |
Trans Fat: 0.2g |
Cholesterol: 24mg |
Sodium: 131mg |
Potassium: 37mg |
Fiber: 2g |
Sugar: 15g |
Vitamin A: 138IU |
Calcium: 13mg |
Iron: 1mg
Frequently Asked Questions About Gluten-Free Chocolate Crinkle Cookies
Here are answers to some common questions you might have while baking these delightful cookies:
- Why didn’t my cookies crinkle properly? The most common reasons for a lack of crinkle are insufficient chilling of the dough or not rolling generously enough in powdered sugar. Ensure your dough is chilled for at least two hours to prevent spreading too rapidly. Also, make sure to use the double-roll method (granulated then powdered sugar) for the best result.
- Can I make these dairy-free? Absolutely! Simply substitute the unsalted butter with your favorite dairy-free butter alternative. Many high-quality plant-based butters work wonderfully in baking.
- My cookies spread too much, what went wrong? Excessive spreading can occur if your butter was too soft or melted, if your dough wasn’t chilled long enough, or if your oven temperature isn’t accurate. Always use room-temperature (but not melted) butter and ensure the dough has adequate chilling time. Check your oven with an oven thermometer for accuracy.
- Are these cookies very sweet? While they have sugar for texture and sweetness, the unsweetened natural cocoa powder provides a deep, rich chocolate flavor that balances the sweetness, resulting in a perfectly balanced and indulgent cookie.
- Can I add mix-ins like chocolate chips or nuts? For a true crinkle effect, it’s best to avoid chunky mix-ins, as they can interfere with the dough’s ability to crackle. However, if you’re not concerned about the perfect crinkle, a small amount of mini chocolate chips could be added. For a nut-free cookie, avoid nuts altogether, as this recipe is naturally nut-free.
Final Thoughts on These Must-Bake Holiday Cookies
These gluten-free chocolate crinkle cookies are more than just a recipe; they are an invitation to create warm, fudgy, and visually stunning memories in your kitchen. Their simplicity, combined with their irresistible flavor and perfect texture, makes them an undisputed winner for any occasion, especially during the festive holiday season.
Whether you’re baking for family, gifting to friends, or simply treating yourself, these cookies are guaranteed to bring smiles. They prove that gluten-free baking can be every bit as decadent and delightful as traditional treats, without compromise. So, gather your ingredients, follow these easy steps, and prepare to fall in love with your new favorite chocolate cookie. Happy baking, and enjoy every fudgy, crinkly bite!
This post was originally published in December 2022. It was updated with new instructions, enhanced tips, and expanded content in November 2025 to provide the most comprehensive guide for baking perfect gluten-free chocolate crinkle cookies.