

Discover Erin’s Gluten-Free Thumbprint Cookies

Welcome to a delightful baking experience with these exceptional Gluten-Free Thumbprint Cookies! Crafted with love and perfected through careful testing, this recipe promises a festive treat that will become a cherished part of your holiday traditions. Here’s a quick rundown of what makes these cookies truly special:
- Irresistible Texture: Prepare for cookies that are wonderfully soft and tender, melting in your mouth without ever being dry or crumbly. The secret lies in a balanced gluten-free flour blend and precise baking techniques.
- Delightful Taste Profile: Each bite delivers the classic, rich flavor of buttery shortbread perfectly complemented by a burst of fruity, sweet jam. It’s a harmonious blend that satisfies both nostalgia and gourmet cravings.
- Effortless Baking Experience: This recipe is designed to be enjoyable and straightforward, making it a fantastic baking project for all skill levels. Even beginner bakers will find success in creating these beautiful cookies.
- Essential Baking Insights: To ensure your thumbprint cookies maintain their ideal shape and prevent the jam from sinking into the dough, it’s crucial to freeze them before baking. This simple step makes all the difference!
- Recommended Gluten-Free Flour: For consistent, high-quality results, I highly recommend using King Arthur Flour Gluten-Free Measure-for-Measure Flour. Its excellent composition, including xanthan gum, is key to achieving the perfect cookie texture.
- A Recipe to Revisit: Absolutely! These thumbprint cookies are incredibly versatile. Whether you opt for a quick store-bought jam or indulge in making homemade preserves, you can customize the flavors to suit your preferences and create a unique batch every time. They are truly a joy to bake and share!
Warmly, Erin

This post was originally published in December 2022. It was meticulously updated with new photos and enhanced instructions in November 2024 to provide you with the best possible baking guide.
There’s something undeniably magical about thumbprint cookies. They are a delightful contradiction: rich and buttery, yet wonderfully bright and fruity. They embody both cherished tradition and a touch of unique homemade charm. Simple to prepare, yet utterly delicious in every bite, these iconic Christmas cookies are an absolute essential for making your holiday season brighter and more flavorful. Imagine the joy of these beautiful cookies gracing your festive table or being shared as thoughtful, homemade gifts.
What makes these particular gluten-free thumbprint cookies even more special is their family-friendly appeal. They offer a fantastic baking project to enjoy with young children, creating lasting memories in the kitchen. Kids will adore the hands-on fun of pressing their thumbs into the center of each soft cookie dough ball, creating the perfect cavity for a spoonful of vibrant jam. This recipe provides festive fun for the entire family, transforming a simple baking session into a heartwarming holiday activity. Get ready to create a batch of these classic gluten-free treats that are sure to impress and satisfy everyone!
The Secret to Perfect Gluten-Free Thumbprint Cookies: Why This Recipe Works
After extensive testing and refining, I’ve uncovered the ultimate secret to baking gluten-free thumbprint cookies that consistently hold their shape beautifully and prevent the delicious jam from seeping into the cookie dough. This game-changing technique involves one crucial step: freezing the cookies thoroughly before baking. This allows the butter in the dough to firm up, creating a more stable structure that resists spreading in the oven. It also helps to create a barrier, ensuring the jam remains a distinct, vibrant filling rather than being absorbed. This simple yet powerful tip guarantees a superior cookie every time, giving you perfectly shaped, jam-filled delights!
Featured Testimonial
From Shara: “‘I didn’t know cookies could be so good!’ Said my gluten-eating husband! 5 stars all the way!!”
47 more comments
Table of Contents
- Discover Erin’s Gluten-Free Thumbprint Cookies
- The Secret to Perfect Gluten-Free Thumbprint Cookies: Why This Recipe Works
- Key Ingredients for Gluten-Free Thumbprint Cookies
- Step-by-Step: How to Make Gluten-Free Thumbprint Cookies
- Make-Ahead, Storage, and Freezing Guide
- Can These Gluten-Free Thumbprint Cookies Be Made Dairy-Free?
- Why Did My Thumbprint Cookies Go Flat?
- How Do I Keep Gluten-Free Thumbprint Cookies from Spreading?
- How Do I Make Sure My Gluten-Free Thumbprint Cookies Turn Out Moist?
- Top Tips for Gluten-Free Thumbprint Cookie Success
- Explore More Gluten-Free Christmas Cookie Recipes
- Gluten-Free Thumbprint Cookies Recipe Card
Key Ingredients for Irresistible Gluten-Free Thumbprint Cookies
Crafting the perfect batch of gluten-free thumbprint cookies begins with understanding the role of each ingredient. Below are essential notes on the key components that give these cookies their exceptional texture and flavor. For precise measurements, be sure to jump directly to the detailed recipe card further down the page.
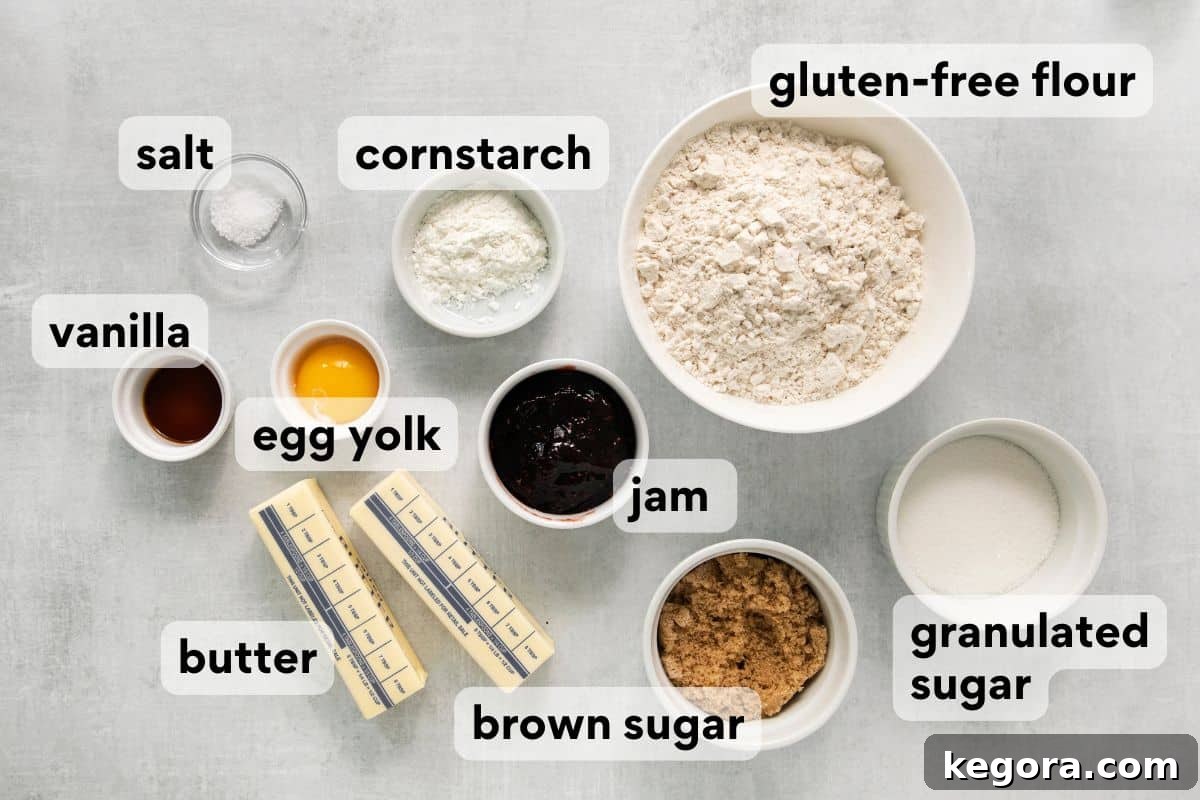
- Gluten-Free Measure-for-Measure Flour: This is the foundation of our cookies. I cannot stress enough the importance of using a high-quality gluten-free measure-for-measure flour blend that already contains xanthan gum. Xanthan gum acts as a crucial binder, replicating the elasticity of gluten and preventing your cookies from becoming crumbly. It ensures the dough holds together beautifully and achieves that desirable tender, soft texture. Without it, gluten-free baked goods often fall apart. My absolute favorite and highly recommended brand for this recipe is this brand, which consistently delivers excellent results.
- Cornstarch: A secret weapon in gluten-free baking, cornstarch plays a vital role in tenderizing the cookies. By lightening the gluten-free flour blend, it contributes significantly to the delicate, melt-in-your-mouth crumb that we all love in shortbread-style cookies. It helps achieve a perfectly tender, not tough, result.
- Single Large Egg Yolk: Unlike many recipes that call for a whole egg, we specifically use only one large egg yolk here. This is a deliberate choice to enrich the cookie dough, adding a lovely richness and helping to bind the ingredients without introducing too much moisture or leavening. A single yolk provides just enough structure to keep the cookies from puffing up excessively and ensures they maintain their classic thumbprint shape during baking, contributing to a chewier texture.
- Your Favorite Jam or Preserves: This is where you can truly personalize your gluten-free jam cookies! The beauty of thumbprint cookies lies in their versatility when it comes to the filling. You can use any jam or preserves that tantalizes your taste buds. Classic options like strawberry jam, vibrant blueberry preserves, or zesty orange marmalade all work wonderfully and taste amazing. However, for a truly traditional and deeply flavorful experience, raspberry jam remains my top recommendation. Its tartness beautifully balances the rich, buttery cookie. Ensure your jam is of good quality and not too runny.
- Unsalted Butter, at Room Temperature: Quality butter is key for that rich, shortbread flavor and tender texture. Ensure it’s at room temperature for optimal creaming with the sugars, creating a light and airy base for your dough.
- Granulated Sugar & Brown Sugar: The combination of both sugars provides depth of flavor and contributes to the cookies’ texture. Granulated sugar offers crispness, while brown sugar adds moisture and a subtle caramel note, making the cookies wonderfully soft and chewy.
- Vanilla Extract: Pure vanilla extract is crucial for enhancing the overall flavor profile, complementing both the butter and the jam beautifully. Don’t skimp on quality here!
- Kosher Salt: A pinch of salt balances the sweetness and brings out the full depth of flavor in the cookies.
If you’re a fan of shortbread-like cookies and eager to explore more gluten-free delights, you’ll also love these recipes: gluten-free snowball cookies, classic gluten-free shortbread cookies, and fragrant gluten-free almond cookies.
Step-by-Step Guide: How to Make Perfect Gluten-Free Thumbprint Cookies
Creating these delightful gluten-free thumbprint cookies is a rewarding process, and following these steps will ensure a perfect batch every time. This overview provides a clear path, but remember, you can always jump to the complete recipe card for all the precise instructions and details!
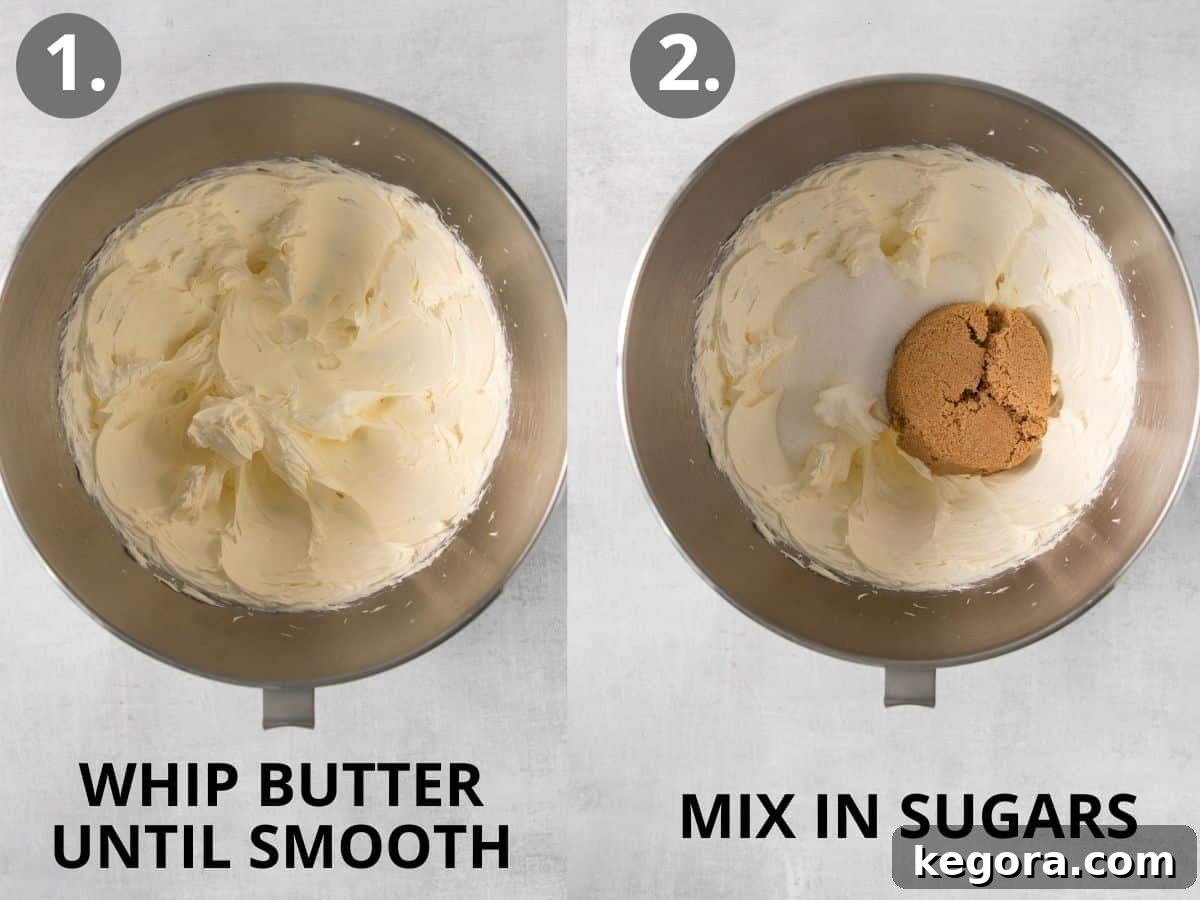
- Cream the Butter: Begin by placing your room temperature butter into the bowl of a stand mixer. If you don’t have a stand mixer, a large mixing bowl and an electric hand mixer will work just as well. Beat the butter on medium speed for about 2 minutes until it becomes noticeably light, pale, and fluffy. This aeration is crucial for a tender cookie texture.
- Incorporate the Sugars: Next, add both the granulated sugar and the packed brown sugar to the creamed butter. Continue mixing on medium-high speed for another 1-2 minutes. The mixture should become even lighter and fluffier, resembling whipped cream. Ensure the sugars are fully incorporated, and the mixture is well aerated.
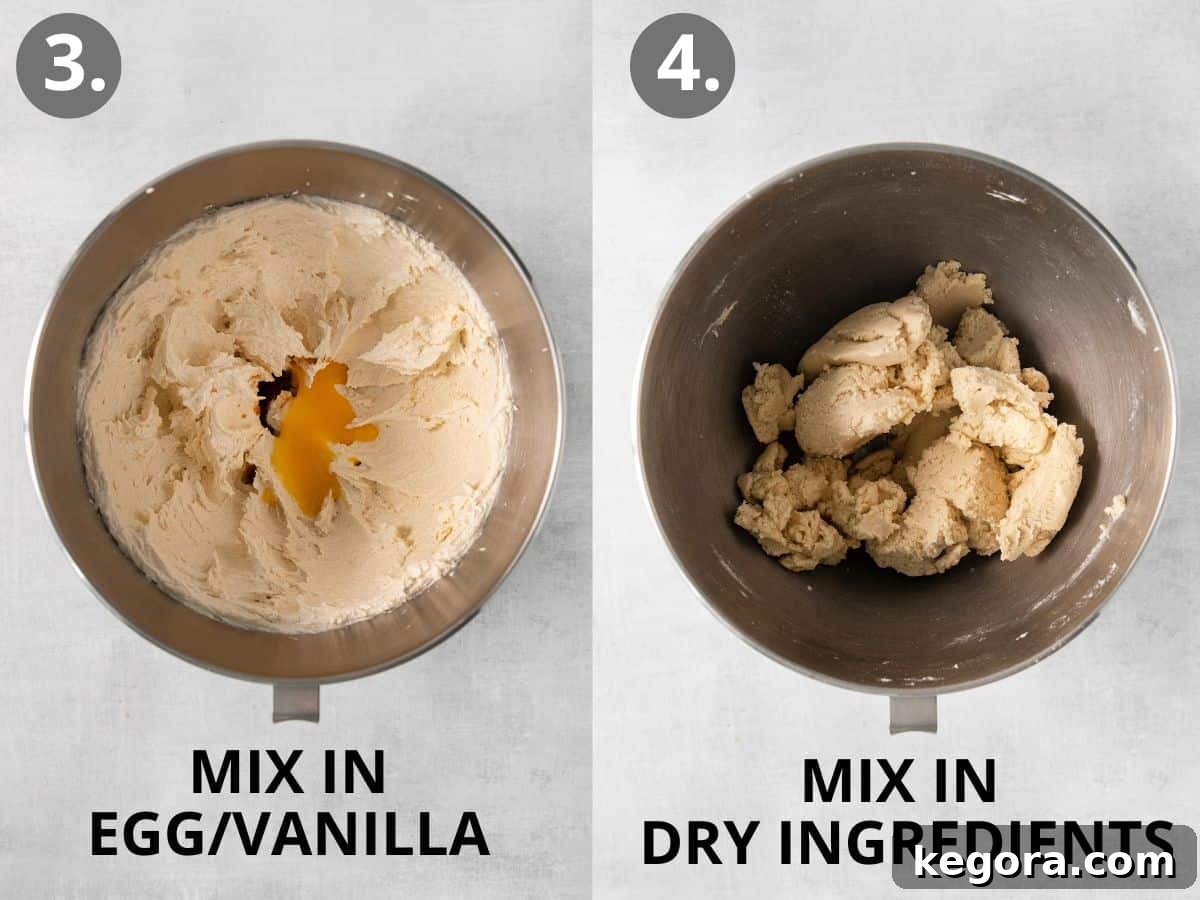
- Add Wet Ingredients: Introduce the single egg yolk and the vanilla extract to the mixture. Mix on low speed just until they are fully combined. Be careful not to overmix at this stage; we simply want to integrate these elements into the butter-sugar base. The egg yolk adds richness and helps bind the dough without adding excess moisture that could lead to spreading.
- Combine Dry Ingredients: Gradually add the gluten-free measure-for-measure flour, cornstarch, and kosher salt. Start mixing on low speed for about 30 seconds to prevent a cloud of flour. Then, increase the speed to medium and continue mixing for 2-3 minutes. This longer mixing time is important for developing the structure of the gluten-free dough and ensuring the xanthan gum is properly activated. You should achieve a thick, cohesive dough that pulls away from the sides of the bowl.
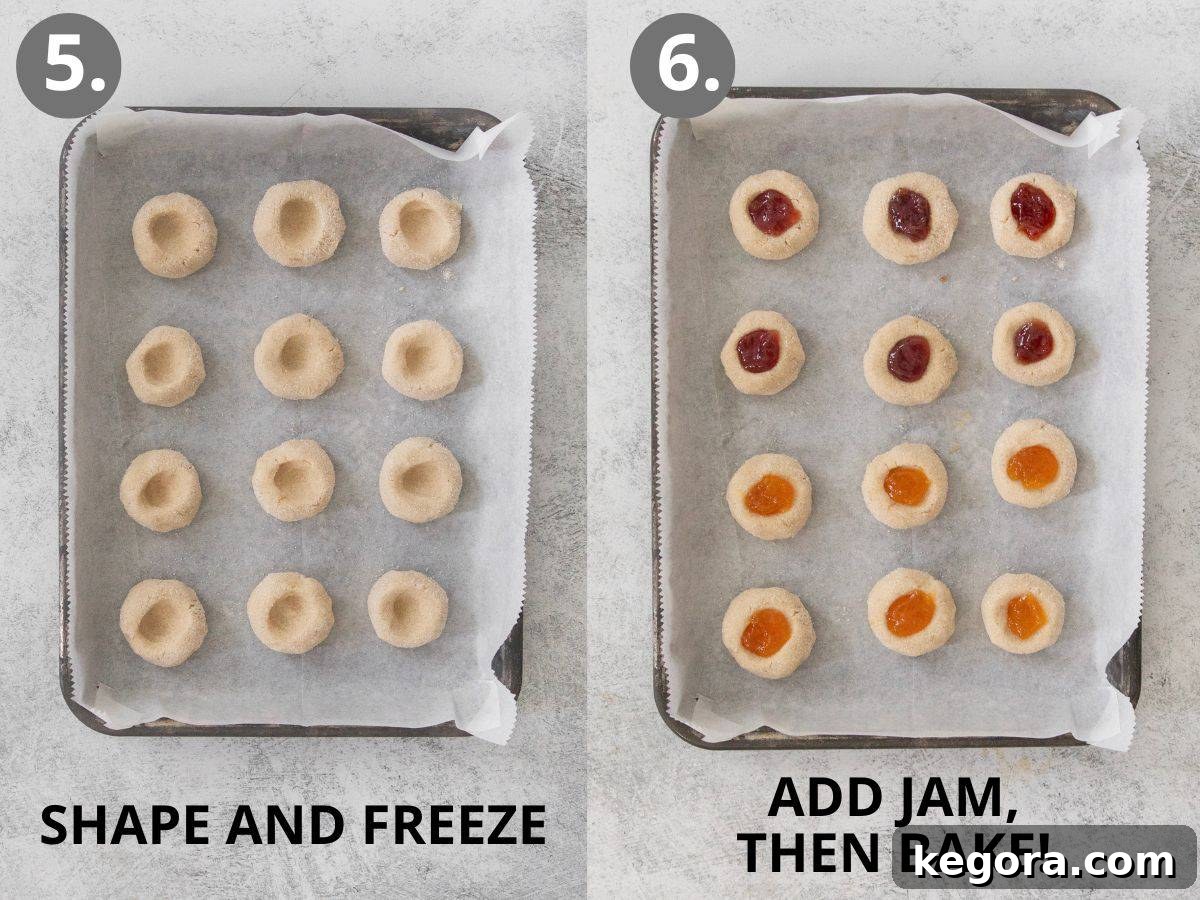
- Shape and Initial Freeze: Line a flat plate or a small baking sheet with parchment paper – choose one that will comfortably fit in your freezer. Using a one-tablespoon cookie scoop or a measuring tablespoon, portion out the cookie dough and roll each portion into a smooth ball. For an extra touch of sweetness and a lovely sparkle, you have the option to roll these dough balls in granulated sugar before placing them on the parchment-lined plate. Next, use your thumb (or the rounded handle of a large wooden spoon for a more uniform indentation) to press down gently into the center of each dough ball, creating a shallow well. If any cracks form around the edges, gently smooth them with your fingers. This step creates the “thumbprint” that will hold your delicious jam. Freeze these shaped dough balls for a crucial 20 minutes. This chilling period is key to preventing spreading during baking.
- Fill with Jam and Final Freeze: After the initial freeze, remove the dough balls from the freezer. Spoon about 1/2 teaspoon of your chosen jam or preserves into the center indentation of each cookie. A handy trick for neat filling is to place your preserves into a small ziplock bag, snip a tiny corner off, and then pipe the jam precisely into each cookie well. Be careful not to overfill, as too much jam can bubble over. Once filled, return the cookies to the freezer for another 15-20 minutes. This second freeze ensures the jam is sufficiently chilled, preventing it from being absorbed into the cookie dough and maintaining its vibrant appearance. While they are chilling, preheat your oven to 375°F (190°C) and line a large baking sheet with parchment paper or a silicone baking mat.
- Bake to Golden Perfection: Transfer the thoroughly chilled, jam-filled cookies to your prepared baking sheet, ensuring they are spaced at least 2 inches apart to allow for proper air circulation. Bake for approximately 12 minutes, or until the edges of the cookies just begin to turn a beautiful golden brown. The center might still look soft, but they will firm up as they cool.
- Cool and Enjoy: Once baked, remove the cookies from the oven. Allow them to cool on the baking sheet for about 10 minutes. This critical cooling period allows the cookies to set and firm up without breaking. After 10 minutes, carefully transfer the cookies to a wire cooling rack to cool completely. Repeat the baking process with any remaining dough. These gluten-free jam thumbprint cookies are best enjoyed after they have cooled sufficiently, allowing the flavors to meld and the texture to fully develop.
For more delicious gluten-free baking ideas, you also might like these fudgy gluten-free brownies!
Make-Ahead, Storage, and Freezing Guide for Gluten-Free Thumbprint Cookies
Planning ahead or managing leftovers is easy with these gluten-free thumbprint cookies. Here’s a comprehensive guide to ensure you can enjoy them fresh or save them for later:
- Making the Dough Ahead: You can prepare the cookie dough 1-2 days in advance. Simply wrap the dough tightly in plastic wrap and store it in the refrigerator. When you’re ready to bake, allow the dough to sit at room temperature for about 10-15 minutes to soften slightly, then proceed with shaping, adding the jam, freezing, and baking according to the recipe instructions.
- Storing Baked Cookies: Once baked and completely cooled, store your leftover gluten-free jam cookies in an airtight container at room temperature for up to 3 days. If you need to extend their freshness, they can be kept in the refrigerator for up to 1 week. Bring them to room temperature before serving for the best texture and flavor.
- Freezing Unbaked Dough: For ultimate convenience, you can freeze the unbaked cookie dough. After shaping the dough balls and creating the indentations, place them on a baking sheet and freeze until they are completely solid (this usually takes 1-2 hours). Once frozen solid, transfer the dough balls to an airtight container or a freezer-safe bag. They can be stored in the freezer for up to 2 months. When you’re ready to bake, simply add the jam to the frozen indentations, give them another short freeze (about 15-20 minutes to ensure the jam is cold), and then bake as directed in the recipe, possibly adding a minute or two to the baking time.
- Freezing Baked Cookies: If you have an abundance of baked cookies or want to prepare a batch for future enjoyment, allow the cookies to cool completely after baking. Then, arrange them in a single layer on a baking sheet and freeze until solid. Once frozen, transfer them to an airtight freezer-safe container, placing parchment paper between layers to prevent sticking. They can be frozen for up to 2 months. To enjoy, simply thaw them at room temperature for an hour or two.
Can These Gluten-Free Thumbprint Cookies Be Made Dairy-Free?
Absolutely! These delicious gluten-free thumbprint cookies can be easily adapted to be dairy-free with just a couple of simple substitutions. The primary adjustment involves swapping out the butter for your favorite brand of vegan butter. When making this switch, it’s important to be mindful that vegan butter can sometimes soften more quickly than dairy butter, which might lead to increased spreading during baking. To counteract this, you may need to increase the freezing time for your dough balls. Additionally, if the dough feels too soft or sticky after mixing with vegan butter, consider adding a tiny bit more gluten-free flour, a tablespoon at a time, until the dough reaches a firm, manageable consistency before shaping and baking. This attention to texture will help ensure your dairy-free thumbprint cookies hold their shape beautifully.
Why Did My Gluten-Free Thumbprint Cookies Go Flat?
A common concern in cookie baking, especially with gluten-free recipes, is cookies spreading too much and losing their shape. If your gluten-free thumbprint cookies turned out flat, it’s typically due to the butter or the cookie dough being too warm. Butter, when excessively soft or melted, causes cookies to spread rapidly in the oven before they have a chance to set. To prevent this, chilling your cookie dough balls thoroughly before baking is paramount. The colder the butter, the slower it melts, allowing the cookies to bake and set into a thicker, chewier form. Additionally, freezing the dough with the indentation already made provides an even stronger defense against spreading and crucially helps prevent the jam from sinking into the cookies during the baking process, ensuring those distinct, vibrant centers.
How Do I Keep Gluten-Free Thumbprint Cookies from Spreading?
Preventing your gluten-free shortbread cookies from spreading excessively is key to achieving that classic, perfectly formed thumbprint. The most effective method is to ensure your cookie dough is adequately chilled. By freezing the dough balls (both before and after adding the jam) before they go into the oven, you guarantee that the butter remains cold and the dough is firm. This coldness provides structural integrity, causing the butter to melt slowly and the cookies to set before they can flatten out. Always start with cold dough for the best results, and avoid placing dough on a warm baking sheet.
How Do I Make Sure My Gluten-Free Thumbprint Cookies Turn Out Moist?
Achieving a perfectly moist and tender crumb in gluten-free shortbread cookies is a delicate balance. The secret to these particular thumbprint cookies’ moistness lies significantly in the use of a single egg yolk. This ingredient adds richness and binding properties without introducing excess liquid that could lead to a dry or crumbly texture. Furthermore, precise measurement of flour is critical. Too much gluten-free flour can quickly absorb moisture and dry out the dough, resulting in a dense and less appealing cookie. Ensure you follow the recipe’s exact measurements for both dry and wet ingredients. Using a kitchen scale for flour measurement can greatly improve accuracy. A balanced ratio of ingredients is essential for that wonderfully tender, moist texture that makes these cookies so enjoyable.
Top Tips for Gluten-Free Thumbprint Cookie Success
To ensure your gluten-free thumbprint cookies turn out perfectly every time, keep these expert tips in mind:
- Embrace Variety with Jam: While raspberry preserves are a personal favorite, feel free to get creative with your fillings! These cookies are incredibly versatile. Experiment with different fruit jams or preserves that you love. For a luxurious twist, consider using homemade lemon curd for a zesty kick or even a rich chocolate ganache for an indulgent treat. The possibilities are endless!
- The Power of Freezing: This is arguably the most crucial tip for gluten-free thumbprint cookies. Freezing the cookie dough (both before and after making the indentations) is essential. It helps the cookies maintain their classic round shape and prevents them from spreading excessively during baking. Cold dough ensures crisp edges and a soft, tender center.
- Strategic Jam Application: For optimal results, add the jam or preserves after the initial freezing of the dough balls. This timing is strategic: the chilled dough provides a solid base, preventing the jam from being absorbed into the cookie dough while they bake. A final quick freeze after filling ensures the jam is cold and sets beautifully, resulting in a distinct, vibrant fruit center that stays perfectly in place.
- Measure Flour Accurately: Gluten-free baking benefits immensely from precision. While measure-for-measure flours aim for convenience, weighing your flour with a kitchen scale (300g for 2 cups in this recipe) is the most accurate way to ensure you don’t add too much, which can lead to dry, crumbly cookies.
- Room Temperature Butter is Key: Ensure your butter is truly at room temperature (soft enough to indent easily with a finger, but not melted) before you start creaming it. This allows it to whip up properly with the sugars, creating an airy base that contributes to the cookies’ tender texture.
- Don’t Overfill the Jam: While tempting to load up on jam, resist the urge to overfill the indentations. A scant 1/2 teaspoon is usually plenty. Too much jam can bubble over during baking, making a mess and potentially burning.
- Watch for Golden Edges: Keep a close eye on your cookies during the final minutes of baking. You’re looking for the edges to just begin turning golden brown. Overbaking can lead to dry cookies, especially with gluten-free flour.

Explore More Delicious Gluten-Free Christmas Cookie Recipes
The holiday season is synonymous with baking, and being gluten-free shouldn’t limit your festive cookie platter! Once you’ve mastered these incredible gluten-free thumbprint cookies, you’ll be eager to try more seasonal delights. Here’s a curated list of other beloved gluten-free Christmas cookie recipes to fill your home with warmth and delicious aromas:
- Decadent Gluten-Free Peppermint Frosted Chocolate Cookies
- Crispy Gluten-Free Pizzelle
- A Collection of Gluten-Free Christmas Cookies
- The Best Gluten-Free Sugar Cookies for Decorating
- Classic Gluten-Free Gingerbread Cookies
- Rich Gluten-Free Chocolate Crinkle Cookies
- Delicate Gluten-Free Spritz Cookies
- Spicy Gluten-Free Gingersnaps

Classic Gluten-Free Thumbprint Cookies with Jam
Erin Collins
20 minutes
12 minutes
40 minutes
1 hour 12 minutes
24 cookies
My top tip for crafting gluten-free thumbprint cookies that maintain their beautiful shape and ensure the jam doesn’t absorb into the dough – always freeze the cookies before baking!
Comments
Print Recipe
Ingredients
- 1 cup (226g) unsalted butter at room temperature
- 1/3 cup (70g) granulated sugar (plus extra for rolling, optional)
- 1/3 cup (70g) brown sugar packed
- 1 large egg yolk
- 1 teaspoon vanilla extract
- 2 cups (300g) gluten-free measure-for-measure flour
- 2 tablespoons cornstarch
- ½ teaspoon kosher salt
- ½ cup (165g) jam or preserves of choice (I prefer raspberry preserves)
Instructions
-
In the bowl of a stand mixer (or use a large bowl with an electric hand mixer), add the butter. Beat for 2 minutes until light and fluffy.
-
Add the granulated sugar and light brown sugar. Mix on medium-high speed until light and fluffy, another 1-2 minutes.
-
Add the egg yolk and vanilla and mix to combine.
-
Add the gluten-free flour, cornstarch and salt. Mix on low speed, then after 30 seconds increase the speed to medium. Mix for 2-3 minutes until a thick dough forms.
-
Line a flat plate or small baking sheet with parchment paper. (One that will fit in your freezer!) Using a one-tablespoon cookie scoop or measuring tablespoon, measure out the cookie dough, roll into balls, roll each one in granulated sugar (optional), then place on the parchment-lined plate.
-
Use your thumb (or the handle of a large wooden spoon) to press an indentation into each ball of cookie dough. Smooth any seams or cracks on the edges of the cookie.
-
Freeze the cookie dough balls for 20 minutes.
-
Spoon a scant 1/2 teaspoon of preserves/jam into the indentation in each one. (You can make this easier by scooping the preserves into a small ziplock bag and clipping the edge of the bag, then piping a little bit into each cookie. Do not overfill.)
-
Freeze for another 15-20 minutes. Preheat the oven to 375°F (190°C). Line a baking sheet with parchment paper or a silicone baking mat.
-
Place the cookies at least 2″ apart on a parchment paper-lined cookie sheet and bake for 12 minutes, until starting to turn golden brown.
-
Let the cookies cool on the baking sheet for 10 minutes. Then transfer to a wire cooling rack. Repeat baking the remaining dough. Enjoy your delightful gluten-free thumbprint cookies!
Notes for Success
Jam/Preserves Selection: Feel free to use any type of jam or preserves you love! Raspberry preserves are a personal favorite for their perfect balance of sweetness and tartness. You can also get creative with lemon curd or chocolate ganache for different flavor profiles.
Make-Ahead Instructions: The dough for these gluten-free thumbprint cookies can be prepared 1-2 days in advance. Wrap it tightly in plastic wrap and refrigerate. When ready to bake, proceed with shaping, adding jam, freezing, and baking as instructed. For longer storage, the dough can be frozen for up to 2 months (see “Freezing Unbaked Dough” below).
Storage Tips: Store any leftover baked and cooled cookies in an airtight container at room temperature for up to 3 days. For extended freshness, keep them in the refrigerator for up to 1 week.
Freezing Unbaked Dough: Shape the dough into balls and create the indentations. Freeze them on a baking sheet until completely solid. Once firm, transfer them to an airtight container or a freezer-safe bag. They can be frozen for up to 2 months. When ready to bake, fill with jam, freeze briefly again, and then bake according to the recipe.
Freezing Baked Cookies: Allow the cookies to cool completely after baking. Freeze them on a baking sheet until solid, then transfer to an airtight container or freezer-safe bag. They will keep well in the freezer for up to 2 months. Thaw at room temperature before serving.
Nutrition Information
Carbohydrates: 19g |
Protein: 1g |
Fat: 8g |
Saturated Fat: 5g |
Polyunsaturated Fat: 0.4g |
Monounsaturated Fat: 2g |
Trans Fat: 0.3g |
Cholesterol: 28mg |
Sodium: 113mg |
Potassium: 13mg |
Fiber: 1g |
Sugar: 10g |
Vitamin A: 247IU |
Vitamin C: 1mg |
Calcium: 14mg |
Iron: 0.4mg