

Erin’s Essential Guide to Savory Scones
Texture: Prepare for a culinary delight with these scones boasting a perfectly buttery, wonderfully flaky interior, and an irresistibly crisp golden exterior. They strike the ideal balance between tender and firm.
Taste: Each bite delivers a rich, deeply savory, and distinctly cheesy flavor, beautifully complemented by the subtle, fresh oniony notes of chives. It’s a comforting yet sophisticated profile that will tantalize your taste buds.
Ease: You might be surprised by how straightforward this recipe is! Designed for success, it’s an excellent choice for both novice bakers eager to expand their repertoire and seasoned pros looking for a reliable, delicious gluten-free option.
Top Tips: To unlock the secret to truly spectacular, extra-flaky scones, always use frozen grated butter. This simple technique prevents overworking the butter and creates steam pockets during baking. Crucially, do not skip the chilling step; it firms the butter and hydrates the gluten-free flour. Starting with a high oven temperature then reducing it helps the scones achieve an impressive rise and beautiful golden crust.
Recommended GF Flour: For consistently excellent results, a high-quality 1:1 gluten-free baking blend that includes xanthan gum is essential. Brands like King Arthur Flour and Bob’s Red Mill have proven to deliver reliable texture and structure, making your baking experience smooth and successful.
Would I make these again? Without a doubt! These savory cheese scones have become a cherished staple in my kitchen, perfect for elevating any breakfast or brunch spread, or serving as a delightful side dish alongside hearty soups or crisp salads.
xoxo erin

This post was originally published in May 2022. It was meticulously updated with new photos, enhanced instructions, and additional tips in March 2025, ensuring an even better baking experience for you.
Welcome to the ultimate recipe for unbelievably fluffy and flavorful gluten-free cheese scones! Infused with savory cheddar and fresh herbs, these scones are more than just a baked good—they’re a versatile culinary delight. While they are absolutely divine enjoyed on their own as a satisfying snack, their rich taste also makes them an exceptional accompaniment to a wide array of dishes. Imagine them complementing a plate of eggs and crispy bacon, adding a gourmet touch to fresh salads, or serving as the perfect dipper for a comforting bowl of soup.
The secret to the consistently light and incredibly fluffy texture of these gluten-free scones lies in the generous amount of baking powder and the careful selection of a high-quality gluten-free flour blend. This combination ensures a magnificent rise and a tender crumb every single time. It’s truly one of my favorite methods for transforming a classic scone recipe, adding a delightful savory twist with the sharp, irresistible bite of cheddar cheese. Get ready to impress your family and friends with these easy-to-make, utterly delicious savory scones!
Featured Comment
From Lauren: “These scones are simply delicious! I added a little extra cheese on top for a beautiful crust, and truly, no one could tell they were gluten-free. Thank you so much for creating such a fantastic option for the GF community – these are a game-changer.”
33 more comments
Table of Contents
- Erin’s Essential Guide to Savory Scones
- Key Ingredients You’ll Need
- How to Make Gluten-Free Cheese Scones
- Storage, Make-Ahead, and Freezing Instructions
- How do you achieve fluffy scones every time?
- Can you use a different type of cheese?
- Why is frozen butter essential for flaky scones?
- Can these scones be made dairy-free?
- Can these scones be made egg-free?
- Expert Recipe Tips for Gluten-Free Scones
- More Gluten-Free Recipes
- The Best Gluten-Free Cheese Scones Recipe
Looking for more delightful gluten-free appetizers or baked goods? You might also enjoy these delicious deviled eggs with relish, or our incredibly satisfying gluten-free cheese breadsticks, perfect for sharing!
Key Ingredients You’ll Need for Irresistible Scones
Crafting these savory gluten-free cheese scones requires a handful of carefully selected ingredients. Below, we’ll highlight the purpose of each key component. For precise measurements and a comprehensive list, please refer to the full recipe card below.
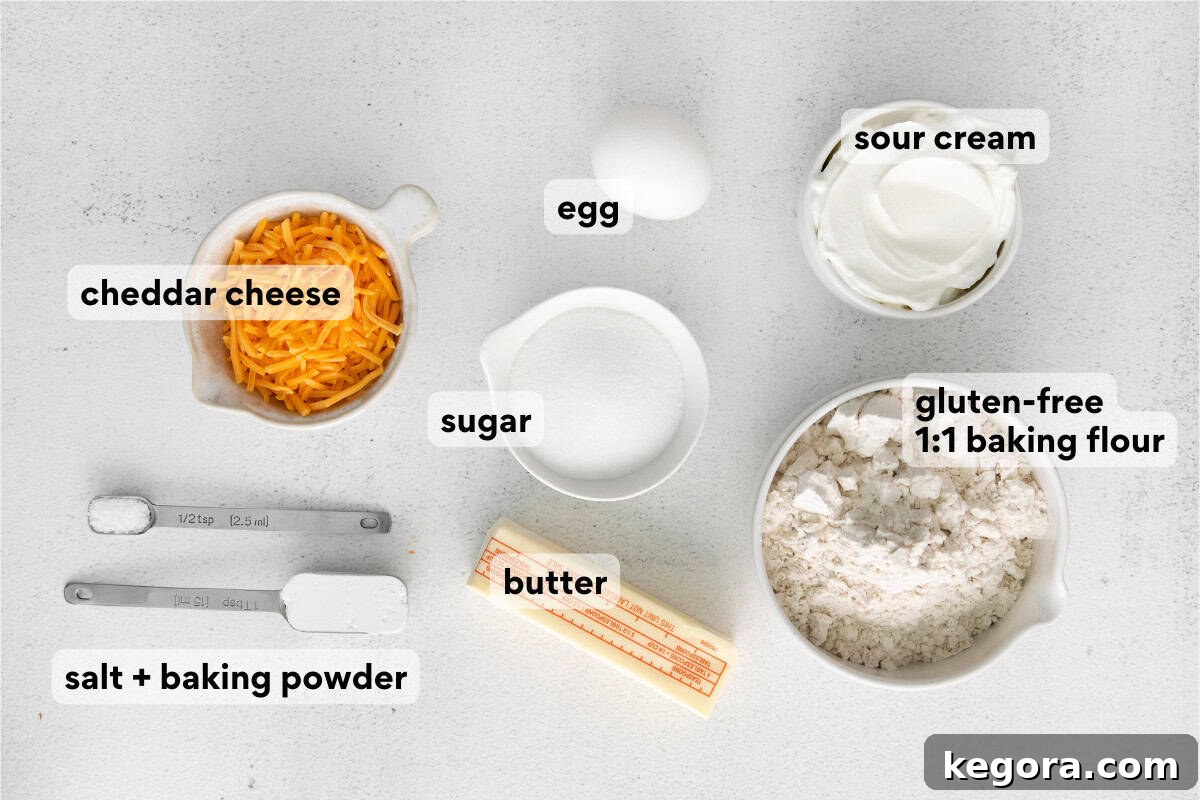
- Gluten-Free Measure-for-Measure Flour: The foundation of our scones. Using a high-quality 1:1 gluten-free baking blend that includes xanthan gum is crucial. This type of blend mimics the structure of wheat flour and prevents a crumbly texture. Brands like King Arthur or Bob’s Red Mill are excellent choices for consistent results.
- Baking Powder: This recipe calls for a full tablespoon of baking powder, and for good reason! It is the primary leavening agent that ensures these gluten-free scones turn out exceptionally light, airy, and boast a beautiful rise. Always check that your baking powder is fresh for optimal performance.
- Sour Cream: Beyond adding a delightful richness to the scones, sour cream plays a vital role in their structure. Its acidity reacts with the baking powder, promoting lift, while its creamy texture helps the dough hold its shape perfectly during baking, resulting in a tender interior.
- Frozen Grated Butter: This is arguably the most critical ingredient technique for achieving light, incredibly flaky, and perfectly crisp scones. When cold, the butter is grated into the flour mixture, creating tiny pockets. As the scones bake, these small pieces of butter melt, releasing steam and forming numerous air pockets. These pockets are what give scones their characteristic flaky layers and wonderfully crisp edges.
- Sharp Cheddar Cheese: The star of our savory flavor profile! Sharp cheddar cheese introduces a robust, tangy, and deeply savory taste that elevates these scones beyond a simple baked good. Its bold flavor ensures every bite is packed with cheesy goodness.
- Fresh Chives: Offering a delicate, oniony freshness, chopped chives provide a subtle herbaceous note that beautifully complements the richness of the cheddar cheese, adding depth and brightness to the overall flavor.
How to Make Fluffy Gluten-Free Cheese Scones: A Step-by-Step Guide
Making these delectable gluten-free cheese scones is a straightforward process, even for beginners. Follow these detailed steps to achieve perfect results every time. For the complete list of ingredients and exact measurements, you can jump directly to the recipe card below!
Crafting Your Scone Dough
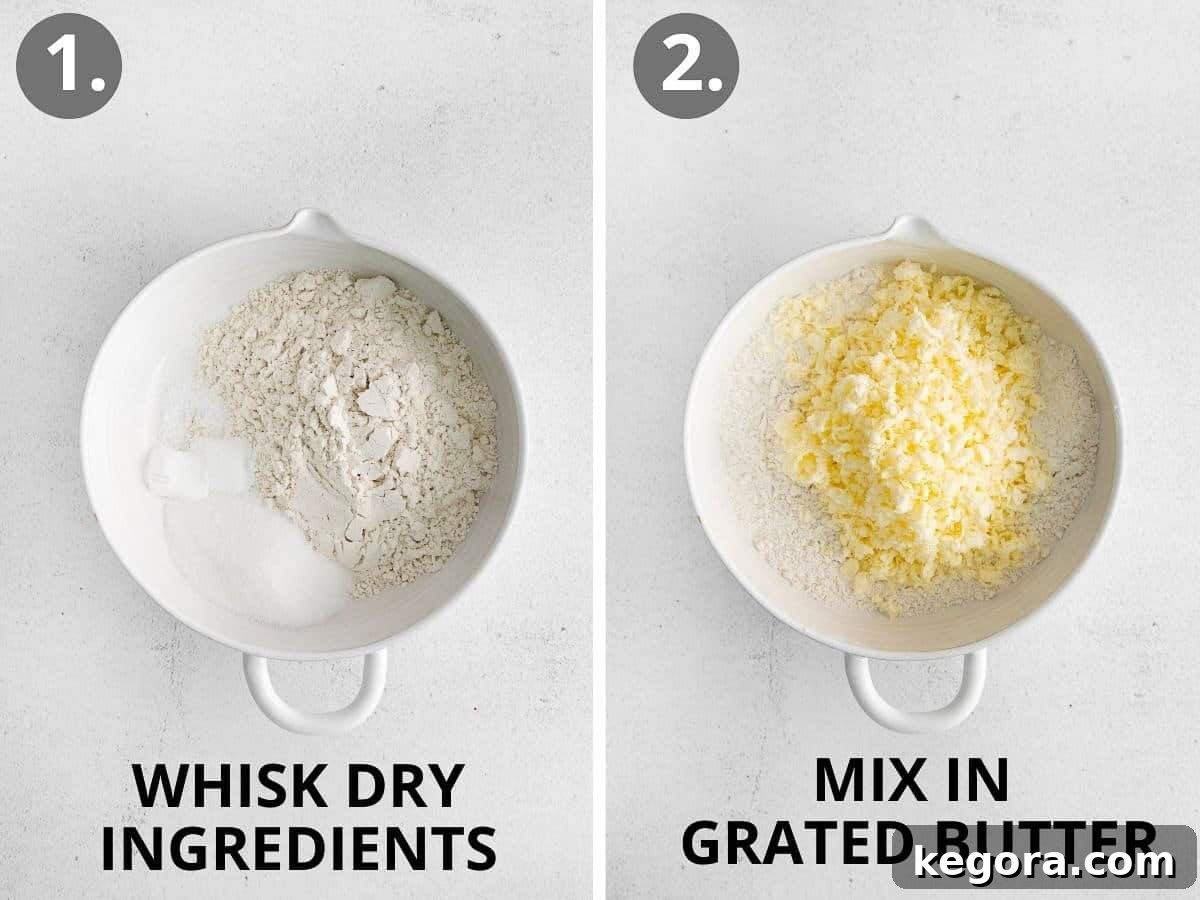
- Whisk Dry Ingredients: In a spacious mixing bowl, combine your gluten-free measure-for-measure flour, granulated sugar, baking powder, and kosher salt. Whisk them together thoroughly to ensure all ingredients are evenly distributed. This step is crucial for consistent leavening throughout your scones.
- Incorporate Frozen Grated Butter: Using a box grater, finely grate the frozen butter directly into your dry flour mixture. Once grated, use a pastry cutter, two forks, or even your fingertips to gently work the butter into the flour. Mix until the butter is fully incorporated and the mixture resembles coarse breadcrumbs or small, pea-sized crumbs. The key here is to keep the butter as cold as possible to ensure maximum flakiness.
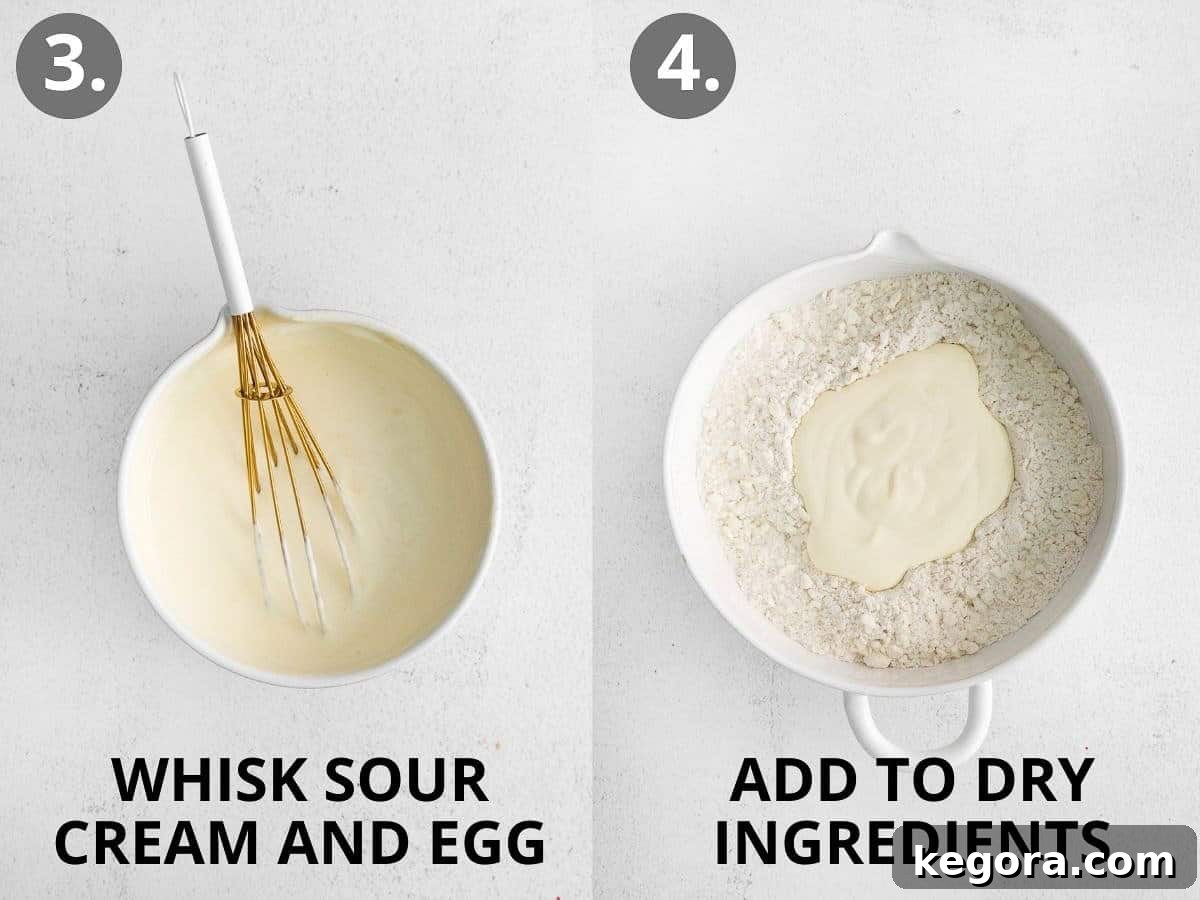
- Prepare Wet Ingredients: In a separate, medium-sized bowl, whisk together the sour cream and the large egg until they are fully combined and smooth. This creates our liquid base, adding richness and binding the dough.
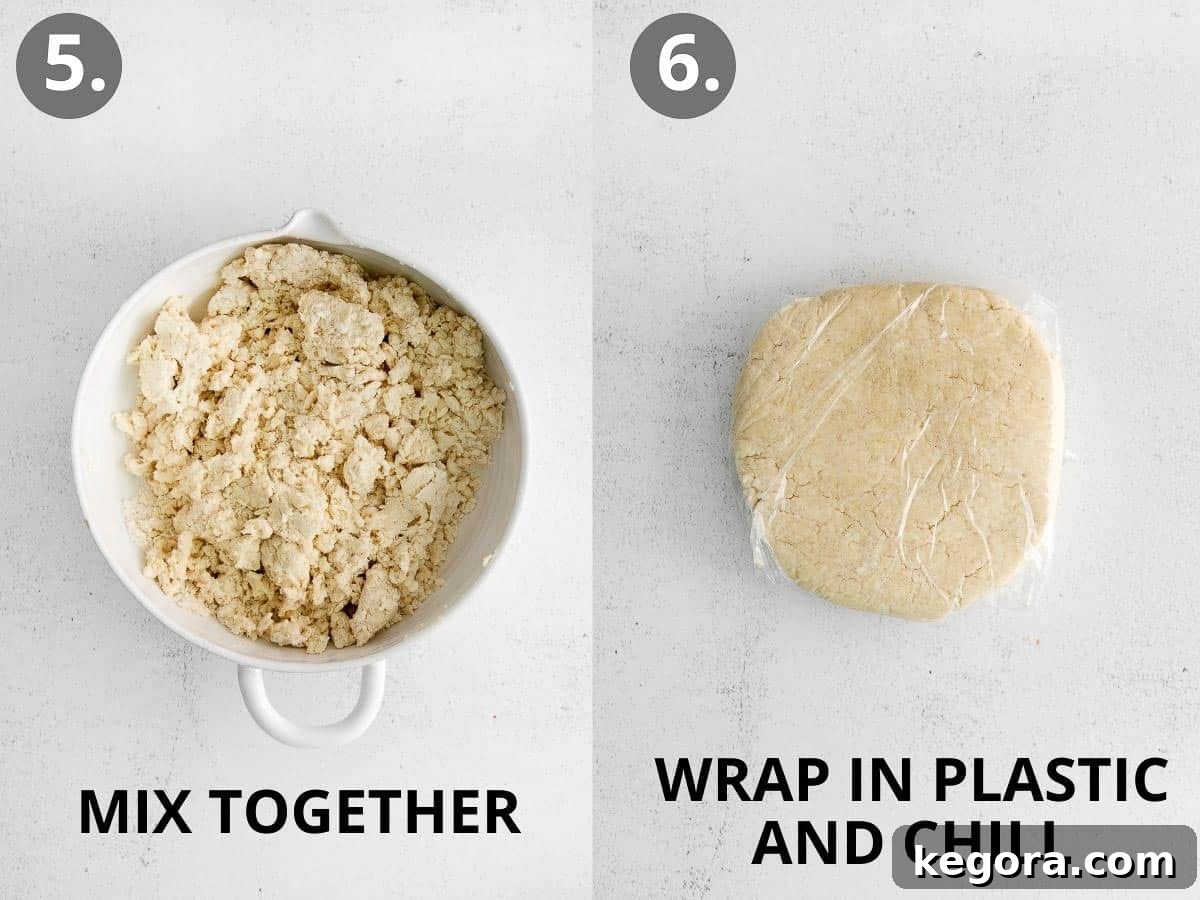
- Combine and Fold in Cheese: Pour the whisked sour cream and egg mixture into the dry ingredients. Using a rubber spatula, gently stir the wet into the dry until just combined. Be careful not to overmix; overworking gluten-free dough can lead to tough scones. Stop mixing once no dry streaks of flour remain. Finally, fold in the sharp cheddar cheese, ensuring it’s evenly distributed throughout the dough.
- Shape and Chill the Dough: Lay out a large piece of plastic wrap on your counter. Transfer the scone dough onto the center of the plastic wrap. With lightly wet hands (this prevents sticking), gently pat and shape the dough into a cohesive round, approximately 6 inches in diameter and 1 inch thick. Wrap the dough tightly in the plastic and refrigerate for exactly 30 minutes. Do not chill for longer than 30 minutes, as over-chilling can make the dough too stiff to cut cleanly. After refrigeration, transfer the wrapped dough to the freezer for 15 minutes while your oven preheats; this extra chill makes cutting easier and helps with the rise.
Baking Your Golden Scones

- Prepare for Baking: Preheat your oven to a high temperature of 500°F (260°C). While the oven preheats, line a baking sheet with a silicone mat or a piece of parchment paper. This prevents sticking and ensures even baking.
- Cut and Arrange: After the 15-minute freezer chill, remove the dough. Lightly spray a sharp knife with vegetable oil (this helps prevent the cheese from sticking to the blade). Carefully cut the chilled dough round into 6 equal wedges. Arrange these wedges on your prepared baking sheet, leaving a little space between each scone for even air circulation.
- Bake to Perfection: Place the baking sheet with the scones into the preheated 500°F (260°C) oven. Immediately after placing them in, reduce the oven temperature to 425°F (220°C). The initial blast of high heat is crucial; it helps the scones rapidly rise and develop a beautifully golden-brown crust before they fully cook through. Bake for 12-14 minutes, or until the scones are gloriously golden brown and cooked through.
- Cool and Serve with Chive Butter: Once baked, remove the scones from the oven. Transfer them to a wire rack to cool for about 20 minutes. This cooling period is important for the texture to set. While they cool, prepare your savory chive butter. In a small bowl, whisk together 2 tablespoons of melted butter, 1 tablespoon of freshly chopped chives, and ¼ teaspoon of garlic powder. After the scones have cooled sufficiently, brush the tops of each warm scone generously with this aromatic chive butter. Serve warm and enjoy!

Storage, Make-Ahead, and Freezing Instructions
Ensure your delicious gluten-free cheese scones remain fresh and flavorful with these practical storage and make-ahead tips:
To Store Baked Scones: These savory gluten-free cheese scones are truly at their peak on the day they are baked, offering the best texture and flavor. However, if you have leftovers, you can store them in an airtight container at room temperature for up to two days. For extended freshness, transfer them to the refrigerator, where they will keep well for up to five days. To reheat, simply warm them gently in a microwave or a preheated oven until just heated through.
To Make Ahead (Dough): Planning is key for effortless baking! You can prepare the scone dough in advance by following all the mixing and shaping steps outlined in the recipe. Once shaped into a disc, wrap the dough tightly in plastic wrap and refrigerate it for up to 24 hours. When you’re ready to bake, remove the dough from the refrigerator, cut into wedges, and proceed with baking as directed, potentially adding a minute or two to the baking time if the dough is very cold.
To Freeze (Unbaked Scones): Freezing unbaked scones is a fantastic way to enjoy fresh-baked goodness anytime! After shaping and cutting the scones into wedges, place them on a baking sheet and freeze until they are completely solid (this prevents them from sticking together). Once frozen, transfer the solid scone wedges to a freezer-safe bag or airtight container, and they can be stored for up to three months. When you’re ready to bake, simply place the frozen scones directly onto a prepared baking sheet and bake straight from frozen, adding approximately 5-8 extra minutes to the baking time to ensure they cook through evenly.
To Freeze (Baked Scones): Baked scones can also be frozen! Allow them to cool completely, then wrap each scone individually in plastic wrap, followed by a layer of aluminum foil, or store them in a freezer-safe bag. They can be frozen for up to two months. To reheat, place the frozen baked scones in a preheated 300°F (150°C) oven for about 10-15 minutes, or until warmed through and revived to a delightful crispness.
How do you achieve fluffy scones every time?
The secret to consistently light and fluffy scones lies in a few critical techniques. First, always ensure you use a generous amount of fresh baking powder, as specified in this recipe; it’s the primary leavening agent responsible for that impressive rise. Secondly, avoid over-kneading your dough. Overworking the dough develops gluten (even in gluten-free flours, it can affect texture negatively), which can lead to dense, tough scones instead of light, tender ones. Finally, resist the urge to add more flour than the recipe calls for, even if the dough seems a little sticky. Excess flour can dry out the dough, resulting in a heavier texture.
Can you use a different type of cheese?
Absolutely! While sharp cheddar cheese provides a robust, classic flavor that we adore in these scones, don’t hesitate to experiment with other cheeses to customize them to your liking. Asiago offers a nutty, slightly sharp profile; Parmesan adds a salty, umami depth; Gruyère contributes a rich, complex sweetness; and even a smoked cheese can introduce a wonderfully unique dimension. Feel free to use your favorite hard or semi-hard cheese—just be sure to grate it fresh for the best flavor and melt.
Why is frozen butter essential for flaky scones?
Frozen butter is the cornerstone of truly light and flaky scones, and this technique is non-negotiable for achieving that coveted texture. When you grate frozen butter into the flour, it creates tiny, distinct pieces of butter distributed throughout the dough. As the scones bake in the hot oven, these minuscule pieces of butter melt quickly, releasing steam. This steam then creates small air pockets within the dough, which expand and separate the layers, resulting in those characteristic tender, flaky layers and wonderfully crisp edges that are the hallmark of a perfect scone.
Can these scones be made dairy-free?
Yes, absolutely! To transform this recipe into delicious dairy-free, gluten-free scones, you’ll need to make a few simple substitutions. Replace the regular sour cream with a high-quality dairy-free sour cream alternative. Swap out the traditional butter for your favorite brand of dairy-free butter (ensure it’s a solid, stick-style butter for grating). Finally, instead of dairy cheese, opt for a good quality dairy-free shredded cheese blend that melts well. These adjustments will allow you to enjoy all the flavor and texture of these savory scones without any dairy.
Can these scones be made egg-free?
Yes, these savory scones can certainly be adapted to be egg-free! Simply replace the large egg with a flax egg. To make a flax egg, combine 1 tablespoon of ground flaxseed meal with 3 tablespoons of water, stir well, and let it sit for about 5 minutes until it thickens into a gel-like consistency. This flax egg acts as a binder, helping to hold the dough together. While the flax egg may subtly alter the texture of the scones, making them slightly denser, they will still be incredibly flavorful and enjoyable.

Expert Recipe Tips for Gluten-Free Scones
Mastering gluten-free scones is easier than you think with these expert tips:
- Allow the Dough to Rest: The resting period for the scone dough—first in the refrigerator for 30 minutes, then a brief 15-minute stint in the freezer—is a critical step you should never skip. Gluten-free flours require more time than traditional wheat flours to fully hydrate and absorb moisture. This resting time allows the flour to properly swell, preventing a gritty texture and ensuring your scones are moist, tender, and hold their shape beautifully during baking.
- Don’t Overmix the Dough: Gentle handling is key to light and tender scones. Overmixing gluten-free dough can lead to a tough, dense product, even without the gluten network. Mix until just combined, with no dry flour streaks visible, and then stop.
- Embrace Customization with Cheese and Herbs: While sharp cheddar offers a fantastic base, this recipe is incredibly versatile! Feel free to experiment with various types of cheese such as nutty Asiago, savory Parmesan, creamy Gruyère, or even a smoked Gouda for a unique twist. You can also play with different fresh herbs beyond chives, like finely chopped rosemary, thyme, or dill, to create an entirely new flavor profile.
- Ensure Your Baking Powder is Fresh: Leavening agents are paramount in gluten-free baking. If your baking powder is old, it won’t react properly, and your scones won’t rise. Test its freshness by adding a teaspoon to a bowl of hot water; it should bubble vigorously.
- Preheat Your Oven Thoroughly: A hot oven is essential for scones to rise quickly and create that desirable flaky texture. Make sure your oven is fully preheated to the specified temperature before placing the scones inside.
More Delicious Gluten-Free Recipes You’ll Love
- Fluffy Gluten-Free Blueberry Scones
- Irresistible Gluten-Free Chocolate Chip Scones
- Mastering the Art: How to Make Gluten-Free Scones
- Quick & Easy Gluten-Free Drop Biscuits
- Melt-in-Your-Mouth Gluten-Free Butter Dip Biscuits

The Best Gluten-Free Cheese Scones
Erin Collins
40
27
1
7
6
scones
If you’re searching for gluten-free cheese scones that are consistently light, fluffy, and rise beautifully with every bake, then this delicious recipe is precisely what you need!
Comments
Ingredients
- 1 ½ cups (225g) gluten-free measure-for-measure flour
- 1 tablespoon (12 g) granulated sugar
- 1 tablespoon baking powder
- ½ teaspoon kosher salt
- 8 tablespoons (113g) butter frozen
- ⅔ cup (160g) sour cream
- 1 large egg
- 1 cup sharp cheddar cheese
Chive Butter
- 2 tablespoons butter melted
- 1 tablespoon chopped fresh chives
- ¼ teaspoon garlic powder
Instructions
-
In a large mixing bowl, thoroughly whisk together the gluten-free flour, sugar, baking powder, and salt until well combined.
-
Grate the frozen butter using a box grater directly into the flour mixture. Using a pastry cutter, two forks, or your fingertips, cut the butter into the flour until the mixture resembles pea-sized crumbs. Work quickly to keep the butter cold.
-
In a separate bowl, whisk together the sour cream and egg until fully combined and smooth.
-
Pour the sour cream mixture into the flour mixture. Stir with a rubber spatula until just combined, ensuring no dry flour streaks remain. Gently fold in the shredded cheddar cheese. Be careful not to overmix the dough.
-
Spread out a large piece of plastic wrap on a clean surface. Using lightly wet hands, transfer the dough onto the plastic wrap. Gently pat the dough to form a 6-inch round, about 1-inch thick. Wrap the dough tightly in plastic and refrigerate for precisely 30 minutes. (Do not refrigerate longer than 30 minutes.) While your oven preheats, transfer the wrapped dough to the freezer for an additional 15 minutes.
-
Preheat your oven to 500°F (260°C). Line a baking sheet with a silicone mat or parchment paper.
-
After the 15-minute freezer chill, remove the dough. Lightly spray a sharp knife with cooking spray and cut the dough into 6 equal wedges. Arrange the scones on the prepared baking sheet, leaving some space between each for even baking.
-
Place the baking sheet with the scones into the preheated 500°F (260°C) oven, then immediately lower the oven temperature to 425°F (220°C). The initial high heat is crucial for a rapid rise and golden crust. Bake for 12-14 minutes, or until the scones are beautifully golden brown.
-
Remove the scones from the oven. Carefully transfer them to a wire rack and allow them to cool for 20 minutes before applying the chive butter.
-
While the scones cool, prepare the chive butter by whisking together the melted butter, chopped fresh chives, and garlic powder. After cooling for 20 minutes, generously brush the tops of each scone with the prepared chive butter. Serve warm.
Notes
- Gluten-Free 1:1 Baking Flour: For optimal results, I strongly recommend using a high-quality gluten-free measure-for-measure flour blend that explicitly states it contains xanthan gum. This is vital for providing structure and preventing a crumbly texture in your baked goods. Brands like King Arthur Flour and Bob’s Red Mill are consistently reliable choices for this recipe.
- Sour Cream: This ingredient is not just for flavor; sour cream plays a dual role in these scones. It imparts a rich, tender crumb, and its acidity contributes to the leavening process, helping the scones maintain their beautiful shape and rise during baking.
- Frozen Grated Butter: This technique is an absolute game-changer for achieving light, flaky, and supremely buttery scones. The tiny, cold butter particles create pockets within the dough. As the scones bake, these butter pieces melt, releasing steam that expands and separates the layers, resulting in that coveted flaky interior with crisp, golden edges.
Recipe Notes
- Rest the Dough: Allowing the scone dough to rest for 30 minutes in the refrigerator (and 15 mins in freezer) before baking is crucial for gluten-free flours. This period gives the flour ample time to fully hydrate, leading to a tenderer texture and preventing a crumbly result.
- Customize the Recipe: This recipe is wonderfully adaptable! While sharp cheddar is classic, feel free to use your favorite hard or semi-hard cheese. Asiago, Parmesan, or Manchego cheese are all delicious alternatives that will bring their unique flavors to these savory scones. You can also add other fresh herbs like rosemary or thyme.
- Dairy-Free Option: To make these scones dairy-free, simply substitute dairy-free sour cream, dairy-free butter (ensure it’s a solid stick for grating), and your preferred unsweetened dairy-free milk.
- Nut-Free Option: Good news! These savory gluten-free cheese scones are naturally nut-free, making them suitable for those with nut allergies.
- To Store Baked Scones: For the best quality, enjoy these savory gluten-free cheese scones on the day they are baked. Store leftovers in an airtight container at room temperature for up to two days, or in the refrigerator for up to five days.
- To Make Ahead (Dough): Prepare the scone dough and shape it into a disc as directed. Wrap it tightly in plastic wrap and refrigerate for up to 24 hours. When ready to bake, proceed with cutting and baking as usual, potentially extending baking time by a minute or two.
- To Freeze (Unbaked Scones): After shaping and cutting, freeze unbaked scones on a baking sheet until solid. Transfer them to a freezer-safe bag for up to three months. Bake directly from frozen, adding a few extra minutes to the baking time. Baked scones can also be frozen; wrap them individually and reheat in a 300°F (150°C) oven for 10-15 minutes.