
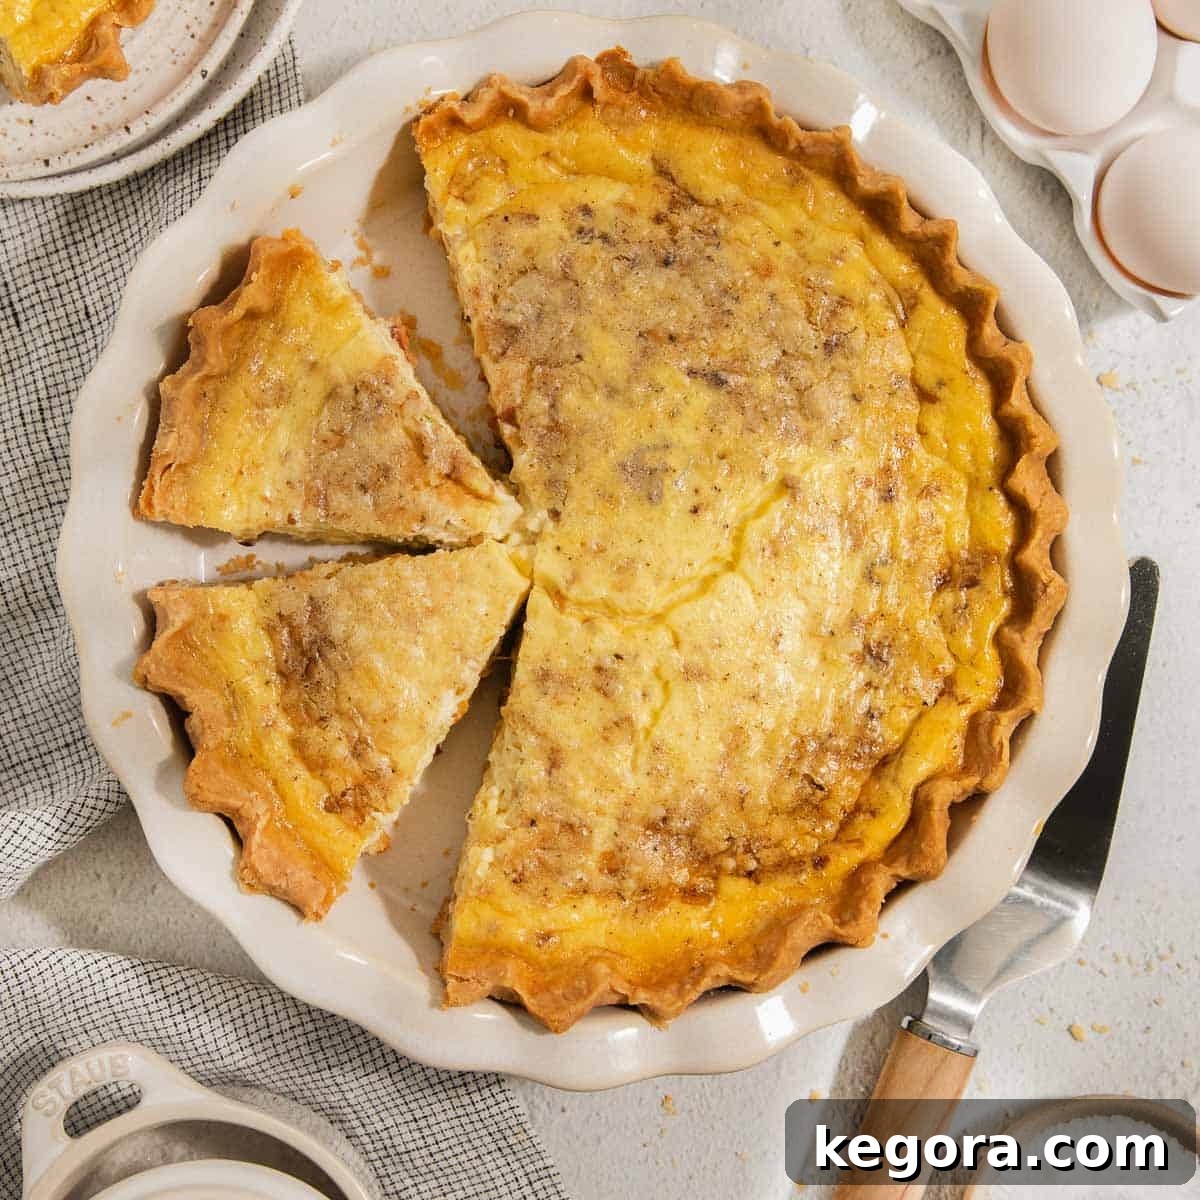
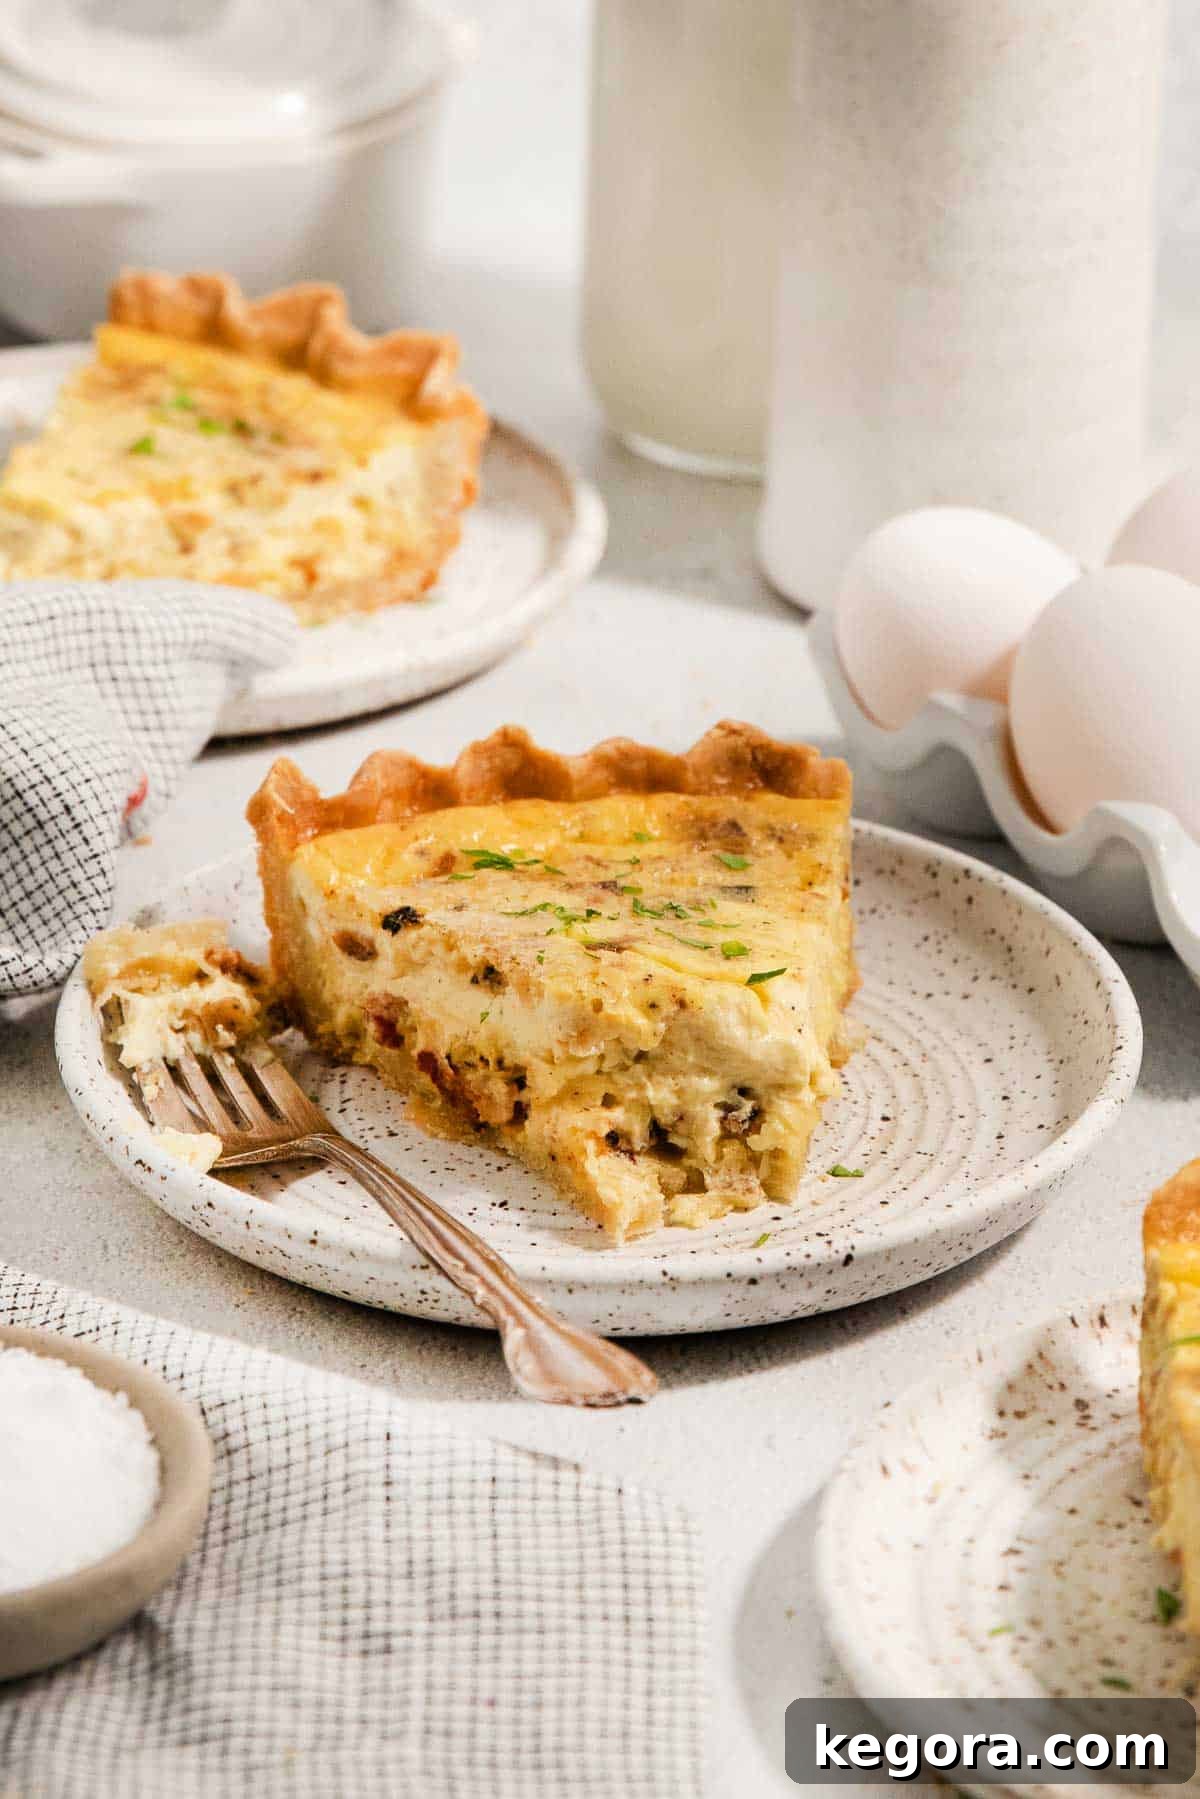
Delight in the timeless elegance of a perfectly crafted **Gluten-Free Quiche Lorraine**. This exceptional recipe presents a rich, creamy, and savory filling nestled within a supremely tender and flaky gluten-free crust. Combining the irresistible flavors of smoked bacon, sweet caramelized onions, and nutty Swiss cheese, this quiche is more than just a meal—it’s a culinary experience. Whether you’re hosting a festive brunch, preparing a comforting dinner, or simply seeking a sophisticated breakfast option, this classic Quiche Lorraine, reimagined for gluten-free diets, promises to impress every palate.
Beyond its exquisite taste, this recipe is designed for both ease and reliability. It features a meticulously developed gluten-free pie crust that has been perfected over years, ensuring a result that rivals traditional pastry in texture and flavor. We also provide comprehensive instructions for crafting the silky, flavorful filling, making the entire process enjoyable and straightforward. Pair this magnificent quiche with a slice of moist gluten-free coffee cake for a memorable special occasion spread, or explore other delightful morning options like our hearty gluten-free breakfast casserole or the fun gluten-free tater tot breakfast casserole.
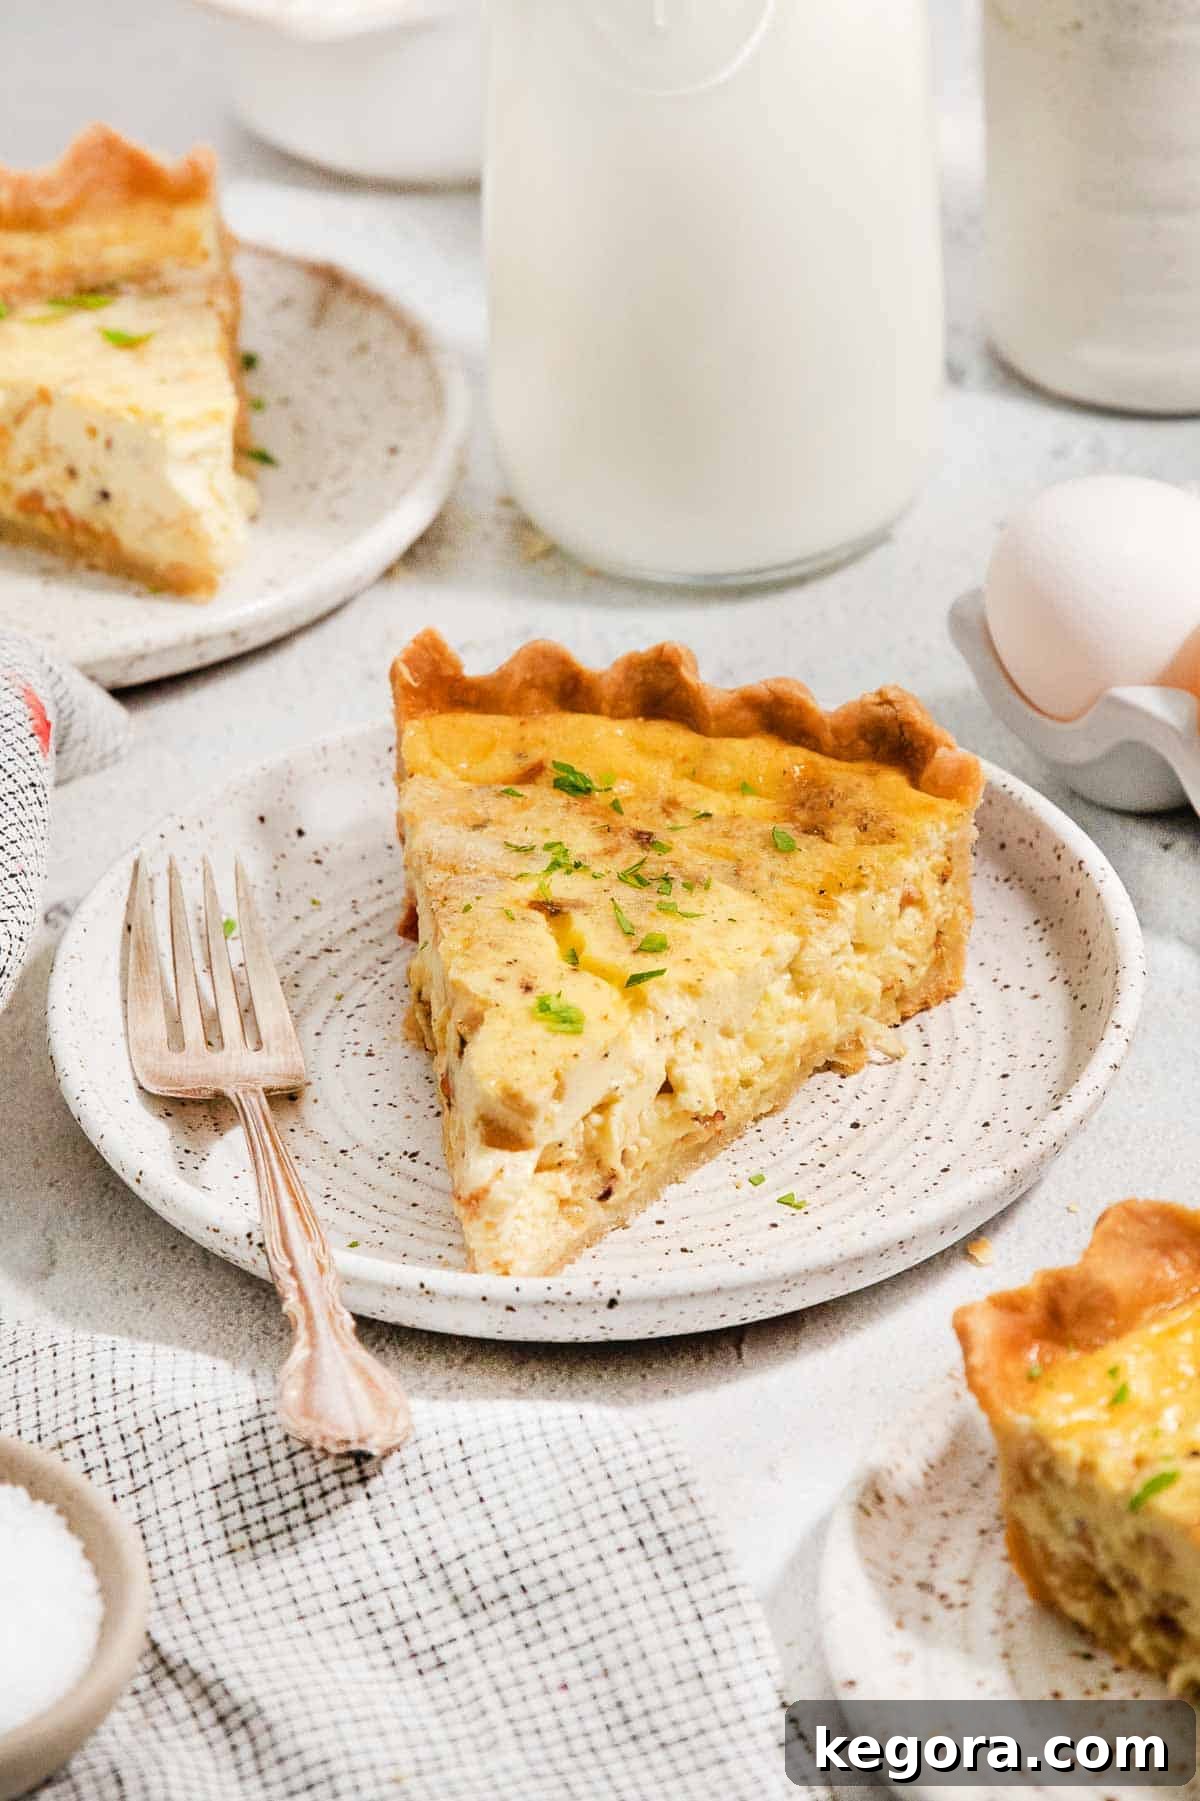
This beloved gluten-free Quiche Lorraine recipe holds a special place in my heart, rooted in a cherished family tradition. It’s an adaptation of an old recipe from my mother’s classic “Joy of Cooking” cookbook, a staple in our kitchen for generations. Growing up, Christmas mornings were always marked by the delicious aroma of this quiche baking, and I’ve proudly continued this tradition with my own family. The joyous combination of a light, flaky pie crust enveloping a rich, creamy filling—enhanced by the delightful blend of premium Swiss cheese, crispy bacon, and delicately caramelized onions—is a guaranteed crowd-pleaser. I am confident that once you try it, this recipe will become a treasured part of your family’s culinary heritage too.
Crafting a truly exceptional gluten-free quiche requires attention to detail, especially when it comes to the crust. Many gluten-free pastries can be dense or crumbly, but our perfected recipe ensures a delicate, airy texture that beautifully complements the luscious filling. The secret lies in precise ingredient ratios and specific preparation techniques, which we’ll guide you through step-by-step. The filling, a harmonious blend of savory and subtly sweet notes, achieves its depth from slow-cooked onions and perfectly rendered bacon, while heavy cream and eggs provide its signature custard-like consistency.
Why You’ll Adore This Gluten-Free Quiche Lorraine Recipe
This Gluten-Free Quiche Lorraine isn’t just a recipe; it’s an invitation to savor a perfect blend of tradition and modern dietary needs. Here are compelling reasons why this quiche will become a staple in your kitchen:
- Unmatched Tender, Flaky Gluten-Free Crust: Forget dry, brittle gluten-free pastry. Our tried-and-true pie crust recipe has been rigorously tested and refined over several years to achieve an exquisitely tender and flaky texture. It holds its shape beautifully and provides the perfect foundation for the creamy, savory quiche Lorraine filling, proving that gluten-free doesn’t mean compromising on taste or texture.
- The Epitome of Holiday and Special Occasion Breakfasts: This quiche transcends ordinary breakfast fare, making it ideal for festive gatherings. I love preparing this Gluten-Free Quiche Lorraine for Christmas morning, Easter brunch, intimate girls’ trips, or any celebratory occasion. Its sophisticated flavor profile and elegant presentation elevate any meal, leaving a lasting impression on your guests.
- Effortless Make-Ahead Convenience: Simplify your busy schedule with this incredibly convenient make-ahead option. This gluten-free Quiche Lorraine maintains its excellent quality and flavor for up to three days when stored properly in the refrigerator. It reheats beautifully, whether you’re warming individual slices in the microwave or the entire quiche in the oven, making it an invaluable asset for holiday meal prep or stress-free entertaining.
- Rich, Creamy, and Flavorful Filling: The heart of any great quiche is its filling, and ours is no exception. Bursting with the classic combination of savory bacon, delicate caramelized onions, and melted Swiss cheese, suspended in a rich egg and heavy cream custard, every bite is a delightful experience. The balance of flavors is simply unparalleled.
- Versatile Serving Options: While often considered a breakfast or brunch dish, this Quiche Lorraine is equally delightful as a light lunch or even a sophisticated dinner. Serve it warm, at room temperature, or even chilled—it’s delicious any way you slice it, making it incredibly adaptable to your dining preferences.
Crafting the Perfect Gluten-Free Quiche Crust
A truly exceptional quiche begins with an extraordinary crust, and our gluten-free version is nothing short of revolutionary. Achieving a tender, flaky pastry without gluten can be a challenge, but this recipe has been meticulously developed to ensure success every time. The key lies in understanding the role of each ingredient and following the precise preparation steps. This crust is designed not just to be gluten-free, but to be a genuinely delicious and structurally sound foundation for your quiche.
Essential Ingredients for Your Gluten-Free Crust
Here are crucial notes on the key ingredients that will transform your gluten-free quiche Lorraine crust into a masterpiece:
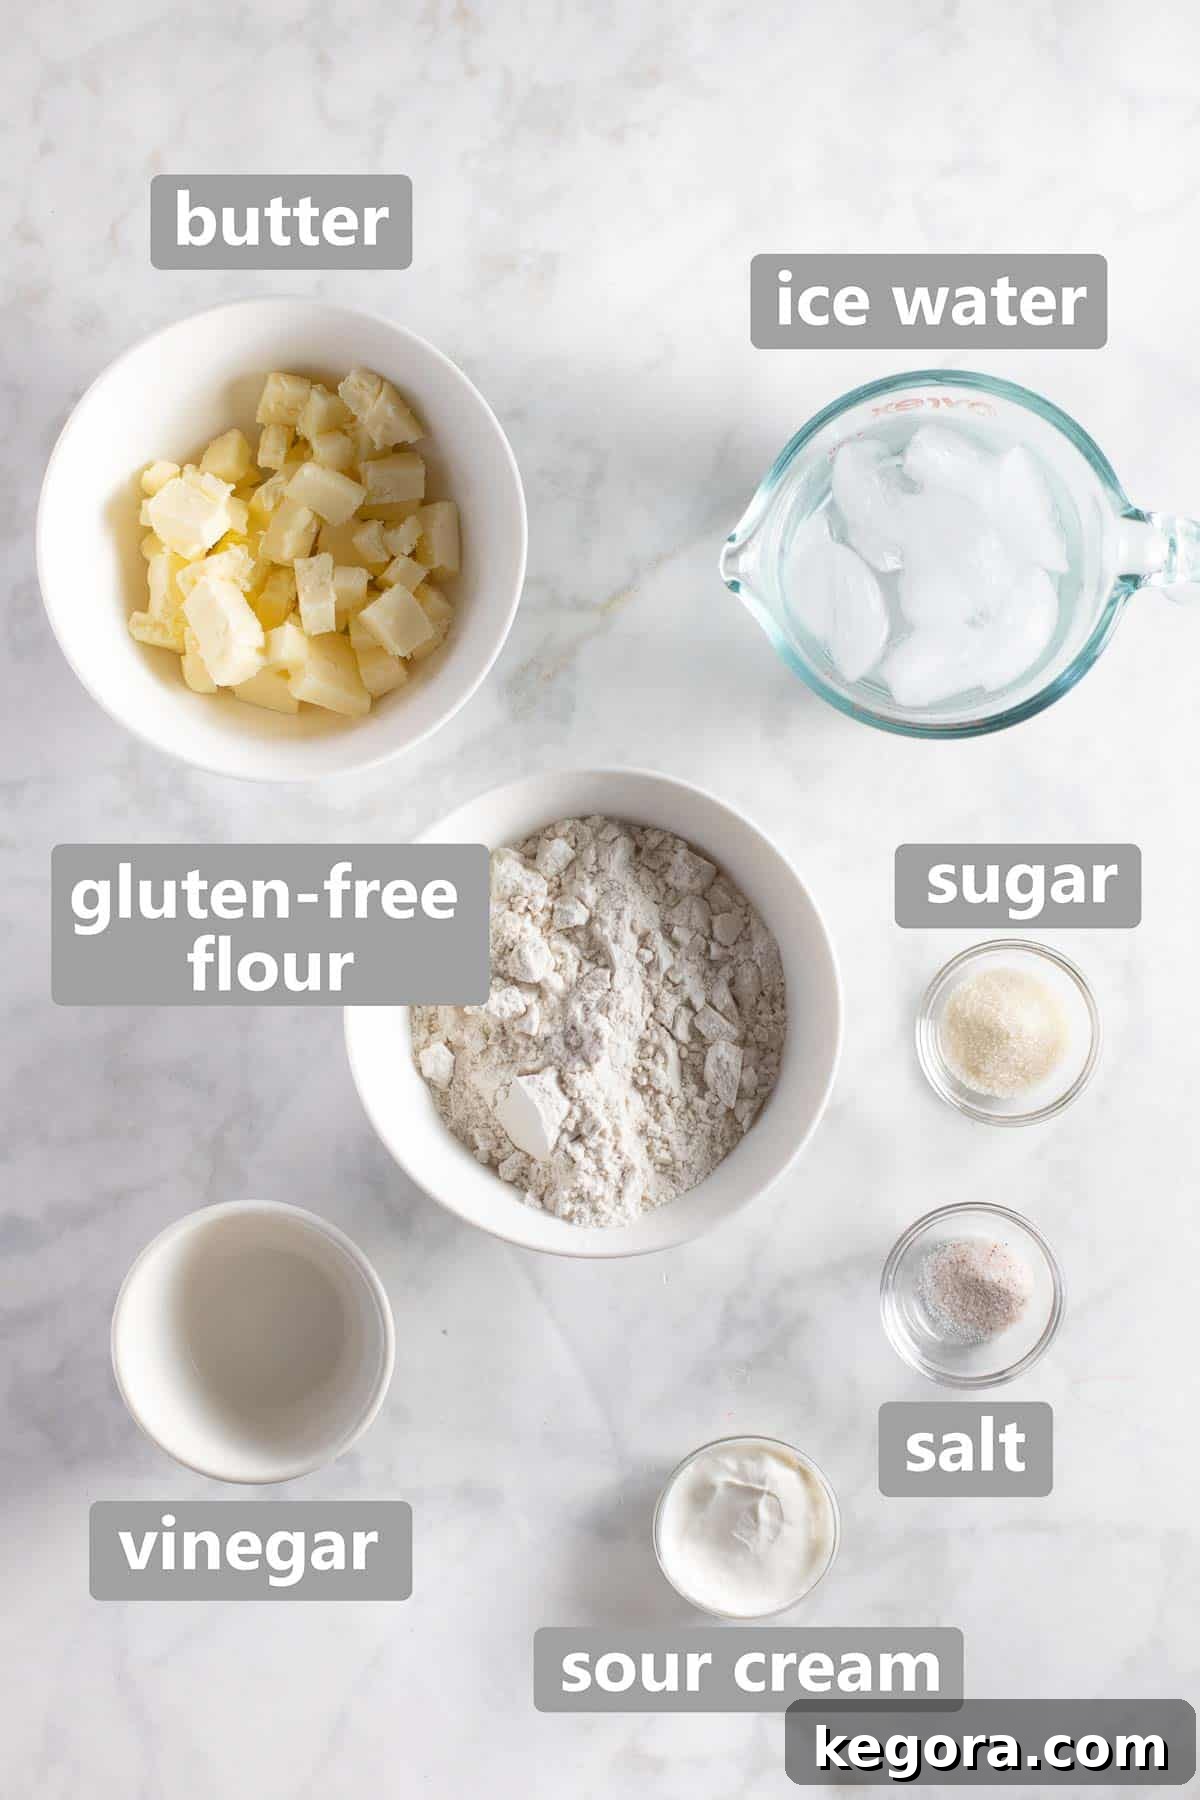
- High-Quality Gluten-Free Flour Blend: The foundation of any successful gluten-free bake. I highly recommend using a premium 1:1 gluten-free baking flour blend that already contains xanthan gum. Xanthan gum is vital as it provides elasticity and structure that gluten typically offers, preventing the crust from becoming crumbly. This is my personal favorite brand for consistent results.
- Ice-Cold Butter: This is non-negotiable for a flaky crust. Cold butter creates pockets of steam during baking, separating the layers of dough to produce that coveted flakiness. Cutting it into small pieces and freezing it briefly ensures it remains cold throughout the mixing process.
- Vinegar (White or Rice): A small but mighty ingredient! Vinegar helps tenderize the gluten-free dough, making it more pliable and easier to roll without tearing. It also contributes to a slightly more delicate texture. I find that white vinegar or rice vinegar works best without imparting a strong flavor.
- Sour Cream: Beyond adding a subtle tang, sour cream plays a crucial role in the dough’s stability and promotes beautiful browning during baking. Its fat content also contributes to the crust’s richness and tenderness. Using full-fat sour cream is recommended for the best results.
- Granulated Sugar and Salt: These aren’t just for flavor; sugar aids in browning and slightly tenderizes the crust, while salt balances the flavors and enhances the richness of the butter.
- Ice Water: Similar to butter, cold water is essential. It prevents the butter from melting prematurely and helps bring the dough together without overworking it.
NOTE: Achieving this perfect gluten-free pie crust relies heavily on using the exact listed ingredients and diligently following the detailed instructions. I have rigorously tested this recipe countless times to guarantee its consistent success. Any substitutions or deviations may alter the desired texture and flakiness.
Step-by-Step Guide: How to Make the Gluten-Free Quiche Crust
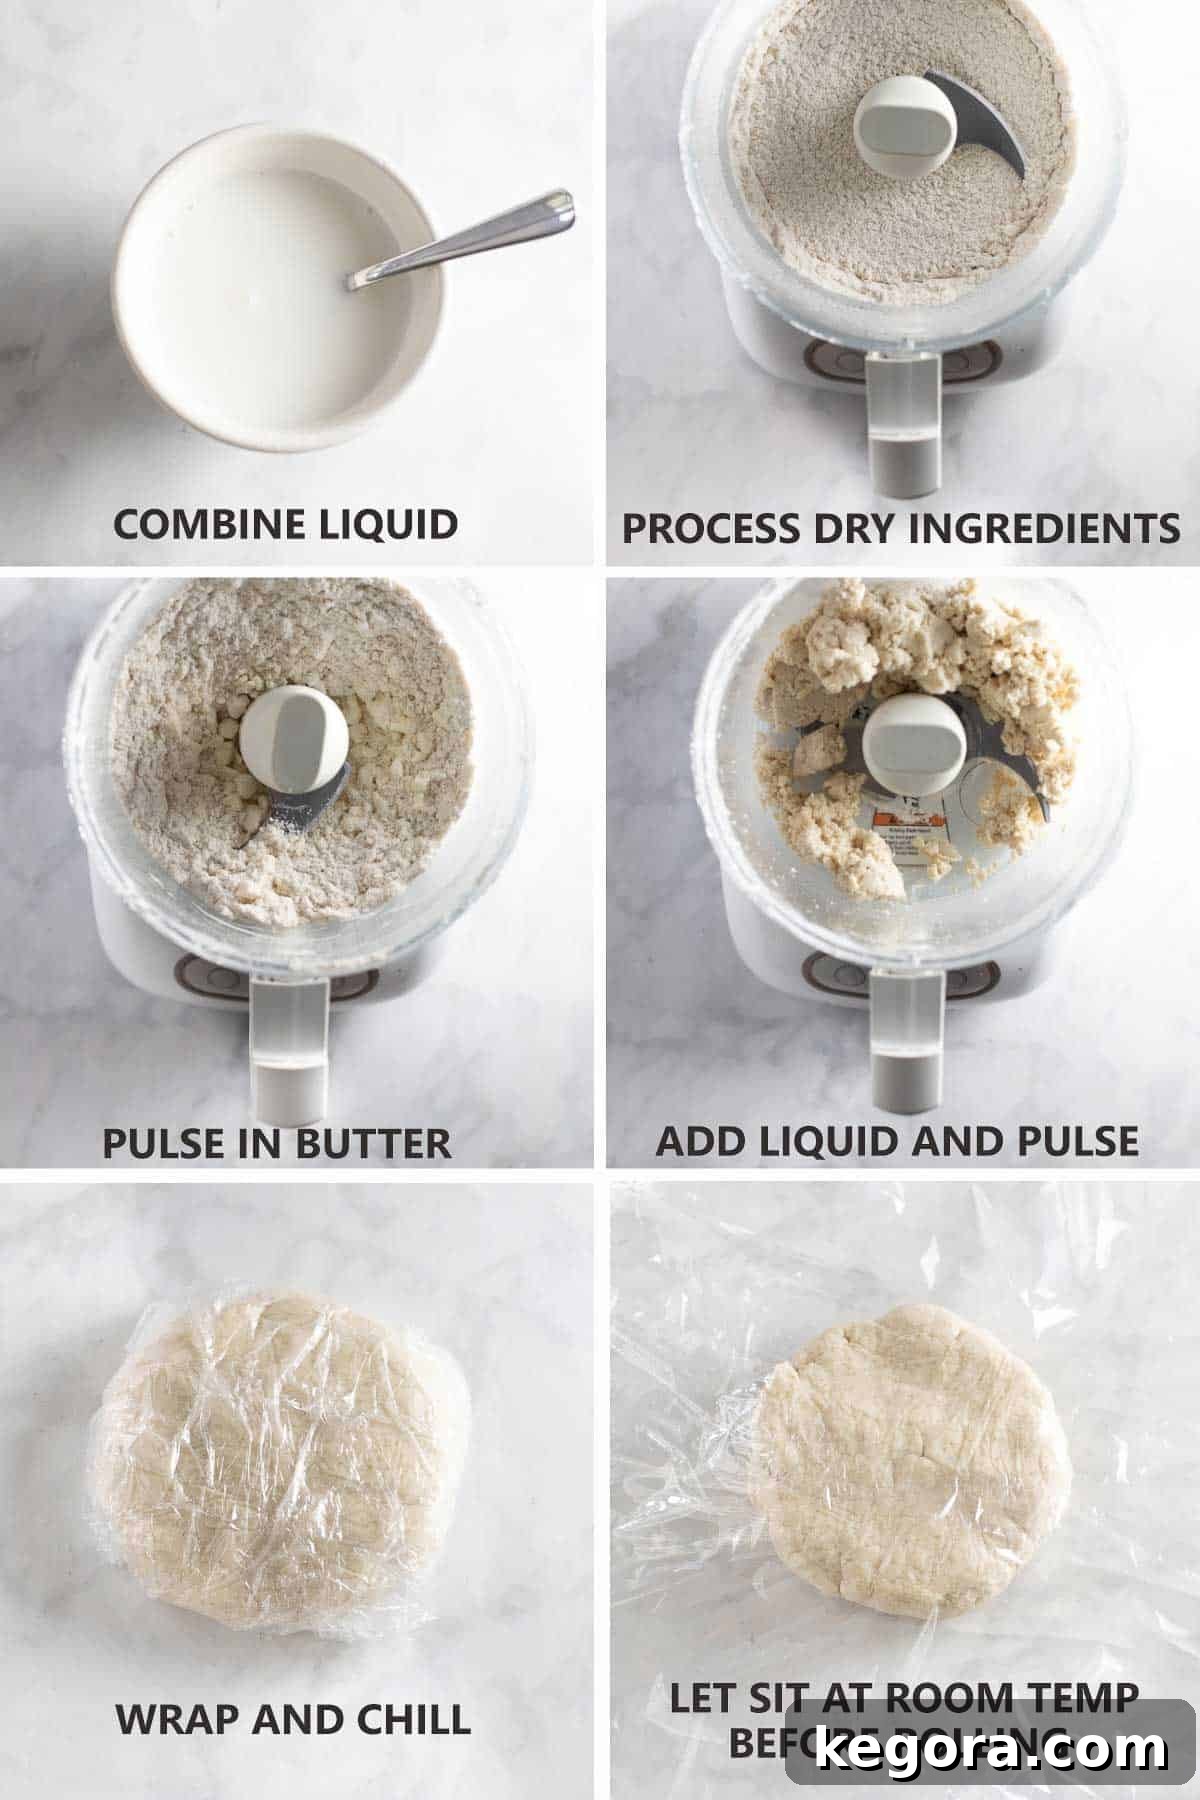
Crafting this gluten-free crust is a straightforward process, especially with the aid of a food processor. Follow these steps for a perfect, flaky result:
1. Chill and Prepare Butter: Begin by cutting your cold butter into small ¼-inch pieces. This maximizes the surface area for cutting into the flour and ensures it stays very cold. Place these butter pieces in the freezer for 10-15 minutes. This crucial step prevents the butter from melting too quickly when mixed, which is key to achieving a flaky crust.
2. Prepare Liquid Mixture: In a small bowl, combine the ice water, sour cream, and vinegar. Whisk these ingredients together until they are thoroughly smooth. Set this bowl aside; keeping the liquid cold is just as important as keeping the butter cold.
3. Process Dry Ingredients: Add the gluten-free flour, sugar, and salt to the bowl of your food processor. Pulse a few times until these dry ingredients are well combined. Next, scatter the frozen butter pieces evenly over the flour mixture. Pulse the food processor in short bursts (about 10 pulses) until the butter is broken down into small, pea-sized pieces. Avoid over-processing at this stage; larger butter pieces lead to flakier crusts.
4. Incorporate Liquid: Pour the chilled sour cream mixture evenly over the flour and butter mixture in the food processor. Continue to pulse, typically around 10 pulses, until the mixture just begins to clump together around the blade. The dough should look shaggy but cohesive, not wet or sticky.
5. Wrap and Chill Dough: Carefully turn the dough out onto a piece of plastic wrap. Gently gather it and press it into a flat disc shape. This flat disc will be easier to roll out later. Wrap the dough tightly in the plastic wrap to prevent it from drying out. Refrigerate for at least 1 hour, or ideally for up to 2 days. This chilling period allows the flour to fully hydrate, improving the dough’s texture and making it less prone to cracking when rolled.
6. Bring to Room Temperature Before Rolling: Before you plan to roll out your crust, remove the chilled dough from the refrigerator and let it sit at room temperature for approximately 15 minutes. This slight warming makes the dough more pliable and significantly reduces the chances of it cracking during the rolling process.
Expert Tips for Gluten-Free Pie Dough Success
Mastering gluten-free pie dough requires a few specialized techniques. These tips will help you achieve a crust that’s tender, flaky, and a joy to work with:
- Embrace the Food Processor: While traditional methods involve cutting butter by hand, I highly recommend making this pie crust in a food processor. It’s incredibly quick, efficient, and consistently delivers excellent results by ensuring the butter remains cold and is evenly distributed without overworking the dough. If you don’t have a food processor, you can use a pastry cutter or two forks, but work quickly to keep ingredients cold.
- The Power of Chilling: It is absolutely essential to let the pie dough rest in the refrigerator for at least 1 hour, and up to overnight, before attempting to roll it out. This resting period allows the gluten-free flours to fully hydrate, preventing a crumbly dough and enabling it to form a cohesive, manageable ball that’s less likely to tear.
- A Brief Room Temperature Rest is Key: After its initial chilling time, the pie dough will be quite firm. Allow it to sit at room temperature for about 15 minutes before you begin rolling it out. This short rest makes the dough more pliable and elastic, greatly reducing the risk of cracking and making it much easier to handle.
- Roll Between Plastic Wrap: Gluten-free pie dough is inherently more delicate and less elastic than its gluten-containing counterpart. To facilitate easy transfer and prevent sticking, always roll the dough out between two large pieces of plastic wrap or parchment paper. Once rolled, you can peel off the top layer, invert the dough into your pie plate, and then gently remove the second layer.
- Work with Cold Hands: If you’re cutting the butter by hand or handling the dough directly for shaping, try to keep your hands as cold as possible. Rinse them in cold water before touching the dough to prevent the butter from melting.
- Don’t Overwork the Dough: Gluten-free dough can become tough or crumbly if overworked. Mix and handle it just enough until it comes together. Pulsing in the food processor should be done in short bursts.
- Measure Precisely: Baking is a science, and gluten-free baking even more so. Use a kitchen scale for flour measurements (grams are most accurate) whenever possible to ensure consistent results.
Shaping and Preparing Your Gluten-Free Quiche Crust
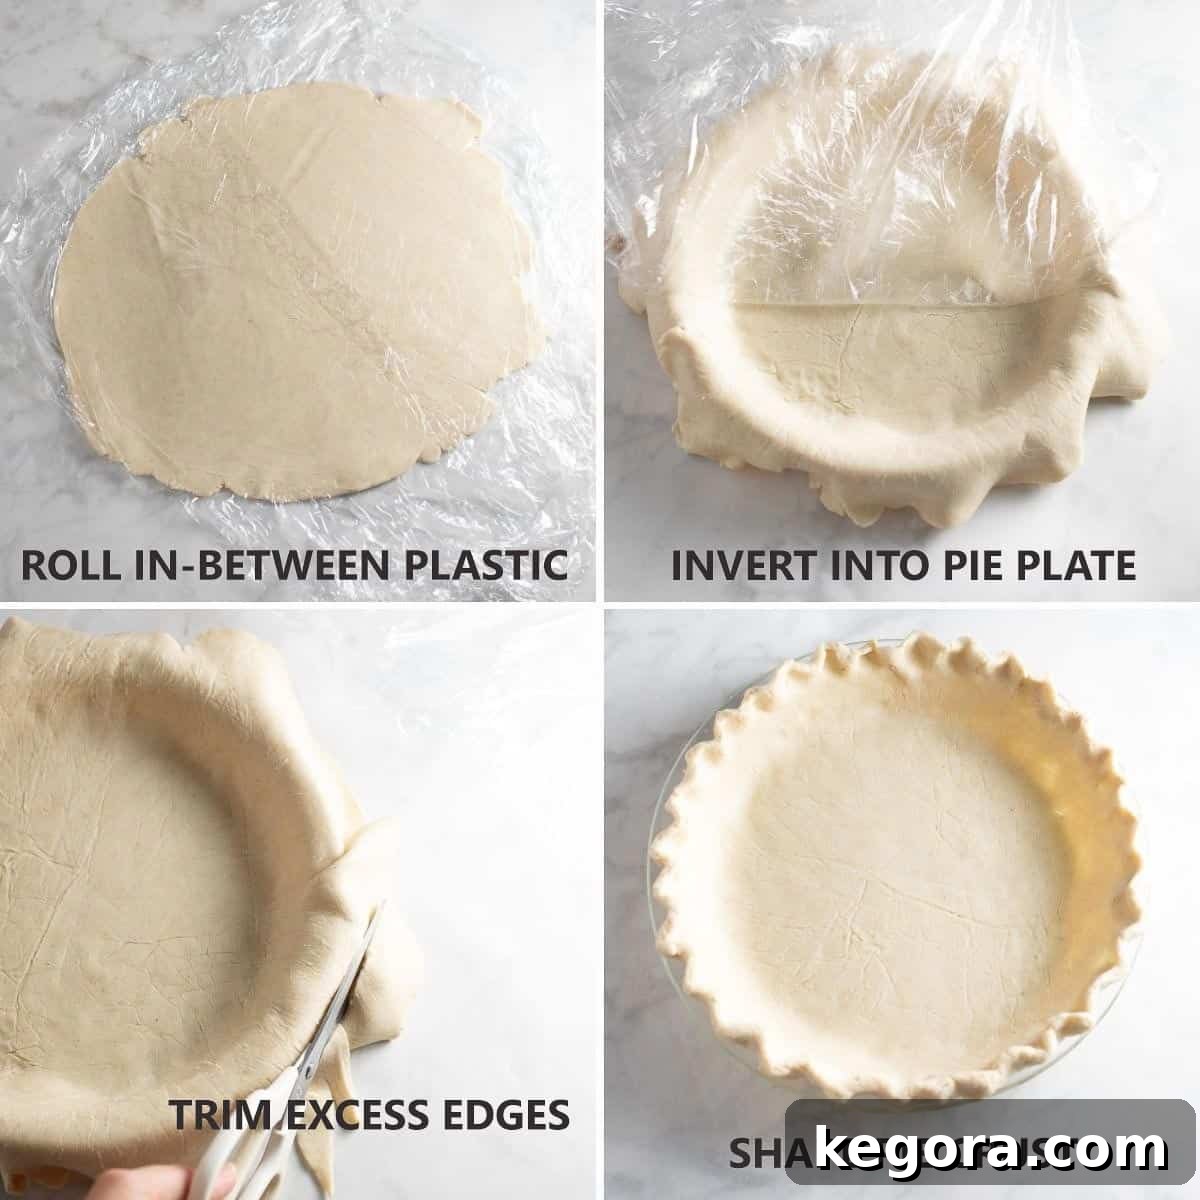
Once your gluten-free pie dough has properly chilled and rested, it’s time to transform it into the perfect quiche crust. Handling gluten-free dough requires a gentle touch, but with the right technique, it will be effortless:
1. Roll the Pie Crust: Place your slightly softened dough disc between two large sheets of plastic wrap (or parchment paper). Using a rolling pin, roll the dough evenly into a 12-inch circle, approximately ⅛-inch thick. Rolling between plastic wrap prevents sticking and makes transfer much simpler.
2. Invert into Pie Plate: Carefully peel off the top layer of plastic wrap from the rolled dough. Center your 9-inch pie pan upside down over the dough. Now, swiftly but gently flip the pie pan and dough over together. Once the dough is in the pan, slowly and carefully peel away the second piece of plastic wrap. Gently ease the dough into the contours of the pie pan, ensuring it fits snugly without stretching or tearing. Press firmly but delicately into the bottom and up the sides.
3. Trim and Shape Edges: Using a pair of kitchen scissors or a sharp knife, trim any excess dough from the edges, leaving about a ½-inch overhang. You can then crimp the edges decoratively with your fingers or a fork, or simply fold them under for a rustic look. Ensure the edges are uniform and appealing.
4. Chill the Shaped Crust: To help the crust maintain its shape and flakiness during baking, wrap the shaped pie crust loosely in plastic wrap and place it in the freezer for 15 minutes, or in the refrigerator for up to 1 hour, until it is thoroughly chilled and firm. This step is crucial before parbaking to prevent shrinkage and a soggy bottom.
For even more in-depth guidance on achieving an impeccable gluten-free pie crust, you might also like to consult my 2025 tested and perfected gluten-free pie crust recipe!
Crafting the Irresistible Gluten-Free Quiche Lorraine Filling
While your meticulously prepared gluten-free quiche crust chills, it’s the perfect opportunity to create the rich and savory filling that defines Quiche Lorraine. This harmonious blend of flavors is what elevates this dish from simple egg pie to a gourmet delight. The filling comes together quickly, allowing you to maximize your time while the crust is firming up.
Key Ingredients for a Sublime Filling
The success of the quiche Lorraine filling hinges on a few essential, high-quality ingredients:
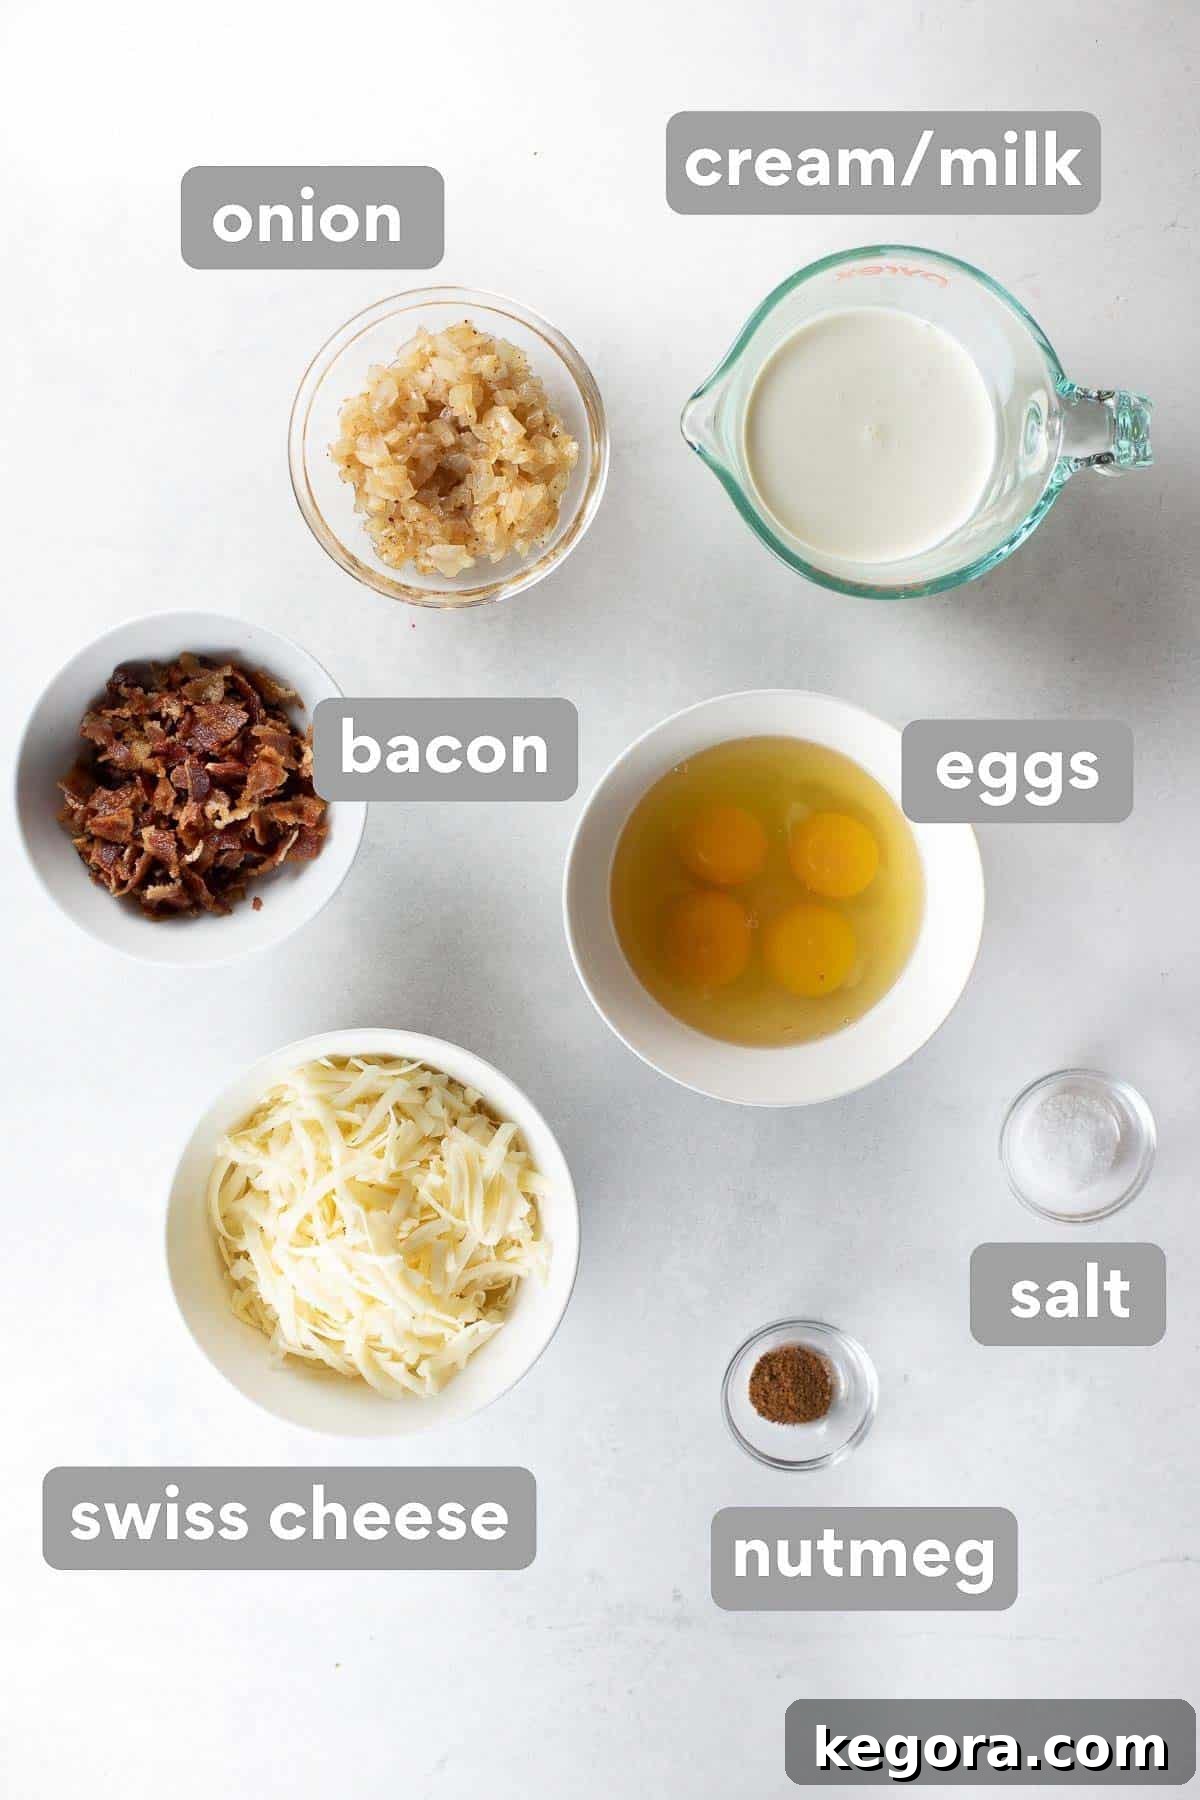
- Heavy Whipping Cream: This is a non-negotiable ingredient for authentic Quiche Lorraine. Its high-fat content is crucial for creating that luxuriously rich, velvety, and creamy custard texture that sets this quiche apart. Avoid substitutes like half-and-half or whole milk, as they will result in a less decadent and thinner filling.
- Smoked Bacon: The quintessential flavor bomb for Quiche Lorraine. Choose a good quality, thick-cut bacon for the best flavor and texture. The rendered fat will be used to sauté the onions, deepening the overall savory profile of the quiche.
- Sweet Onion: Finely diced and caramelized onions add a subtle sweetness and aromatic depth that beautifully complements the salty bacon and nutty cheese. Proper caramelization is key to unlocking their full flavor.
- Swiss Cheese: When it comes to classic Quiche Lorraine, the combination of bacon, onion, and Swiss cheese is truly unbeatable. Swiss cheese melts beautifully and offers a delightful nutty, slightly sweet flavor that perfectly balances the richness of the cream and the saltiness of the bacon. However, if you prefer, you could also experiment with other excellent melting cheeses such as sharp Cheddar cheese, Gruyere cheese, or even a blend for a customized flavor profile.
- Large Eggs: The binding agent for the custard. Fresh, large eggs provide the structure and tender texture of the quiche.
- Milk: While heavy cream provides richness, a touch of milk helps to lighten the custard slightly and ensures a balanced consistency without being overly heavy.
- Gluten-Free 1:1 Baking Flour: A small amount of gluten-free flour is added to the filling. This acts as a stabilizer, helping to thicken the custard slightly and prevent it from weeping or separating during baking, contributing to a smooth, uniform texture.
- Salt and Nutmeg: Salt enhances all the savory flavors, while a dash of freshly grated nutmeg adds a warm, subtly aromatic spice that is traditional in Quiche Lorraine and complements the creamy ingredients beautifully.
Assembling Your Quiche Lorraine: Filling Preparation
Follow these steps to create a perfectly balanced and flavorful filling that will truly elevate your gluten-free Quiche Lorraine:
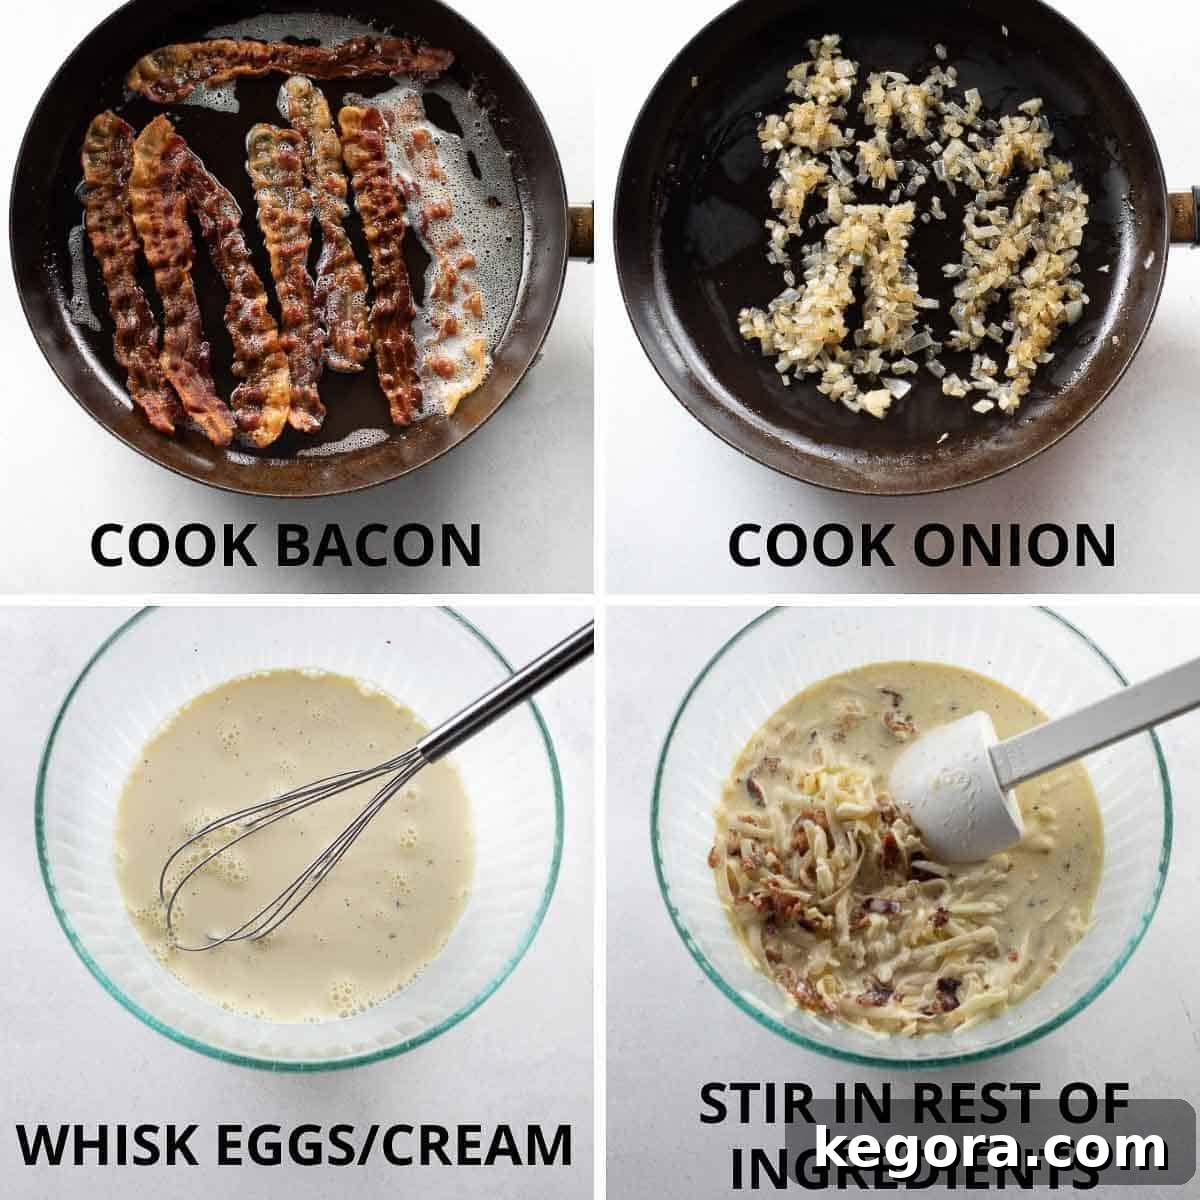
1. Cook the Bacon to Perfection: In a large skillet, cook the bacon over medium-low heat until it is beautifully crisp and golden brown. Cooking it slowly allows the fat to render properly and ensures maximum crispness. Once cooked, transfer the crispy bacon to a plate lined with a paper towel to drain excess grease. Let it cool completely before crumbling it into small pieces. This crisp texture is crucial for the quiche.
2. Caramelize the Onion: Pour off all but approximately 2 tablespoons of the flavorful bacon grease from the skillet. Return the pan to medium-high heat. Add the finely diced onion and cook, stirring occasionally, until it has softened and turned translucent, about 6-8 minutes. The goal here is to gently caramelize the onions, bringing out their natural sweetness without browning them too much. Once softened, remove the pan from the heat and let the onion cool to room temperature.
3. Prepare the Custard Base: In a medium or large bowl, whisk together the large eggs, heavy cream, milk, the tablespoon of gluten-free 1:1 baking flour, salt, and a dash of nutmeg. Whisk vigorously until the mixture is completely smooth and well combined, with no visible streaks of egg white. The flour helps to stabilize the custard and prevents it from weeping. Ensure all ingredients are thoroughly incorporated for an even texture.
4. Combine All Filling Elements: Gently stir the cooled, crumbled bacon, the cooled caramelized onion, and the freshly shredded Swiss cheese into the whisked egg and cream mixture. Fold everything together until all the savory components are evenly distributed throughout the custard. This ensures every slice of quiche will have a delightful blend of flavors and textures.
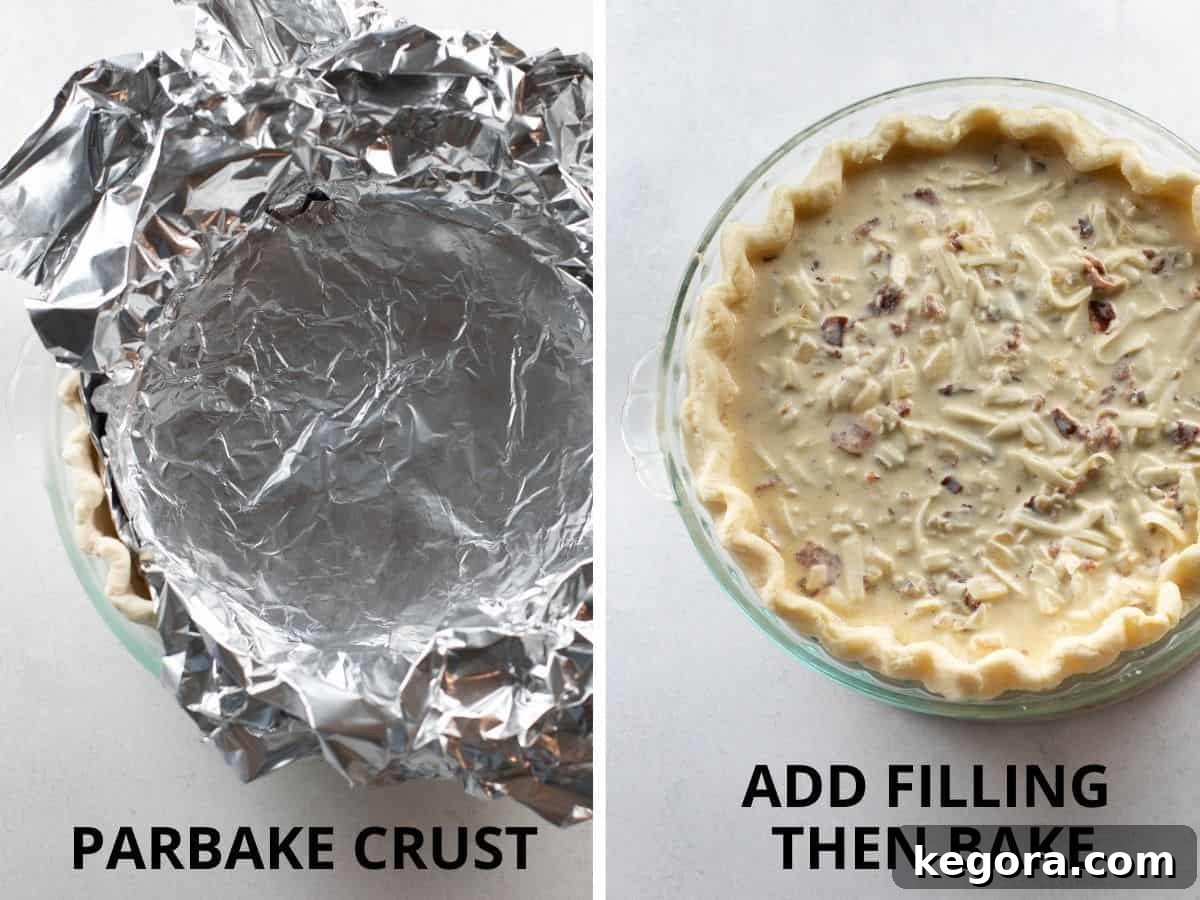
5. Preheat Oven and Parbake the Crust: Preheat your oven to a high temperature of 450°F (230°C). Blind baking the crust is a critical step to prevent a soggy bottom and ensure a crisp, flaky foundation for your quiche. To do this, press two layers of aluminum foil gently into the chilled crust, making sure it covers the sides and bottom. You can also add pie weights or dried beans over the foil to keep the crust from puffing up. Bake the crust for 10-12 minutes, or until it is nearly done and lightly golden. This initial bake sets the crust beautifully.
6. Bake the Quiche to Golden Perfection: After parbaking, carefully remove the foil and pie weights from the crust. Reduce the oven temperature significantly to 325°F (160°C). Immediately pour the prepared quiche filling into the hot, parbaked crust. This helps to create an even bake. Carefully transfer the quiche back to the oven and bake for 45-50 minutes. The quiche is ready when the center is set and no longer jiggly, and the top is a beautiful golden brown. To test for doneness, insert a knife or toothpick into the center; it should come out clean. If the edges begin to brown too quickly, you can loosely tent the quiche with foil.
7. Cool Before Serving: Once baked, remove the quiche from the oven and allow it to cool on a wire rack for at least 20 minutes before slicing and serving. This resting period is essential for the custard to fully set, making it easier to cut into clean slices. The quiche can be served warm, at room temperature, or even chilled.
For those looking to explore other quiche variations, you might also enjoy this delicious sundried tomato, gouda, and spinach quiche.

Storage and Make-Ahead Instructions for Your Gluten-Free Quiche Lorraine
One of the many advantages of this Gluten-Free Quiche Lorraine is its fantastic versatility for make-ahead preparation and convenient storage, perfect for streamlining your meal planning or holiday hosting.
To Make Ahead (Full Quiche): This quiche is an excellent candidate for advance preparation. You can bake the entire quiche up to three days before you plan to serve it. Once baked, allow it to cool completely on a wire rack. Then, wrap it tightly in plastic wrap and store it in the refrigerator. When ready to serve, you can reheat the whole quiche by wrapping it loosely in aluminum foil and warming it in a preheated oven at 325°F (160°C) for 15-20 minutes, or until it’s warmed through to the center.
To Make Ahead (Components): For even more flexibility, you can prepare components in advance:
- Crust: The gluten-free pie dough can be made up to 2 days in advance and stored in the refrigerator, or frozen for up to 1 month. The shaped and parbaked crust can also be prepared a day ahead and stored wrapped in the fridge.
- Filling: The bacon can be cooked and crumbled, and the onions can be caramelized a day or two in advance. Store them separately in airtight containers in the refrigerator. The egg and cream mixture should be whisked fresh just before baking.
To Store Leftovers: Any leftover quiche should be stored in an airtight container or tightly wrapped in plastic wrap in the refrigerator for up to 3 days. Proper sealing prevents it from drying out or absorbing other refrigerator odors.
To Reheat Individual Slices: For a quick reheat, individual slices can be warmed in the microwave for 30-60 seconds, or until heated through. For a crispier crust, reheat slices in a toaster oven or conventional oven at 300°F (150°C) for about 10-15 minutes.
Freezing (Baked Quiche): While best enjoyed fresh or refrigerated, a baked quiche can be frozen. Allow it to cool completely, then wrap tightly in plastic wrap and then in aluminum foil. Freeze for up to 1-2 months. Thaw overnight in the refrigerator before reheating in the oven as described above.
Advanced Recipe Tips for a Flawless Gluten-Free Quiche Lorraine
Elevate your gluten-free Quiche Lorraine with these expert tips, ensuring a perfect bake every time:
- Embrace Make-Ahead Versatility: Don’t hesitate to prepare and bake this gluten-free Quiche Lorraine entirely in advance. It’s a fantastic time-saver for entertaining or busy weekdays. Simply allow it to cool completely after baking, cover tightly, and refrigerate for up to 3 days. Before serving, gently reheat the entire quiche in the oven (covered with foil) until warmed through, or microwave individual slices for quick enjoyment.
- Prioritize Blind Baking for a Crispy Crust: To prevent the dreaded soggy bottom and ensure your gluten-free crust remains beautifully flaky and crisp, blind bake it. This involves baking the empty crust (lined with foil and pie weights) for 10-12 minutes at a higher temperature before adding the filling. This initial bake partially cooks the dough, creating a barrier against the wet custard.
- Invest in High-Quality Gluten-Free Flour: The type of gluten-free flour you use significantly impacts the final texture of your crust. For the best tender and flaky gluten-free pastry, I strongly recommend using a high-quality 1:1 gluten-free baking flour blend that specifically includes xanthan gum. Xanthan gum provides the necessary elasticity for gluten-free dough, mimicking the structure of traditional flour. This particular brand is my go-to for its consistent and superior results.
- Consider a Crustless Quiche Lorraine Option: For those seeking a lower-carb alternative or simply prefer to skip the crust, this classic quiche Lorraine filling can be baked without the pastry. Simply pour the prepared filling into a well-greased 9-inch pie pan or oven-safe baking dish and bake according to the recipe instructions, adjusting the baking time slightly as needed until the center is set.
- Don’t Overbake the Custard: Overbaking will result in a dry, rubbery quiche. The center should still have a slight wobble when gently shaken; it will continue to set as it cools. A knife or toothpick inserted near the center should come out clean when it’s perfectly done.
- Allow for Proper Cooling: Resist the urge to slice into your quiche immediately after it comes out of the oven. Allowing it to cool for at least 20 minutes on a wire rack allows the custard to fully set, ensuring clean, beautiful slices and preventing the filling from running out.
- Customize Your Filling: While the classic bacon, Swiss, and onion combination is superb, feel free to get creative! Other additions like sautéed spinach (ensure it’s well-drained), diced bell peppers, mushrooms, or different cheeses (Gruyere, sharp cheddar) can add wonderful variety.
Explore More Gluten-Free Brunch & Breakfast Recipes:
If you loved this Gluten-Free Quiche Lorraine, you’ll surely enjoy these other delicious gluten-free morning meals and treats:
- Gluten-Free Blueberry Muffins: Discover these incredibly soft and tender blueberry muffins, crafted with whole milk yogurt (with a dairy-free option available!) and bursting with fresh, juicy blueberries. They’re a breakfast classic perfected for gluten-free diets.
- Gluten-Free Waffles: This outstanding gluten-free waffle recipe consistently produces the lightest and crispiest homemade waffles. Made with readily available ingredients, it’s destined to become your go-to recipe for delightful weekend breakfasts.
- Sweet Potato Crust Quiche: A creative and naturally gluten-free option! Eggs, tangy goat cheese, and delicate leeks come together in a creamy, savory filling, all nestled in a delicious sweet potato crust. It’s a winning combination, perfect for impressing guests at your next holiday brunch.
- Gluten-Free Dutch Baby: Indulge in this easy and impressive gluten-free Dutch baby, also known as a German pancake! With its light custard base, dramatically fluffy sides and edges, and rich buttery flavor, no one will ever guess it’s gluten-free.
- Gluten-Free Cranberry Orange Bread: This delightful sweet gluten-free cranberry orange bread is generously studded with fresh, tart cranberries and crowned with a zesty orange citrus glaze. It’s the ultimate treat for the festive holiday season.
- Gluten-Free Breakfast Casserole: A total crowd-pleaser, this sausage hashbrown breakfast casserole is packed with flavorful sausage and wholesome veggies. It’s one of my top recommendations for a hearty and satisfying holiday breakfast.
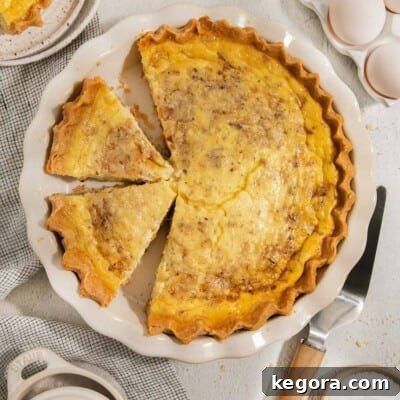
Classic Gluten-Free Quiche Lorraine
This versatile quiche is perfect for any meal—be it a hearty breakfast, an elegant brunch, or a light dinner. It’s especially wonderful as a make-ahead option for holidays and special occasions, ensuring deliciousness with minimal stress.
Comments
(Email submission form content removed as per instructions.)
Ingredients
For the Gluten-Free Crust:
- 8 tablespoons unsalted butter (1 stick, very cold, cut into ¼-inch pieces)
- 3 tablespoons ice water
- 1 1/2 tablespoons sour cream (full-fat)
- 1 1/2 teaspoons white vinegar or rice vinegar
- 1 cup + 2 tablespoons gluten-free 1:1 baking flour (185 grams, with xanthan gum)
- 1 teaspoon granulated sugar
- 1/2 teaspoon fine sea salt
For the Classic Quiche Lorraine Filling:
- 8 slices bacon (thick-cut recommended)
- 1 medium onion (finely diced)
- 4 large eggs
- 1 cup heavy whipping cream
- 1 cup whole milk
- 1 tablespoon gluten-free 1:1 baking flour
- 1/2 teaspoon fine sea salt
- dash freshly grated nutmeg
- 1 1/2 cups freshly shredded Swiss cheese (6 oz)
Instructions
To Prepare the Gluten-Free Crust:
-
Cut the very cold butter into small ¼-inch pieces and place them in the freezer for 10-15 minutes to ensure they remain firm.
-
In a small bowl, combine the ice water, sour cream, and vinegar. Whisk until smooth and thoroughly chilled, then set aside.
-
In the bowl of a food processor, combine the gluten-free flour, sugar, and salt. Pulse briefly to combine. Scatter the frozen butter pieces over the flour mixture and pulse about 10 times, until the butter is broken into pea-sized pieces.
-
Add the chilled sour cream mixture to the food processor. Pulse about 10 times until the dough just begins to clump together around the blade and looks shaggy. Avoid over-processing.
-
Turn the dough out onto a piece of plastic wrap. Gently gather it into a flat disc and wrap it tightly. Refrigerate for at least 1 hour, or ideally up to 2 days, to allow the flour to hydrate and the dough to firm up.
-
Before rolling, let the chilled dough sit at room temperature for 15 minutes to become slightly more pliable. Then, roll the pie crust evenly between two large pieces of plastic wrap into a 12-inch circle.
-
Remove the top piece of plastic wrap and carefully invert the dough into a 9-inch pie plate. Gently ease the dough into the edges of the pan before peeling off the second piece of plastic wrap. Trim any excess edges with scissors and shape the crust edges as desired (e.g., crimping with fingers or a fork).
-
Wrap the shaped pie crust loosely in plastic wrap and place it in the freezer for 15 minutes or up to 1 hour, until it is chilled and firm. This prevents shrinkage during baking.
To Prepare the Quiche Lorraine Filling and Bake:
-
In a large skillet, cook the bacon over medium-low heat until it is crisp and golden. Transfer the cooked bacon to a paper-towel lined plate to drain and cool, then crumble it into small pieces.
-
Pour off all but 2 tablespoons of bacon grease from the skillet. Add the finely diced onion and cook over medium-high heat for 6-8 minutes until softened and translucent, allowing it to lightly caramelize. Let the onion cool completely.
-
In a medium bowl, whisk together the eggs, heavy cream, milk, gluten-free flour, salt, and a dash of nutmeg until the mixture is smooth and well combined. Stir in the cooled crumbled bacon, cooled caramelized onion, and shredded Swiss cheese.
-
Preheat your oven to 450°F (230°C). To parbake the chilled crust, press 2 layers of aluminum foil into the crust, covering the bottom and sides (you can add pie weights). Bake for 10-12 minutes, until the crust is nearly cooked and lightly golden. This ensures a crispy bottom.
-
Carefully remove the foil and pie weights from the hot crust. Reduce the oven temperature to 325°F (160°C). Pour the prepared filling into the hot, parbaked crust. Bake for 45-50 minutes, or until the center is set and the top is golden brown. Test for doneness by inserting a knife or toothpick into the center; it should come out clean.
-
Allow the quiche to cool on a wire rack for at least 20 minutes before slicing and serving. This allows the custard to fully set. This quiche can also be cooled completely and served at room temperature. Store any leftovers in an airtight container in the refrigerator and reheat slices individually for up to 3 days. Enjoy your delicious homemade Gluten-Free Quiche Lorraine!
Notes
MAKE-AHEAD/STORAGE: This quiche is an excellent make-ahead option. You can store the baked quiche in the refrigerator for up to 3 days. Reheat individual slices in the microwave, or for the entire quiche, wrap it in foil and warm in an oven at 325°F (160°C) for 10-15 minutes (or until thoroughly warmed) before serving.
Nutrition Information (per serving)
Carbohydrates: 36g |
Protein: 17g |
Fat: 50g |
Saturated Fat: 25g |
Trans Fat: 1g |
Cholesterol: 229mg |
Sodium: 801mg |
Potassium: 387mg |
Fiber: 3g |
Sugar: 4g |
Vitamin A: 1304IU |
Vitamin C: 2mg |
Calcium: 127mg |
Iron: 3mg