

Welcome to your new holiday baking obsession! These incredibly soft and chewy gluten-free peppermint sour cream sugar cookies are a true Christmas miracle. Infused with delightful peppermint crunch and crowned with a rich, tangy sour cream frosting, they’re not just a cookie – they’re an experience. For an unparalleled texture that will win over hearts and taste buds, always serve them chilled!
If you’re looking to expand your gluten-free baking repertoire, you might also enjoy our popular recipes for classic gluten-free cut-out sugar cookies or our indulgent gluten-free double chocolate mint cookies.

Experience the Magic of Chilled Peppermint Perfection
Imagine a cookie that perfectly captures the essence of a “swig cookie,” elevated for the festive season. Our rendition delivers a luxuriously soft, pillowy sour cream sugar cookie, generously studded with crunchy peppermint bark pieces, all topped off with a thick, creamy, and irresistibly cool sour cream frosting. This isn’t just a treat; it’s a revelation you truly need to taste to believe how utterly good these gluten-free peppermint sour cream sugar cookies are!
Each bite offers a symphony of textures: wonderfully thick and chewy centers yielding to slightly crisp edges, all punctuated by the refreshing burst of candy cane goodness. The chilled frosting adds an extra dimension, providing a cool contrast that enhances every element of the cookie, making it profoundly satisfying and truly unique among holiday treats. These thick, chewy cookies, with their delightful peppermint crunch and creamy frosting, are designed to be served chilled for the ultimate flavor and texture experience.
One of the best features of these easy sugar cookies? You can confidently set aside your rolling pin and cookie cutters! Achieving these perfectly imperfect, charmingly rustic edges is a breeze. Simply form the gluten-free peppermint cookie dough into balls, gently flatten them with the bottom of a sugar-dipped glass cup, and they’re ready for the oven. This no-fuss approach means more time enjoying the baking process and less time on intricate preparations, making them an ideal choice for busy holiday bakers.
Looking for more delicious gluten-free meal ideas? Don’t miss our extensive collection of top 25 gluten-free dinner recipes, perfect for any occasion beyond just desserts.
Why These Gluten-Free Peppermint Sour Cream Cookies Will Be Your New Favorite
There are countless reasons why these gluten-free peppermint sour cream sugar cookies stand out, especially during the festive season. Here’s what makes them truly special and a must-try for your holiday baking list:
- Unrivaled Soft and Chewy Texture: The secret to their incredible mouthfeel lies in the combination of full-fat sour cream and a precise baking time. Sour cream adds a unique tenderness, a luxurious richness, and a subtle tang, while slightly underbaking ensures they remain moist and delightfully chewy, especially after chilling. This perfect balance creates an indulgent experience that’s hard to find in other cookies.
- The Ultimate Holiday Cookie: What’s a holiday party without the invigorating taste of peppermint? These cookies are packed with festive cheer, making them an ideal dessert for any gathering. Their vibrant flavor and appealing look, dotted with red peppermint pieces and a creamy frosting, will instantly put everyone in a celebratory mood and become a talking point at your festive table.
- Perfect for Thoughtful Gifting: Spread holiday joy effortlessly! Your friends, family, and neighbors will be absolutely delighted to receive a batch of these homemade, competition-worthy gluten-free peppermint cookies. Package them beautifully in decorative tins or bags for a personalized gift that truly comes from the heart and shows you care. They’re a delicious way to share the holiday spirit.
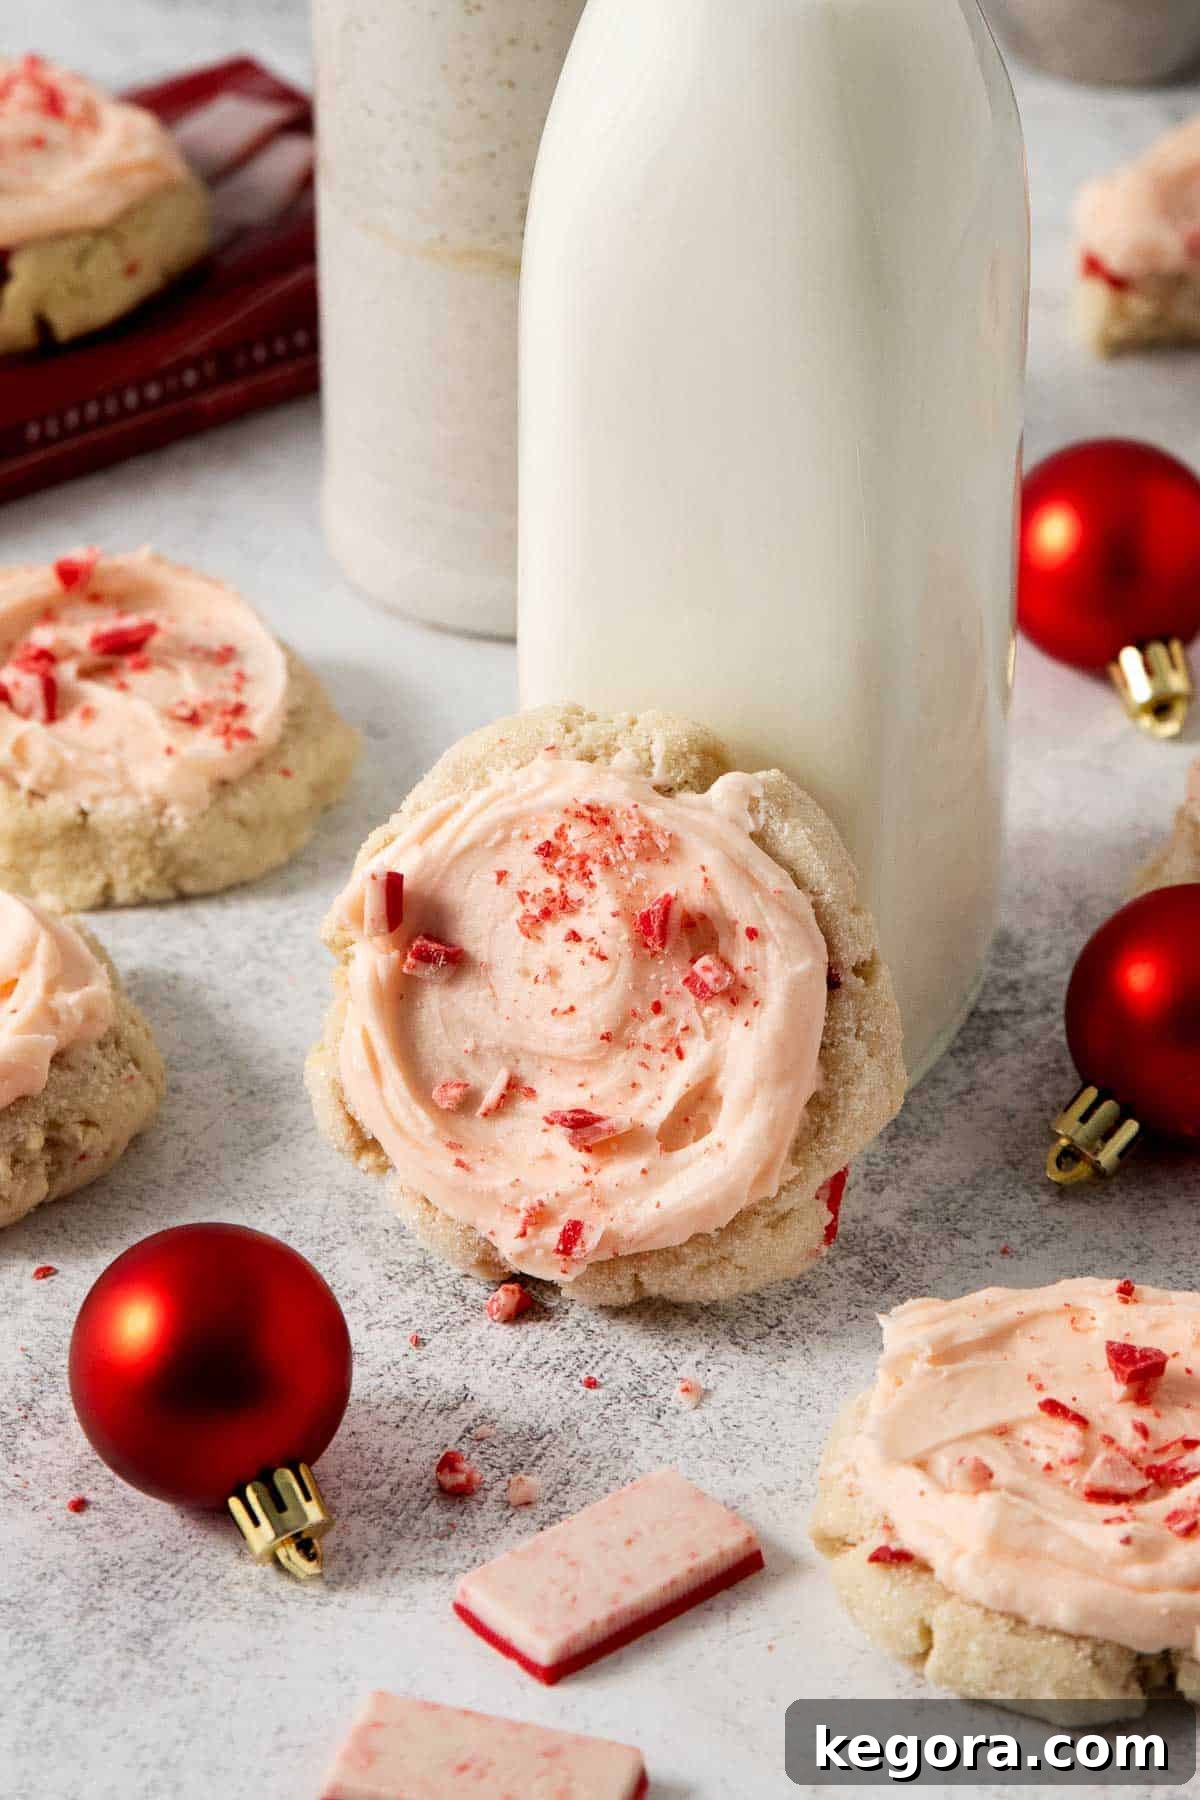
- Irresistibly Served Chilled: This is a game-changer and arguably the most distinctive feature! Serving these cookies straight from the refrigerator transforms them into an extraordinary treat. The cool cookie combined with the thick, refreshing sour cream frosting creates a unique sensation that’s simply impossible to resist. It’s a texture and temperature combination that truly sets these chilled peppermint cookies apart from any other sugar cookie you’ve tasted.
- Effortless Preparation – No Rolling Required: Say goodbye to the tedious task of rolling out dough and using cookie cutters! This recipe simplifies your baking process, allowing you to enjoy the festive fun without the usual fuss. Just scoop the dough, form into balls, gently press with a glass, and bake. It’s a fantastic way to achieve beautiful, uniform cookies with minimal effort, making them accessible even for novice bakers.
Key Ingredients for Unforgettable Gluten-Free Peppermint Sour Cream Cookies
Crafting these exceptional gluten-free peppermint sour cream sugar cookies requires a few key ingredients that contribute significantly to their unique flavor and texture. Here’s a closer look at what you’ll need and why each component is important for achieving cookie perfection:
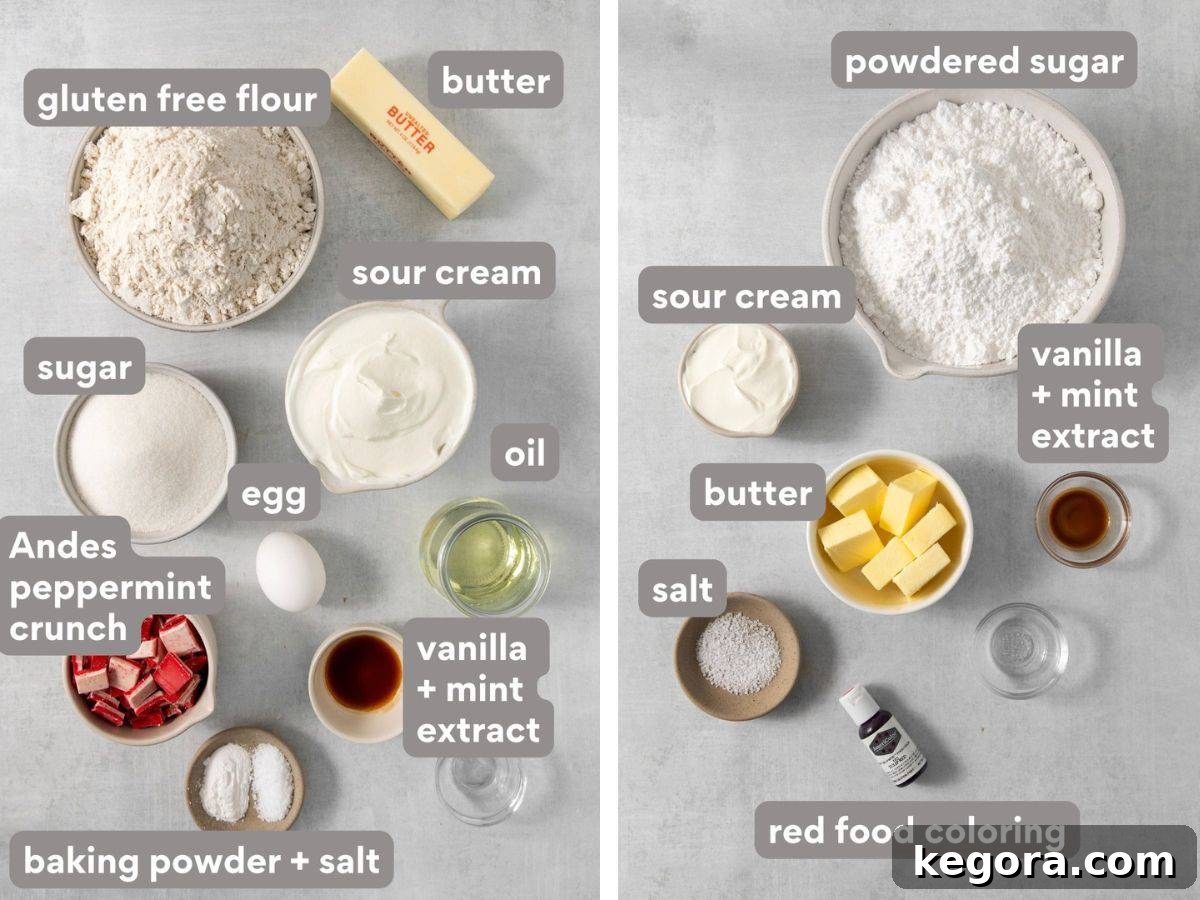
- High-Quality Gluten-Free Flour Blend: The success of any gluten-free baked good hinges on the right flour. It’s crucial to use a high-quality gluten-free flour blend that already contains xanthan gum. Xanthan gum acts as a binder, providing the elasticity and structure often missing in gluten-free recipes, preventing a crumbly texture. We highly recommend and have tested this recipe with King Arthur Gluten-Free Measure-for-Measure Flour for its consistent, reliable results and excellent texture.
- The Magical Combination of Oil and Full-Fat Sour Cream: These two ingredients are the secret weapons for achieving an incredibly moist, rich, and almost creamy texture in the center of your cookies. The vegetable oil contributes to tenderness and prevents dryness, while full-fat sour cream adds a delightful tangy note, luxurious moisture, and a distinct softness that truly makes these cookies special. Ensure you use *full-fat* sour cream for the best results, as low-fat versions can alter the texture and moisture content.
- Andes Peppermint Crunch: To achieve that perfect festive flavor and delightful crunch, you’ll want to use the RED Andes peppermint crunch variety. It provides the iconic sweet and minty flavor that defines these holiday cookies. Avoid the green mint varieties, as they typically have a different, often stronger, mint flavor profile that isn’t ideal for this recipe. You can either use the convenient Andes Peppermint Crunch Baking Chips that come in a bag, or if you prefer, chop up Andes Peppermint Crunch Thins until you have approximately 1 cup. Both options work beautifully to infuse the cookies with that signature peppermint zing and visual appeal.
- Softened Butter: For both the cookies and the frosting, ensuring your unsalted butter is properly softened (at room temperature but not melted) is essential. This allows for proper creaming with the sugar and other wet ingredients, resulting in a smooth, well-combined mixture and a tender, light crumb for the cookies and a silky frosting.
- Granulated Sugar and Powdered Sugar: Granulated sugar provides the foundational sweetness and helps with the spread and chewy texture of the cookies. Powdered sugar, also known as confectioners’ sugar, is essential for achieving a smooth, lump-free, and creamy frosting texture that melts delightfully in your mouth.
- Flavor Extracts: Vanilla extract adds a foundational warmth and depth of flavor, enhancing the overall sweetness. Peppermint extract provides that quintessential holiday flavor; be mindful when adding it, as a little goes a long way to deliver that refreshing minty kick without overpowering the other flavors.
- Large Egg: A single large egg acts as a crucial binder in the cookie dough, adding structure, richness, and helping to create that perfect soft and chewy texture.
- Baking Powder and Salt: Baking powder is our leavening agent, ensuring the cookies rise to a perfect thickness and achieve their characteristic pillow-like softness. Salt is vital for balancing the sweetness, enhancing all the flavors, and providing a subtle contrast that makes the cookies truly pop.
Step-by-Step Guide to Baking Gluten-Free Peppermint Sour Cream Sugar Cookies
Follow these detailed instructions to create your own batch of these delightful holiday cookies. Remember, patience and adherence to the steps are key for the perfect result and the signature soft, chewy texture of these gluten-free peppermint cookies!
1. Prepare the Wet Ingredients for the Cookie Dough
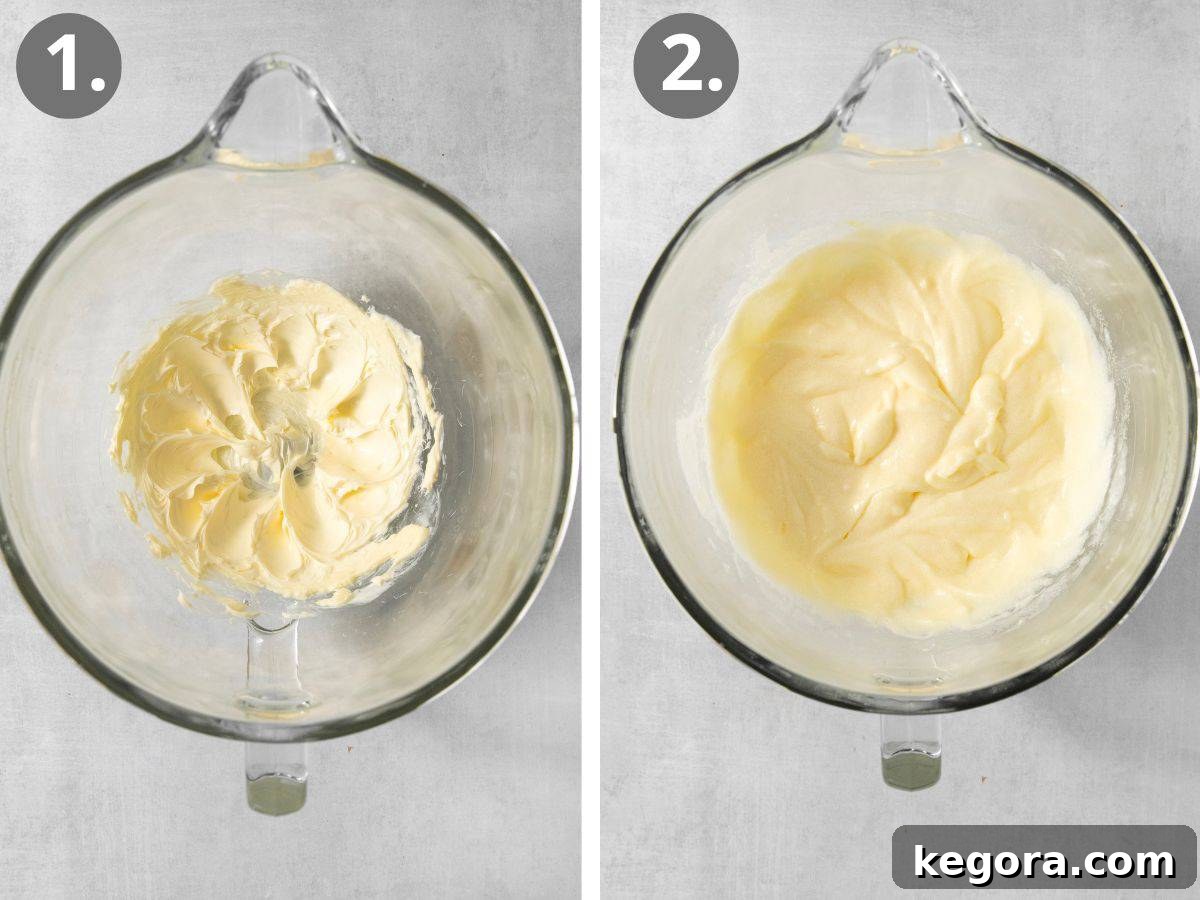
Begin by creaming your butter. In the bowl of a stand mixer fitted with the paddle attachment (or using a large bowl and a high-quality electric hand mixer), add the softened unsalted butter. Mix on medium speed for 2-3 minutes, allowing the butter to become noticeably light in color and fluffy in texture. This aeration is crucial for creating a tender and airy cookie crumb.
Next, pour in the vegetable oil and continue mixing for another 1-2 minutes until it is thoroughly incorporated into the butter mixture. Then, add the full-fat sour cream, the large egg, granulated sugar, vanilla extract, and peppermint extract. Mix all these wet ingredients together on medium-low speed until they are well combined and the mixture appears smooth. Be sure to stop and scrape down the sides of the bowl as needed to ensure all ingredients are fully integrated, leaving no unmixed pockets.
2. Incorporate the Dry Ingredients and Peppermint Crunch
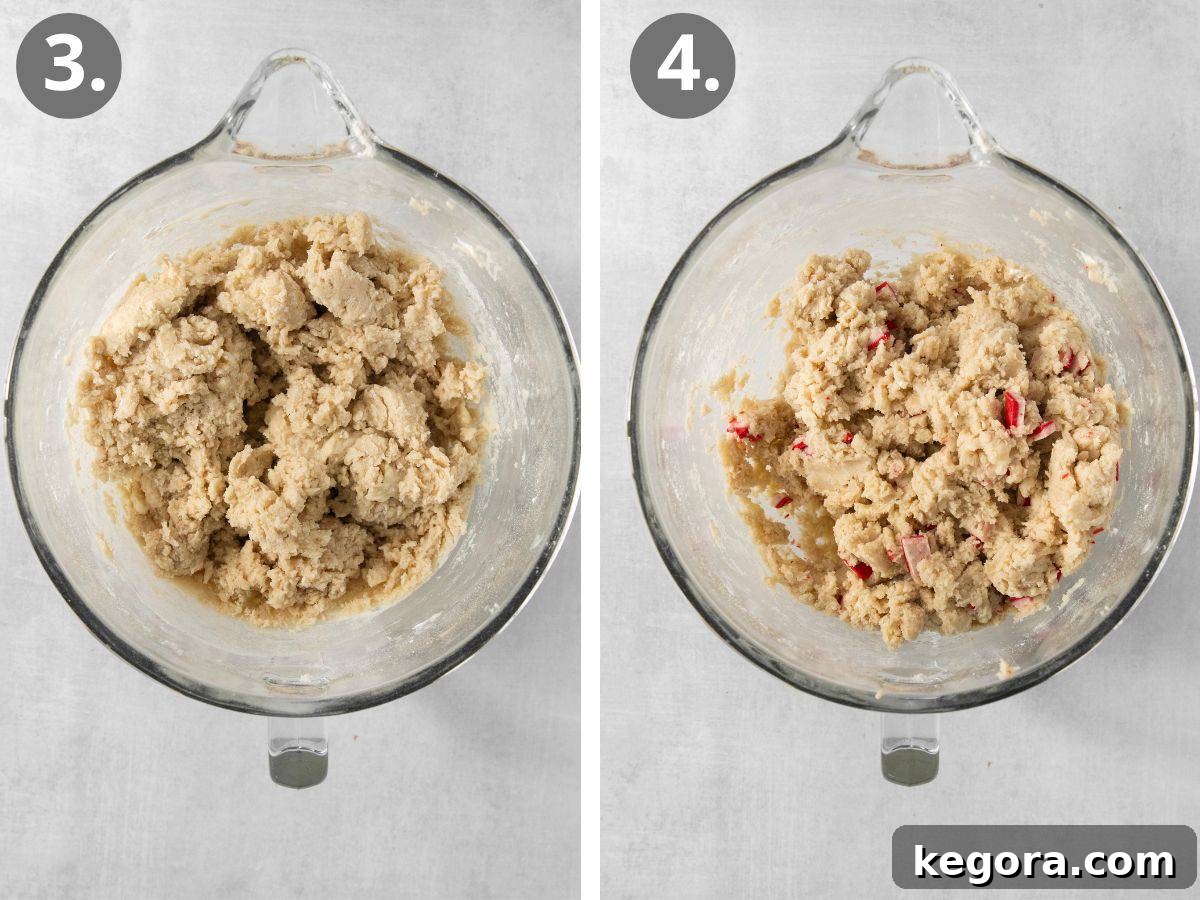
To the wet mixture in your stand mixer, add the baking powder, salt, and approximately one-third of your measured gluten-free flour blend. Mix on low speed until the dry ingredients are just combined with the wet. Gradually add the remaining gluten-free flour, mixing slowly until no dry streaks remain and the cookie dough is evenly combined and cohesive. It’s important to be careful not to overmix at this stage, as excessive mixing can lead to a tougher cookie texture. As you mix, assess the dough texture: Depending on your specific gluten-free flour brand, you may find the dough a little too sticky. If so, feel free to add up to an additional ¼ cup of gluten-free flour, one tablespoon at a time, until the dough is manageable but still soft.
Finally, gently fold in the Andes Peppermint Crunch chips. Mix just until they are evenly distributed throughout the dough. The goal is to incorporate them without crushing them too much, preserving their delightful texture and ensuring a burst of peppermint in every bite.
3. Shape the Gluten-Free Cookies with Ease
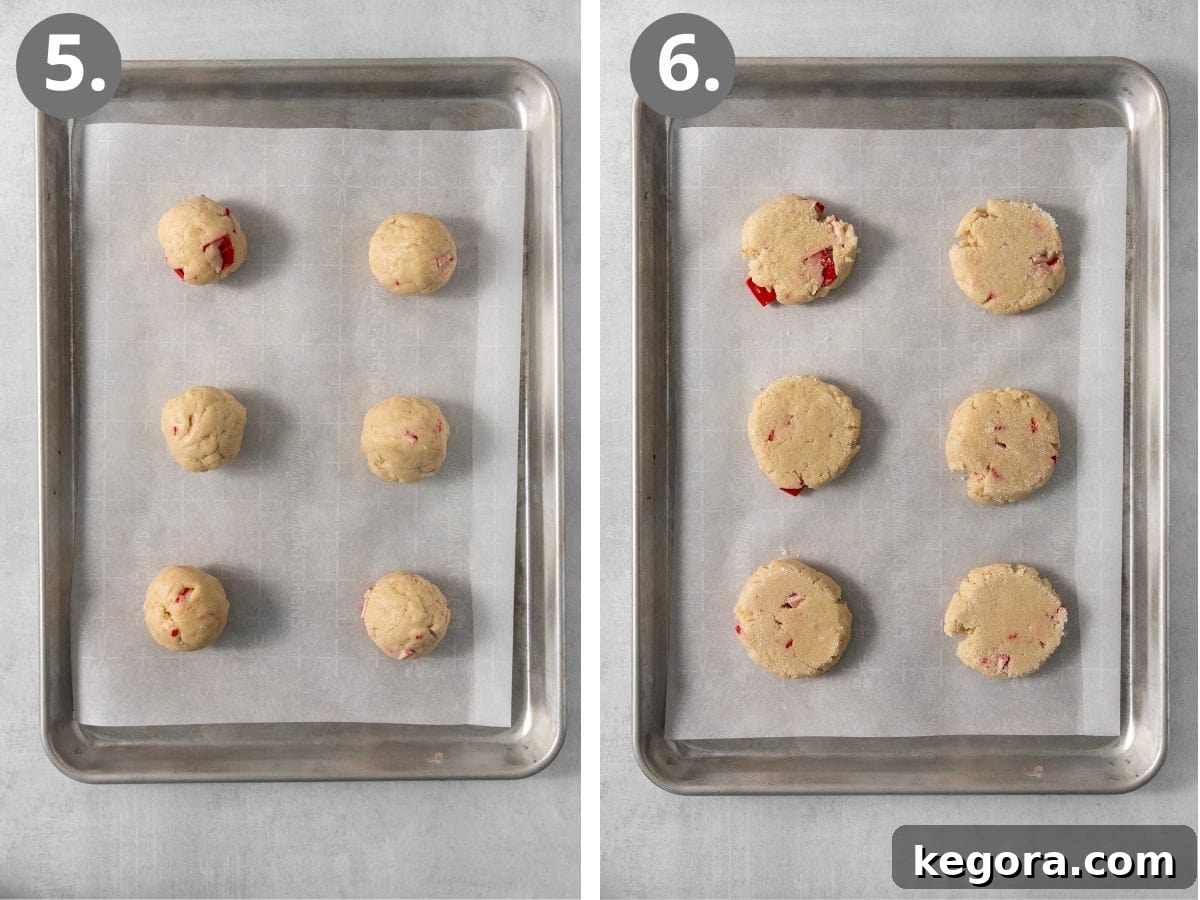
Preheat your oven to 350°F (175°C) and line two large baking sheets with parchment paper or silicone baking mats. This crucial step prevents sticking and ensures even baking. Using a ¼ cup cookie scoop, portion out the dough and roll each portion into a smooth ball. Place these dough balls several inches apart on your prepared baking sheets. We recommend placing no more than 6 cookies per baking sheet to allow for adequate spreading during baking and to prevent them from merging together.
Prepare a shallow dish or bowl with about ½ cup of granulated sugar. Lightly spray the bottom of a ¼ or ⅓ cup measuring cup (or any small glass with a flat bottom) with cooking spray, then dip the sprayed bottom into the granulated sugar. Use this sugar-coated cup to gently press each cookie dough ball into an even thickness, aiming for about ½ inch. Re-dip the glass in sugar between each press (there’s no need to respray with cooking spray after the first time, only re-dip in sugar). The edges of the cookies will naturally ruffle out in an appealing, imperfect way – this rustic charm is exactly what you’re aiming for, adding to their homemade appeal!
4. Bake and Frost for Chilled Peppermint Perfection
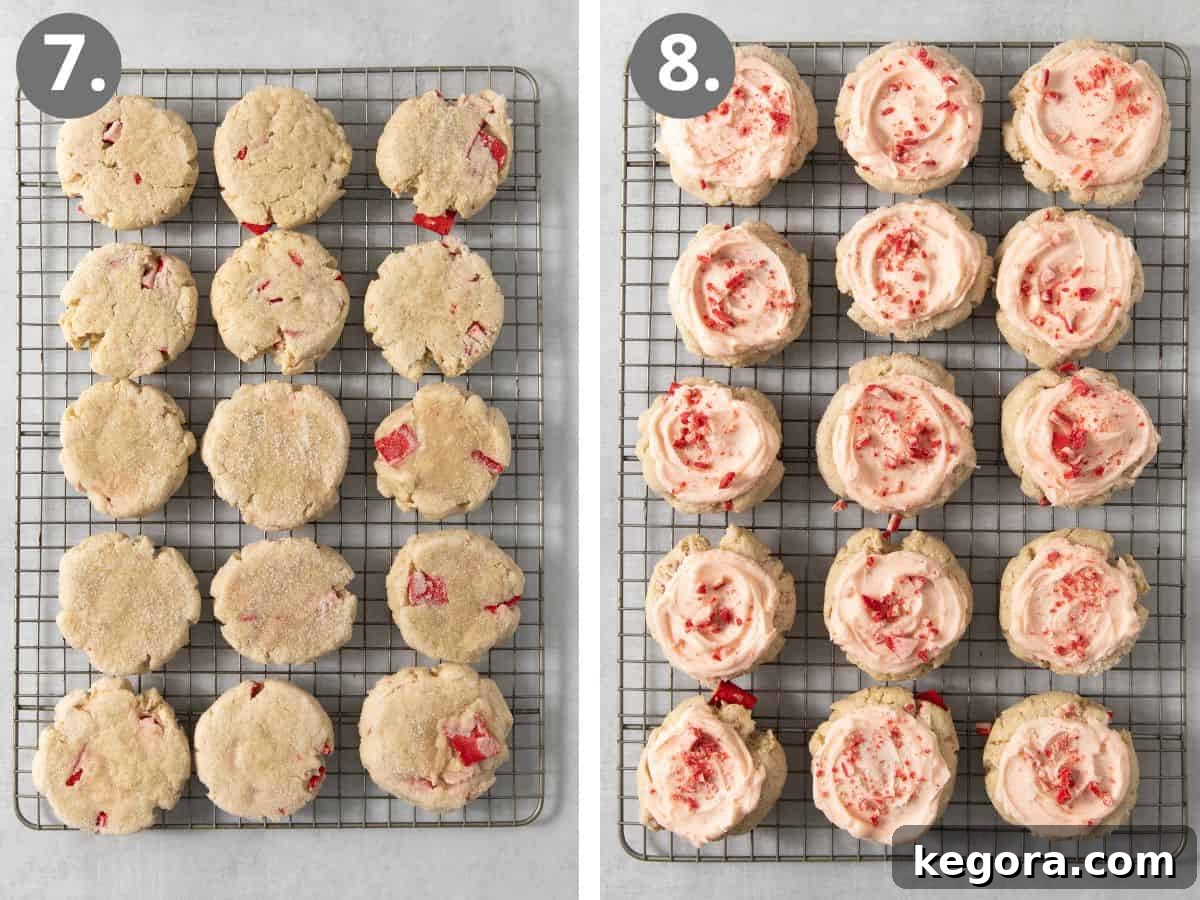
Bake the cookies for a short 6-8 minutes. This is a critical step for achieving the signature texture: DO NOT OVERBAKE! These gluten-free peppermint cookies should not turn golden brown; they should still appear pale and slightly underdone in the center when you remove them from the oven. This slight underbaking is what guarantees they remain incredibly soft, moist, and creamy once chilled – a key characteristic of a true “swig cookie.”
Allow the baked cookies to cool almost completely on the baking sheet before carefully transferring them to a wire cooling rack to finish cooling entirely. This step helps them set without breaking and ensures they are firm enough for frosting.
For the luscious sour cream frosting: In a clean mixing bowl, use a hand mixer to combine the softened butter, sour cream, powdered sugar, a pinch of salt, peppermint extract, vanilla extract, and just one tiny drop of red food coloring (if using, for that festive pink hue!). Mix until the frosting is smooth, creamy, and free of lumps. If the frosting feels too thick, you can add a tablespoon or two of milk (or a little of the liquid from the sour cream) until it reaches your desired spreadable consistency. Aim for a frosting that is thick enough to hold its shape but easy to spread.
Once the cookies are fully cooled, generously frost each one. For the absolute best texture and flavor, chill the frosted cookies in the refrigerator for at least 1 hour, or preferably up to 2 days, before serving. These delightful peppermint sour cream sugar cookies are truly at their peak when served cold, straight from the fridge! Enjoy every refreshing, chewy bite.
Storage and Longevity of Your Gluten-Free Peppermint Cookies
To maintain their exceptional softness and chilled texture, store these gluten-free peppermint sour cream sugar cookies in an airtight container in the refrigerator for up to five days. This not only preserves their freshness and creamy texture but also allows the flavors to meld beautifully, making them even more enjoyable over time. For longer storage, unfrosted cookies can be frozen in an airtight container for up to 3 months. Once you’re ready to enjoy them, thaw the cookies at room temperature, then frost and chill as directed in the recipe for the best experience.
Expert Tips for Gluten-Free Peppermint Cookie Success
Achieving bakery-quality gluten-free peppermint sour cream sugar cookies is simple when you follow these expert tips and tricks. These pointers will help you master the recipe and ensure delicious results every time:
- The Golden Rule: Do Not Overbake! This is perhaps the most crucial tip for these cookies. Unlike traditional sugar cookies, these should not develop any golden-brown hue. Overbaking, even slightly, will cause them to lose precious moisture, resulting in a dry and crumbly texture, especially after chilling. Remove them from the oven when they still look noticeably pale, appear set around the edges, but are still very soft in the center. This slight underbaked state is the secret to their incredibly soft, moist, and creamy finish once they fully cool and chill.
- Choose the Right Peppermint Crunch: For the authentic festive flavor and vibrant visual appeal of these peppermint cookies, always opt for the RED Andes peppermint crunch variety. The green mint varieties typically have a different, often stronger, mint flavor profile that isn’t ideal for this particular recipe and won’t give you the desired classic peppermint taste. You have two excellent options: either use the convenient pre-packaged Andes Peppermint Crunch Baking Chips or, if you can only find the Andes Peppermint Crunch Thins, simply chop them into small, even pieces until you have about one cup.
- Give Your Cookies Ample Room to Spread: These are generously sized cookies that will spread slightly during baking, so adequate spacing on the baking sheet is essential. Crowding them can lead to uneven baking, cause the cookies to merge together, and result in less crisp edges. I find that placing no more than six cookies per standard baking sheet provides ample room for them to bake perfectly without touching, allowing for optimal air circulation.
- Don’t Skip the Sugar Dip for Pressing: The light coating of granulated sugar on the bottom of your glass or measuring cup before pressing the dough balls serves a dual purpose that significantly enhances the final cookie. Firstly, it prevents the dough from sticking to your tool, making the shaping process smooth and easy. More importantly, it adds a delicate, sparkling textural element and an extra touch of sweetness to the cookie’s exterior, elevating the overall eating experience.
- Chilled Serving is Non-Negotiable: While these cookies would still be delicious at room temperature, their true magic is undoubtedly unlocked when they are served chilled. The cold temperature significantly amplifies the creamy texture of the cookie and the cool, refreshing quality of the frosting, creating a delightful contrast that elevates the entire tasting experience to something truly special. Plan to chill them for at least an hour before serving for optimal enjoyment – straight from the fridge is best!
- Measure Flour Accurately: Especially in gluten-free baking, precision is absolutely key. Using a kitchen scale for the most accurate measurement of your gluten-free flour (560g is recommended) will ensure the perfect dough consistency and prevent issues like dry or overly sticky dough. If you don’t have a scale, use the “spoon and level” method rather than scooping directly from the bag, which can compact the flour and lead to too much being used.
- Soften Butter Properly: For both the cookie dough and the frosting, make sure your butter is truly at room temperature. It should be soft enough to indent easily with your finger but not melted or greasy. Properly softened butter ensures proper creaming with the sugar, leading to a smooth, emulsified batter and frosting, which is critical for the tender texture of these gluten-free sugar cookies.
Explore More Gluten-Free Holiday Baking Inspiration
The holiday season is perfect for indulging in a variety of festive treats. If you’ve enjoyed these delightful gluten-free peppermint sour cream sugar cookies, you’ll love exploring these other fantastic gluten-free cookie recipes from our collection, perfect for any celebration:
- Gluten-Free Peppermint Frosted Chocolate Cookies
- Classic Gluten-Free Christmas Cookies
- Irresistible Gluten-Free Gingerbread Cookies
- Melt-in-Your-Mouth Gluten-Free Snowball Cookies
- Decadent Gluten-Free Chocolate Crinkle Cookies
- Crunchy Gluten-Free Biscotti
- Elegant Gluten-Free Spritz Cookies
We genuinely hope these gluten-free peppermint sour cream sugar cookies bring a delightful spark to your holiday celebrations! If you bake a batch, please do us a favor and leave a comment or rating below. Your feedback means the world to us and helps other bakers discover these amazing festive treats!

Gluten-Free Peppermint Sour Cream Sugar Cookies
Erin Collins
20 mins
10 mins
1 hr
1 hr 30 mins
18 cookies
Print Recipe
Ingredients
For the Cookies:
- 1/2 cup (113g) butter, softened
- 1/2 cup (110g) vegetable oil
- 1 cup (240g) sour cream, full fat
- 1 large egg
- 1 ½ (300g) cups granulated sugar, plus more for rolling
- 1 teaspoon vanilla extract
- 1/2 teaspoon peppermint extract
- 1 teaspoon baking powder
- 1 teaspoon salt
- 3 3/4 cups (560g) gluten-free measure-for-measure flour (add up to 1/4 cup more if dough is too sticky)
- 1 cup Andes Peppermint Crunch Baking Chips or Andes Peppermint Crunch Thins, chopped
For the Frosting:
- 6 tablespoons (84g) butter, softened
- 1/3 cup (80g) sour cream
- 4 cups (450g) powdered sugar
- 1/2 teaspoon peppermint extract
- ½ teaspoon vanilla extract
- pinch of salt
- 1 tiny drop red food coloring (optional, for festive pink hue)
Instructions
Make the Cookies
- Preheat the oven to 350°F (175°C). Line 2 large baking sheets with parchment paper or silicone baking mats.
- In the bowl of a stand mixer (or with an electric hand mixer), add the softened butter and mix on medium speed for 2-3 minutes, until light and fluffy.
- Add the oil and mix for another 1-2 minutes until well combined.
- Add the sour cream, egg, granulated sugar, vanilla extract, and peppermint extract. Mix on medium-low speed until well combined.
- Add the baking powder, salt, and ⅓ of the gluten-free flour. Mix until just combined. With the mixer running on low, slowly add the rest of the gluten-free flour and mix until evenly combined, being careful not to overmix. (Dough texture check: Depending on your flour brand, you may need to add up to 1/4 cup more flour if the dough feels too sticky.) Gently mix in the Andes Peppermint Crunch chips until evenly distributed.
Scoop and Shape the Cookies
- Using a ¼ cup cookie scoop, portion the dough and roll into smooth balls. Place them several inches apart on the prepared baking sheets (approximately 6 cookies per sheet).
- In a shallow dish, add about 1/2 cup granulated sugar. Lightly spray the bottom of a ¼ or ⅓ cup measuring cup (or a small glass) with cooking spray, then dip it into the sugar.
- Press each cookie dough ball into an even thickness (about ½-inch thick), re-dipping the glass bottom in sugar between each press (no need to respray with cooking spray after the initial spray). The edges will naturally ruffle, creating a desirable imperfect look.
Bake and Frost
- Bake for 6-8 minutes. DO NOT OVERBAKE! The cookies should not turn golden; they should appear pale and slightly soft in the center when removed from the oven. This ensures a soft and creamy texture when chilled.
- Let the cookies cool almost completely on the baking sheet before carefully transferring them to a wire cooling rack to cool completely.
- FROSTING: In a clean bowl, use a hand mixer to combine the softened butter, sour cream, powdered sugar, pinch of salt, peppermint extract, vanilla extract, and one tiny drop of red food coloring (if using). Mix until smooth and creamy. If needed, add 1-2 tablespoons of milk (or the liquid from the sour cream) to achieve your desired spreadable consistency.
- Generously frost the cooled cookies. For the best results, chill the frosted cookies in the refrigerator for at least 1 hour (or up to 2 days) before serving. These cookies are truly at their best when served chilled, straight from the fridge! Enjoy!
Recipe Notes
Important Reminders for Success:
- Always use the RED Andes peppermint crunch for the authentic flavor and visual appeal. You can either use the baking chips or chop 1 cup of Andes Peppermint Crunch Thins.
- Resist the urge to overbake! These cookies should remain pale and slightly underdone to ensure they are soft, moist, and creamy when chilled.
- Measure your gluten-free flour precisely, preferably by weight (560g), for optimal dough consistency.
- Ensure butter is at true room temperature for proper creaming.
Nutrition Information (per cookie)
- Calories: 347 kcal
- Carbohydrates: 36g
- Protein: 1g
- Fat: 23g
- Saturated Fat: 12g
- Polyunsaturated Fat: 4g
- Monounsaturated Fat: 5g
- Trans Fat: 0.4g
- Cholesterol: 43mg
- Sodium: 282mg
- Potassium: 51mg
- Fiber: 0.02g
- Sugar: 34g
- Vitamin A: 394 IU
- Vitamin C: 0.2mg
- Calcium: 51mg
- Iron: 0.1mg