
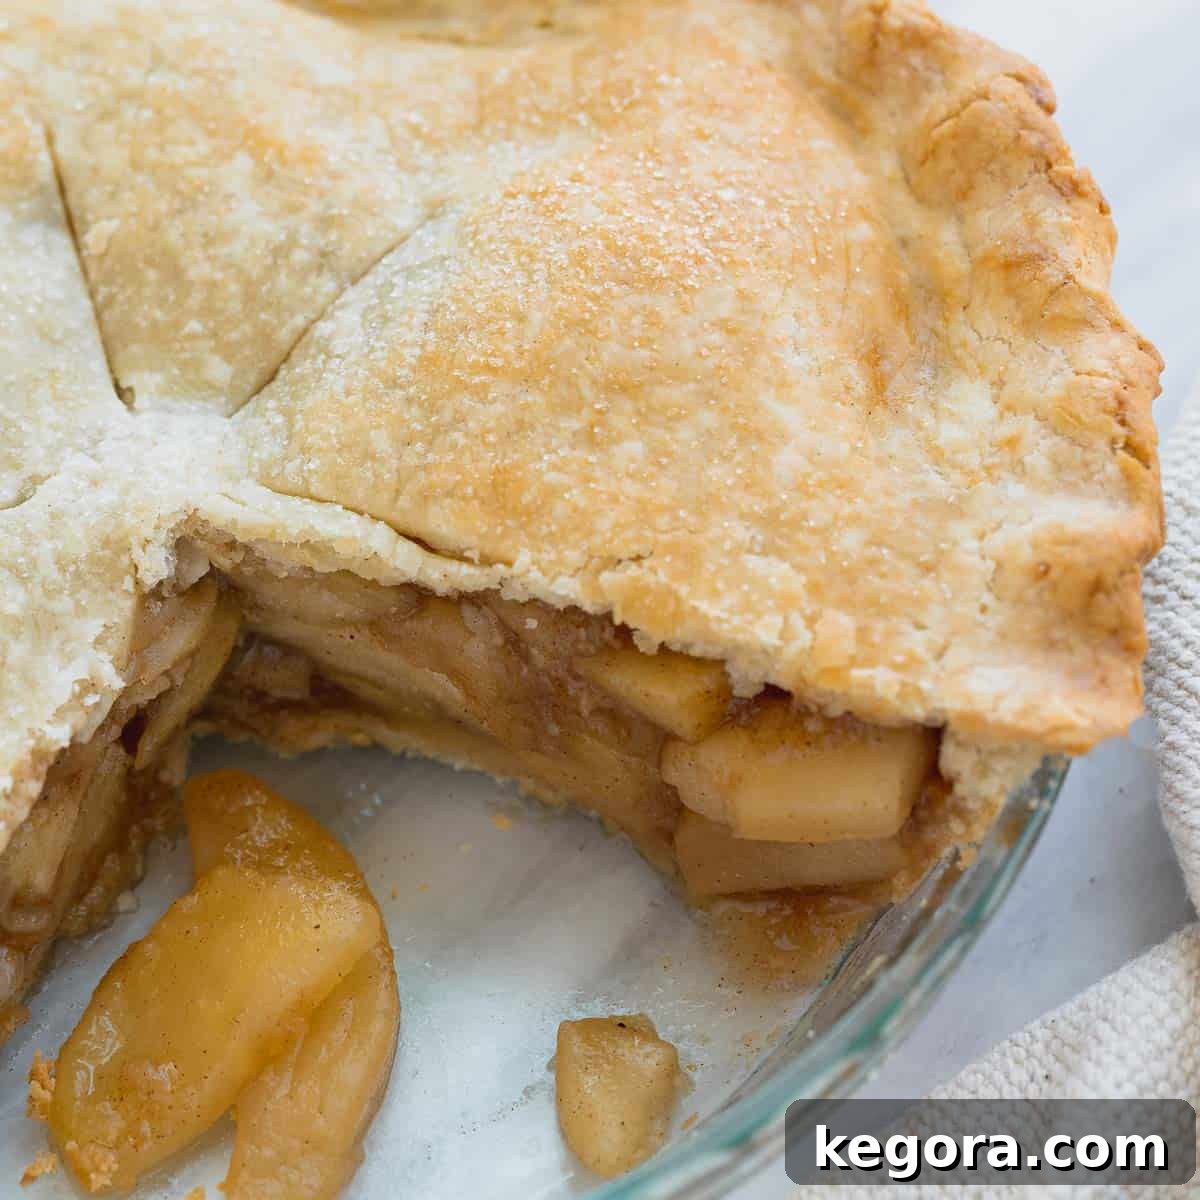
The Ultimate Guide to Baking a Flaky Gluten-Free Apple Pie with a Perfect Homemade Crust
There’s nothing quite like a warm, inviting apple pie, fresh from the oven, with its aromatic blend of sweet spices and tender fruit. For those navigating a gluten-free lifestyle, achieving this classic dessert can often feel like an insurmountable challenge. From a soggy crust that falls apart to a watery filling that lacks flavor, the journey to a perfect gluten-free apple pie is fraught with potential pitfalls.
But fear not, fellow bakers! This comprehensive guide reveals the secrets to crafting a truly spectacular gluten-free apple pie. We’re talking about a pie with a buttery, flaky, homemade gluten-free pie crust that stands up beautifully, complemented by a thick, saucy, and perfectly spiced apple filling. This isn’t just another recipe; it’s a meticulously tested and perfected method designed to ensure your gluten-free apple pie dreams come true, delivering crispness on the bottom and a rich, irresistible center every time.
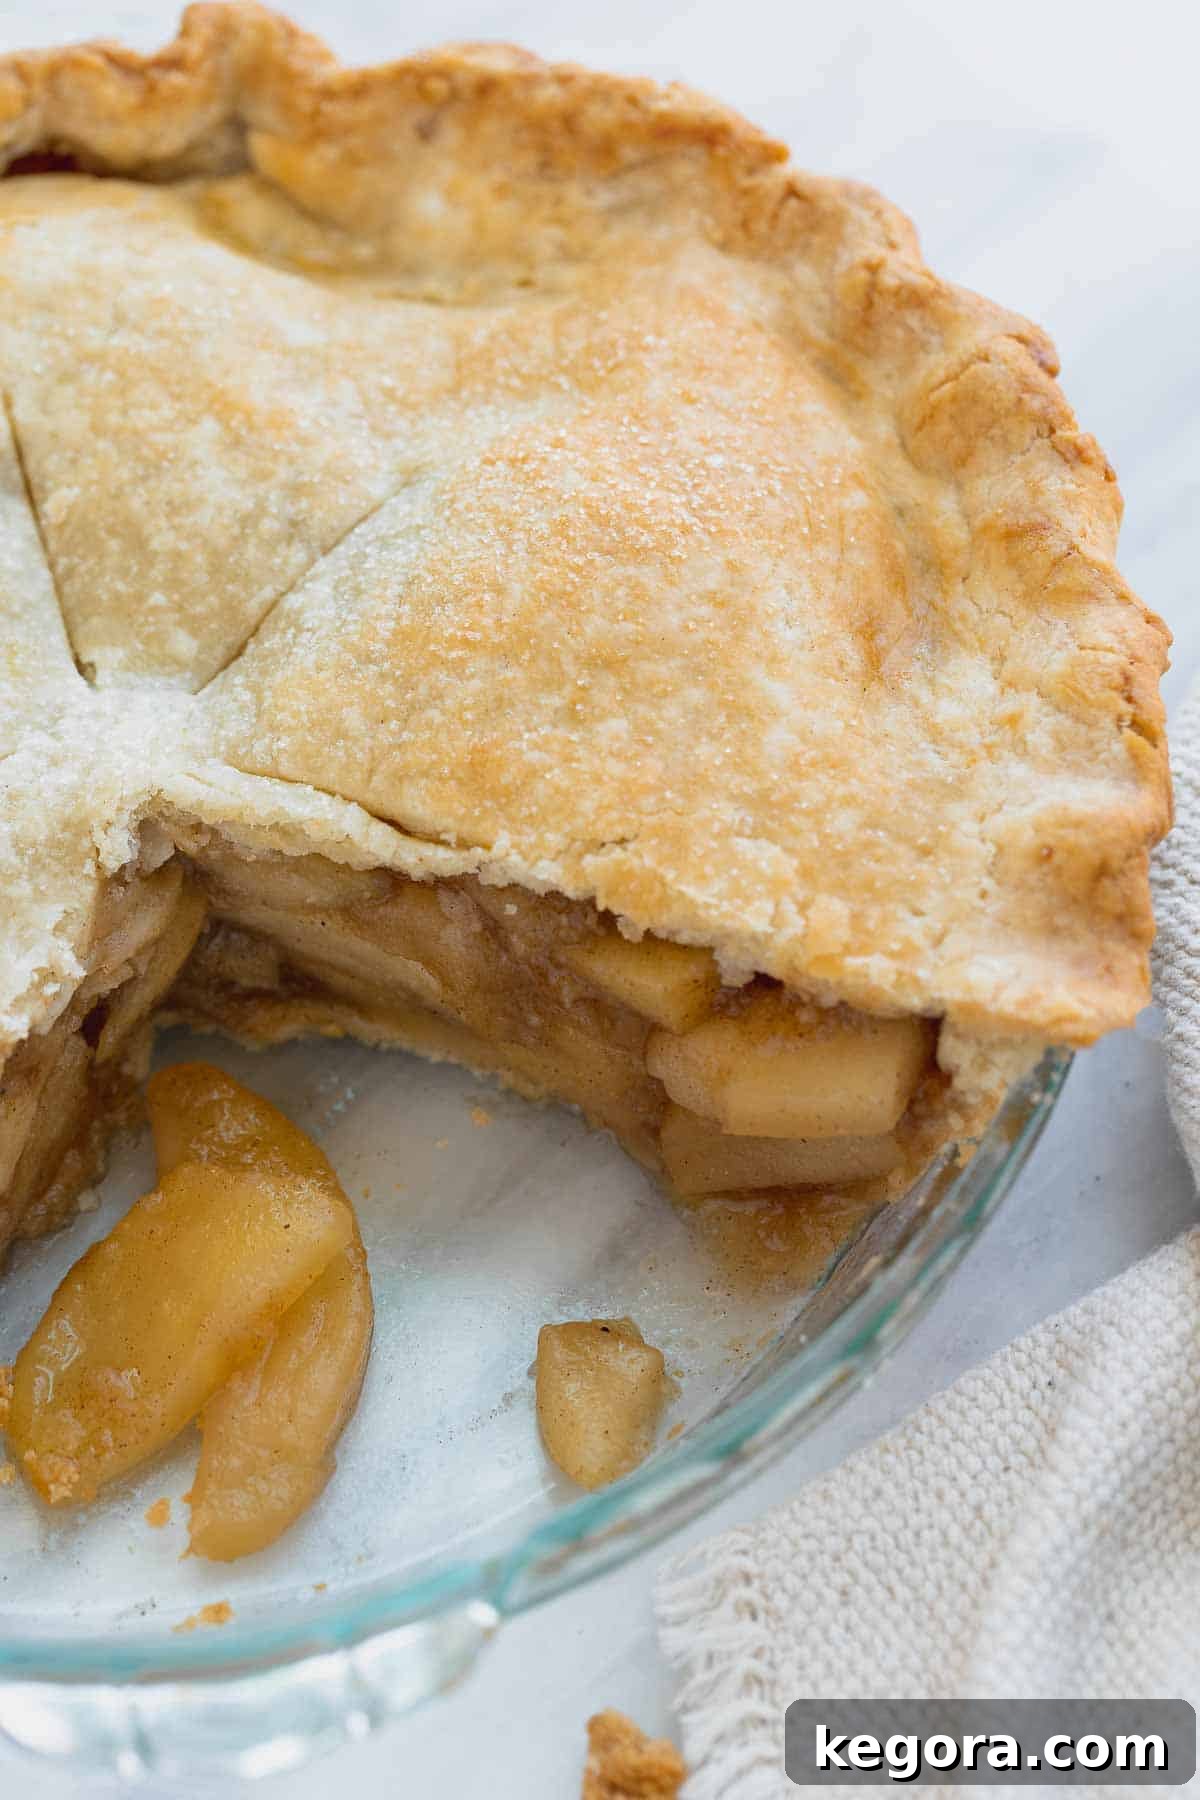
Homemade pie, especially a gluten-free version, often carries a reputation for being difficult. However, with the right techniques and a few expert tips, you can overcome common issues like a lackluster crust or an overly liquid filling. This recipe is your steadfast companion, guiding you through each stage to create a gluten-free apple pie that will impress even the most discerning palates. Prepare to master the art of gluten-free pie baking, producing a dessert that is not only delicious but also a triumph of texture and flavor.
Why This Gluten-Free Apple Pie Recipe is a Game-Changer
The quest for the perfect gluten-free apple pie often ends in disappointment for many home bakers. However, this recipe introduces two critical techniques that elevate it above the rest, guaranteeing a superior result every time:
- Pre-Cooking the Apple Pie Filling: This is arguably the most crucial tip for gluten-free apple pie success. By cooking the apple filling before it goes into the crust, you achieve several vital benefits. Firstly, it allows the apples to release their excess moisture, which is then thickened on the stovetop. This prevents a common problem: a watery filling that makes the bottom crust soggy during baking. Secondly, pre-cooking ensures the apples are perfectly tender and the spices are fully melded, resulting in a thick, saucy, and richly flavored center that complements the crisp crust beautifully.
- A Robust, Flaky Homemade Gluten-Free Pie Crust: Many gluten-free pie crusts can be fragile, difficult to work with, and prone to breaking. This recipe utilizes a specific blend of ingredients and techniques that yield a remarkably pliable and flaky gluten-free dough, mimicking the texture and workability of traditional pie crust. It’s designed to give you confidence in handling, rolling, and transferring, leading to a golden, structurally sound pie that holds its shape.
Together, these two strategies eliminate the most common frustrations associated with gluten-free pie baking, paving the way for a dessert that is both visually appealing and incredibly delicious.
If you’re looking to expand your repertoire of delightful gluten-free desserts, consider trying our luscious gluten-free cheesecake, the best gluten-free pecan pie, or these charming crustless gluten-free pumpkin desserts. For special occasions, explore our full collection of gluten-free Thanksgiving recipes.
Apple lovers will also rejoice in these additional recipes: gluten-free apple crumble, gluten-free apple cake, gluten-free apple muffins, apple compote, and gluten-free apple crisp!
Mastering the Gluten-Free Pie Crust
The foundation of any great pie is its crust, and for gluten-free baking, this means choosing the right ingredients and handling them with care. This recipe uses a crust that has been specifically formulated for optimal flakiness and ease of use, ensuring it holds together beautifully without becoming tough or crumbly. It’s the same reliable recipe featured in our popular gluten-free pumpkin pie, known for its consistent results.
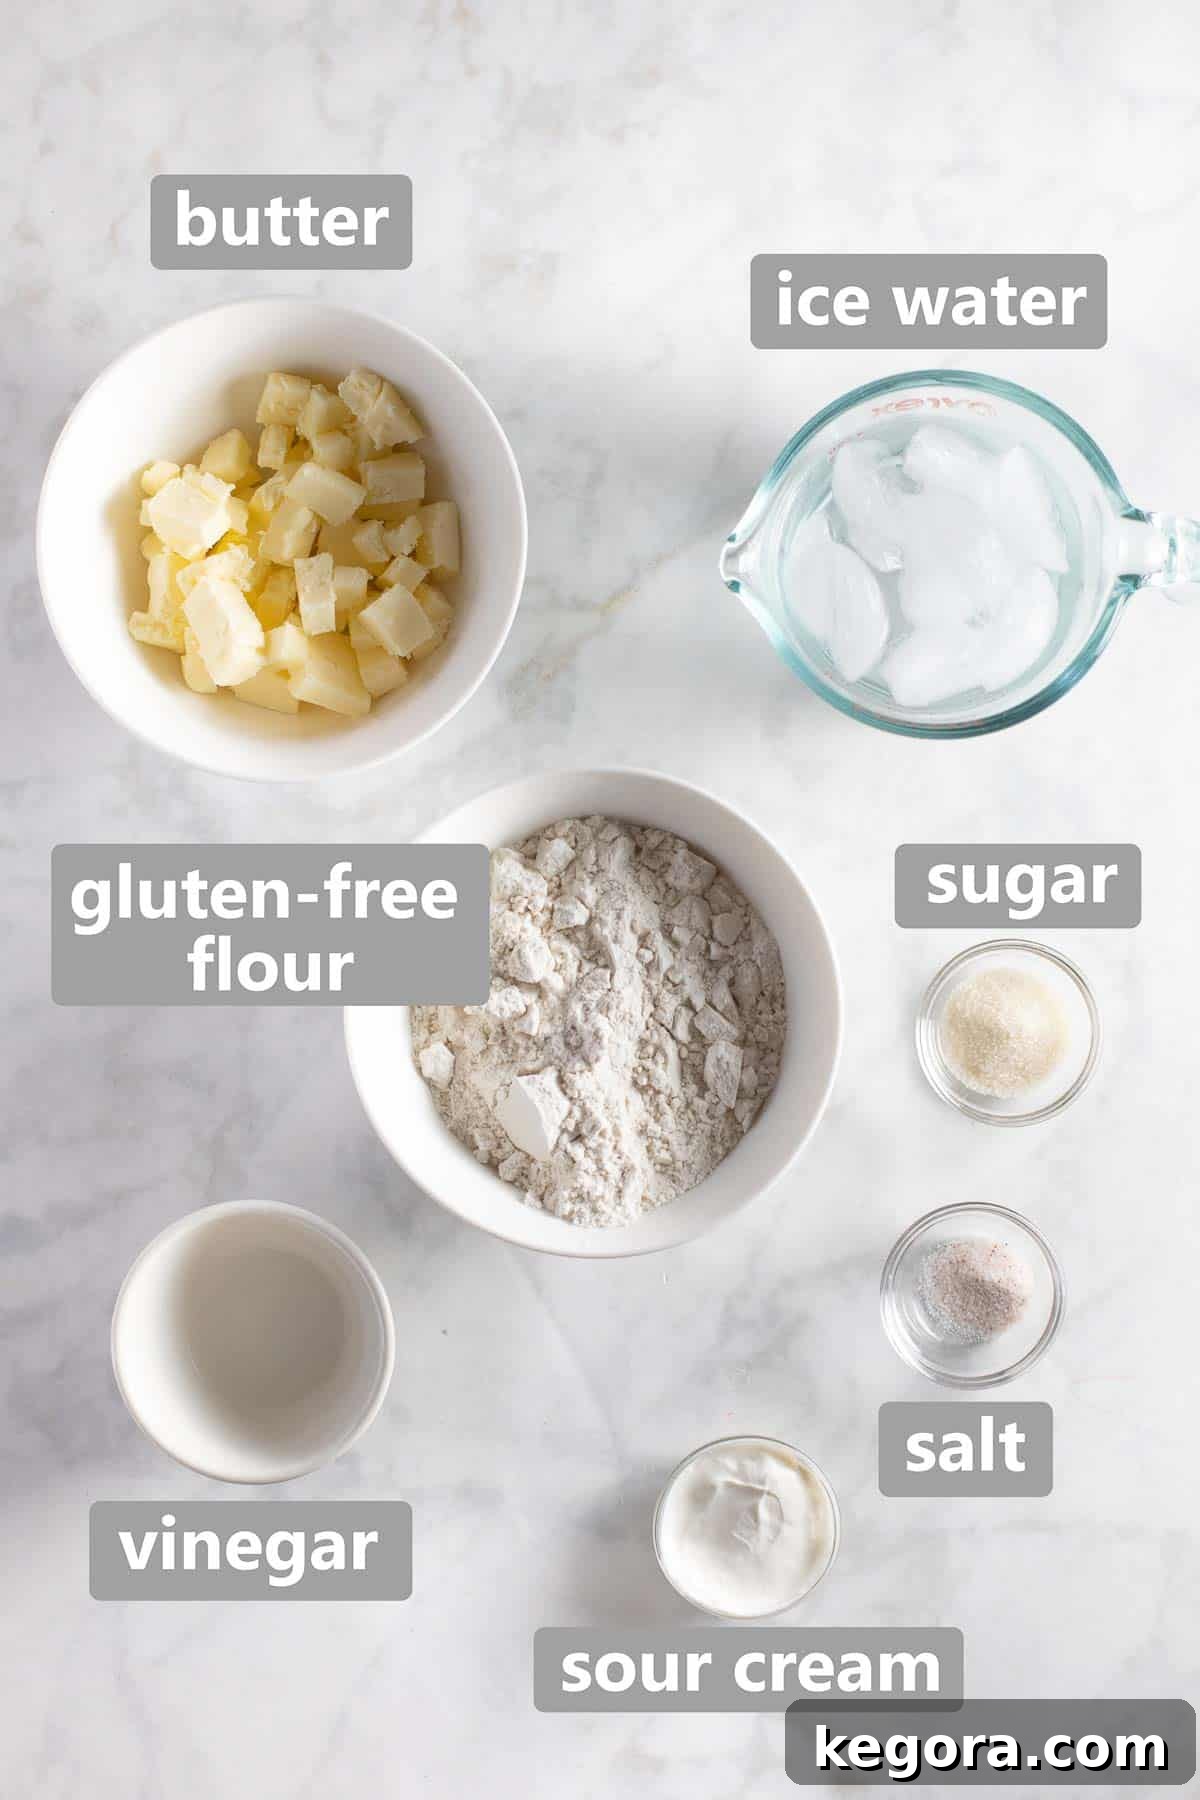
Essential Ingredients for a Flaky Gluten-Free Crust
The combination of these ingredients creates a gluten-free pie dough with the perfect consistency: tender, yet sturdy enough to handle.
- Gluten-Free Flour Blend: The quality of your gluten-free flour makes a significant difference. We highly recommend using a high-quality 1:1 gluten-free baking flour blend that already contains xanthan gum. Xanthan gum is crucial in gluten-free baking as it provides elasticity and structure that gluten typically provides, preventing your crust from becoming too crumbly. For consistent, excellent results, this brand is a favorite.
- Vinegar: A splash of white vinegar or rice vinegar serves a specific purpose: it helps tenderize the gluten-free dough. While there’s no gluten to “tenderize” in the traditional sense, vinegar still aids in creating a more pliable and delicate crust.
- Sour Cream: Beyond adding a subtle tang, sour cream contributes fat and moisture, which helps stabilize the dough and promotes a lovely golden-brown finish during baking. For those with dairy sensitivities, dairy-free sour cream can be a suitable alternative.
- Cold Butter, Ice Water, Sugar, and Salt: These are the classic components of any good pie crust, and their role is just as important in a gluten-free version. Using very cold butter and ice water is paramount for achieving a flaky texture. The cold butter creates pockets of steam as it bakes, separating the layers of dough. Sugar adds a touch of sweetness and aids in browning, while salt balances the flavors.
Dairy-Free Adaptation: If you’re avoiding dairy, you can successfully substitute dairy-free sour cream. However, for the butter, we strongly recommend using shortening (butter-flavored shortening works wonderfully) instead of vegan butter. Vegan butter often has a different fat composition that can alter the crust’s texture, while shortening will deliver a consistently flaky result.
Tips for Gluten-Free Pie Dough Success
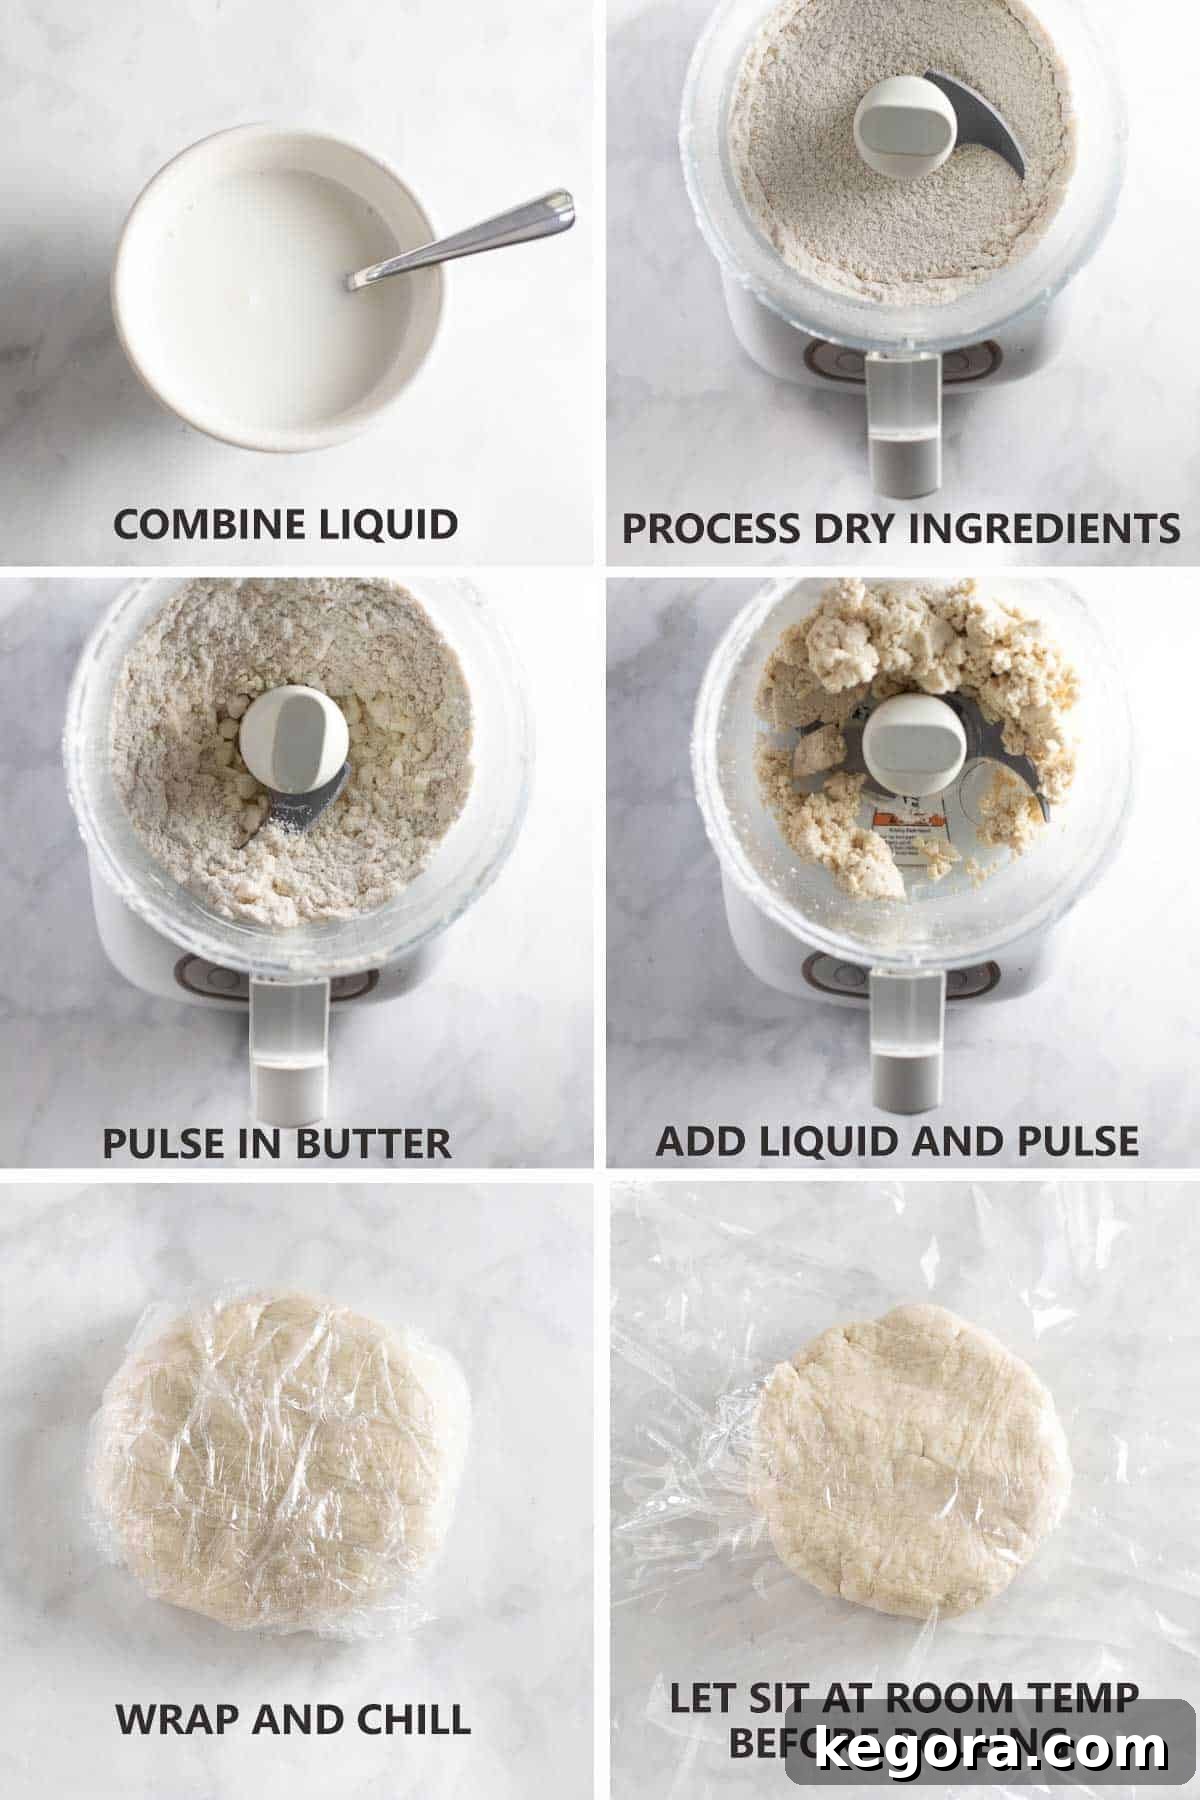
Making gluten-free pie dough can be straightforward with the right approach. We find the food processor method to be quick, efficient, and reliable for incorporating the butter into the flour. Alternatively, you can use a fork or pastry cutter to cut the butter into the dry ingredients by hand, if you prefer a more traditional method.
- Chilling is Crucial: After mixing, it’s vital to let the pie dough chill in the refrigerator for at least 1 hour, or even overnight. This resting period allows the gluten-free flours to properly hydrate, resulting in a more cohesive and manageable dough. It also firms up the butter, which contributes to flakiness.
- Bringing to Room Temperature: Once chilled, allow the pie dough to sit at room temperature for about 15 minutes before you attempt to roll it out. This slight warming makes the dough more pliable and less prone to cracking, while still keeping the butter cold enough for flakiness.
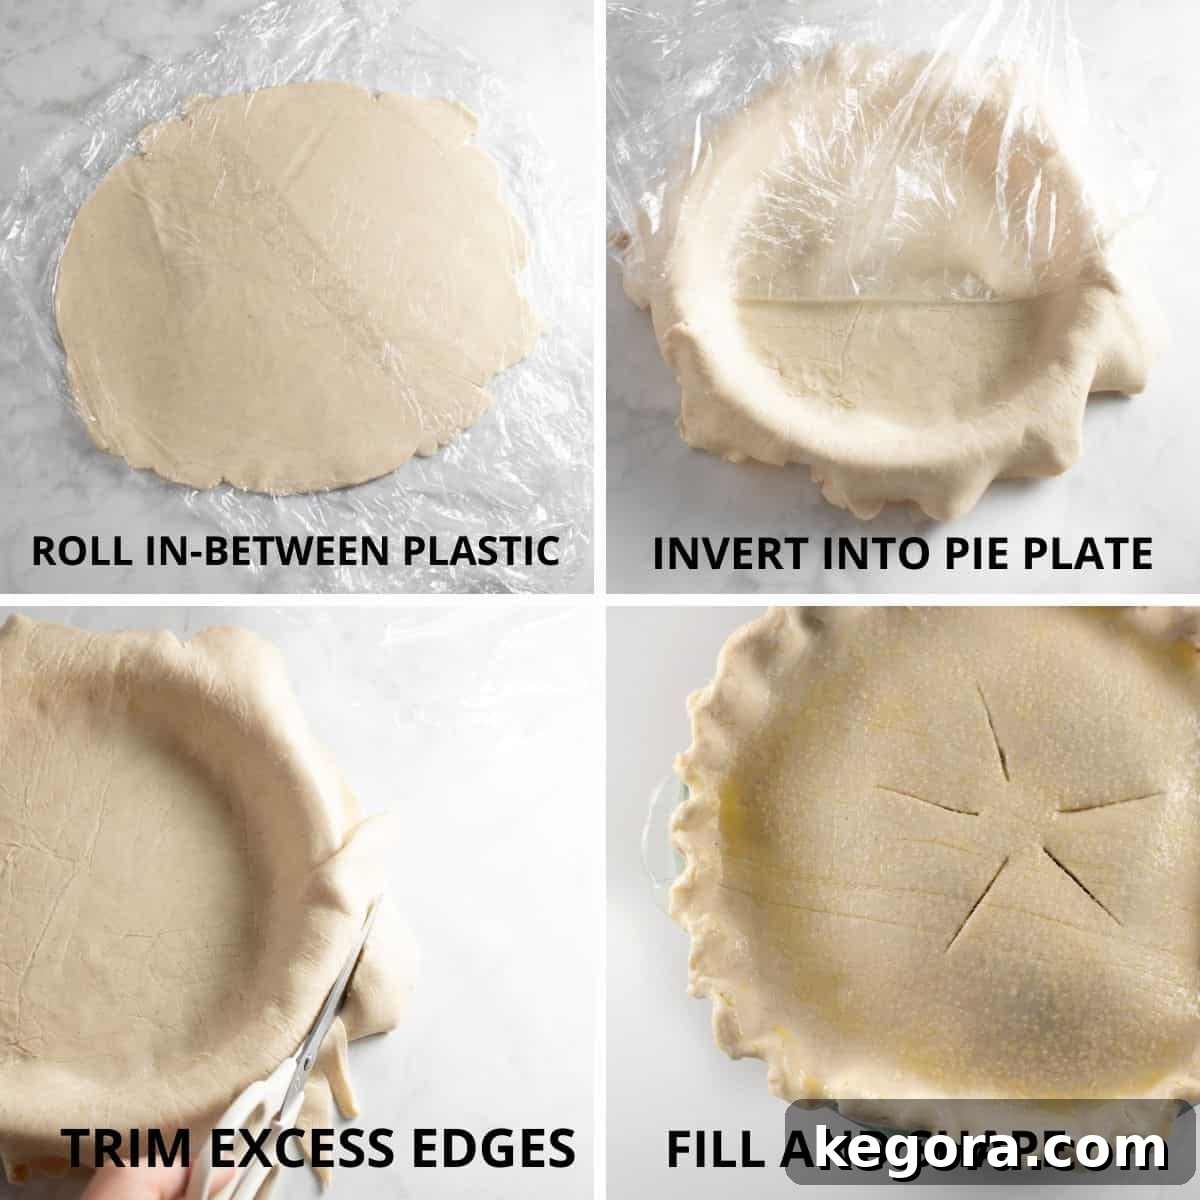
- Roll Between Plastic Wrap: Gluten-free crusts are inherently more delicate than their gluten-containing counterparts. To make handling and transferring the dough much easier, roll it out between two large sheets of plastic wrap. This method prevents sticking and provides support as you move the rolled crust to your pie plate.
- Choose the Right Pie Plate: For the crispiest bottom crust, we now strongly recommend using a metal pie plate. A light-colored 9-inch metal pie pan conducts heat more efficiently than glass or ceramic, which is essential for achieving that coveted perfectly baked gluten-free bottom crust.
- Transferring and Shaping: Once rolled, peel off the top layer of plastic wrap and carefully invert the dough into your pie plate. Then, gently peel off the remaining plastic wrap from the pie shell. Take your time to ease the dough into the plate without stretching it. After this, you can trim the edges and shape the crust as desired, creating a beautiful decorative finish.
- Patching Cracks: It’s common for small cracks to form on the edges of gluten-free dough as you roll it. Don’t worry! Simply smoosh any cracks together with your rolling pin as you work. The dough is forgiving and will meld back together as you continue to roll and shape it.
For an even deeper dive into crust perfection, you might also like our 2025 tested and perfected gluten-free pie crust recipe!
The Secret to a Perfect Apple Pie Filling: Pre-Cooking!
One of the most common complaints about homemade apple pie, particularly gluten-free versions, is a runny, watery filling and a soggy bottom crust. The ultimate solution to this problem is surprisingly simple yet incredibly effective: pre-cooking your apple pie filling!
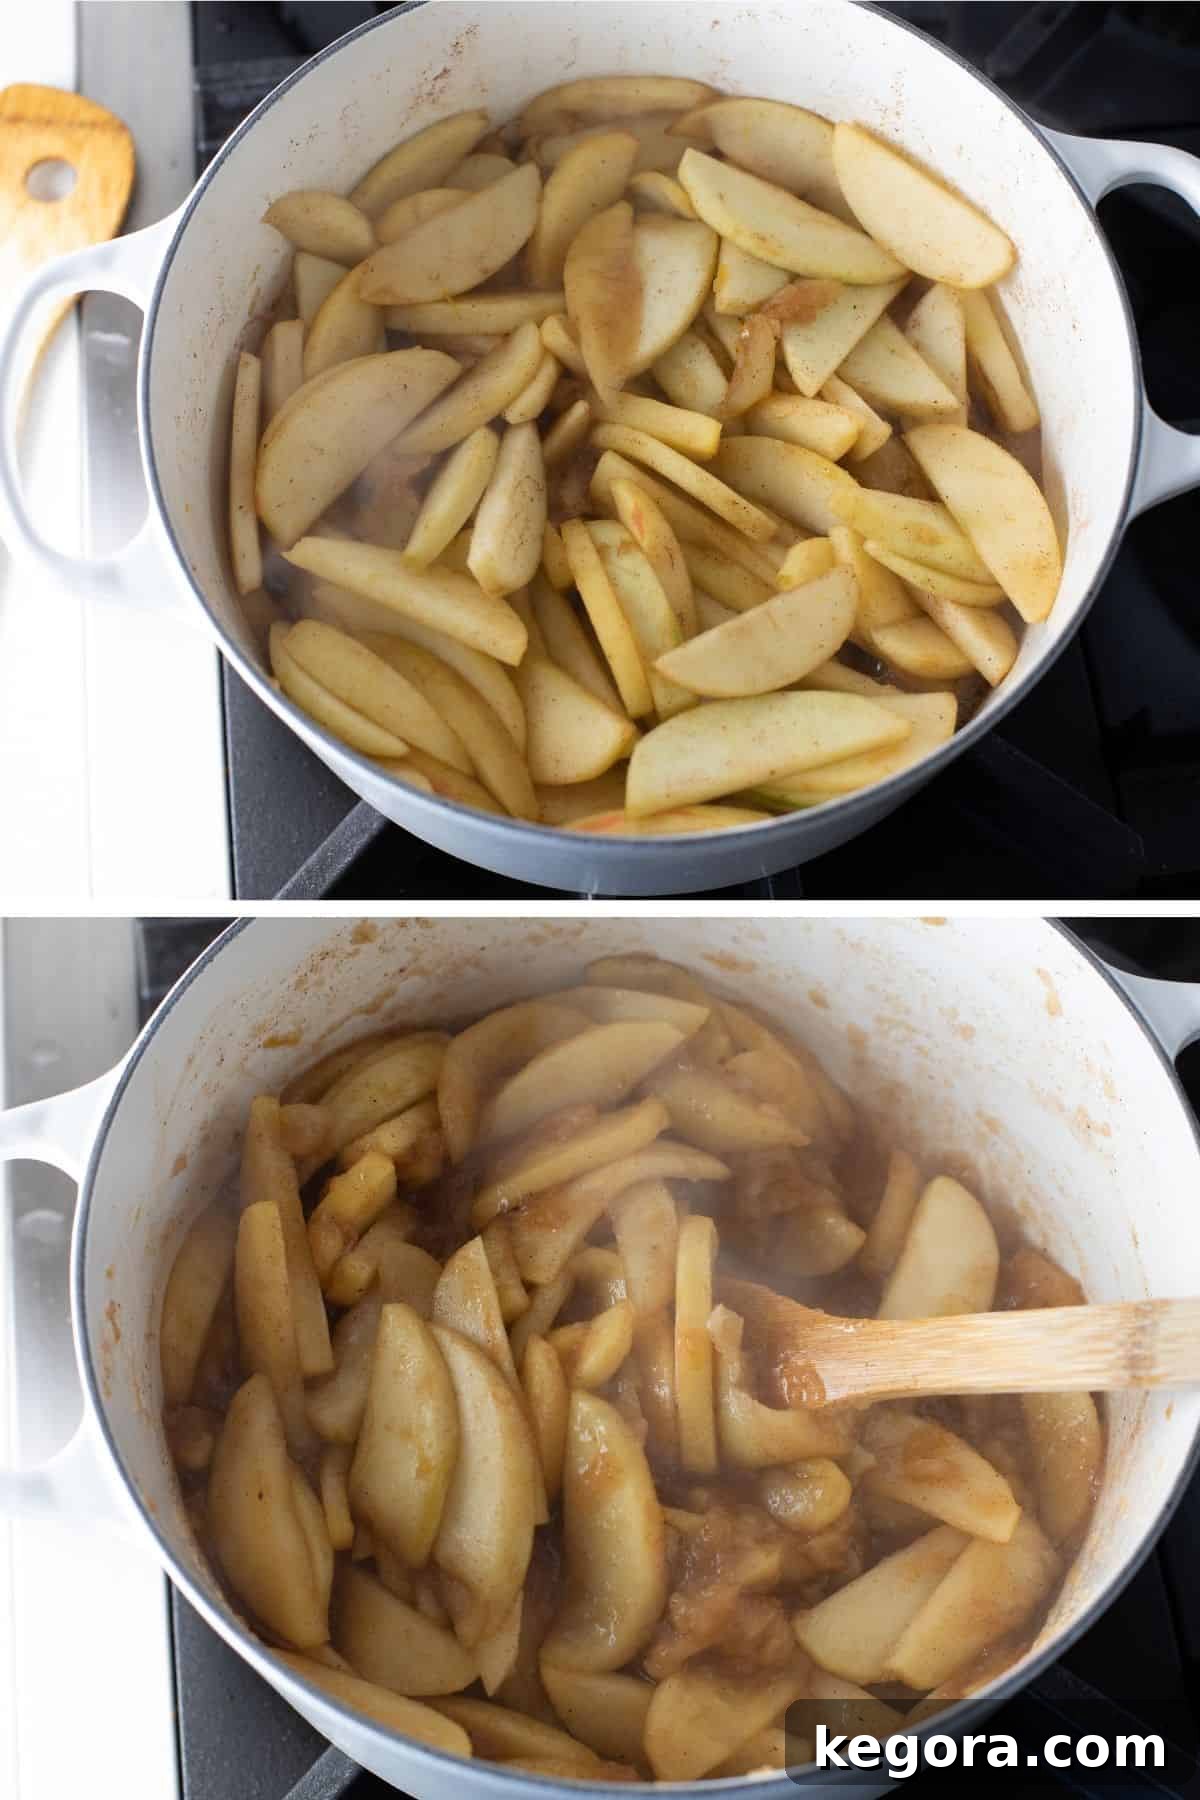
Why Pre-Cooked Filling is Essential for a Crisp Bottom Crust: Apples contain a significant amount of water. When raw apples are baked directly in a pie crust, they release this moisture, which then saturates the bottom crust before it has a chance to fully bake and crisp up. Pre-cooking the apples addresses this by allowing the fruit to release its liquid on the stovetop, where it can then be thickened with cornstarch. This ensures that by the time the filling goes into your delicate gluten-free crust, it’s already a thick, luscious, and perfectly spiced mixture, eliminating any risk of a soggy bottom.
Choosing the Best Apples for Your Pie
The type of apple you choose can significantly impact the texture and flavor of your pie. For the best results, select apples that are both tart and firm. This balance ensures they hold their shape during cooking without turning to mush, while their tartness provides a delightful contrast to the sweetness of the sugar and spices.
- Granny Smith: A classic choice for apple pie due to its firm texture and distinct tartness. It holds up exceptionally well during baking.
- Honeycrisp: Offers a great balance of sweetness and tartness with a wonderfully crisp texture that softens beautifully.
- Braeburn: Known for its crisp texture and sweet-tart flavor, it bakes well without becoming mushy.
- Fuji: Sweet and crunchy, Fuji apples contribute a lovely flavor and good texture.
A mix of a few varieties can also add depth and complexity to your pie filling.
The Pre-Cooking Process
Making the filling is straightforward:
- Prepare the Apples: Peel, core, and slice your chosen apples into even ¼-inch pieces. Consistency in size ensures uniform cooking.
- Simmer the Filling: In a large Dutch oven or deep skillet, combine the sliced apples with butter, brown sugar, granulated sugar, ground cinnamon, nutmeg, allspice, salt, lemon zest, and fresh lemon juice. Cook this mixture over medium heat, stirring occasionally, for about 5-10 minutes. You want the apples to just begin to soften, becoming slightly translucent, but not fully cooked through or mushy.
- Thicken with Cornstarch Slurry: Whisk together a small amount of cornstarch and water to create a slurry. Pour this into the simmering apple mixture and continue to cook for another 2-3 minutes, stirring constantly, until the juices visibly thicken into a glossy, beautiful sauce.
- Cool Completely: This step is critical. The filling must cool completely before you add it to the pie crust. Adding warm or hot filling to a chilled crust will cause the butter in the crust to melt prematurely, compromising its flakiness.
Pro Tip for Speed: To accelerate the cooling process, pour the hot apple filling onto a large baking sheet and spread it into a thin, even layer. Place the baking sheet in the refrigerator or freezer for 15-30 minutes, stirring occasionally, until it reaches room temperature.
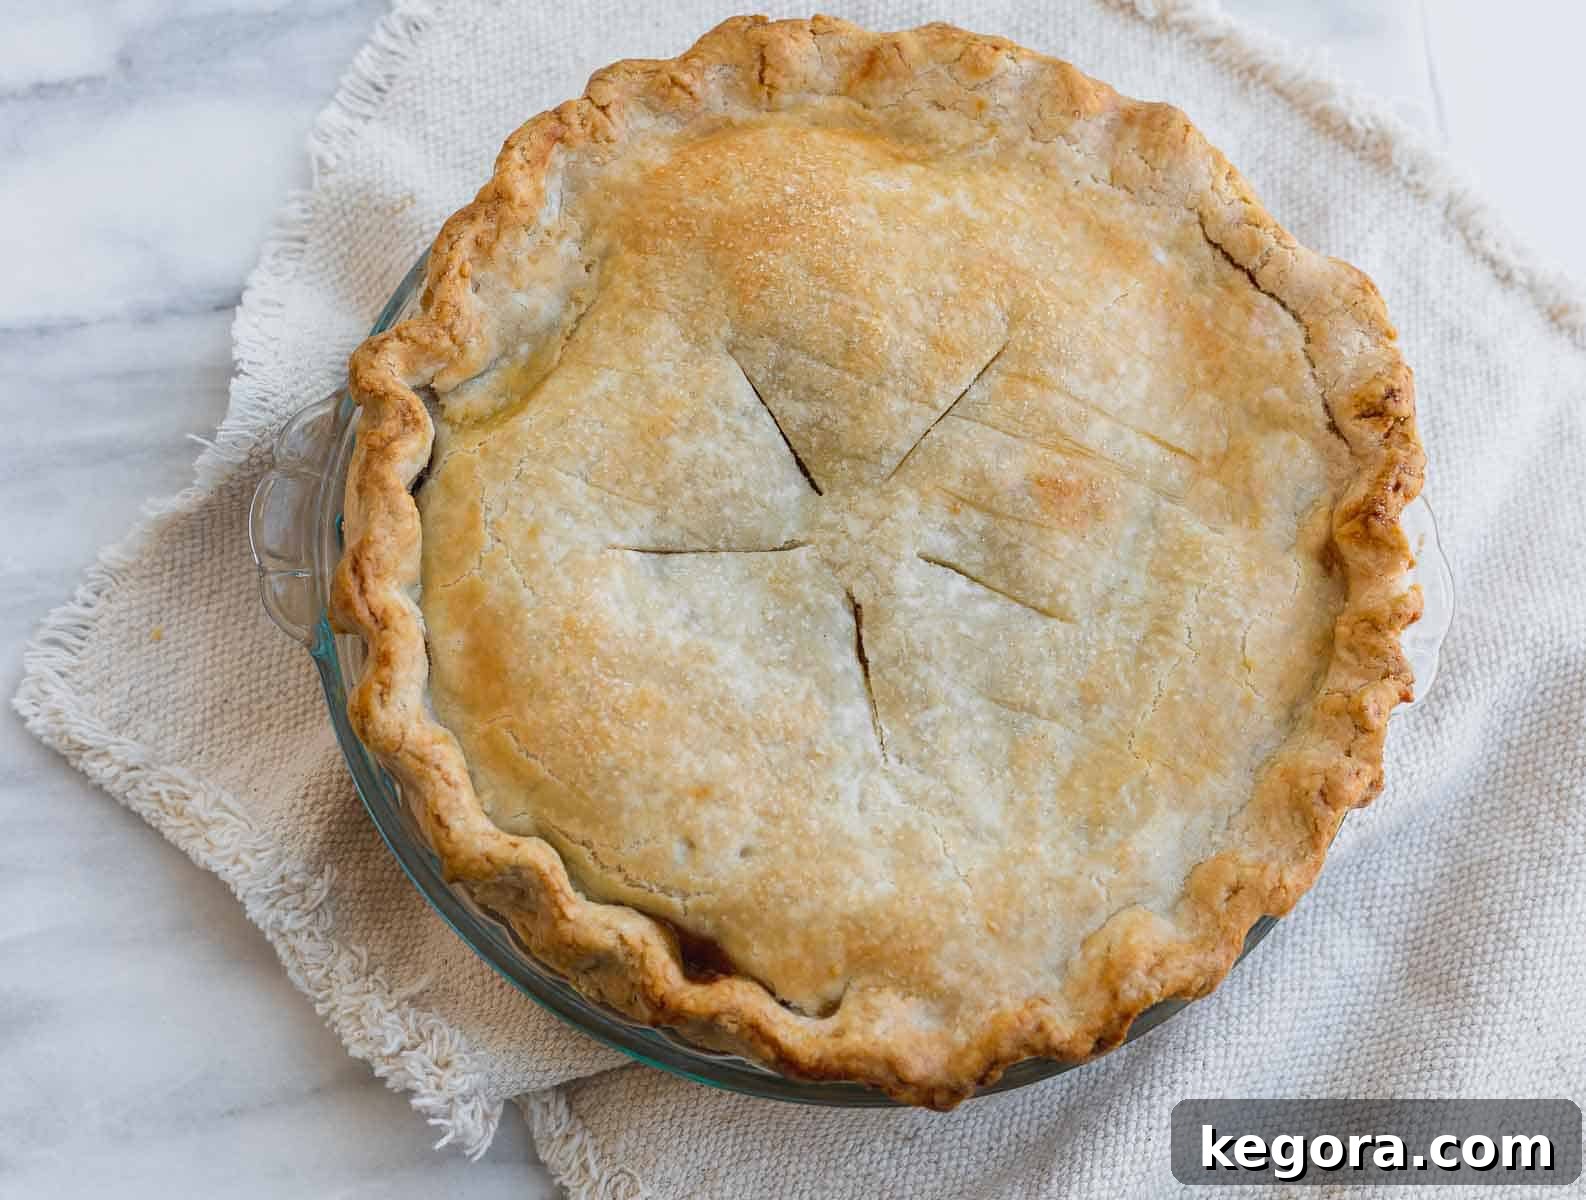
Once your perfectly cooled filling and chilled pie crust are ready, it’s time for the exciting part: assembling and baking your masterpiece. For that irresistible golden hue on the top crust, a simple egg wash works wonders. You can find a full visual tutorial in the recipe video provided in the original content (though we’ve removed the interactive player, the steps are detailed below!).
Assembling and Baking Your Gluten-Free Apple Pie
- Roll and Place the Bottom Crust: If your dough has chilled for more than an hour, let it sit at room temperature for 15 minutes. Roll out one disc of dough between two pieces of plastic wrap to about 1/4-inch thickness. Carefully remove the top layer of plastic, invert the dough into your 9-inch metal pie plate, and gently ease it into the contours. Remove the second piece of plastic. Place this bottom crust back in the fridge while you prepare the top crust.
- Fill and Top: Pour the completely cooled apple filling into the prepared bottom crust. Roll out the second dough disc for the top crust in the same manner. Place it over the filling, trim any excess dough, and seal the edges by crimping with your fingers or a fork. Cut several slits in the center of the top crust to allow steam to escape during baking. For an extra firm crust, place the assembled pie in the freezer for 10 minutes before baking.
- The Hot Baking Sheet Trick: This is another game-changer for a crisp bottom crust. Place a baking sheet on the center rack of your oven and preheat the oven to 400°F (200°C). You want the baking sheet to be hot when the pie goes in. This immediate blast of heat from underneath helps set the bottom crust quickly, preventing sogginess.
- Egg Wash for Golden Perfection: Whisk together one egg with a tablespoon of milk (any milk will do). Brush this egg wash generously over the entire top crust. For a sparkling finish, sprinkle a little granulated sugar over the egg wash.
- Baking Process: Carefully place your pie on the preheated hot baking sheet in the oven. Bake at 400°F (200°C) for 35 minutes. After this initial bake, lightly place a piece of aluminum foil over the pie (or use a pie shield) to prevent the edges and top from over-browning, then reduce the oven temperature to 375°F (190°C). Continue baking for an additional 35-40 minutes, or until the crust is deeply golden brown and the filling is visibly bubbly through the steam vents.
- The Essential Cooling Period: This step requires patience but is absolutely non-negotiable for a perfect pie. Allow the pie to cool completely on a wire rack for at least 3 hours before slicing and serving. This extended cooling time allows the filling to fully set, preventing it from oozing out when cut and ensuring beautiful, clean slices.
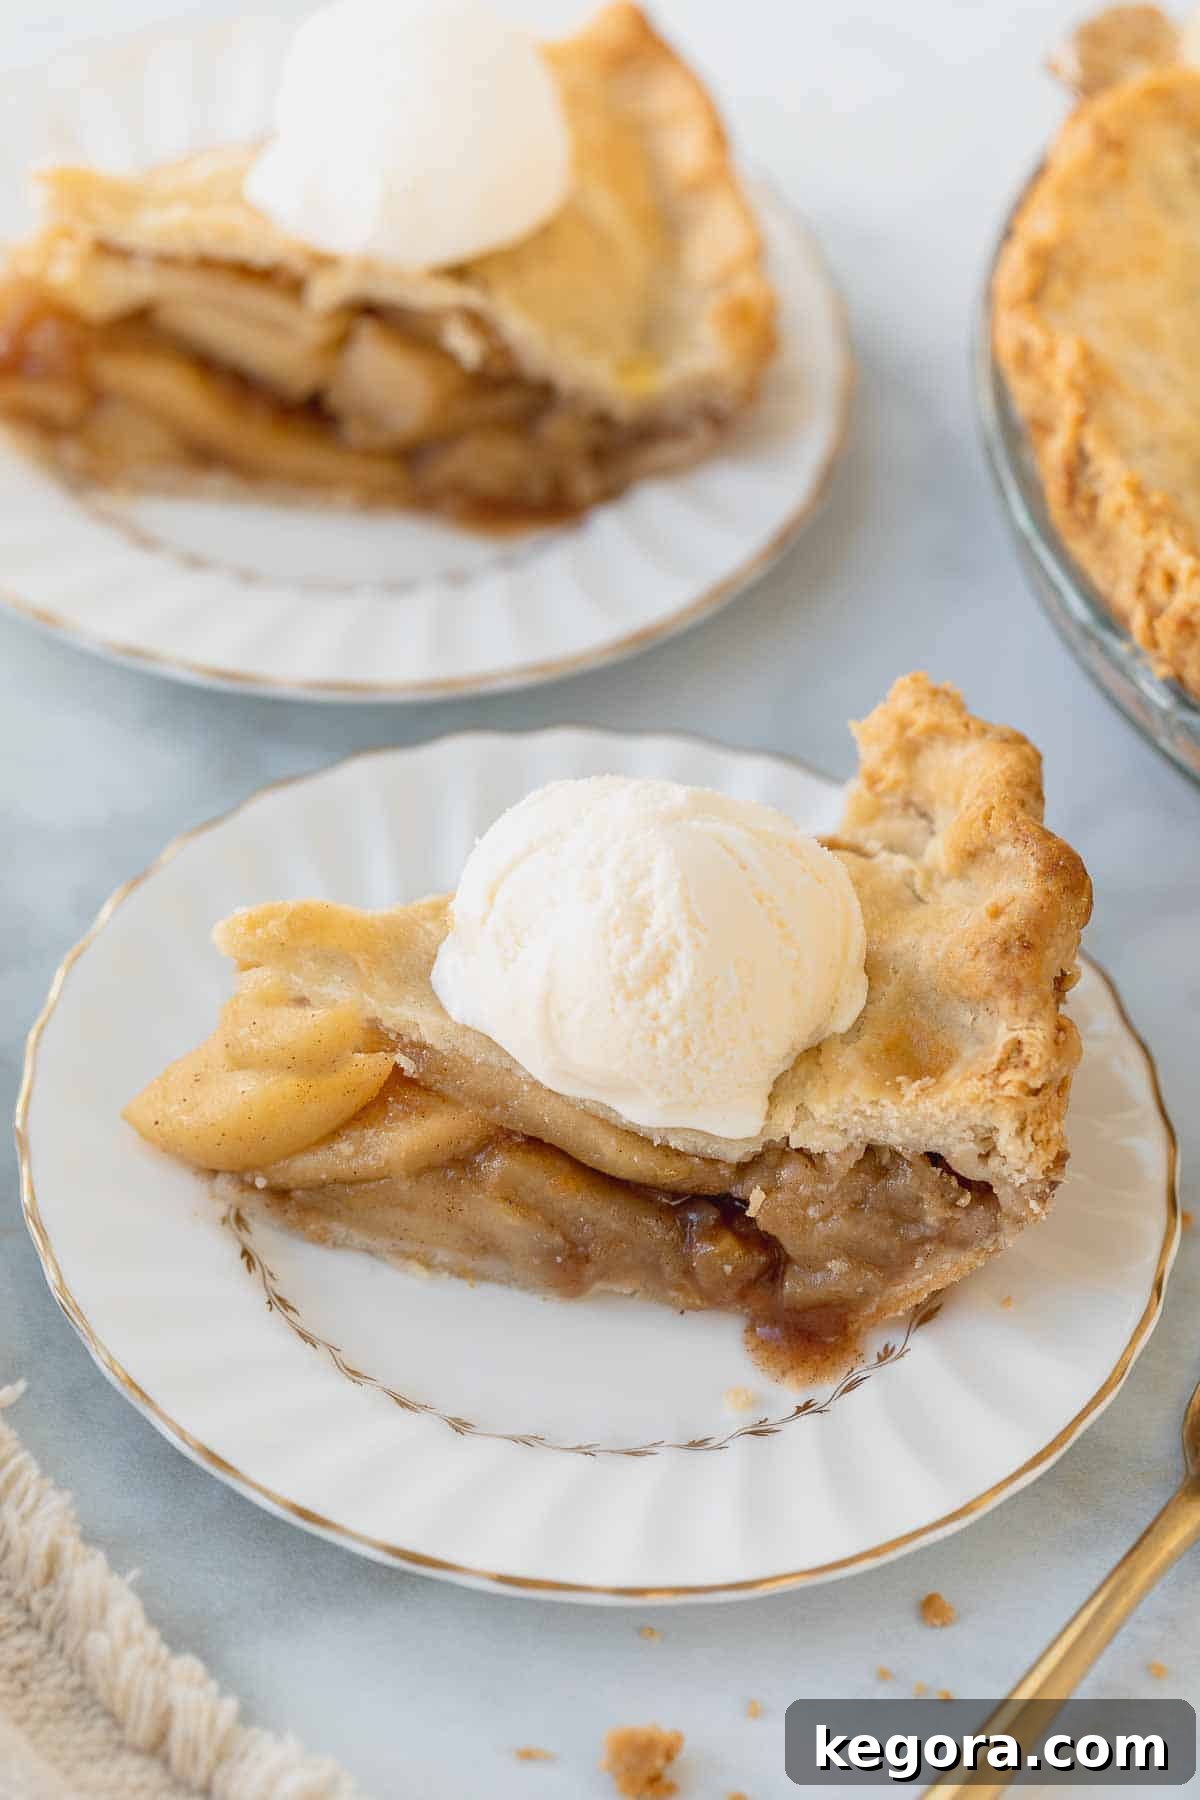
Serve your magnificent gluten-free apple pie warm with a generous scoop of vanilla ice cream and a drizzle of caramel sauce. For a dairy-free option, try this easy dairy-free caramel sauce!
Tips for Amazing Gluten-Free Apple Pie
To ensure every bite of your gluten-free apple pie is nothing short of amazing, keep these essential tips in mind:
- Start with a Proven Crust: A well-tested gluten-free pie crust recipe, like the one provided here, is your first step towards success. It ensures a flaky texture and reliable handling.
- Handle Dough with Care: Always roll gluten-free pie crust between plastic wrap. This technique minimizes sticking and makes transferring the delicate dough much easier, reducing the chances of breakage.
- Embrace Pre-Cooking the Filling: This is our number one recommendation! Pre-cook the apple filling to eliminate excess moisture and ensure it’s perfectly thickened before it ever touches your pie crust. This guarantees a crisp bottom and a luscious center.
- Taste and Adjust the Filling: After pre-cooking, taste your apple filling. This is your chance to adjust the sweetness or tartness to your preference by adding a little more sugar or lemon juice.
- Use a Hot Baking Sheet: For a wonderfully crispy bottom crust, always bake your pie on a pre-heated baking sheet. The immediate high heat helps to set the crust quickly and prevent sogginess.
- Chill the Assembled Pie: A quick 10-minute chill in the freezer after assembling helps firm up the butter in the crust one last time before it hits the hot oven, contributing to flakiness.
- Allow Ample Cooling Time: Patience is a virtue when it comes to pie. Let your baked pie cool on a wire rack for at least 3 hours. This allows the filling to properly set, making for clean slices and a more enjoyable eating experience.
Make-Ahead Options
While this pie is truly at its best when enjoyed the day it’s baked, we understand the need for advance preparation, especially during busy holidays. Unfortunately, gluten-free pie crusts don’t tend to hold up well for extended storage after baking, as they can lose their crispness.
However, you can absolutely prepare components in advance to streamline your baking day:
- Prepare the Pie Crust Dough: Make the pie dough up to two days in advance. Wrap the discs tightly in plastic wrap and store them in the refrigerator. Remember to let them sit at room temperature for about 15 minutes before rolling.
- Pre-Cook the Apple Filling: The apple pie filling can also be made up to two days ahead. Cook it as directed, cool it completely, and then store it in an airtight container in the refrigerator.
When you’re ready to bake, simply pull your prepared crust and filling from the fridge, assemble the pie, and follow the baking instructions. This strategy significantly cuts down on active preparation time on the day you plan to serve, allowing you to enjoy fresh, warm pie with less stress.
More Gluten-Free Holiday & Everyday Recipes
Explore a variety of delicious gluten-free options for any occasion:
Discover More Gluten-Free Delights
15 Easy Gluten-Free Appetizers for Any Gathering
13 Must-Try Gluten-Free Thanksgiving Desserts
Gluten-Free Baked Brie
13 Gluten-Free Thanksgiving Sides Everyone Loves
Gluten-Free Buttermilk Pie
Gluten-Free Yule Log
Easy, Soft Gluten-Free Dinner Rolls
Pumpkin Rice Pudding
We sincerely hope this detailed guide answers all your questions about baking an incredible gluten-free apple pie and empowers you for countless baking successes! If you have any further questions or would like to share your experience, please leave a comment or star rating below. Happy Baking!
Gluten-Free Apple Pie (Homemade Crust!)
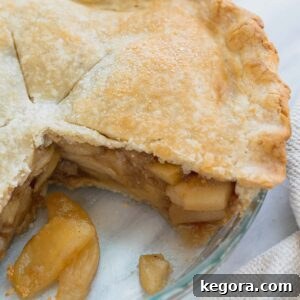
This gluten-free apple pie features a wonderfully flaky, homemade pie crust and a deliciously sweet-spiced apple filling! Our top recommendation for achieving perfection is pre-cooking the apple pie filling, which guarantees a crisp bottom crust and a thick, saucy center. Additionally, for an even crisper bottom crust, we highly recommend using a metal pie plate.
This article provides all the essential tips and tricks for crafting a classic gluten-free apple pie from scratch. For a visual demonstration, be sure to watch the full video tutorial on how to make it!
Recipe Details
- Author: Erin Collins
- Prep Time: 1 hour 20 mins
- Cook Time: 1 hour
- Total Time: 2 hrs 20 mins
- Servings: 10 (9-inch pie)
Ingredients
For the Crust:
- 16 tablespoons salted butter (2 sticks)
- 6 tablespoons ice water
- 3 tablespoons sour cream (dairy-free sour cream works too!)
- 1 tablespoon white vinegar
- 2 cups gluten-free 1:1 baking flour (340 grams)
- 2 teaspoons sugar
- 1 teaspoon salt
For the Filling:
- 4 pounds apples (about 6-7 large apples, see notes for recommended types)
- 2 tablespoons butter
- 1/2 cup brown sugar
- 1/4 cup granulated sugar
- 1 1/2 teaspoons ground cinnamon
- 1/4 teaspoon ground nutmeg
- 1/4 teaspoon ground allspice
- 1/4 teaspoon salt
- Zest of 1 lemon
- 2 tablespoons fresh lemon juice
- 2 tablespoons cornstarch + 2 tablespoons water (for slurry)
For the Egg Wash:
- 1 egg
- 1 tablespoon milk of choice
Instructions
Make the Crust:
- Cut the butter into small ¼-inch pieces and freeze for 10-15 minutes.
- Combine the ice water, sour cream, and vinegar in a small bowl. Whisk until smooth and set aside.
- Process the flour, sugar, and salt in the bowl of a food processor until combined. Scatter the frozen butter over top and pulse until the butter is the size of large peas, about 10 pulses.
- Add the sour cream mixture and pulse until the mixture begins to clump around the blade, about 10 pulses. If the crust does not clump around the blade after 10 pulses, pour it into a bowl and finish mixing with your hands or a spatula.
- Divide the dough into 2 balls. Press and shape into flat discs and wrap each disc tightly in plastic wrap. Refrigerate for 1 hour or up to 2 days.
Make the Filling:
- Peel the apples and cut out the core. Then cut into 1/4 inch slices. Be sure to cut the apples the same size so they cook evenly.
- In a large deep skillet or Dutch oven, combine the sliced apples, butter, brown sugar, granulated sugar, cinnamon, nutmeg, allspice, salt, lemon juice, and lemon zest. Cook over medium heat, stirring occasionally for about 10 minutes, until apples have slightly softened but not lost their shape.
- Mix together the cornstarch and water to create a slurry. Pour into the apple mixture and cook for another 2-3 minutes until thickened and glossy.
- Pour the filling into a bowl and let cool completely to room temperature. Taste the filling to see if it needs any more sugar or lemon juice to your liking.
Tip: To speed up the cooling process, pour the apple filling out onto a baking sheet and place in the refrigerator.
Assemble the Pie:
- If you refrigerated the dough longer than 1 hour, let the dough sit at room temperature for 15 minutes before rolling. Roll the pie crust out between 2 large pieces of plastic wrap to 1/4-inch thickness.
Tip: Try to smoosh any cracks that form on the edges together with the rolling pin as you roll. They may form at first, but the crust will meld together as you roll it.
- After rolling, remove the top piece of plastic wrap and flip into a 9-inch pie plate. (UPDATE: We recommend a metal pie plate!) Gently ease the dough into the edges of the pan before removing the 2nd piece of plastic wrap. Place the bottom crust in the fridge to keep chilled while you roll out the top crust the same way.
- Pour the cooled filling into the prepared crust. Top with the 2nd crust. Trim any overhang or excess dough. Seal edges with a fork or with your fingers. Cut a few slits into the center of the pie for the steam to escape. Place the pie in the freezer for 10 minutes before baking for the dough to chill one last time.
- Place a baking sheet in the center rack of the oven. Preheat the oven to 400°F (200°C). Tip: You want the baking sheet to be in the oven as it preheats. You’ll place the pie on the hot baking sheet which will help the bottom crust bake.
- Make the Egg Wash: Whisk together the egg and milk until totally combined. Brush the pie dough with egg wash and sprinkle sugar if desired.
- Place the pie on the preheated baking sheet and bake for 35 minutes. Lightly place a piece of foil on top of the pie to keep it from over-browning (or use a pie shield), then lower the oven temperature to 375°F (190°C). Bake for an additional 35-40 minutes, until golden brown and bubbly.
- Let the pie cool on a wire rack for 3 hours before slicing. (I know it’s hard to wait but this is important!) Enjoy!
Tip: This pie is best eaten the day it’s baked. See the notes for make-ahead instructions.
Notes
Dairy-Free? You can use dairy-free sour cream in place of the sour cream, however, we don’t recommend using vegan butter. We recommend using shortening (butter flavored with you like) in place of the butter for a dairy-free option.
Tips for Success
- Use tart, firm apples. We prefer Granny Smith apples for this pie!
- Roll the pie crust in-between plastic wrap so it’s easier to handle.
- Pre-cook the filling to get rid of extra moisture and ensure that the filling is perfectly thickened before going into the oven.
- Taste the pre-cooked filling to see if you need to add more lemon or sugar to your liking.
- Cook on a pre-heated baking sheet to get the bottom crust extra crispy.
MAKE-AHEAD INSTRUCTIONS: This pie is best eaten the day it’s baked. Unfortunately, gluten-free pie crust doesn’t hold up for longer storage.
To make this pie in advance, we recommend making the apple pie filling and pie crust and refrigerating them until you’re ready to assemble the pie.
Nutrition
Calories: 452kcal | Carbohydrates: 58g | Protein: 5g | Fat: 24g | Saturated Fat: 14g | Polyunsaturated Fat: 2g | Monounsaturated Fat: 6g | Trans Fat: 1g | Cholesterol: 73mg | Sodium: 490mg | Potassium: 322mg | Fiber: 6g | Sugar: 36g | Vitamin A: 778IU | Vitamin C: 10mg | Calcium: 52mg | Iron: 1mg