
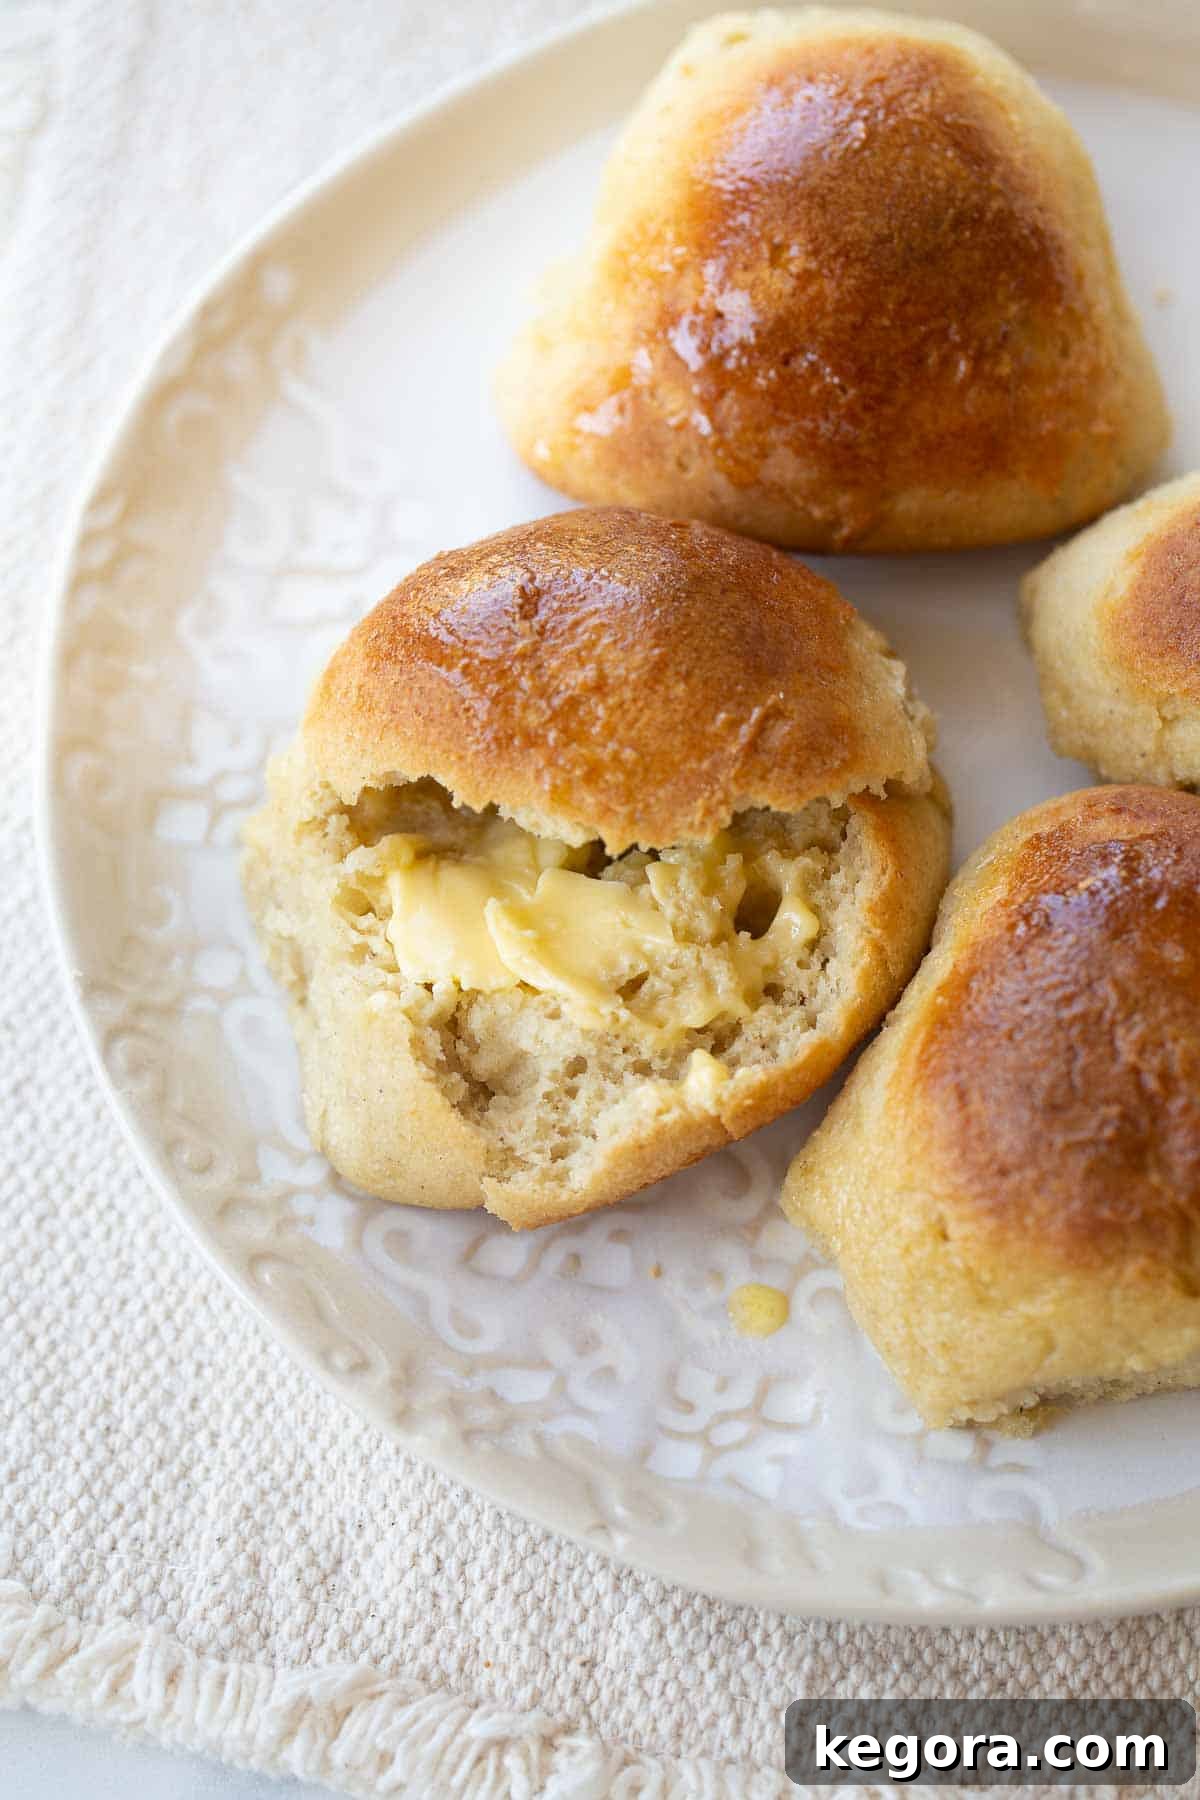
Imagine sinking your teeth into a soft, fluffy, and perfectly buttery roll, knowing it's entirely gluten-free. These incredible Gluten-Free Rolls are not only exceptionally delicious but also surprisingly easy to prepare, making them a perfect addition to any meal or special occasion.
If you've been searching for a reliable gluten-free dinner roll recipe that delivers on taste and texture without the fuss, your quest ends here. Crafted with readily available ingredients, these rolls move from mixing bowl to golden-brown perfection in less than two hours. You'll be amazed at how effortlessly you can achieve bakery-quality results right in your own kitchen.
For those who follow a gluten-free diet, the joy of a warm, yeasted dinner roll can often feel like a distant memory. But with this recipe, there's absolutely no need to compromise. These rolls are so good, they might just steal the show from your main course!
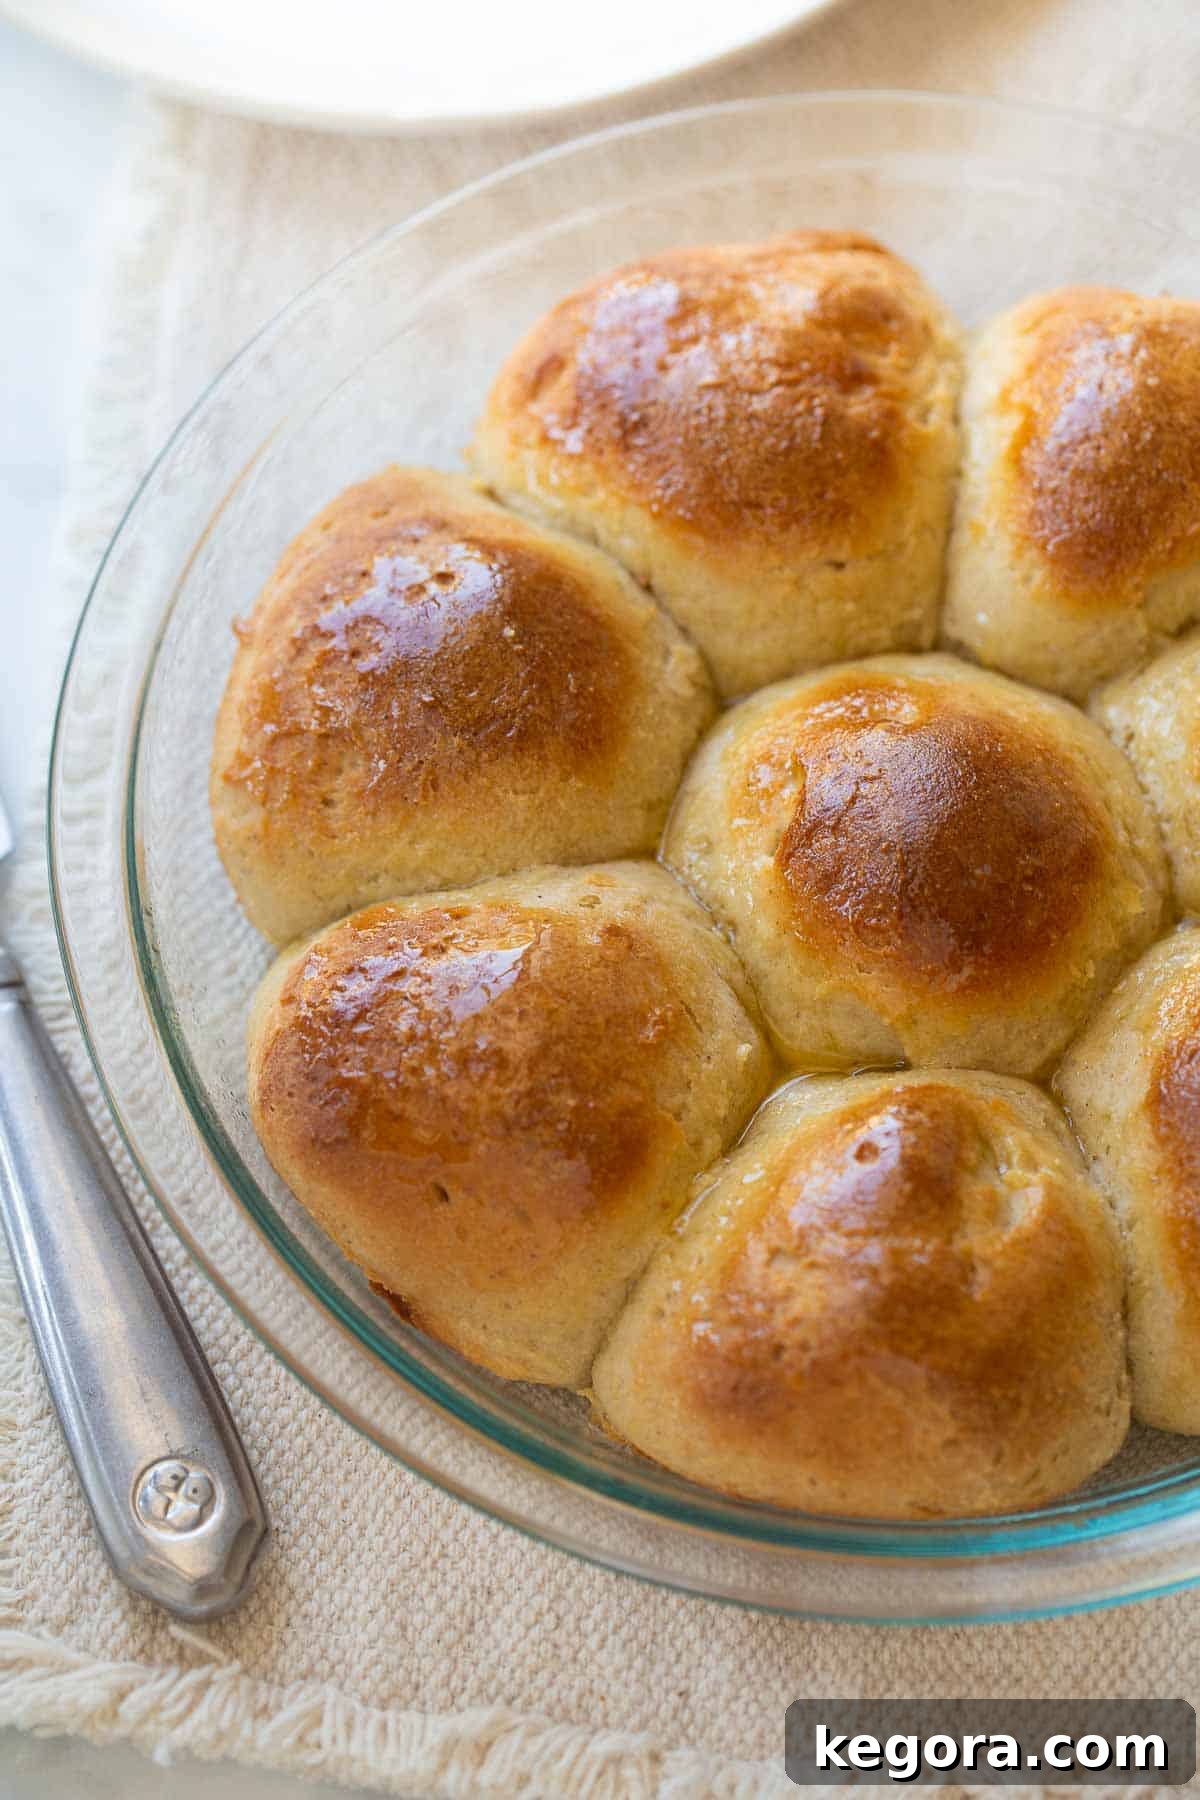
Our family cherishes these gluten-free dinner rolls, especially during the holidays. They're a staple at our Thanksgiving dinner every year, and the recipe scales beautifully. You can easily double or even triple the batch to feed a large gathering, ensuring everyone gets to enjoy these delightful morsels. Beyond holidays, they make an ideal accompaniment to a cozy Sunday dinner. Picture them alongside a hearty gluten-free beef stew, a succulent sirloin tip roast, or a rich gluten-free pot roast. No matter what you serve them with, these rolls will fill your home with the most comforting and inviting bread-baking aroma, promising a meal to remember.
Visual Guide: Watch How to Make These Gluten-Free Rolls
To ensure your success, a detailed video tutorial is available within this article, providing visual guidance for each step of the recipe. Watching the process unfold can be incredibly helpful, especially for those new to gluten-free baking. It allows you to see the dough's consistency, how to properly scoop and shape the rolls, and what to look for at each stage.
Selecting the Best Gluten-Free Flour for Your Rolls
Many assume that baking gluten-free dinner rolls is inherently complex, but in reality, this recipe simplifies the process, making it even more straightforward than traditional rolls. The key lies in selecting the right gluten-free ingredients, particularly your flour blend. These rolls require just a single rise, ensuring they're ready from start to finish in under two hours, a significant advantage for busy bakers.
- Opt for a High-Quality Gluten-Free Measure-for-Measure Flour Blend: The foundation of these rolls is a reliable gluten-free 1:1 or measure-for-measure flour blend. I highly recommend a blend that already contains xanthan gum, such as King Arthur Flour's Gluten-Free Measure for Measure Flour. Xanthan gum acts as a crucial binder, mimicking the elastic properties of gluten and preventing your rolls from becoming crumbly. Using a pre-blended flour with xanthan gum simplifies the ingredient list and ensures consistent results. If your blend does not contain xanthan gum, you may need to add about ½ teaspoon per cup of flour, but it's often easier to start with a suitable blend.
- Enhance with a Touch of Almond Flour: A secret weapon in gluten-free baking, adding a small amount of almond flour elevates these rolls significantly. The extra protein and healthy fats from the almond flour contribute to a wonderfully rich flavor profile and help the rolls achieve a beautiful, golden-brown crust. This subtle addition makes a noticeable difference in both taste and appearance, adding depth that typical gluten-free flours might lack on their own.
If you enjoy experimenting with different gluten-free bread options, you might also love our recipe for gluten-free crescent rolls, offering another fantastic yeasted bread experience.
How to Bake Soft and Buttery Gluten-Free Rolls: A Detailed Guide
Creating these delightful gluten-free rolls is a rewarding experience, and we've broken down the process into simple, easy-to-follow steps. The visual guide below, featuring numbered pictures, directly corresponds to these instructions, helping you along the way.
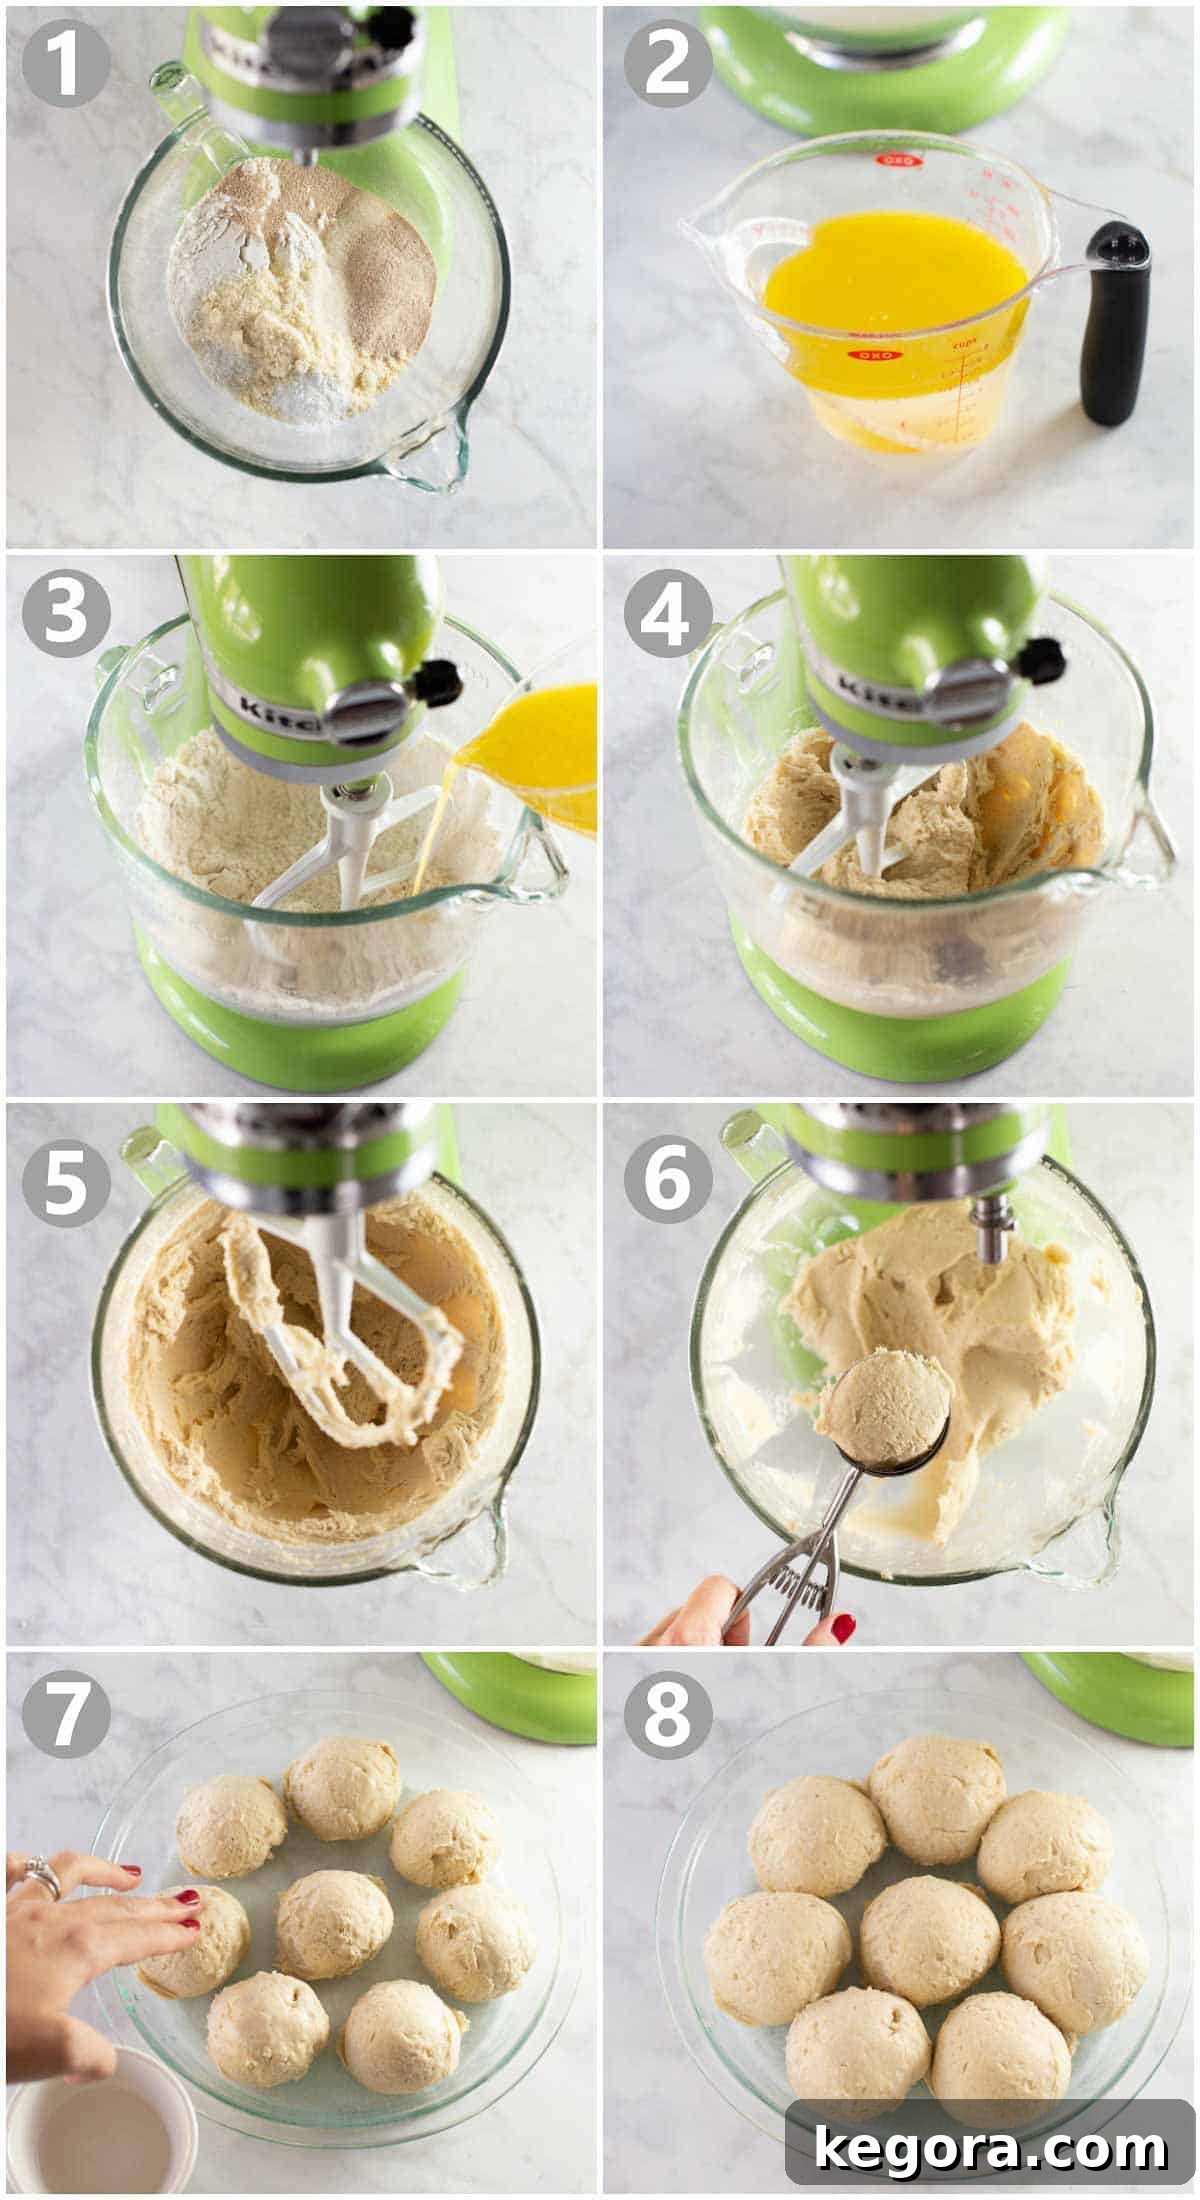
These how-to numbered pictures match up with the instructions below, providing a clear visual reference.
- Combine the Dry Ingredients: In the bowl of your stand mixer, add all the dry ingredients. Mix them on low speed until they are thoroughly combined. This ensures an even distribution of leavening agents and binders.
- Prepare the Wet Ingredients: In a separate measuring cup or bowl, whisk together all the wet ingredients. Ensure your water is warm (around 110°F/43°C) to activate the yeast properly.
- Incorporate Wet into Dry: With your stand mixer running on low speed (using the paddle attachment, not a dough hook, which is generally better for gluten-free dough), slowly pour the warm wet mixture into the dry ingredients. Gradually increasing the speed allows the flour to hydrate without clumping.
- Mix for Air Incorporation: Once all ingredients are combined, increase the mixer speed to medium-high and continue to mix the dough for a full 6 minutes. This crucial step incorporates air, which is vital for developing the light, airy texture of gluten-free bread, compensating for the lack of gluten structure.
- Observe Dough Consistency: After mixing, don't be alarmed if your dough resembles thick cookie dough rather than traditional bread dough. This is exactly the texture you're aiming for – it will be soft and pliable, but not sticky or elastic like wheat dough.
- Scoop into Balls: Using a large cookie scoop (a #14 scoop, or approximately 4 tablespoons), portion the dough into even balls. Lightly spraying the scoop with cooking spray between each use will prevent sticking.
- Smooth the Tops: Dip your fingers in a little water and gently smooth the tops of each scooped roll. This helps create a smooth, even surface and prevents cracking during baking.
- Rise and Bake: Place the shaped dough balls in a warm spot to rise for about an hour. During the last few minutes of the rise, preheat your oven to 400°F (200°C). Then, bake until golden brown and cooked through.
Remember, the video tutorial included in this post offers an invaluable visual guide, reinforcing these instructions and helping you confidently navigate each step to perfect your gluten-free rolls.
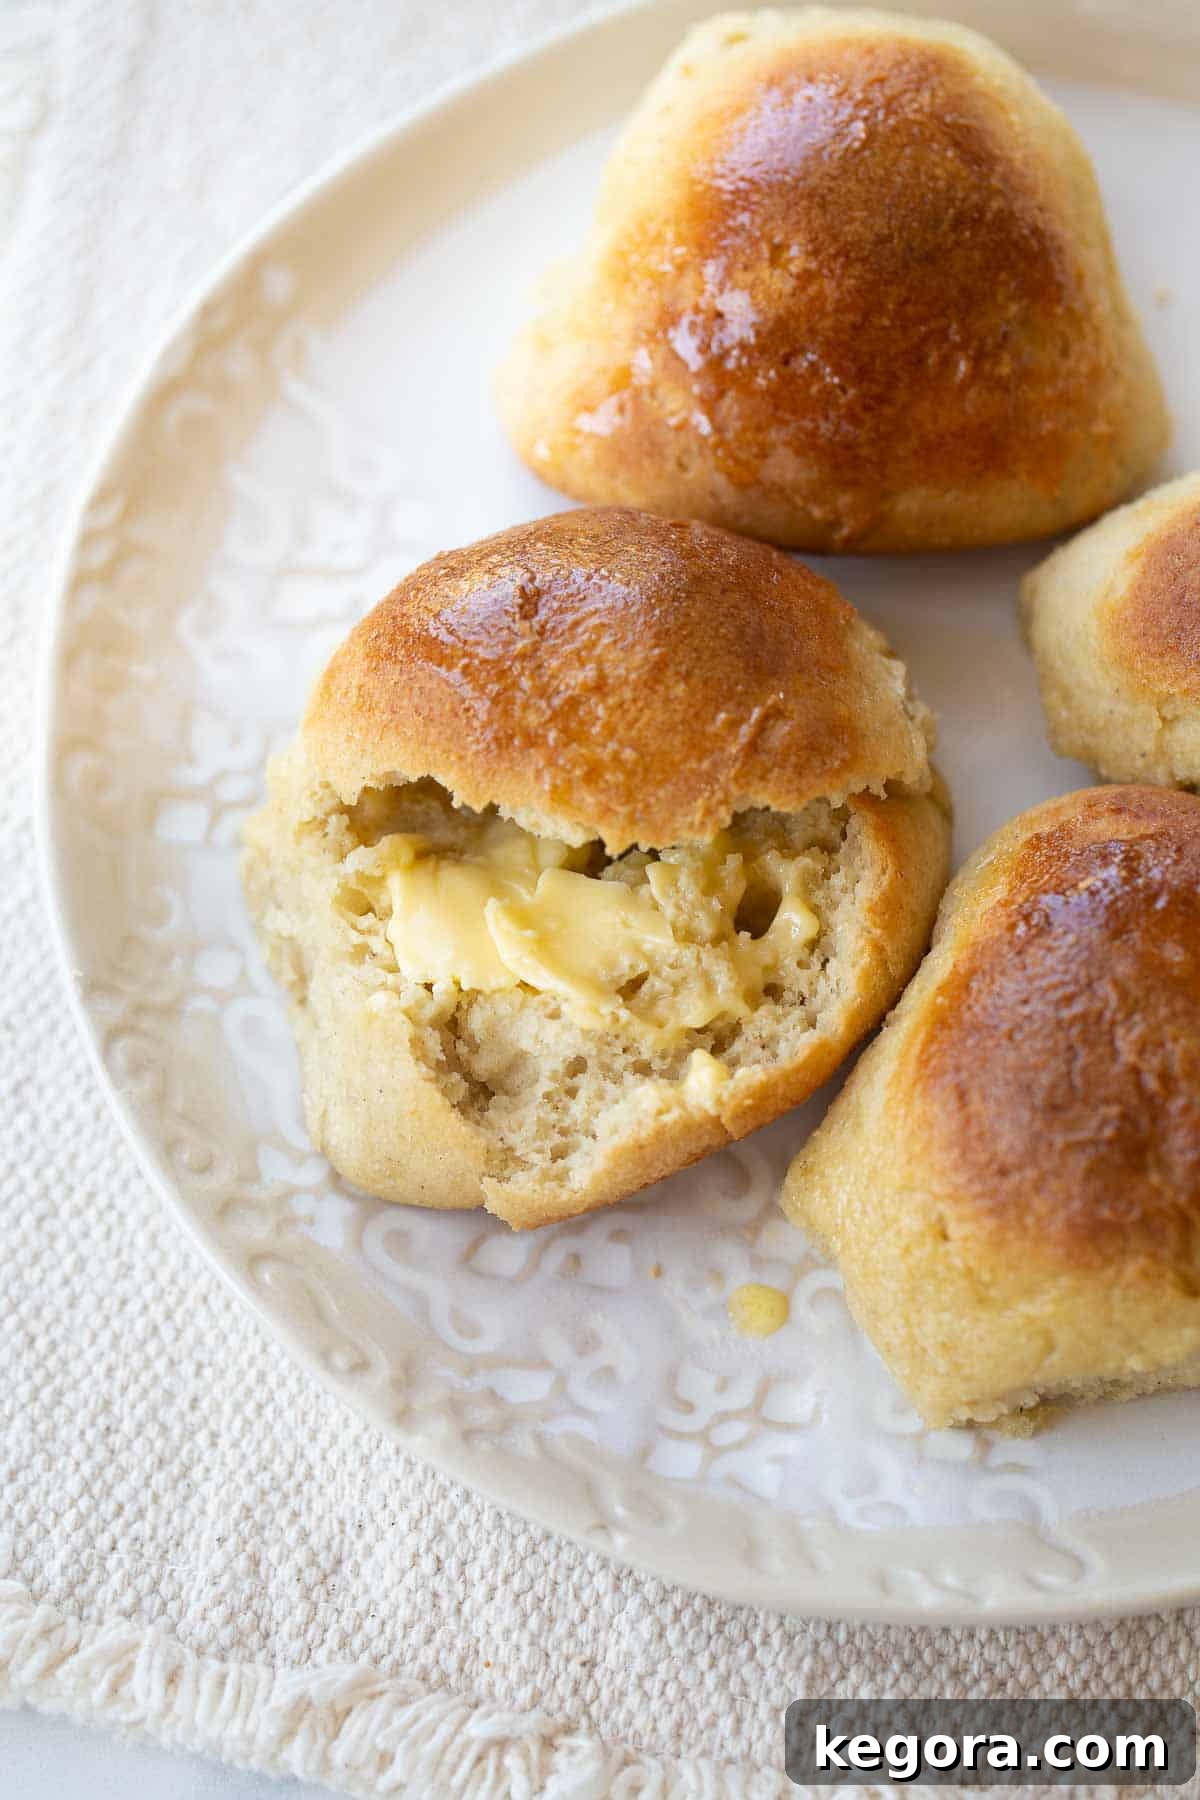
Adapting for Dietary Needs: Egg-Free and Dairy-Free Rolls
These versatile gluten-free rolls can easily be adapted to accommodate egg-free or dairy-free diets without sacrificing their signature soft and buttery texture. With a few simple substitutions, everyone can enjoy these homemade delights.
- For Egg-Free Rolls: To make these rolls egg-free, simply omit the egg from the wet ingredients. Instead, add 2 tablespoons of golden flaxseed meal (ground golden flaxseeds) to your dry ingredients. Concurrently, increase the amount of warm water in your wet ingredients by 2 tablespoons. While the rolls might not achieve quite the same lofty rise as those with an egg, the combination of instant yeast and the baking powder/apple cider vinegar will still provide a substantial lift, ensuring they remain wonderfully soft and palatable.
- For Dairy-Free Rolls: Achieving dairy-free rolls is even simpler. Just substitute the melted butter with a high-quality vegan butter alternative. Brands like Earth Balance Buttery Sticks work exceptionally well, providing that essential rich, buttery flavor that makes these rolls so irresistible. Using a butter substitute is preferable to other oils like olive oil, as the specific flavor profile of butter (or its vegan counterpart) significantly contributes to the overall deliciousness of the rolls.
Essential Tips for Perfecting Your Gluten-Free Rolls
While this recipe is designed to be straightforward, a few key considerations will ensure your gluten-free dinner rolls turn out perfectly every time. Understanding the role of specific ingredients and techniques is crucial for successful gluten-free baking.
- The Indispensable Role of Psyllium Husk: Psyllium husk is a non-negotiable ingredient in this recipe. There is no comparable substitute that yields the same incredible results. Psyllium husk powder acts as a powerful binder, providing essential structure and elasticity to gluten-free dough, preventing it from becoming crumbly. It ensures your rolls are soft and pliable, mimicking the texture of traditional wheat-based breads. Be sure to use psyllium husk powder, not whole psyllium husks, for optimal binding and texture. The powder is finer and disperses more evenly throughout the dough.
- Utilize Instant or Highly Active Yeast: Unlike many traditional bread recipes that might call for active dry yeast requiring proofing, gluten-free dough often benefits from instant or highly active yeast. This type of yeast works quickly and efficiently, making it ideal for recipes that only require a single rise. This single-rise characteristic is a major factor in what makes this gluten-free roll recipe so quick and easy, cutting down significantly on preparation time.
- The Power Couple: Baking Powder + Apple Cider Vinegar: These two ingredients might seem unconventional in a yeast roll recipe, but they are a brilliant trick for gluten-free baking. The chemical reaction between baking powder and apple cider vinegar creates additional leavening, providing an extra boost of lift and contributing to a lighter, airier texture. This combination helps overcome the common density issues often associated with gluten-free breads.
- Embrace the "Cookie Dough" Consistency: One of the most common surprises for new gluten-free bakers is the consistency of the dough. It will not be elastic or stretchy like traditional wheat dough. Instead, expect a thick, almost batter-like texture, similar to a very dense cookie dough. This is perfectly normal and exactly what you want for these rolls to turn out beautifully. Do not try to knead or handle it like regular bread dough.
- Precision Shaping with a Large Cookie Scoop: Given the unique consistency of gluten-free dough, shaping by hand can be tricky. A large cookie scoop (specifically a #14 or 4-tablespoon capacity) is your best friend here. It helps create uniformly sized balls of dough, which leads to even baking. You should yield approximately 8 rolls from this recipe. After scooping, dampen your fingers with water to gently smooth out any rough edges or imperfections on the surface of the dough balls.
Frequently Asked Questions for Gluten-Free Roll Baking
- My rolls didn't rise much. What went wrong? Ensure your warm water is the correct temperature (around 110°F/43°C) – too hot will kill the yeast, too cold won't activate it. Also, check that your yeast is fresh and active. A warm, draft-free spot for rising is also crucial.
- Why are my gluten-free rolls crumbly? This is often due to insufficient binding. Double-check that you used psyllium husk powder and a good quality gluten-free flour blend with xanthan gum. Over-baking can also lead to a dry, crumbly texture.
- Can I make these rolls ahead of time? Yes! You can prepare the dough and scoop the rolls into the pan, then cover tightly with plastic wrap and refrigerate overnight. Let them come to room temperature for about 30-45 minutes before allowing them to rise for an hour and bake as directed.
- How do I store leftover rolls? Store any leftover rolls in an airtight bag or container at room temperature for up to 2 days. For longer storage, freeze them for up to 1 month.
- What's the best way to reheat them? For freshly baked warmth, microwave individual rolls for 15-20 seconds. If reheating from frozen, thaw first, then microwave, or wrap in foil and warm in a preheated oven at 300°F (150°C) for 10-15 minutes. Brushing with a little melted butter before reheating can restore some moisture.
Beyond Rolls: Discover More Gluten-Free Bread Recipes
If you're eager to expand your gluten-free baking repertoire, we have a variety of other fantastic recipes that are sure to impress. Our gluten-free sandwich bread is a staple, perfect for toast, sandwiches, or simply enjoyed fresh out of the oven with a dollop of honey. It's truly amazing and incredibly easy to make.
You might also enjoy these long-time reader favorites:
- Gluten-Free Soft Pretzels: A fun and delicious snack or appetizer.
- The Best Gluten-Free Pizza Crust: Create your perfect homemade pizza night.
- Gluten-Free Garlic Bread: A flavorful accompaniment to Italian meals.
- Gluten-Free Flatbread: Versatile and simple for dips or wraps.
More Must-Try Gluten-Free Bread Recipes
Gluten-Free Sticky Buns
Gluten-Free Soft Pretzels
Gluten-Free Sandwich Bread (Amazing & Easy!)
Gluten-Free Pizza Crust
I hope these detailed instructions, tips, and the accompanying video empower you to create these truly remarkable gluten-free rolls with confidence. If you have any further questions about gluten-free baking or this specific recipe, please don't hesitate to leave a comment below. Your successful baking journey is important to me!
If you try this recipe, I'd absolutely love to hear how it turned out for you! Please leave a comment and rating below. Happy Baking!
Gluten-Free Dinner Rolls (1:1 Baking Flour)
Erin Collins
1 hr 15 mins
30 mins
1 hr 45 mins
8
Soft, fluffy and buttery, these Gluten-Free Rolls are EASY to make and perfect for any occasion!
These dinner rolls are made with easy-to-find ingredients and bake up start to finish in less than 2 hours. You'll be happily surprised with how easy they are to make!
Comments
Video
A video tutorial is available within the article to guide you through the recipe steps visually.
Ingredients
Dry Ingredients:
- 1 3/4 cup gluten-free 1:1 baking flour
- 2/3 cup almond flour
- 3 tablespoons cane sugar
- 3 tablespoons whole psyllium husk (or 1 1/2 tablespoons psyllium husk powder)
- 1 packet (2 1/4 teaspoons) instant or highly active yeast
- 1 teaspoon baking powder
- 3/4 teaspoon salt
Wet Ingredients:
- 1 1/4 cup warm water (about 110F/43C)
- 1 egg
- 1 1/2 teaspoons apple cider vinegar
- 1/4 cup butter, melted
Instructions
- In the bowl of a stand mixer fitted with the paddle attachment, add all the dry ingredients. Mix on low speed until thoroughly combined.
- In a separate measuring cup or bowl, mix together all the wet ingredients.
- With the mixer running on low speed, slowly pour the wet ingredients into the dry ingredients. Once combined, increase the mixer speed to medium-high and mix for 6 minutes. This process helps incorporate air into the dough. The final dough consistency will resemble thick cookie dough.
- Lightly spray a 9-inch pie or cake pan with cooking spray. Also, spray a #14 (4 tablespoon measure) cookie scoop with cooking spray. Scoop 8 balls of dough into the prepared pan, spraying the scoop as needed between scoops to prevent sticking.
- Use wet hands to gently smooth out the tops of the rolls. Let the dough rise in a warm place for 1 hour. During the last few minutes of the rising time, preheat your oven to 400°F (200°C). Bake the rolls for 25-30 minutes, or until the tops are golden brown.
- Remove from oven and let cool for 15 minutes before serving. For extra flavor and shine, brush the warm rolls with additional melted butter. Serve and enjoy!
- Store any leftover rolls in an airtight bag at room temperature for up to 2 days. To reheat, warm for 15-20 seconds in the microwave before serving.
Notes
RECIPE NOTES
- For best results, use a high-quality gluten-free 1:1 baking flour that contains xanthan gum.
- A large cookie or ice cream scoop (#14 or a 4 tablespoon amount) is ideal for shaping these rolls evenly.
- There is no substitute that works quite the same as psyllium husk powder in this recipe. It's crucial for binding and adding structure to gluten-free breads.
SUBSTITUTIONS
- MAKE IT EGG-FREE: Omit the egg. Add 2 tablespoons ground golden flaxseed to the dry ingredients and increase the water by 2 tablespoons.
- MAKE IT DAIRY-FREE: Use vegan butter (like Earth Balance Buttery Sticks) instead of regular butter.
- MAKE IT NUT-FREE: Substitute the 2/3 cup almond flour with 1/2 cup more gluten-free 1:1 baking flour.