
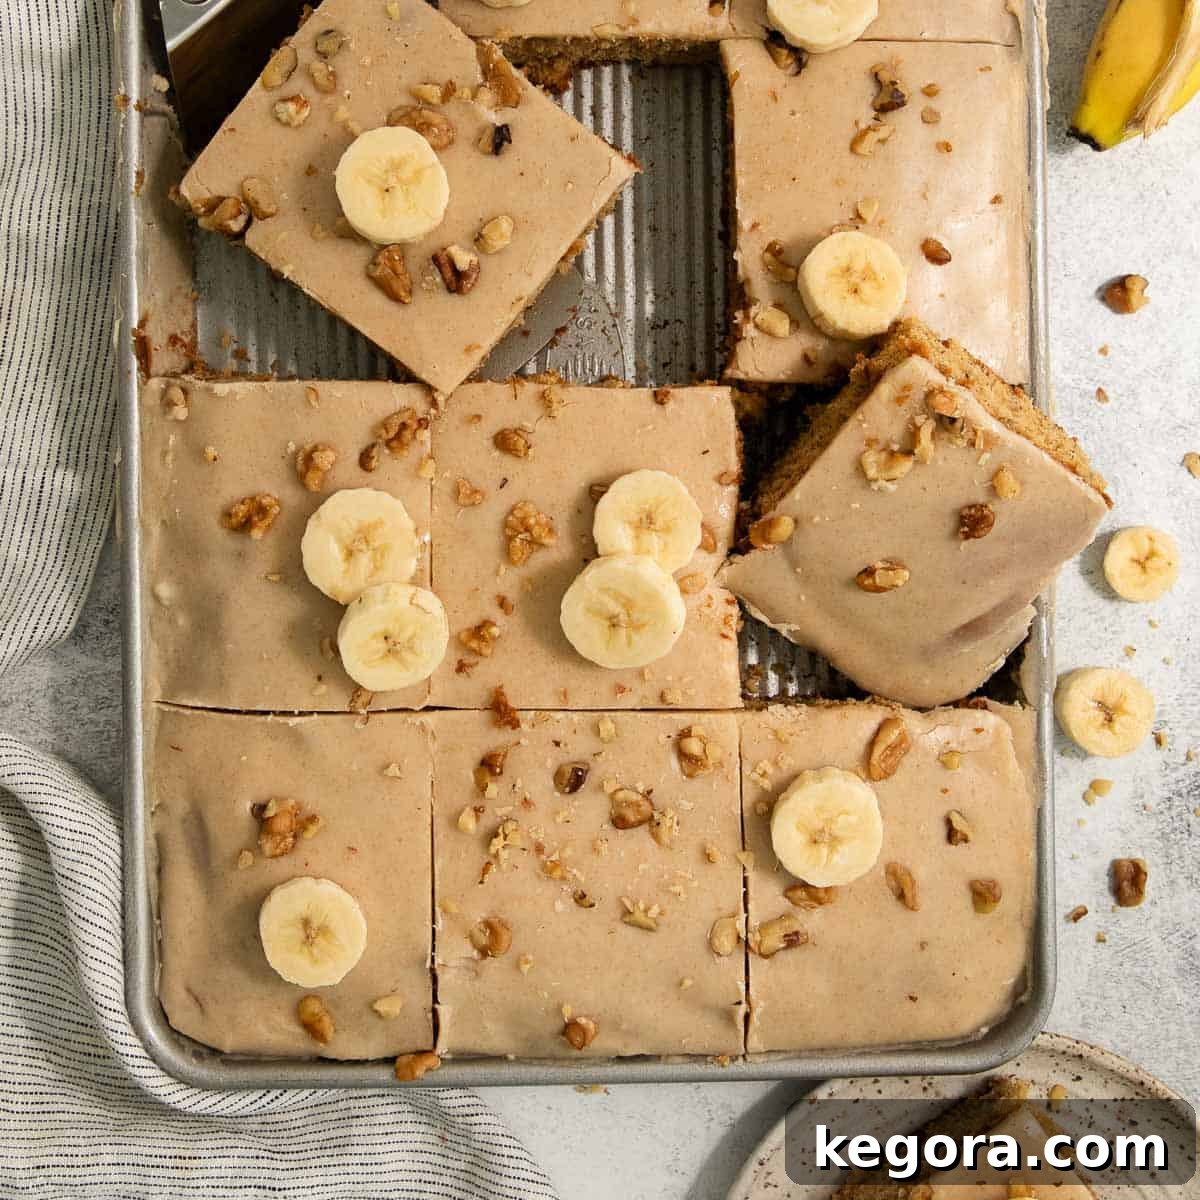
Irresistible Gluten-Free Brown Butter Banana Bars with Decadent Frosting
Experience the ultimate comfort dessert with these moist, tender, and incredibly flavorful gluten-free banana bars, crowned with a rich, nutty brown butter frosting. This recipe is a guaranteed crowd-pleaser that everyone, regardless of dietary needs, will adore!
Erin’s Recipe Rundown: Why You’ll Love These Bars
Texture: Prepare for pure bliss! These banana bars boast an exceptionally soft and moist crumb, contrasting beautifully with the delightful crunch from optional chopped walnuts. Each bite offers a harmonious balance that melts in your mouth.
Taste: A symphony of flavors awaits! The star of the show is the rich, nutty depth imparted by the brown butter, perfectly complementing the natural sweetness of ripe bananas. This combination creates a uniquely comforting and utterly addictive taste experience that sets these bars apart.
Ease: Don’t let the gourmet flavor fool you – these bars are surprisingly easy to whip up! They’re perfect for both novice bakers and seasoned pros, making them an excellent choice for entertaining a crowd or simply indulging in a special treat at home.
Recommended GF Flour: For the best results, always use a high-quality, reliable gluten-free measure-for-measure flour that includes xanthan gum. My personal top recommendation is King Arthur Measure-For-Measure Flour for its consistent performance. Alternatively, Bob’s Red Mill 1-to-1 Baking Flour is another fantastic option that will yield equally delicious results.
Would I make these again? Absolutely, without a doubt! These brown butter banana bars are a consistent hit whenever I make them. The best part? No one ever guesses they’re gluten-free, which makes them even more special!
xoxo erin
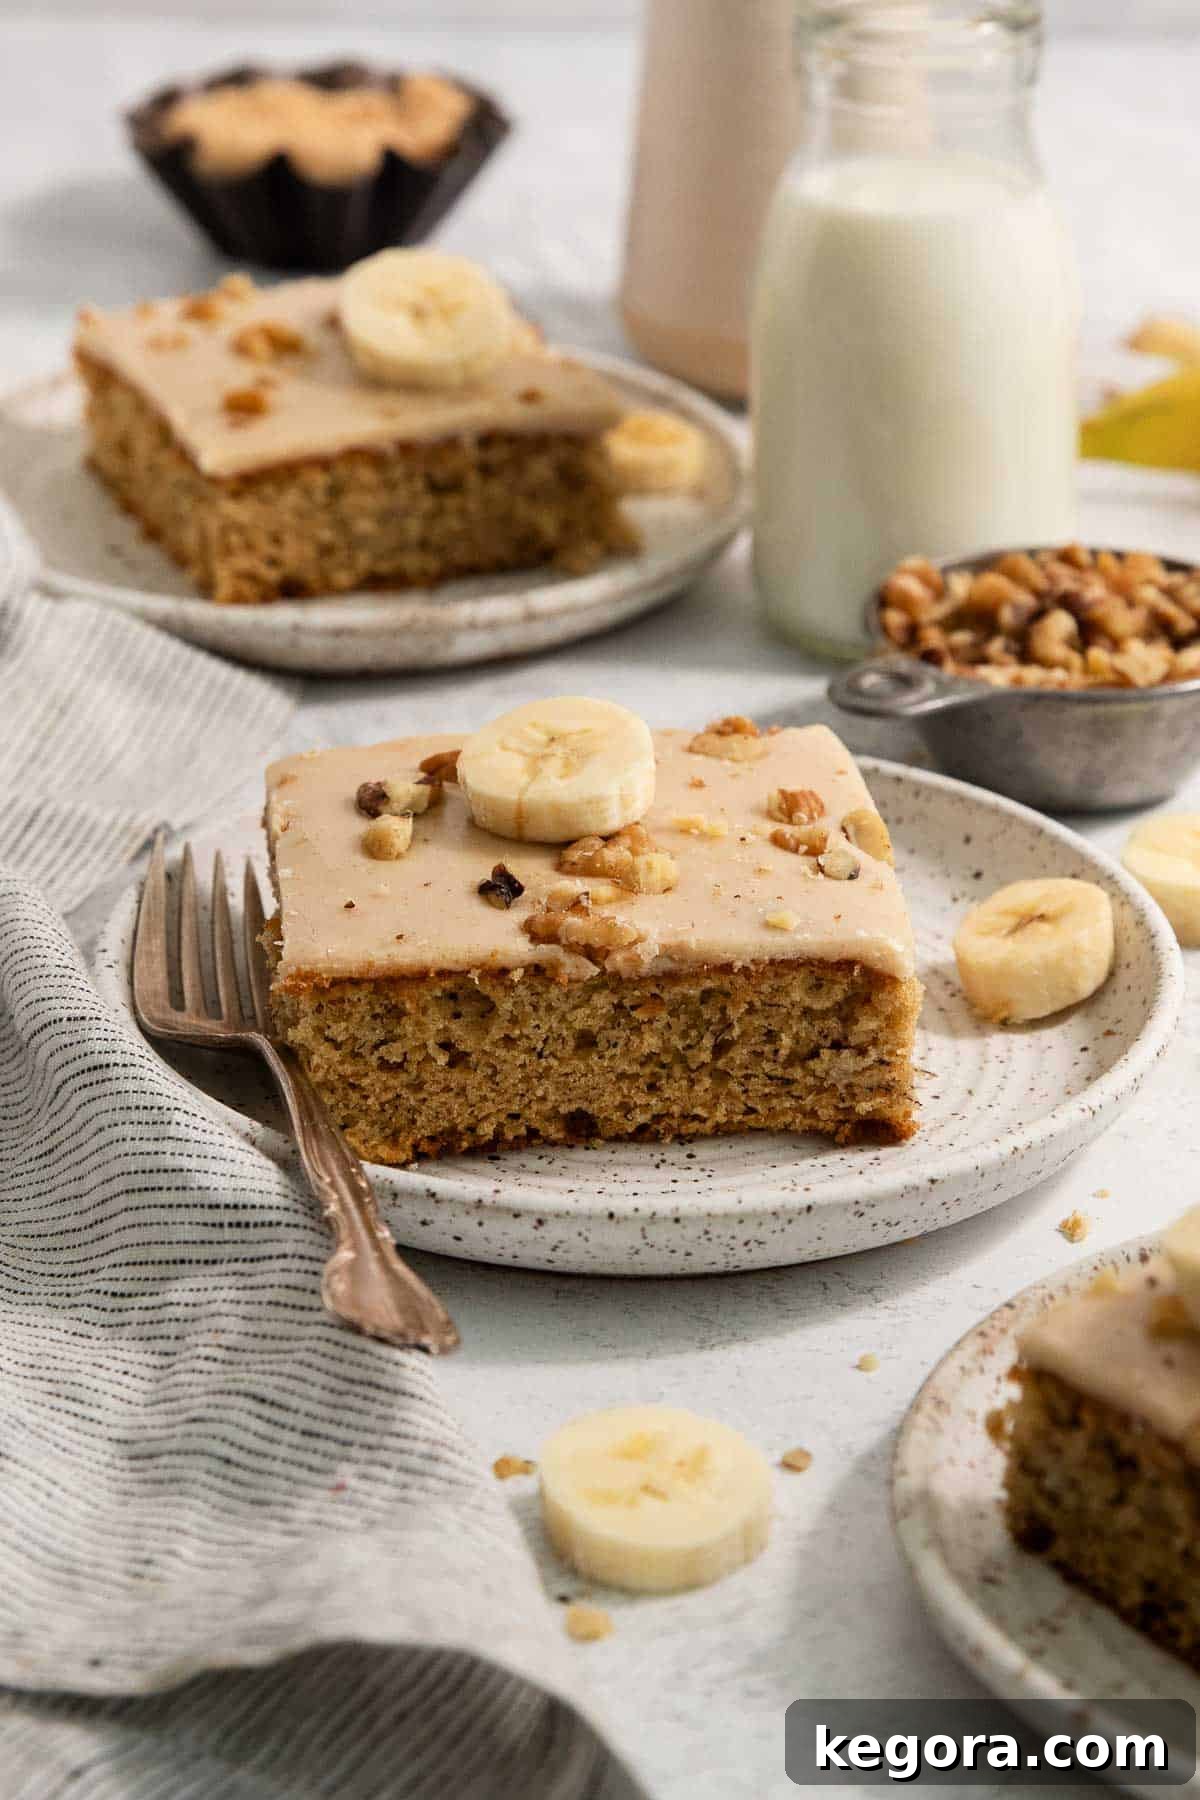
You might have enjoyed classic banana bars before, but have you ever savored them generously topped with a rich, nutty brown butter frosting? If that delightful combination hasn’t graced your palate yet, prepare for a culinary revelation! These gluten-free brown butter banana bars are destined to become your new go-to favorite dessert.
The deeply satisfying, rich, and nutty notes of brown butter create the perfect harmony with the sweet, comforting flavor of ripe bananas. It’s a match made in heaven that elevates a simple banana bar to an extraordinary treat. Trust me when I say, these bars are not just delicious; they are a guaranteed crowd-pleaser that will have everyone asking for the recipe!
Featured Comment
From Jenn: “I made these the other day! Oh my goodness what a hit! They were perfect. The frosting has a great almost toffee like flavor, the cake is moist. I even messed up the mixing order of ingredients for the cake but they were still perfect! Thank you for this recipe! It’s a keeper!”
18 more comments
Table of Contents
- Erin’s Recipe Rundown: Why You’ll Love These Bars
- The Magic of Brown Butter: Why It Elevates This Recipe
- Essential Ingredients for Perfect Banana Bars
- Step-by-Step Guide: Crafting Your Banana Bars
- Storage, Make-Ahead, and Freezing Tips
- Can these Gluten-Free Banana Bars be Made Dairy-Free?
- Why is Warm Frosting Recommended?
- Can I Use Other Frostings?
- More Delicious Gluten-Free Banana Desserts
- Gluten-Free Brown Butter Banana Bars Recipe Card
The Magic of Brown Butter: Why It Elevates This Recipe
What makes these banana bars truly unforgettable? It’s the brown butter frosting! Browning butter transforms it from a simple fat into a complex, aromatic ingredient. As butter gently cooks, its milk solids toast, developing an incredible nutty, caramel-like flavor and a delightful fragrance. This nuanced depth perfectly complements the sweet, fruity notes of ripe bananas, adding a sophisticated twist that regular butter simply can’t achieve. It’s this unique flavor profile that makes our brown butter banana bars stand out as a truly special dessert.
Essential Ingredients for Perfect Banana Bars
To create these utterly delicious gluten-free brown butter banana bars, you’ll need a selection of high-quality ingredients. Below are a few detailed notes on the key components. For precise measurements, please refer to the comprehensive recipe card at the bottom of this post.
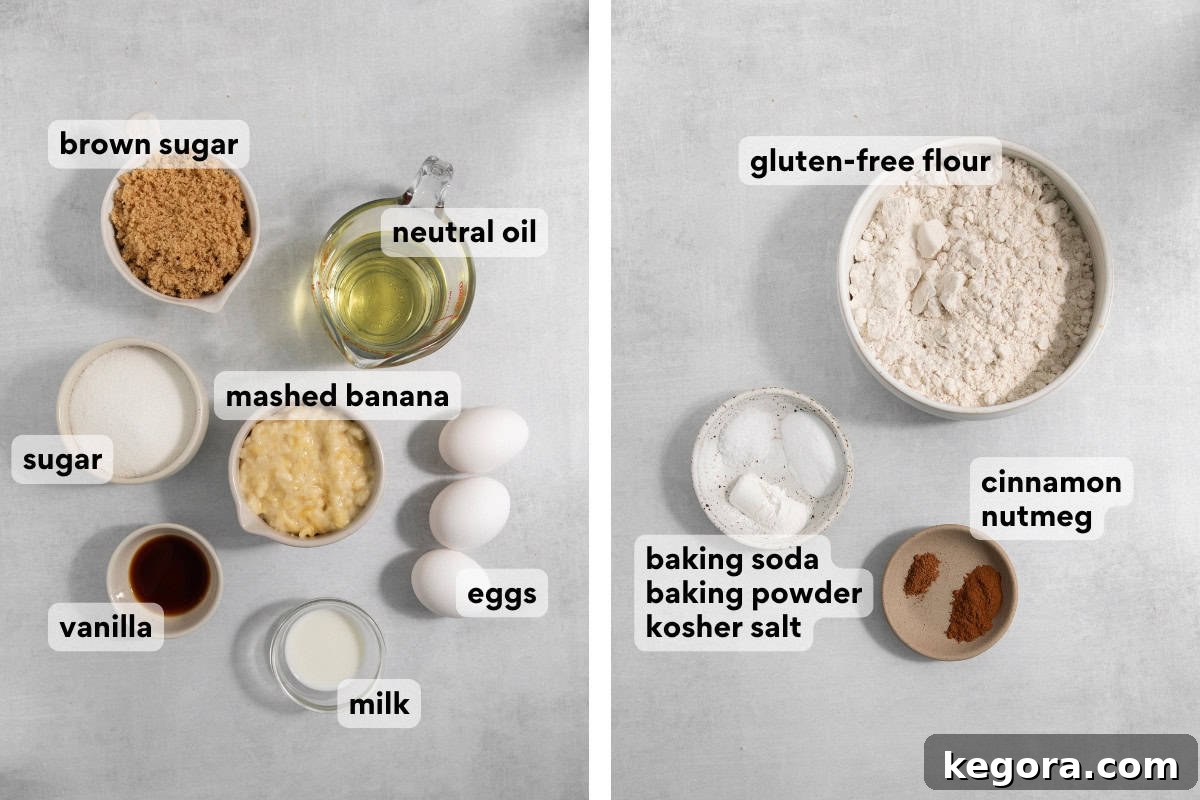
- Gluten-Free Flour: The foundation of our delightful bars! It’s absolutely crucial to use a “measure-for-measure” or “1-to-1” gluten-free flour blend that already contains xanthan gum. This ensures your bars have the correct structure and texture without becoming crumbly. My top recommendation for consistency and flavor is King Arthur Measure-for-Measure Flour. Another excellent choice that performs reliably is Bob’s Red Mill 1-to-1 Baking Flour. Using a quality blend is key to gluten-free baking success.
- Ripe Bananas: The riper, the better! For maximum sweetness and a deeply rich banana flavor, select bananas with plenty of brown speckles on their skins. These overripe bananas are naturally sweeter and mash easily, contributing to the moistness and intense flavor of the bars. Avoid using green or slightly yellow bananas, as they lack the necessary sugar content and aroma.
- Milk: This ingredient adds essential moisture and tenderness to the banana bar batter. You have flexibility here – any type of milk will work beautifully. If you’re aiming for dairy-free bars, simply opt for your preferred unsweetened dairy-free milk, such as almond, soy, or oat milk.
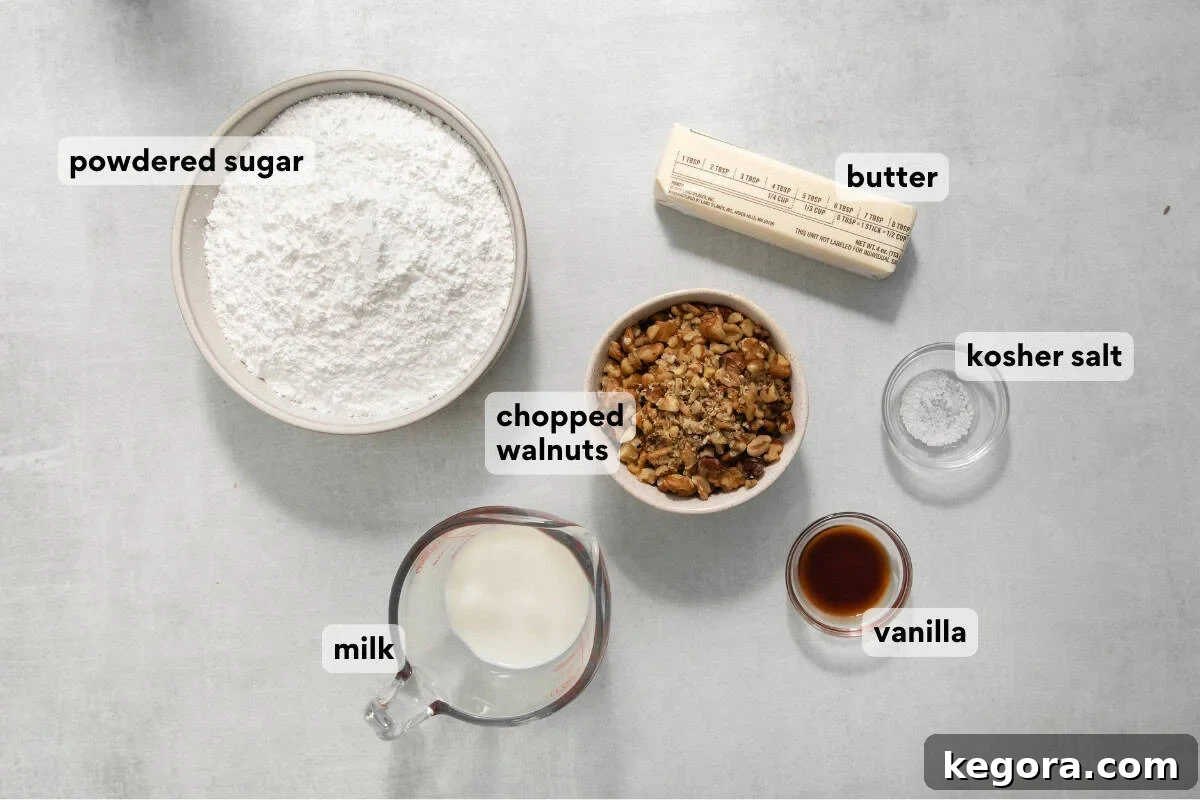
- Butter (for frosting): I prefer using salted butter for the brown butter frosting as it adds another layer of depth and balances the sweetness. The good news is you won’t need to soften it to room temperature; you’ll be melting and browning the butter directly in a skillet, which is part of the magic that creates that signature nutty flavor.
- Vanilla Extract: Don’t skimp on quality here! Real vanilla extract is paramount for enhancing the overall flavor profile of both the bars and the frosting. For an even more intense, luxurious vanilla experience, consider using vanilla bean paste. Its concentrated flavor and visible specks will elevate your dessert significantly.
- Chopped Walnuts (optional): These add a fantastic textural contrast and a pleasant nutty flavor to the bars. If you’re a fan of nuts, sprinkle them generously on top for that extra crunch. However, if walnuts aren’t to your taste or if you have allergies, feel free to omit them entirely – the bars will still be incredibly delicious!
Step-by-Step Guide: Crafting Your Brown Butter Banana Bars
Creating these heavenly gluten-free brown butter banana bars is a straightforward and rewarding process. Follow these steps carefully to ensure a perfect batch every time. For a complete list of ingredients and detailed measurements, remember you can jump to the full recipe card below!
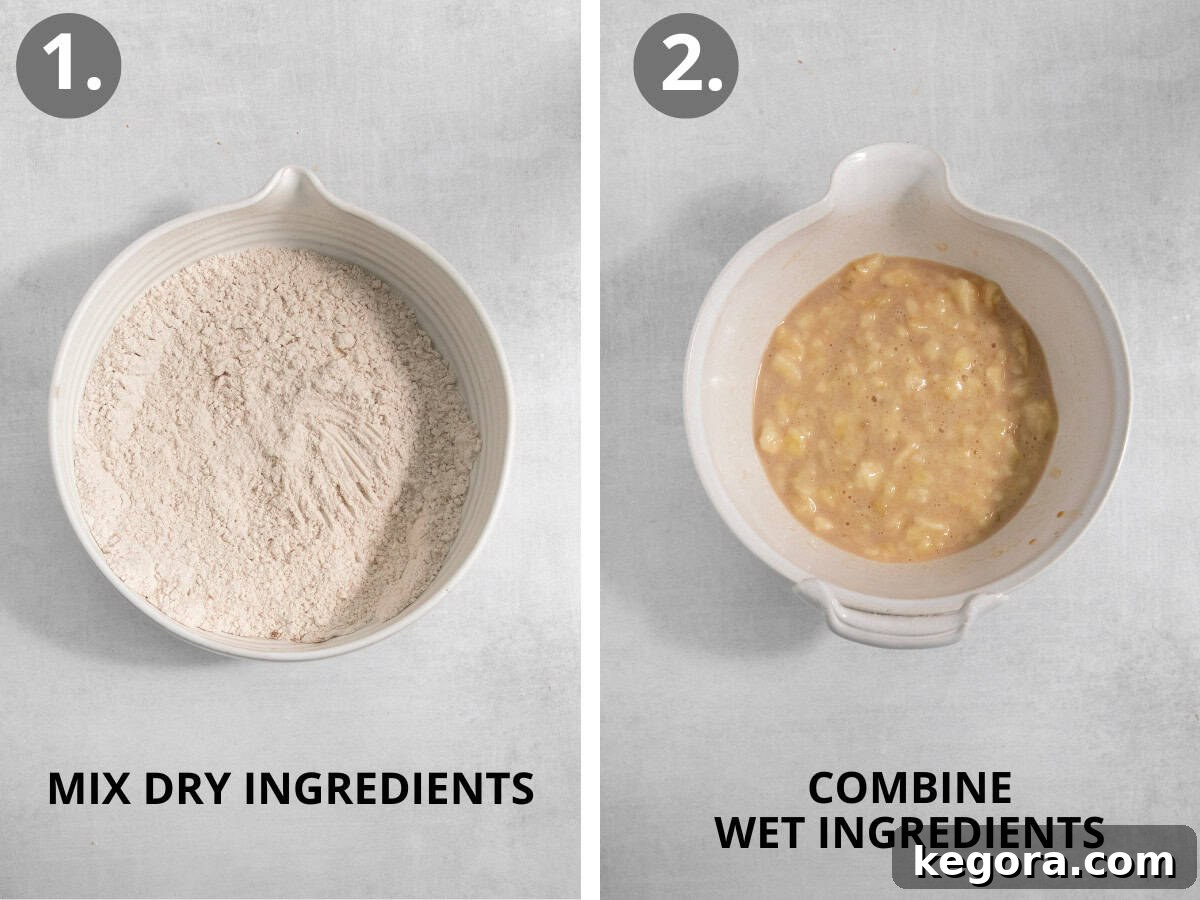
- Prepare Dry Ingredients: In a large mixing bowl, meticulously whisk together your gluten-free flour, baking soda, baking powder, kosher salt, ground cinnamon, and ground nutmeg. Whisking ensures these dry ingredients are thoroughly combined and evenly distributed, which is crucial for the uniform rise and flavor of your bars.
- Prepare Wet Ingredients: In a separate, smaller bowl or a large measuring cup, combine your mashed ripe banana, milk of choice, and vanilla extract. Give this mixture a good stir until everything is well incorporated. This banana mixture will bring essential moisture and flavor to the batter.
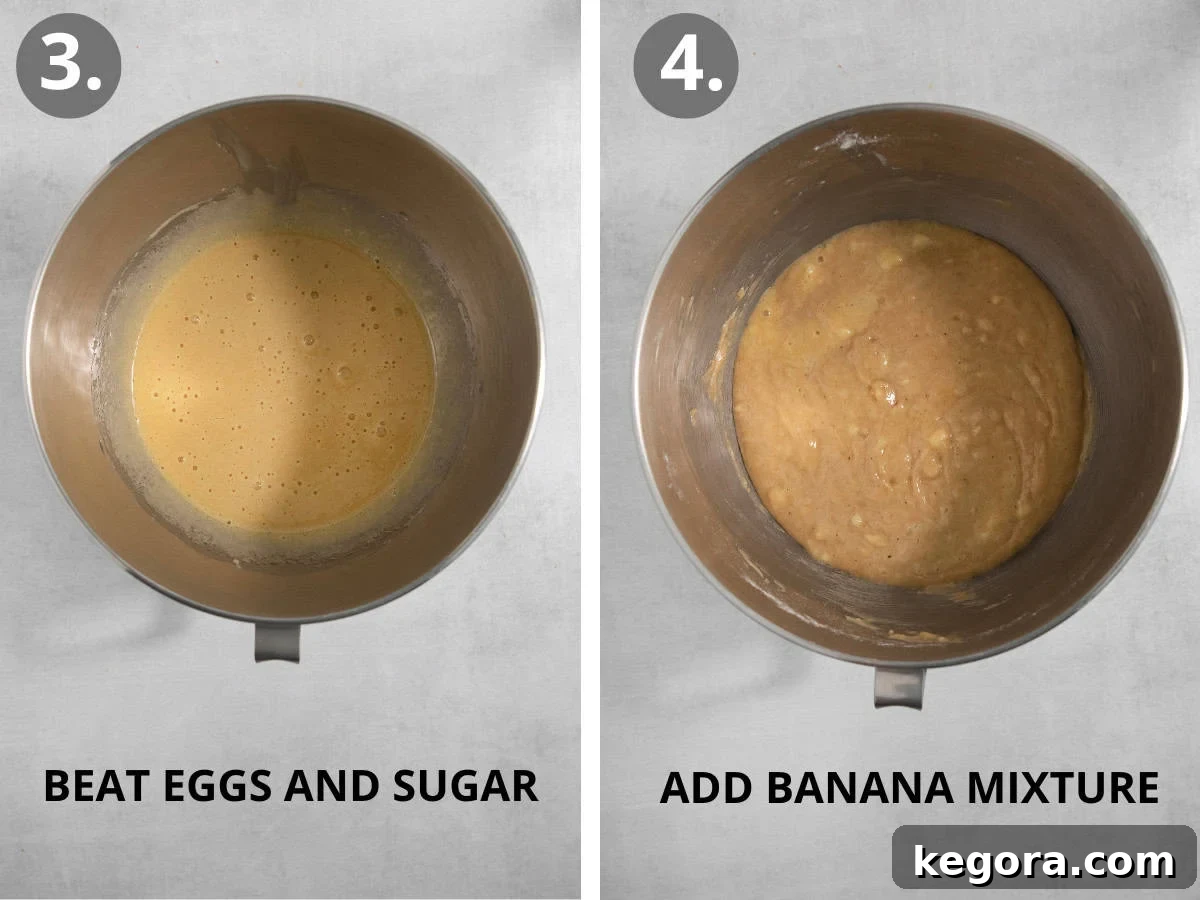
- Cream Eggs and Sugars: In the bowl of a stand mixer fitted with the paddle attachment, or using a hand mixer, add the large eggs, granulated sugar, and brown sugar. Beat these ingredients together on medium-high speed for about 2-3 minutes. You’re looking for a mixture that becomes light, fluffy, and noticeably pale in color. This step incorporates air, contributing to the bars’ tender texture. Once fluffy, slowly drizzle in the neutral oil with the mixer running on low speed, mixing until just combined.
- Combine Wet and Dry: With your mixer still running on low, carefully add about half of the whisked dry ingredients to the egg and sugar mixture. Mix until just combined, being careful not to overmix. Then, add half of your banana mixture and mix again. Repeat this process with the remaining dry ingredients and banana mixture, ensuring you mix well after each addition. Finally, scrape down the sides and bottom of the bowl with a spatula to ensure all ingredients are fully incorporated and there are no dry pockets remaining.
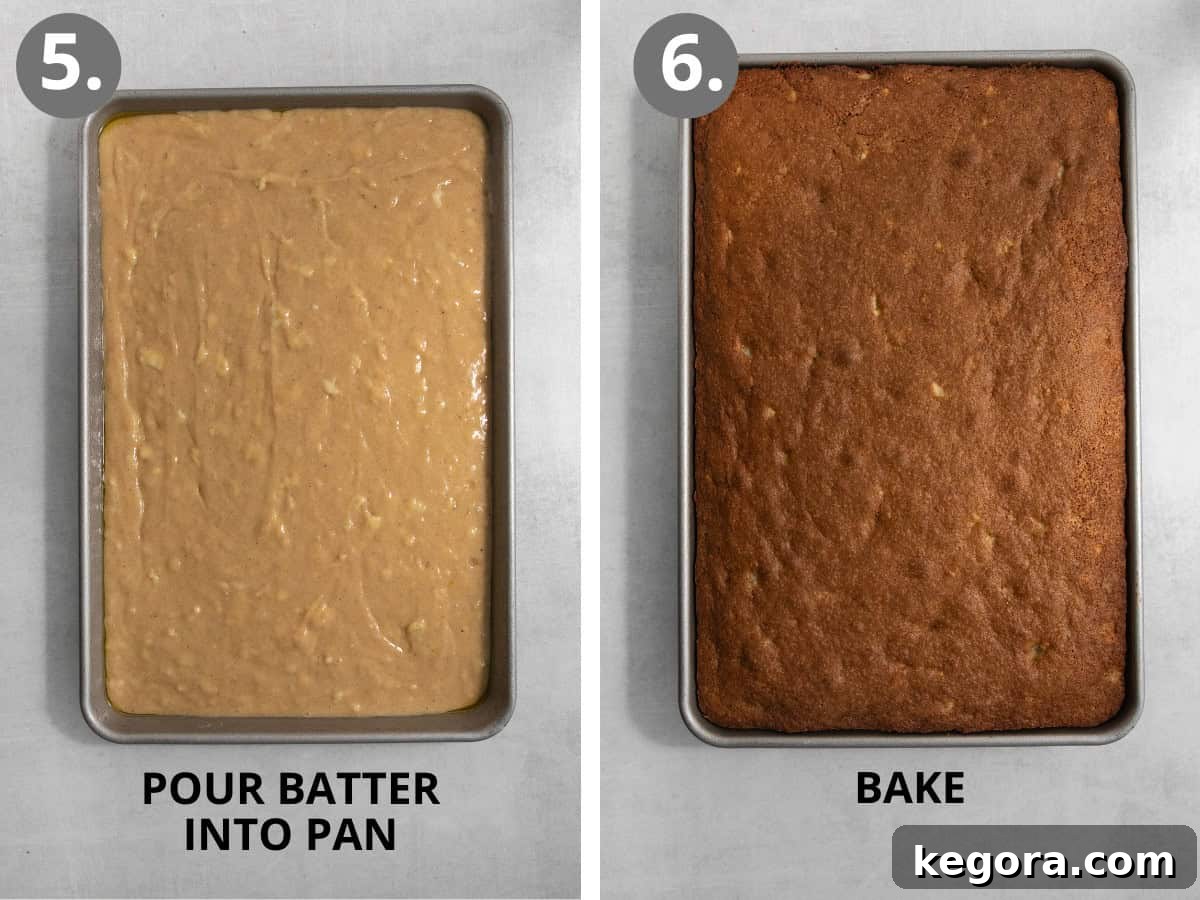
- Pour and Bake: Gently pour the prepared batter into your prepped 10×15-inch jelly roll pan. Use an offset spatula or the back of a spoon to spread the batter into an even, uniform layer across the pan. This ensures even baking.
- Bake to Perfection: Transfer the pan to your preheated oven and bake for approximately 25-30 minutes. The bars are ready when a toothpick inserted into the center comes out clean or with only a few moist crumbs attached. Avoid overbaking, as this can lead to dry bars.
Mastering the Brown Butter Frosting
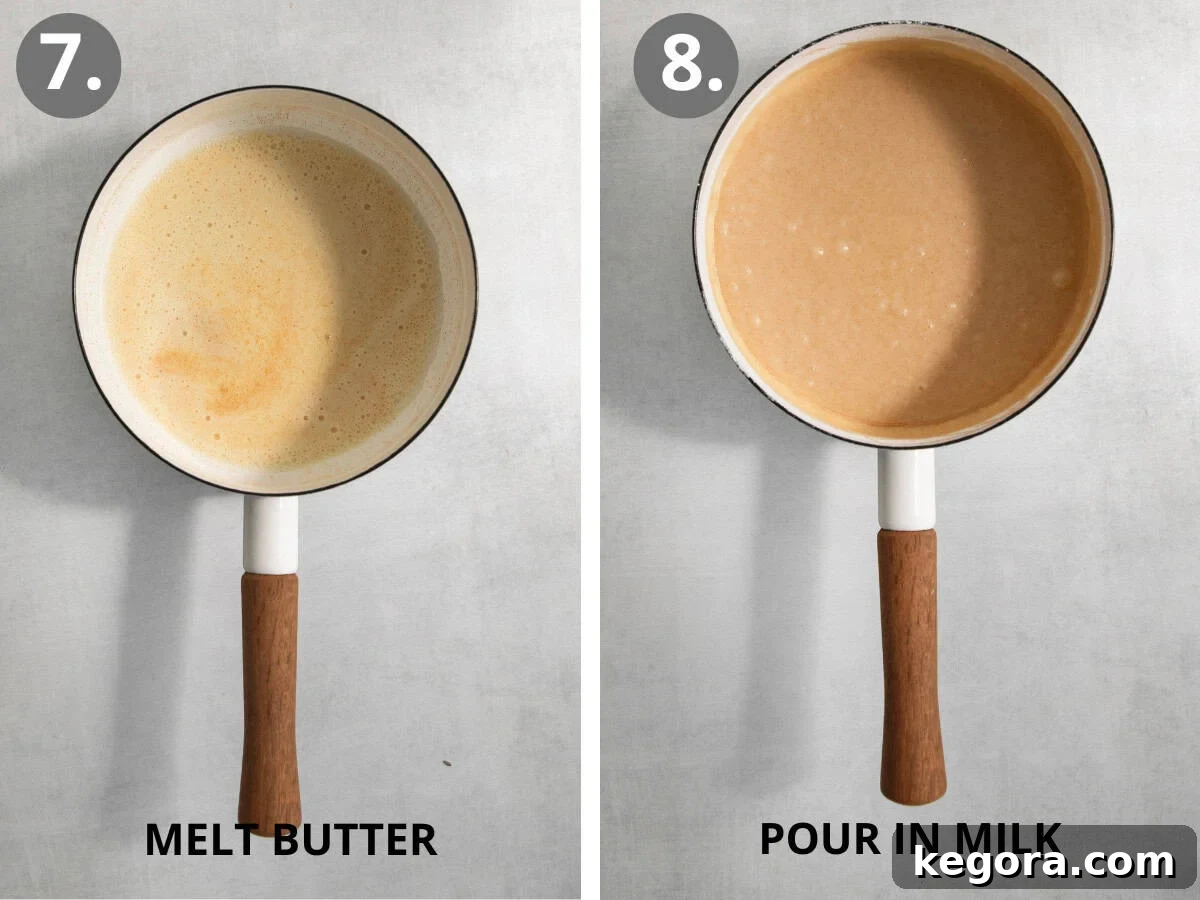
- Melt and Brown Butter: Begin preparing your brown butter frosting shortly after the banana bars come out of the oven, as you’ll want to frost them while they’re still warm. In a medium skillet, melt the butter over medium-low heat, stirring occasionally. As the butter melts, it will begin to foam. Continue stirring to prevent the milk solids from sticking to the bottom of the pan. The butter will transition from yellow to a beautiful golden brown color, releasing a distinct, nutty aroma. This transformation happens quickly, so watch it closely to avoid burning.
- Create the Frosting Base: Once the butter reaches that perfect golden-brown, nutty stage, carefully pour in the milk and bring the mixture to a gentle simmer. As soon as it begins to simmer, immediately remove the skillet from the heat. Whisk in the powdered sugar, vanilla extract, and a pinch of kosher salt until the frosting is completely smooth and free of lumps.
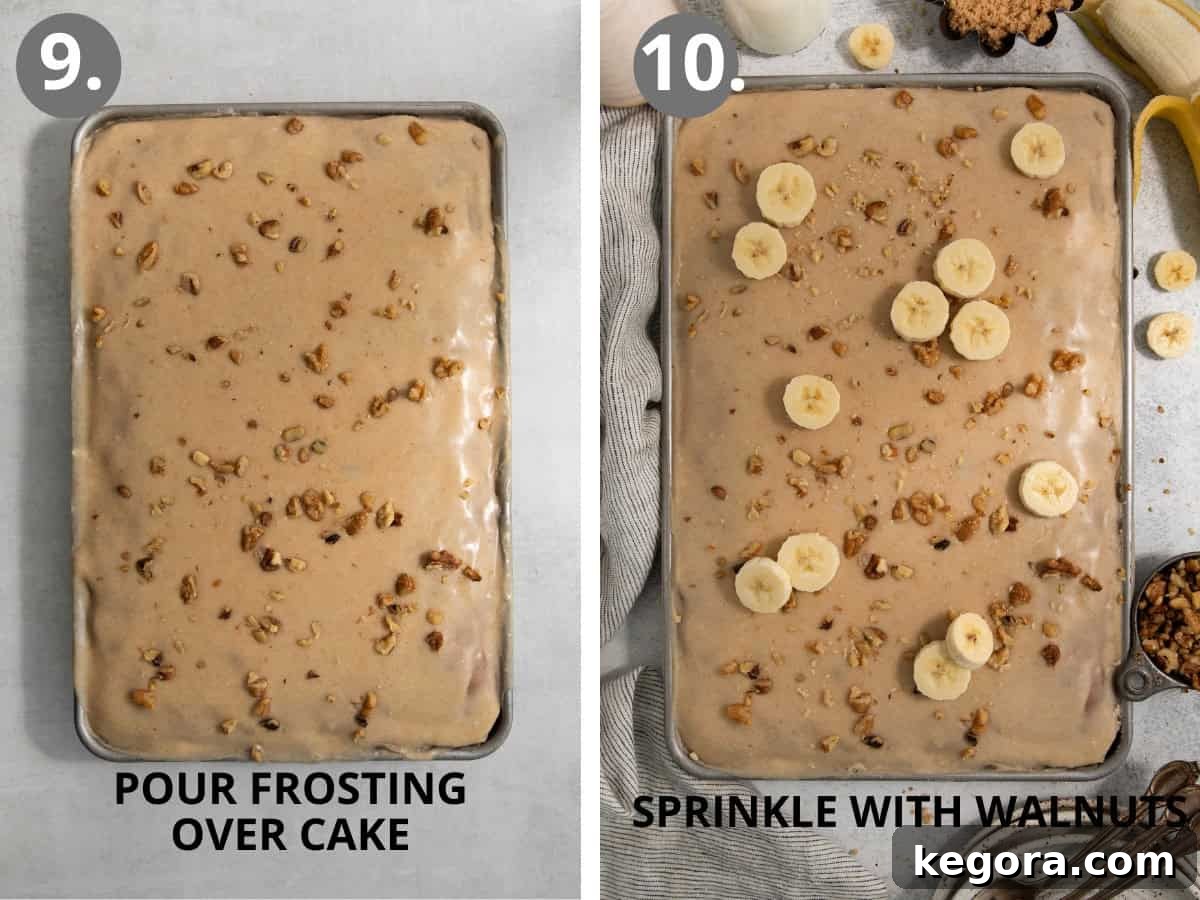
- Frost While Warm: This is a crucial step for achieving the best texture and flavor! Immediately pour the warm brown butter frosting over the slightly cooled banana bars (allow them to cool for about 10-15 minutes after baking). Use an offset spatula to smooth the frosting into an even layer. The warmth of the bars helps the frosting spread beautifully and allows a subtle absorption, creating an incredibly moist and flavorful dessert.
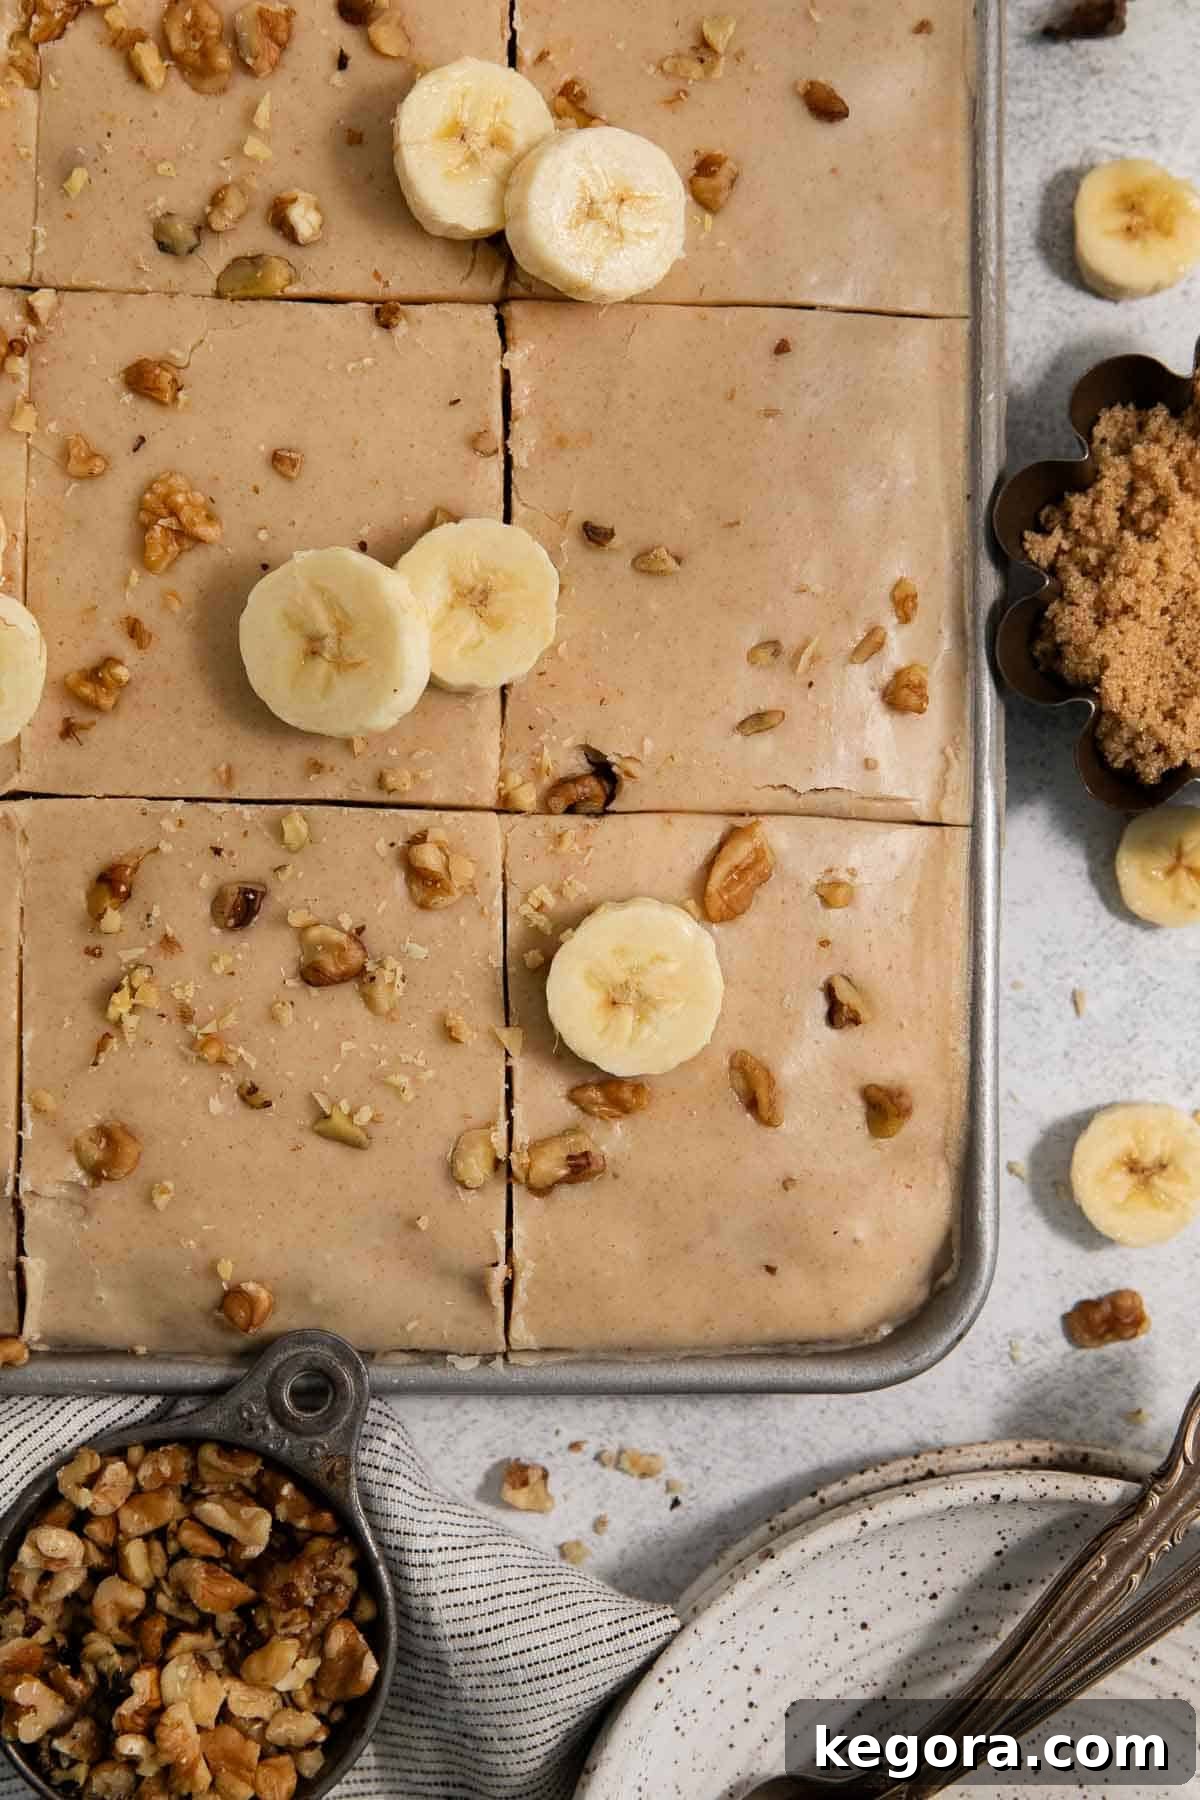
- Garnish and Serve: If desired, generously sprinkle your freshly frosted bars with finely chopped walnuts. You can also add thin banana slices just before serving for an elegant touch, but be mindful that fresh banana slices will brown quickly. Allow the bars to cool completely before slicing them into squares and serving. Enjoy!
Storage, Make-Ahead, and Freezing Tips for Your Banana Bars
To ensure your gluten-free brown butter banana bars stay fresh and delicious, here are some helpful guidelines for storage and preparation:
- To Store: Keep your frosted banana bars in an airtight container at room temperature for up to three days. Due to their wonderfully moist nature, they tend to be softer than some other bar or brownie recipes, so consuming them within this timeframe is ideal for the best quality.
- To Make Ahead: These banana bars are a fantastic option for preparing one day in advance of an event or gathering. Be sure to apply the brown butter frosting while the bars are still slightly warm, as directed, to achieve that perfect seeped-in texture. If you plan to add walnuts, sprinkle them on after frosting. However, avoid adding fresh banana slices if making ahead, as they will brown and lose their appeal quickly. Once frosted and cooled, cover the pan tightly with plastic wrap or a jelly roll pan lid. Slice the bars just before you are ready to serve them for the freshest presentation.
- To Freeze: For longer storage, these frosted banana bars freeze exceptionally well. Arrange the bars in an airtight freezer-safe container, or wrap them tightly in multiple layers of plastic wrap followed by aluminum foil. They can be frozen for up to 3 months. If stacking layers of bars, place a piece of parchment or wax paper between each layer to prevent sticking. Thaw them overnight in the refrigerator or at room temperature for a few hours before serving.
Can these Gluten-Free Banana Bars be Made Dairy-Free?
Absolutely, yes! Making these delicious banana bars dairy-free is quite simple. For the banana bar batter itself, merely substitute your favorite unsweetened dairy-free milk (such as almond, soy, or oat milk) for regular milk. When it comes to the frosting, you’ll need to adjust the method slightly. Skip the browning step entirely and simply use melted dairy-free butter. It’s important to note that dairy-free butter does not brown in the same way traditional butter does, so you won’t achieve that nutty browned butter flavor. However, the melted dairy-free butter, when whisked into the other frosting ingredients (powdered sugar, dairy-free milk, vanilla, and salt), will still create a wonderfully rich and creamy frosting. Proceed with frosting the bars as directed.
Why is Warm Frosting Recommended?
Frosting the banana bars while they are still warm (after cooling for 10-15 minutes out of the oven) is a secret to their incredible texture and flavor. The gentle warmth of the bars helps the frosting spread more smoothly and evenly, creating a beautiful, glossy finish. More importantly, this warmth allows the frosting to slightly seep into the top layer of the bars, infusing them with extra moisture and the rich, nutty brown butter flavor. The result is an ultra-moist, tender bar with a harmonious blend of flavors that truly enhances the overall dessert experience.
Can I Use Other Frostings?
While the brown butter frosting is a key element that makes these banana bars uniquely delicious and truly special, you certainly can use a different type of frosting if you prefer. A classic cream cheese frosting, a simple vanilla buttercream, or even a rich chocolate ganache would all be delightful alternatives and pair well with the banana base. If you opt for a different frosting, I recommend allowing the banana bars to cool down completely to room temperature before applying the frosting. This ensures your alternative frosting sets properly and doesn’t melt into the warm cake, maintaining its intended texture and appearance.
More Delicious Gluten-Free Banana Desserts to Explore
If you’re a fan of the delightful flavor of bananas and looking for more gluten-free baking inspiration, you’re in luck! Here are some other fantastic banana-infused desserts that are sure to satisfy your cravings:
- Gluten-Free Banana Bread: A classic comfort, perfectly moist and flavorful.
- Gluten-Free Banana Cookies: Soft, chewy, and bursting with banana goodness.
- Dairy-Free Banana Cream Pie: A creamy, indulgent pie that’s surprisingly dairy-free.
- Gluten-Free Banana Cake: A festive and tender cake perfect for any occasion.
- Gluten-Free Banana Pudding: Layers of creamy pudding, vanilla wafers, and fresh bananas.
- Gluten-Free Banana Muffins: Ideal for breakfast or a quick snack, always a family favorite.
- Banana Pancakes: A healthy, grain-free, and dairy-free option for breakfast.
Gluten-Free Brown Butter Banana Bars
Erin Collins
25 mins
25 mins
12
My top tips are to use a high-quality gluten-free measure-for-measure flour and to frost the cake while it’s still warm for perfect consistency.
Comments
Ingredients
Dry Ingredients
- 1¾ cups (262g) gluten-free measure-for-measure flour
- 1 teaspoon baking soda
- 1 teaspoon baking powder
- ¾ teaspoon kosher salt
- ½ teaspoon ground cinnamon
- ¼ teaspoon ground nutmeg
Other Ingredients
- 1 cup (230g) mashed ripe banana about 2-3 bananas
- 2 tablespoons milk of choice
- 2 teaspoons vanilla extract
- 3 large eggs
- ¾ cup (150g) granulated sugar
- ½ cup (106g) brown sugar
- ⅔ cup (160ml) neutral oil
Brown Butter Frosting
- ½ cup (113g) butter
- ⅓ cup (80ml) milk
- 4 cups (480g) powdered sugar
- 1 teaspoon vanilla extract
- pinch kosher salt
- 1 cup (130g) finely chopped walnuts optional
Instructions
-
Preheat your oven to 375°F (190°C). Prepare a 10×15-inch jelly roll pan by lightly spraying it with cooking spray to prevent sticking.
-
In a large bowl, combine the gluten-free measure-for-measure flour, baking soda, baking powder, kosher salt, ground cinnamon, and ground nutmeg. Whisk thoroughly until all dry ingredients are well integrated.
-
In a separate small bowl or a large measuring cup, mix together the mashed ripe banana, your chosen milk, and vanilla extract until smooth.
-
In the bowl of a stand mixer (or using a hand mixer), add the eggs, granulated sugar, and brown sugar. Beat on medium-high speed for 2-3 minutes until the mixture is light, fluffy, and visibly pale. With the mixer on low speed, slowly drizzle in the neutral oil until just combined.
-
With the mixer still running on low, gradually add half of the dry ingredients, mixing until just combined. Next, add half of the banana mixture, mixing gently. Repeat this process with the remaining dry ingredients and banana mixture. Ensure you scrape the bottom and sides of the bowl to fully incorporate all ingredients.
-
Pour the prepared batter into the greased jelly roll pan and spread it into an even layer using an offset spatula or the back of a spoon.
-
Bake for 25-30 minutes, or until a wooden toothpick inserted into the center of the bars comes out clean, indicating they are fully baked.
-
For the Brown Butter Frosting: You will want to apply the frosting while the cake is still warm. Begin making the frosting as soon as the banana bars are out of the oven, allowing the baked bars to cool for 10-15 minutes while you prepare the frosting.
-
In a medium skillet, melt the butter over medium-low heat, stirring occasionally.
-
Once the butter is fully melted and starts to foam, stir continuously. The butter will rapidly change color from yellow to a rich golden brown, developing a distinct nutty aroma. This browning process ensures the unique flavor.
-
Immediately pour in the milk and bring the mixture to a simmer. Once simmering, remove the skillet from the heat and whisk in the powdered sugar, vanilla extract, and a pinch of salt until the frosting is completely smooth and velvety.
-
Pour the warm frosting over the slightly cooled banana bars. Use an offset spatula to smooth the frosting into an even, consistent layer. If desired, sprinkle generously with finely chopped walnuts. Allow the bars to cool completely to set the frosting before slicing and serving.
Notes
Dairy-Free Adaptation: To make these bars dairy-free, simply use your favorite unsweetened dairy-free milk in the banana bar batter. For the frosting, omit steps 9-11 (the browning process) and instead use melted dairy-free butter. Please note that dairy-free butter will not brown in the same way traditional butter does, so the distinct nutty flavor of brown butter will be absent. Whisk the melted dairy-free butter into the remaining frosting ingredients and frost as directed.
Nut-Free Option: If you or your guests have nut allergies or simply prefer not to use them, you can easily omit the walnuts without affecting the core recipe.
Nutrition Information (per serving)
Carbohydrates: 79g |
Protein: 5g |
Fat: 29g |
Saturated Fat: 7g |
Polyunsaturated Fat: 9g |
Monounsaturated Fat: 11g |
Trans Fat: 0.4g |
Cholesterol: 62mg |
Sodium: 321mg |
Potassium: 168mg |
Fiber: 3g |
Sugar: 63g |
Vitamin A: 321IU |
Vitamin C: 1mg |
Calcium: 65mg |
Iron: 1mg
These Gluten-Free Brown Butter Banana Bars are more than just a dessert; they are a delightful experience that brings together comforting flavors and a perfect texture. Whether you’re baking for a special occasion or simply treating yourself, this recipe promises ease and an unforgettable taste. Don’t hesitate to whip up a batch and share the joy!