
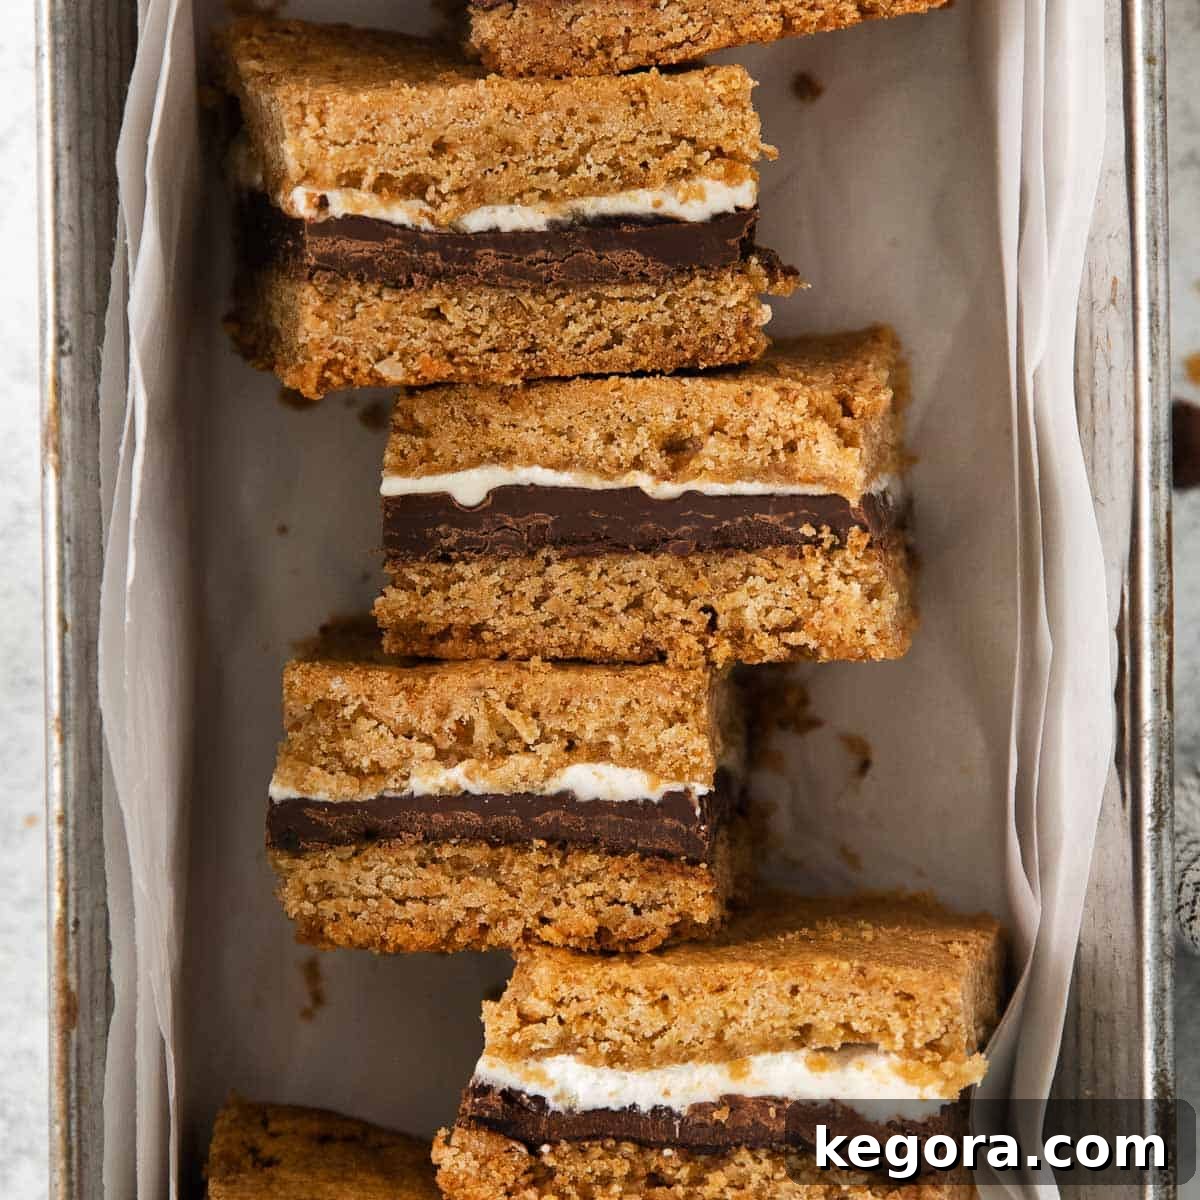
Indulge in Homemade Bliss: The Ultimate Gluten-Free S’mores Bars Recipe
Welcome to Erin’s Kitchen, where we transform classic treats into delightful gluten-free experiences! Today, we’re diving into a recipe that promises all the nostalgic joy of campfire s’mores without the need for a roaring fire or sticky fingers: our incredibly delicious and easy-to-make **Gluten-Free S’mores Bars**. Imagine sinking your teeth into layers of chewy graham cracker cookie, rich melted chocolate, and irresistibly gooey marshmallow, all baked to golden perfection in a convenient tray bake. This recipe is a guaranteed crowd-pleaser for any summer gathering, party, or simply a sweet family night in.
Erin’s Recipe Rundown: A Quick Look
Before we jump into the full instructions, here’s a snapshot of what makes these s’mores bars truly special:
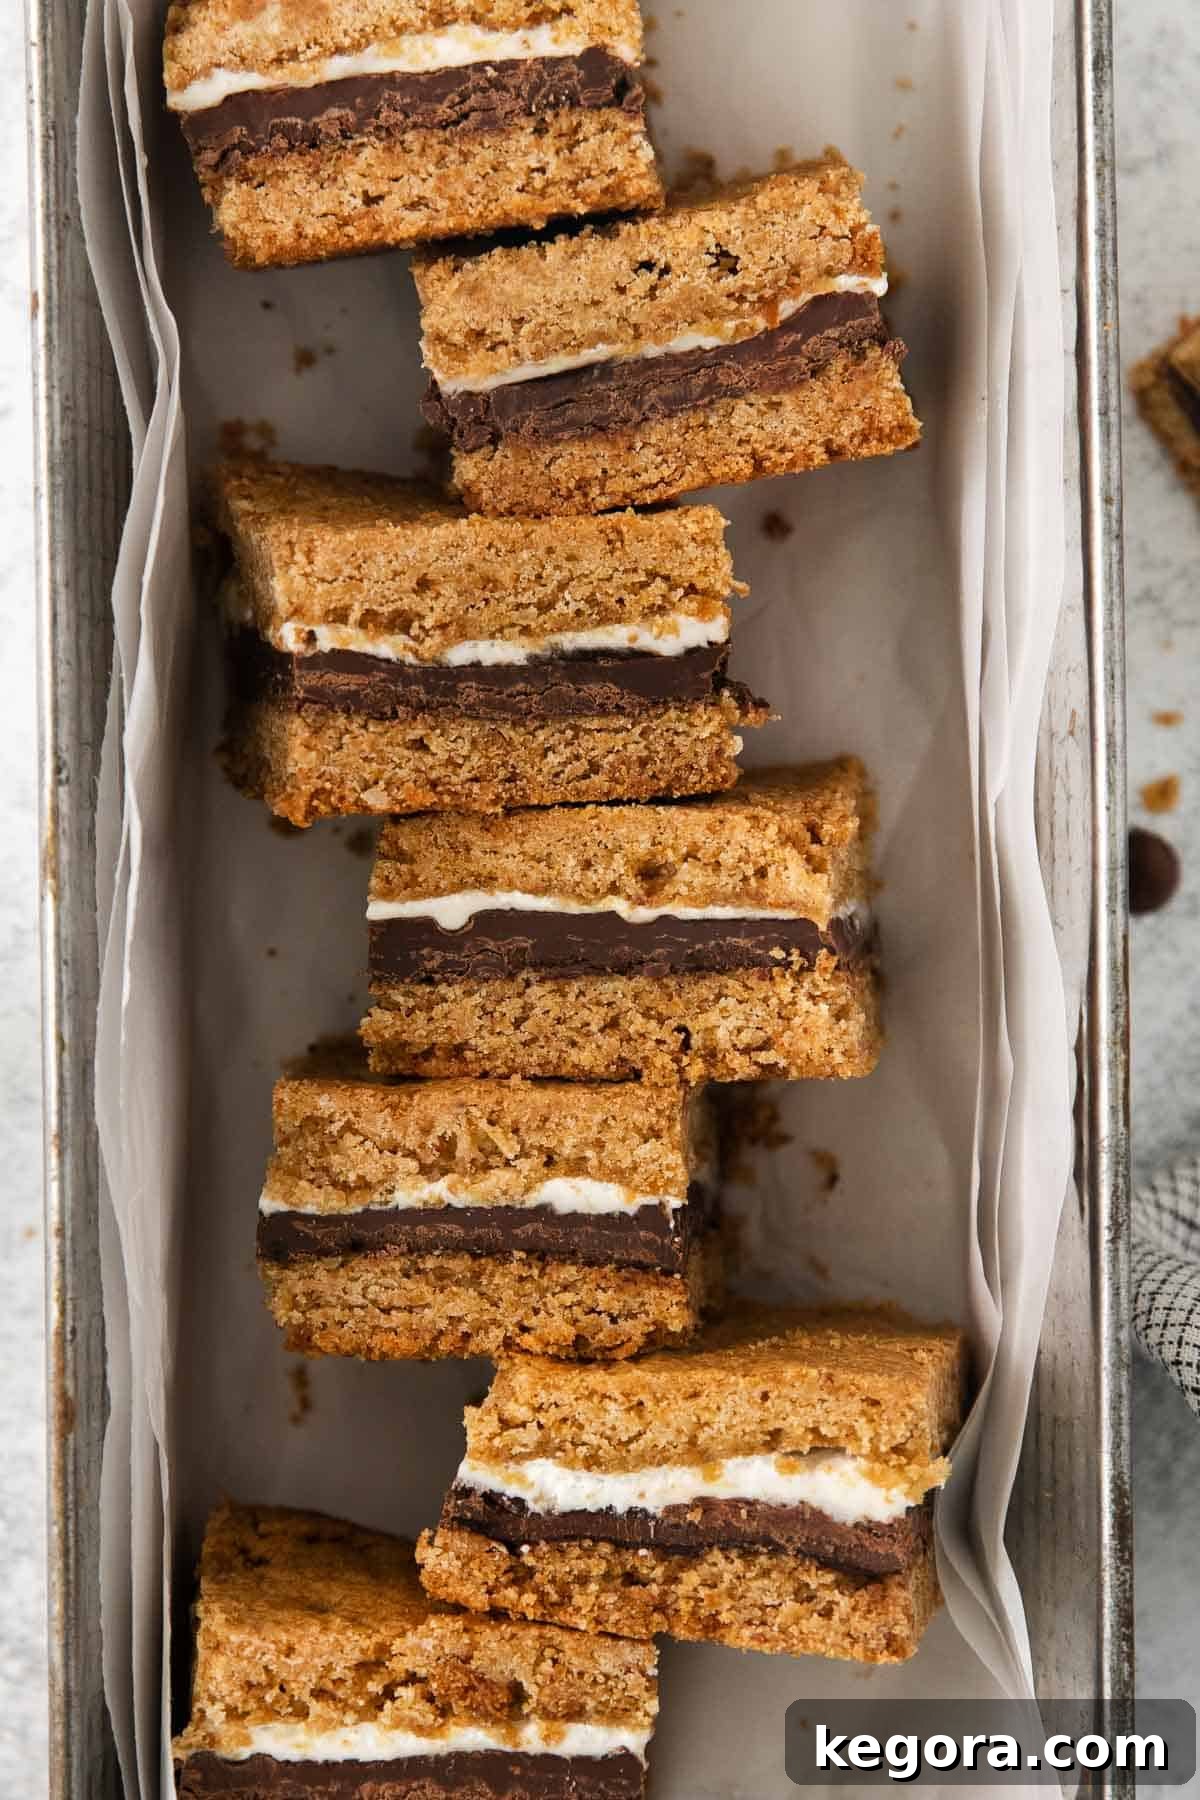
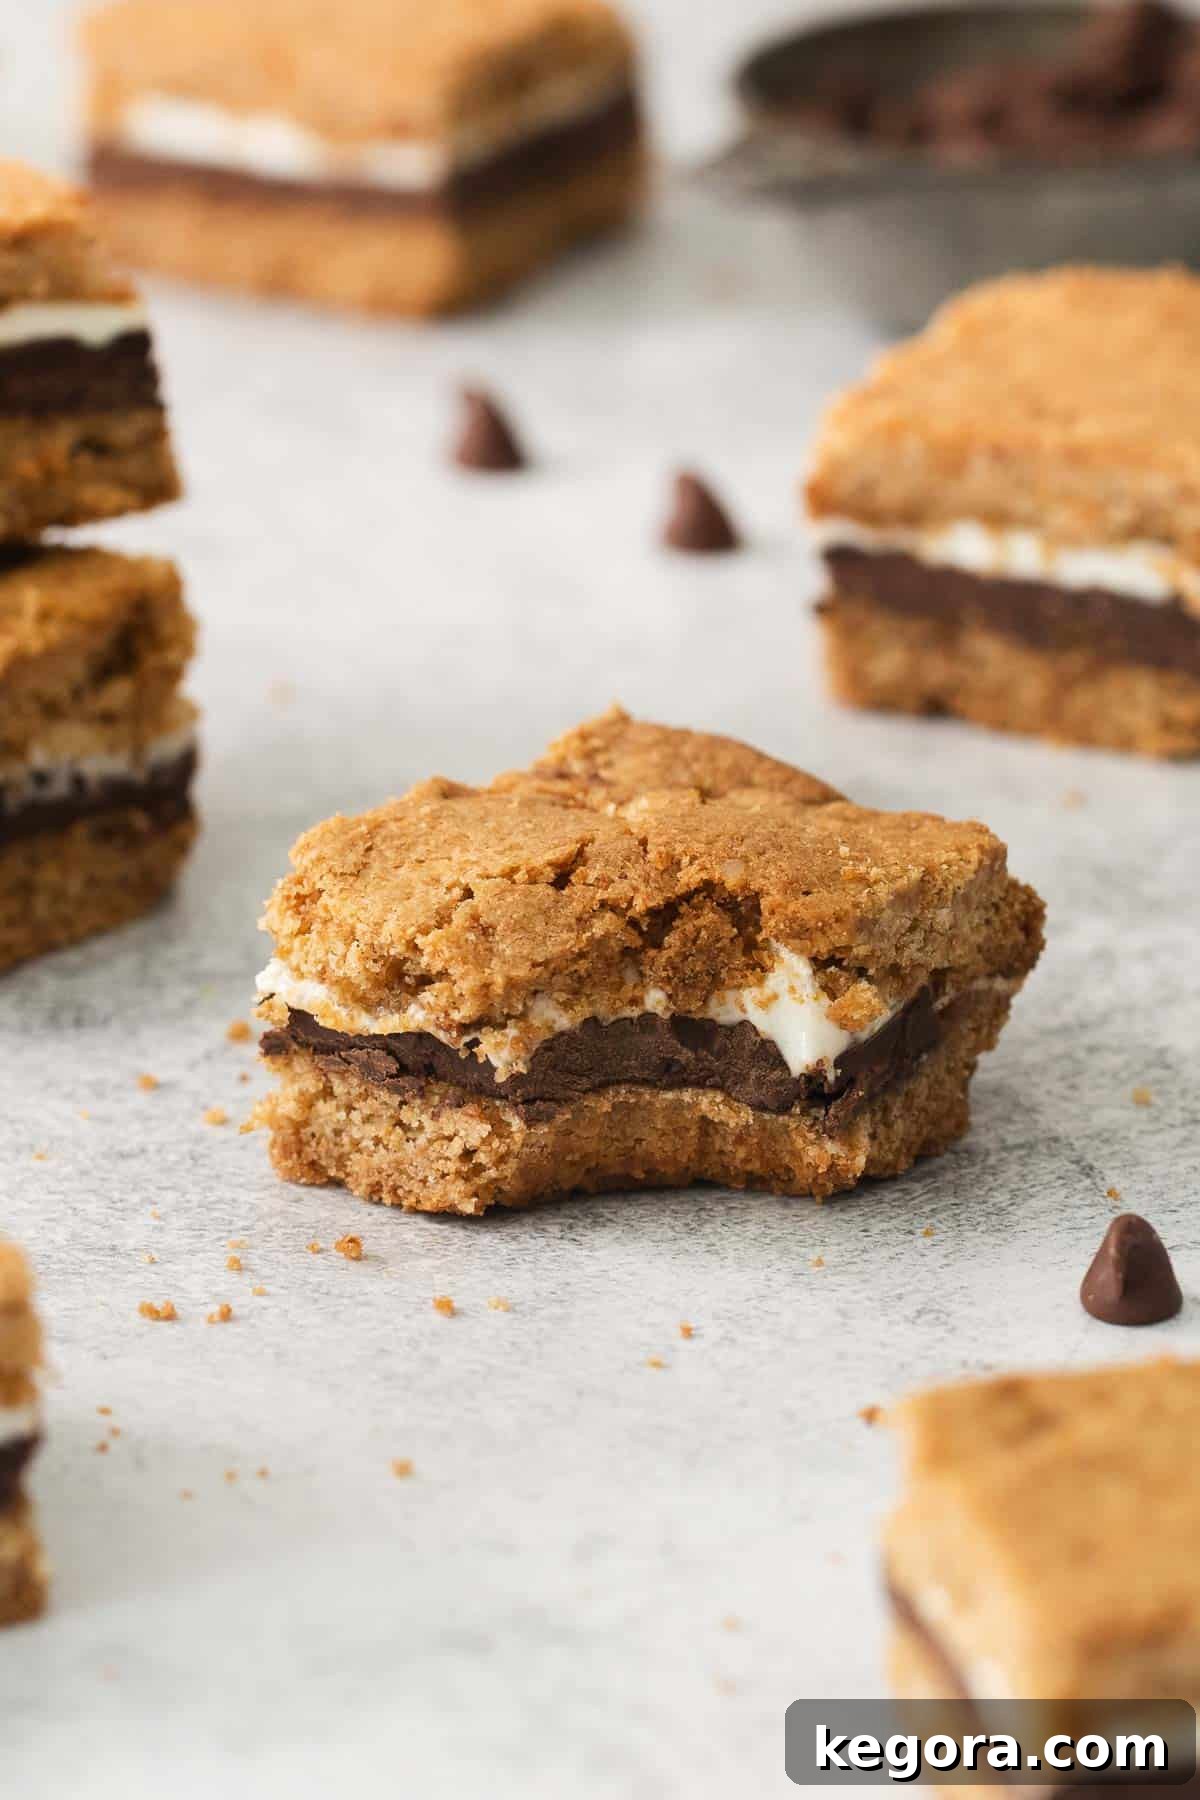
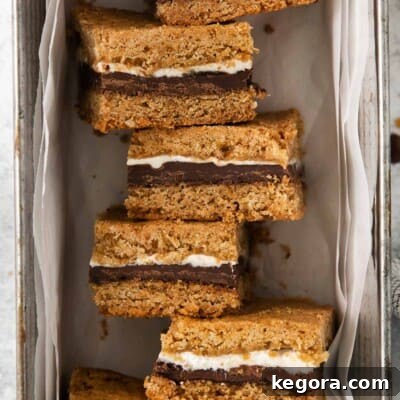
- Texture: Prepare for a symphony of textures! You’ll experience the satisfying chewiness of two golden-brown gluten-free graham cracker cookie layers, encasing a generous, thick layer of luscious melted chocolate, crowned with perfectly gooey, slightly toasted marshmallow. Each bite is a delightful blend of soft, chewy, and melt-in-your-mouth goodness.
- Taste: These bars deliver pure, unadulterated sweet, chocolatey bliss. The subtle honey notes of the graham cracker crust perfectly complement the rich chocolate and the sweet, airy marshmallow, creating a harmonious flavor profile that echoes the classic campfire treat.
- Ease: Forget the outdoor hassle! This recipe offers an incredibly easy and far less messy way to enjoy s’mores. It’s designed for simplicity, making it accessible even for novice bakers. Just a few straightforward steps stand between you and s’mores perfection.
- Top Tips: For the absolute best results and picture-perfect slices, I cannot emphasize this enough: allow the bars to cool *completely* before attempting to cut and serve them. This patience will be rewarded with firm, well-structured bars that hold their layers beautifully.
- Recommended GF Flour: My go-to for this particular recipe, ensuring a consistent and delicious outcome, is King Arthur Gluten-Free Measure-for-Measure Flour. Its reliable blend provides the perfect texture for the cookie layers.
- Would I make these again? Without a shadow of a doubt, 100% YES! This tray bake rendition of the beloved classic is not only incredibly satisfying but also an absolute must-have for any summer party or get-together. It’s a total crowd-pleaser that requires no campfire, just an oven and a craving for deliciousness!
xoxo erin
Featured Comment
From Sharina: “These s’mores bars are a hit! Kids at my nephew’s birthday party loved them. So delicious and a total crowd favorite!“
Read 31 more comments
Essential Ingredients for Perfect Gluten-Free S’mores Bars
Creating these irresistible gluten-free s’mores bars starts with selecting the right ingredients. Here are a few detailed notes on some of the key components to ensure your bars turn out perfectly every time. For the precise measurements, please refer to the recipe cardbelow.
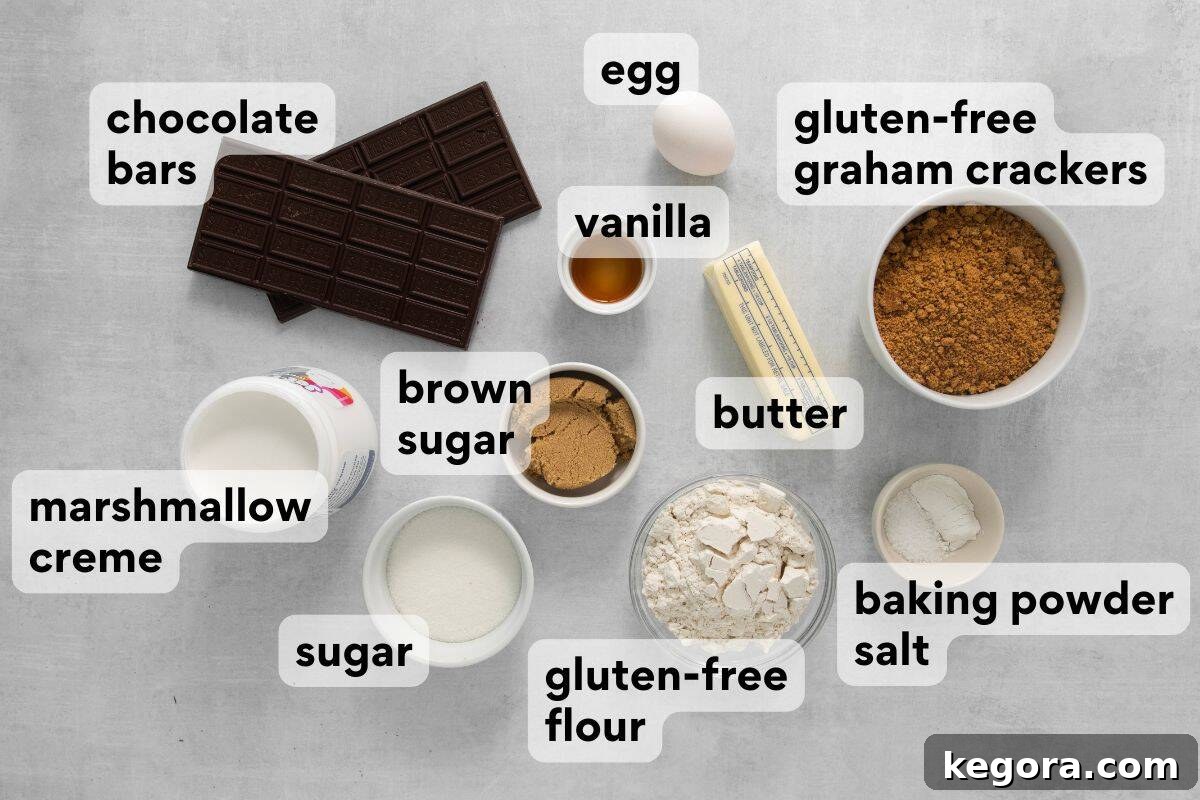
- Gluten-Free Flour: The foundation of our chewy cookie layers. It’s absolutely vital to use a high-quality gluten-free measure-for-measure flour blend that explicitly states it contains xanthan gum. Xanthan gum is essential for providing structure and elasticity in gluten-free baking, preventing crumbly results. My top recommendation for this recipe, delivering consistent and delicious results, is King Arthur Gluten-Free Measure-for-Measure Flour.
- Gluten-Free Graham Crackers: These form the iconic flavor of our s’mores base. The good news is that there are many fantastic gluten-free graham cracker brands available today, making this step super easy! Popular choices include Pamela’s, Schar, and Kinnikinnick. Feel free to use your favorite brand. If you’re looking for more options or want to explore what’s out there, be sure to check out our comprehensive guide on gluten-free graham crackers for additional ideas and recommendations.
- Marshmallow Creme: This gooey, sweet layer is what truly makes s’mores s’mores! Most brands of marshmallow creme are naturally gluten-free, but as with any packaged product for a gluten-free diet, it’s always a good practice to double-check the label for any hidden gluten-containing ingredients or cross-contamination warnings. Any brand you prefer will work beautifully to create that signature stretchy, sweet marshmallow experience.
- Chocolate: For an exceptionally rich and indulgent s’mores bar experience, the key is to use extra-thick chocolate bars. These melt into a decadent, substantial layer that holds its own against the chewy cookie and gooey marshmallow. I personally love using XL Hershey’s Bars for their classic flavor and perfect thickness, but you can also experiment with other high-quality chocolate bars or even a mix of milk and semi-sweet chocolate for a more complex flavor profile. Chocolate chips can work in a pinch, but thick bars provide a more authentic s’mores chocolate “snap.”
- Butter: Use unsalted butter for better control over the saltiness of the bars. Ensure it’s softened to room temperature for smooth creaming with the sugars. For a dairy-free version, high-quality dairy-free butter sticks work well.
- Sugars (Granulated and Brown): The combination of granulated and brown sugar gives our cookie base the perfect balance of sweetness and a wonderfully chewy texture. Brown sugar also adds a hint of molasses flavor that complements the graham crackers beautifully.
- Egg: A single large egg binds our cookie dough together, adding moisture and richness.
- Vanilla Extract: Pure vanilla extract enhances all the sweet flavors in the bars, adding a comforting aromatic note.
- Baking Powder and Kosher Salt: These essential baking staples provide the necessary lift for our cookie layers and balance the sweetness, respectively.
Beyond these delightful bars, explore more of our favorite gluten-free recipes that are sure to become household staples. Try these amazing gluten-free chocolate chip cookies, the moist and flavorful gluten-free banana bread, the light and airy gluten-free angel food cake, and our comforting gluten-free peach cobbler.
Step-by-Step Guide: How to Bake Irresistible Gluten-Free S’mores Bars
Ready to create these gooey, chocolatey wonders? This overview will guide you through the process, making it simple and fun. For the complete, detailed instructions with exact measurements, be sure to jump to the recipe card below!
Crafting the Perfect Graham Cracker Cookie Crust
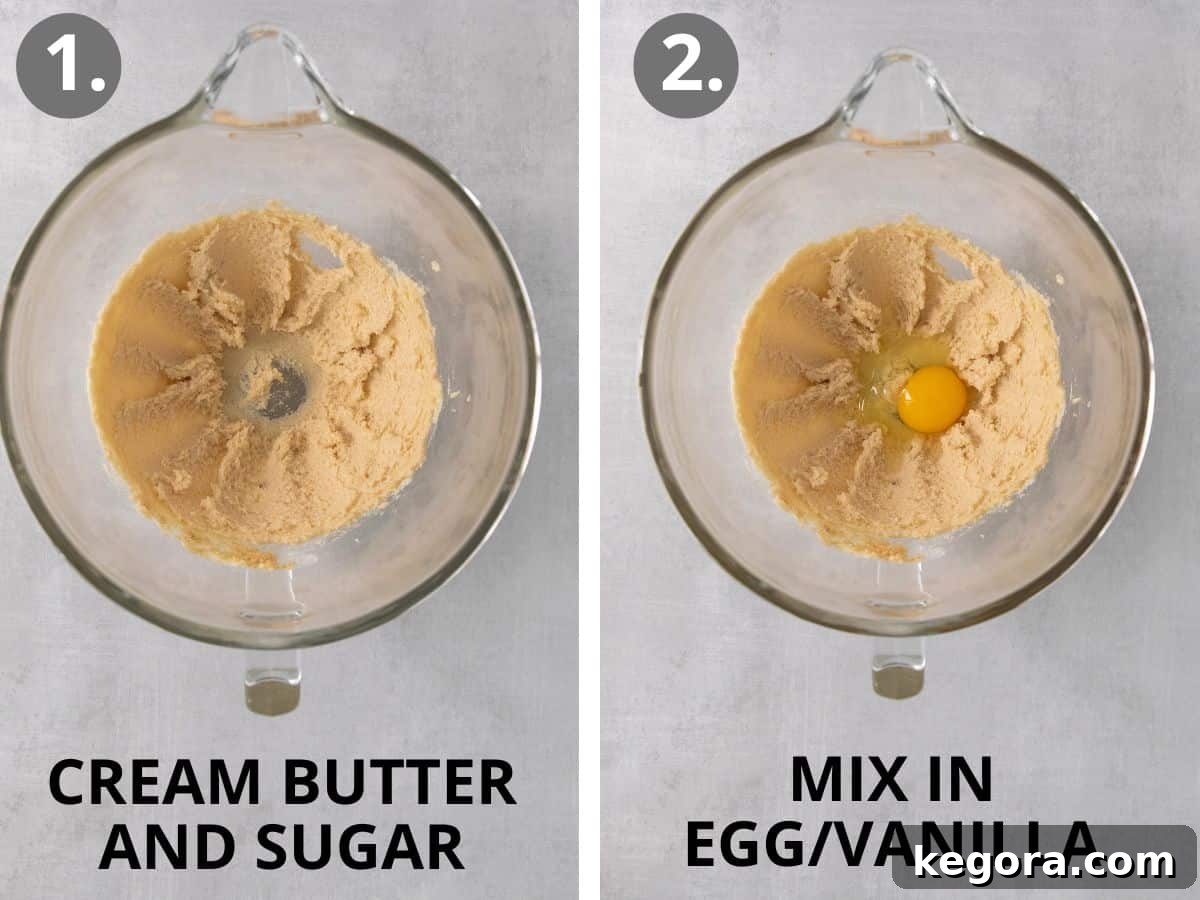
To begin, you’ll create the foundational graham cracker cookie crust – a key element that sets these bars apart. Start by creaming together the softened butter, granulated sugar, and brown sugar. For optimal results and ease, I highly recommend using a stand mixer, allowing it to work its magic until the mixture is light and fluffy, typically 2-3 minutes. If you don’t have a stand mixer, a reliable electric hand mixer will achieve equally fantastic results. Ensure your butter is at room temperature to achieve that perfectly smooth, creamy consistency.
Next, introduce the large egg and vanilla extract to your creamed butter and sugar mixture. Continue mixing until these wet ingredients are fully incorporated, creating a cohesive and aromatic base. After that, it’s time to add the dry components: your chosen gluten-free flour blend, baking powder, and a touch of salt. Mix these on a low speed to avoid overmixing, which can lead to tough bars. Make sure to pause halfway through and scrape down the sides of your bowl with a spatula. This ensures all the ingredients are thoroughly combined, leaving no dry pockets.
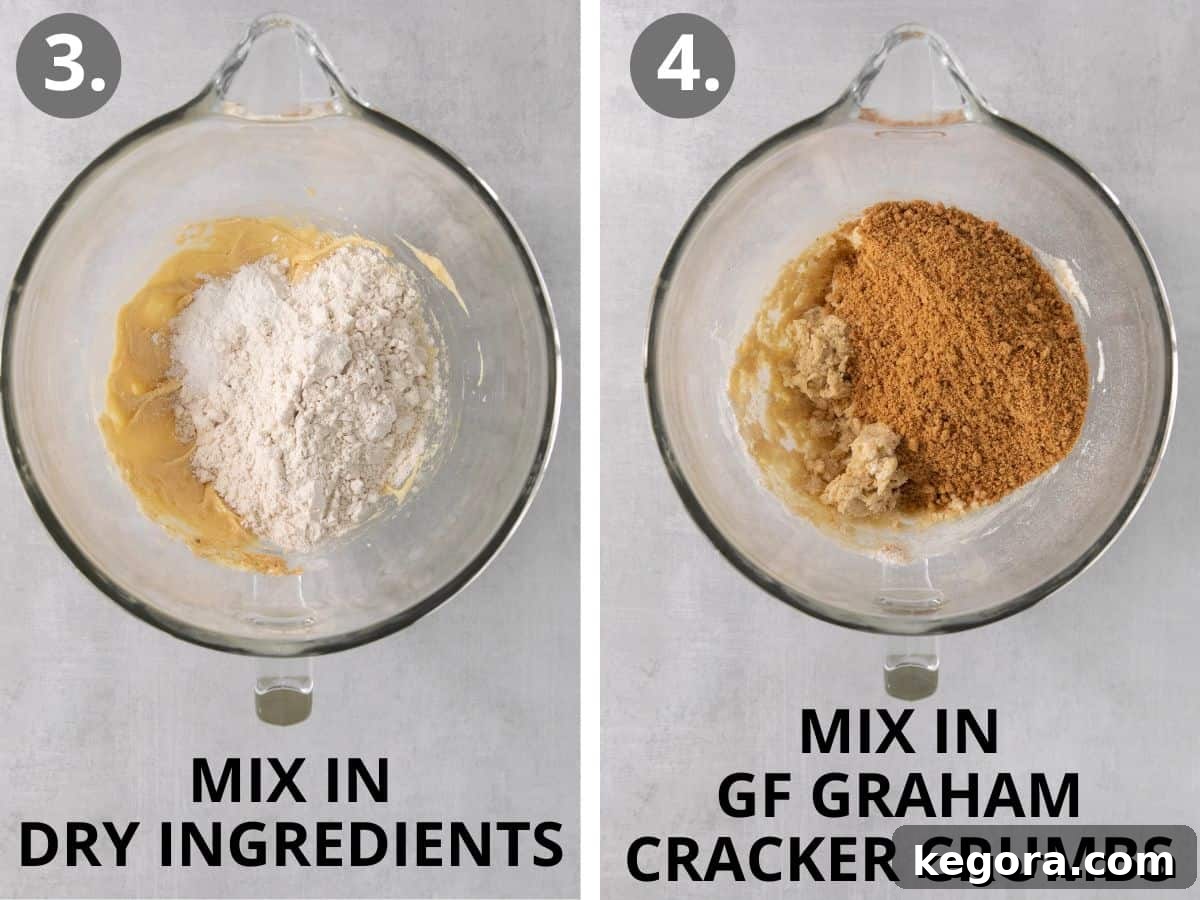
Finally, gently fold in the crushed gluten-free graham crackers. These crumbs are crucial for imparting that authentic s’mores flavor and adding a delightful texture to our cookie layers. Mix just until they are evenly distributed throughout the dough.
Assembling and Baking Your S’mores Masterpiece
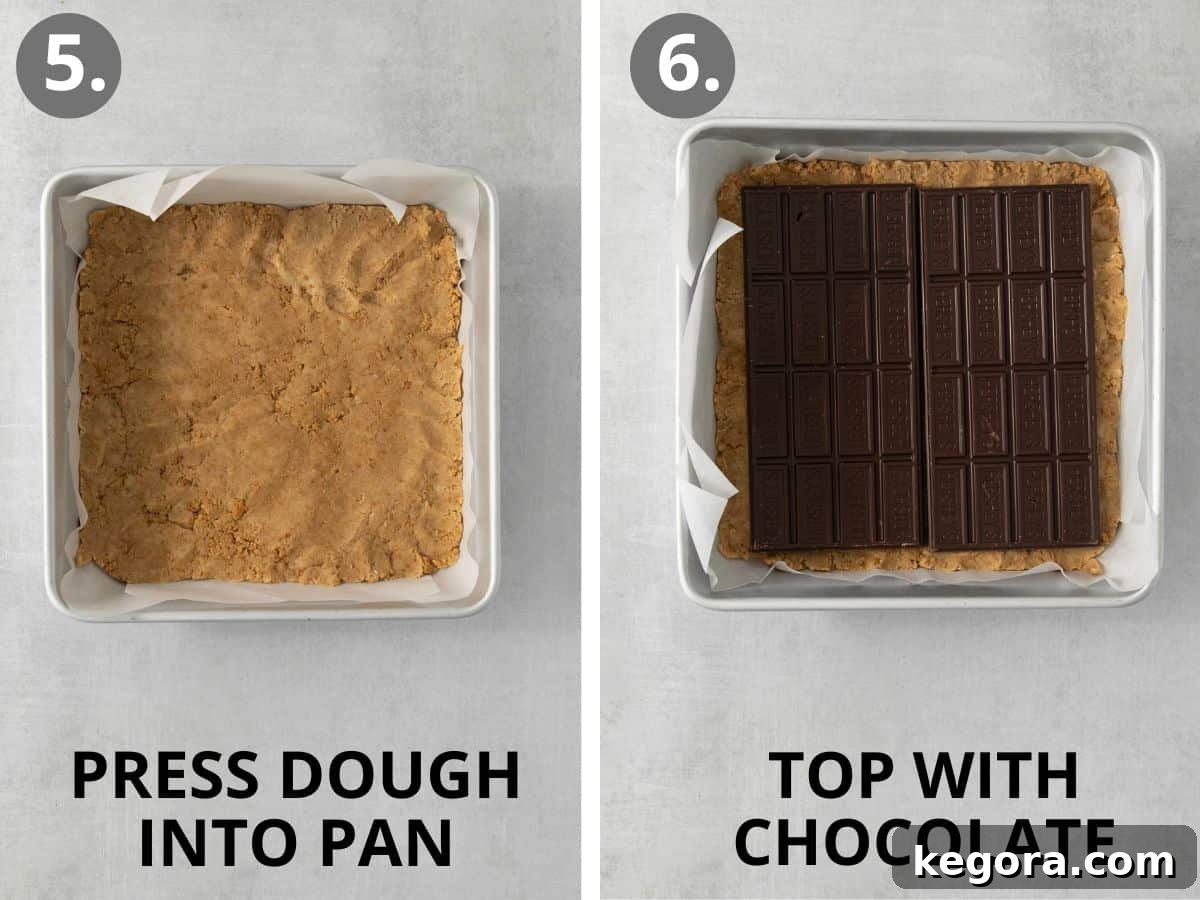
This next step is where the magic of layering happens! Begin by creating the top cookie layer. Take approximately half of your prepared dough and press it evenly into the bottom of your parchment-lined baking pan. Once it’s uniformly shaped, you can easily lift the entire parchment paper, along with this dough layer, straight out of the pan. Set it aside carefully for now – this will become the delicious top crust of your bars.
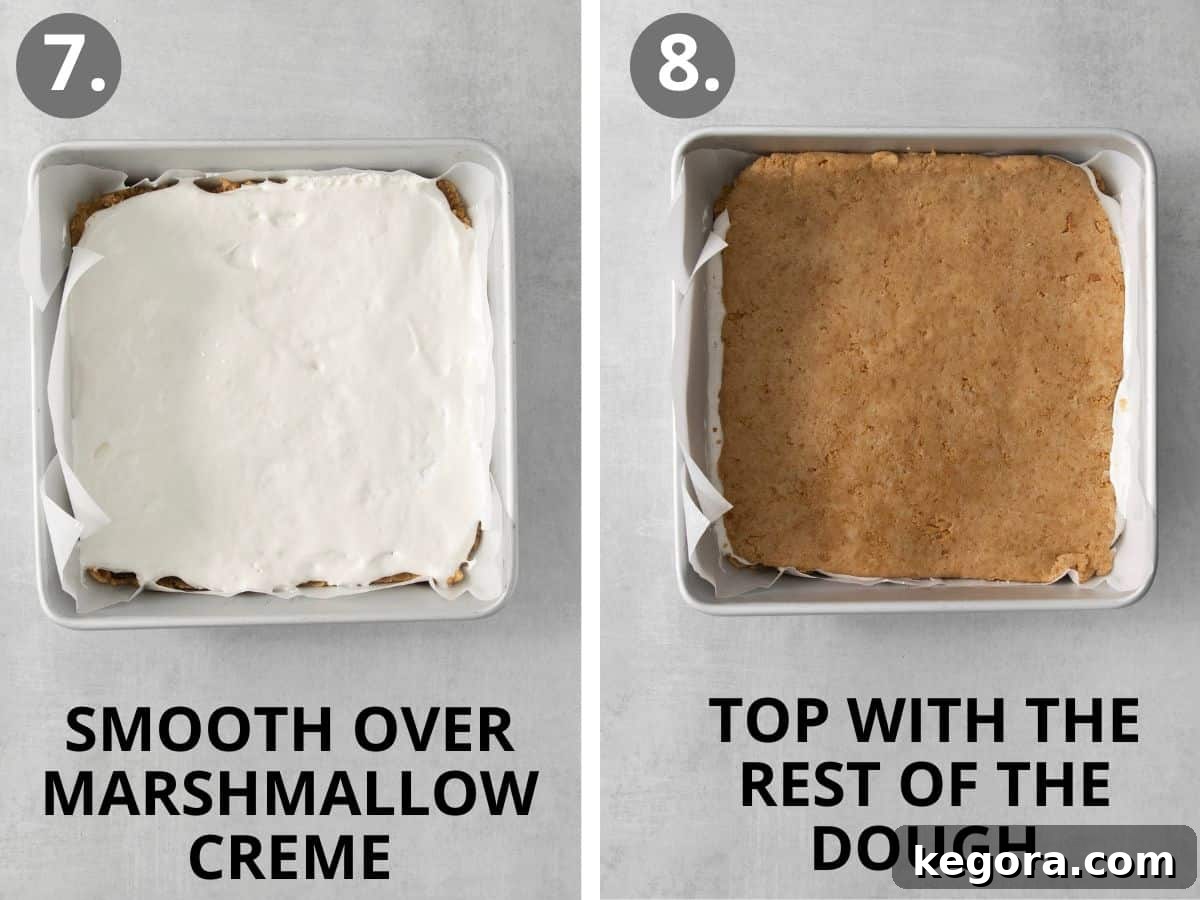
Now, re-line your baking pan with a fresh piece of parchment paper. Take the remaining half of the dough and press it firmly and evenly into the bottom of the pan to form what will be your bottom cookie layer. On top of this base, arrange your extra-thick chocolate bars, covering the entire surface. The generous thickness of these bars ensures a substantial, gooey chocolate center. Following the chocolate, evenly spread the marshmallow creme over the chocolate layer. Be gentle as you spread to avoid disturbing the chocolate beneath.
Finally, carefully flip the pre-shaped top cookie layer that you set aside earlier, placing it directly on top of the marshmallow creme. Bake your assembled bars in the preheated oven until the cookie layers are beautifully golden brown and the marshmallow is puffed and slightly toasted. Remember, the most crucial step for perfect s’mores bars is patience: allow them to cool completely before slicing and serving. This ensures clean cuts and perfectly set layers. Enjoy your homemade gluten-free s’mores bars!
Gluten-Free S’mores Bars
Erin Collins
15
30
45
12 servings
They’re always a crowd favorite and disappear fast at parties!
Comments
Ingredients
- 1/2 cup (113g) butter, softened
- 1/2 cup (100g) granulated sugar
- 1/4 cup (53g) brown sugar, packed
- 1 large egg
- 1 teaspoon vanilla extract
- 1 cup (150g) gluten-free measure-for-measure flour (with xanthan gum)
- 1 teaspoon baking powder
- 1 teaspoon kosher salt
- 5-6 ounces (160g) gluten-free graham crackers, crushed into fine crumbs
- 2 4-ounce extra thick chocolate bars (like XL Hershey’s)
- 7 ounces (198g) marshmallow creme
Instructions
-
Preheat your oven to 350°F (175°C). Line an 8×8 inch (20×20 cm) baking dish with parchment paper, allowing some overhang on the sides for easy lifting.
-
In the bowl of a stand mixer fitted with the paddle attachment (or using a large bowl with an electric hand mixer), add the softened butter, granulated sugar, and brown sugar. Cream these together on medium speed until the mixture is light, fluffy, and well-combined, typically for 2-3 minutes. Scrape down the sides of the bowl as needed.
-
Add the large egg and vanilla extract to the creamed mixture. Mix until just combined, ensuring not to overmix at this stage.
-
In a separate bowl, whisk together the gluten-free flour, baking powder, and kosher salt. Gradually add these dry ingredients to the wet mixture in the mixer bowl. Mix on low speed until the flour is totally combined and no dry streaks remain. Remember to scrape down the sides of the bowl once halfway through to ensure everything is thoroughly incorporated.
-
Remove the bowl from the mixer and stir in the crushed gluten-free graham cracker crumbs by hand with a spatula, mixing just until they are evenly distributed throughout the dough.
-
Take approximately half of the dough and press it firmly and evenly into the bottom of the parchment-lined baking pan. Once shaped, carefully lift the parchment paper with the dough still on it, out of the pan, and set it aside. This will serve as your top cookie layer later.
-
Line the same baking pan with a fresh piece of parchment paper. Press the remaining half of the dough evenly into the bottom of this newly lined pan to form the base cookie layer. Arrange the extra-thick chocolate bars in a single layer over the dough. Then, carefully spread the marshmallow creme over the top of the chocolate layer, trying to cover it as evenly as possible. Gently flip the previously shaped top cookie layer (from step 5) onto the marshmallow layer, creating a sandwich.
-
Bake for 25-30 minutes, or until the top cookie layer is golden brown and the edges are set. Once baked, remove the pan from the oven. For the best possible results and clean, neat slices, it is absolutely crucial to let the bars cool completely at room temperature before attempting to cut and serve them. This allows the chocolate and marshmallow to set properly. Enjoy your perfect gluten-free s’mores bars!
Notes for Success & Variations
Dairy-Free Adaptation: Making these bars dairy-free is surprisingly simple! Substitute regular butter with your favorite high-quality dairy-free butter sticks (ensure they are solid sticks, not soft spread). Replace traditional chocolate bars with certified dairy-free chocolate varieties. Always double-check the labels on your graham crackers and marshmallow creme to ensure they are free from dairy, as formulations can vary between brands.
To Make-Ahead: These s’mores bars are fantastic for preparing in advance! You can assemble the entire pan of bars (layers of cookie, chocolate, marshmallow, and top cookie) up to 1 day before baking. Once assembled, cover the dish tightly with plastic wrap or aluminum foil and refrigerate. The next day, simply remove the bars from the refrigerator and let them sit at room temperature for about 15-20 minutes while your oven preheats, then bake as directed.
To Store: Once baked and completely cooled, store your gluten-free s’mores bars in an airtight container at room temperature. They will remain wonderfully fresh and delicious for up to 5 days, making them perfect for lunchboxes or a prolonged sweet treat supply!
To Freeze: While it might be tempting to freeze a batch, I generally don’t recommend freezing these s’mores bars. The freezing and thawing process can significantly alter the texture of both the marshmallow and the cookie layers, potentially making them less appealing. For best enjoyment, stick to refrigeration or room temperature storage.
Clean Cuts: For perfectly clean slices, ensure the bars are completely chilled. Using a sharp knife that has been warmed slightly under hot water and then wiped dry can also help achieve cleaner cuts through the chocolate and marshmallow layers.
Chocolate Variations: Don’t limit yourself to milk chocolate! Experiment with dark chocolate for a richer, less sweet bar, or even white chocolate for a different flavor profile. You can also mix in some chopped nuts or sprinkles on top of the marshmallow for extra flair.
Nutrition
Carbohydrates: 43g |
Protein: 2g |
Fat: 11g |
Saturated Fat: 6g |
Polyunsaturated Fat: 0.4g |
Monounsaturated Fat: 2g |
Trans Fat: 0.3g |
Cholesterol: 41mg |
Sodium: 301mg |
Potassium: 48mg |
Fiber: 1g |
Sugar: 26g |
Vitamin A: 256IU |
Calcium: 36mg |
Iron: 1mg
This post was originally published in June 2023. It was comprehensively updated with enhanced photos, clearer instructions, and additional tips in June 2025 to provide the best possible experience for our readers.
Explore More Delicious Gluten-Free Bar Recipes
If you’ve fallen in love with these s’mores bars, you’ll be thrilled to discover our other fantastic gluten-free bar recipes. Perfect for parties, potlucks, or simply satisfying your sweet tooth, these easy-to-make treats are always a hit:
- Decadent Gluten-Free Millionaire’s Shortbread
- Chewy and Easy Gluten-Free Blondies
- Irresistible Gluten-Free 7-Layer Bars
- Sweet and Tart Gluten-Free Raspberry Crumb Bars
- Bright and Zesty Gluten-Free Lemon Bars
- Fudgy and Rich Gluten-Free Brownies
- Simple and Satisfying Peanut Butter Bars
We hope you enjoy baking and sharing these wonderful gluten-free treats as much as we do. Happy baking!