

Welcome to the ultimate guide for crafting the most delectable, light, and perfectly crispy oat flour waffles! Made with wholesome, nutrient-rich oat flour and a handful of everyday pantry essentials, these waffles are a game-changer for any breakfast or brunch occasion. Imagine them golden brown, fresh off the waffle iron, eagerly awaiting a generous drizzle of pure maple syrup and a dollop of melted butter. They offer a delightful texture and a subtly nutty flavor that elevates your morning meal from ordinary to extraordinary.
If you’re a waffle enthusiast looking to explore beyond the traditional, be sure to check out our other popular recipes. For those with dietary considerations, our crispy gluten-free waffles are a fantastic option, and for a rustic, earthy twist, these buckwheat waffles are truly exceptional.

There’s something uniquely satisfying about starting your day with homemade waffles. They are the epitome of a cozy, lazy morning, filling your kitchen with an inviting aroma. If you have a bag of oat flour in your pantry and are seeking inspiration for a wholesome and delicious treat, look no further than these incredible oat flour waffles. They are not only easy to prepare but also boast a fantastic nutritional profile, delivering a healthy dose of fiber and whole grains without compromising on taste or crispiness.
Beyond waffles, our breakfast repertoire includes other family favorites like gluten-free pancakes, the delicate buckwheat blender crepes, and our ever-popular gluten-free blueberry muffins. Each recipe is designed to bring joy and wholesome goodness to your breakfast table.
The Secret Behind Perfectly Crispy Oat Flour Waffles
What makes this oat flour waffle recipe truly stand out is a thoughtful blend of ingredients working in harmony to create an unparalleled texture and flavor profile. At its core, the success lies in the unique combination of nutrient-rich oat flour and a touch of cornstarch. The whole-grain oat flour provides a wonderfully wholesome, slightly nutty flavor and a satisfying chewiness, while the crucial addition of cornstarch is the secret weapon for achieving that coveted light and extra crispy exterior, preventing the waffles from becoming dense or gummy.
Furthermore, a carefully calibrated amount of baking powder and baking soda, activated by the acidity of cider vinegar, ensures a spectacular lift. This dynamic trio creates countless tiny air pockets throughout the batter, resulting in waffles that are incredibly fluffy on the inside and irresistibly crunchy on the outside. The vinegar’s acidity reacts with the leavening agents, generating carbon dioxide bubbles that expand during cooking, giving the waffles their airy structure. A hint of vanilla extract and a touch of sugar are added to perfectly balance the flavors, enhancing the natural sweetness of the oats. And the best part? You have the flexibility to use any type of milk you prefer, making this recipe easily adaptable to various dietary needs and preferences without sacrificing taste or texture.
Essential Ingredients for Your Oat Flour Waffles
Crafting these delightful oat flour waffles begins with gathering a few simple, high-quality ingredients. Each component plays a vital role in achieving the perfect balance of flavor and texture:
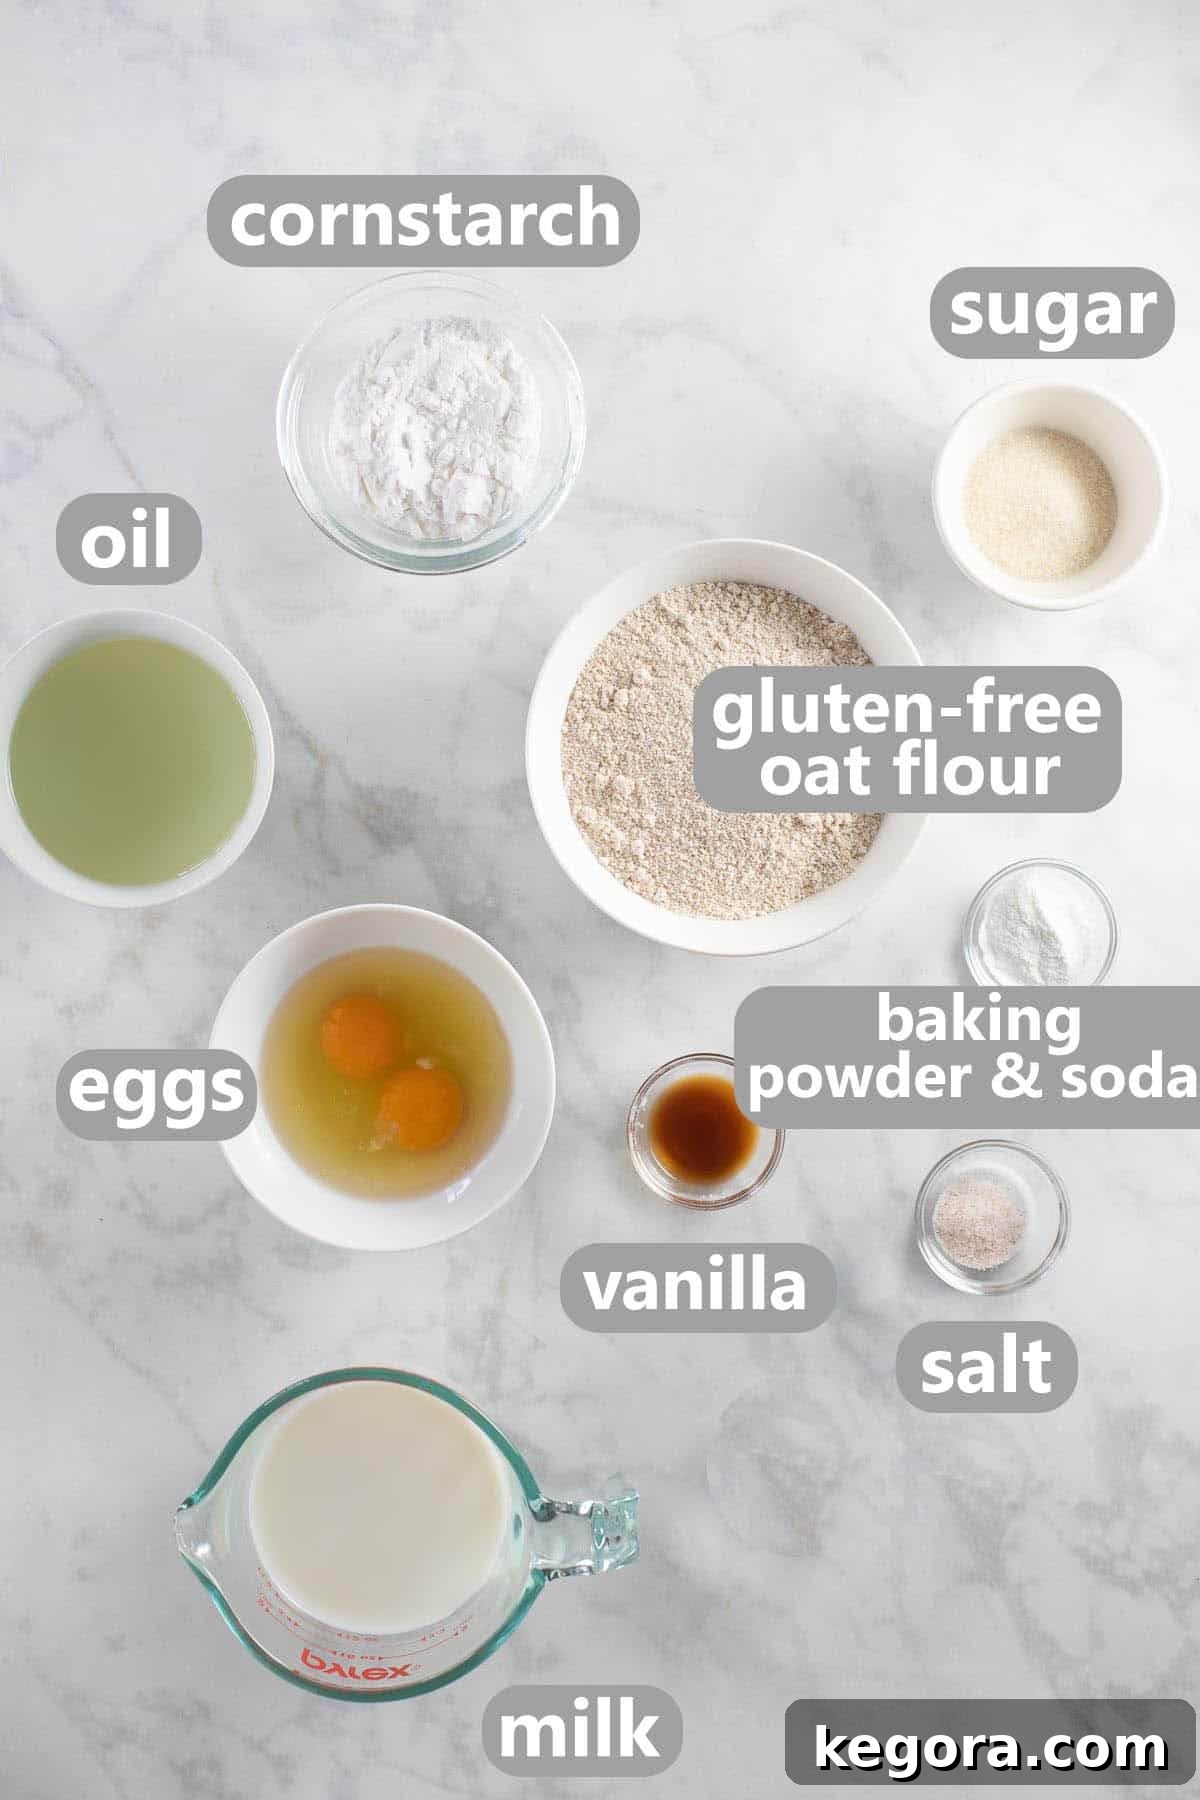
- Oat Flour: This is the star of our recipe, providing a wonderful whole-grain foundation. Its inherent slightly nutty flavor and tender crumb are perfect for waffles. For those adhering to a gluten-free diet, it is crucial to select a certified gluten-free oat flour to prevent cross-contamination. You can also make your own by blending rolled oats until fine.
- Cornstarch: Consider this your secret weapon for achieving exceptionally crispy waffles. Cornstarch helps to lighten the texture of the oat flour, preventing the waffles from becoming too dense and contributing significantly to that desirable crunch.
- Milk: The beauty of this recipe is its versatility when it comes to milk. While cow’s milk delivers a rich, traditional flavor, any plant-based milk will work beautifully. We often opt for almond milk for a lower-dairy option, but soy milk or oat milk are also excellent choices, allowing you to tailor the recipe to your dietary preferences.
- Eggs: Eggs provide structure, richness, and help bind the ingredients. For an even crispier waffle experience, consider separating the egg whites and whipping them to soft peaks before gently folding them into the batter. This adds extra air and results in an incredibly light texture.
- Oil: A neutral-flavored oil is essential for adding moisture and tenderness without imparting any unwanted tastes. Avocado oil, vegetable oil, or melted coconut oil (if you don’t mind a slight coconut flavor) are all great choices.
- Cider Vinegar: This acidic ingredient is key to activating the baking soda and enhancing the action of the baking powder. It contributes to the waffles’ lightness and crispness by creating more air pockets within the batter.
- Baking Powder & Baking Soda: These two leavening agents work in tandem to provide the perfect rise and texture, ensuring your waffles are fluffy and light. Both are necessary for the best results.
- Sugar, Vanilla Extract, & Salt: These ingredients are not just for sweetness; they round out the flavor profile. Sugar provides a hint of sweetness and aids in browning, vanilla adds warmth and depth, and salt balances all the flavors, preventing the waffles from tasting flat.
Once you’ve mastered these waffles, delve into our full collection of oat flour recipes for more delicious inspiration!
Mastering the Art of Oat Flour Waffles: A Step-by-Step Guide
Making these incredibly delicious oat flour waffles is a straightforward and rewarding process. Follow these simple steps for perfect results every time:
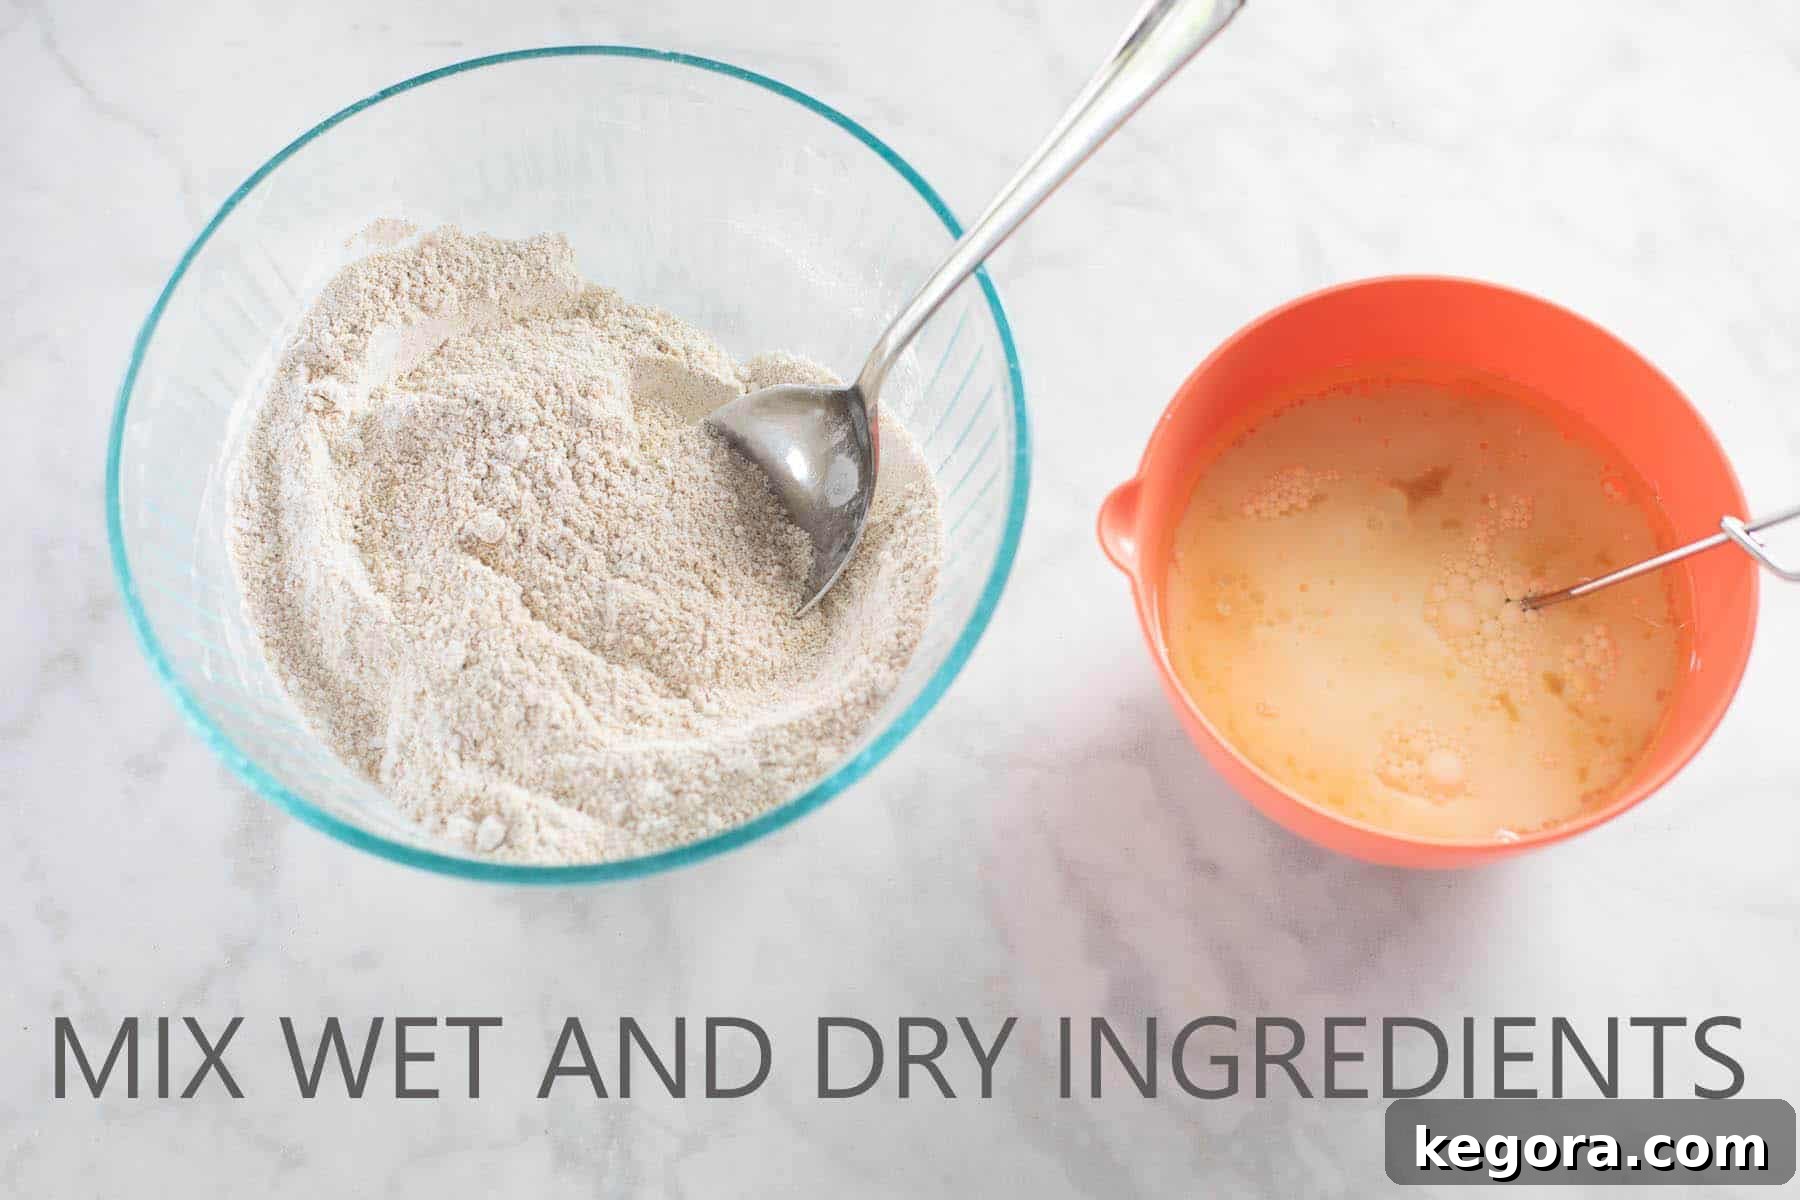
1. Prepare Your Batter:
Begin by ensuring all your ingredients are at room temperature, which helps them combine more smoothly. In a large mixing bowl, thoroughly whisk together all your dry ingredients: the oat flour, cornstarch, sugar, baking powder, baking soda, and salt. Whisking well at this stage ensures that the leavening agents are evenly distributed, leading to a consistent rise in every waffle.
In a separate, medium-sized bowl or a large measuring cup, combine all the wet ingredients: milk, eggs, neutral-flavored oil, apple cider vinegar, and vanilla extract. Whisk these together until they are well blended and homogenous. This separate mixing prevents overworking the flour when the wet and dry ingredients are combined.

Now, pour the wet mixture into the bowl containing the dry ingredients. Stir them together gently until just combined. It’s crucial not to overmix the batter; a few small lumps are perfectly fine. Overmixing can develop any inherent gluten (even in oats, though minimal) and lead to tough, rather than tender, waffles. Once mixed, let the batter rest for 10 to 15 minutes. This resting period is vital: it allows the oat flour to fully hydrate, absorbing the liquids and softening, and gives the baking powder and soda ample time to activate, creating a light and airy batter that will produce wonderfully crispy waffles.
2. Cook Your Waffles to Perfection:
While your batter is resting, preheat your oven to 250°F (120°C). This warm oven will be your secret weapon for keeping cooked waffles perfectly crisp while you finish the batch. Next, preheat your waffle iron until it’s hot and ready. Lightly grease the waffle iron plates if your model requires it. (If you’re in the market for an upgrade, we recently upgraded to this waffle iron and highly recommend it for consistent results!)
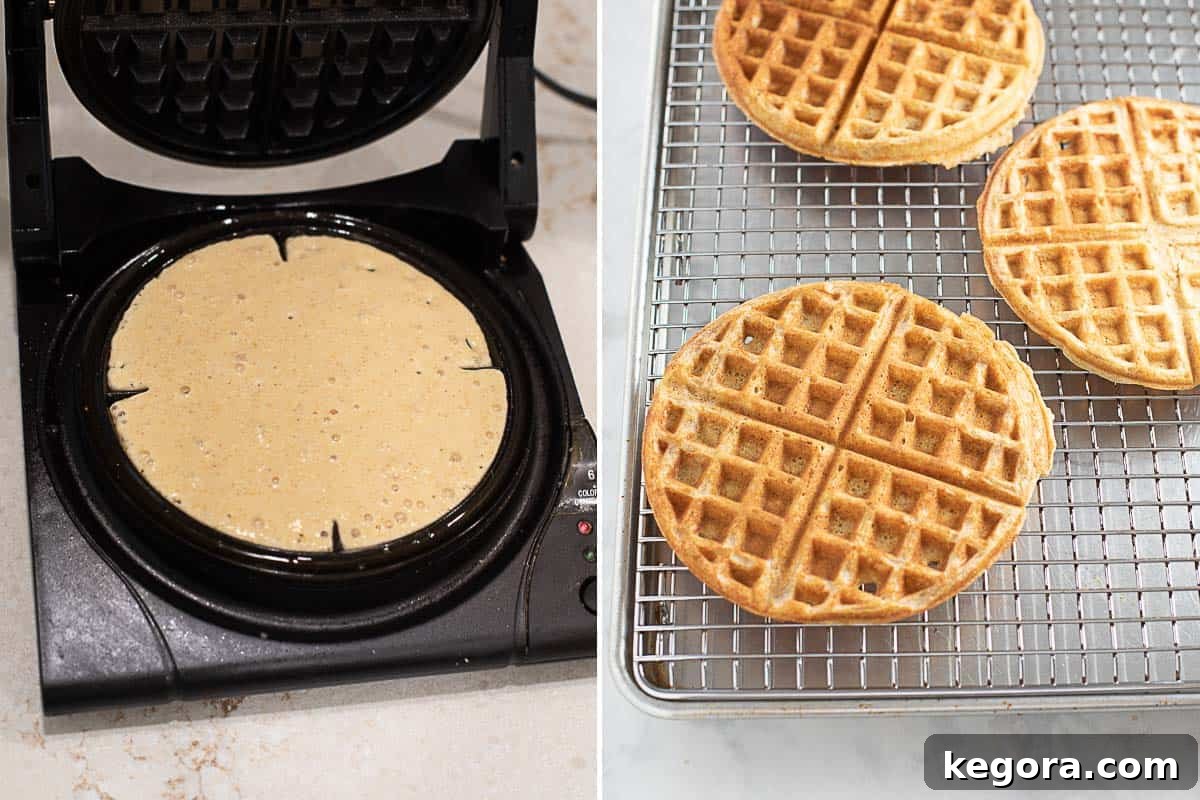
Pour approximately ⅓ to ½ cup of the prepared batter onto the hot waffle iron, adjusting the amount based on your specific waffle maker’s size and capacity. Close the lid and cook until the waffles are beautifully golden brown and crispy. This typically takes around 3 to 3½ minutes, but cooking times can vary depending on your waffle iron’s wattage and desired crispness. Once cooked, carefully remove the waffle and immediately transfer it to a wire rack placed over a sheet pan in your preheated 250°F oven. This setup allows air to circulate around the waffle, preventing steam from collecting and ensuring it stays perfectly crisp until you’re ready to serve. Remember, whatever you do, avoid stacking freshly cooked waffles directly on top of each other, as this will trap steam and cause them to lose their wonderful crispness. They’re also perfectly delicious served straight from the griddle if you can’t wait!
Repeat this process with the remaining batter until you have a stack of golden, inviting oat flour waffles. Enjoy them warm with your favorite toppings, or save the extras for later!
Pro Tips for Achieving the BEST Oat Flour Waffles
Elevate your waffle game from good to absolutely outstanding with these expert tips:
- Embrace the Power of Cider Vinegar: Don’t skip the cider vinegar! This acidic ingredient is crucial for activating the baking powder and baking soda, creating a more vigorous reaction. This leads to a greater rise and a significantly lighter, crisper waffle texture. If you don’t have cider vinegar, a similar amount of lemon juice can be used as a substitute.
- Prioritize Batter Rest Time: Allowing the batter to rest for 10-15 minutes is not just a suggestion; it’s a vital step for exceptional waffles. This period gives the oat flour adequate time to fully hydrate, absorbing the liquids and yielding a more tender interior. Simultaneously, it allows the leavening agents to begin their work, producing small bubbles that will contribute to a fluffy inside and a crispy exterior during cooking.
- Keep Waffles Warm and Crisp in the Oven: To ensure every waffle in your batch maintains its perfect crispness until serving, utilize your oven. As each waffle finishes cooking, transfer it to a wire rack set over a baking sheet and place it in a 250°F (120°C) oven. This keeps the waffles warm while allowing air to circulate, preventing them from becoming soggy. This simple trick makes a huge difference, especially when feeding a crowd.
- Don’t Overmix the Batter: Overmixing any waffle batter, even one made with oat flour, can lead to tough waffles. Mix until just combined – a few lumps are perfectly normal and preferred over a completely smooth batter.
- Proper Waffle Iron Care: Always preheat your waffle iron thoroughly before adding the batter. A hot iron immediately starts to crisp the exterior. If your iron isn’t non-stick, a light coating of oil or cooking spray before each waffle is essential to prevent sticking.
- Listen to Your Waffle Iron: Many modern waffle irons have indicator lights that signal when they are ready and when the waffle is cooked. If yours doesn’t, listen for the steam. When the steam significantly reduces, it’s often a sign that your waffle is done and beautifully golden.
Why Choose Oat Flour for Your Waffles?
Oat flour is an exceptional ingredient, offering numerous benefits that make it a fantastic choice for waffles, especially for those seeking healthier and more inclusive options:
- Wholesome Whole Grain: Oat flour is made from whole oats, meaning it retains all the valuable nutrients found in the grain, including the bran, germ, and endosperm. This provides a significant boost of dietary fiber compared to refined flours.
- Naturally Gluten-Free: For individuals with gluten sensitivity or celiac disease, oat flour is a wonderful, naturally gluten-free alternative to wheat flour. However, always opt for certified gluten-free oat flour to ensure it hasn’t been cross-contaminated during processing.
- Nutrient-Rich: Beyond fiber, oat flour is packed with essential vitamins and minerals, including manganese, phosphorus, magnesium, copper, iron, and B vitamins. It’s also a good source of plant-based protein.
- Heart Health Benefits: Oats are well-known for their beta-glucan fiber, which has been shown to help lower cholesterol levels and support cardiovascular health.
- Unique Flavor and Texture: Oat flour imparts a subtle, slightly sweet, and nutty flavor to baked goods that is incredibly appealing. It also contributes to a tender yet hearty texture, which works wonderfully in waffles, providing a satisfying chew without being heavy.
- Easy to Digest: For many, oats are easier to digest than other grains, making oat flour waffles a comfortable and nourishing breakfast choice.
Serving Suggestions and Creative Topping Ideas
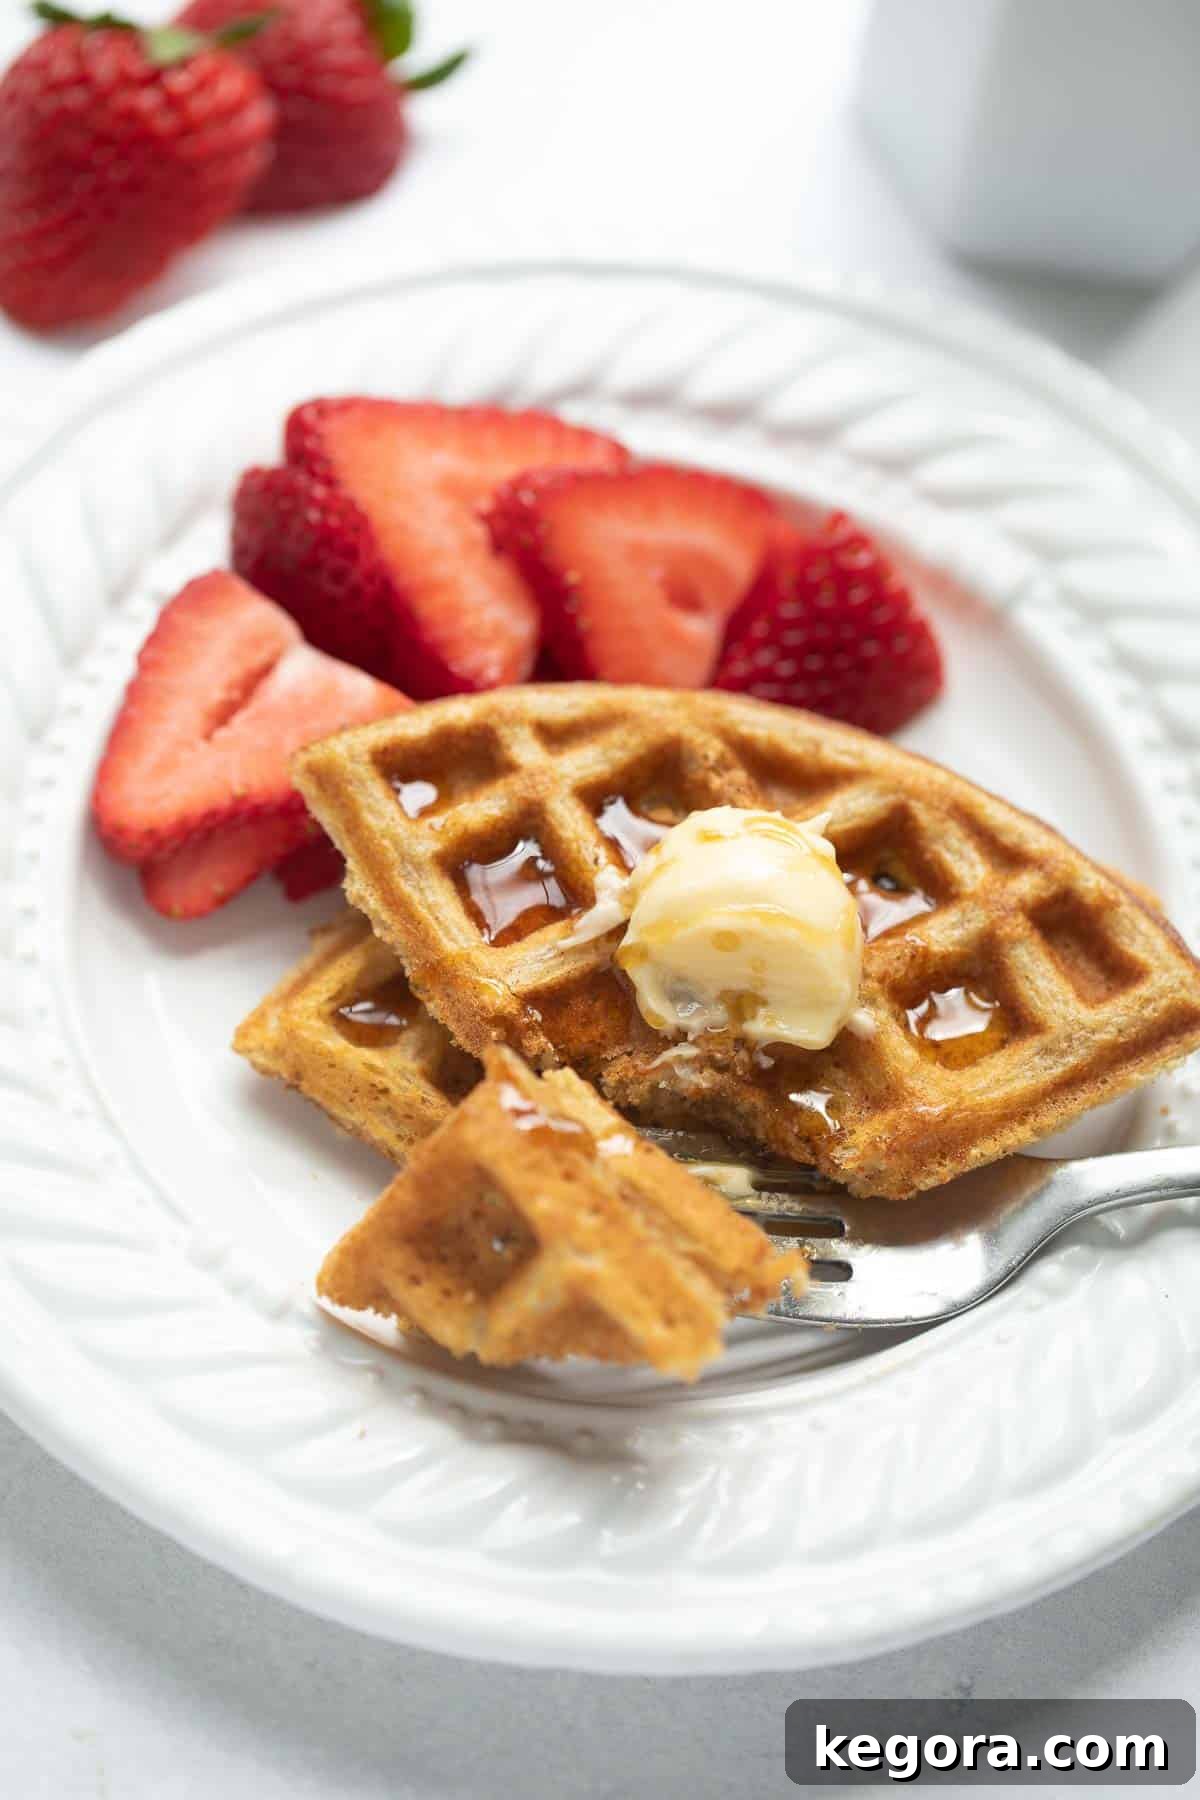
Once your light and crispy oat flour waffles are ready, the fun truly begins with the toppings! While the classic combination of maple syrup and melted butter is always a winner, here are some creative ideas to elevate your waffle experience:
- Classic Comfort: A generous pour of warm pure maple syrup and a pat of softened butter are unbeatable.
- Fresh Fruit Medley: Top with seasonal berries like strawberries, blueberries, raspberries, or sliced bananas, peaches, or even caramelized apples.
- Creamy Indulgence: Add a dollop of freshly whipped cream, a scoop of Greek yogurt for a tangy contrast, or even a spoonful of mascarpone cheese.
- Nutty Delights: A drizzle of peanut butter, almond butter, or hazelnut spread (like Nutella) provides extra protein and rich flavor. Sprinkle with chopped nuts like pecans, walnuts, or almonds for crunch.
- Chocolate Lover’s Dream: Melted chocolate, chocolate chips, or a sprinkle of cocoa powder can satisfy any sweet craving.
- Sweet and Savory Fusion: For a truly decadent brunch, pair your oat flour waffles with crispy bacon, breakfast sausage, or even fried chicken for a homemade chicken and waffles experience.
- Homemade Compotes or Jams: A warm berry compote or your favorite homemade fruit jam adds a burst of fruity goodness.
Storage and Reheating for Later Enjoyment
These oat flour waffles are so delicious, you might not have any leftovers! But if you do, they store and reheat beautifully, making them perfect for meal prep and quick breakfasts throughout the week.
- Room Temperature: Cooked waffles can be left at room temperature for a few hours, ideally on a wire rack to maintain crispness, before being stored.
- Refrigerator: To store in the refrigerator, allow waffles to cool completely. Stack them with parchment paper in between to prevent sticking, then place in an airtight container or zip-top bag for up to 3-4 days.
- Freezer: For longer storage, cool waffles completely. Place them in a single layer on a baking sheet and freeze for about 30 minutes until firm. This “flash freezing” prevents them from sticking together. Once firm, transfer the waffles to a freezer-safe zip-top bag or airtight container, separated by parchment paper. They can be frozen for up to 2-3 months.
Reheating Frozen Waffles:
- Toaster: The best method for bringing back crispness! Pop frozen waffles directly into your toaster on the defrost or medium setting. Toast until golden and heated through.
- Oven: Preheat oven to 350°F (175°C). Place frozen waffles in a single layer on a baking sheet and bake for about 10-15 minutes, or until heated through and crispy.
- Air Fryer: For an extra-crispy result, air fry frozen waffles at 350°F (175°C) for 3-5 minutes, or until desired crispness is achieved.
Troubleshooting Common Oat Flour Waffle Issues
Even with a great recipe, sometimes things don’t go exactly as planned. Here’s how to troubleshoot common waffle problems:
- Soggy or Limp Waffles:
- Cause: Overmixing the batter, not enough leavening, stacking waffles too soon after cooking, or the waffle iron wasn’t hot enough.
- Solution: Mix batter just until combined. Ensure baking powder and soda are fresh. Always place cooked waffles on a wire rack in a warm oven (do not stack). Make sure your waffle iron is fully preheated.
- Waffles Sticking to the Iron:
- Cause: Insufficient greasing, waffle iron not hot enough, or too much sugar in the batter (which can caramelize and stick).
- Solution: Lightly grease your waffle iron before each waffle. Ensure it’s fully preheated. If recipe is followed exactly, sticking usually points to greasing or heat.
- Flat or Dense Waffles:
- Cause: Old or inactive baking powder/soda, batter not rested, or not enough leavening agents.
- Solution: Check the freshness of your leavening agents. Always allow the batter to rest for 10-15 minutes. Ensure the correct quantities are used.
- Waffles Too Dry:
- Cause: Too much flour, not enough liquid or fat.
- Solution: Accurately measure your ingredients, especially flour. Spoon and level flour rather than scooping directly from the bag.
Frequently Asked Questions About Oat Flour Waffles
Here are answers to some common questions you might have about making oat flour waffles:
- Can I make these waffles dairy-free?
Absolutely! While cow’s milk yields a rich waffle, this recipe works beautifully with dairy-free alternatives. We often use almond milk, but soy milk, oat milk, or even cashew milk are excellent substitutes. Just ensure you use a dairy-free butter or neutral oil.
- Are these waffles gluten-free?
Yes, by nature, oat flour waffles are gluten-free. However, if you have celiac disease or a severe gluten sensitivity, it is imperative to use certified gluten-free oat flour to avoid cross-contamination that can occur during oat processing or packaging.
- Can I use regular all-purpose flour instead of oat flour?
This recipe is specifically formulated for oat flour, which has different absorption and texture properties than wheat flour. While you can often substitute flours, it’s not a direct 1:1 swap and the results (texture, crispness) will vary significantly. For best results, stick to oat flour for this recipe.
- Can I prepare the batter ahead of time?
You can mix the dry ingredients ahead of time and store them in an airtight container. For the wet ingredients, mix them just before adding to the dry. Once the wet and dry ingredients are combined, the batter should ideally be used within 30 minutes to an hour after its initial 10-15 minute rest period, as the leavening agents will lose their potency over time, leading to flatter waffles.
- What kind of waffle iron is best?
Any standard waffle iron will work. Belgian waffle makers produce thicker, deeper-pocketed waffles perfect for holding lots of syrup and toppings, while classic waffle irons make thinner, crispier waffles. Choose what you prefer!
Explore More Delicious Breakfast Recipes
Gluten-Free Dairy-Free Banana Protein Pancakes (30g Protein!)
Gluten-Free Nutella Star Bread
Gluten-Free Tater Tot Breakfast Casserole
Gluten-Free Sticky Buns
We genuinely hope you cherish this oat flour waffle recipe as much as our family does! If you try your hand at these wonderfully crispy waffles, we’d be thrilled to hear your thoughts. Please share your experience and leave a comment below. Your feedback is greatly appreciated! ♥

Oat Flour Waffles {Light & Crispy}
Print Recipe
Ingredients
- 1 ¾ cups oat flour
- ¼ cup cornstarch (lightens the waffles but you can use ¼ cup more oat flour if desired)
- 2 tablespoons sugar
- 2 teaspoons baking powder
- ½ teaspoon baking soda
- ½ teaspoon salt
- 1 ¾ cups milk (almond milk will work)
- 2 eggs
- 1/3 cup neutral flavored oil (I use avocado oil or vegetable oil)
- 2 teaspoons apple cider vinegar
- 1 teaspoon vanilla
Instructions
MAKE THE BATTER
-
Whisk the oat flour, cornstarch, sugar, baking powder, baking soda and salt in a medium bowl.
-
In another bowl or large measuring cup, whisk the milk, oil, eggs, apple cider vinegar and vanilla together until blended.
-
Pour the milk mixture into the flour mixture and whisk until just mixed. Let the batter sit for 10 to 15 minutes so the flours hydrate and the baking powder has time to activate.
COOK THE WAFFLES
-
Heat the oven to 250° F and heat the waffle iron.
-
Pour about ⅓-1/2 cup of the mixture into the waffle iron (depending on how much batter your iron takes) and cook. I cook mine for about 3- 3 ½ minutes. Remove and place on the rack of the oven to keep warm.
-
Repeat with the remaining batter. Enjoy! Break the extras into sections to freeze. Frozen waffles will reheat well using the defrost setting of the toaster.
Notes
- Gluten-Free oat flourworks better than using a gluten-free all-purpose blend because it doesn’t contain any added gums or binders like xanthan gum that can make floppy waffles.
- Add some cornstarch. Cornstarch is the secret ingredient that adds that next level of crispness to the waffles. Plus it’s naturally gluten-free!
- Let the batter rest. This allows the flours to hydrate and the baking powder/soda to activate.
- Set in the oven after cooking. If you’re not serving the waffles right away, set them on a wire rack over a baking sheet in a 250F degree oven so they stay nice and crisp.
TO FREEZE: Any leftover waffles can be cooled then frozen in a ziploc bag. Reheat the waffles in the toaster on the defrost setting for easy breakfasts later.