
Indulge in Decadence: The Ultimate Easy Gluten-Free Chocolate Lava Cake Recipe
Prepare to be enchanted by this truly decadent yet incredibly **easy gluten-free chocolate lava cake recipe**. Crafted with just six pantry-friendly ingredients, these molten chocolate masterpieces promise an unforgettable dessert experience. For that coveted, flowing “lava” center, our top secret is simple: always opt for a **high-quality chopped chocolate bar** over chocolate chips. This single tip elevates your lava cake from good to absolutely extraordinary!
If you’re a connoisseur of rich, chocolatey delights, you might also enjoy our other gluten-free creations like this gluten-free tiramisu, luxurious dark chocolate pots de crème, the elegant flourless chocolate torte, or a classic gluten-free chocolate sheet cake.
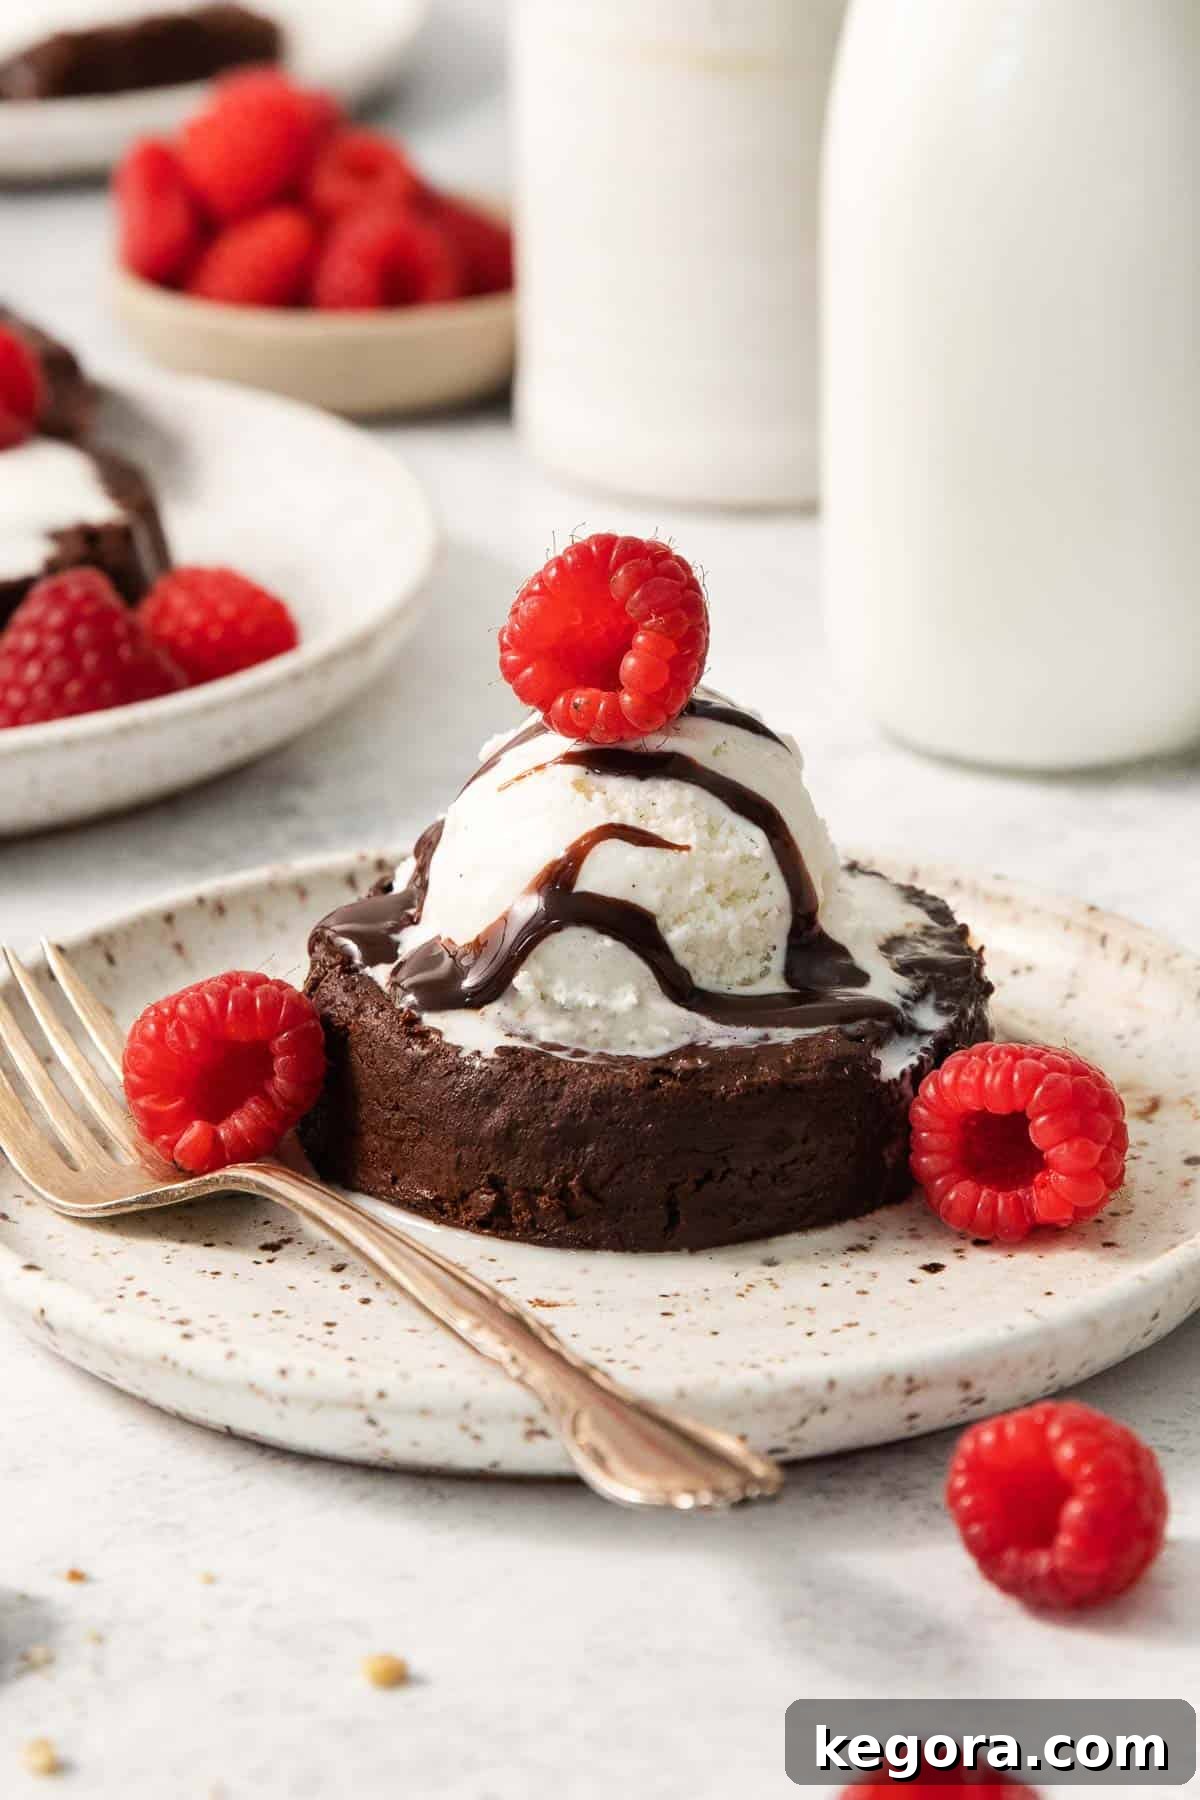
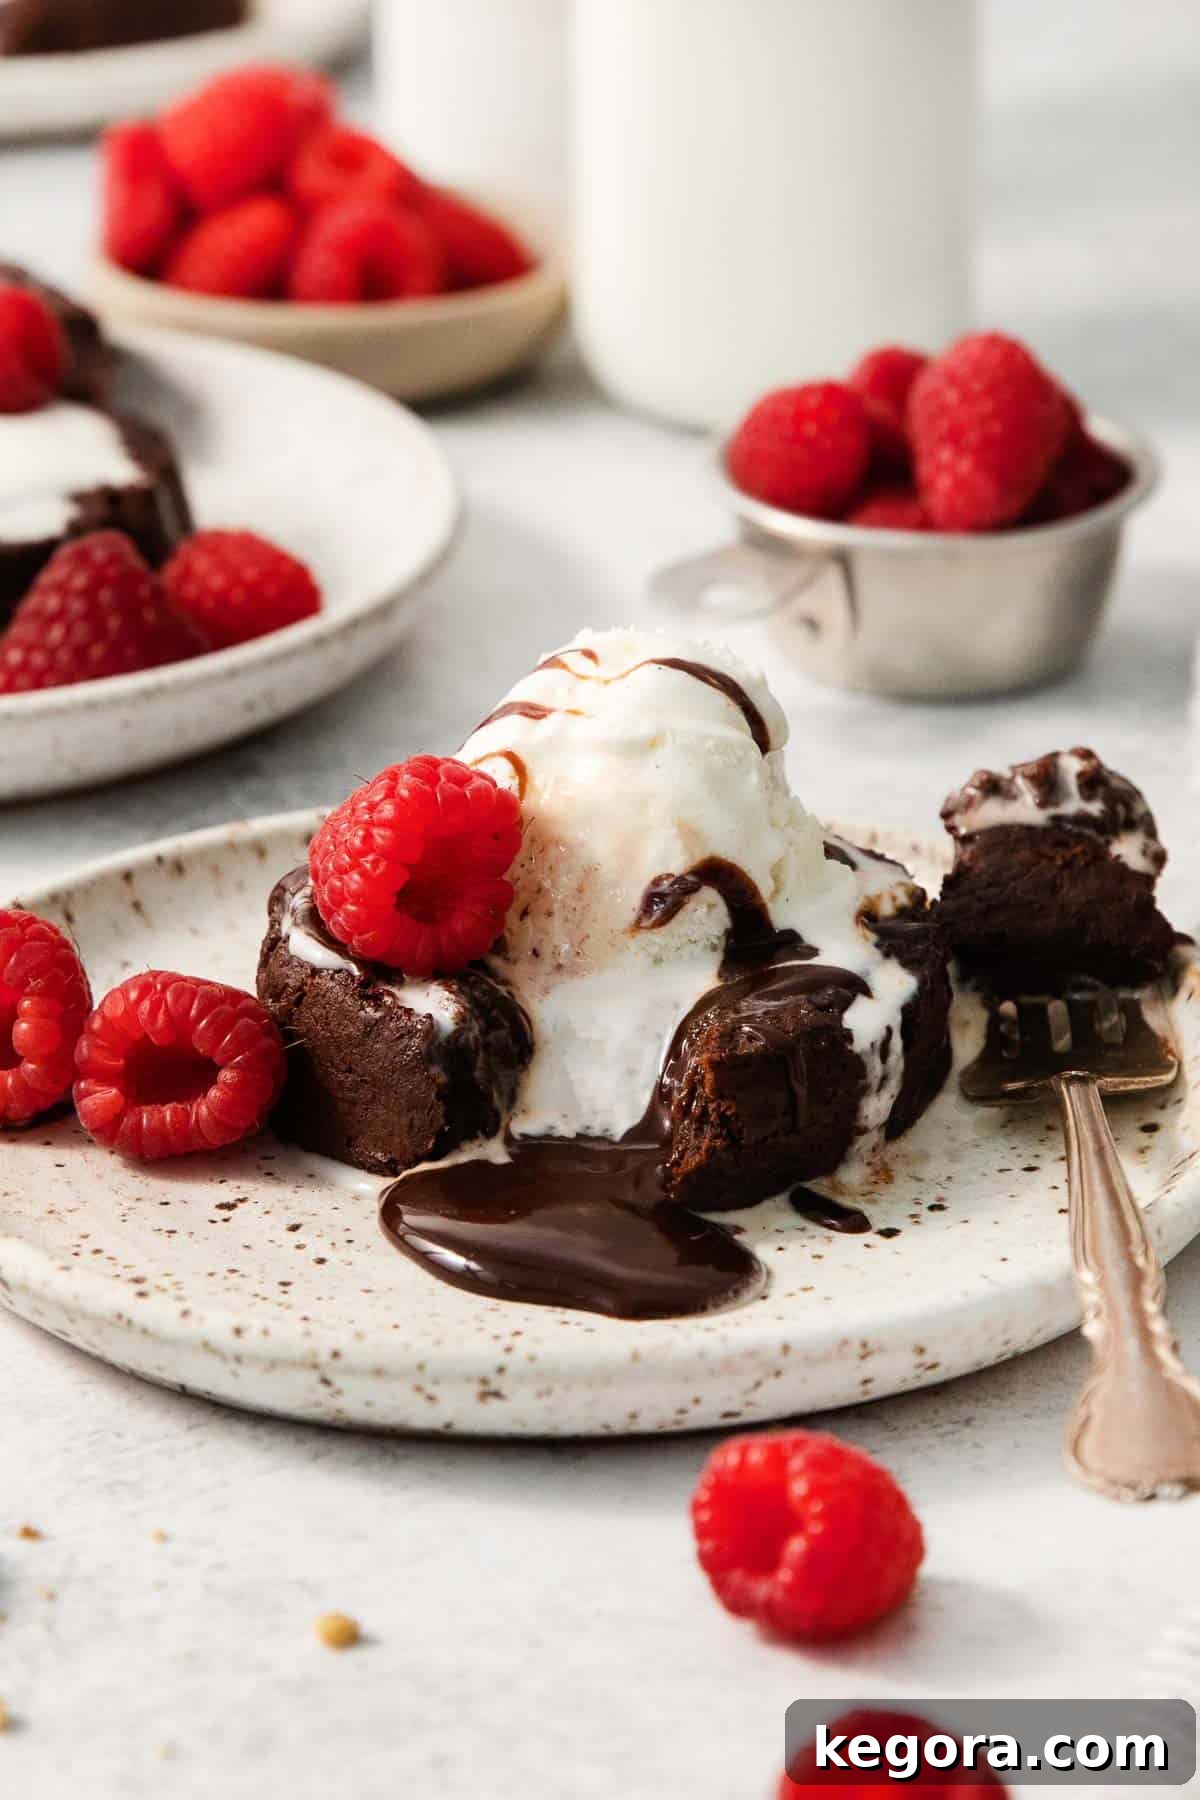
Are you searching for the perfect dessert to celebrate Valentine’s Day, an anniversary, or any special occasion? Look no further! This **gluten-free chocolate lava cake** is your answer. It’s not just a dessert; it’s an experience – impressive to behold, incredibly simple to prepare, and unbelievably delicious. Each cake boasts a warm, gooey, molten chocolate center, perfectly complemented by a delicate outer crust. Garnish these individual delights with fresh berries, a dollop of your favorite ice cream, or a dusting of powdered sugar for an elegant presentation that will impress even the most discerning palates.
For any chocolate lover, this gluten-free molten chocolate cake is an absolute dream come true. You’ll astound your guests with a dessert that tastes like it came from a gourmet bakery, all while only requiring about 20 minutes of active preparation and a handful of fundamental ingredients. Get ready to elevate your dessert game!
Why This Gluten-Free Chocolate Lava Cake Will Become Your Go-To Dessert
There are countless reasons why this **gluten-free chocolate lava cake** stands out as a truly exceptional dessert. Its combination of simplicity, rich flavor, and impressive presentation makes it a favorite for both everyday indulgence and momentous celebrations.
- Effortless Elegance with 6 Pantry Staples: Don’t let the sophisticated appearance of these gluten-free chocolate lava cakes deceive you. They are surprisingly easy to make! You’ll only need six common ingredients that you likely already have in your pantry: butter, flour (gluten-free, of course!), and high-quality bittersweet chocolate being the stars. This minimal ingredient list means less fuss and more time to enjoy your special moments.
- Unrivaled Richness and Decadence: Each bite of this molten chocolate cake delivers an intensely rich and deeply satisfying experience. The combination of luscious egg yolks, creamy butter, and premium bittersweet chocolate creates an unparalleled depth of flavor and a sumptuously moist texture. The gooey, molten center is the hallmark of this decadent treat, offering a delightful contrast to the perfectly baked exterior.
- Your Perfect Special Occasion Dessert, Made Simple: When time is short, but the desire to create something extraordinary is high, this recipe shines. It’s the ideal dessert for romantic Valentine’s Day dinners, cherished anniversaries, or an intimate date night at home. The quick preparation and baking time mean you can whip up an impressive dessert without spending hours in the kitchen, allowing you to focus on what truly matters.
- A Delight for Gluten-Sensitive Guests: Catering to dietary restrictions shouldn’t mean compromising on taste or luxury. This recipe ensures that everyone, including those following a gluten-free diet, can enjoy a truly indulgent chocolate dessert without a second thought. It’s a crowd-plepleaser that truly delivers on flavor and texture, proving that gluten-free can be every bit as delicious.
Essential Ingredients for Your Gluten-Free Molten Chocolate Cake
Creating the perfect **gluten-free chocolate lava cake** starts with selecting the right ingredients. Here’s a detailed look at each key component and why your choices matter for achieving that signature molten center and rich flavor profile.
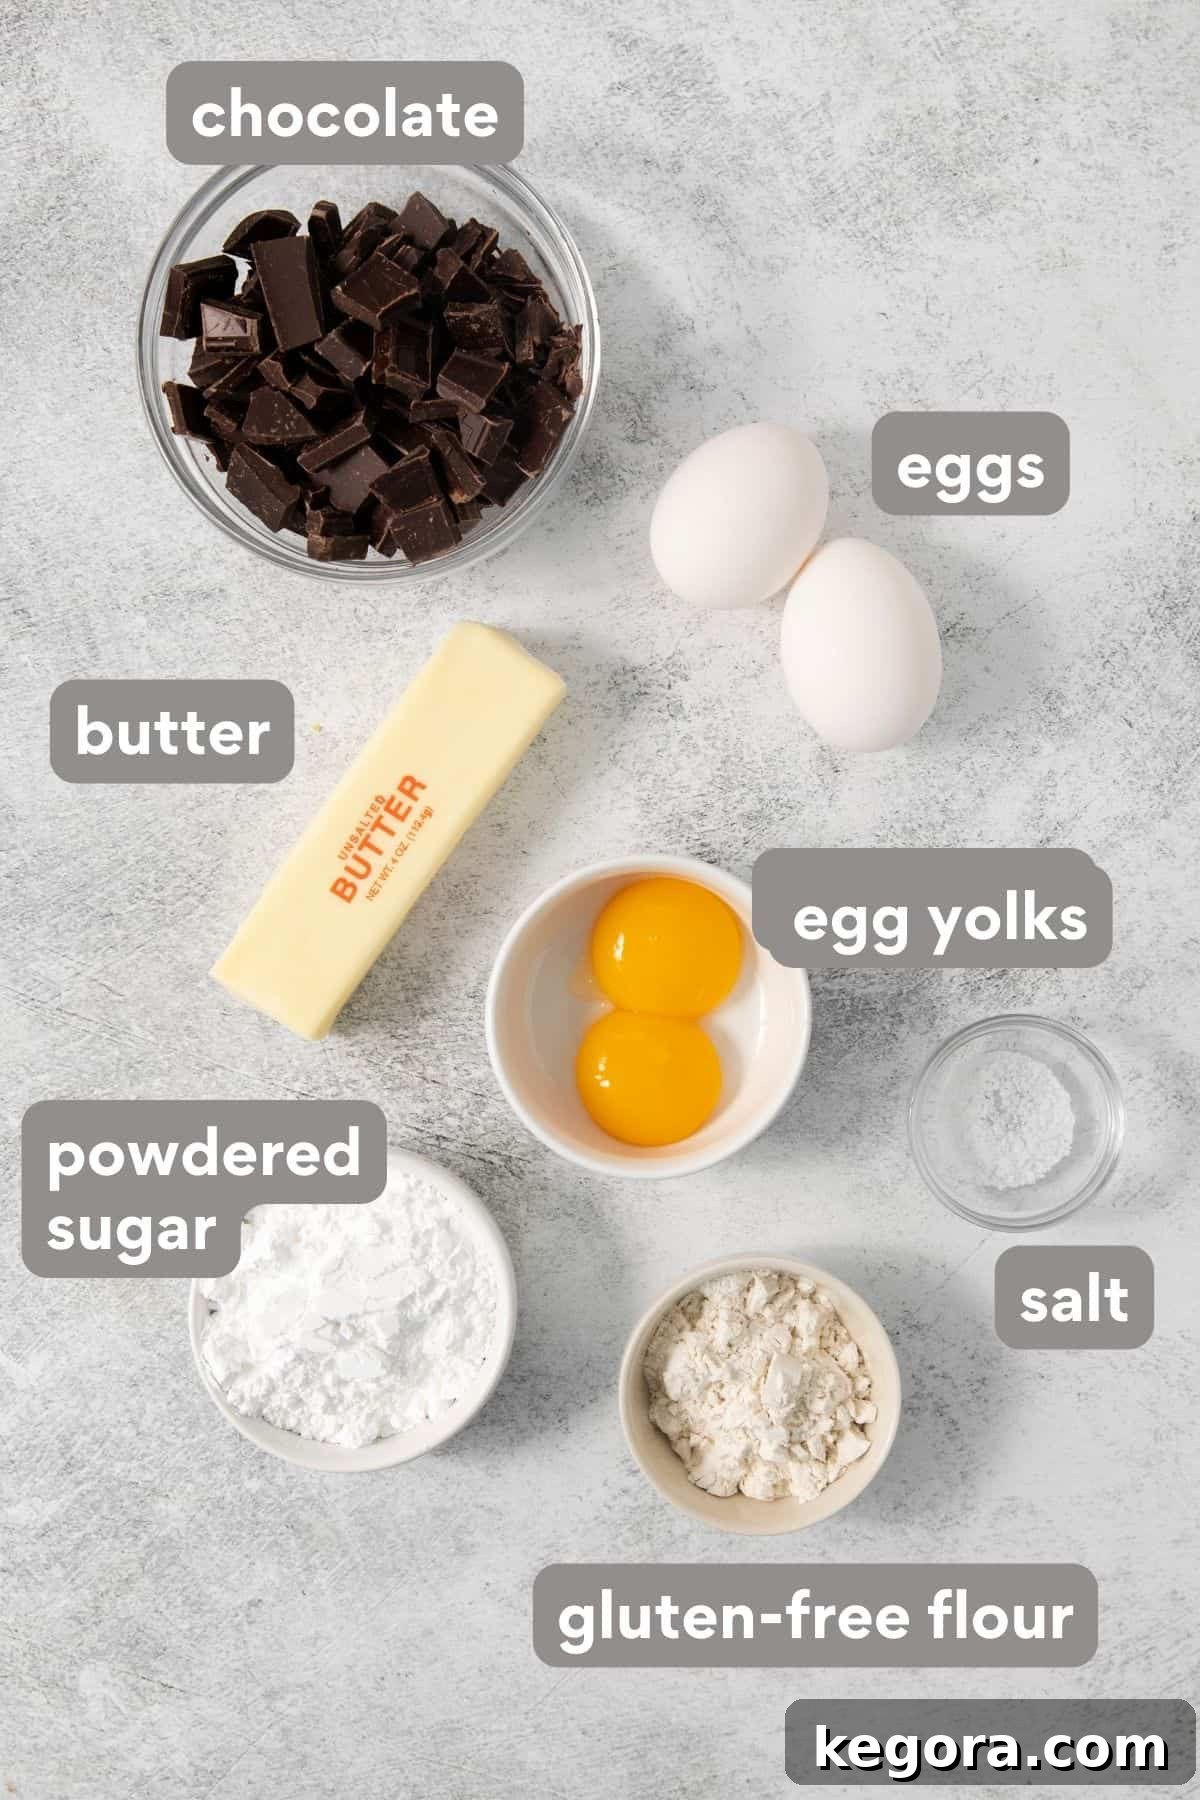
- High-Quality Chocolate: The Heart of the Lava Cake
For an unparalleled molten center and deep chocolate flavor, the type and quality of your chocolate are paramount. I highly recommend using a high-quality semi-sweet or bittersweet baking bar. Brands like Guittard are excellent choices, offering a rich flavor that truly shines. Before melting, coarsely chop the chocolate bars. This helps them melt evenly and smoothly.
A Crucial Tip: Avoid Chocolate Chips! While convenient, chocolate chips are formulated with stabilizers to maintain their shape during baking, which means they won’t melt into that glorious, flowing “lava” consistency you desire. They also tend to have a less intense flavor compared to baking bars. For the authentic lava cake experience, always opt for a solid chocolate bar.
- Gluten-Free Flour: The Structural Support
Choosing the right gluten-free flour blend is essential for the structure of your lava cake without compromising its delicate texture. My top recommendation is King Arthur Gluten-Free Measure-for-Measure Flour. This blend is expertly formulated to mimic traditional all-purpose flour, providing excellent results in baked goods. Alternatively, Bob’s Red Mill Gluten-Free 1:1 Baking Flour is another reliable option that will work beautifully in this recipe. These blends typically contain a combination of rice flours, starches, and xanthan gum to ensure proper binding and texture.
- Powdered Sugar (Confectioners’ Sugar): For a Silky Smooth Batter
Instead of granulated sugar, this recipe calls for powdered sugar. The finely milled texture of powdered sugar allows it to absorb seamlessly into the batter, ensuring a perfectly smooth consistency. This prevents any grainy texture in your finished lava cakes, contributing to their luxurious mouthfeel.
- Butter: For Richness and Moisture
Butter is key to both the flavor and moistness of these individual chocolate cakes. I prefer using salted butter as it adds an extra layer of depth and complexity to the overall flavor profile, beautifully complementing the rich chocolate. If you only have unsalted butter, you can certainly use it, but you might want to increase the added salt slightly to achieve a similar flavor balance.
- Eggs and Egg Yolks: The Secret to Structure and Molten Goo
A combination of whole large eggs and additional large egg yolks plays a dual role. The whole eggs provide structure and binding, while the extra egg yolks contribute immense richness and help create that signature custardy, flowing molten center. They are fundamental to the cake’s luxurious texture and flavor.
- Salt: The Flavor Enhancer
Just a touch of salt is crucial. It doesn’t make the cake taste salty, but rather acts as a flavor enhancer, balancing the sweetness and intensifying the deep chocolate notes, making every bite even more satisfying.
Step-by-Step: Crafting Your Decadent Gluten-Free Chocolate Lava Cakes
Creating these impressive **gluten-free chocolate lava cakes** is simpler than you might imagine. Follow these detailed steps to ensure a perfect, molten-centered dessert every time.
- Step 1: Prepare Your Ramekins for Easy Release.
Begin by preheating your oven to 425°F (220°C). This high temperature is crucial for setting the outside of the cake quickly while keeping the inside wonderfully gooey. Next, prepare four 6-ounce ramekins. Generously spray the inside of each ramekin with nonstick cooking spray, ensuring full coverage. Then, lightly dust them with unsweetened cocoa powder, rotating the ramekin to coat all sides evenly. This vital step creates a barrier that prevents sticking and ensures your beautifully baked lava cakes will effortlessly release after baking, leaving their elegant shape intact.
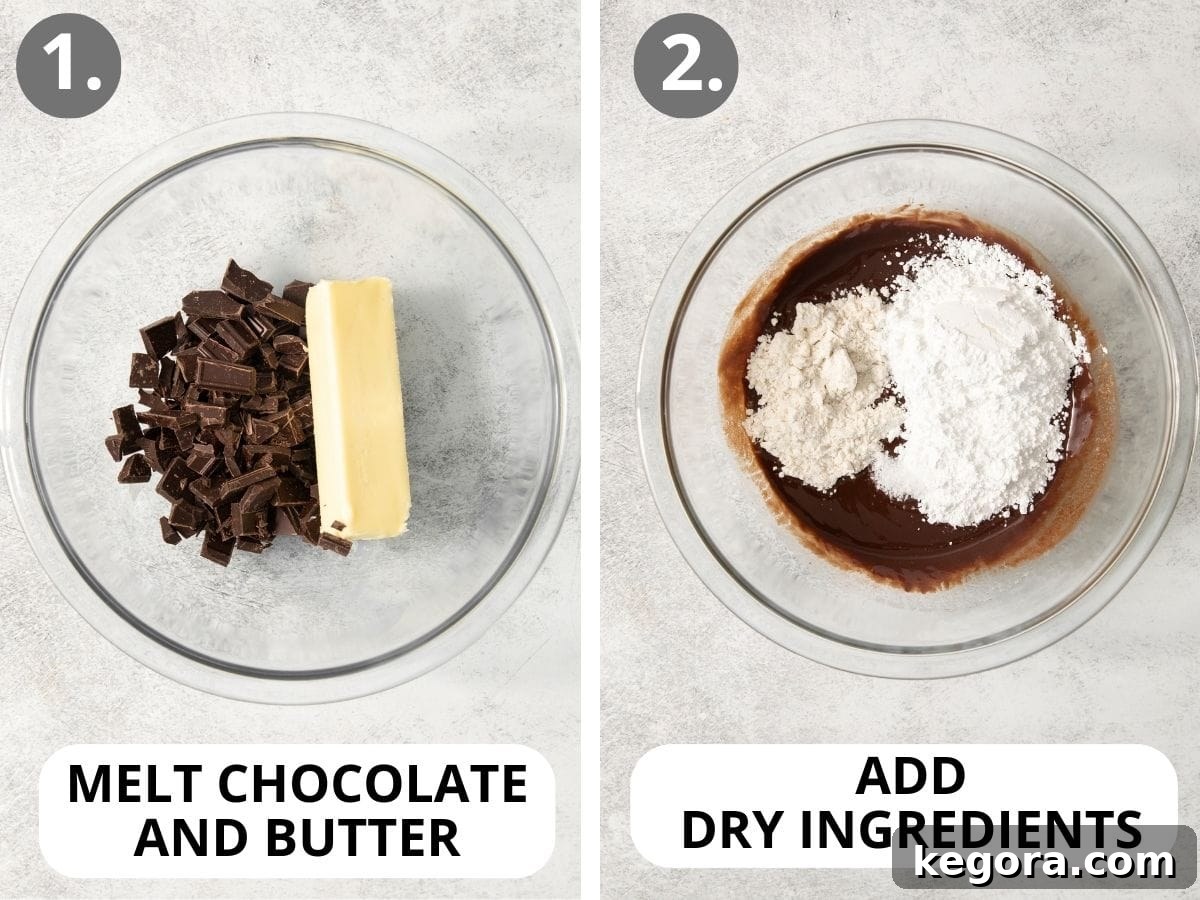
- Step 2: Melt the Chocolate and Butter to Silky Perfection.
Take your coarsely chopped high-quality chocolate bar (remember, no chocolate chips!) and place it in a medium microwave-safe bowl. Add the butter to the bowl. Microwave on high, pausing to stir every 15 seconds. Continue this process until the mixture is completely melted and beautifully smooth. This gentle melting process prevents the chocolate from seizing or burning, which is essential for a smooth batter. Once melted, set the mixture aside to cool slightly while you prepare the other ingredients.
- Step 3: Combine Dry Ingredients with Melted Chocolate.
To the slightly cooled melted chocolate and butter mixture, add your gluten-free measure-for-measure flour, powdered sugar, and a pinch of salt. Using a whisk, thoroughly combine these ingredients until the batter is smooth and free of any lumps. Ensure all the dry ingredients are fully incorporated without overmixing.
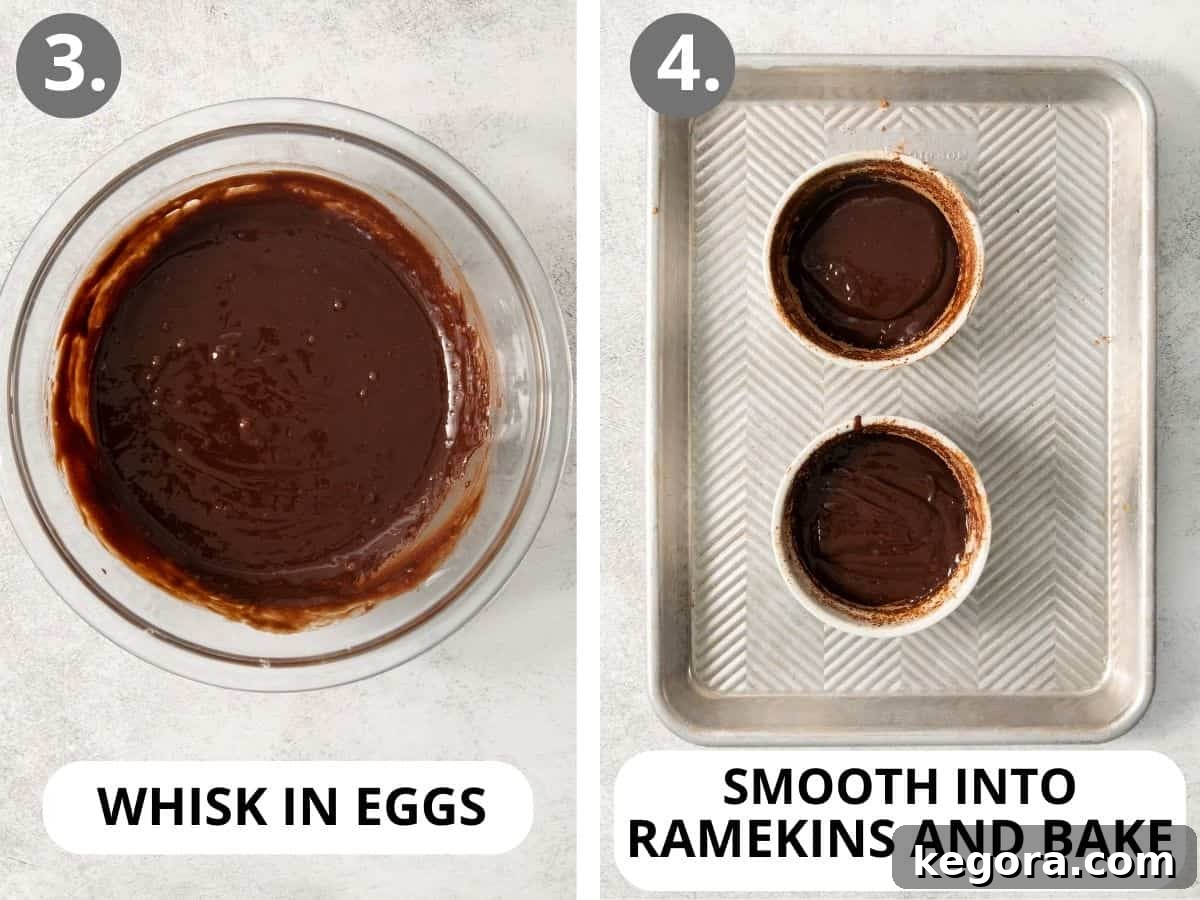
- Step 4: Incorporate the Eggs for Richness and Structure.
In a separate small bowl, whisk together the whole large eggs and the additional egg yolks until they are smooth and well combined. This ensures they integrate evenly into the chocolate mixture. Pour this egg mixture into the chocolate batter. Using either a hand mixer on low speed or a regular whisk, stir until the ingredients are fully incorporated and the batter is smooth. At this stage, you’ll notice the gluten-free chocolate lava cake batter will be slightly thick and luscious – a perfect consistency for baking.
- Step 5: Fill the Ramekins and Prepare for Baking.
Carefully spoon the rich chocolate cake batter evenly into each of your four prepared ramekins. Aim to fill them about two-thirds to three-quarters full to allow for a slight rise. Gently smooth the top of the batter in each ramekin using the back of a spoon or an offset spatula for a clean finish. Place the filled ramekins onto a baking sheet. This makes it easier to transfer them to and from the oven and catches any potential overflows.
- Step 6: Bake to Molten Perfection.
Bake the lava cakes in the preheated 425°F (220°C) oven for approximately 10-12 minutes. The key is to watch for the edges of each cake to appear solid and firm. The very center of the molten chocolate lava cakes, however, should still look soft and slightly jiggly when gently nudged. This soft center is your indicator of the perfect molten interior. Overbaking will result in a fully cooked cake, losing the desirable “lava” effect, so keep a close eye on them!
- Step 7: Serve Immediately and Enjoy Your Decadent Treat.
Once baked, allow the gluten-free cakes to cool in their ramekins for just 1 minute. This brief cooling period helps the cakes set slightly, making them easier to invert. After 1 minute, carefully cover each individual ramekin with an inverted serving plate. With a quick, confident motion, turn the ramekin and plate over. The gluten-free chocolate lava cake should easily slide out onto the plate. Serve these divine chocolate treats immediately with your desired toppings – perhaps a scoop of vanilla bean ice cream, a dusting of powdered sugar, or a scattering of fresh berries. Enjoy every last bite of this rich, warm, and utterly decadent chocolate experience!
Storage and Make-Ahead Instructions for Convenience
Planning ahead or dealing with irresistible leftovers? Here’s how to best manage your **gluten-free chocolate lava cakes**:
Make-Ahead Prep: For ultimate convenience, you can prepare the lava cake batter through Step 5 (filling the ramekins) up to 2 days in advance. Once the ramekins are filled, cover them tightly with plastic wrap and refrigerate. When you’re ready to bake, allow the batter to come to room temperature for a couple of hours before proceeding with Step 6 (baking). This ensures an even bake and the best molten center.
To Serve Leftovers: While these gluten-free molten lava cakes are undeniably best enjoyed fresh out of the oven, any leftovers can be stored. Place them in an airtight container in the refrigerator for up to five days. To recapture some of their molten magic, reheat individual cakes in the microwave for 5-10 seconds. Be careful not to overheat, as this can cause the center to cook through.
Pro Tips for Achieving Perfect Gluten-Free Chocolate Lava Cakes
Mastering the art of **gluten-free chocolate lava cake** is easy with these expert tips:
- Ramekin Size Matters: For consistent results, I recommend using 6-ounce ramekins for these rich chocolate cakes. This size is ideal for individual servings and ensures the proper bake time for that signature molten center.
- Alternative Bakeware – The Muffin Pan Option: No ramekins? No problem! You can still enjoy these delightful molten cakes using a 12-count muffin pan. For best results, utilize the two inside rows of the muffin tin, as these usually bake more evenly. Prepare the muffin tin just as you would ramekins: spray generously with nonstick cooking spray and dust with cocoa powder. When using a muffin pan, reduce the cooking time slightly to 8-10 minutes, as smaller cakes cook faster. After baking, allow to cool briefly, then gently use a spoon to release each gluten-free chocolate lava cake from the pan and carefully place them upside down on your plates.
- The Golden Rule: Don’t Overbake! This is perhaps the most crucial tip. The magic of a lava cake lies in its gooey, flowing center. As soon as the edges appear set and firm, but the center still jiggles slightly, take them out of the oven. Even a minute or two too long can turn your molten center into a regular chocolate cake.
- Room Temperature Ingredients: Ensure your eggs and butter are at room temperature before you begin. This allows them to incorporate more smoothly into the batter, creating a more cohesive and evenly textured cake.
- Elevate with Toppings: These molten cakes are delicious on their own, but they truly shine with the right accompaniments! Feel free to add your favorite toppings to enhance the experience. Some fantastic ideas include:
- Vanilla Bean Ice Cream: The classic pairing, offering a delightful hot-cold contrast.
- Fresh Whipped Cream: A light and airy complement to the rich chocolate.
- Fresh Berries: Tart raspberries, sweet strawberries, or mixed berries provide a beautiful color contrast and cut through the richness. Consider a simple raspberry coulis or strawberry compote for an extra touch of fruitiness.
- Chocolate Sauce: Double down on the chocolate with an extra drizzle of homemade or store-bought chocolate sauce.
- A Pinch of Sea Salt: A sprinkle of flaky sea salt on top can intensify the chocolate flavor and add a sophisticated touch.
- Powdered Sugar: A simple, elegant dusting of powdered sugar is always a beautiful finish.
- Flavor Boosters: A tiny pinch of espresso powder can significantly deepen the chocolate flavor without making the cake taste like coffee. A splash of vanilla extract or a hint of almond extract can also add wonderful complexity.
Explore More Irresistible Gluten-Free Chocolate Recipes
If you’ve fallen in love with the richness of this **gluten-free chocolate lava cake**, you’re in for a treat! Our collection of gluten-free chocolate desserts offers a variety of ways to satisfy your sweet tooth without compromising on flavor or texture. Discover your next favorite:
- Gluten-Free Chocolate Cupcakes: Perfectly moist and fluffy, topped with luscious frosting.
- Dairy-Free Chocolate Fondue: A fun and interactive dessert, perfect for sharing.
- Gluten-Free Chocolate Mousse Cake: Layers of rich chocolate cake and airy mousse for an elegant dessert.
- Gluten-Free Brownies: Fudgy, chewy, and intensely chocolatey – a classic favorite.
- Oat Flour Brownies: A unique twist on brownies, offering a slightly different texture and wholesome flavor.
- Gluten-Free Chocolate Bundt Cake: A show-stopping centerpiece, perfect for gatherings.
Gluten-Free Chocolate Lava Cake (Effortless Indulgence!)
Ingredients
- 6 ounces (170g) high-quality semi-sweet or bittersweet chocolate, chopped (see note)
- 1/2 cup (113g) butter
- 3 tablespoons (30g) gluten-free measure-for-measure flour
- 1/2 cup (60g) powdered sugar
- 1/4 teaspoon salt
- 2 large eggs
- 2 large egg yolks
Instructions
-
Preheat oven to 425°F (220°C). Spray four 6-ounce ramekins with nonstick cooking spray and dust thoroughly with cocoa powder. This step is crucial for ensuring the cakes easily release after baking.
-
Coarsely chop the high-quality chocolate bar (do not use chocolate chips, as they will not yield the desired “lava” effect) and place it in a medium microwave-safe bowl. Add the butter to the bowl. Microwave on high, stirring every 15 seconds until the mixture is completely melted and smooth. Set aside to cool slightly.
-
Add the gluten-free flour, powdered sugar, and salt to the melted chocolate mixture. Whisk until the batter is smooth and well combined.
-
In a small separate bowl, whisk together the whole eggs and egg yolks until smooth. Pour this egg mixture into the chocolate batter and whisk until fully incorporated. The batter will be slightly thick.
-
Spoon the chocolate batter evenly into each of the prepared ramekins. Gently smooth the top of the batter in each ramekin.
-
Place the filled ramekins onto a baking sheet. Bake for 10-12 minutes, or until the edges of each cake appear solid and firm. The very tops and centers should still look soft and slightly jiggly – this indicates the perfect molten center. Be careful not to overbake.
-
Allow the cakes to cool in their ramekins for just 1 minute. Then, carefully cover each ramekin with an inverted serving plate and quickly flip it over. The cakes should easily come out onto the plates.
-
Serve immediately with your desired toppings, such as fresh berries, vanilla ice cream, or a dusting of powdered sugar. Enjoy this decadent gluten-free chocolate treat!
Notes
- Chocolate Selection: For the best “lava” effect and a truly rich flavor, I recommend using high-quality semi-sweet or bittersweet baking bars (like Guittard). Make sure to chop them before melting. Avoid chocolate chips as their stabilizers prevent proper melting into a molten center.
- Gluten-Free Flour Choice: King Arthur Gluten-Free Measure-for-Measure Flour is my top choice for this recipe, delivering excellent results. Bob’s Red Mill Gluten-Free 1:1 Baking Flour is another reliable option.
- For perfectly portioned cakes, I prefer using 6-ounce ramekins.
- Muffin Pan Adaptation: If you don’t have ramekins, you can use the two inner rows of a 12-cup muffin pan. Prepare the muffin tin by spraying and cocoa-dusting as you would ramekins. Reduce baking time to 8-10 minutes. After baking, carefully use a spoon to release the cakes and invert them onto plates.
- Make-Ahead Tip: Prepare the batter and fill the ramekins up to 2 days in advance. Cover tightly and refrigerate. Allow to come to room temperature for a couple of hours before baking.
- Reheating Leftovers: Best served fresh, but leftovers can be stored in an airtight container in the fridge for up to 5 days. Reheat briefly in the microwave (5-10 seconds) to warm and re-liquefy the center.