
Crafting the Perfect Crunch: Your Go-To Gluten-Free Granola Recipe
Are you searching for a genuinely delicious, incredibly easy, and undeniably healthy breakfast or snack option that also happens to be gluten-free? Look no further! This homemade gluten-free granola recipe isn’t just a dish; it’s a game-changer. Forget those expensive, often overly sweet, and less-than-fresh store-bought alternatives. Once you experience the irresistible crunch, the rich flavor, and the pure satisfaction of making your own granola, you’ll be hooked. This recipe is designed to deliver consistent results every time, creating perfectly golden, sweet, and wonderfully clumpy granola that will elevate your mornings and fuel your day.
Join me, Erin, as we dive into the delightful world of homemade granola. I promise, this will become your new favorite go-to recipe for a wholesome and satisfying treat!
Why This Gluten-Free Granola Will Be Your New Obsession
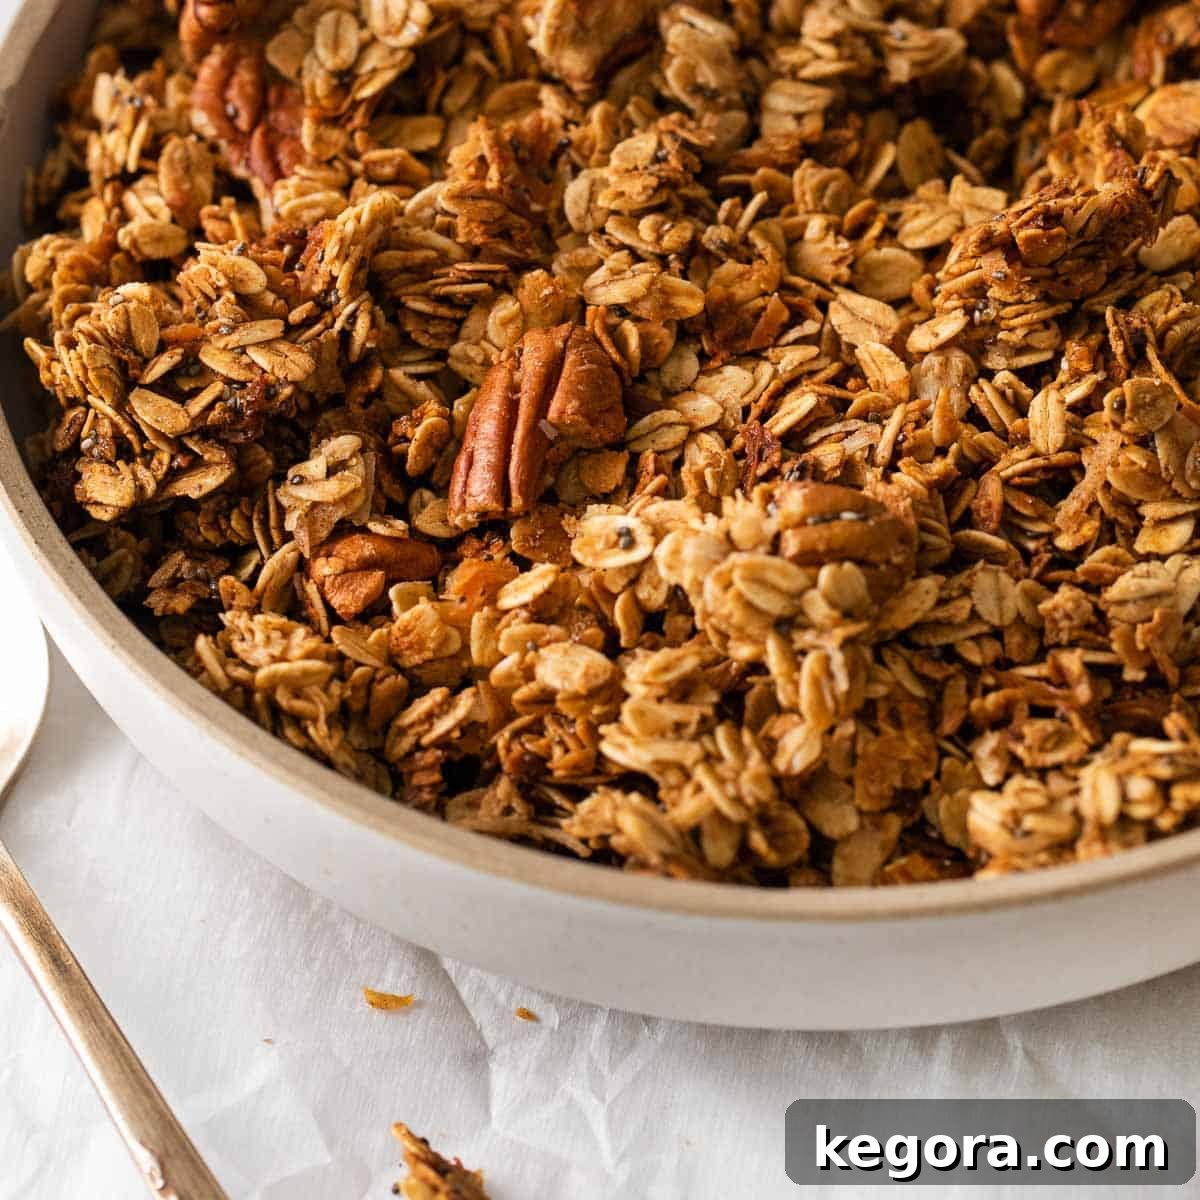
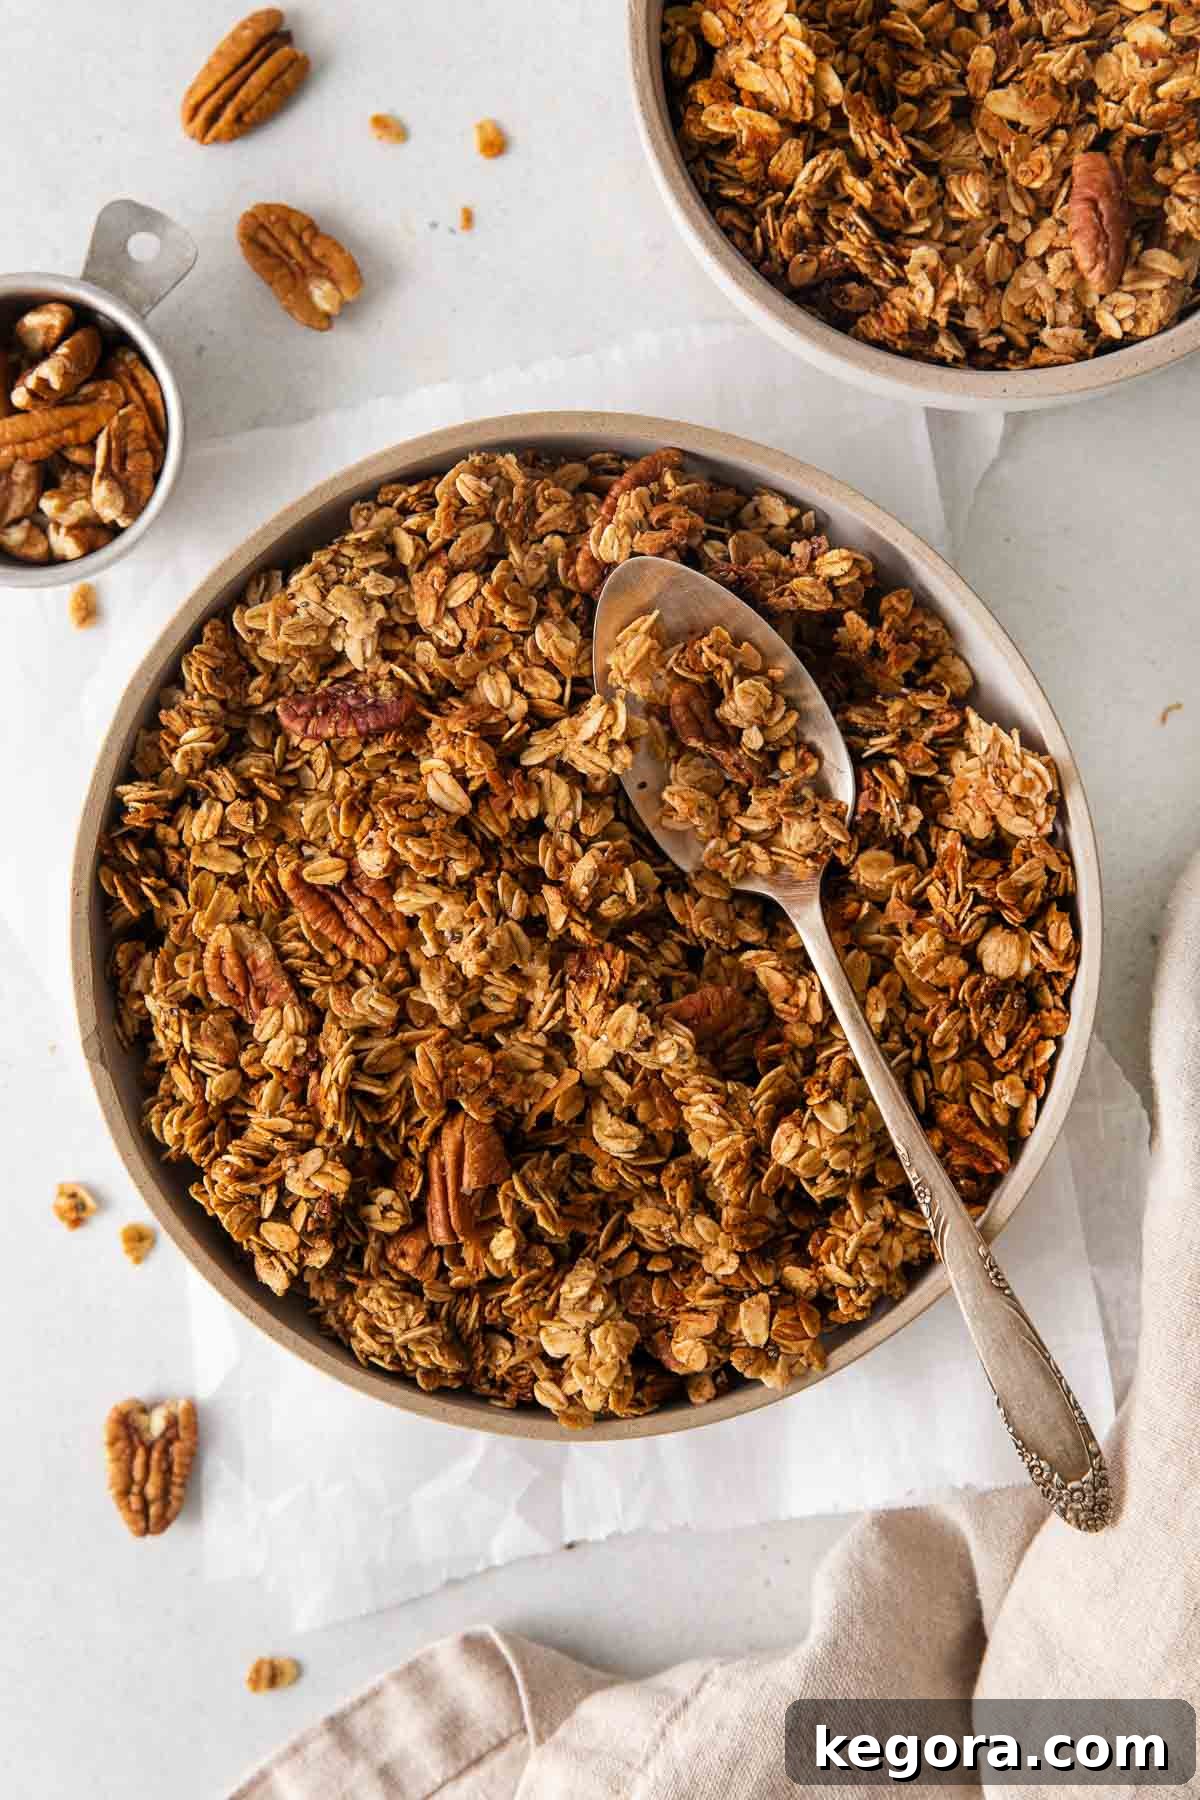
- Texture Perfection: Prepare for a truly crunchy and delightfully crisp experience with every bite. We’ll reveal the secret to achieving those coveted, hearty granola clusters that everyone loves.
- Flavor Harmony: Indulge in a beautiful symphony of sweet and toasty notes, perfectly balanced with delicate hints of caramel, warm coconut, and aromatic cinnamon. It’s a flavor profile designed to please every palate.
- Effortless Preparation: Say goodbye to complicated recipes and specialized kitchen gadgets. This granola is incredibly simple to make, requiring no advanced techniques or fancy equipment. It’s perfect for both novice and experienced bakers alike.
- Top Tips for Granola Gold: The key to achieving superior crunch and enviable clusters lies in a few simple, yet crucial, steps. Our number one tip? Allowing your freshly baked granola to cool completely and undisturbed is absolutely vital. This cooling period is what transforms the warm, loose oats into those firm, chunky clusters that make homemade granola so irresistible.
- A Recipe You’ll Cherish: Will I be making this again? Absolutely, and you will too! This easy gluten-free granola recipe is astonishingly versatile – perfect for a quick breakfast, a satisfying snack, or as a delightful topping for yogurt, fruit, or even ice cream. Once you taste this homemade goodness, you’ll never consider store-bought granola again. It’s a culinary triumph you’ll want to recreate time and time again.
xoxo erin
Featured Comment
From Jess: “Thank you so much for sharing this amazing recipe! I just recently went gluten free and I have been having a hard time with losing some of my favorite dishes like granola. This is a life saver!”
11 more comments
Essential Ingredients for Your Gluten-Free Granola
Creating this irresistible gluten-free granola begins with selecting the right ingredients. Each component plays a vital role in achieving that perfect texture and flavor. Below, you’ll find detailed notes on some of the key ingredients to ensure your homemade granola is nothing short of spectacular. For precise measurements, be sure to jump straight to the complete recipe cardbelow.
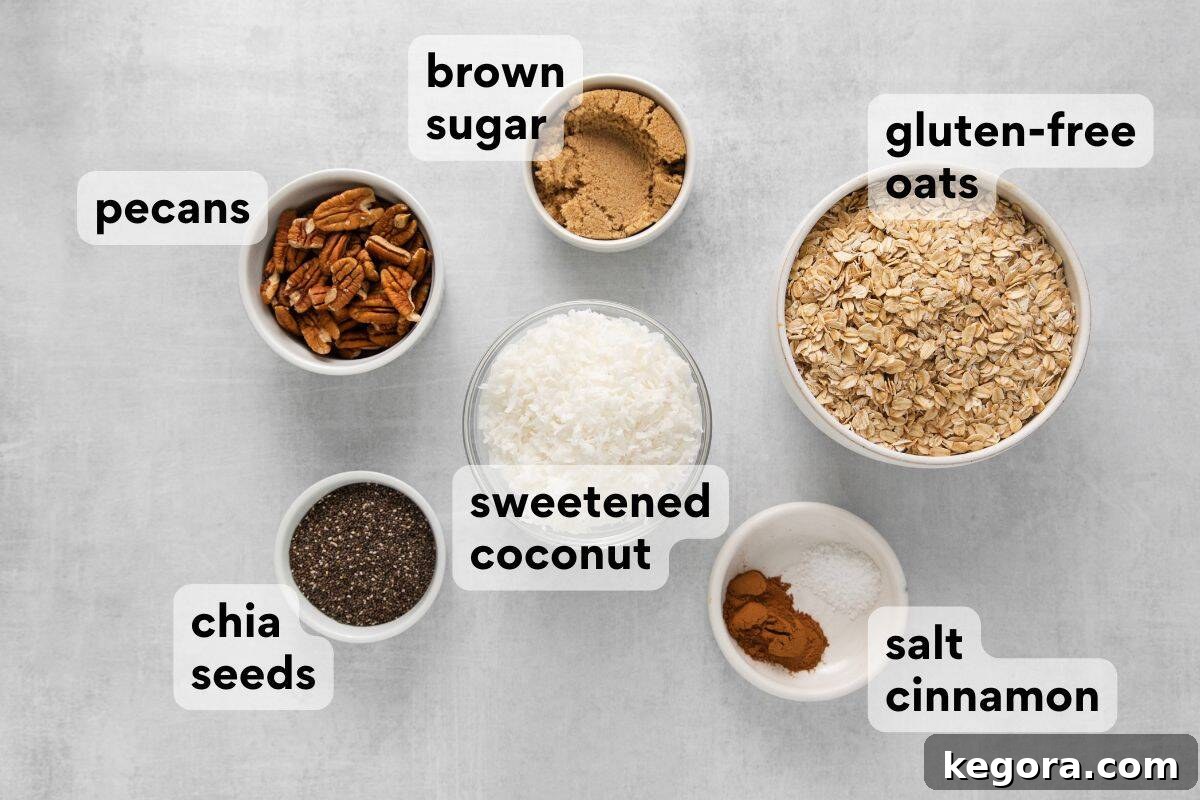
- Certified Gluten-Free Rolled Oats: This is the foundation of our granola. To ensure your granola is truly gluten-free, it is absolutely essential to purchase oats that are specifically certified gluten-free. Regular oats can often be cross-contaminated with wheat, barley, or rye during processing. Rolled oats (old-fashioned oats) are ideal as they provide a hearty texture that holds up beautifully during baking, contributing to substantial clusters. Avoid instant or quick oats, as they can become mushy. This is my personal favorite brand for reliability and quality.
- Pure Maple Syrup: Maple syrup serves a dual purpose in this recipe: it acts as a natural sweetener, imparting a delightful caramel-like depth, and functions as a binder, helping the granola stick together to form those desirable clumps. Always opt for pure maple syrup for the best flavor and consistent results; artificial pancake syrups won’t deliver the same quality or caramelization. A crucial tip: if your maple syrup is cold, warm it slightly before mixing. Cold syrup can cause the coconut oil to solidify, making it difficult to achieve an even coating.
- Sweetened Shredded Coconut: This ingredient adds a wonderful chewiness and an intense tropical flavor. Make sure you use shredded coconut, not larger coconut chips, as the shredded variety integrates better into the granola mixture and toasts more evenly. If you prefer a less sweet option, you can certainly use unsweetened shredded coconut, adjusting the brown sugar slightly if needed to taste. The natural oils in the coconut also contribute to the granola’s overall crispness.
- Coconut Oil & Coconut Extract: The coconut oil is key for achieving that desirable golden-brown color and irresistible crisp texture. As it melts and coats the oats, it facilitates even baking and adds a subtle richness. Using both coconut oil and a touch of coconut extract amplifies the natural coconut flavor, ensuring every bite is infused with a fragrant, tropical essence. For best results, use melted coconut oil so it can be easily incorporated into the wet mixture.
- Pecans: We incorporate both whole and finely chopped pecans to create a dynamic textural contrast. The chopped pecans integrate throughout the granola, while the whole pieces provide satisfying bursts of nutty flavor and crunch. As they bake, the pecans toast beautifully, releasing their rich, buttery notes and adding another layer of complexity to the granola. Feel free to substitute with other nuts like walnuts or almonds if pecans aren’t your preference.
- Chia Seeds: Beyond adding a pleasant, subtle crunch and unique texture, chia seeds are a nutritional powerhouse. They are packed with fiber, omega-3 fatty acids, and essential minerals, making your homemade granola even healthier. Their ability to absorb moisture also subtly aids in binding the granola together, contributing to firmer clusters without being overtly noticeable.
- Brown Sugar: A small amount of brown sugar works in harmony with the maple syrup to deepen the caramel notes and enhance the overall sweetness. Its molasses content adds a rich, nuanced flavor that granulated sugar simply cannot replicate.
- Cinnamon & Salt: These two ingredients are flavor enhancers. Cinnamon brings a warm, comforting spice that complements the sweet and nutty elements, while a touch of salt is crucial for balancing the sweetness and making all the other flavors truly pop. Don’t skip the salt – it’s vital for a well-rounded taste.
For more delightful recipes featuring gluten-free oats, be sure to try these gluten-free oatmeal scotchies or these incredibly chewy and satisfying gluten-free oatmeal chocolate chip cookies.
Step-by-Step Guide to Making Perfect Gluten-Free Granola
Making your own wholesome, crunchy, and delicious gluten-free granola is incredibly straightforward, and the process is just as rewarding as the outcome. You’ll be amazed at how simple it is to achieve results that far surpass anything you can buy at the store. Here’s a comprehensive overview of how to bring this fantastic recipe to life. For detailed, step-by-step instructions and exact measurements, you can always jump to the full recipe card below!
1. Prepare Your Workspace
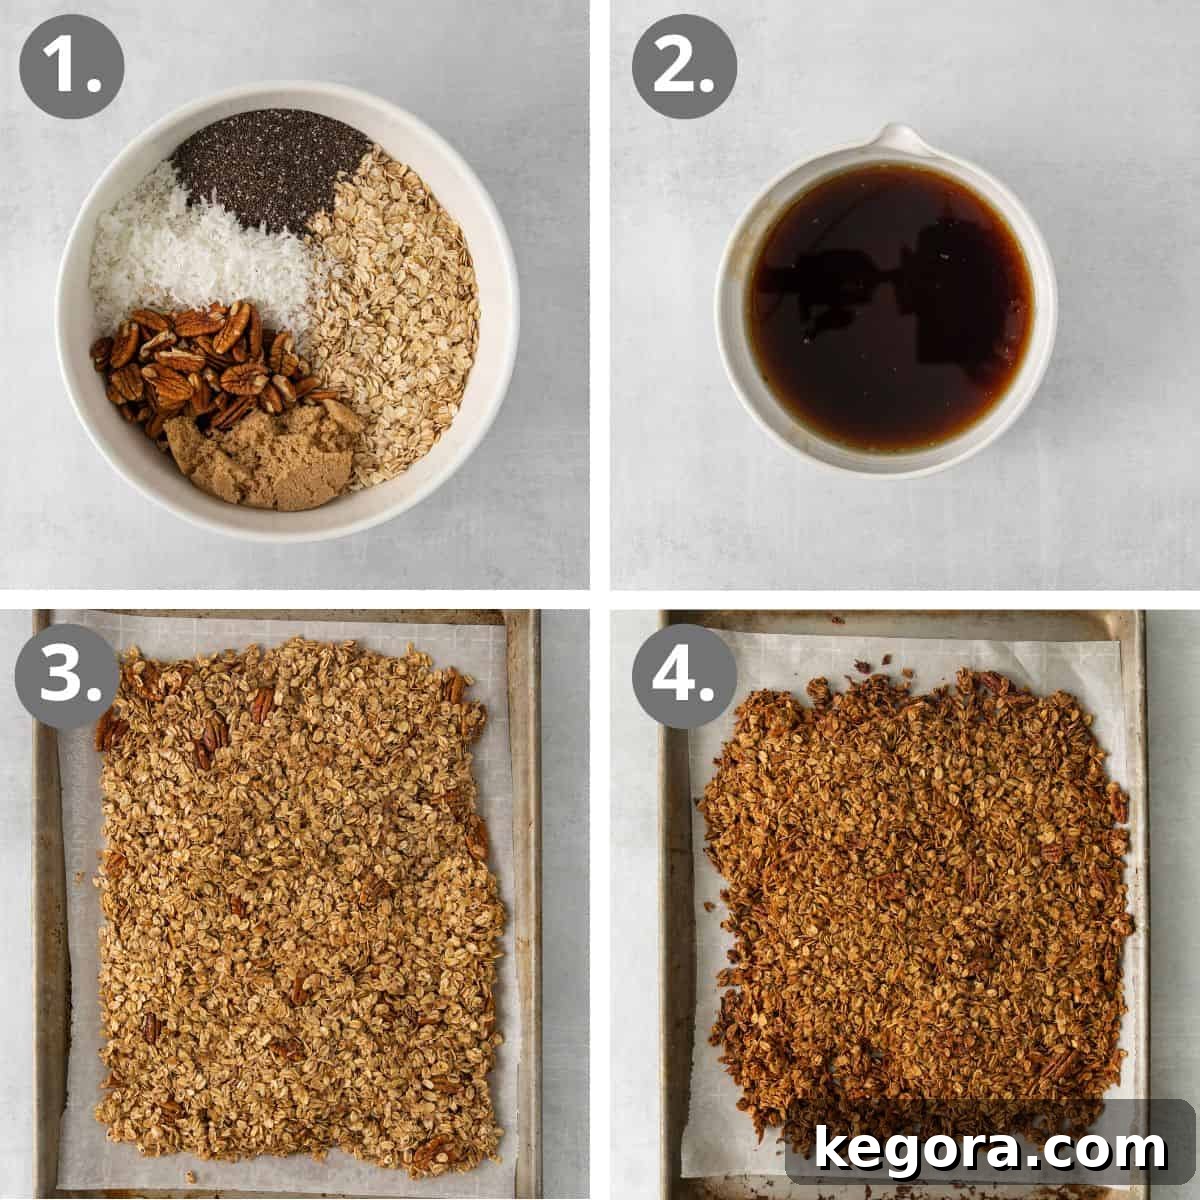
Before you begin, preheat your oven to 350°F (175°C). This ensures the oven is at the correct temperature for even baking. Line two large baking sheets with parchment paper or silicone baking mats. This prevents sticking and makes cleanup a breeze. Using two sheets is crucial to avoid overcrowding, which can steam the granola instead of crisping it. Overcrowding is a common mistake that leads to soft granola.
2. Combine Dry Ingredients
You’ll only need two bowls for this easy recipe! In a generously sized large mixing bowl, combine all your dry ingredients: the certified gluten-free rolled oats, shredded sweetened coconut, pecan chips, whole pecans, chia seeds, brown sugar, cinnamon, and salt. Take your time to mix these thoroughly. A good, even distribution of all dry components ensures that every spoonful of granola will have a consistent flavor and texture.
3. Whisk Wet Ingredients
In a separate, smaller bowl, whisk together the melted coconut oil, pure maple syrup, vanilla extract, and coconut extract. It’s important that your coconut oil is fully melted and that your maple syrup is not cold, as previously mentioned. If the maple syrup is too chilly, it can cause the melted coconut oil to seize and form clumps, making it difficult to coat the dry ingredients evenly. A quick zap in the microwave for a few seconds can warm up cold maple syrup if necessary.
4. Combine and Coat
Pour the whisked wet ingredients over the dry ingredients in the large bowl. Now, the magic happens! Stir everything together thoroughly, making sure every single oat, nut, and flake of coconut is evenly coated with the sweet, oily mixture. This thorough coating is essential for that beautiful golden color and the deep, rich flavor that develops during baking.
5. Spread and Bake Evenly
Once combined, divide the granola mixture equally between your two prepared baking sheets. Spread the granola out into a single, even layer on each sheet. This uniformity is incredibly important for even baking and crispness. If the granola is piled too thick in some areas and thin in others, you’ll end up with inconsistently baked results – some burnt, some still soft. Bake the granola for approximately 30 minutes. Halfway through the baking time (around 15 minutes), gently stir the granola on each pan and rotate the baking sheets from top to bottom and front to back. This ensures even exposure to heat, promoting uniform browning and crisping. For those larger, desirable granola chunks, gently press the stirred granola back down with your spatula to create a more compact, even layer before returning it to the oven.
6. The Golden Rule of Cooling
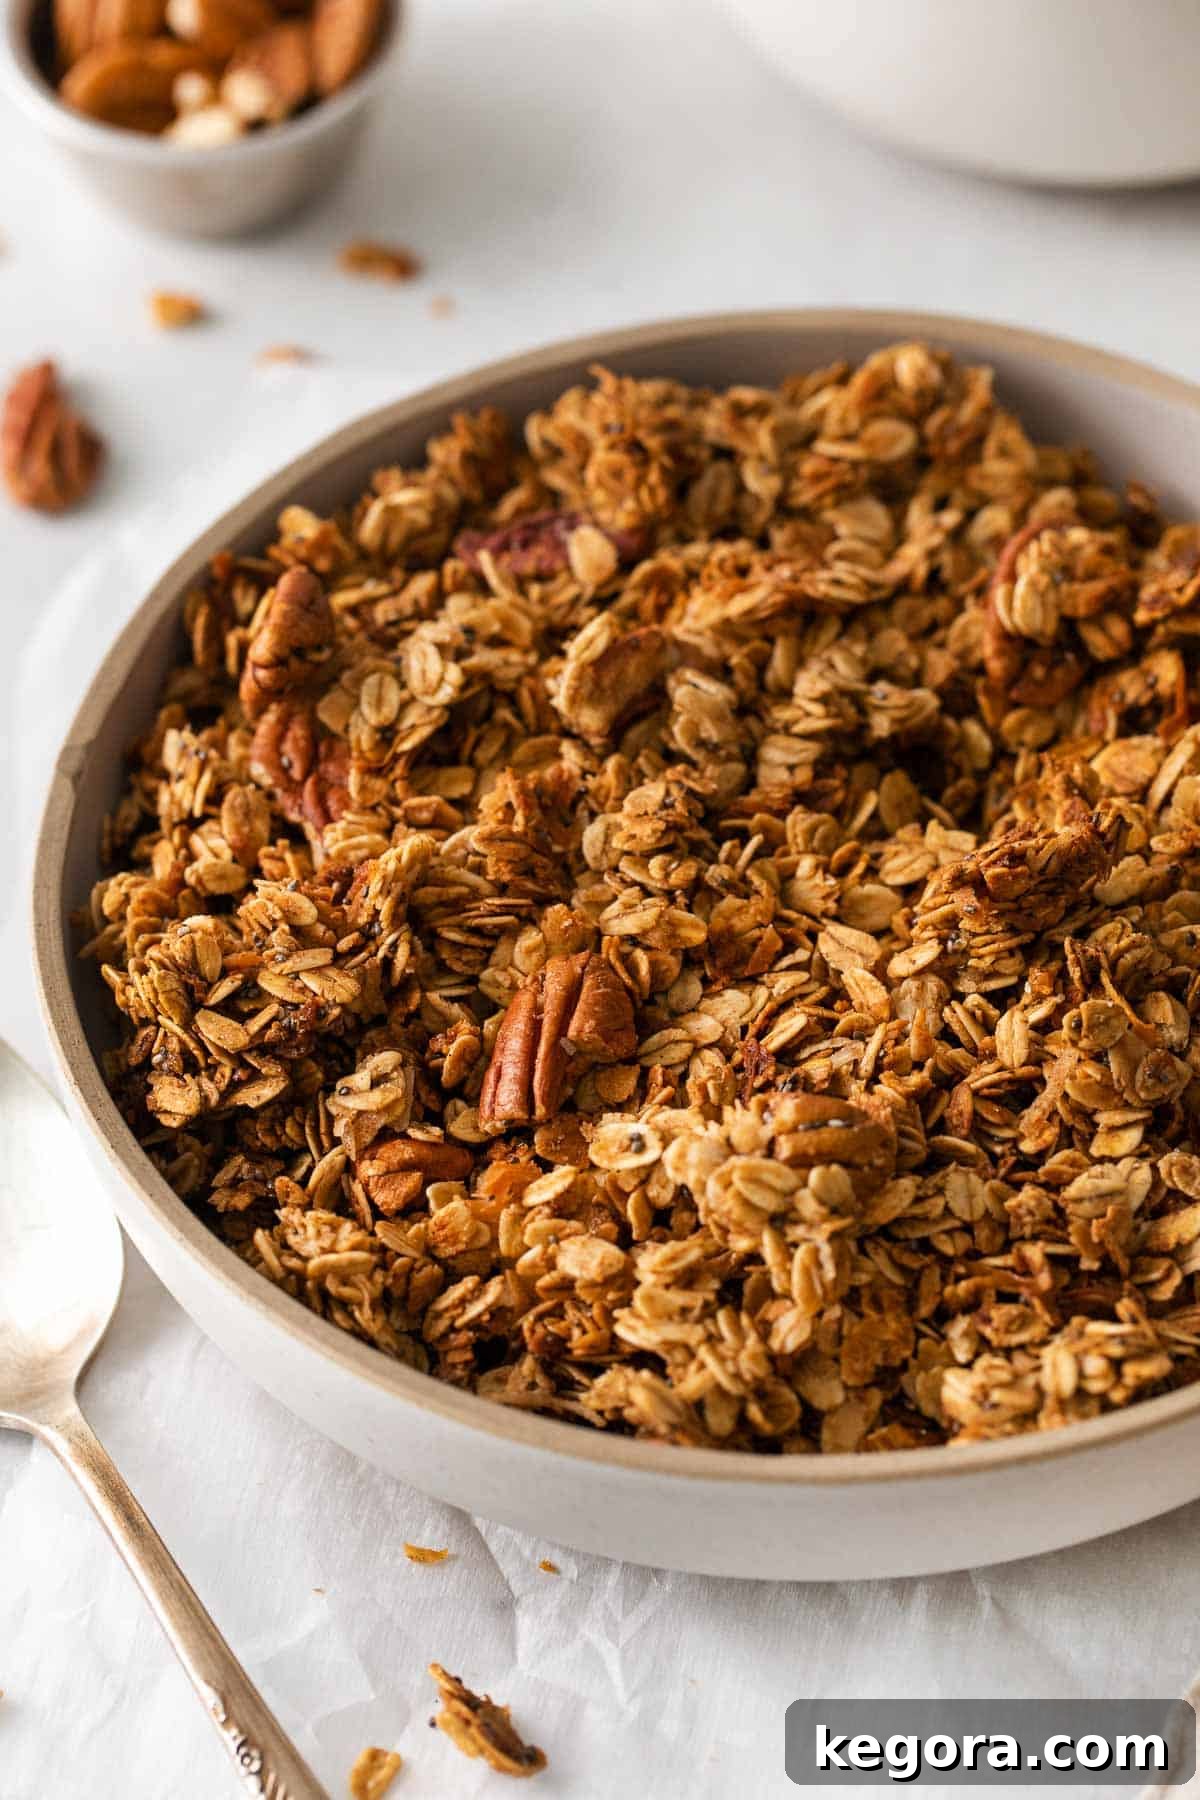
The most crucial step for achieving those coveted crunchy granola clusters is often overlooked: the cooling process. Once the granola is baked to a golden perfection, remove the baking sheets from the oven and let the granola cool completely undisturbed for at least 45 minutes, or even longer, until it reaches room temperature. Resist the urge to stir it or break it up while it’s warm! As the granola cools, the sugars and fats solidify, binding the oats and nuts together into those wonderful, crunchy clusters. Patience here is truly rewarded!
Customize Your Granola!
This recipe provides a fantastic base, but don’t hesitate to make it your own by adding different mix-ins. For variety, consider incorporating extras like dried fruit (such as cranberries, raisins, or chopped apricots – add these after baking to prevent burning), flax seeds, pumpkin seeds, sunflower seeds, or even mini chocolate chips (also added after baking while the granola is still warm, then allowed to cool and firm up). The possibilities are endless, allowing you to create a personalized granola that perfectly suits your taste.
Favorite Gluten-Free Granola (Go-To Recipe!)
This granola is not only incredibly EASY-TO-MAKE but also vanishes quickly from our pantry every time. I genuinely hope you’ll find yourself making this recipe over and over again, just like we do!
Comments
Ingredients
Dry Ingredients
- 6 cups (510g) certified gluten-free rolled oats
- 1 ½ cups (120g) shredded sweetened coconut
- 3/4 cup (98g) pecan chips or finely chopped pecans
- ½ cup (65g) whole pecans you can half some if you like
- ¼ cup (50g) chia seeds
- ¼ cup (53g) packed light brown sugar
- 2 teaspoons ground cinnamon
- ¾ teaspoon sea salt
Wet Ingredients
- ½ cup (112g) coconut oil melted
- 1 cup (240ml) pure maple syrup heated slightly if cold
- 1 tablespoon pure vanilla extract
- 1 teaspoon coconut extract
Instructions
-
Preheat your oven to 350°F (175°C). Prepare two large baking sheets by lining them with parchment paper or silicone baking mats. This ensures easy release and prevents sticking.
-
In a very large bowl, combine all the dry ingredients: the gluten-free oats, shredded coconut, pecan chips, whole pecans, chia seeds, brown sugar, cinnamon, and salt. Stir well with a spoon or your hands until everything is thoroughly mixed and evenly distributed.
-
In a separate, small bowl, whisk together the melted coconut oil, pure maple syrup (ensure it’s slightly warm if cold), vanilla extract, and coconut extract until fully combined and smooth.
-
Pour the wet ingredient mixture over the dry ingredients in the large bowl. Stir diligently with a spatula until all the dry ingredients are uniformly coated with the wet mixture. Ensure there are no dry spots remaining.
-
Divide the coated granola mixture evenly between the two prepared baking sheets. Spread the granola out into a thin, single, and even layer across each sheet. Avoid piling it up, as this can lead to uneven baking.
-
Bake the granola for a total of 30 minutes. Halfway through the baking time (after 15 minutes), remove the pans from the oven. Gently stir the granola on each sheet, then rotate the pans (swap top and bottom racks, and turn each pan 180 degrees). If you desire larger, chunkier clusters, use your spatula to gently press the stirred granola back down into a more compact, even layer. Return to the oven and continue baking. The granola will continue to crisp up significantly as it cools.
-
Once baked, remove the granola from the oven and, very importantly, let it cool completely undisturbed on the baking sheets for at least 45 minutes, or until it reaches room temperature. This crucial cooling time allows the granola to firm up and form those delightful crunchy clusters. Once cooled, break it into pieces and enjoy!
Notes
Dairy-Free Delight: This recipe is naturally dairy-free, making it a wonderful option for those with dairy sensitivities or following a vegan diet.
Make-Ahead Prep: To save time during busy mornings, you can prepare the dry ingredients ahead of time. Simply combine all the dry components and store them in an airtight container at room temperature for up to 1 week. When you’re ready to bake, just mix in the wet ingredients and proceed with the baking instructions.
Storage Tips: Once your delicious granola has completely cooled, transfer it to an airtight container. Store it at room temperature in a cool, dry place, and it will remain fresh and crunchy for up to 1 month.
Freezing for Freshness: For longer storage, homemade granola freezes exceptionally well. Place cooled granola in a freezer-safe bag or an airtight container and freeze for up to 3 months. When you’re ready to enjoy it, simply thaw at room temperature for a few hours.
Nutrition
Frequently Asked Questions About Homemade Gluten-Free Granola
How do I ensure my granola forms those big, satisfying clusters?
The secret to substantial granola clusters lies primarily in two steps: first, ensure you press the granola down firmly with a spatula after stirring it halfway through baking. This compacts the mixture. Second, and most importantly, allow the granola to cool completely and undisturbed on the baking sheets. Resist the urge to touch or break it apart until it is fully at room temperature. The cooling process allows the sugars and oils to solidify, binding the oats and other ingredients into firm, crunchy clumps.
Can I adjust the sweetness level of this granola?
Absolutely! This recipe provides a wonderfully balanced sweetness, but you can certainly tailor it to your preference. For a slightly less sweet granola, you can reduce the amount of brown sugar by half or even omit it entirely, relying solely on the maple syrup. You could also experiment with using unsweetened shredded coconut instead of sweetened. If you prefer it sweeter, a touch more brown sugar or a drizzle of extra maple syrup after baking can do the trick, but taste as you go!
What kind of gluten-free oats are best for granola?
For the best texture and structure in your granola, certified gluten-free rolled oats (also known as old-fashioned oats) are highly recommended. These oats are flatter and thicker than quick or instant oats, which means they hold their shape better during baking and contribute to a chewier, heartier granola. Quick oats can sometimes result in a crumbly or mushy texture. Always double-check the packaging to ensure they are certified gluten-free to avoid cross-contamination.
How long does homemade granola last and how should I store it?
Properly stored homemade granola can last quite a while, though it’s so delicious it often disappears quickly! Once completely cooled, transfer your granola to an airtight container. Store it at room temperature in a cool, dry place, away from direct sunlight. It will stay fresh, crunchy, and delicious for up to one month. For longer storage, see the “To Freeze” note in the recipe card.
Can I add other ingredients or create variations?
This recipe is an excellent base for endless customization! Feel free to get creative with your mix-ins. Consider adding:
- Dried Fruits: Stir in dried cranberries, raisins, chopped apricots, or cherries *after* the granola has baked and cooled slightly, to prevent them from burning or becoming too hard.
- Other Nuts & Seeds: Walnuts, almonds, cashews, sunflower seeds, or pumpkin seeds can replace or complement the pecans. Hemp hearts or flax seeds are also great additions for extra nutrition.
- Chocolate: Mini chocolate chips are a popular choice. Add them after the granola has cooled but is still slightly warm, then let it set completely. This prevents them from melting entirely during baking.
- Spices: Experiment with other warm spices like nutmeg, cardamom, or a touch of ginger for different flavor profiles.
This post was originally published in January 2023. It was updated with new photos, expanded instructions, and additional helpful tips in July 2025 to ensure the best possible experience for our readers.
Discover More Gluten-Free Favorites from Our Kitchen
If you loved this gluten-free granola recipe, we invite you to explore more of our cherished gluten-free creations. Each recipe is crafted with care, ensuring delicious results without compromising on flavor or texture. Expand your repertoire of gluten-free baking and cooking with these delightful options:
- Fluffy & Flavorful Gluten-Free Muffins (Our Master Recipe!)
- Crispy & Delicious Gluten-Free Oatmeal Waffles (Also Dairy-Free!)
- Perfectly Baked Gluten-Free Donuts (A Healthier Treat!)
- Light & Airy Gluten-Free Buttermilk Pancakes
- Delicate Gluten-Free Crepes (Versatile for Sweet or Savory)
- How to Make Irresistible Gluten-Free Scones (Step-by-Step Guide)