
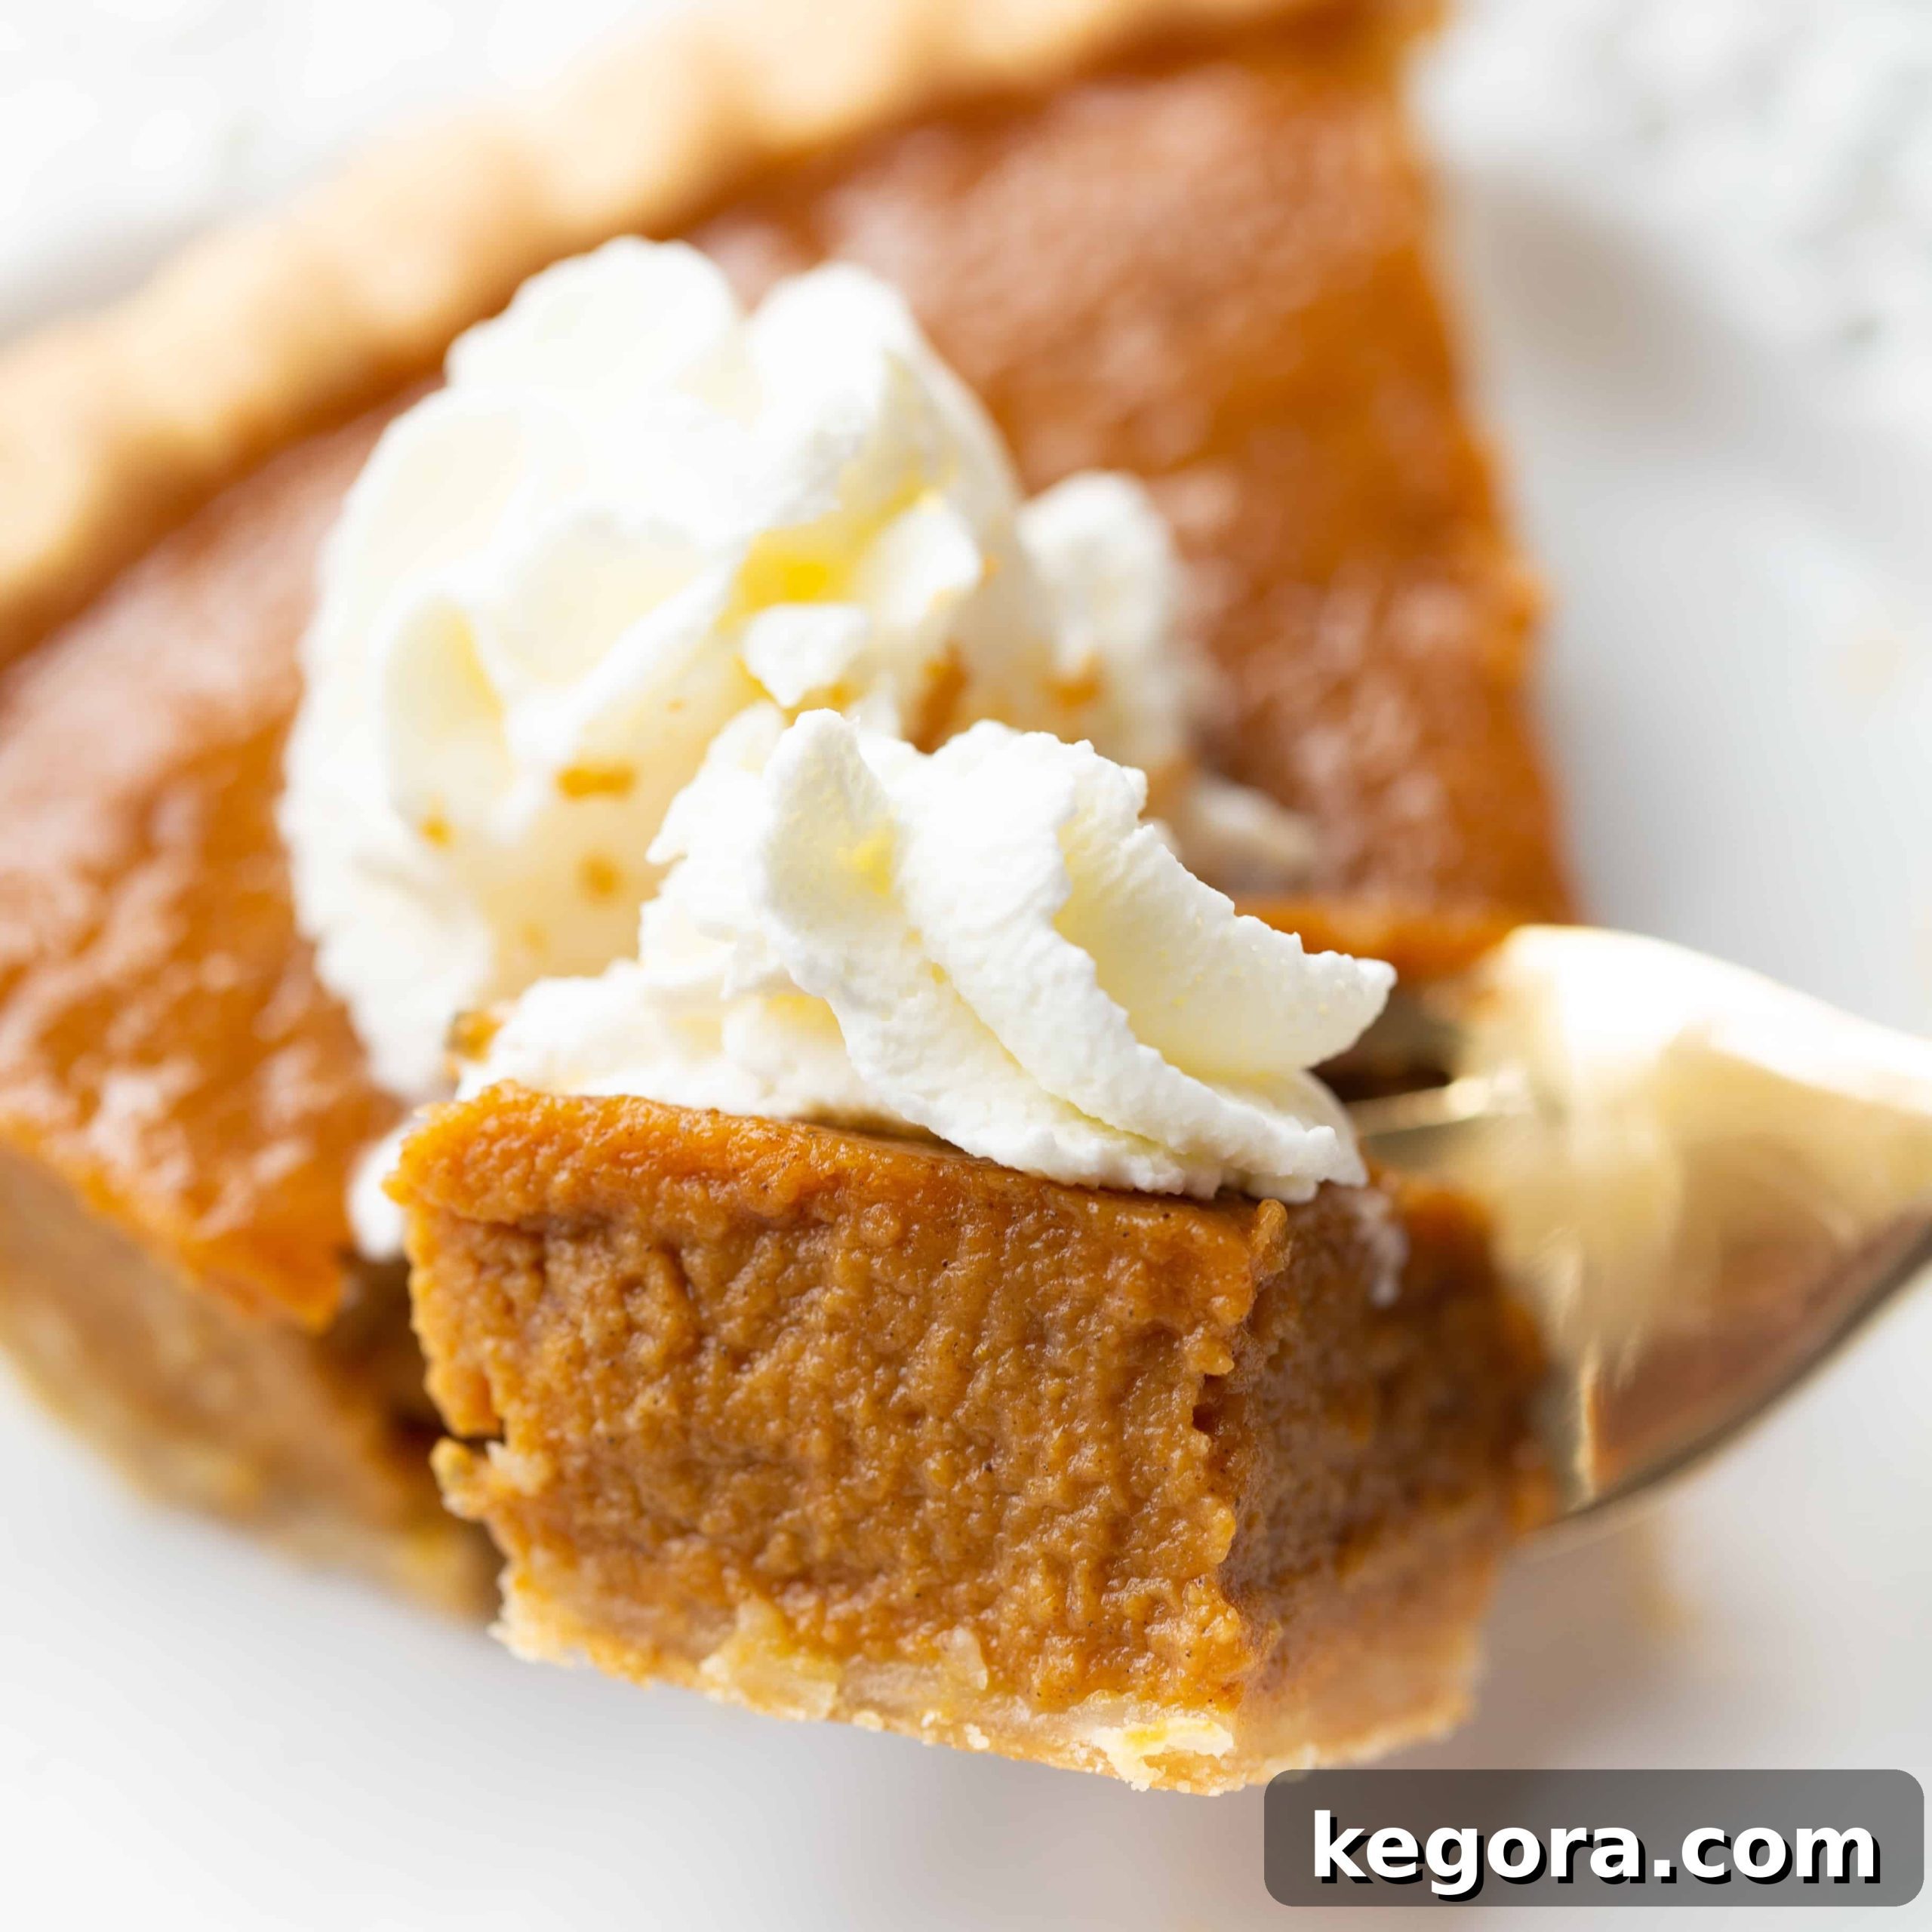
Welcome to the ultimate guide for creating the most delicious, crowd-pleasing, and utterly flawless Gluten-Free Pumpkin Pie! This holiday season, delight everyone at your table, whether they follow a gluten-free diet or not, with a homemade dessert that is simply indistinguishable from its traditional counterpart. Imagine a rich, creamy pumpkin filling nestled in a golden, flaky gluten-free pie crust – a true Thanksgiving essential that brings warmth and joy to any gathering.
For many, Thanksgiving isn’t truly complete without the classic pumpkin pie. And for those navigating gluten sensitivities or hosting gluten-free guests, the thought of baking a perfect pie from scratch can sometimes feel daunting. But fear not! This comprehensive guide provides all the expert tips, ingredient insights, and step-by-step instructions you’ll need to achieve a smooth, custardy pumpkin pie, complete with a perfectly buttery and flaky gluten-free crust. Prepare to impress even the most discerning palates; nobody will ever guess it’s gluten-free!
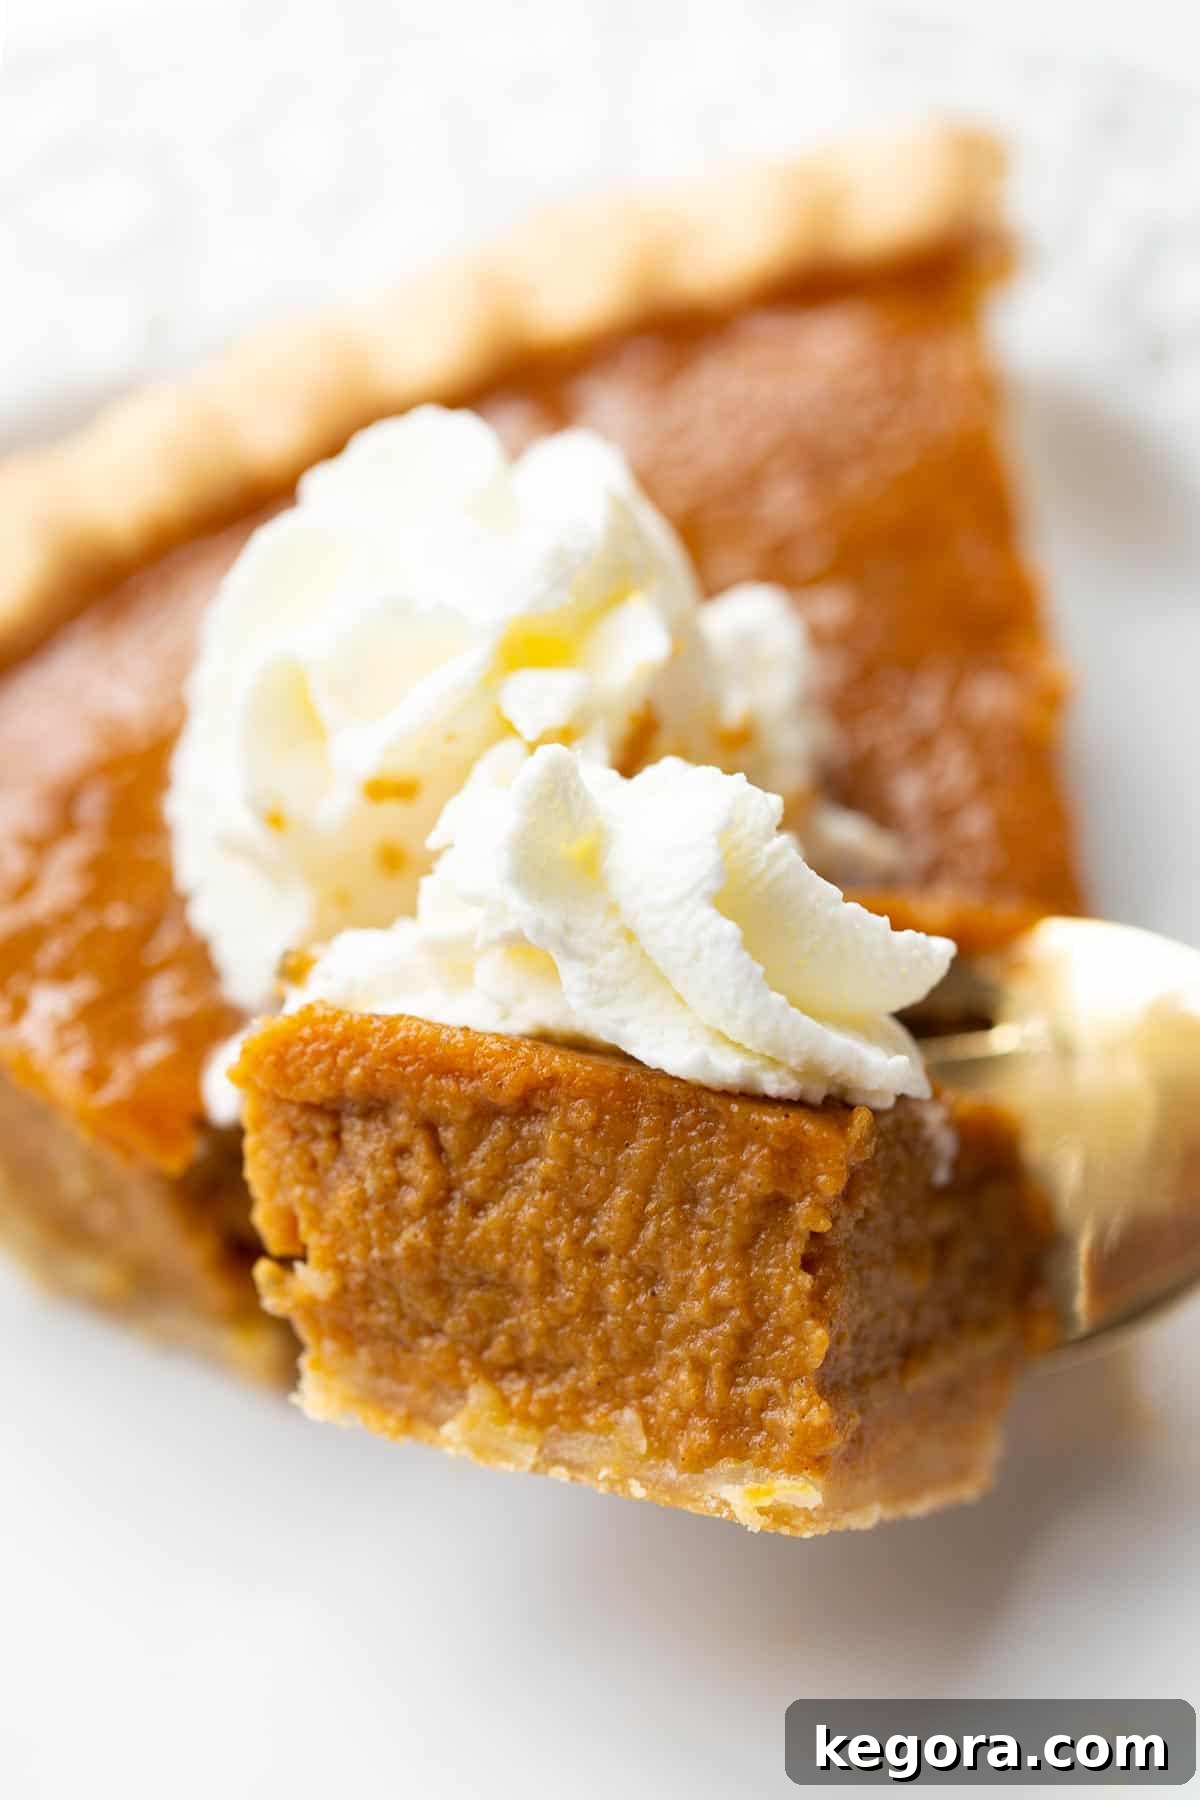
As a passionate baker, pumpkin pie holds a special place in my heart, easily topping the list of holiday favorites – even over this incredible Gluten-Free Chocolate Pie with its unique pretzel crust! Crafting a gluten-free pie crust that achieves that sought-after flaky, buttery texture has been a journey of experimentation and refinement. This recipe utilizes my tried-and-true, absolute favorite gluten-free pie crust, a recipe I’ve perfected over years of dedicated baking. It’s the same reliable crust that forms the base of our beloved gluten-free apple pie and decadent gluten-free pecan pie, ensuring consistent, delicious results every time.
Achieving a truly flaky and sturdy gluten-free pie crust is key to a perfect pumpkin pie. Unlike traditional wheat-based doughs, gluten-free variations require specific techniques and ingredients to prevent crumbling or becoming too tough. My recipe focuses on creating a dough that is both pliable enough to work with and robust enough to hold up to a rich, moist filling. The secret lies in the precise ratio of ingredients and proper chilling, allowing the flavors to meld and the starches to fully hydrate. I’ve tested this particular crust recipe countless times to ensure it’s just right, yielding a tender, golden crust that complements the creamy pumpkin filling beautifully. When preparing this crust, it’s essential to meticulously follow the ingredient list and directions for guaranteed success. Every measurement and step has been carefully calibrated for optimum texture and flavor.
Essential Ingredients for a Flaky Gluten-Free Pie Crust
The foundation of any exceptional pie is its crust, and for a gluten-free pumpkin pie, a truly outstanding crust is paramount. This carefully curated blend of ingredients works harmoniously to create a gluten-free pie dough with the perfect consistency – easy to roll, wonderfully flaky when baked, and rich in flavor. Let’s delve into the specifics of what makes this crust recipe so special:
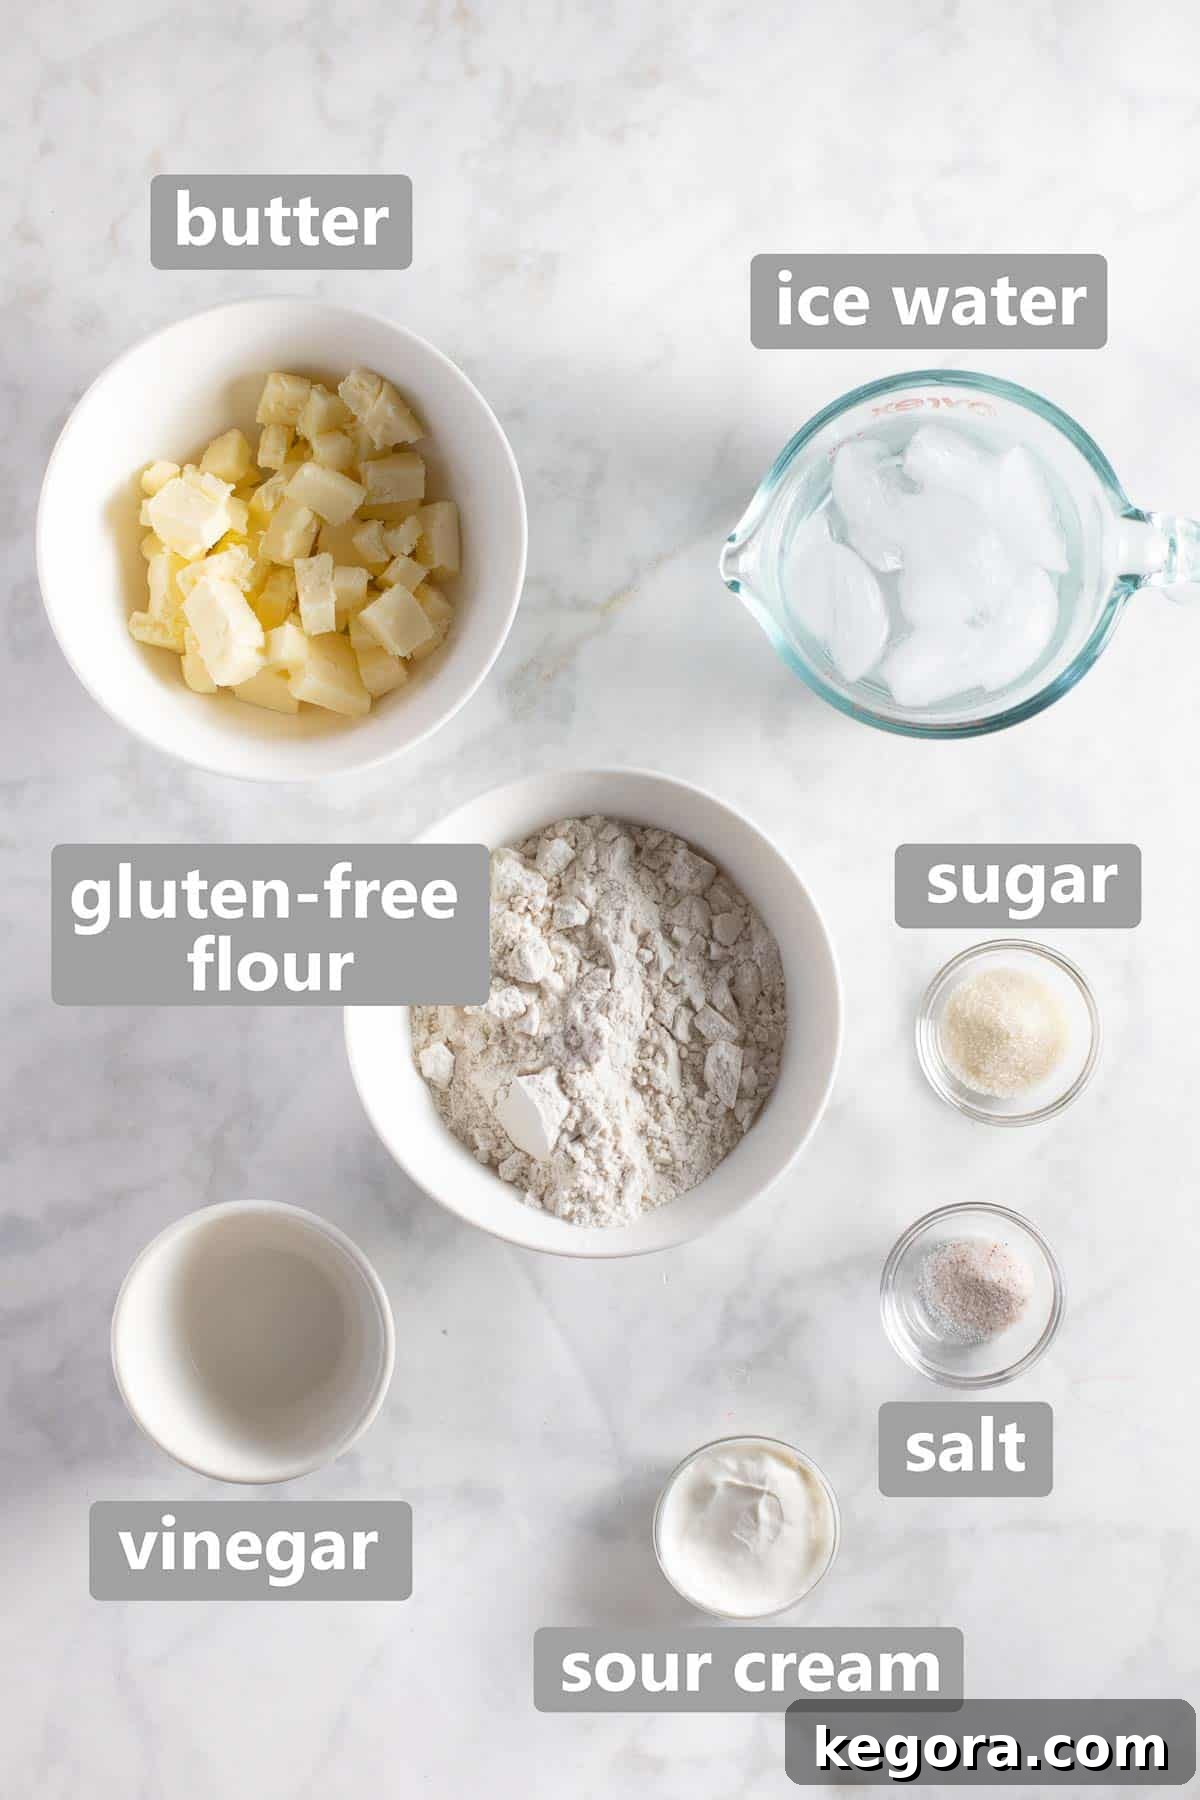
- High-Quality Gluten-Free Flour Blend: The choice of gluten-free flour is critical. I highly recommend using a premium 1:1 gluten-free baking flour that already contains xanthan gum. Xanthan gum acts as a binder, mimicking the elasticity that gluten provides in traditional flours, which is crucial for preventing a crumbly crust. My personal preference is this brand, known for its consistent results. If your blend does not include xanthan gum, you may need to add about ½ teaspoon per cup of flour, but I strongly advise using a blend that already incorporates it for ease and optimal texture.
- Vinegar (White or Rice Vinegar): This might seem like an unusual addition, but vinegar plays a vital role in creating a tender and flaky crust. It inhibits the development of toughness by breaking down proteins in the flour, resulting in a more delicate texture. While gluten-free flours don’t develop gluten, the acid in vinegar still contributes positively to the overall crumb, making the crust more forgiving and tender.
- Sour Cream: Sour cream is a secret weapon in this recipe. Its fat content and acidity add a wonderful richness, pliability, and stability to the dough. It also aids in achieving a beautiful golden-brown color during baking, enhancing both the appearance and flavor of the crust. The slight tang from the sour cream also provides a subtle depth that complements the sweetness of the pumpkin filling.
- Cold Butter: As with any great pie crust, cold butter is non-negotiable. When butter is cut into the flour in small, cold pieces, it creates pockets of steam during baking, which separate the layers of dough, resulting in that coveted flaky texture. Ensure your butter is very cold, ideally frozen for a short period before mixing, to prevent it from fully incorporating into the flour too quickly.
- Ice Water: Similar to cold butter, ice water helps keep the dough cool, preventing the butter from melting prematurely and maintaining its distinct pieces. This ensures maximum flakiness. Use just enough to bring the dough together, as too much water can make the crust tough.
- Salt & Sugar: These are the usual suspects for flavor enhancement. Salt balances the sweetness and brings out the buttery notes, while a touch of sugar contributes to the crust’s browning and adds a subtle sweetness that pairs well with the filling.
Dairy-Free Considerations: While this recipe is designed for a buttery, flaky crust, I understand the need for dairy-free options. However, I do not recommend substituting dairy-free alternatives directly into this specific crust recipe, as the precise balance of fat and acid from the sour cream and butter is crucial for its structure and flakiness. For an excellent dairy-free alternative, I suggest seeking out a dedicated gluten-free and dairy-free crust recipe, specifically formulated to achieve the best results without dairy.
Crafting Your Flaky Gluten-Free Pie Dough
Making pie dough, especially a gluten-free version, can feel like a delicate dance, but with the right tools and techniques, it becomes an enjoyable and rewarding process. I find that a food processor is an invaluable ally in achieving a consistently excellent gluten-free pie crust due to its speed and efficiency, which helps keep the butter cold. However, for those who prefer a more traditional approach, the butter can certainly be cut in by hand using a pastry cutter or two forks.
Key Tips for Gluten-Free Pie Dough Success:
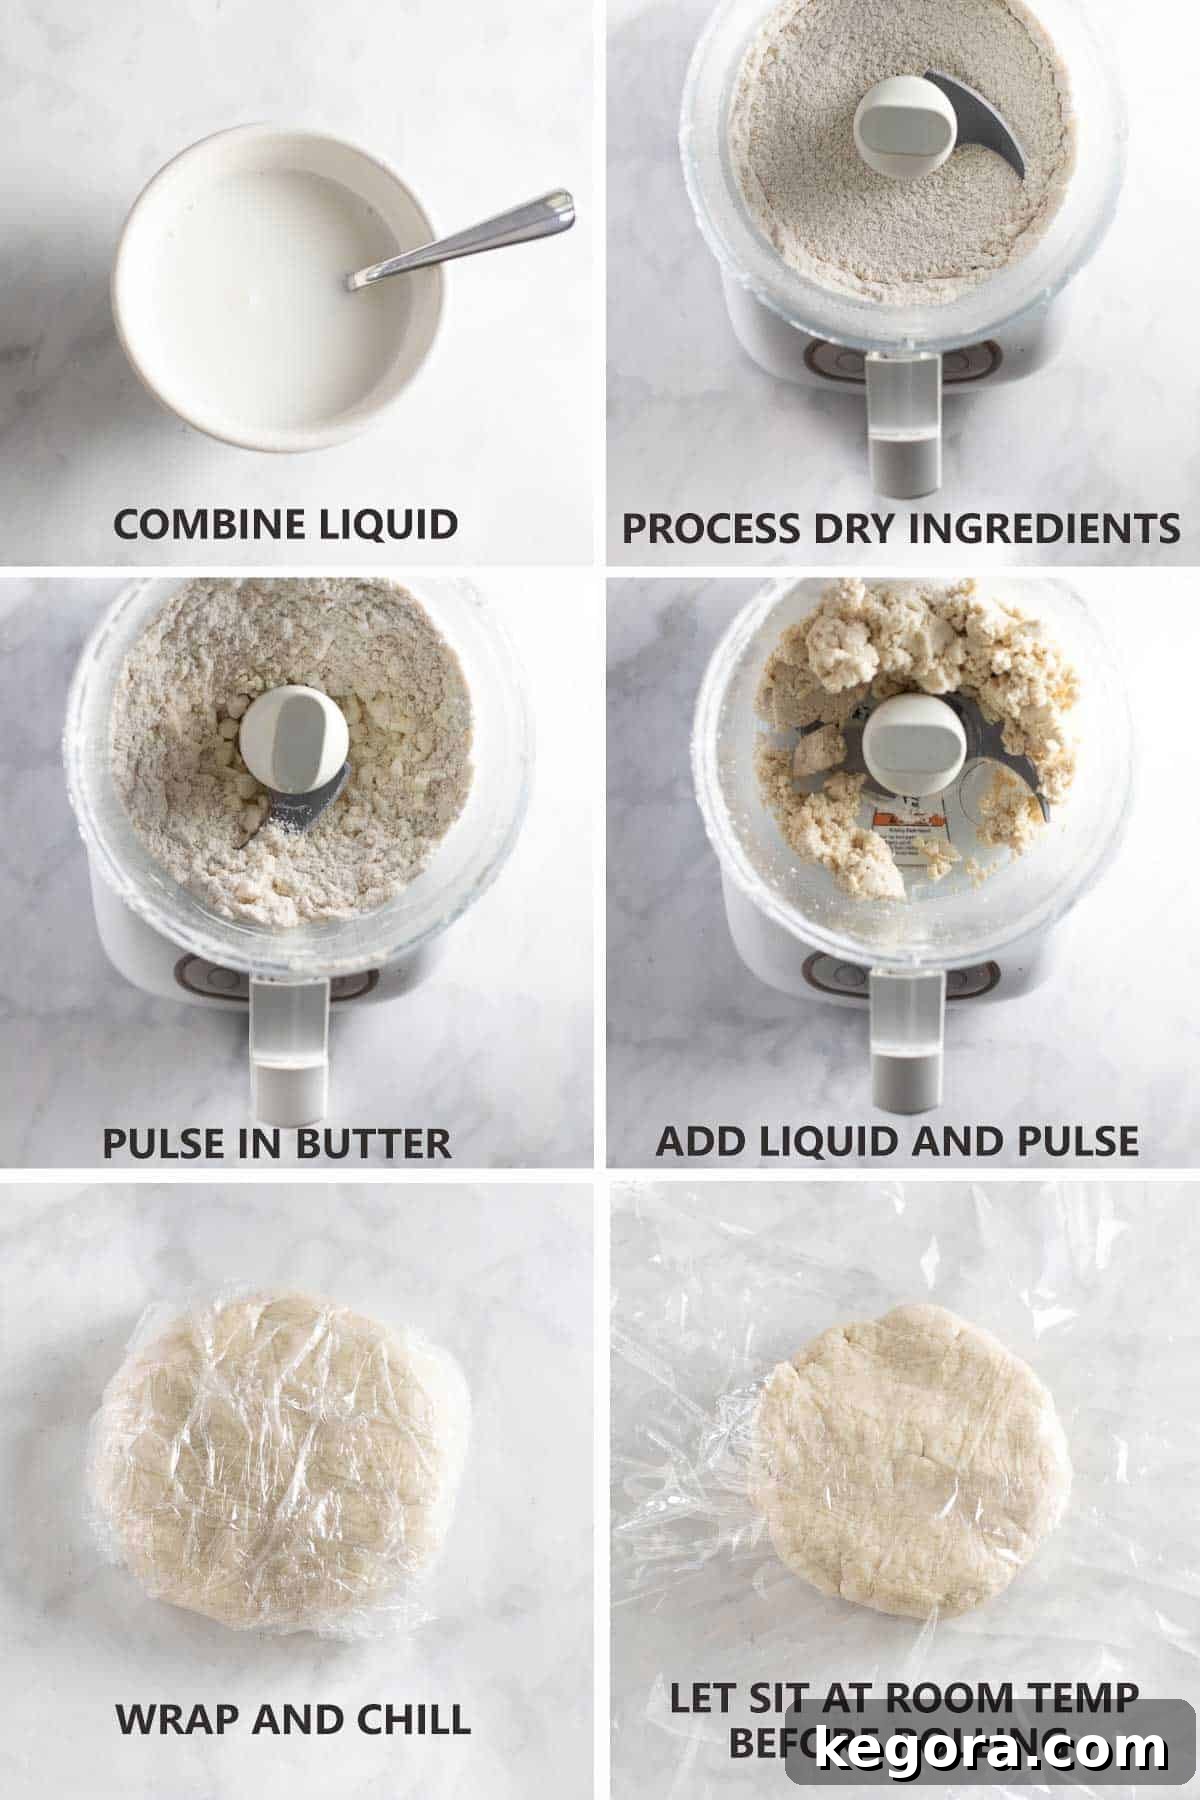
- The Power of Cold Butter: Begin by cutting your cold butter into small, ¼-inch pieces and place them in the freezer for 10-15 minutes. This ensures the butter remains very cold and firm when it interacts with the flour, creating those vital pockets of fat that translate into a flaky crust during baking.
- The Food Processor Advantage: When using a food processor, work quickly. Pulse the flour, sugar, and salt together first, then scatter the frozen butter pieces over the mixture. Pulse in short bursts (about 10 times) until the butter pieces are roughly the size of large peas. Avoid over-processing, which can lead to a tough crust.
- Incorporating Wet Ingredients: In a separate small bowl, whisk together the ice water, sour cream, and vinegar until smooth. Add this mixture to the food processor and pulse just until the dough begins to clump around the blade, typically another 10 pulses. If the dough doesn’t quite clump, don’t worry! Turn it out into a bowl and gently bring it together with your hands, pressing it until it forms a cohesive ball. This minimal handling prevents the butter from warming too much.
- The Crucial Chilling Period: Once the dough is formed, flatten it into a disc, wrap it tightly in plastic wrap, and refrigerate it for at least 1 hour, or even better, overnight (up to 2 days). This chilling period is non-negotiable for gluten-free pie dough. It allows the flour to fully hydrate, preventing a gritty texture, and gives the butter a chance to firm up completely. This leads to a more cohesive, easier-to-handle dough that rolls out without crumbling and bakes into a beautifully flaky crust.
- Room Temperature Rest Before Rolling: After the initial chilling time, especially if refrigerated overnight, the dough will be quite firm. It’s important to let the pie dough sit at room temperature for about 15 minutes before you attempt to roll it out. This short rest allows the butter to soften slightly, making the dough more pliable and less prone to cracking when you roll it.
By following these steps and understanding the role of each ingredient and technique, you’ll be well on your way to a perfect gluten-free pie crust that is both delicious and easy to manage.
Mastering the Art of Rolling and Shaping Your Gluten-Free Crust
Working with gluten-free pie dough requires a slightly different approach than traditional dough, as it tends to be more delicate and less elastic. However, with the right technique, you can achieve a beautifully shaped crust without frustration. The key to success lies in a simple yet effective trick: rolling the dough between two sheets of plastic wrap.
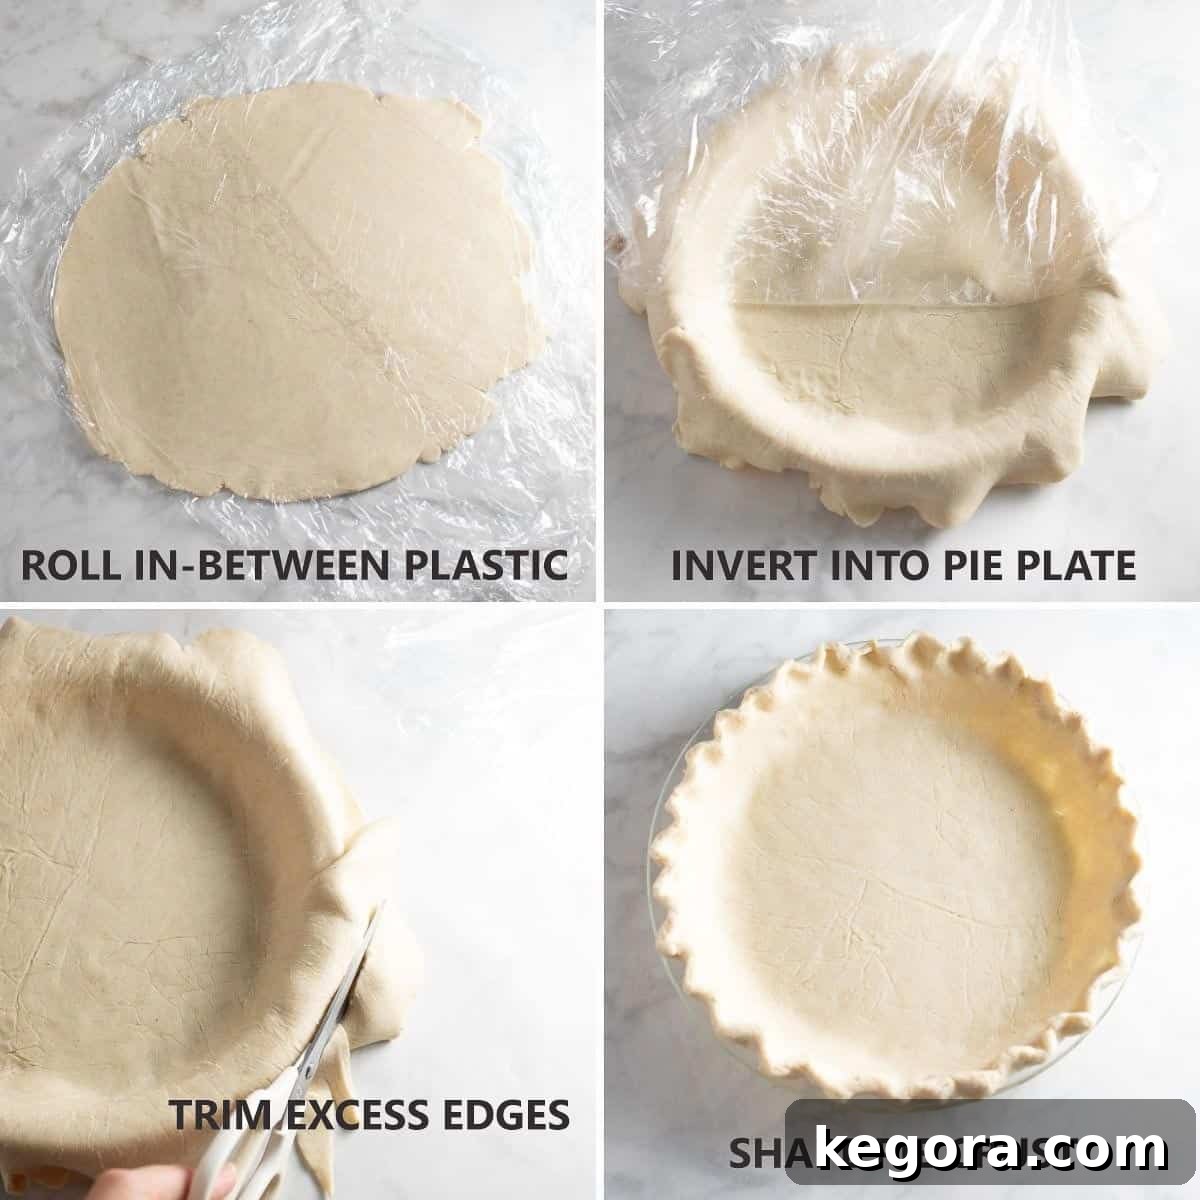
- The Plastic Wrap Method: Place your chilled dough disc between two large pieces of plastic wrap. This technique prevents the dough from sticking to your rolling pin or work surface and makes transferring it to the pie plate incredibly easy, minimizing tears and breakage. Roll the dough evenly from the center outwards, rotating frequently, until it reaches about ¼ inch thickness and is large enough to fit your 9-inch pie plate with some overhang.
- Effortless Transfer: Once rolled, carefully peel off the top layer of plastic wrap. Then, gently invert the rolled crust (still on the bottom layer of plastic wrap) onto your pie plate. Position it carefully, then peel off the remaining plastic wrap. This method ensures a smooth transfer, reducing the risk of the dough tearing.
- Easing and Shaping: Once the dough is in the pie plate, gently ease it into the contours of the pan without stretching. Stretching can cause the crust to shrink during baking. After the dough is comfortably settled, you can trim any excess edges with scissors, leaving about a ½-inch overhang. Then, get creative with shaping the crust edges! You can use your fingers to crimp them, press them with a fork, or create a decorative pattern – the choice is yours.
- Pre-Baking Chill: After shaping, loosely wrap the pie crust in plastic and place it in the freezer for 15 minutes to 1 hour. This final chill is crucial for setting the butter and preventing the crust from shrinking or slumping in the oven. A very cold crust will hold its shape much better when it hits the heat.
For more in-depth guidance on crafting the perfect foundation for any sweet or savory creation, you may also like my 2025 tested and perfected gluten-free pie crust recipe, which offers additional tips and troubleshooting for consistent results.
Irresistible Ingredients for the Gluten-Free Pumpkin Pie Filling
The heart of any pumpkin pie is its rich, velvety filling, bursting with the warm, comforting flavors of autumn. My recipe honors the timeless classic that many of us grew up with – the simple yet perfect recipe found on the back of a pumpkin can. However, I’ve made a couple of subtle enhancements to elevate its natural goodness and cater to modern preferences, ensuring it’s not only delicious but also incredibly adaptable.
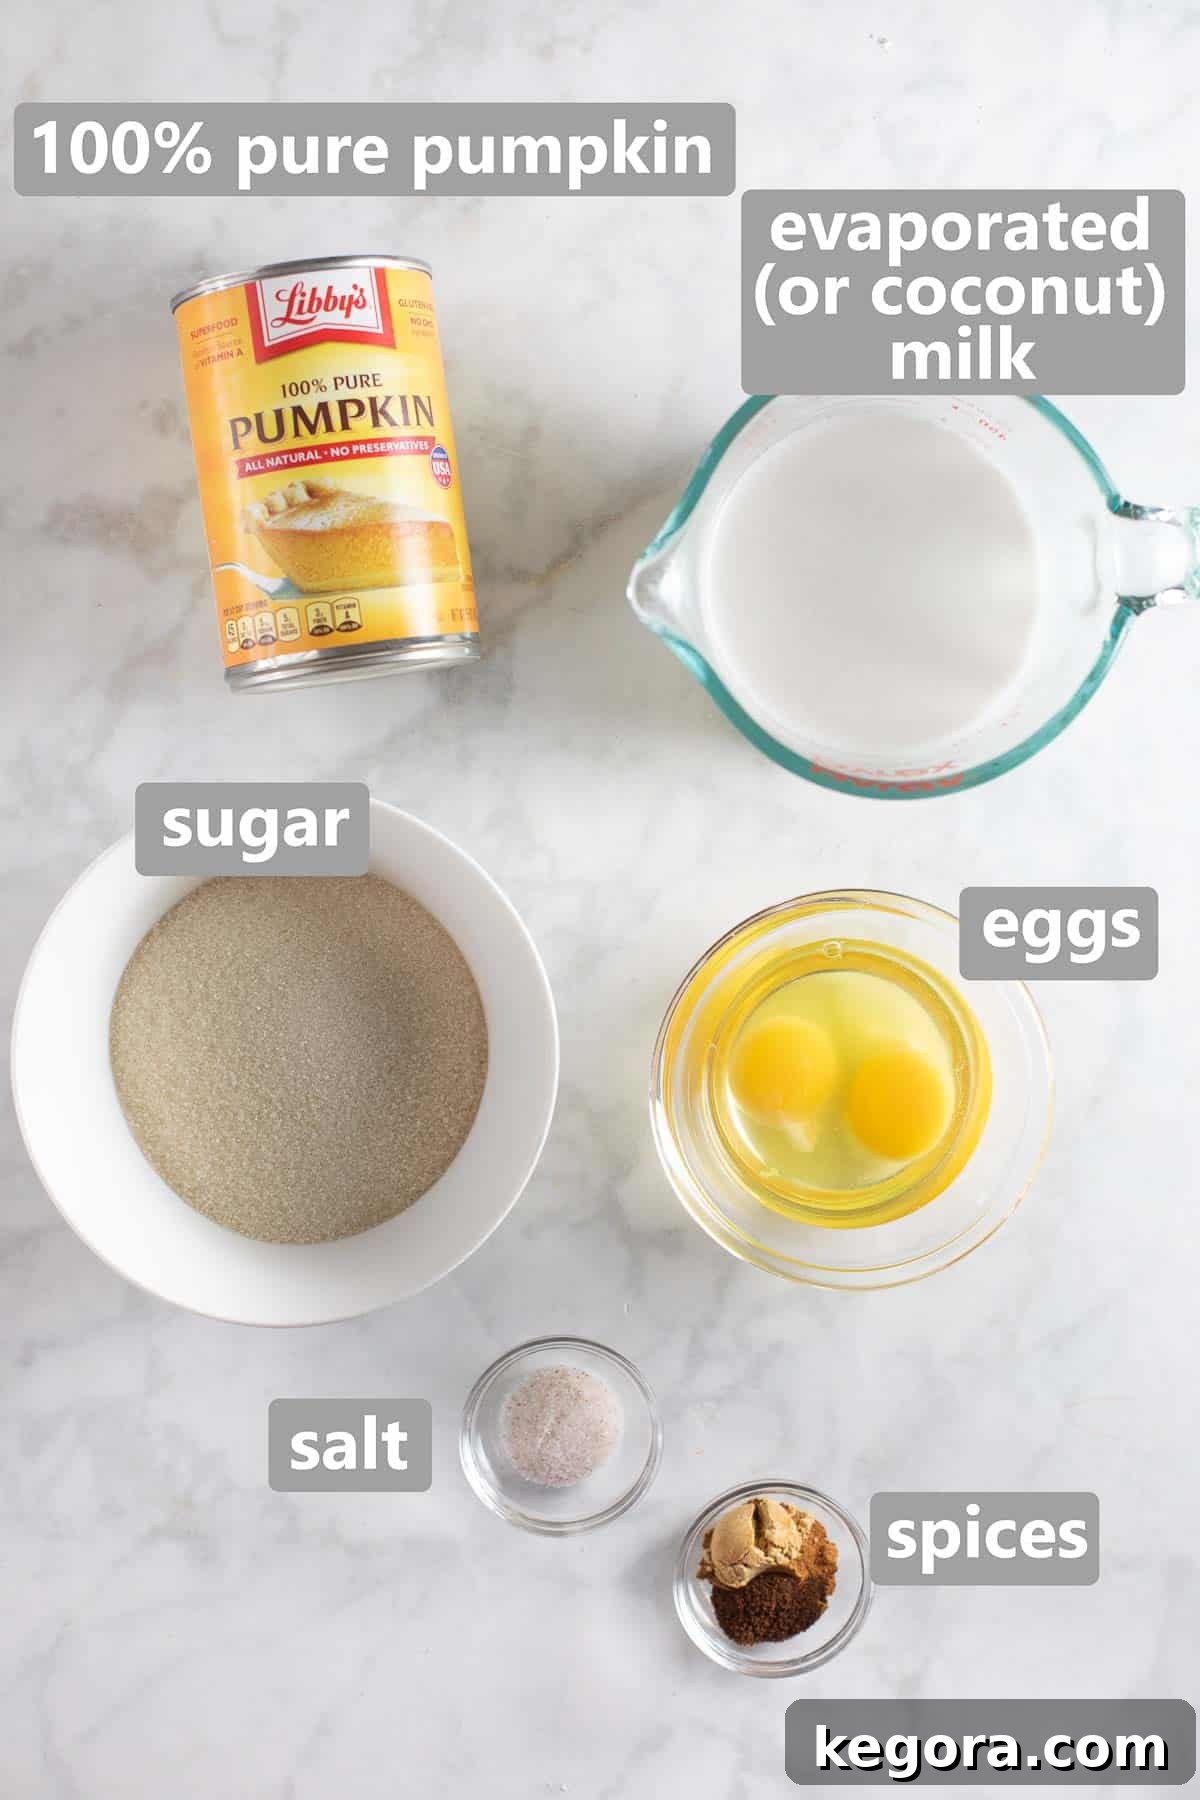
- 100% Pure Pumpkin Puree: This is arguably the most critical ingredient. It is absolutely essential to use 100% pure pumpkin puree for this recipe, not pumpkin pie filling. Pumpkin pie filling is a pre-mixed product that already contains spices and sweeteners, which can throw off the flavor balance of this recipe. Pure pumpkin puree allows you to control the exact amount and type of spices and sugar, resulting in a fresher, more authentic pumpkin flavor.
- Granulated Sugar: While the classic recipe calls for a specific amount, I often reduce the sugar slightly to let the natural sweetness of the pumpkin and the warmth of the spices shine through. You can adjust the quantity based on your personal preference for sweetness. A range of 1/2 to 2/3 cup is usually ideal.
- Warm Autumn Spices:
- Cinnamon: The quintessential pumpkin spice, providing a sweet and woody aroma.
- Ground Ginger: Adds a delightful warmth and a subtle peppery note that brightens the overall flavor.
- Ground Cloves: Offers a strong, sweet, and pungent aroma, rounding out the spice profile beautifully.
- Optional additions: For an even more complex flavor, consider adding a pinch of ground nutmeg or allspice. These spices truly evoke the essence of fall.
- Fine Sea Salt: A small amount of salt is crucial for balancing the sweetness and enhancing all the other flavors in the pie, preventing it from tasting flat.
- Eggs: Eggs serve as the primary binding agent in the custard, providing structure and richness. They are essential for the pie to set properly, resulting in that wonderfully smooth and firm texture.
- Evaporated Milk (or Full-Fat Coconut Milk for Dairy-Free):
- Evaporated Milk: The traditional choice, evaporated milk contributes to the pie’s incredibly creamy texture and rich flavor. It’s milk from which about 60% of the water has been removed, resulting in a thicker, more concentrated product.
- Full-Fat Coconut Milk: For a delicious dairy-free alternative, I sometimes swap out evaporated milk for full-fat canned coconut milk. Make sure to use canned coconut milk (not the refrigerated beverage type) and shake the can well before opening to ensure the cream and liquid are fully combined. This substitution lends a subtle tropical note that pairs surprisingly well with pumpkin, creating a rich and satisfying dairy-free pumpkin pie experience.
By carefully selecting and combining these ingredients, you’ll create a pumpkin pie filling that is both traditional in its comfort and exquisite in its execution, perfect for your gluten-free celebration.
Assembling and Baking Your Gluten-Free Pumpkin Masterpiece
With your perfectly prepared gluten-free pie crust chilling in the freezer and your rich pumpkin filling ready, it’s time to bring this holiday classic to life. The assembly process is straightforward, but a few key steps will ensure a beautifully baked pie with a perfectly set custard and a golden, crisp crust.
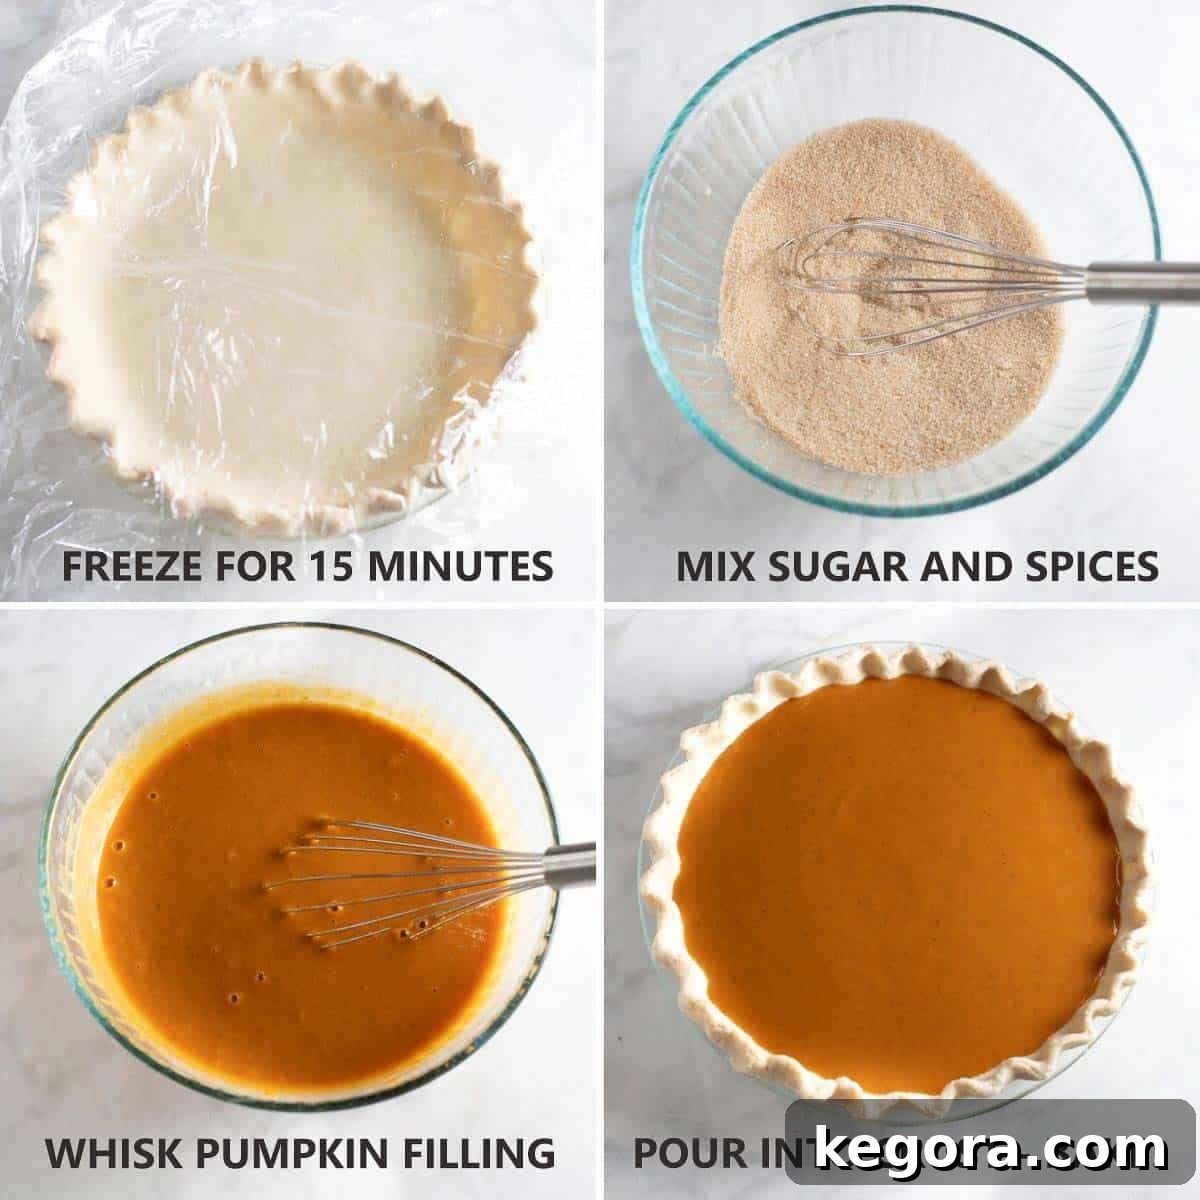
- Preheat and Prepare: First, preheat your oven to 425°F (220°C). This initial high temperature is crucial for the pie crust, helping to set it quickly and prevent a soggy bottom. While the oven preheats, make sure your shaped pie crust has been in the freezer for the recommended 15 minutes. You want it to be really cold before it hits the hot oven – this thermal shock helps the crust hold its shape and become wonderfully flaky.
- Whisk the Filling: In a medium bowl, simply whisk together all the filling ingredients: the sugar, cinnamon, ginger, cloves, salt, pumpkin puree, eggs, and your chosen milk (evaporated or coconut). Whisk until the mixture is completely smooth and well combined. This ensures an even distribution of flavor and a silky-smooth custard texture.
- Fill the Crust: Carefully pour the whisked pumpkin filling into your prepared and chilled pie shell. If you have any extra filling that doesn’t quite fit into the pie plate, don’t waste it! Pour it into small ramekins and bake them alongside the pie for delightful individual custard desserts. Placing the pie on a baking sheet before transferring it to the oven is a good practice, as it makes handling easier and catches any potential drips.
- Baking in Two Stages:
- Initial High Heat: Bake the pie at 425°F (220°C) for the first 15 minutes. This burst of high heat helps to rapidly set the crust and begin the baking process for the custard.
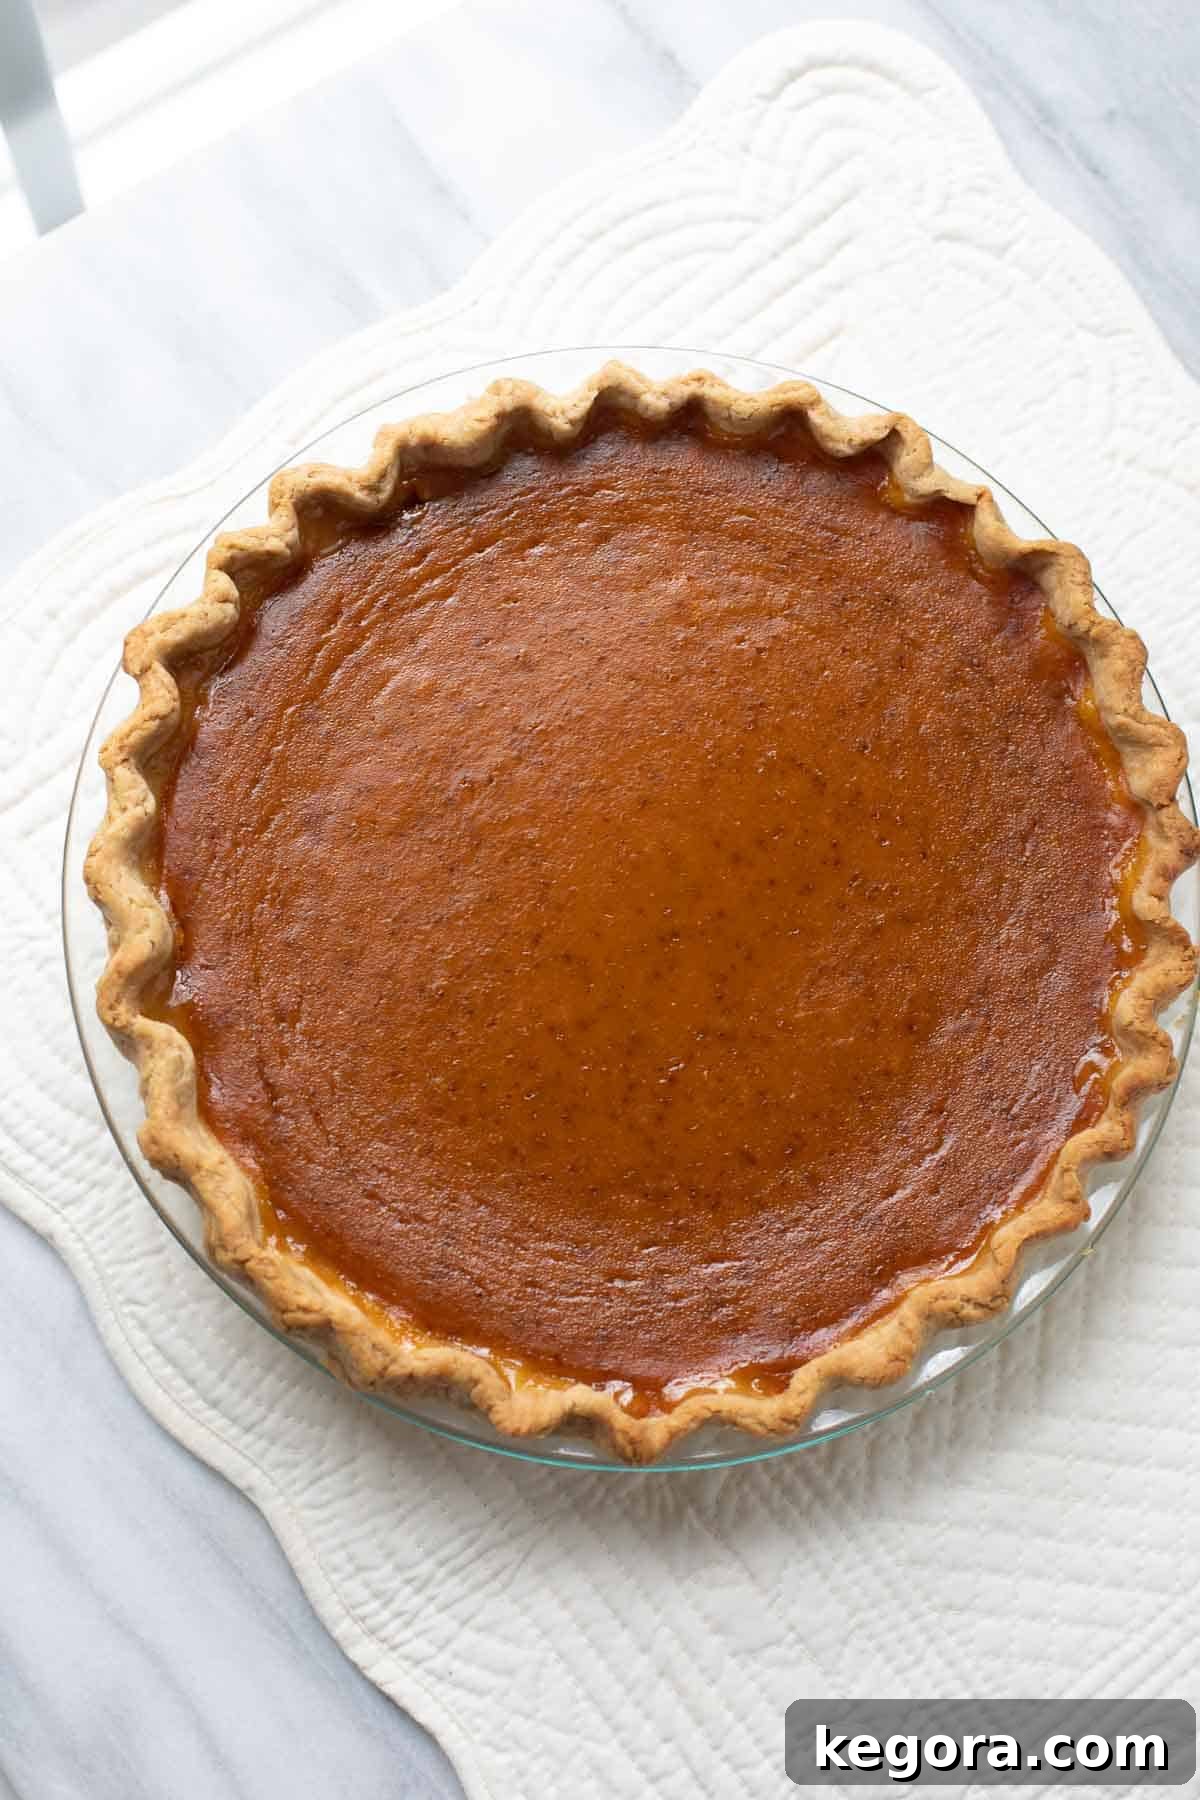
- Lower Heat for Setting: After 15 minutes, reduce the oven temperature to 350°F (175°C) and continue baking for another 40-50 minutes. This lower temperature allows the custard to cook gently and evenly, preventing it from cracking. The pie is done when the edges are set and a 1-inch circle in the center still has a slight jiggle. A knife inserted near the edge should come out clean. Avoid overbaking, which can lead to cracks and a dry texture.
- Cooling to Perfection: Once baked, carefully remove the pie from the oven and place it on a wire rack to cool completely for at least 2 hours at room temperature. This gradual cooling is essential for the custard to fully set and for the flavors to meld beautifully. Resisting the urge to cut into it too early is perhaps the hardest part!
Frequently Asked Questions (FAQ) About Gluten-Free Pumpkin Pie
Yes, absolutely! I often cut the sugar back to 1/2 cup for the filling to highlight the natural sweetness of the pumpkin and spices. If your pumpkin puree is particularly sweet or if you prefer a less sweet dessert, you can even experiment with slightly less. Taste the filling before baking and adjust to your preference.
Pure pumpkin puree (100% pumpkin) does not contain gluten. However, some pre-made “pumpkin pie filling” products might contain other ingredients or cross-contamination that includes gluten. Always check the ingredient label to ensure it’s certified gluten-free if you have severe sensitivities. For this recipe, we specifically use 100% pure pumpkin puree. The main source of gluten in a pumpkin pie typically comes from the pie crust itself, which is why a dedicated gluten-free crust is necessary.
Preventing a soggy bottom is crucial for any pie! Several steps in this recipe help: 1) Ensuring the pie crust is thoroughly chilled (or even frozen) before baking. 2) Starting the pie at a high oven temperature (425°F) for the first 15 minutes, which helps to quickly set and crisp the crust. 3) Not overfilling the pie, as excess liquid can lead to sogginess. These techniques work together to create a barrier and promote a crispy crust.
Yes, you can! For the pie filling, simply swap the evaporated milk for an equal amount of full-fat canned coconut milk. Ensure it’s full-fat and shaken well. For the crust, as noted in the ingredients section, directly substituting dairy-free butter or sour cream in *this specific crust recipe* is not recommended due to the precise balance required. Instead, I recommend using a dedicated gluten-free and dairy-free pie crust recipe formulated for that purpose, such as the one linked in the crust ingredients section.
Cracks usually occur when a pie is overbaked or cools too quickly. To prevent cracks: 1) Do not overbake the pie. It should still have a slight jiggle in the center when you remove it from the oven. It will continue to set as it cools. 2) Allow the pie to cool slowly and completely on a wire rack at room temperature. Avoid moving it to the refrigerator immediately, as the sudden temperature change can cause cracking. A few small cracks won’t affect the taste, but these tips help achieve a smooth top.
Serving, Storing, and Making Ahead Your Gluten-Free Pumpkin Pie
Once your gluten-free pumpkin pie has cooled to perfection, the anticipation of enjoying a slice is almost as rewarding as baking it! Knowing how to properly serve and store your pie ensures that every slice is as delicious as the first.
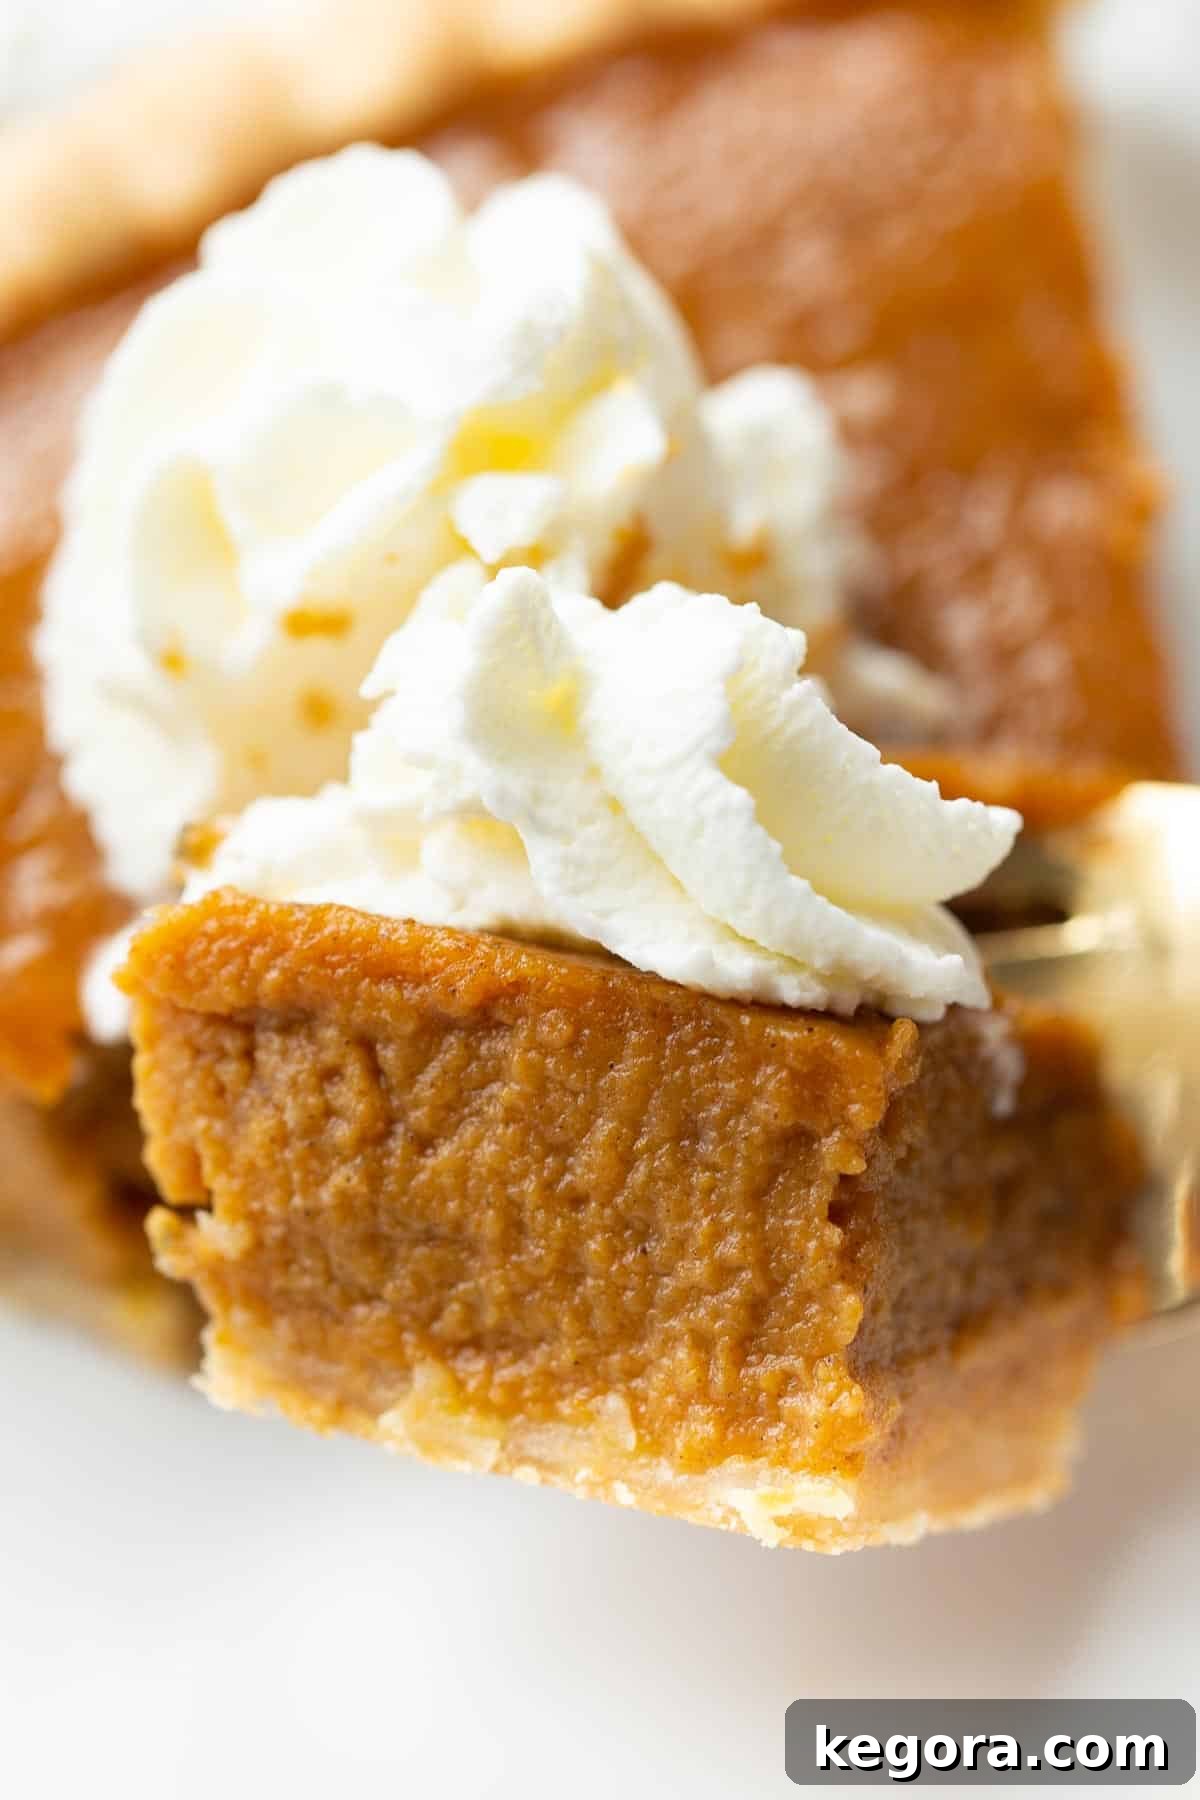
- Serving Suggestions: I am a huge proponent of serving gluten-free pumpkin pie chilled! The cold temperature allows the custard to firm up beautifully, enhancing its silky texture and intensifying the spice flavors. I recommend chilling the pie for at least 4 hours in the refrigerator before serving, though overnight is even better. However, if you prefer, it can certainly be served at room temperature. For an extra touch of indulgence, top each slice with a generous dollop of freshly whipped cream, a sprinkle of cinnamon, or even a drizzle of caramel sauce. Candied pecans or a dusting of powdered sugar also make for elegant garnishes.
- Storage Best Practices: Due to its custardy filling, this pumpkin pie must be refrigerated. Cover the pie loosely with plastic wrap or aluminum foil once it has cooled completely (after the 2-hour room temperature rest). Store it in the refrigerator until you are ready to serve. When stored properly, the pie will remain fresh and delicious for up to 2-3 days. Unfortunately, this pie does not freeze well; the custard texture can become watery and grainy upon thawing, so it’s best enjoyed fresh.
- Make Ahead? Absolutely! Planning for holiday feasts can be hectic, and this gluten-free pumpkin pie is an excellent make-ahead dessert:
- Pie Crust: You can prepare the pie crust dough up to 2 days in advance. Keep the tightly wrapped dough disc in the refrigerator, ready to be rolled out when you’re ready to bake. This saves significant time on baking day.
- Baked Pie: The entire pie can be baked and fully cooled up to 2 days in advance. Once completely cooled, cover it and refrigerate. This makes it a perfect dish to prepare ahead of time, allowing you to focus on other aspects of your holiday meal on the day of your celebration.
More Gluten-Free Thanksgiving Recipes
Round out your holiday menu with these other fantastic gluten-free Thanksgiving dishes:
- Gluten-Free Rolls – incredibly soft and fluffy, perfect for soaking up gravy.
- Gluten-Free Sweet Potato Casserole – a long-time reader favorite with a decadent pecan praline topping.
- Gluten-Free Cheesecake – rich, creamy, and wonderfully decadent for an alternative dessert.
- Gluten-Free Pumpkin Roll – another delightful pumpkin dessert option, elegant and flavorful.
Gluten-Free Pumpkin Pie (with Homemade Crust)
Comments
Ingredients
For the Crust:
- 8 tablespoons butter (1 stick)
- 3 tablespoons ice water
- 1 1/2 tablespoons sour cream
- 1 1/2 teaspoons white vinegar or rice vinegar
- 1 cup + 2 tablespoons gluten-free 1:1 baking flour 180 grams
- 1 teaspoon sugar
- 1/2 teaspoons salt
For the Pie:
- 2/3 cup sugar
- 1 teaspoon cinnamon
- 1/2 teaspoon ginger
- 1/4 teaspoon cloves
- 1/2 teaspoon salt
- 1 15 oz can of pumpkin
- 2 eggs
- 12 ounce (1 can) evaporated milk or 1 cup full-fat coconut milk
Instructions
For the Crust:
-
Cut the butter into small 1/4-inch pieces and freeze for 10-15 minutes.
-
Combine the ice water, sour cream, and vinegar in a small bowl. Whisk until smooth and set aside.
-
Process the flour, sugar and salt in the bowl of a food processor until combined. Scatter the butter over top and pulse until the butter is the size of large peas, about 10 pulses.
-
Add the sour cream mixture and pulse until the mixture begins to clump around the blade, about 10 pulses. (If the mixture doesn’t clump after 10 pulses no worries! Pour it into a bowl and smash together with your hands to form a ball.)
-
Turn the dough out onto a piece of plastic wrap. Gather into a flat disc and wrap tightly in the plastic wrap. Refrigerate for 1 hour or up to 2 days.
-
If you refrigerated the dough longer than 1 hour, let the dough sit at room temperature for 15 minutes before rolling. Roll the pie crust out between 2 large pieces of plastic wrap, to ¼ inch thickness.
-
After rolling, remove the top piece of plastic wrap and flip into a 9-inch pie plate. Gently ease the dough into the edges of the pan before removing the 2nd piece of plastic wrap. Trim any excess edges with scissors and shape the edges as desired.
-
Wrap the shaped pie crust loosely in plastic and place in the freezer for 15 minutes or up to 1 hour until chilled and firm.
For the Pie:
-
Preheat the oven to 425 F.
-
In a medium bowl, whisk together the sugar, cinnamon, ginger, cloves and salt. Whisk in the pumpkin, eggs and milk until smooth.
-
Pour filling into the prepared pie shell – pouring any extra filling into ramekins if needed. Bake for 15 minutes. Reduce the heat to 350 F and bake for another 40-50 minutes until the custard is set.
-
Cool on a wire rack for 2 hours. Cover and refrigerate for up to 2 days. Serve chilled with whipped cream!
Notes
I really like making this pie crust in the food processor because it’s quick and reliable. You could also cut in the butter by hand using a fork or pastry cutter.
It’s important to let the pie dough sit in the fridge for at least 1 hour (up to overnight) before rolling it out. This allows the dough to hydrate form a cohesive ball.
Gluten-free pie dough is more delicate than regular pie dough. It helps to roll the dough in-between plastic wrap so you can easily transfer it to the pie plate.