
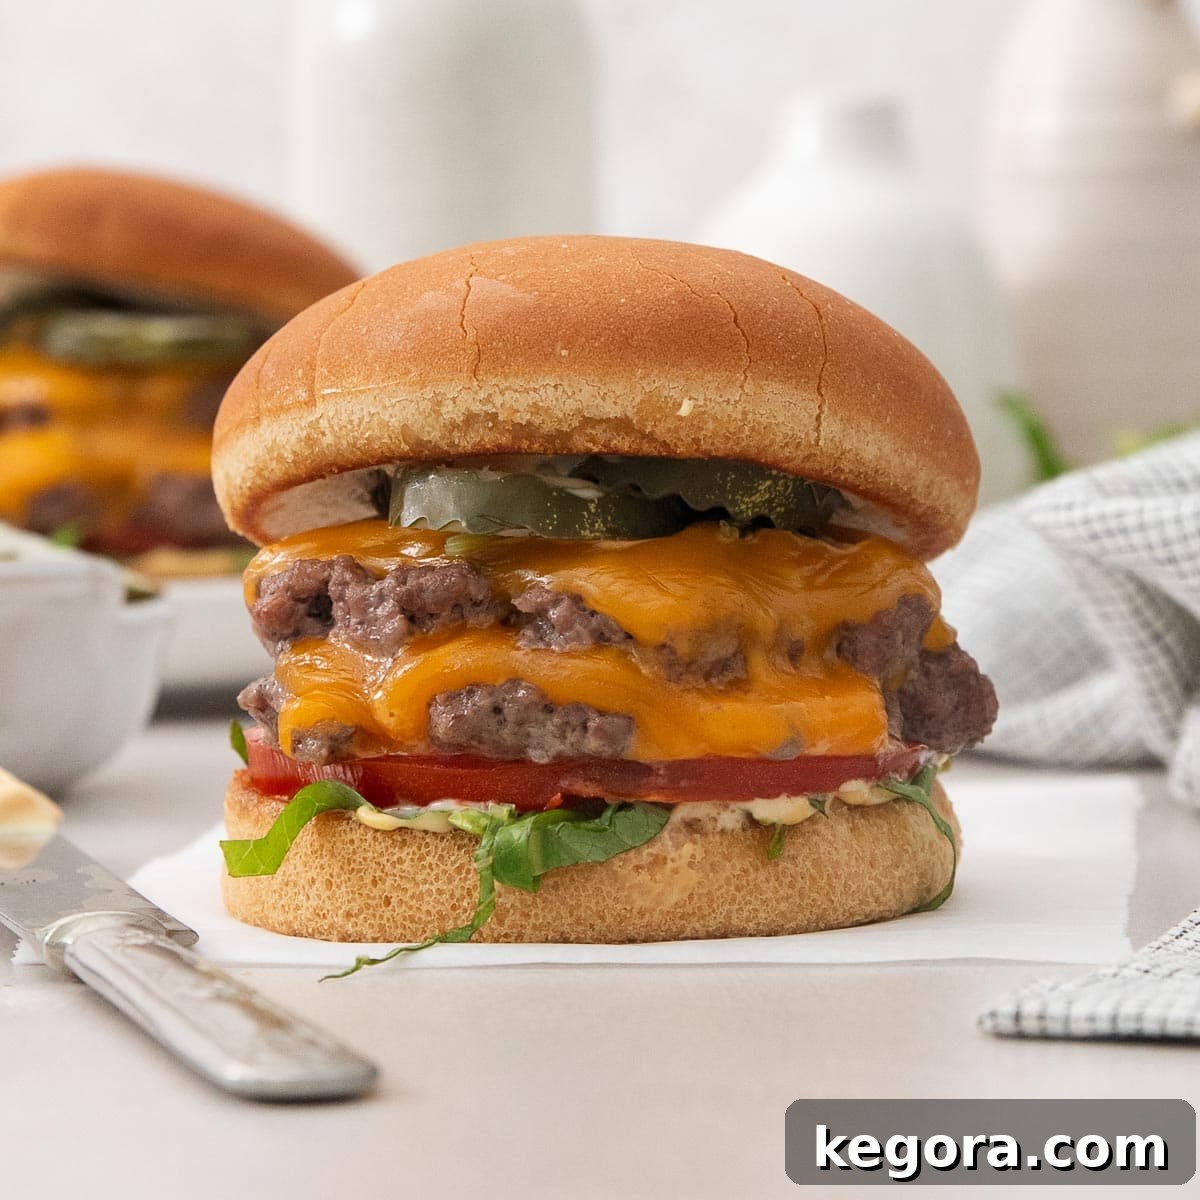
Irresistible Gluten-Free Smashburgers: The Ultimate Homemade Recipe

Welcome, food enthusiasts! Today, we’re diving into the savory world of smashburgers, a culinary delight that promises crispy edges, juicy patties, and an explosion of flavor in every bite. And the best part? This recipe is entirely gluten-free, ensuring everyone can enjoy this classic American favorite without compromise. Crafted with passion, these smashburgers are designed to become a staple in your kitchen, especially during grilling season.
What makes a truly exceptional smashburger? It’s a combination of perfectly seasoned, thinly pressed patties, a delectable, tangy sauce, and the freshest toppings, all nestled within a toasted, buttery bun. This recipe outlines every detail, from selecting the right beef to mastering the griddle technique, guaranteeing a gourmet experience right in your backyard.
Why You’ll Love These Gluten-Free Smashburgers
- Texture Perfection: Expect incredibly juicy burgers with those signature lacy, crispy edges that only a true smashburger can deliver. Paired with perfectly crisp, buttery toasted buns and a smooth, creamy sauce, every bite is a textural masterpiece.
- Unforgettable Taste: A harmonious blend of savory, high-quality ground beef, enriched by our special seasoning, comes together with rich, buttery buns. The star of the show, a tangy and subtly spicy secret sauce, elevates the entire experience, complemented by your favorite fresh toppings.
- Effortless Enjoyment: Despite their gourmet appeal, these smashburgers are surprisingly simple and quick to prepare, making them an ideal choice for busy weeknights or a casual weekend cookout. It’s a satisfying recipe that doesn’t demand hours in the kitchen.
- Erin’s Signature Tip: For an extra layer of flavor and a beautiful caramelization, I highly recommend spreading a little of our special smashburger sauce onto the uncooked side of each patty just before flipping. This creates a divine crust as the burgers cook, infusing them with an unparalleled depth of taste.
- A Guaranteed Crowd-Pleaser: These gluten-free smashburgers are not just a meal; they’re a family favorite, always requested and devoured with enthusiasm. For an even richer flavor profile, try grilling some onions on your Blackstone griddle before the burgers. It’s a simple addition that takes these burgers from great to extraordinary!
xoxo erin
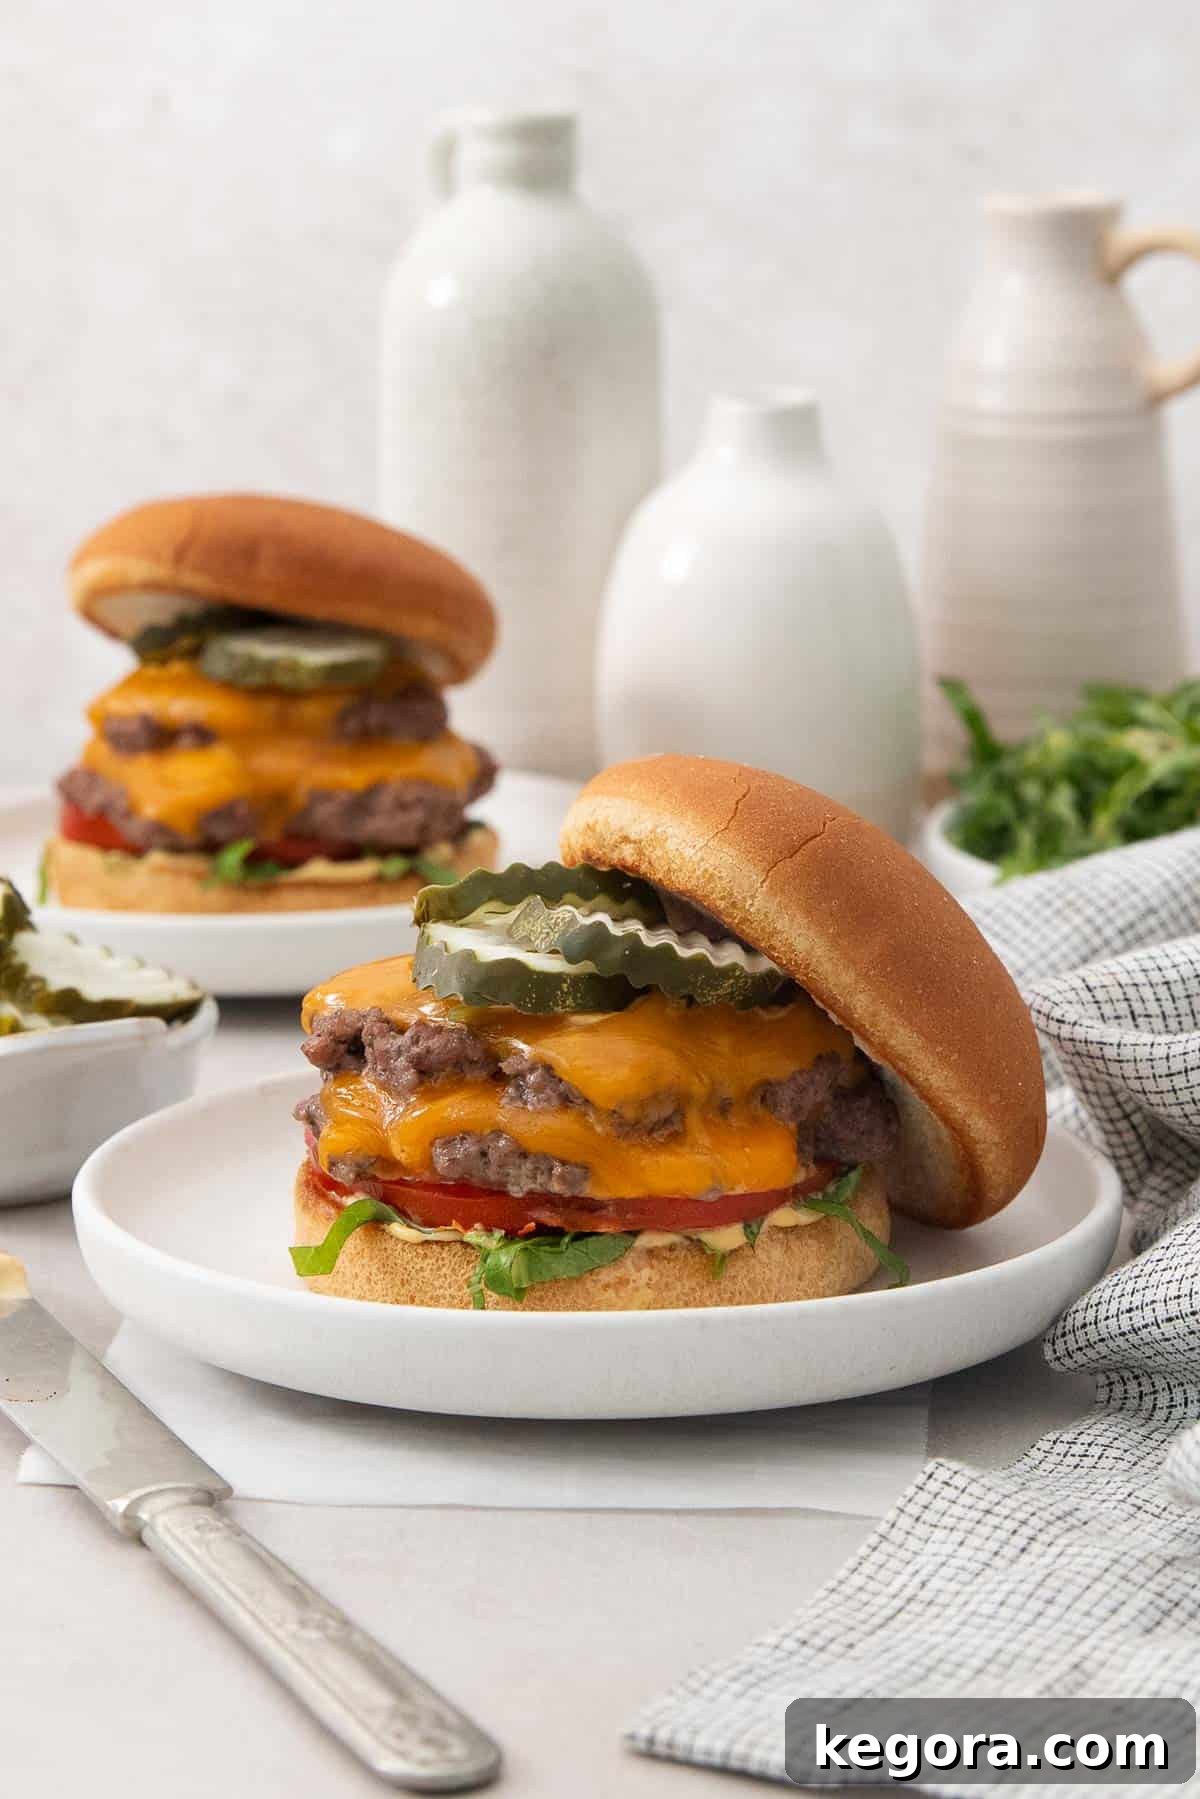
Ingredients You’ll Need to Master the Gluten-Free Smashburger
Creating the perfect gluten-free smashburger starts with sourcing high-quality ingredients. Each component plays a crucial role in achieving the desired flavor and texture. Below are detailed notes on the key ingredients for these incredible burgers. For precise measurements, be sure to jump to the full recipe card located further down the page.
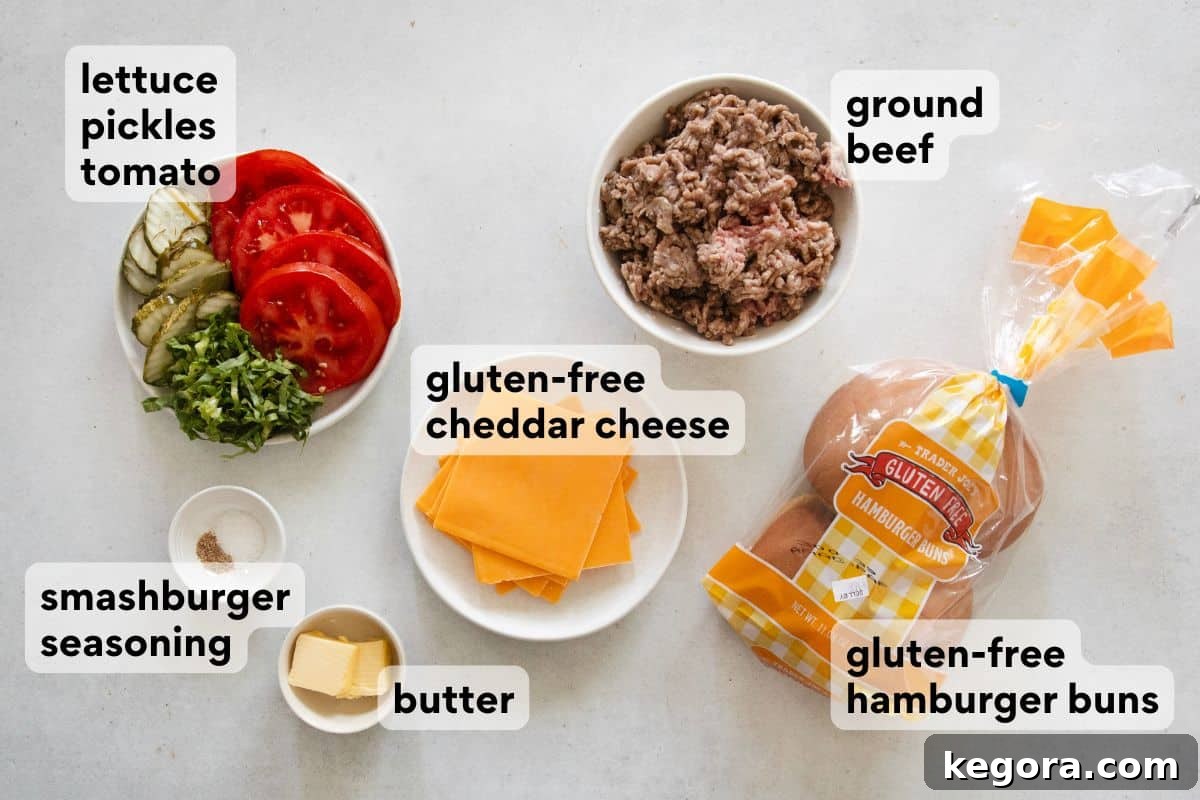
- Gluten-Free Hamburger Buns: The bun is the foundation of any great burger. For this recipe, I highly recommend Trader Joe’s gluten-free buns for their excellent texture and ability to hold up to the juicy patties and rich sauce. A vital step often overlooked is toasting the buns! Brush them generously with melted butter and toast them on your Blackstone griddle until they achieve a beautiful golden crispness. This not only enhances their flavor but also prevents them from becoming soggy, ensuring they’re perfectly ready the moment your smashburgers come off the heat. If you prefer a homemade option, my gluten-free hamburger bun recipe is an excellent choice.
- Premium Ground Beef (80/20 blend): The secret to a truly juicy and flavorful smashburger lies in the fat content. An 80/20 lean-to-fat ratio for ground beef is ideal. The fat renders down on the hot griddle, creating that signature crispy crust while keeping the interior moist and tender. Avoid leaner beef, as it won’t achieve the same lacy edges or rich flavor.
- Smashburger Seasoning: While simple salt and pepper work, using a dedicated smashburger seasoning significantly elevates the flavor. I’m a big fan of McCormick Grill Mates Smash Burger Seasoning. It provides a robust blend of spices that perfectly complements the beef without overpowering it. Don’t be shy with the seasoning—it’s key to developing that incredible savory crust.
- Fresh & Flavorful Toppings: The beauty of a smashburger is its customizability! You can pile on your favorites, but here’s my tried-and-true method for assembly: always start with lettuce and tomato on the bottom bun. This clever trick creates a barrier, helping to keep the burger intact and preventing the bun from getting soggy from the juicy patties and sauce. Other classic toppings like pickles, sautéed onions, and a good slice of cheddar cheese are absolute must-haves.

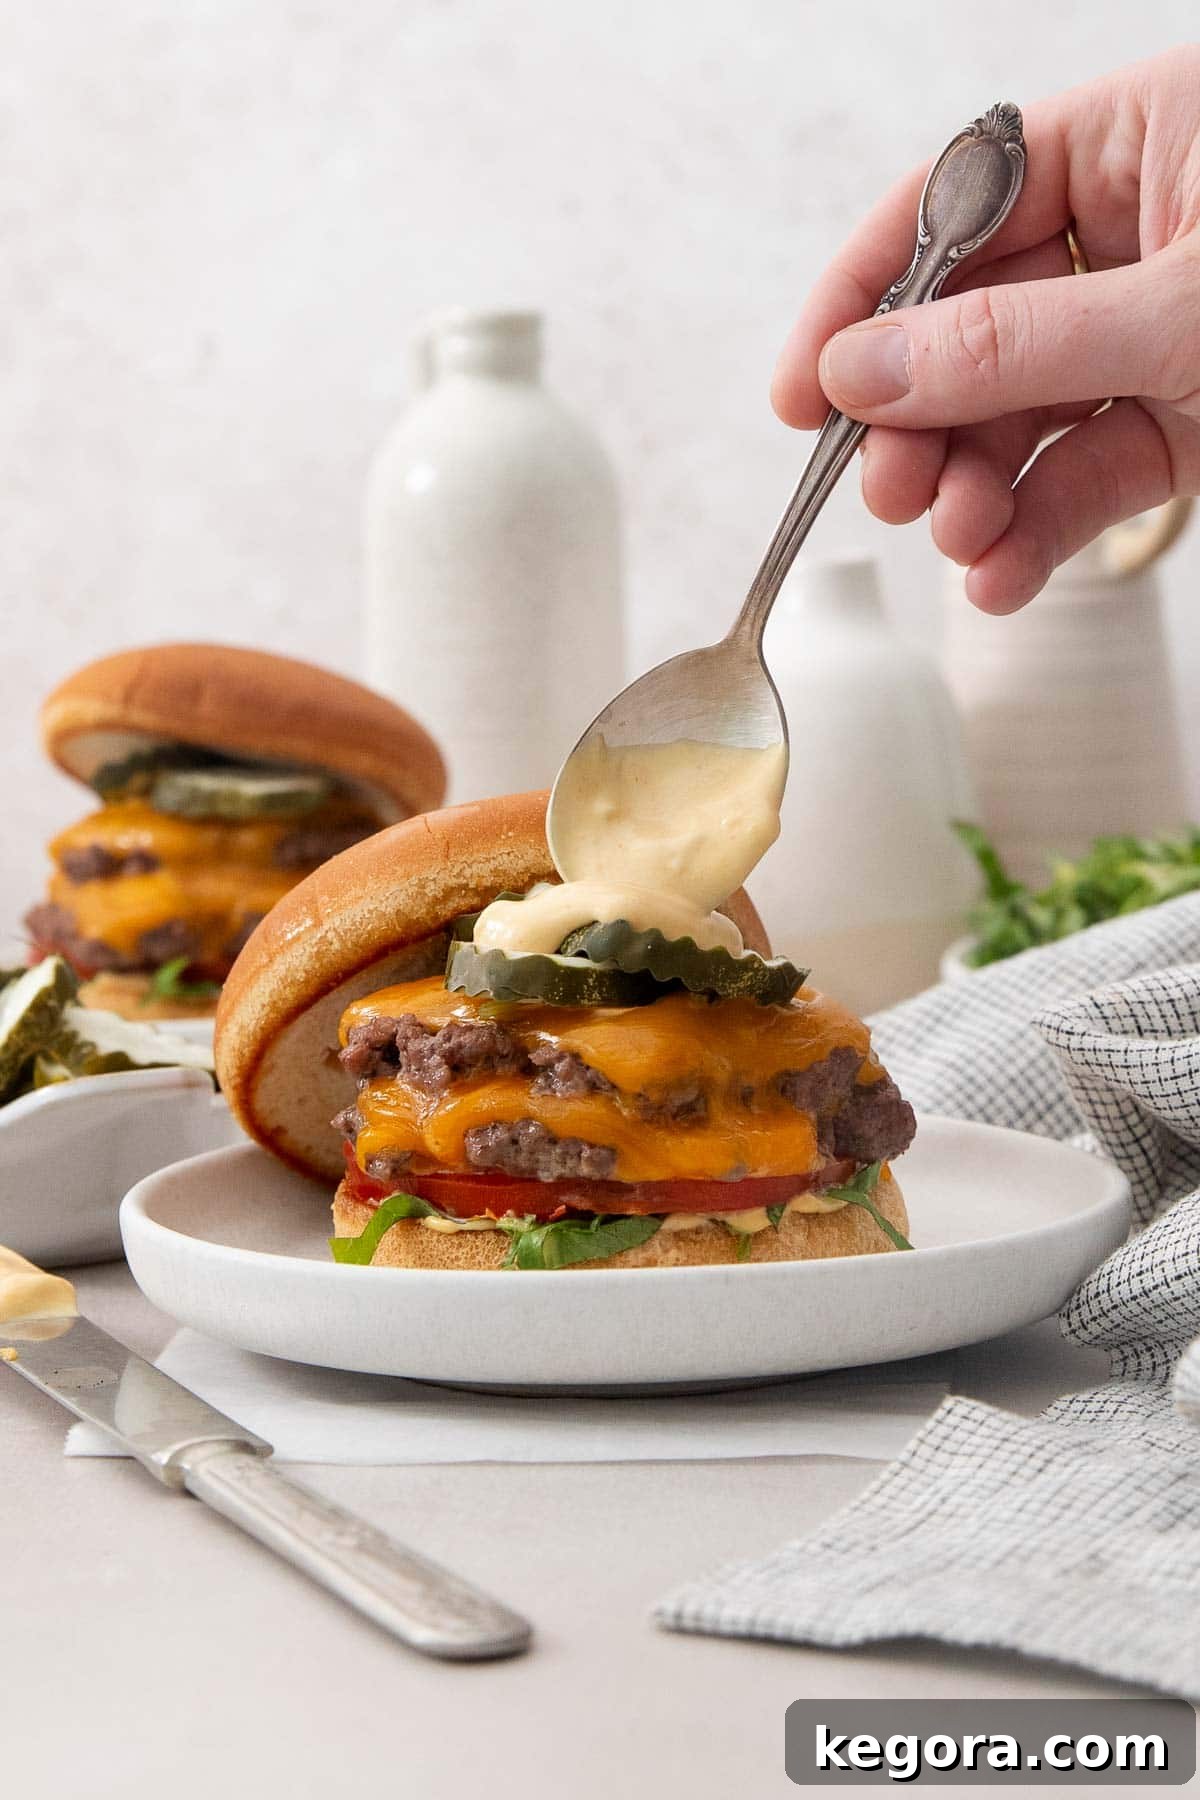
- Homemade Smashburger Sauce: This sauce is not just an accompaniment; it’s an integral part of the smashburger experience and truly makes the recipe! I recommend making it ahead of time to allow the flavors to meld. The magic happens when you divide the sauce into two bowls: one for cooking and one for serving. Spreading half of the sauce directly onto the patties while they cook allows it to caramelize into the meat, creating an unparalleled depth of flavor. The other half is for slathering on the finished burgers, adding that final tangy, creamy touch. This dual application method is a game-changer!
How to Make the Best Gluten-Free Smashburgers: Step-by-Step
Crafting the perfect gluten-free smashburger at home is an art, but with these detailed steps, you’ll achieve crispy, juicy perfection every time. This overview highlights the critical moments of the cooking process. For comprehensive instructions and exact measurements, you can jump straight to the detailed recipe card.
Preparing Your Buns and Beef
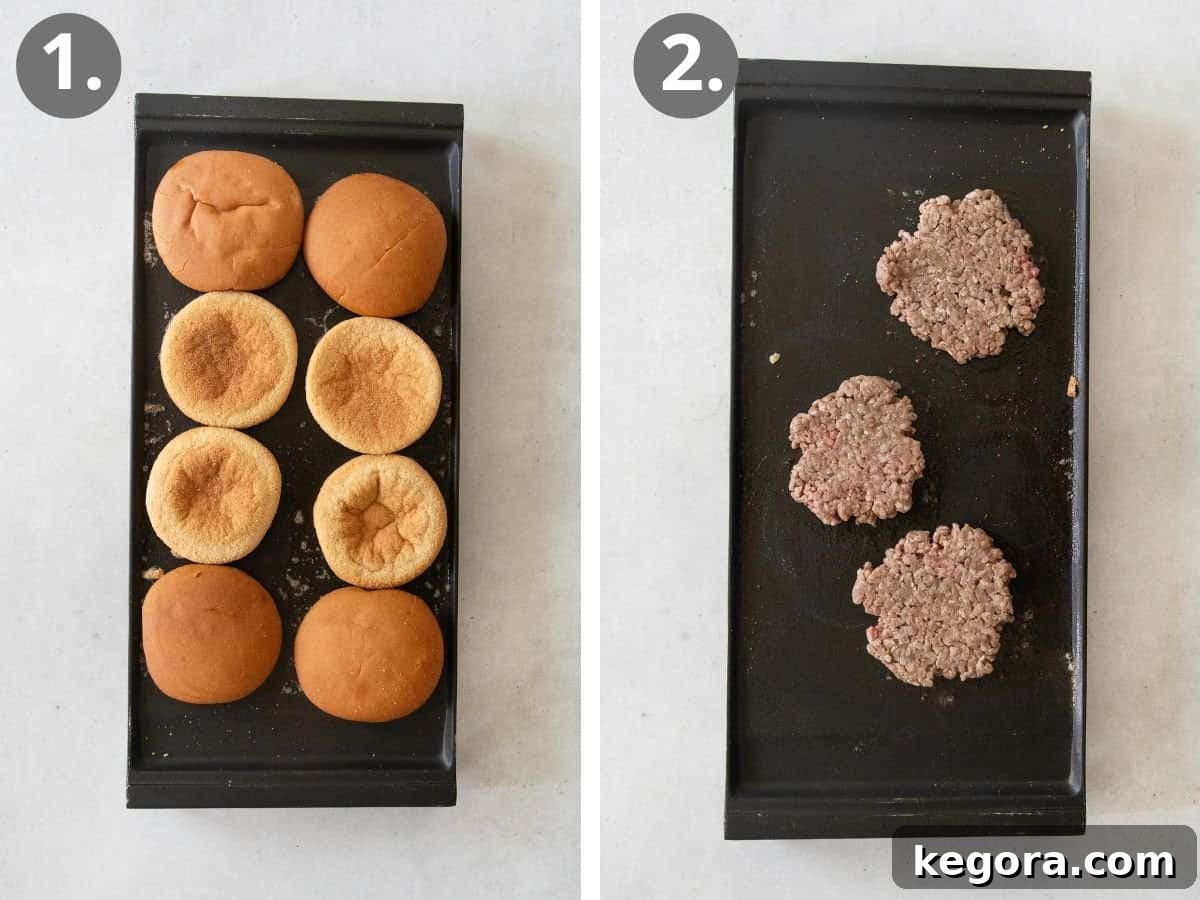
The foundation of any great burger begins with the bun. Even gluten-free buns benefit immensely from proper preparation. Begin by lightly brushing your gluten-free hamburger buns with melted butter. Preheat your griddle or Blackstone to a medium-high temperature, ideally between 400-450°F. Place the buttered buns, cut side down, onto the hot surface. Toast them for approximately 2-3 minutes, or until they achieve a beautiful golden-brown color and crisp texture. Once perfectly toasted, remove them and set aside; they’ll be patiently awaiting your glorious burgers.
Next, prepare your ground beef. For 12 individual patties (resulting in 6 double smashburgers), divide 2 pounds of 80/20 ground beef. A simple method is to first divide each pound in half, then divide each half into three equally sized, loose balls. The key here is to keep the beef loosely formed, not tightly packed. This looseness is crucial for achieving those coveted crispy, lacy edges that define a true smashburger. When placing them on the hot griddle, ensure ample space between each ball, as they will spread out significantly. You may need to cook them in batches to avoid overcrowding, which can lower the griddle temperature and hinder proper searing. Use a sturdy, heavy spatula to immediately smash each beef ball flat into a thin patty. Apply firm, even pressure for a few seconds to ensure maximum contact with the griddle, promoting that fantastic Maillard reaction and crispy crust.
Seasoning and Searing to Perfection
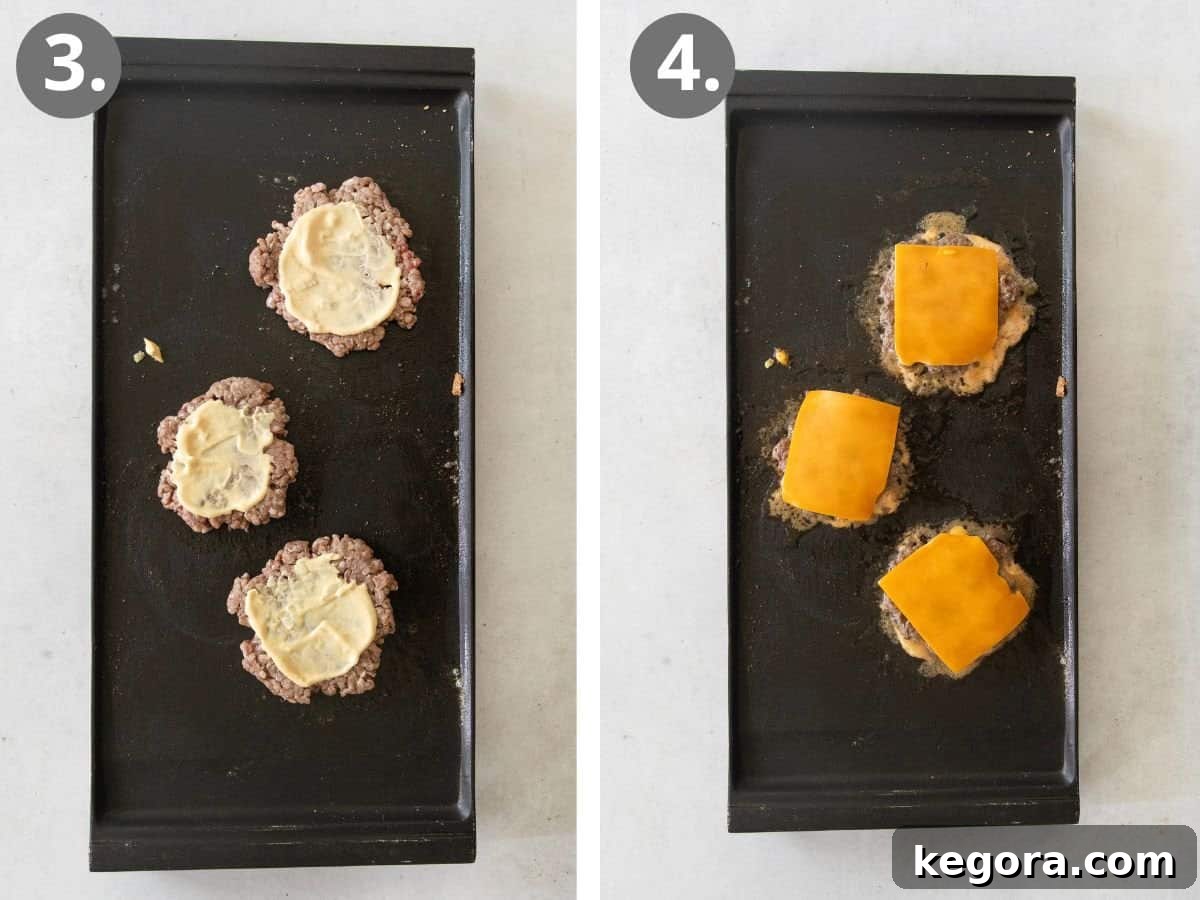
Once your patties are smashed, it’s time to generously season them. My go-to is McCormick’s Smash Burger Seasoning, which imparts an incredible depth of savory flavor. Sprinkle it liberally over each patty. Here’s a top tip for an extra layer of deliciousness: just before you’re about to flip the patties, spread a spoonful of our homemade smashburger sauce onto the uncooked side. This allows the sauce to caramelize and cook directly into the burger as the second side sears, creating an unbelievably rich, tangy crust that is simply divine. After the sauce has been applied, carefully flip the patties. Cook for another 1-2 minutes, allowing the seasoned side to achieve a deep golden-brown crust and the sauce to caramelize beautifully.
The Grand Assembly
Immediately after flipping the patties, place a slice of your favorite cheese (gluten-free cheddar works wonderfully) on top of each one. The residual heat from the griddle and the cooking burger will quickly melt the cheese into a gooey, savory blanket. Now, it’s assembly time! To build the ultimate double smashburger that holds together perfectly, I recommend layering from the bottom up:
- Start with the perfectly toasted bottom bun, spread generously with the reserved smashburger sauce.
- Add a layer of finely shredded lettuce and fresh tomato slices. Placing these crispier, firmer toppings on the bottom creates a stable base and helps absorb juices, keeping your bun from getting soggy.
- Next, carefully stack two cheesy, crispy smashburger patties.
- Finish with tangy pickles, some sweet sautéed onions (if you chose to make them), and finally, the top bun.
Serve immediately and prepare for an unforgettable gluten-free smashburger experience that will rival any restaurant creation!
More Easy Gluten-Free Dinner Recipes to Savor
If you loved these gluten-free smashburgers, you’re in for a treat! Discover more effortless and delicious gluten-free dinner ideas that are perfect for any night of the week. These recipes are designed to be family-friendly, packed with flavor, and easy to prepare, making healthy eating a joy.
- The Best Gluten-Free Sloppy Joes
- Flavorful BBQ Chicken Nachos
- Quick & Easy Instant Pot BBQ Chicken
- Wholesome Gluten-Free Chicken Stir-Fry
- Delicious 30-Minute Beef Teriyaki
- Savory Glazed Pineapple Salmon
- Creamy Dairy-Free Mac & Cheese
Each recipe is tested and approved to ensure it brings joy to your dinner table without the fuss, proving that gluten-free cooking can be both simple and incredibly satisfying.
Gluten-Free Smashburgers (BEST EVER!)
Erin Collins
20 mins
5 mins
25 mins
6 double smashburgers
Here are all my best tips for making the BEST Gluten-Free Smashburgers at home! I recommend toasting the GF buns before you start, using 80/20 meat, and adding a little sauce to the burgers while cooking. These steps ensure a truly exceptional smashburger experience with perfectly crispy patties and a juicy, flavorful center.
We love serving these with crispy Blackstone potatoes and refreshing cucumber tomato salad. For a complete meal, consider adding a side of sweet potato fries or a fresh green salad.
Comments
Ingredients
Smashburger Sauce
-
1/2 cup mayonnaise -
1 tablespoon ketchup -
1 tablespoon yellow mustard -
1 tablespoon grated yellow onion -
1 teaspoon hot sauce -
½ teaspoon Worcestershire sauce
Smashburgers
-
2 pounds ground beef 80/20 -
McCormick Grill Mates Smash Burger Seasoning -
12 slices gluten-free cheddar cheese or cheese of choice -
6 gluten-free hamburger buns toasted -
Melted butter for brushing on the buns -
Toppings: finely shredded lettuce, tomato, pickles, sautéed onions
Instructions
-
For the smashburger sauce: In a small bowl, stir together the mayonnaise, ketchup, mustard, grated onion, hot sauce, and Worcestershire sauce until well combined. Set aside half of the prepared sauce in a separate bowl for serving on the finished burgers. The other half will be used during the cooking process to caramelize onto the patties.
-
Divide the 2 pounds of ground beef into 12 loose balls. A good technique is to divide each pound in half, then each half into 3 balls. It is crucial not to pack them tightly; keeping the beef loose helps achieve those desirable crispy, lacy edges when smashed.
-
Brush the cut sides of your gluten-free hamburger buns with melted butter. Preheat your Blackstone griddle or a heavy-bottomed skillet to medium-high heat (approximately 400–450°F).
-
Place the buttered buns, cut side down, on the hot griddle. Toast them until they are golden brown and crisp, usually about 2-3 minutes. Once toasted, remove them and set aside to cool slightly while you cook the burgers.
-
Place the loose beef balls on the hot griddle, ensuring there is plenty of space between each one. Remember, they will spread out significantly once smashed. You might need to cook them in batches if your griddle is not large enough to accommodate all at once without overcrowding.
-
Immediately and firmly press straight down on each beef ball with a heavy-duty spatula or burger press until the patty is very thin and has jagged edges. Hold the pressure for a few seconds to maximize contact and crust formation.
-
Generously season each smashed patty with McCormick Grill Mates Smash Burger Seasoning (or your preferred seasoning blend). Don’t be shy; this is where a lot of the flavor comes from!
-
Just before you are ready to flip the patties, take a spoonful of the half of the smashburger sauce (the portion reserved for cooking) and gently spread it across the uncooked side of each patty. This sauce will caramelize beautifully into the burger as it finishes cooking.
-
Flip the patties carefully. Continue to cook for another 1–2 minutes, or until the bottom side has a dark, crispy crust and the sauce has caramelized. The thinness of smashburgers means they cook very quickly.
-
Immediately after flipping, place a slice of gluten-free cheddar cheese (or your cheese of choice) on top of each patty. This allows the cheese ample time to melt into a gooey layer as the burger finishes cooking.
-
To assemble your ultimate smashburger: Begin with the bottom toasted bun and spread a generous layer of the remaining reserved smashburger sauce.
-
Next, add your fresh toppings: a bed of finely shredded lettuce, followed by slices of ripe tomato. Placing these items on the bottom helps to create a stable structure for the burger and protects the bun from getting soggy.
-
Stack two of the cheesy, crispy smashburger patties on top of the lettuce and tomato. Finish your masterpiece with crunchy pickles, sweet sautéed onions (if using), and finally, the top bun. Serve immediately and enjoy your perfectly crafted gluten-free smashburger!
Notes
Gluten-Free Bun Options: For this recipe, Trader Joe’s GF Buns are my top recommendation due to their consistent quality and texture. However, if you’re looking for an even more personalized touch, my homemade gluten-free hamburger bun recipe offers a fantastic alternative that will perfectly complement these smashburgers.
Dairy-Free Adaptation: Making this recipe dairy-free is simple. Replace regular butter with a high-quality vegan butter for brushing onto the buns before toasting. For the cheese, you can either omit it entirely or use your favorite brand of dairy-free cheese slices, which melt well and provide a similar creamy texture.
Make-Ahead Tips for Convenience: To streamline your cooking process, you can prepare the smashburger sauce up to 5 days in advance. Store it in an airtight container in the refrigerator. The ground beef can be formed into loose balls up to 1 day ahead and kept refrigerated until you’re ready to cook. Additionally, all your desired toppings can be prepped (washed, sliced, or sautéed) up to 2 days in advance and stored in the fridge.
Storage for Leftovers: While smashburgers are best enjoyed fresh off the griddle, cooked patties can be stored. Place them in an airtight container in the refrigerator for up to 4 days. When reheating, a griddle or cast-iron skillet will help restore some crispness. Assembled smashburgers, however, are highly recommended for immediate consumption to maintain optimal texture and prevent sogginess.
Freezing Options: Both uncooked beef balls and cooked patties freeze exceptionally well. For uncooked beef, arrange the balls on a baking sheet and freeze until solid, then transfer to a freezer bag or airtight container for up to 3 months. Cooked patties can be frozen in the same manner, ideally separated by parchment paper to prevent sticking. Thaw frozen beef overnight in the refrigerator before cooking or reheating.
Nutrition
Carbohydrates: 37g |
Protein: 36g |
Fat: 60g |
Saturated Fat: 22g |
Polyunsaturated Fat: 10g |
Monounsaturated Fat: 19g |
Trans Fat: 2g |
Cholesterol: 149mg |
Sodium: 900mg |
Potassium: 456mg |
Fiber: 2g |
Sugar: 4g |
Vitamin A: 369IU |
Vitamin C: 1mg |
Calcium: 289mg |
Iron: 3mg