
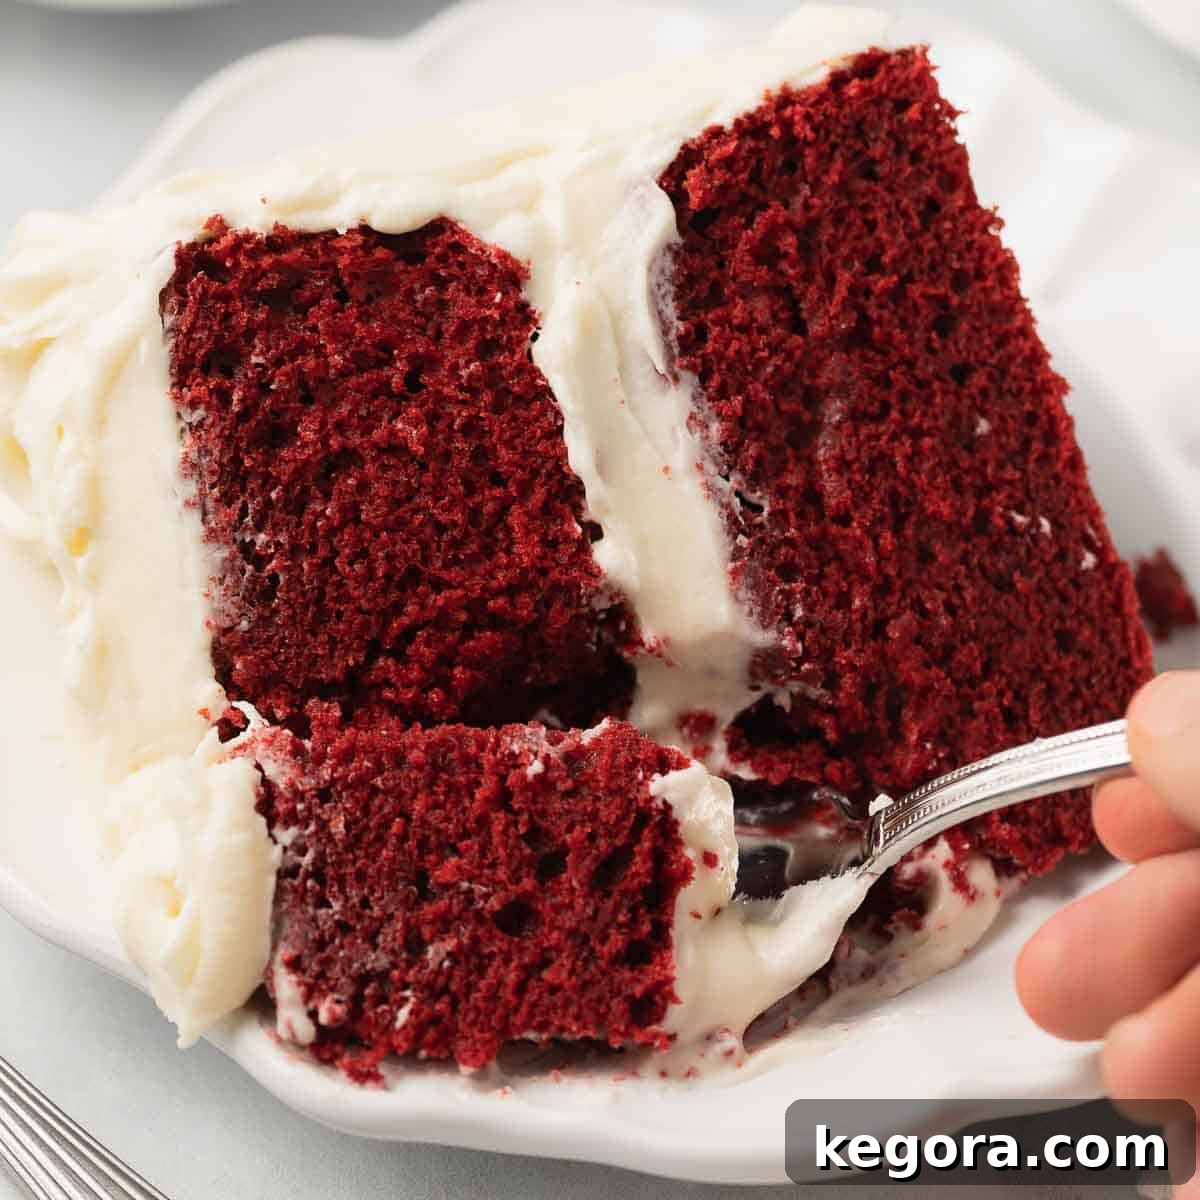
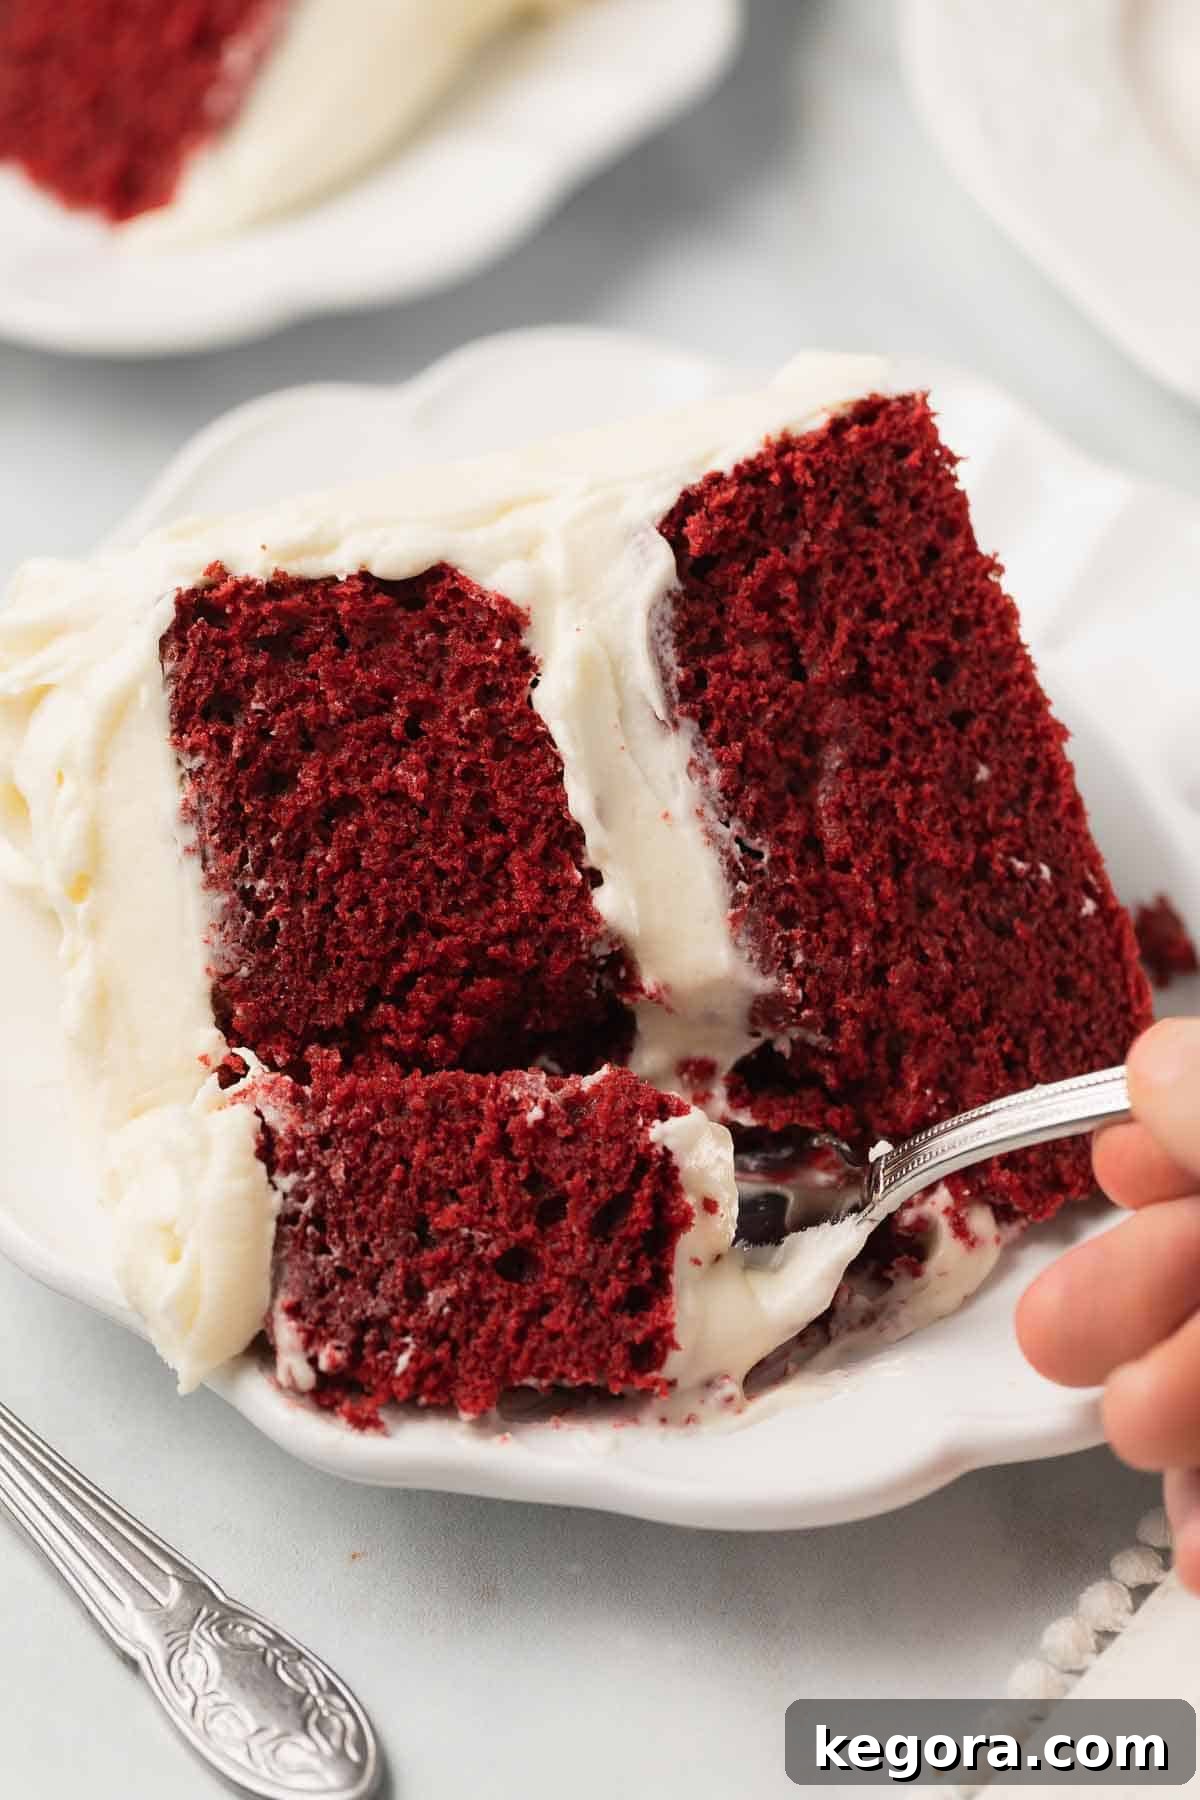
Meet your new favorite gluten-free red velvet cake! This cake stands out for its incredibly light and fluffy texture, achieved through a thoughtful combination of sour cream and oil, meticulously whipped into a perfect batter. Prepare to be amazed by its consistent results, delivering the most exquisite crumb and texture every single time.
Are you on the ultimate quest for the finest gluten-free red velvet cake recipe? Your search ends here! This recipe promises a cake with an impeccably soft, velvety crumb and a layer of luscious, tangy cream cheese frosting that will undoubtedly become the star dessert at any gathering or special occasion. It’s not just a cake; it’s a statement piece, a culinary delight that proves gluten-free can be utterly extraordinary.
Craving something a little smaller but equally delightful? You can easily adapt this recipe to create our Gluten-Free Red Velvet Cupcakes, perfect for individual servings and portion control.
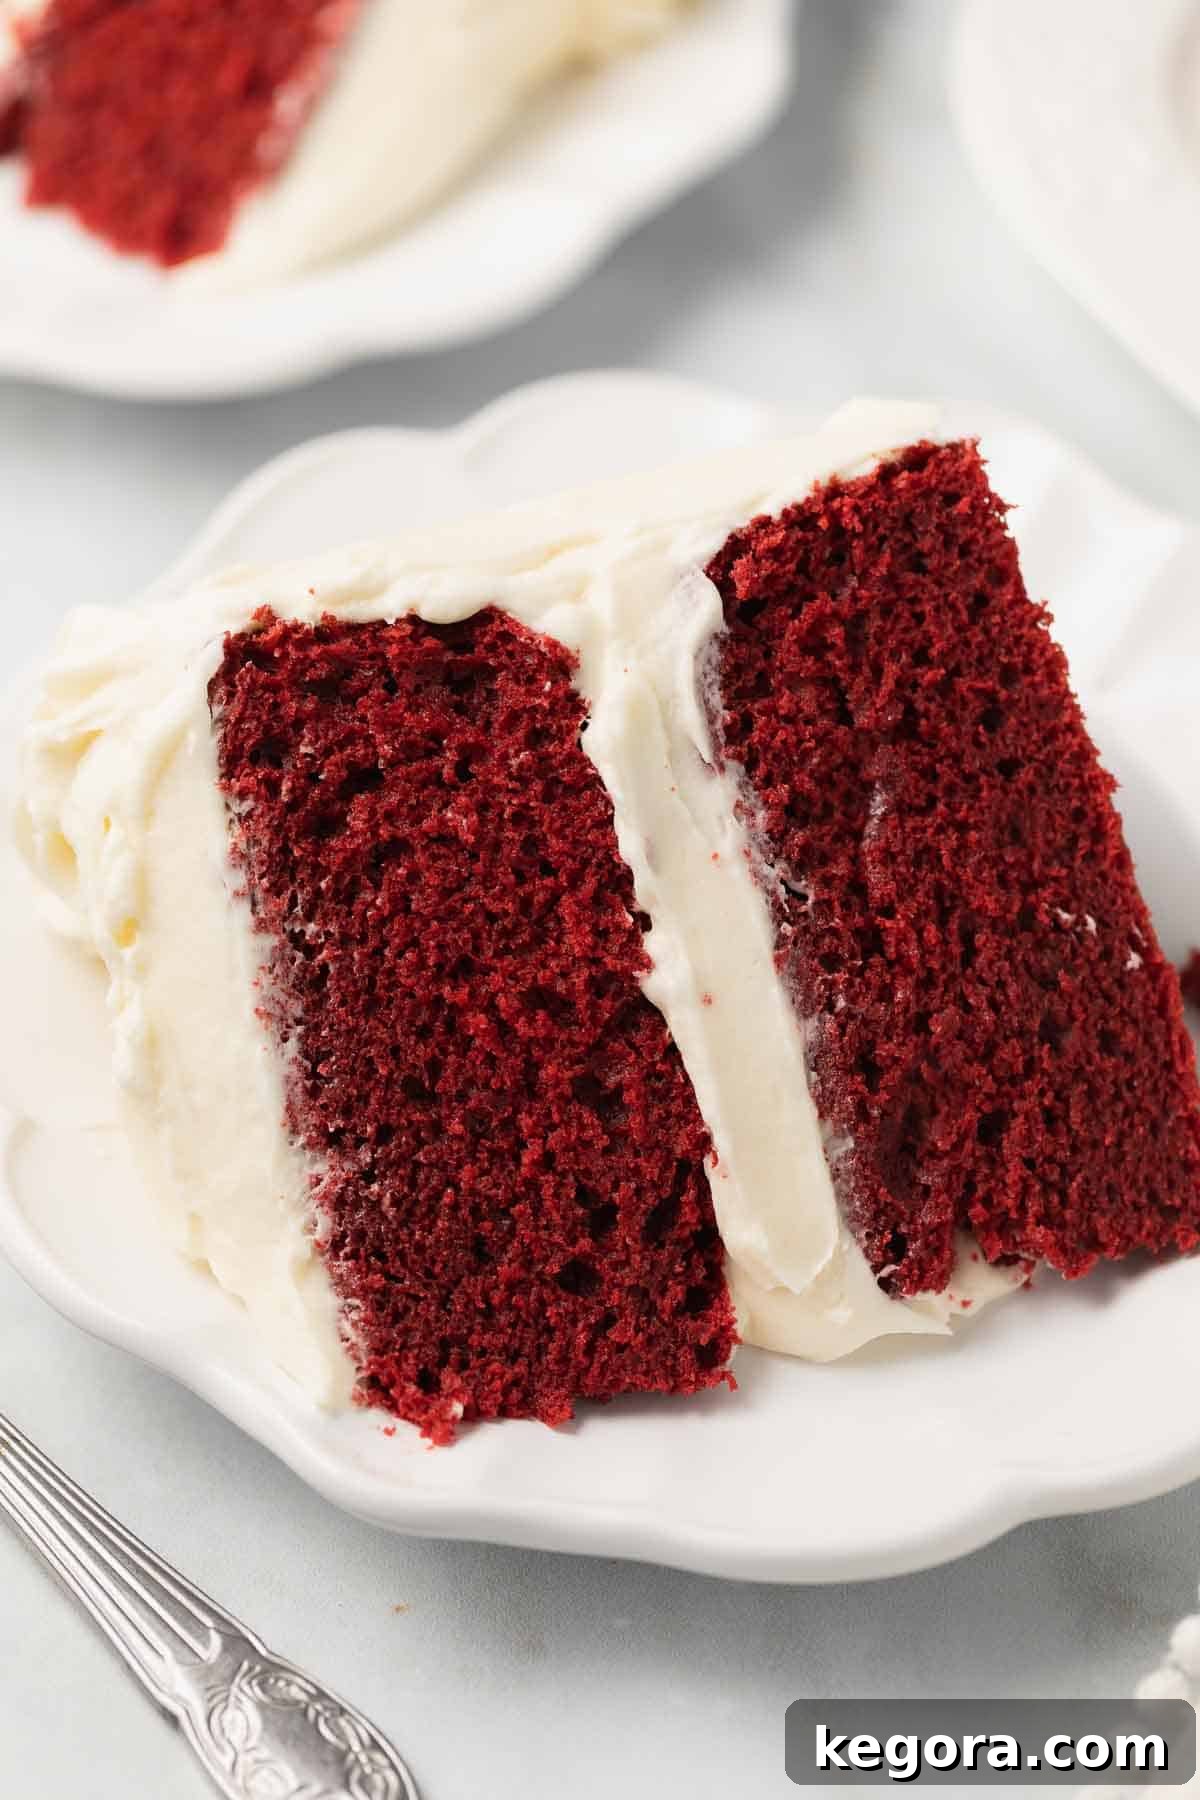
The Enduring Allure of Red Velvet Cake
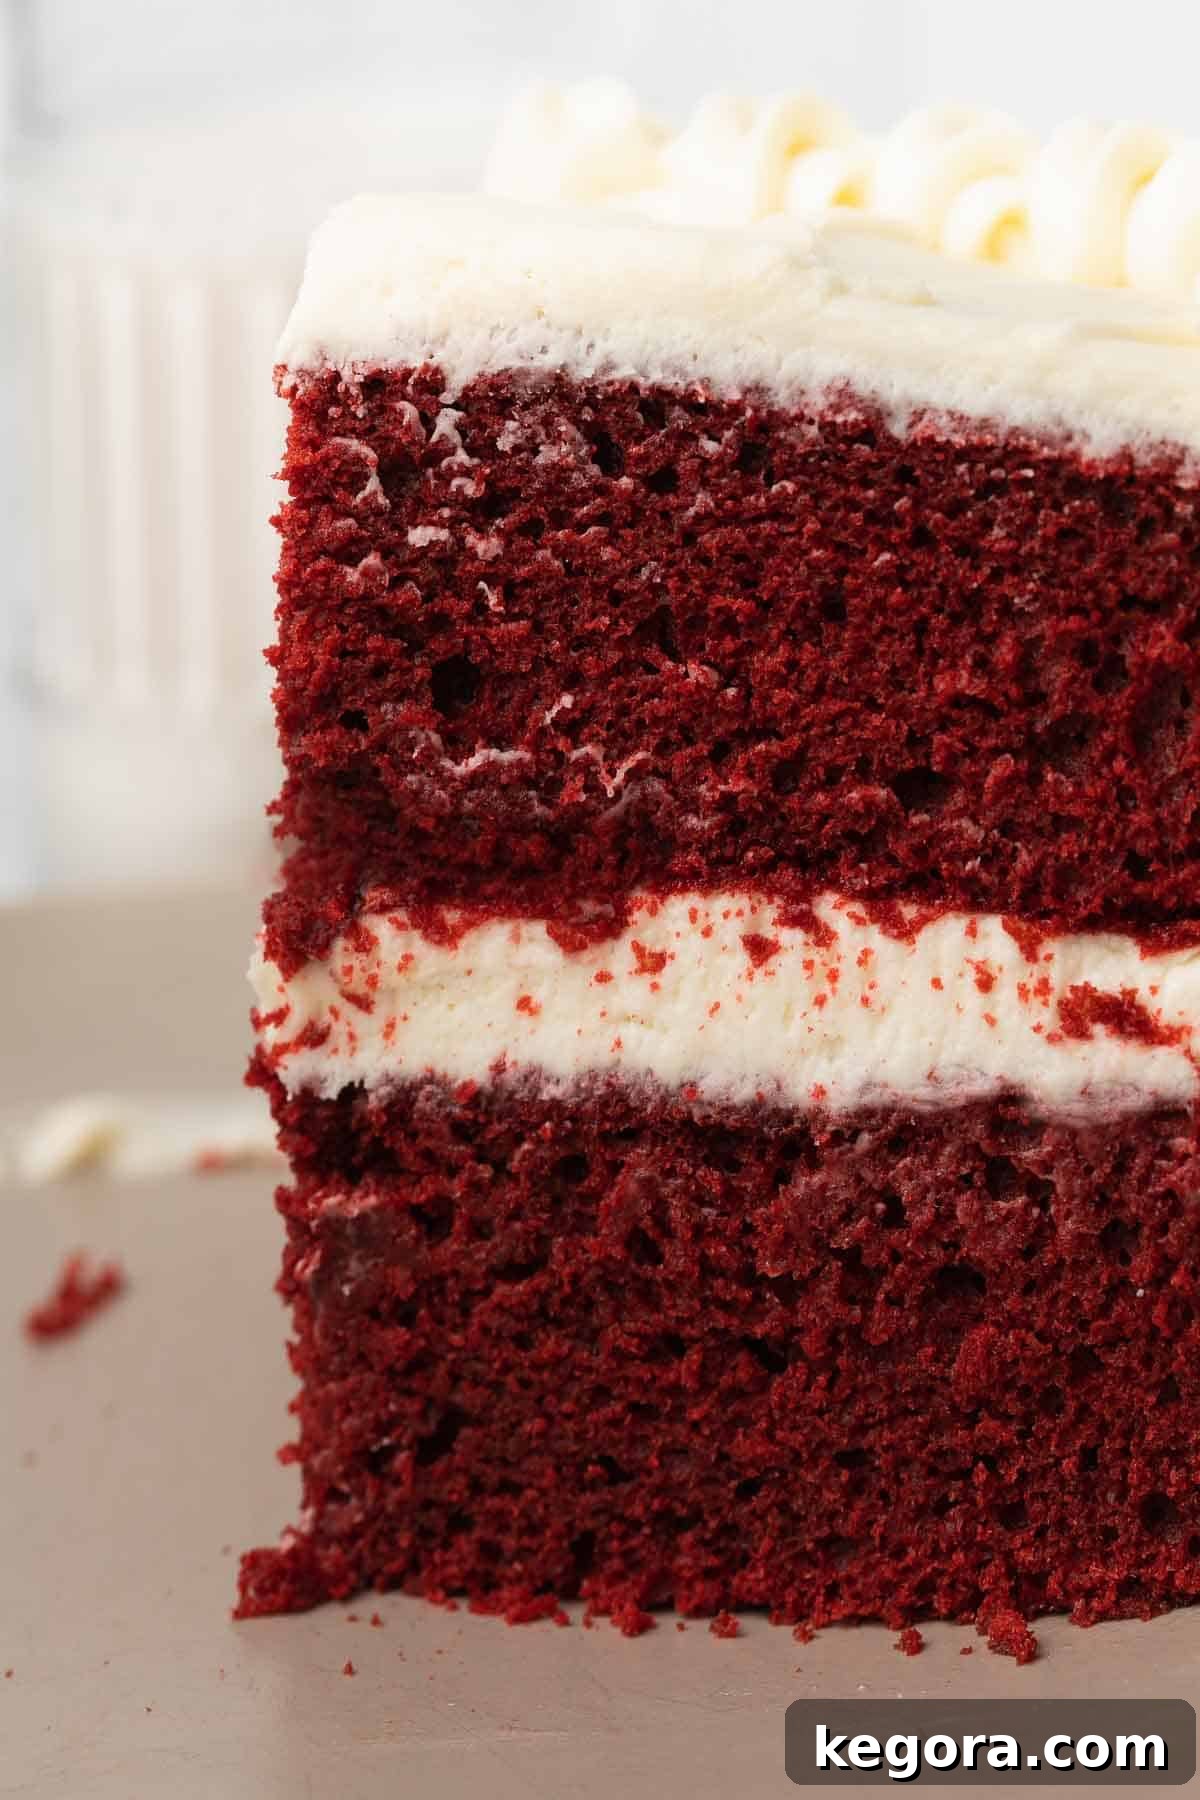
There’s a compelling reason why red velvet cake has gracefully stood the test of time, captivating palates for generations. This classic Southern dessert is more than just a cake; it’s a harmonious symphony of flavors and textures. It perfectly blends the subtle hint of cocoa with a delicate tang, complemented by the rich, buttery, and utterly irresistible cream cheese frosting. Beyond its exquisite taste, the cake’s striking red appearance elevates it to a true show-stopper, a visual feast that promises a delightful experience even before the first bite. It truly is one of those timeless desserts that never fails to impress and satisfy.
A Brief History of Red Velvet
The name “red velvet” derives from its signature soft, fine, and velvety crumb – a texture that was a revolutionary contrast to the coarser cakes typically served in the early 20th century when this dessert first gained prominence. Historically, the red hue was often a result of a chemical reaction between natural cocoa powder (which contains anthocyanins) and acidic ingredients like buttermilk or vinegar, creating a reddish-brown tint. Over time, as food coloring became more widely available, the vibrant, intense red we associate with modern red velvet cake became standard, transforming it into the iconic dessert we cherish today.
Achieving Gluten-Free Perfection
Naturally, when embarking on the journey to create a gluten-free red velvet cake, my goal was uncompromising: to craft a recipe that could truly live up to the original version’s legendary glory and rich heritage. And after extensive testing and refinement, I am immensely proud to declare that this goal has finally been achieved! This recipe proves that dietary restrictions don’t mean sacrificing flavor, texture, or visual appeal.
Many traditional cake recipes rely heavily on butter for richness, but butterfat can sometimes lead to a denser crumb when combined with gluten-free flours. To overcome this common gluten-free baking challenge, this recipe cleverly maintains a wonderfully light and fluffy texture by substituting butter with a masterful combination of sour cream and oil. Sour cream introduces a delicate tang and moisture, while oil contributes to an incredibly tender crumb. Giving the batter a few extra minutes of whipping also incorporates more air, ensuring a truly velvety cake that is guaranteed to please any crowd, even the most discerning red velvet connoisseurs.
If you enjoy this recipe, you might also love our other gluten-free cake creations like this Gluten-Free Texas Sheet Cake, our celebratory Gluten-Free Birthday Cake, or this delightful Gluten-Free Pineapple Upside Down Cake!
Reasons You’ll Absolutely Love This Gluten-Free Red Velvet Cake Recipe
- Unmatched Light, Fluffy Texture: Forget dense or crumbly gluten-free cakes. Our unique combination of sour cream and oil, coupled with proper whipping techniques, guarantees a cake that is exceptionally airy, moist, and tender, melting in your mouth with every bite.
- Sturdy Yet Tender Crumb: This cake strikes the perfect balance – it’s robust enough to hold its shape beautifully for decorating and slicing, yet remains incredibly tender and never dry or crumbly. This makes it ideal for stacking and transport.
- Quick Baking Time: Despite its impressive appearance, this cake bakes up efficiently in less than an hour, making it a fantastic option for last-minute celebrations or when you’re short on time.
- Consistently Perfect Results: Follow our detailed instructions, and you’ll achieve flawless results every single time. This recipe has been thoroughly tested and perfected to ensure reliability and deliciousness.
- Versatile for Various Occasions: While presented as a layer cake, the recipe is flexible and can also be effortlessly made as a convenient and crowd-pleasing sheet cake, perfect for larger gatherings.
Essential Ingredients You’ll Need
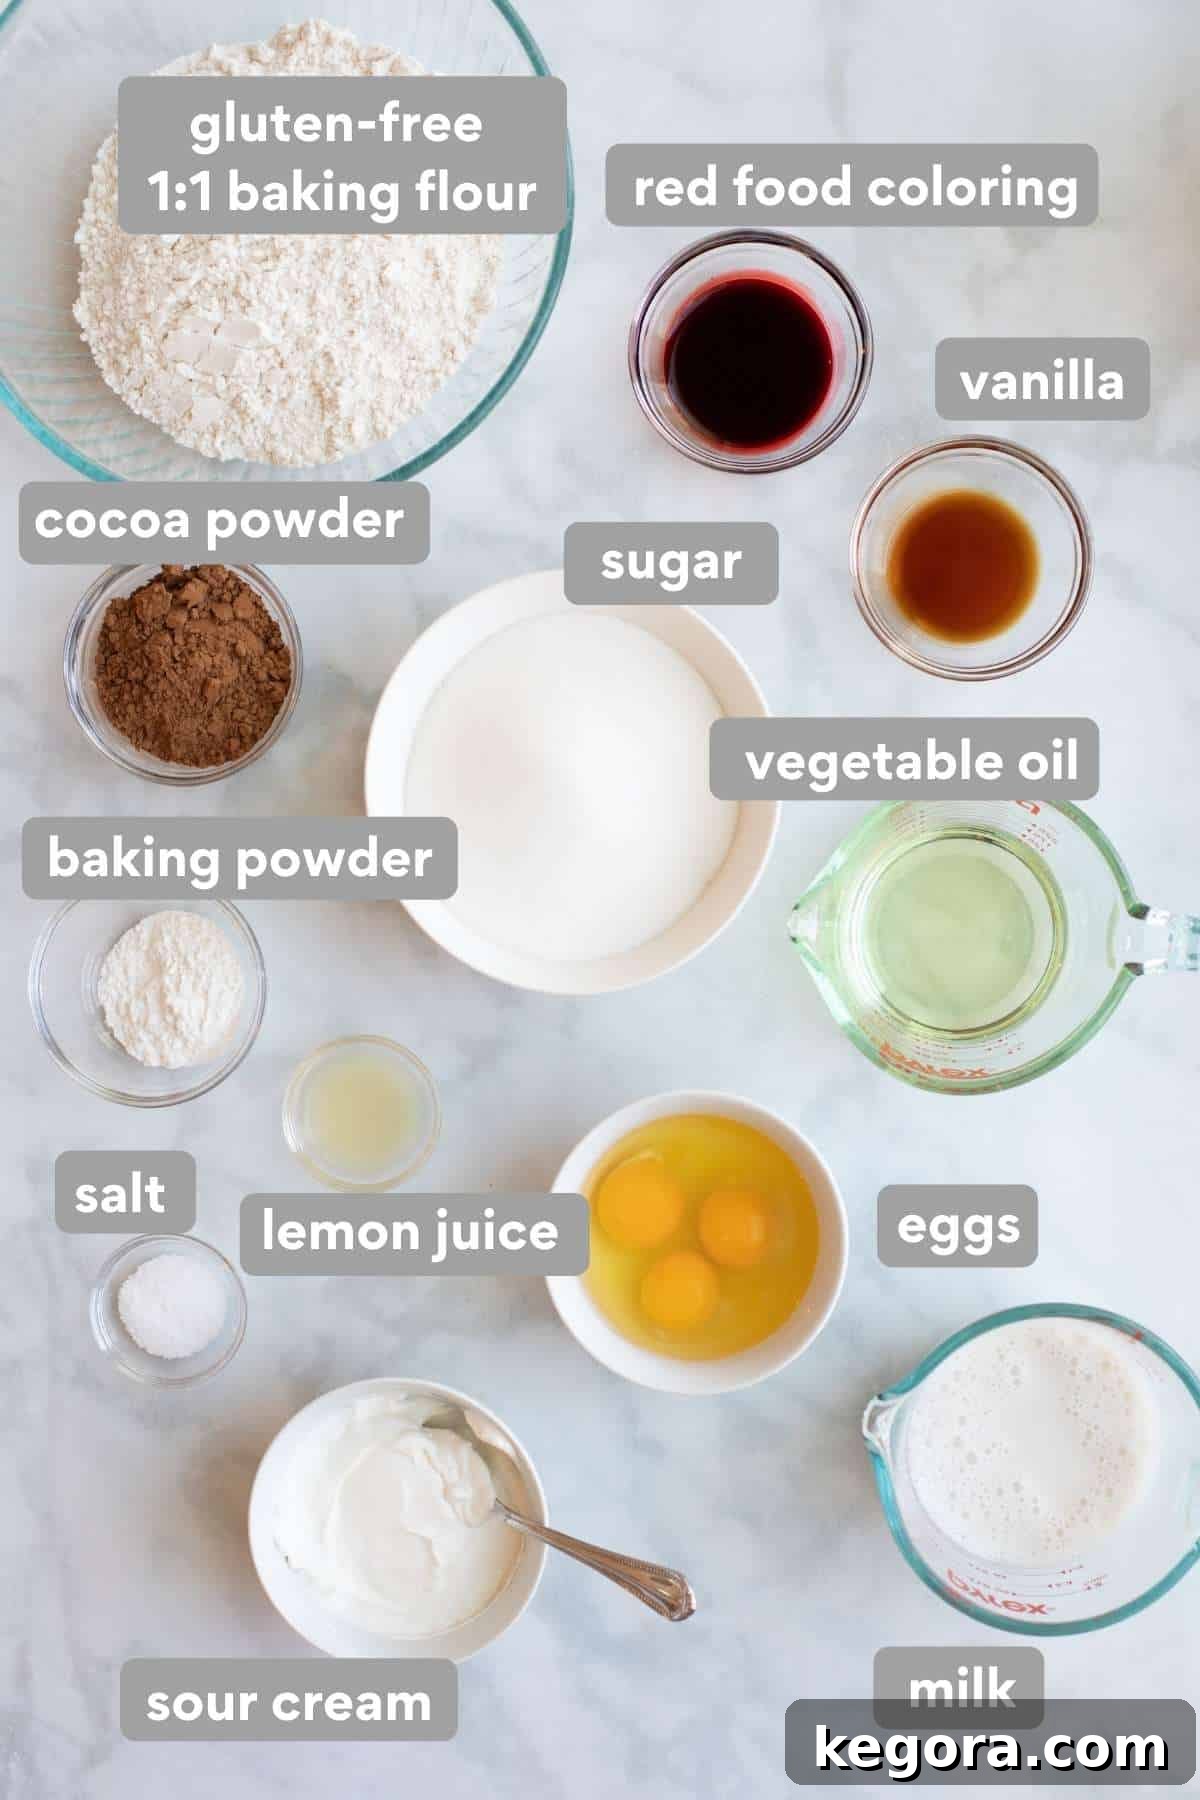
The secret to creating an incredibly moist and rich gluten-free cake lies in a specific culinary “trick”: opting for a combination of sour cream and oil instead of traditional butter for richness. This innovative approach is also a cornerstone in my popular gluten-free vanilla cake recipe. Butterfat can sometimes cause gluten-free flour to clump and result in a denser, heavier crumb. Sour cream, on the other hand, provides essential moisture and a desirable tang without weighing down the cake. It’s also a key ingredient that contributes to the perfect texture in this gluten-free chocolate sheet cake!
- Gluten-Free 1:1 Baking Flour: The foundation of any excellent gluten-free cake is a high-quality 1:1 gluten-free flour blend. For this red velvet cake, specifically look for a blend that clearly states it contains xanthan gum. Xanthan gum is crucial as it acts as a binder, providing the necessary structure and elasticity that gluten typically offers, preventing the cake from becoming crumbly. This particular brand is my top recommendation for achieving the best texture in this recipe.
- Cocoa Powder: To achieve the authentic red velvet flavor and vibrant color, it’s best to use natural, unsweetened cocoa powder, such as reputable brands like Guittard or Ghirardelli. Natural cocoa powder has a higher acidity compared to Dutch-processed cocoa, which reacts beautifully with the baking powder in the recipe. This reaction not only helps create a lighter, more tender crumb but also contributes to a slightly lighter brown base color, allowing the red food coloring to shine through more intensely and produce that iconic vibrant red hue.
- Red Food Coloring: For an intensely red cake that truly captures the visual essence of red velvet, gel food coloring is highly recommended over liquid or natural food colorings. Gel colors are highly concentrated, meaning you need less to achieve a deep, vibrant shade, and they won’t add excess liquid to your batter, which can affect texture. My personal favorites are Americolor “red red” or “super red”. While you can use 1 oz of liquid red food coloring, gel provides a much more impactful color. Without food coloring, the cake will have a pale brownish tint due to the cocoa, still delicious but lacking the characteristic “red” velvet aesthetic.
- Sour Cream & Oil: This dynamic duo is pivotal for the cake’s texture. Sour cream adds a delightful tang and ensures the cake remains incredibly moist and tender. Its acidity also interacts with the leavening agents for a superior rise. The oil, unlike solid fats like butter, contributes a consistent tenderness and richness that keeps the gluten-free crumb from becoming dense or dry. Together, they create a beautifully light and open cake structure.
How to Make the Best Gluten-Free Red Velvet Cake
Creating this gluten-free red velvet masterpiece is a rewarding process. Follow these detailed steps to ensure a flawless cake every time, from moist layers to creamy frosting.
Preparing the Cake Layers
- Begin by preheating your oven to 350°F (175°C). Properly prepare two 8-inch round cake pans or one 9×13 inch pan by greasing them thoroughly. For 8-inch round pans, I highly recommend lining the bottoms with a circle of parchment paper, then greasing again. This extra step ensures easy release and prevents any sticking.
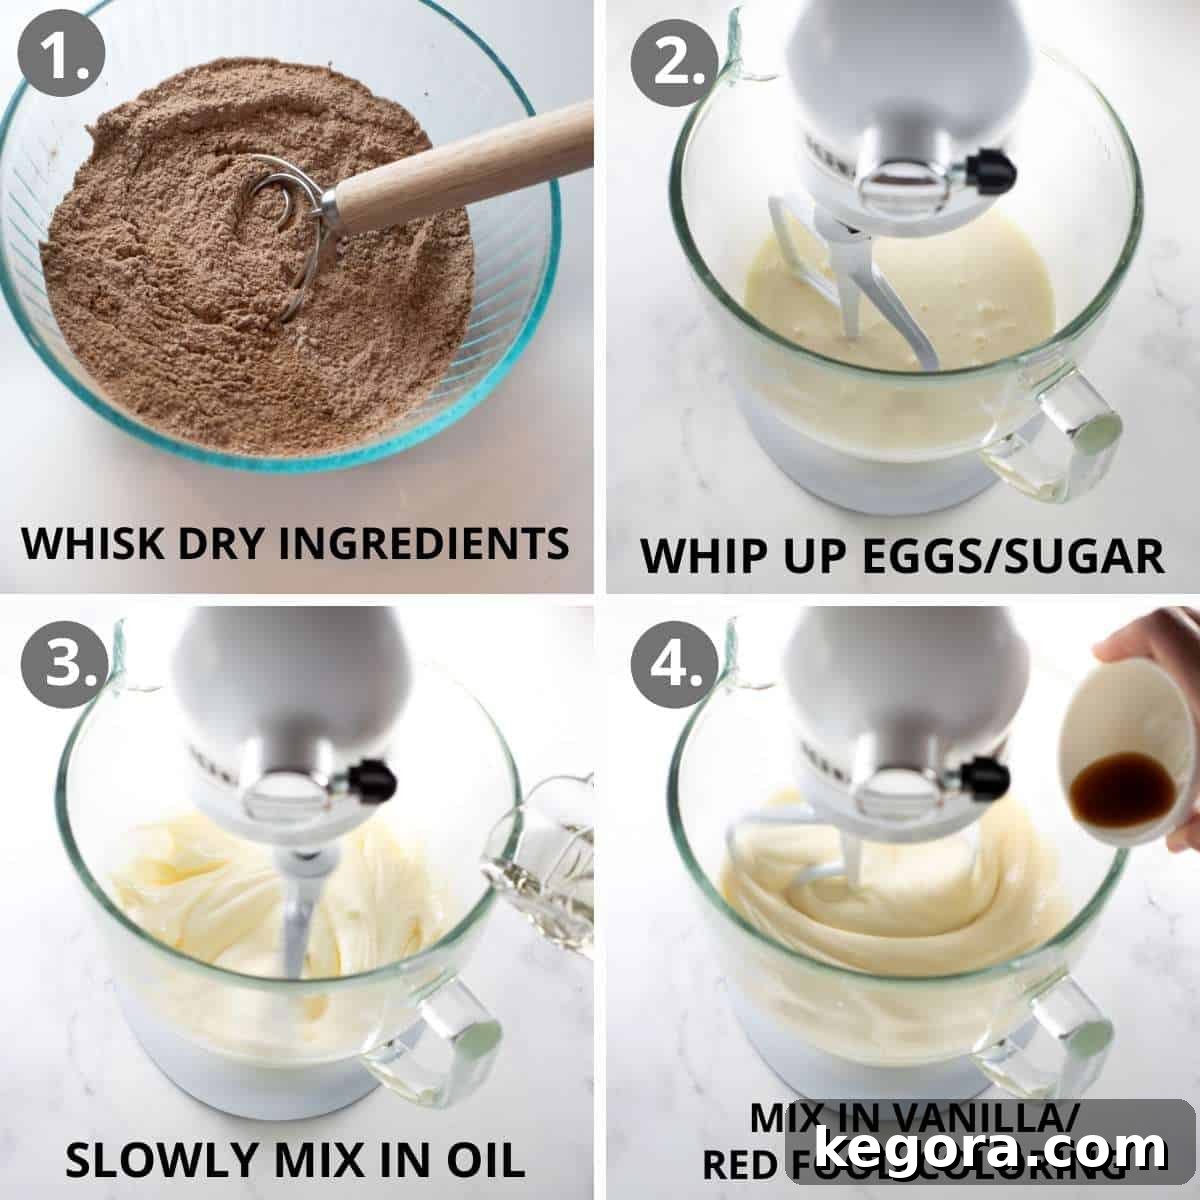
- In a medium-sized bowl, whisk together all your dry ingredients: the gluten-free flour blend, cocoa powder, baking powder, and salt. Whisk well to ensure everything is evenly distributed and there are no lumps.
- In the bowl of a stand mixer fitted with the whisk attachment, combine the eggs and sugar. Whip this mixture on medium-high speed for a full 3 minutes. The goal is to achieve a light, airy, and fluffy consistency, as this step incorporates crucial air that contributes to the cake’s light texture.
- With the mixer still running on low speed, slowly and steadily drizzle in the vegetable oil. It’s important to add the oil gradually to avoid deflating the air you’ve just whipped into the eggs and sugar. Once the oil is incorporated, mix in the red food coloring, vanilla extract, and lemon juice until the batter is uniformly colored and fragrant.
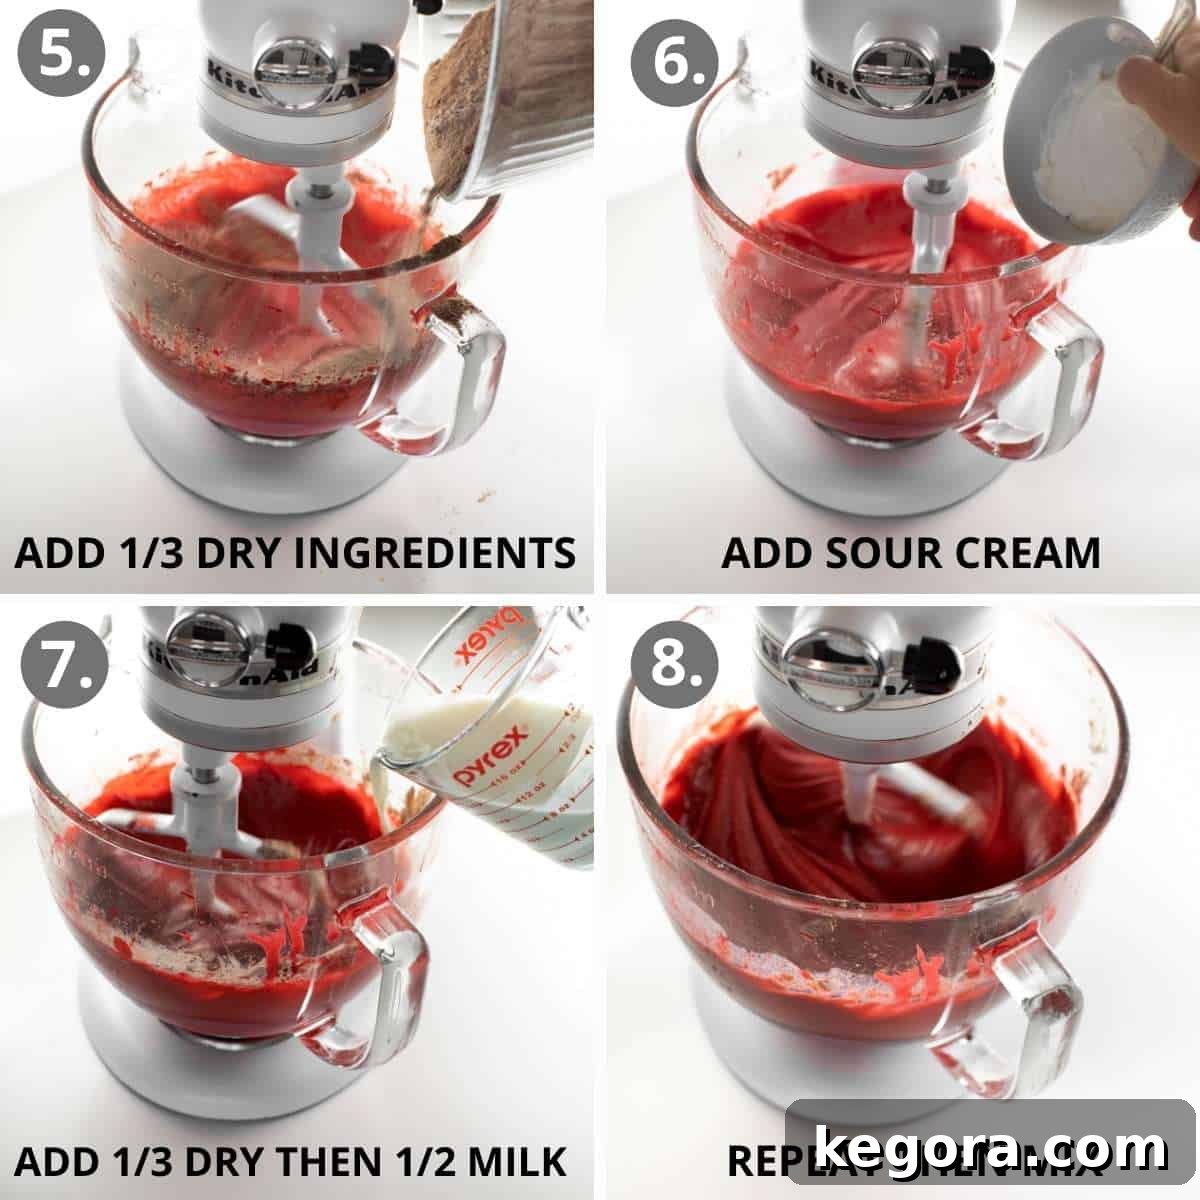
- Now, it’s time to incorporate the dry and wet ingredients in alternating additions. With the mixer on low speed, add approximately one-third of the dry ingredient mixture to the wet batter. Mix until just combined, being careful not to overmix.
- Next, add the sour cream and mix briefly until it’s fully incorporated. Follow this with another one-third of the dry ingredients, mixing until just combined. Then, add half of the milk, mixing again. Finally, add the last one-third of the dry ingredients and the remaining milk, stirring until the batter is completely smooth and cohesive. The alternating addition method is key for gluten-free baking, as it allows the flour to absorb liquids more effectively, preventing a grainy or dry cake.
- Carefully pour the vibrant red batter evenly into your prepared cake pans. Ensure the tops are level for even baking.
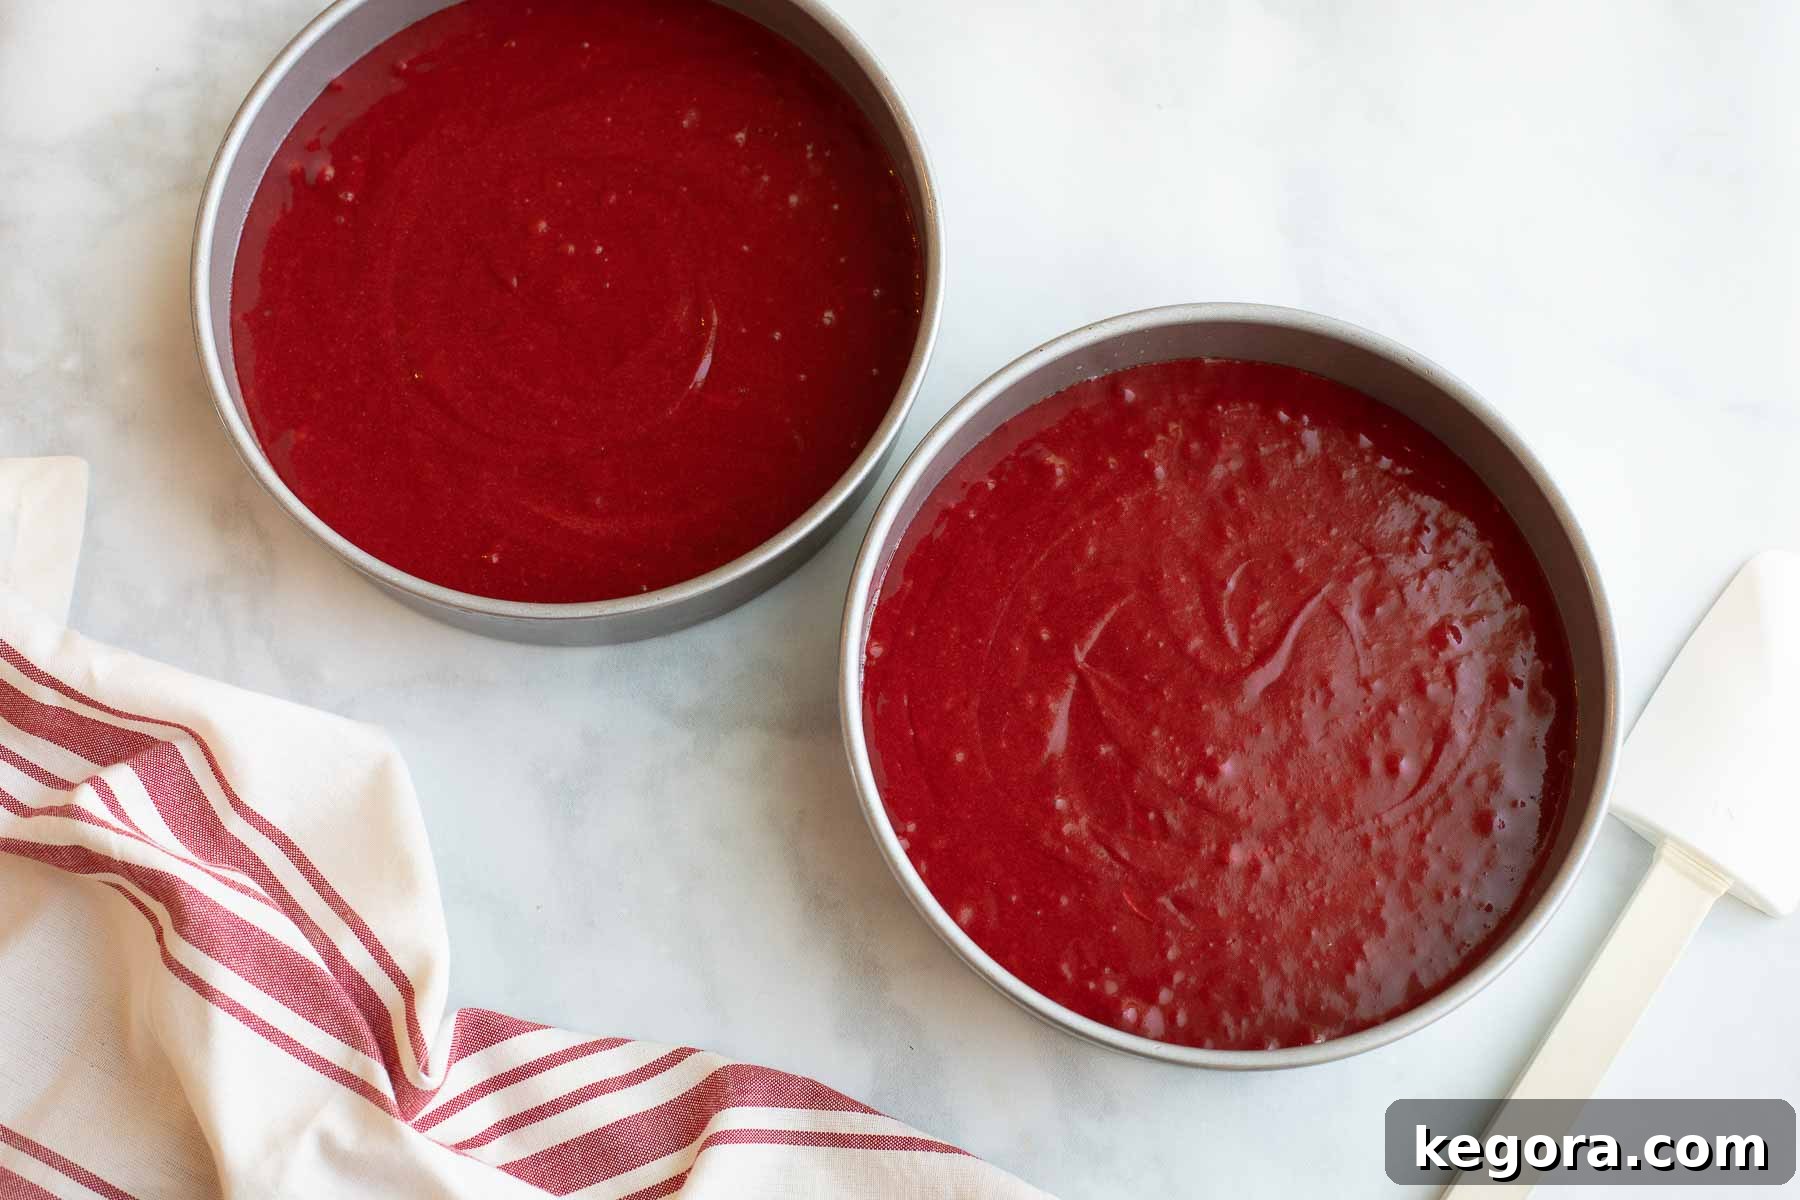
- Bake the cakes for 35-40 minutes. The cakes are done when they are golden around the edges, spring back gently when lightly touched, and a wooden toothpick inserted into the center of each cake comes out clean. Keep an eye on them, as oven temperatures can vary.
- If you’re using 8-inch round pans, allow the gluten-free red velvet cakes to cool in their pans for about 15 minutes. This cooling period helps the cakes firm up and prevents them from breaking when transferred. After 15 minutes, carefully invert the cakes onto a wire rack to continue cooling completely. It is crucial for the cakes to be entirely cool before attempting to frost them; otherwise, your frosting will melt and slide off.
Crafting the Perfect Cream Cheese Frosting
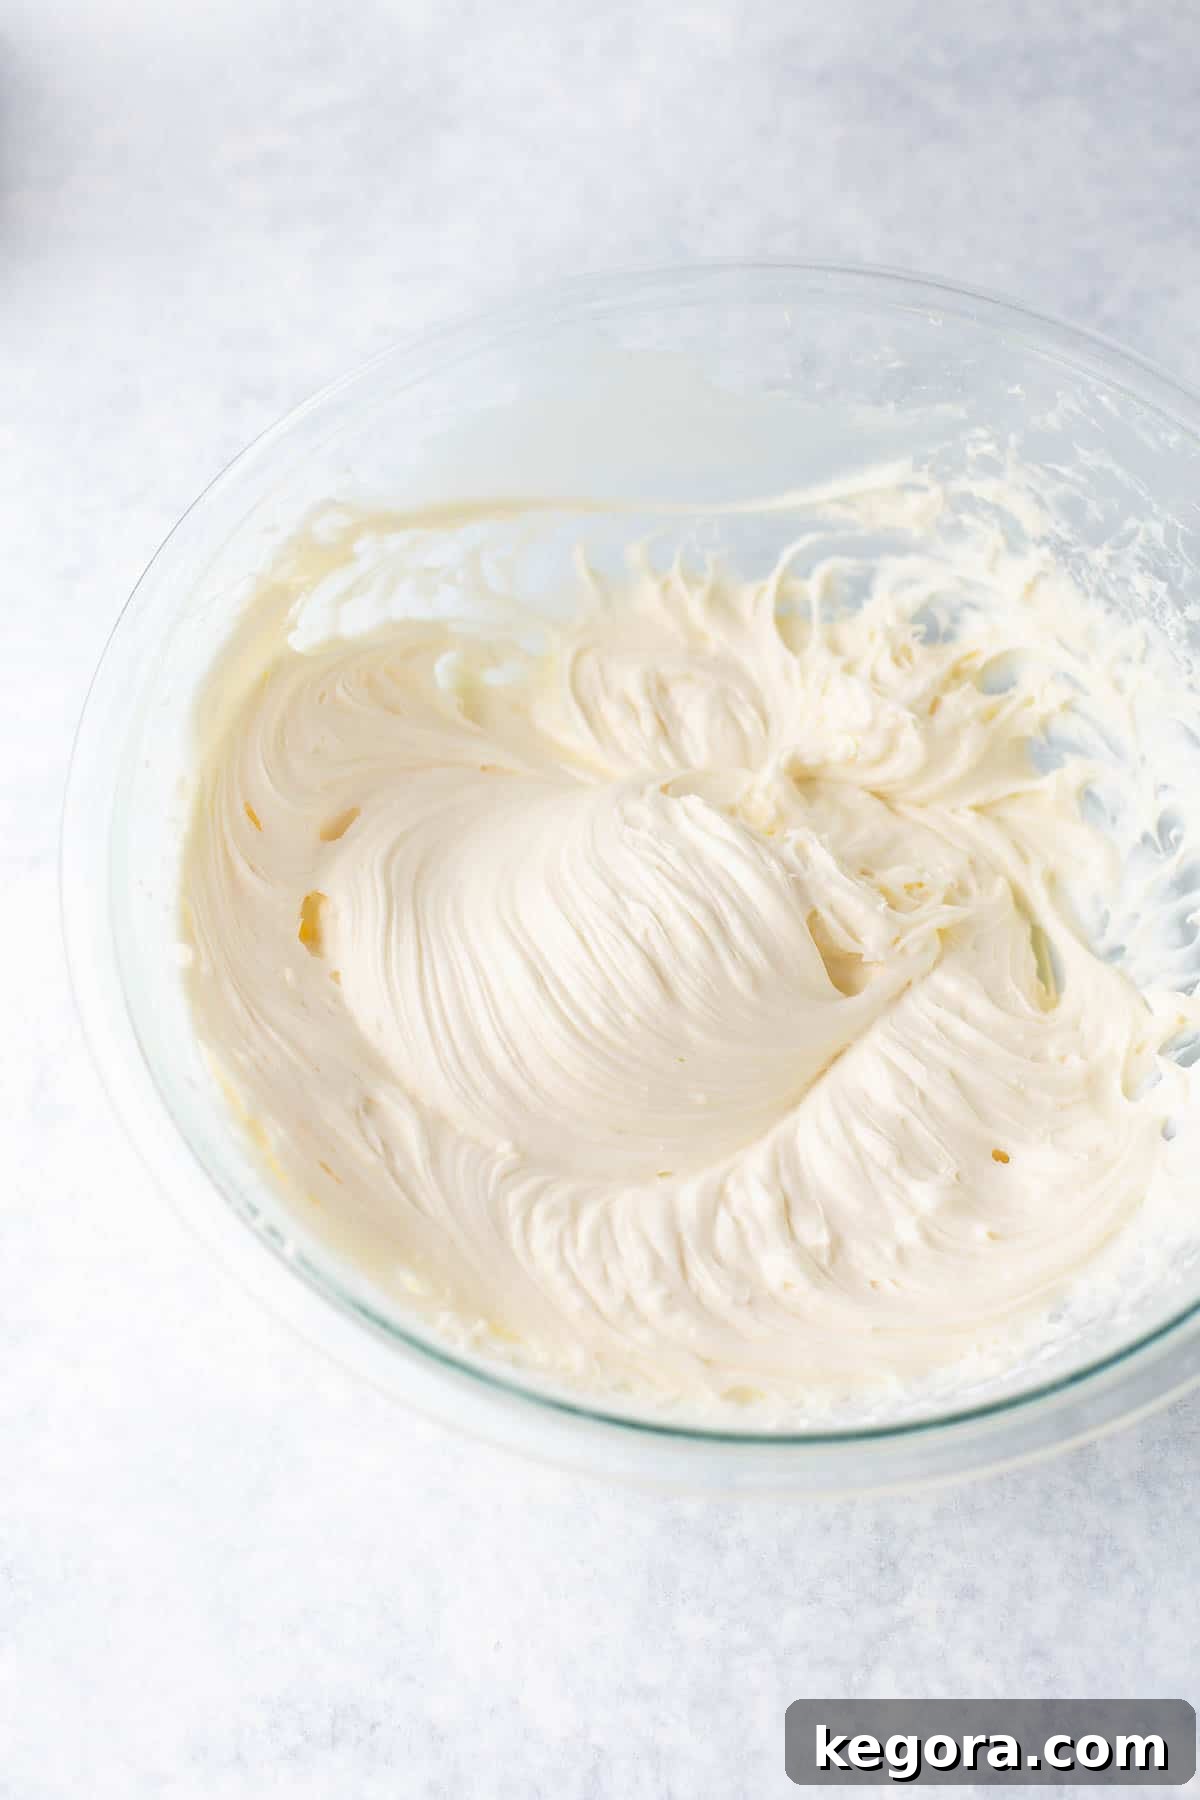
- Using either a hand mixer or a stand mixer fitted with the paddle attachment, beat together the softened butter and cream cheese until they are thoroughly combined and smooth. Ensure there are no lumps of cream cheese.
- Gradually add the powdered sugar, salt, and vanilla extract to the mixture. Start beating on low speed to prevent the powdered sugar from creating a cloud in your kitchen.
- Once the powdered sugar is mostly incorporated, increase the mixer speed to high and beat for about three minutes, or until the frosting is incredibly light, airy, and creamy. Stop the mixer occasionally to scrape down the sides and bottom of the bowl with a spatula, ensuring all ingredients are fully incorporated. Mix for another 30 seconds or so to guarantee a uniform consistency.
- To assemble your cake, place one cooled cake layer on your chosen cake stand or serving plate. Evenly spread a generous layer of cream cheese frosting over the top. Gently place the second cake layer on top, then spread the remaining frosting evenly over the top and sides of the entire cake, creating a beautifully finished dessert. Slice, serve, and savor every delightful bite!
- Any leftover cake should be covered tightly with plastic wrap or stored in an airtight container to maintain its freshness. Store it in the refrigerator for up to 5 days.
Storage and Freezing Instructions for Red Velvet Cake
To Store Leftover Cake:
To ensure your delicious gluten-free red velvet cake remains fresh and moist, it’s essential to store any leftovers properly. Cover the cake tightly with plastic wrap or place it in an airtight cake container. Due to its cream cheese frosting, the cake must be stored in the refrigerator. It will maintain its wonderful taste and texture for up to five days.
To Freeze Cake Layers (Unfrosted):
Planning to bake ahead or simply want to have some cake on hand for a future craving? Freezing cake layers is a fantastic option! Bake the cake layers as usual, then allow them to cool completely on a wire rack. Once fully cooled, wrap each unfrosted cake layer individually and tightly in several layers of plastic wrap, followed by a layer of aluminum foil. This double-wrapping prevents freezer burn and helps preserve moisture. Place the wrapped layers in the freezer for up to 2-3 months.
When you’re ready to assemble and enjoy your cake, transfer the frozen layers from the freezer to the refrigerator to thaw overnight, or at room temperature for a few hours. Once thawed, unwrap them and proceed with making the cream cheese frosting and assembling the cake as per the recipe. Remember, it’s best not to frost the cake before freezing, as the texture of cream cheese frosting can change upon thawing.
Red Velvet Cake Recipe FAQs
Generally, most commercially available red velvet cake mixes are not gluten-free unless they are specifically labeled as such on the packaging. Standard cake mixes typically contain wheat flour, which contains gluten. This is precisely why developing a reliable and delicious homemade gluten-free recipe was so important!
No, red velvet cake is distinctly more than just a colored vanilla cake. It possesses a unique flavor profile characterized by a subtle cocoa taste and a notable tang. This distinctive flavor is traditionally achieved through the addition of a small amount of cocoa powder and acidic ingredients like buttermilk or vinegar to the cake base. These ingredients create a complex, nuanced flavor that sets it apart from a simple vanilla cake.
A true red velvet cake is defined by several key elements: its signature soft, “velvety” crumb texture, a subtle and unique chocolate flavor derived from cocoa powder, and a distinctive tangy note, traditionally from buttermilk or vinegar. In our gluten-free version, we achieve this tangy richness through the use of sour cream. And of course, the vivid red color, whether from artificial gel food coloring or natural sources like beet juice, is an undeniable characteristic that makes red velvet cake so visually appealing and iconic.
Yes, this recipe can be adapted to be dairy-free! For the cake batter, simply substitute the sour cream with a high-quality dairy-free sour cream (brands like Kite Hill or Forager Project often work well) and use a dairy-free milk alternative such as almond milk or oat milk. For the cream cheese frosting, you would need to use dairy-free cream cheese (often found in block form for baking) and a dairy-free butter substitute. Be sure all your substitutions are 1:1 ratios for the best results.
Expert Tips for Making the Best Gluten-Free Red Velvet Cake
Crafting a perfect gluten-free red velvet cake is an art, and these tips will help you achieve outstanding results every time:
- Alternate Wet and Dry Ingredients: This technique is paramount in gluten-free baking. Adding the dry ingredients alternately with liquid ensures that the gluten-free flour blend fully absorbs moisture. This prevents a common pitfall of gluten-free cakes: a dry, grainy, or crumbly texture. It helps create a beautifully hydrated and smooth batter, leading to a perfectly moist cake.
- Choose the Right Pans: For optimal baking and presentation, it’s best to make this cake using either two 8-inch round cake pans or one 9×13-inch sheet cake pan. Using the correct pan size ensures proper cake thickness and baking time. These 8-inch round cake pans are excellent quality and deliver consistent results, while this 9×13 glass pan is ideal for a sturdy sheet cake.
- Whip Your Frosting Thoroughly: For truly amazing cream cheese frosting that is light, fluffy, and spreadable, don’t skimp on the whipping time. Beat the butter and cream cheese until airy, then add the powdered sugar and continue beating on high speed until it reaches a noticeably light and creamy consistency. This aeration is key to a superior frosting.
- A Pinch of Salt is Essential: While often overlooked, a small pinch of salt in your cream cheese frosting is a game-changer. It helps to balance out the sweetness of the powdered sugar, enhancing the tangy notes of the cream cheese and butter, resulting in a more complex and satisfying flavor profile that isn’t overly saccharine.
- Room Temperature Ingredients: Ensure all your wet ingredients for both the cake and frosting (eggs, sour cream, milk, butter, cream cheese) are at room temperature. This allows them to emulsify better, creating a smoother, more uniform batter and a creamier frosting.
- Do Not Overmix the Batter: After adding the dry ingredients, mix the batter only until just combined. Overmixing gluten-free flour can sometimes lead to a tougher texture, even without gluten. A light hand will ensure your cake remains wonderfully tender.
More Irresistible Gluten-Free Cake Recipes
Discover Your Next Favorite Gluten-Free Dessert
Gluten-Free Texas Sheet Cake
Gluten-Free Funfetti Cupcakes
Gluten-Free Brown Butter Banana Bars
Gluten-Free Little Debbie Christmas Trees
Gluten-Free Yule Log
The Best Gluten Free Vanilla Cake Recipe
Gluten-Free Chocolate Cupcakes
Gluten-Free Red Velvet Cupcakes
So there you have it—a truly fluffy, exquisitely velvety, and utterly delicious gluten-free red velvet cake that rivals any traditional version! If you try this recipe, please share your experience by leaving a comment and rating below! Your feedback is incredibly valuable.
Gluten-Free Red Velvet Cake
Comments
Ingredients
Dry Ingredients:
- 2 cups gluten-free 1:1 baking flour (310 grams, I use King Arthur Gluten-Free Measure-for-Measure Flour)
- 1/3 cup cocoa powder (35 grams)
- 3 teaspoons baking powder
- 1 teaspoon salt
Other Ingredients:
- 1 ¾ cups sugar (380 grams)
- 3 eggs
- ½ cup vegetable oil (100 grams)
- 1 tablespoon red food dye (or 1oz red food coloring)
- 1 tablespoon vanilla extract
- 1 teaspoon lemon juice
- ½ cup sour cream (120 grams, regular or light)
- 1 cup milk (250 grams, I use 2%)
Cream Cheese Frosting:
- 1 cup (2 sticks) butter (226 grams, softened)
- 16 oz cream cheese softened (452 grams, brick-style, not spreadable)
- 2 teaspoons vanilla extract
- ¼ teaspoon salt
- 6 cups powdered sugar (780 grams)
Instructions
Make the Cake:
-
Preheat the oven to 350F (175°C). Grease two 8-inch round pans or one 9×13 inch pan. For round pans, I also like to line the bottom with a circle of parchment paper then grease again for easy release.
-
In a medium bowl, whisk together the gluten-free flour, cocoa powder, baking powder and salt. Set aside.
-
In the bowl of a stand mixer, add the eggs and sugar. Whip on medium-high speed for 3 minutes, until light and fluffy.
-
With the mixer running on low, slowly drizzle in the oil. (Do this slowly to maintain the air whipped into the batter.) Mix in the red food coloring, vanilla extract, and lemon juice until well combined.
-
With the mixer on low, add ⅓ of the dry ingredients. Mix until just incorporated. Add the sour cream and mix to combine. Add another ⅓ of the dry ingredients and continue to mix. Add ½ of the milk followed by the last ⅓ of the dry ingredients. Add the remaining milk and stir until totally combined. (Adding dry ingredients alternately with liquid ingredients ensures the flour absorbs into the batter properly.)
-
Pour the batter evenly into the prepared pans. Bake for 35-40 minutes, or until a toothpick inserted into the center of each cake comes out clean.
-
If using 8-inch round pans, let the cakes cool in the pans for 15 minutes. Then, invert the cakes onto a wire rack to continue cooling completely. Ensure cakes are fully cool before frosting.
Make the Frosting:
-
Using a hand or stand mixer, beat together the softened butter and cream cheese until combined and smooth. Add the powdered sugar, salt, and vanilla extract.
-
Beat on low speed to incorporate ingredients, then switch to high for about three minutes, or until the frosting is light and creamy. Scrape down the sides and bottom of the bowl, then mix for another 30 seconds to ensure even consistency.
-
Place one cooled cake layer on your cake stand or serving plate. Evenly cover the top with a generous layer of frosting. Top with the second layer and spread the remaining frosting all over the top and sides. Slice, serve, and enjoy this delightful cake!
-
Cover any leftover cake tightly and store it in the refrigerator for up to 5 days.
Notes
- Cocoa powder: It’s best to use natural cocoa powder like Guittard or Ghirardelli for red velvet cake. The lighter brown color results in a more vibrant red cake, and the higher acidity reacts with the baking powder to create a more tender crumb.
- Red Food Coloring: If you want an intensely red cake, you’ll want to use red gel food coloring, rather than natural or liquid food coloring. I use Americolor “red red” or “super red”. You can also use 1 oz liquid red food coloring, but I prefer gel for a more vibrant hue.
MAKE IT A SHEET CAKE: You can easily adapt this recipe to make a delicious sheet cake by baking it in a 9×13-inch pan. Please note that the baking time might need to be adjusted slightly; typically, you may need to add a few extra minutes to achieve a clean toothpick test.
MAKE IT DAIRY-FREE: For a dairy-free version, use dairy-free sour cream (I recommend brands like Kite Hill or Forager Project) and an unsweetened almond milk or other preferred dairy-free milk alternative. For the frosting, ensure you use dairy-free cream cheese (block-style is best) and a good quality dairy-free butter stick.