
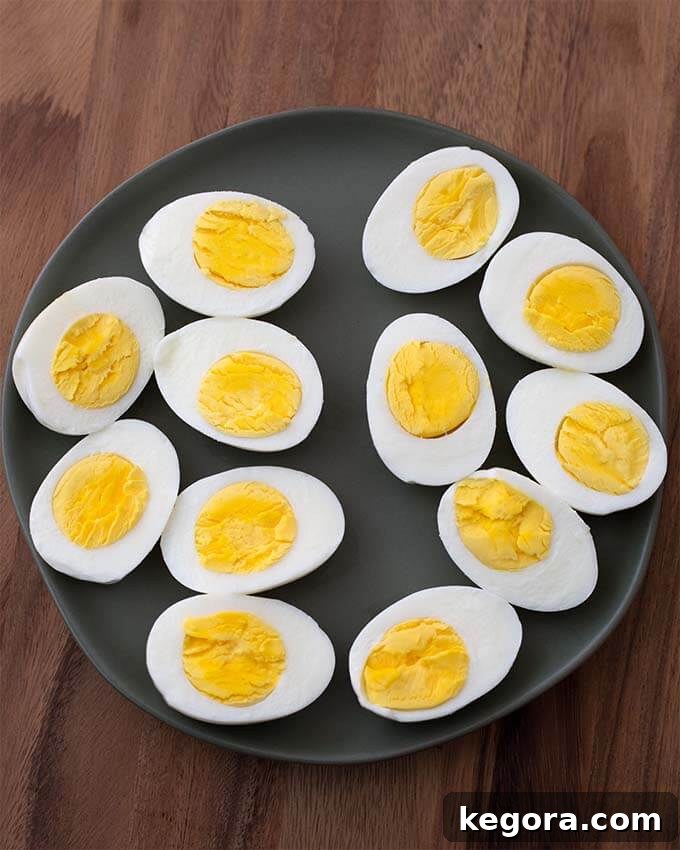
Transforming ordinary eggs into perfectly cooked delights has never been easier, thanks to the Instant Pot. Forget the traditional stovetop methods that often result in stubborn shells and inconsistent doneness. With your electric pressure cooker, you can achieve flawlessly boiled eggs, whether you prefer them soft and jammy or fully hard-cooked, every single time. And the best part? They peel like a dream, making preparation a breeze for everything from quick breakfasts to elaborate holiday platters. While technically steamed under pressure rather than boiled, the outcome is undeniably superior, giving you “egg-cellent” results without the fuss.
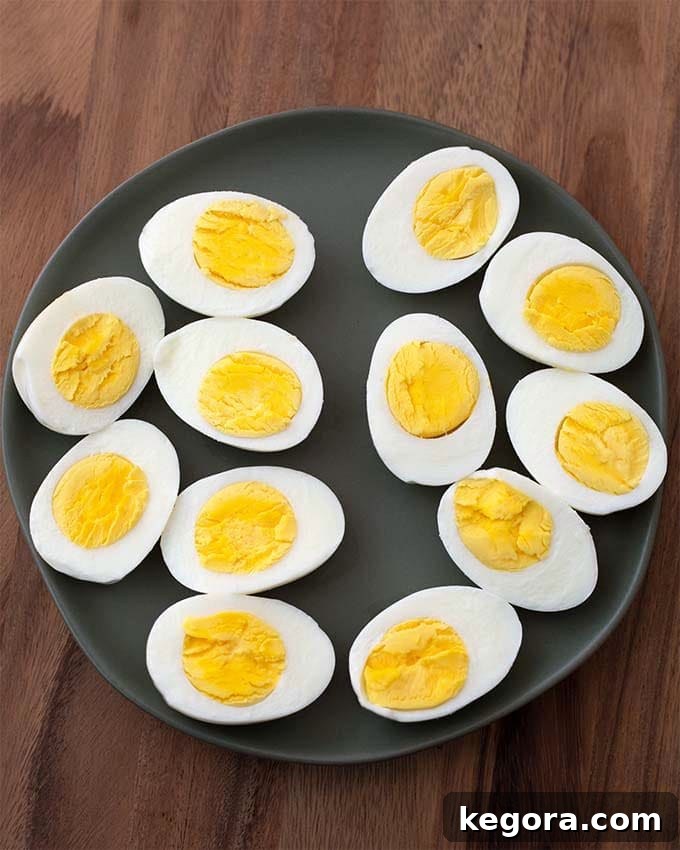
The Instant Pot makes preparing hard-cooked eggs incredibly simple. The convenience of loading the pot, pressing a button, and walking away truly sets this method apart. This guide will walk you through achieving ideal results, offering tips and variations to suit your taste and altitude.
Mastering Instant Pot Boiled Eggs: From Soft to Hard
The journey to perfect Instant Pot eggs often begins with understanding that there isn’t one universal “best” method. Ask any group of Instant Pot enthusiasts, and you’ll receive a multitude of suggestions, each tailored to individual preferences and specific conditions. Today, we’ll dive into various techniques, from achieving a runny, soft-boiled yolk to a firm, perfectly cooked hard-boiled egg, ensuring you find your ideal approach.
The Art of Timing: Demystifying Instant Pot Egg Methods
When discussing Instant Pot eggs, you’ll frequently hear references to specific timing sequences, most famously the “5-5-5 method.” This popular approach refers to:
- **5 minutes of cook time** under high pressure.
- **5 minutes of Natural Pressure Release (NPR)**, where the pot slowly depressurizes on its own.
- **5 minutes in an ice water bath** to halt the cooking process.
This method is a great starting point, but it’s crucial to understand that results can vary significantly. Factors such as your geographical elevation (which affects boiling points and cooking times), the size and starting temperature of your eggs (straight from the fridge versus room temperature), and even the specific model of your Instant Pot can all play a role. The ultimate goal remains consistent: beautifully cooked eggs without the unappetizing greenish-gray ring around the yolk, instead aiming for a vibrant, pleasing yellow.
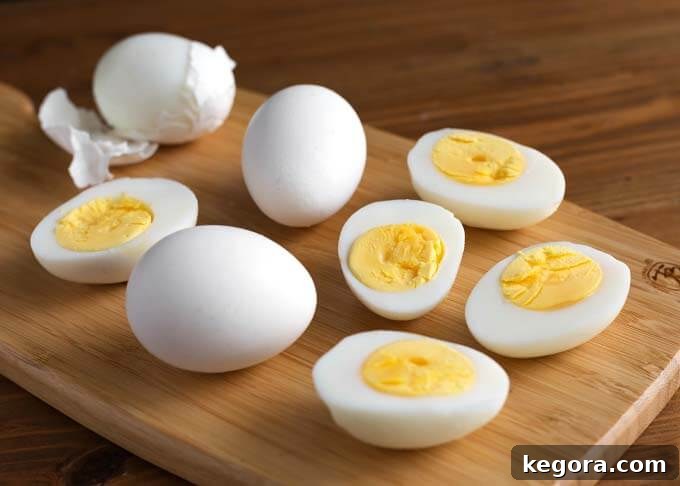
Your First Step: The Essential Test Run
Given the variability in cooking outcomes, especially for first-timers, conducting a small test batch is highly recommended before you commit to cooking a large quantity of eggs. This personalized approach ensures you discover the perfect timing for your setup and preferences. Here’s how to do it:
- **Prepare Your Pot:** Pour 1 cup of water into the bottom of your Instant Pot (if you have an 8-quart model, use 2 cups). Insert the metal trivet or steamer rack that came with your pot.
- **Place the Eggs:** Carefully place 2 eggs on the trivet. It’s okay if they touch or if you decide to test with more.
- **Follow the Recipe:** Proceed with the cooking instructions provided in this guide, specifically the 5-5-5 method as a baseline.
- **Evaluate Results:** Once cooked, peel one egg and slice it in half. Examine the yolk’s consistency and color. Is it too firm? Too runny? Is there a green ring?
- **Adjust as Needed:** Based on your test, you might need to add or subtract a minute from the cook time or adjust the natural release duration. This initial test run is invaluable for dialing in your perfect settings.
While some people achieve perfect results with the 5-5-5 method right away, others find their eggs either overcooked or undercooked. You might encounter people who swear by the 2-8-5 method (2 minutes cook, 8 minutes NPR, 5 minutes ice bath) for better results, or even variations like 4-4-4, 6-6-6, or the expedited 8-0-5. This wide array of timings underscores the importance of your personal test. Don’t be discouraged by the initial confusion; finding your sweet spot is part of the fun!
Navigating High-Altitude Cooking
For those living at higher elevations, cooking in an Instant Pot can require slight adjustments. As someone cooking at sea level, the 5-5-5 method is my go-to. However, if you’re above 2,000 feet, you’ll likely need to increase your cooking time to compensate for the lower boiling point of water. It’s best to start with the standard timing as your baseline and then adjust incrementally.
A general guideline for high-altitude pressure cooking suggests adding approximately 5% more cook time for every 1,000 feet above 2,000 feet. So, for instance, you would consider adding:
- 5% more cook time at 3,000 feet.
- 10% more cook time at 4,000 feet.
- 15% more cook time at 5,000 feet, and so on.
Always remember to perform a test run with these adjustments, as individual Instant Pot models and specific altitudes can still produce varying results.
The Mystery of the Green Ring: What Causes It and How to Prevent It
After cooking numerous batches of eggs in the pressure cooker, I’ve observed that the presence of the dreaded green ring around the yolk can still be a sporadic occurrence. While it doesn’t typically affect the taste, it can certainly be less appealing aesthetically. This greenish discoloration is a result of a chemical reaction, specifically the formation of iron sulfide. This happens when the iron in the yolk reacts with hydrogen sulfide, which is released from the egg white, particularly when eggs are cooked for too long or at too high a temperature.
The primary culprit is often simply overcooking. The longer the eggs are exposed to heat, the more likely this reaction is to occur. However, the age of the egg also plays a significant role. Fresher eggs tend to be more susceptible to the green ring because their whites contain more hydrogen sulfide. Older eggs, which have lost some of this compound, might be less prone to discoloration. To minimize the chances of a green ring, sticking to the precise cooking times recommended, employing an immediate ice bath, and being mindful of egg age are your best strategies.
Achieving the Perfect Soft-Cooked Eggs
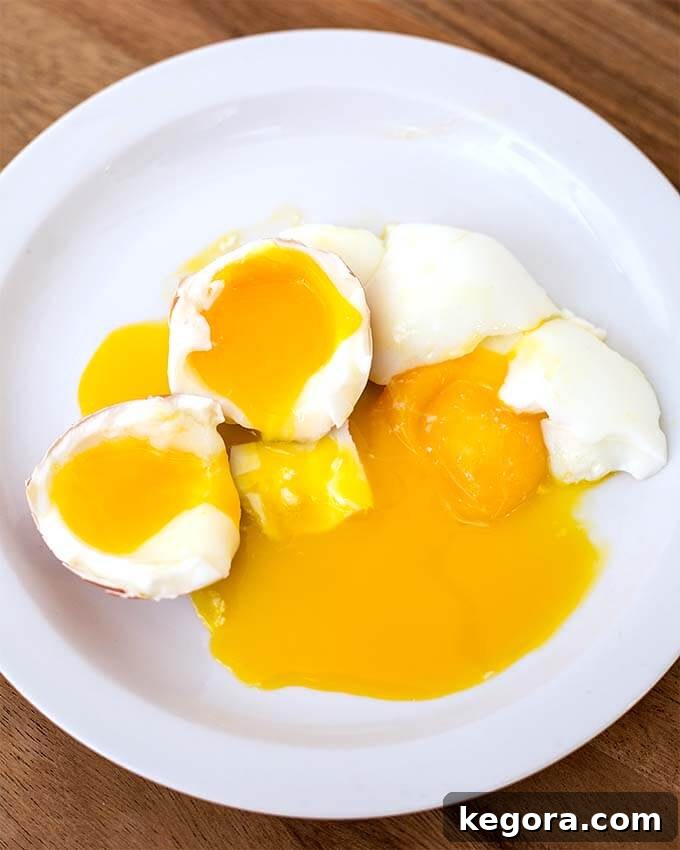
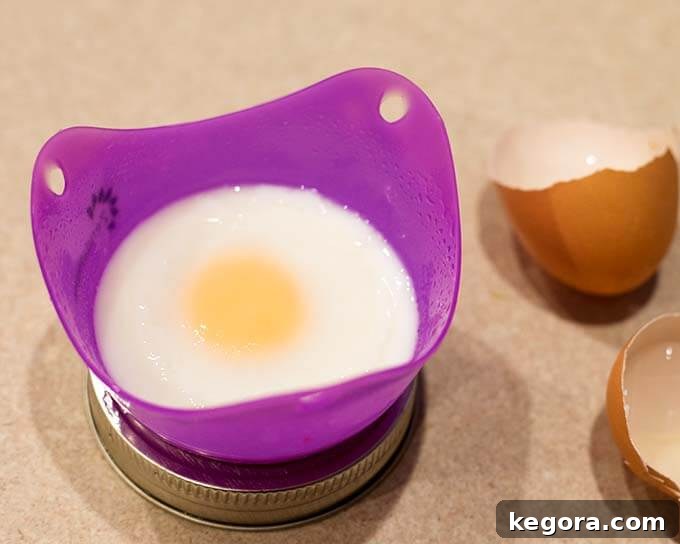
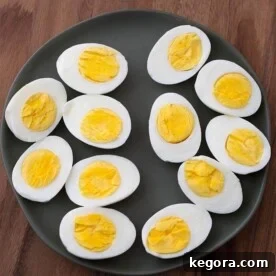
Perhaps your preference leans towards a luxurious soft-cooked egg, with a firm white and a wonderfully runny or jammy yolk. Your Instant Pot is perfectly capable of delivering these delicate results too. The beautiful soft-cooked eggs you see in the photo above were cooked for just 2 minutes under pressure. Following a quick release of the pressure, they were immediately transferred to an ice water bath for 2 minutes – just enough time to make them cool enough to handle without burning fingers. The result was an egg with a slightly firm outer yolk and a soft, almost poached-like center. However, be warned: softer cooked eggs can sometimes be a bit more challenging to peel cleanly, so handle them with extra care.
Innovative Approaches: Instant Pot Poached Eggs and Egg Loaf
If peeling soft-cooked eggs proves too difficult, or if you simply want a completely shell-free option, the Instant Pot offers fantastic alternatives:
Poached Instant Pot Eggs
For a truly effortless poached egg, crack your eggs directly into small silicone cups or other oven-safe dishes that fit comfortably within your pressure cooker. Place these cups on the trivet with 1 cup of water (or 2 cups for an 8-quart pot) at the bottom. Cook for just 2 minutes on high pressure, followed by a quick release. You should be greeted with beautifully soft-cooked eggs that require no peeling whatsoever. As always, a test run is highly recommended to fine-tune the timing for your desired level of doneness.
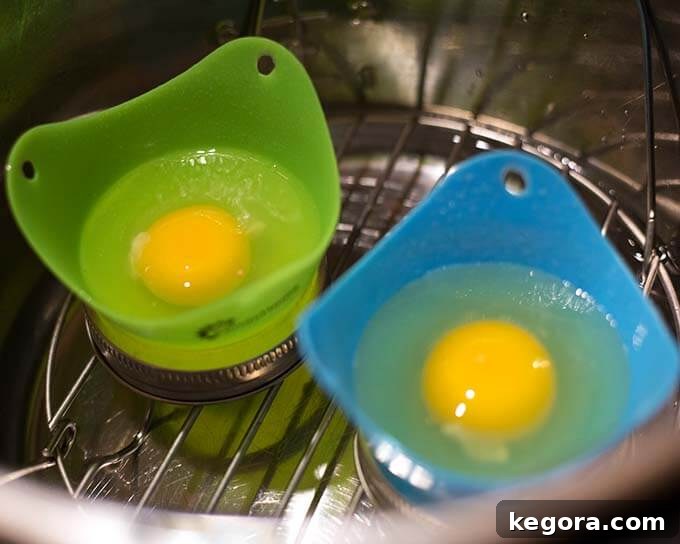
If your silicone cups have rounded bottoms, a clever trick is to use mason jar lid rings to stabilize them on the trivet, preventing any tipping. This ensures your eggs cook evenly and stay perfectly contained.
The Instant Pot Egg Loaf
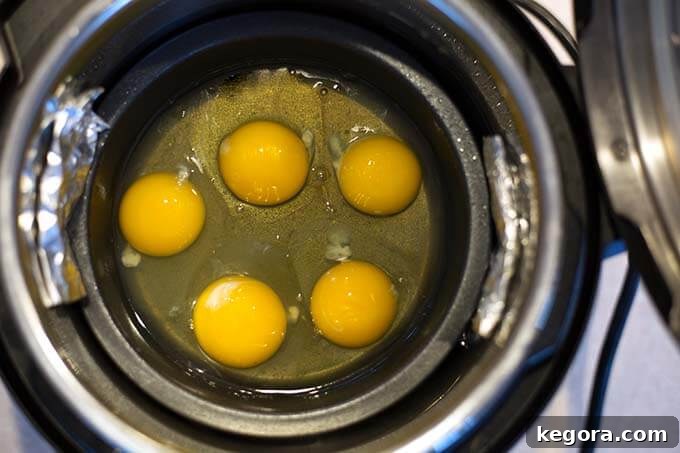
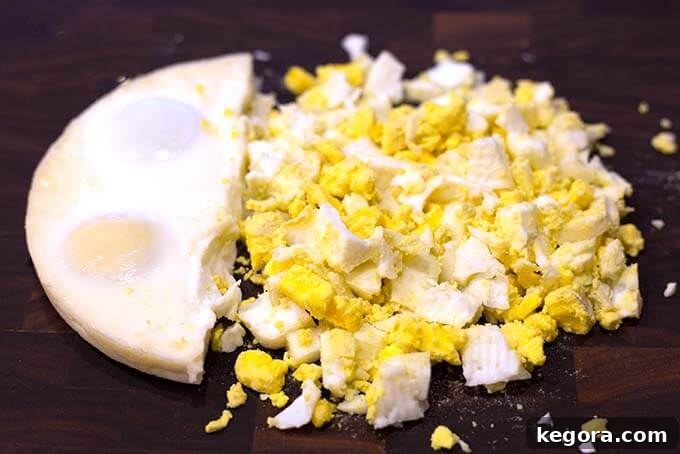
For those times when you need a bulk quantity of chopped hard-cooked eggs, perhaps for egg salad, potato salad, or as a convenient meal prep component, the Instant Pot Egg Loaf is a game-changer. This method eliminates peeling entirely and simplifies chopping:
- **Preparation:** Crack several eggs (the number will depend on the size of your dish) into an oven-safe dish that is also suitable for pressure cooking. Ensure the dish fits onto your Instant Pot’s trivet or rack.
- **Cooking:** Place the dish with the cracked eggs on the rack in the Instant Pot, with the specified amount of water beneath it.
- **Timing:** Set the cook time to 6 minutes on high pressure.
- **Release:** Allow the pressure to naturally release for about 10 minutes, then perform a quick release for any remaining pressure.
The result is a perfectly cooked, dense “egg loaf” that you can easily slice or chop directly into your recipe – no peeling required! This method is incredibly efficient for batch cooking.
Discover the full Instant Pot Egg Loaf recipe here!
Tips for Storing and Enjoying Your Instant Pot Eggs
Once your Instant Pot eggs are perfectly cooked and cooled, proper storage ensures they remain fresh and delicious. Hard-cooked eggs, whether peeled or unpeeled, can be stored in an airtight container in the refrigerator for up to one week. If storing them unpeeled, they tend to stay fresh longer. If peeled, it’s best to keep them submerged in a bowl of cold water (changing the water daily) or simply in a sealed container to prevent them from drying out.
The versatility of Instant Pot eggs makes them a staple in many kitchens. Beyond a simple snack, they are fantastic for:
- **Quick Breakfasts:** Grab-and-go protein powerhouses.
- **Salad Toppings:** Adding substance to garden salads, Cobb salads, or chef salads.
- **Deviled Eggs:** A classic appetizer that’s always a crowd-pleaser.
- **Egg Salad Sandwiches:** A creamy and flavorful lunch option.
- **Adding to Soups & Ramen:** A delicious and nutritious boost to brothy dishes.
- **Picnics & Potlucks:** Easy to transport and universally loved.
Having a batch of perfectly cooked, easy-to-peel Instant Pot eggs on hand can simplify your meal prep and expand your culinary options significantly.

Easy Instant Pot Potato Salad
Instant Pot Southwest Biscuit Egg Bake
Instant Pot Egg Loaf
Instant Pot Egg Bites
This comprehensive guide should equip you with all the knowledge needed to master cooking eggs in your Instant Pot. From understanding the nuances of timing to exploring creative ways to use your pressure cooker for various egg preparations, we hope you’ve found this information helpful and inspiring!
Instant Pot Boiled Eggs
Sandy Clifton
5
5
10
20
1
+
Equipment
-
Electric Pressure Cooker
-
Trivet / Rack to set eggs on, or Basket (stainless or silicone)
-
Tongs to get hot eggs out of the pressure cooker
-
Bowl for Ice Water Bath
Ingredients
-
1-2
cups
Water,
for the pressure cooker (use 2 cups for the 8 quart pressure cooker) -
1
or more Eggs -
Large bowl filled with ice cubes and water,
for the ice bath
Instructions
5-5-5 Method
-
Add 1 to 2 cups of water to the pot (1 cup for 6-quart, 2 cups for 8-quart), and set the trivet/rack in the pot.
-
Place the eggs on the rack. It is okay to stack the eggs on top of each other if you have several.
-
Place the lid on the pressure cooker and lock in place. Turn the steam release knob to the Sealing position.
-
Press the Pressure Cook (or Manual) button or dial. Then the +/- button or dial to choose 5 minutes. High Pressure.
-
After the cook time has ended, let the pot sit undisturbed and Naturally Release pressure for 5 minutes. Then manually release remaining pressure by turning the steam release knob to the Venting position.
-
After the pin in the lid drops down, immediately remove eggs to the bowl of ice water, using tongs. Let them sit in the water for at least 5 minutes before removing.
Notes
Nutrition
Calories:
78
kcal
Nutrition information is automatically calculated, so should only be used as an approximation.
Additional Info
Appetizer, Breakfast
American
Tried this recipe?
Mention @simply_happy_foodie
Resources to Enhance Your Instant Pot Egg Experience
This post contains affiliate links. As an Amazon Associate, I earn from qualifying purchases.