
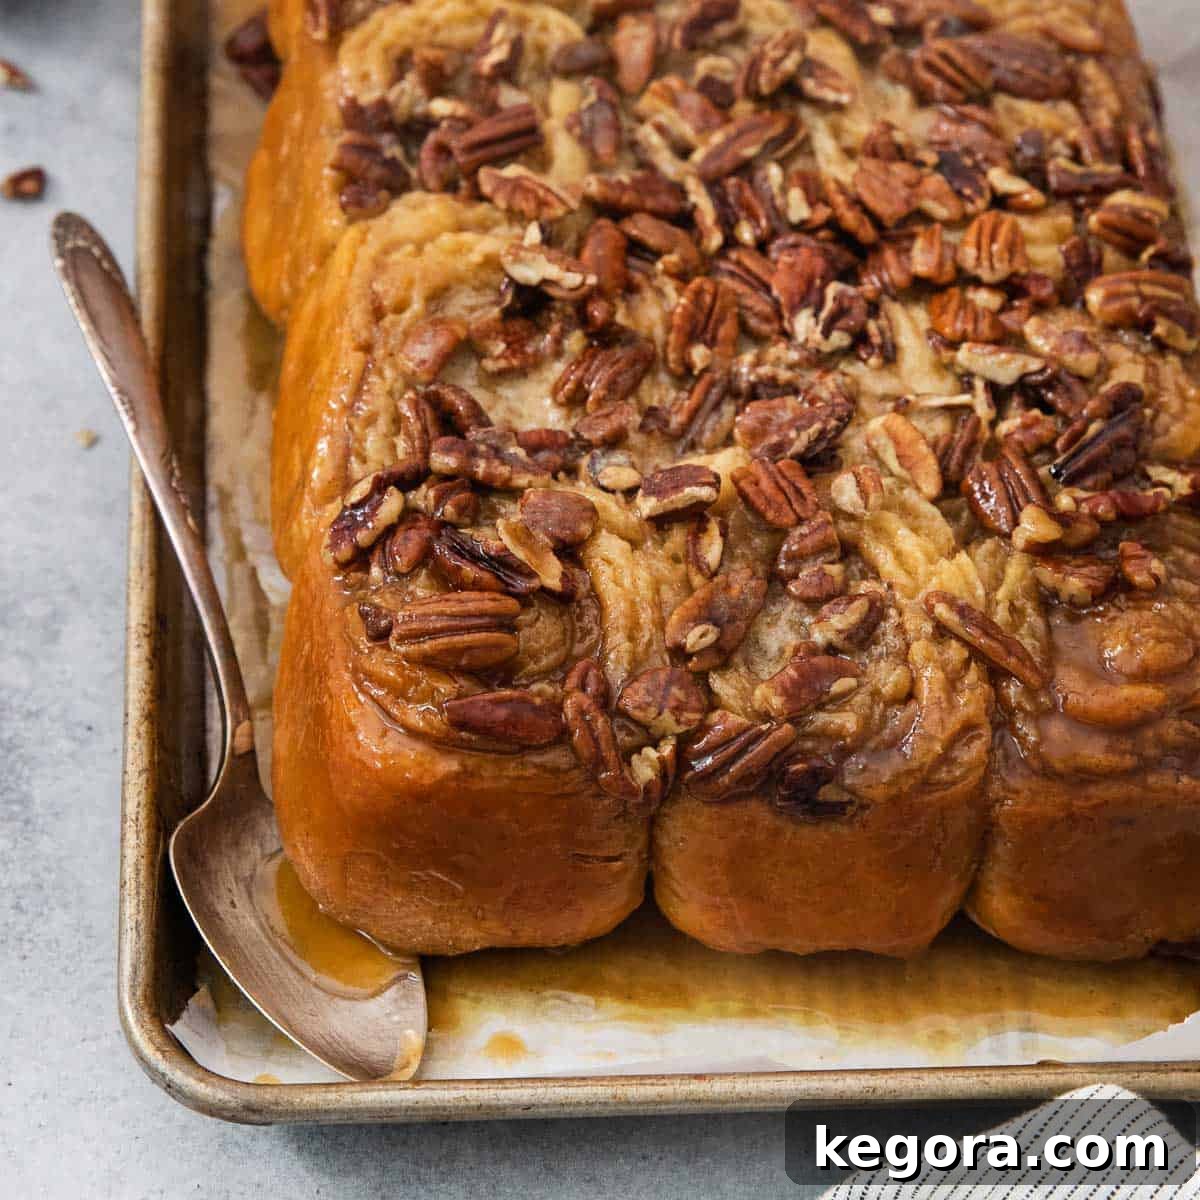
Irresistible Gluten-Free Sticky Buns: A Decadent Holiday Tradition
For many, holiday mornings evoke cherished memories and specific aromas. Growing up, my family always celebrated Christmas morning with a delicious spread, featuring fluffy cornmeal pancakes alongside a savory gluten-free quiche. However, when I married, I discovered a delightful new tradition from my husband’s family: warm, gooey sticky buns.
The idea of a sweet, cinnamon-laced roll dripping with caramel sauce immediately captivated me. It became an absolute must to create a gluten-free version that could stand proudly next to the classic. After much experimentation and refinement, I am thrilled to share that these gluten-free sticky buns not only meet but exceed expectations, consistently **passing my husband’s discerning sweet roll test with flying colors.** They truly capture the essence and flavor of the traditional treat, ensuring no one misses out on this beloved holiday indulgence!
Why You’ll Fall in Love with This Recipe
These gluten-free sticky buns are more than just a breakfast pastry; they’re an experience. Here’s why this recipe will become a staple in your kitchen:
- Unforgettable Texture: Imagine soft, pillowy, yeasted rolls that are incredibly light and fluffy, despite being gluten-free. This recipe achieves a tender crumb that is often elusive in gluten-free baking.
- Rich Caramel Glaze: Each bun is generously coated in a luxurious, buttery caramel sauce. Made with a perfect balance of sugars and corn syrup, the glaze is smooth, decadent, and utterly irresistible, providing that classic sticky sweetness.
- Crunchy Pecan Perfection: Toasted pecans are folded into the caramel glaze, adding a delightful textural contrast and nutty flavor that complements the sweet rolls beautifully.
- Holiday-Worthy Decadence: Whether it’s for Christmas morning, a special brunch, or simply a treat to brighten any day, these sticky buns elevate the occasion. They are impressive enough to serve guests yet simple enough to make at home.
- Inclusive Indulgence: This recipe is designed to be enjoyed by everyone. Both gluten-free diners and those who love traditional baked goods will rave about their taste and texture.
Top Tip for Gluten-Free Dough Success
Gluten-free dough can sometimes be a bit trickier to handle compared to traditional wheat-based dough. To ensure the best results and make your baking experience as smooth as possible, always take the time to refrigerate the dough before rolling it out. Chilling the dough firms it up, making it significantly easier to manage, shape, and roll without stickiness or tearing.
More Gluten-Free Sweet Roll Inspiration
If you love these sticky buns, you might also enjoy exploring other delightful gluten-free bread flour recipes that bring joy to the breakfast table or dessert plate:
- Gluten-Free Cinnamon Rolls
- Gluten-Free Pumpkin Cinnamon Rolls
- Gluten-Free Apple Fritters
- Gluten-Free Monkey Bread
- Gluten-Free Hot Cross Buns
Enjoy your baking journey!
xoxo erin
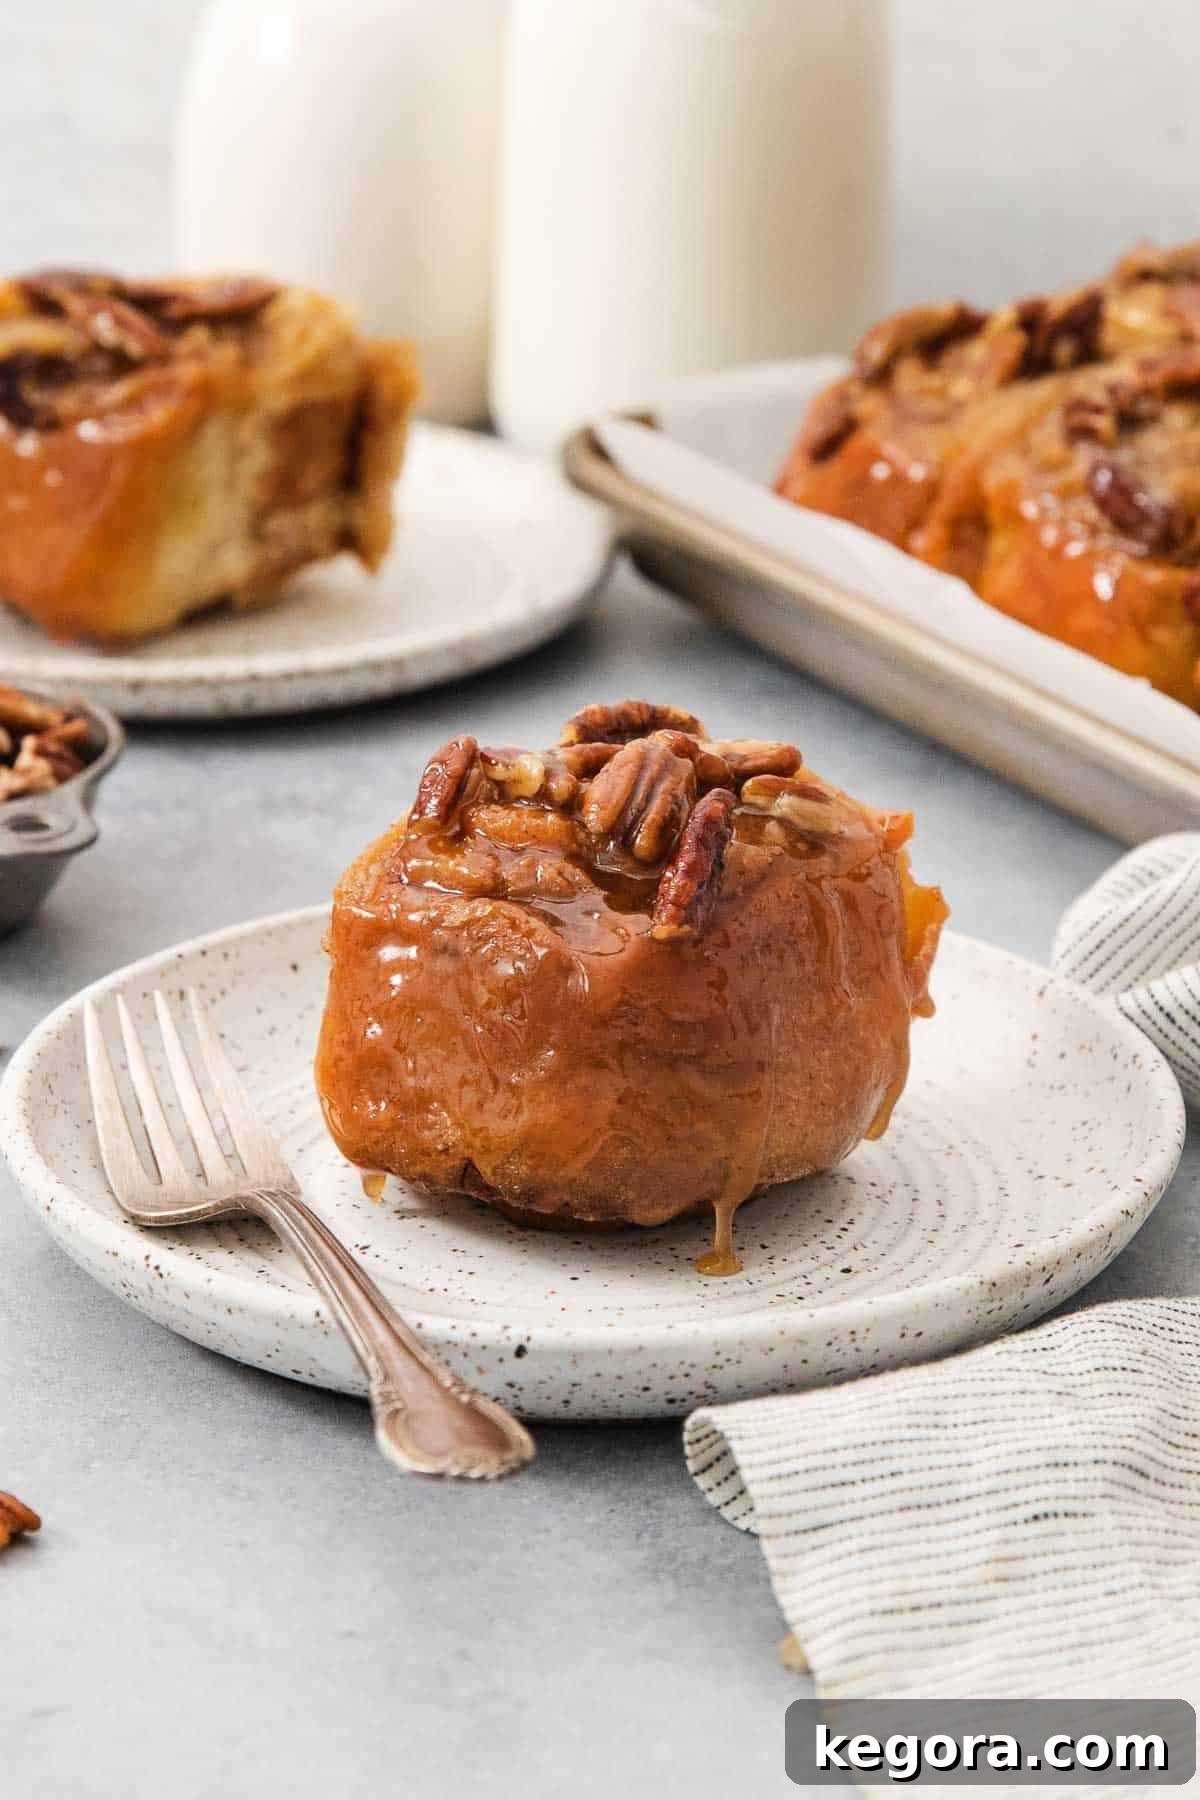
Essential Ingredients for Perfect Gluten-Free Sticky Buns
Crafting truly exceptional gluten-free sticky buns starts with understanding the role of each ingredient. While all components are vital, some play particularly crucial roles in achieving that desirable texture and flavor. Below are a few key ingredients and insights into why they are indispensable for this recipe. You’ll find the precise measurements in the recipe card further down the page!
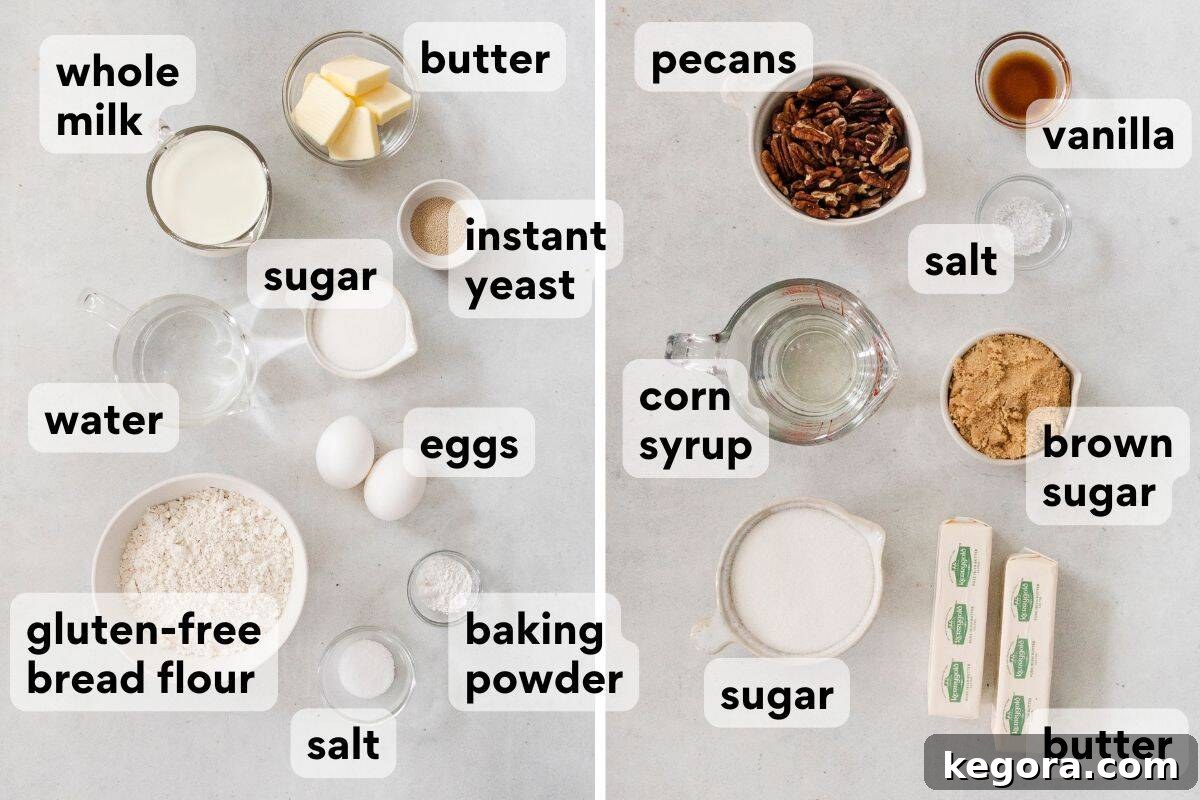
- Gluten-Free Bread Flour: This is arguably the most critical component. For this specific recipe, King Arthur Gluten-Free Bread Flour is the *only* blend I recommend. Its unique composition, which includes gluten-free wheat starch, is key to developing the traditional sticky bun texture and robust structure that other gluten-free flours simply cannot replicate. Do not substitute with a standard gluten-free all-purpose or “measure-for-measure” blend, as the results will vary significantly.
- Yeast: Essential for light and airy rolls, yeast is 100% necessary to give these sticky buns their signature rise and fluffy interior. This recipe calls for *instant yeast*, which is incredibly convenient as it can be added directly to your dry ingredients without prior activation (no proofing needed!). This saves time and simplifies the process.
- Eggs: In gluten-free yeast baking, eggs serve multiple vital functions. They act as a crucial binder, providing structure and elasticity to the dough, which would otherwise be prone to crumbling. Without eggs, gluten-free buns can easily become dense, dry, and disappointing. They also contribute to the richness and golden color of the final product.
- Corn Syrup: While you might be tempted to skip it, the corn syrup in the glaze is not just for sweetness. Its primary role is to prevent crystallization, ensuring your caramel sauce remains wonderfully smooth, glossy, and perfectly gooey, without becoming grainy or hard. This creates that irresistible “sticky” quality that defines a true sticky bun.
- Butter (Room Temperature & Melted): Butter is used in two forms for this recipe. At room temperature, it’s creamed into the glaze for a rich, emulsified base. Melted butter is incorporated into the dough, adding essential fat for flavor, tenderness, and moisture, which is especially important in gluten-free baking to prevent dryness.
- Warm Water & Milk: These liquids are vital for activating the yeast and bringing the dough together. Ensuring they are warm (not hot!) is important for the yeast to work effectively, promoting a good rise. Whole milk adds extra richness and softness to the buns.
- Pecans: Beyond adding a delightful crunch, pecans provide a nutty depth of flavor that perfectly complements the sweet caramel. Toasting them briefly before adding them to the glaze further enhances their aroma and taste.
These delectable sticky buns make a fantastic standalone treat, but they also pair wonderfully with a savory side. Consider serving them alongside this hearty Sausage Hashbrown Breakfast Casserole for a complete and satisfying holiday brunch.
How to Make Irresistible Gluten-Free Sticky Buns: A Step-by-Step Guide
Creating these heavenly gluten-free sticky buns is a rewarding process. While the full, detailed instructions are in the recipe card below, here’s an overview of the key stages to guide you through making this decadent treat.
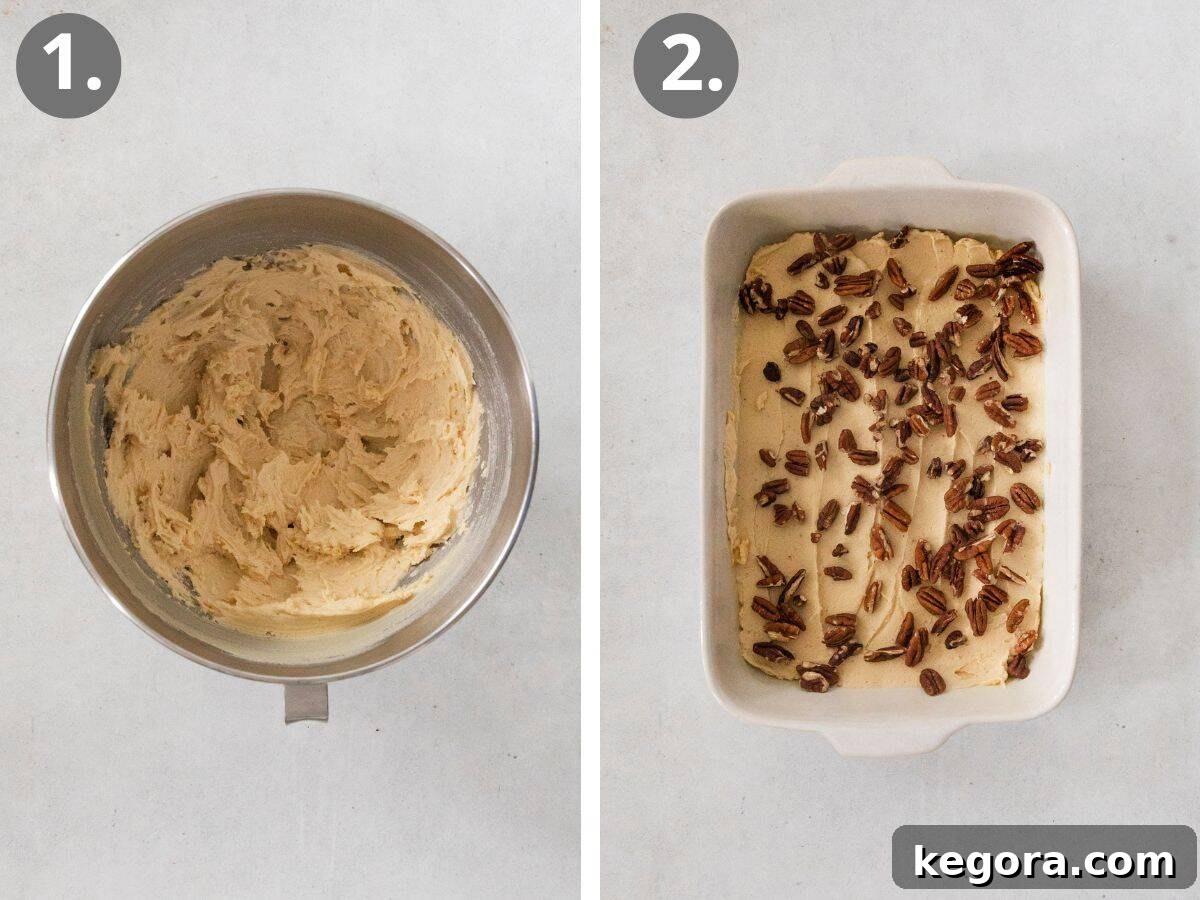
Crafting the Luxurious Caramel-Pecan Glaze
The foundation of a truly “sticky” bun is its rich, gooey glaze. This is where we start!
- Prepare the Glaze: Begin by combining room-temperature butter, granulated sugar, brown sugar, and kosher salt in the bowl of a stand mixer fitted with a paddle attachment. Beat on medium speed for 2-3 minutes until the mixture is light and fluffy. This creaming process incorporates air, resulting in a lighter glaze.
- Add Corn Syrup and Vanilla: Next, incorporate the corn syrup, which is crucial for preventing crystallization and ensuring a smooth, pliable caramel. Stir in the vanilla extract for a warm, aromatic note. Continue mixing for another 5 minutes until the mixture becomes even lighter and creamier.
- Set the Pan: Generously spray a 9×13-inch baking pan with cooking spray. This crucial step prevents the sticky buns from adhering to the pan after baking.
- Layer the Glaze and Pecans: Evenly spread the prepared caramel glaze across the bottom of the baking pan. Then, generously sprinkle with chopped pecans. These will toast beautifully in the oven, adding a wonderful crunch and nutty flavor to the bottom (which will become the top!) of your sticky buns.
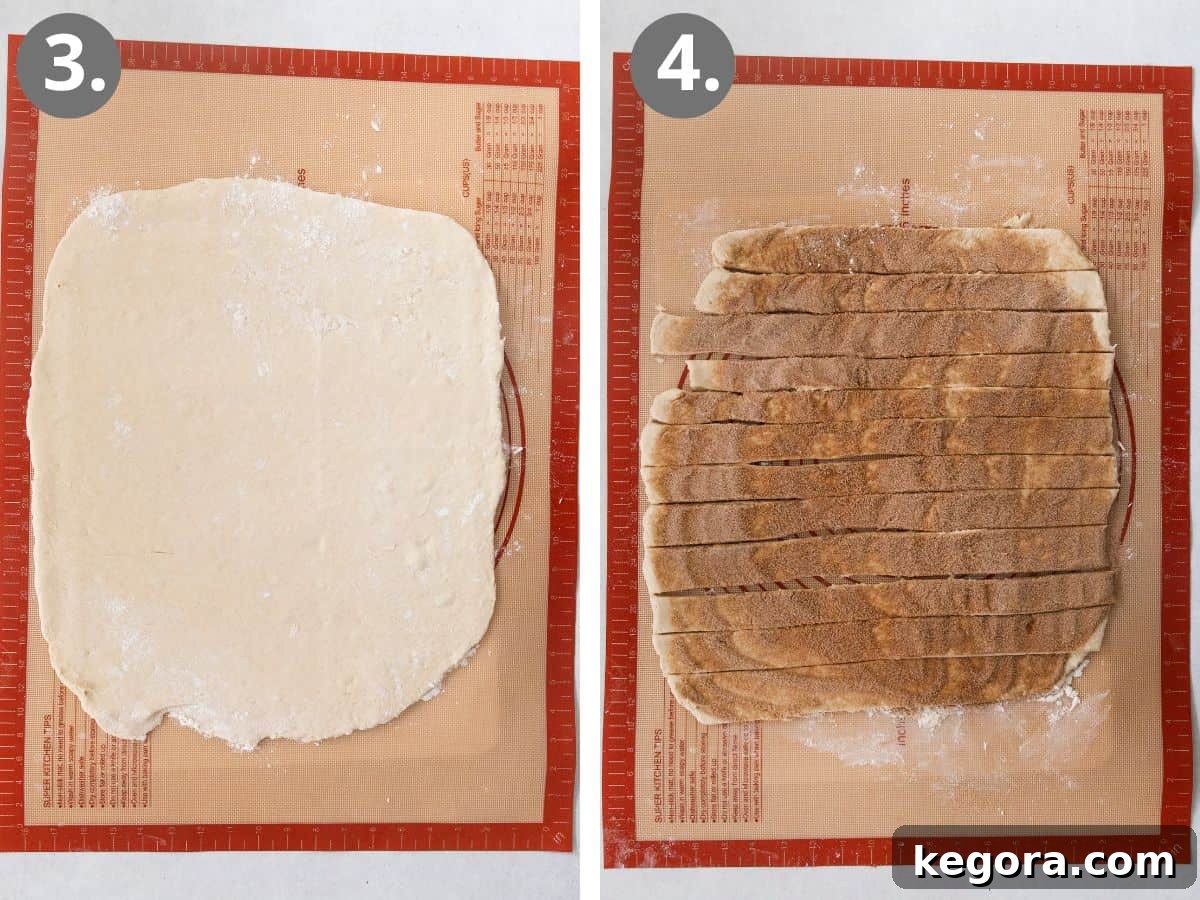
Preparing and Rolling the Gluten-Free Dough
Working with gluten-free dough requires a slightly different approach, but it’s entirely manageable with a few tips.
- Combine Dry Ingredients: In the bowl of a stand mixer (again, using the paddle attachment is ideal for gluten-free doughs), whisk together the King Arthur Gluten-Free Bread Flour, granulated sugar, instant yeast, kosher salt, and baking powder. Ensure they are well combined.
- Incorporate Wet Ingredients: With the mixer running on low speed, slowly add the warm water, warm whole milk, large eggs, and melted butter. Gradually increase the speed to medium and mix for about 3 minutes.
- Dough Consistency: Don’t be alarmed if the gluten-free dough looks different from traditional wheat dough. It will be thick, resembling a very thick cookie dough or a soft batter, rather than a firm, elastic dough. This is perfectly normal and exactly what you want!
- Chill the Dough: Use an oiled rubber spatula to scrape down the sides and bottom of the bowl, gathering the dough. Cover the bowl tightly with plastic wrap and refrigerate for 20 minutes. This chilling period is crucial as it firms up the dough, making it much easier to handle and roll without excessive stickiness.
- Roll it Out: Lightly flour your work surface with gluten-free flour. Turn the chilled dough out onto the floured surface and gently shape it into a ball. Sprinkle a little more gluten-free flour on top and then, using a rolling pin, roll the dough out into a roughly 15×15-inch square. Aim for an even thickness across the square.
Adding the Sweet Cinnamon Filling
The classic cinnamon-sugar swirl is what makes these buns so comforting.
- Mix the Filling: In a small separate bowl, combine the granulated sugar and ground cinnamon. Mix them thoroughly to ensure the cinnamon is evenly distributed.
- Apply to Dough: Sprinkle this fragrant cinnamon-sugar mixture evenly over the entire rolled-out dough square, leaving a small border free around the edges if desired, but covering most of the surface.
- Slice into Strips: Using a pizza cutter makes this step incredibly easy and efficient! Cut the dough square into twelve 1¼-inch-wide strips. Precision here helps create uniform buns.
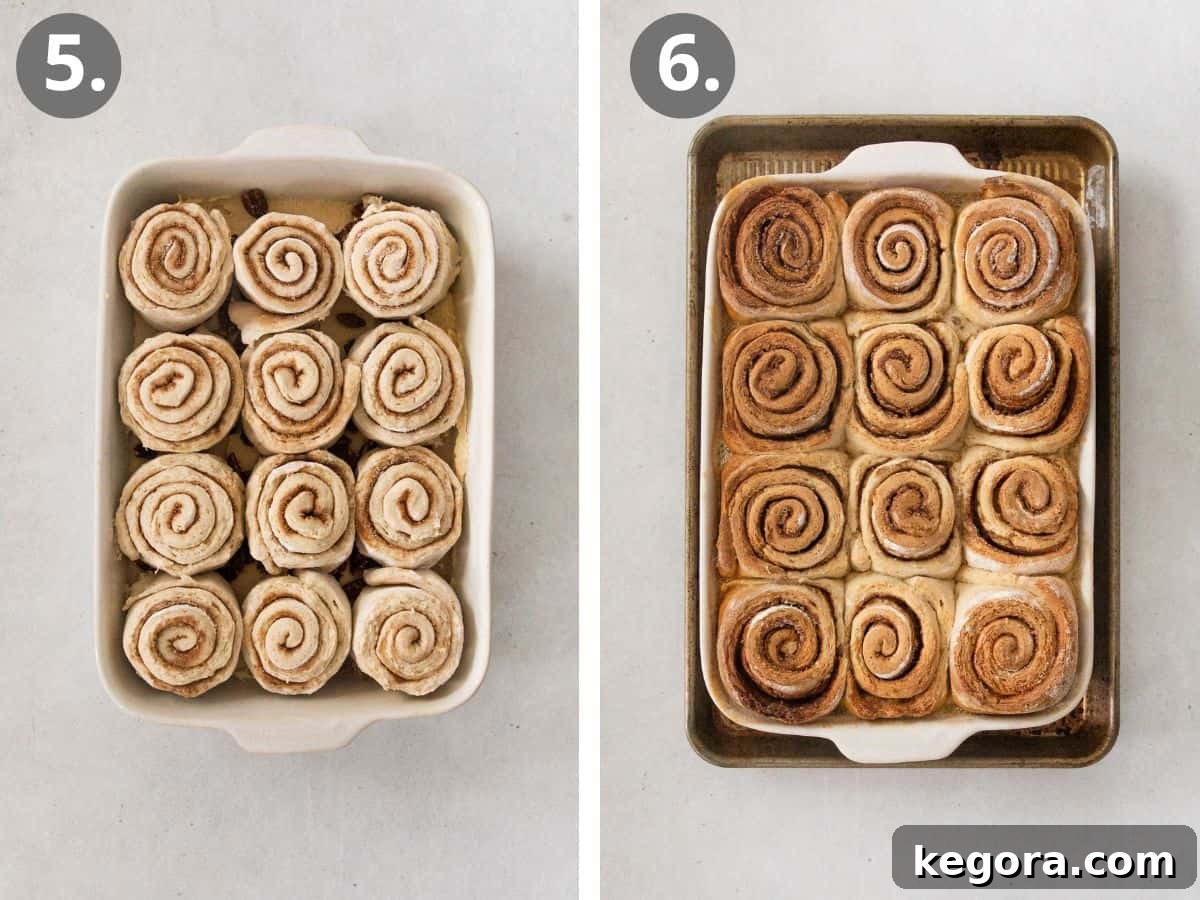
Rolling, Rising, and Baking to Perfection
The final steps bring all the elements together for a truly spectacular result.
- Roll the Buns: Take each individual dough strip and carefully roll it up into a tight spiral, creating the classic bun shape.
- Arrange in Pan: Place each rolled bun into the prepared baking pan, directly on top of the caramel-pecan glaze. Arrange them evenly, leaving a small gap between each bun to allow for expansion during the rise and bake. Repeat until all twelve buns are in the pan.
- Proof (Rise) the Buns: Lightly oil a piece of plastic wrap and use it to cover the baking pan tightly. Place the covered pan in a warm spot in your kitchen. This warm environment encourages the yeast to activate and the rolls to rise. Allow them to rise for approximately 45-60 minutes, or until they look visibly puffy and have expanded.
- Preheat Oven & Bake: While the buns are rising, preheat your oven to 350°F (175°C). Once risen, carefully remove the plastic wrap.
- Bake Until Golden: Bake the sticky buns for 30-35 minutes, or until their tops are slightly golden brown and the internal temperature reaches around 200-205°F (93-96°C).
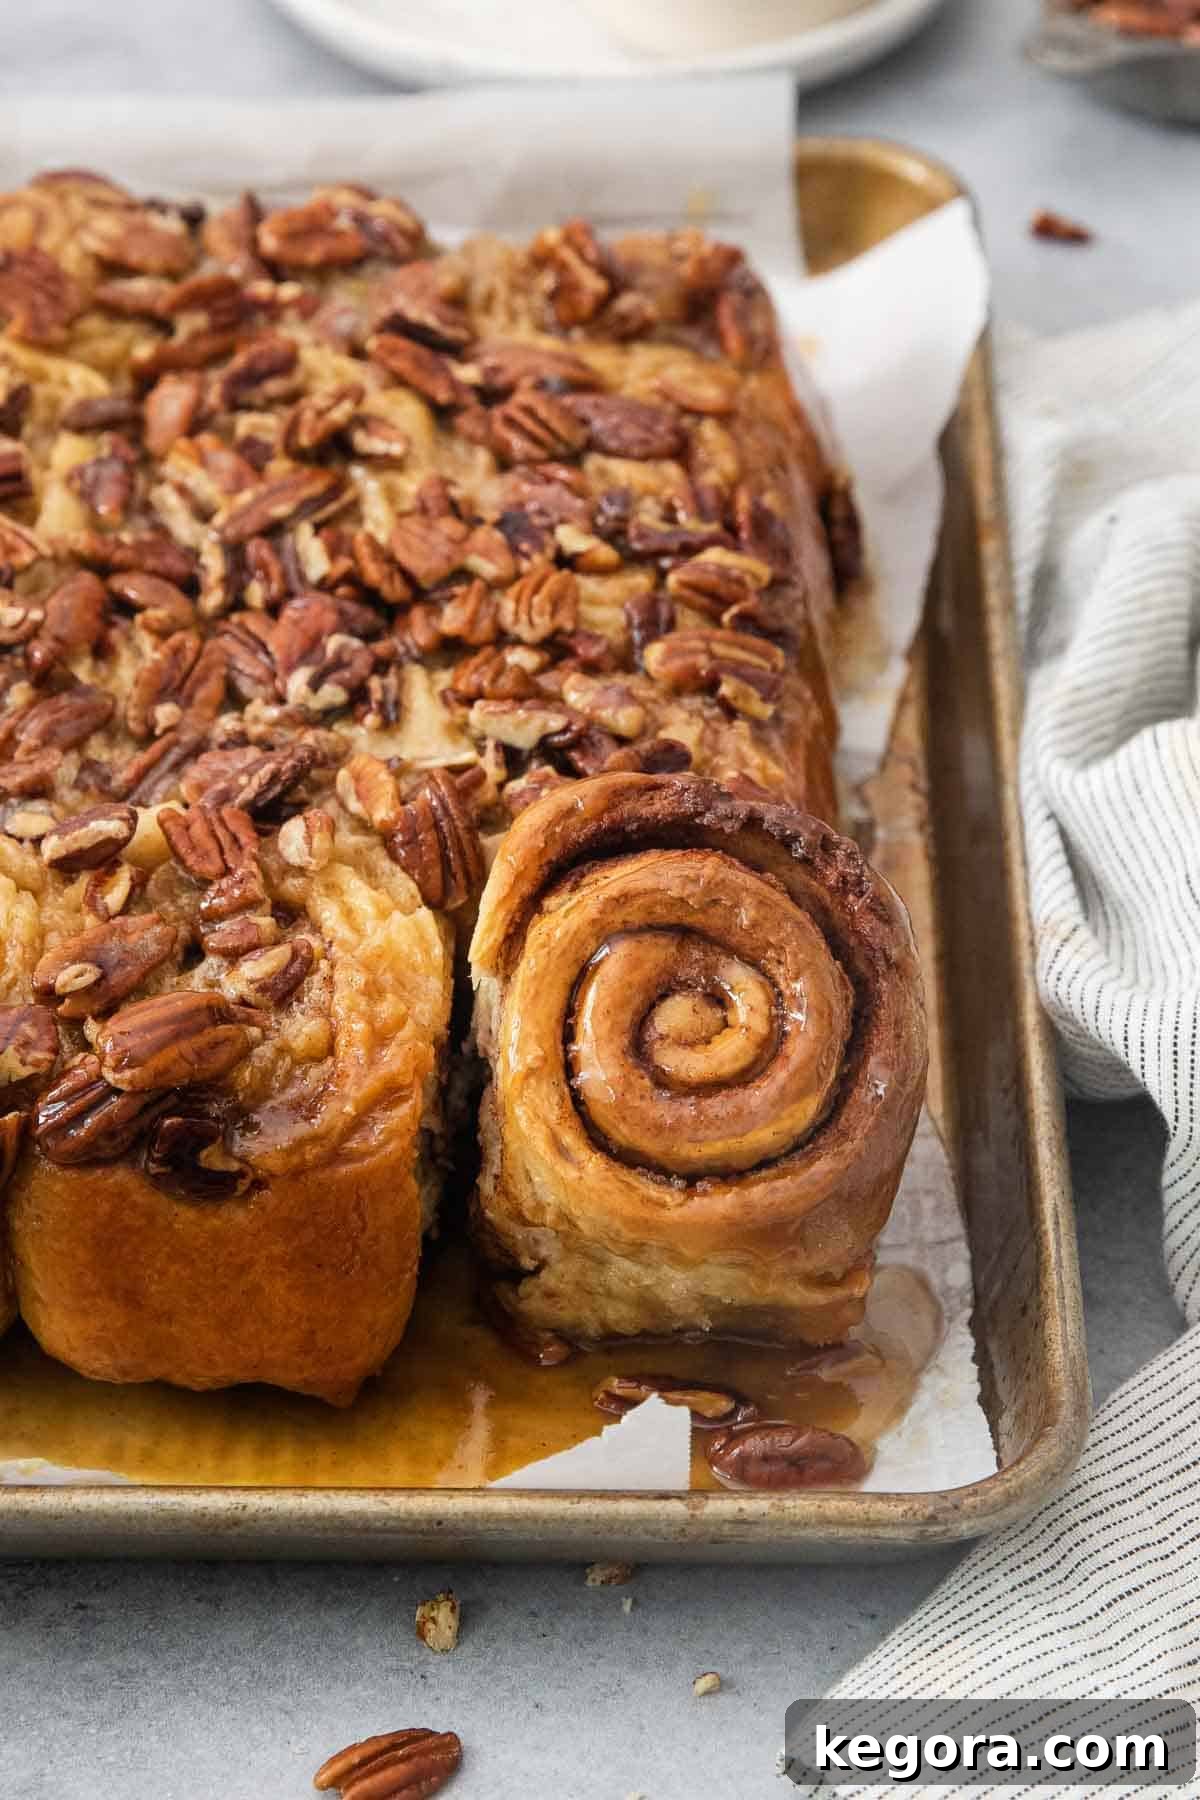
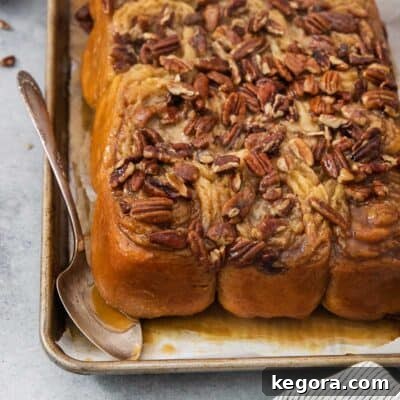
- Cool and Serve: Remove the pan from the oven. Resist the urge to flip them immediately! Let the sticky buns cool in the baking pan for 15 minutes. This allows the caramel to set slightly and ensures a cleaner flip. After 15 minutes, carefully invert the pan onto another serving platter or baking sheet. Spoon any delicious run-off glaze back over the buns to ensure maximum stickiness and flavor. Allow them to cool for an additional 20 minutes before serving. Now comes the hardest part – trying to eat just one!
★
★
★
★
Gluten-Free Sticky Buns
IMPORTANT NOTE: For optimal results and the intended texture, these gluten-free sticky buns must be made with King Arthur Gluten-Free Bread Flour. Standard gluten-free measure-for-measure flours will not yield the same structure or quality.
Comments
Ingredients
Caramel-Pecan Glaze
- 1 cup (226g) butter, at room temperature
- ½ cup (100g) granulated sugar
- ½ cup (106g) brown sugar
- ½ teaspoon kosher salt
- ½ cup (120ml) corn syrup
- 1 teaspoon vanilla extract
- ½ cup (65g) chopped pecans
Dough
- 4½ cups (675g) King Arthur Gluten-Free Bread Flour
- ⅓ cup (67g) granulated sugar
- 2¼ teaspoons instant yeast
- 2 teaspoons kosher salt
- 1 teaspoon baking powder
- 1¼ cups (300ml) water, warm
- 1 cup (240ml) whole milk, warm
- 2 large eggs
- 6 tablespoons (85g) butter, melted
Filling
- ½ cup (100g) granulated sugar
- 1 tablespoon ground cinnamon
Instructions
-
Spray a 9×13-inch baking pan generously with cooking spray.
-
For the caramel-pecan glaze: In the bowl of a stand mixer fitted with a paddle attachment (or using a hand mixer), combine the room-temperature butter, granulated sugar, brown sugar, and salt. Mix on medium speed for 2-3 minutes until the mixture is light and fluffy.
-
Add the corn syrup and vanilla extract. Continue to mix for 5 minutes until the glaze is truly light, fluffy, and well combined.
-
Spread the prepared glaze evenly into the bottom of the greased baking pan. Sprinkle the chopped pecans over the glaze.
-
For the sticky bun dough: In the bowl of a stand mixer fitted with the paddle attachment, add the King Arthur Gluten-Free Bread Flour, granulated sugar, instant yeast, kosher salt, and baking powder. Mix these dry ingredients thoroughly to combine.
-
With the mixer running on low speed, slowly pour in the warm water, warm milk, eggs, and melted butter. Once all liquid ingredients are added, increase the speed to medium and mix for 3 minutes. The dough will have a thick, cookie-dough-like consistency; this is perfectly normal for gluten-free yeast dough.
-
Using an oiled rubber spatula, scrape down the bottom and sides of the bowl to consolidate the dough. Cover the bowl tightly with plastic wrap and refrigerate for 20 minutes. This chilling step is essential as it makes the gluten-free dough much easier to handle and roll out.
-
Lightly flour your work surface with gluten-free flour. Turn the chilled dough out onto the floured surface and gently shape it into a ball. Sprinkle with a little more gluten-free flour, then roll the dough out into a consistent 15×15-inch square.
-
For the filling: In a small bowl, thoroughly mix together the granulated sugar and ground cinnamon. Sprinkle this cinnamon-sugar filling evenly all over the rolled-out dough.
-
Using a pizza cutter (this makes the task much easier!), cut the dough square into twelve uniform 1¼-inch-wide strips.
-
Carefully roll each dough strip up into a spiral, creating a neat bun shape. Place each rolled bun into the prepared baking pan, positioning it on top of the caramel-pecan glaze.
-
Cover the pan with lightly oiled plastic wrap. Place the pan in a warm, draft-free place to allow the rolls to rise for 45-60 minutes, or until they appear visibly puffy.
-
Preheat your oven to 350°F (175°C). Once preheated, remove the plastic wrap from the risen buns. Bake for 30-35 minutes, or until the tops are beautifully golden brown and the buns are cooked through.
-
Remove the pan from the oven and let the sticky buns cool in the baking pan for 15 minutes. This cooling time allows the caramel glaze to set slightly. After 15 minutes, carefully invert the pan onto another serving platter or baking sheet. Spoon any delicious run-off glaze back over the buns. Allow them to cool for another 20 minutes before serving warm.
Recipe Notes & Expert Tips
Dairy-Free Adaptations: To make these delectable sticky buns dairy-free, simply substitute the butter with your favorite dairy-free butter alternative (ensure it’s suitable for baking) and use unsweetened dairy-free milk of your choice (almond, soy, or oat milk all work well).
Nut-Free Option: If you or your guests have nut allergies, you can easily make these sticky buns nut-free by simply omitting the pecans from the caramel glaze. The buns will still be incredibly delicious and sticky!
Make-Ahead Instructions: For a stress-free morning, these sticky buns can be prepared the night before. Follow the recipe through step 11 (after placing the rolled buns in the pan with the glaze). Cover the pan tightly with oiled plastic wrap and refrigerate for 8-12 hours (overnight). The next morning, remove the pan from the refrigerator and let the rolls rise on the counter for 30-45 minutes in a warm spot before baking as directed in steps 12 and 13.
Storage Guidelines: Store any leftover sticky buns in an airtight container at room temperature for up to 2 days. For extended freshness, you can refrigerate them for up to 5 days. To enjoy them warm again, briefly rewarm individual buns in the microwave.
Freezing Instructions: To freeze sticky buns, wrap them tightly in plastic wrap, then cover with a layer of aluminum foil to prevent freezer burn. They can be frozen for up to 2 months. Thaw frozen buns overnight in the refrigerator. To reheat, warm them in an oven preheated to 300°F (150°C) until heated through and gooey again.
Nutrition Information (Per Serving)
This post was originally published in August 2014. It has been extensively updated with enhanced instructions, new photos, and additional tips to improve your baking experience in October 2025.