
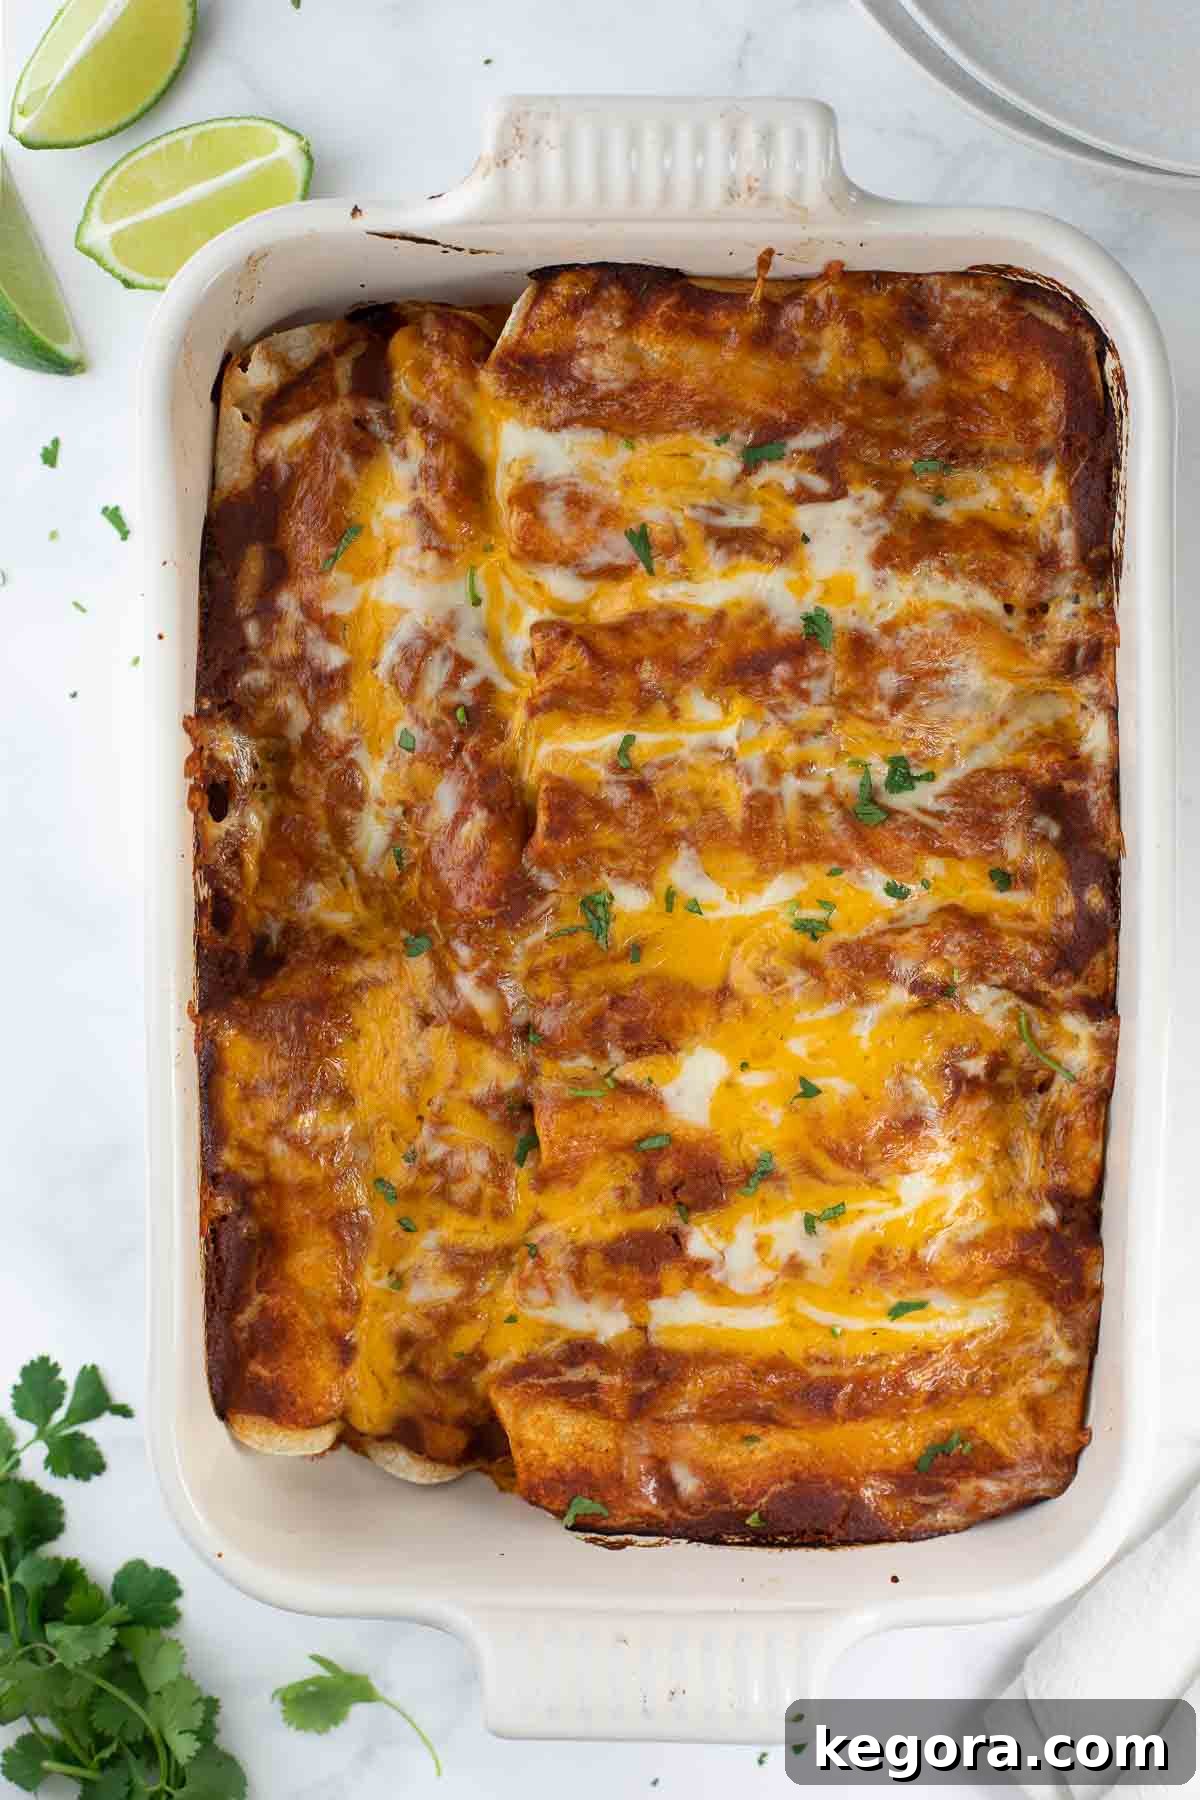
Erin’s Recipe Overview: Delicious Gluten-Free Chicken Enchiladas
Taste/Texture: Experience a burst of fresh, homemade flavor with every bite! These gluten-free enchiladas feature tender chicken enveloped in a vibrant, easy-to-make red enchilada sauce that is truly exceptional. The sauce is so fresh and flavorful, you’ll never go back to canned.
Ease: While not a lightning-fast 30-minute meal, this recipe for chicken enchiladas is remarkably straightforward and absolutely worth the effort. The steps are intuitive, ensuring a rewarding cooking experience for home cooks of all levels.
Top Tip: For an unparalleled depth of flavor, simmer the chicken directly in the homemade enchilada sauce. This infuses the chicken with rich, savory notes, making it incredibly tender and delicious.
Would I make these again? Without a doubt! This recipe has become a cherished family favorite, proving that gluten-free dishes can be both satisfying and incredibly delicious. It’s also perfect for feeding larger gatherings, offering a crowd-pleasing option that caters to dietary needs without compromising on taste.
xoxo Erin
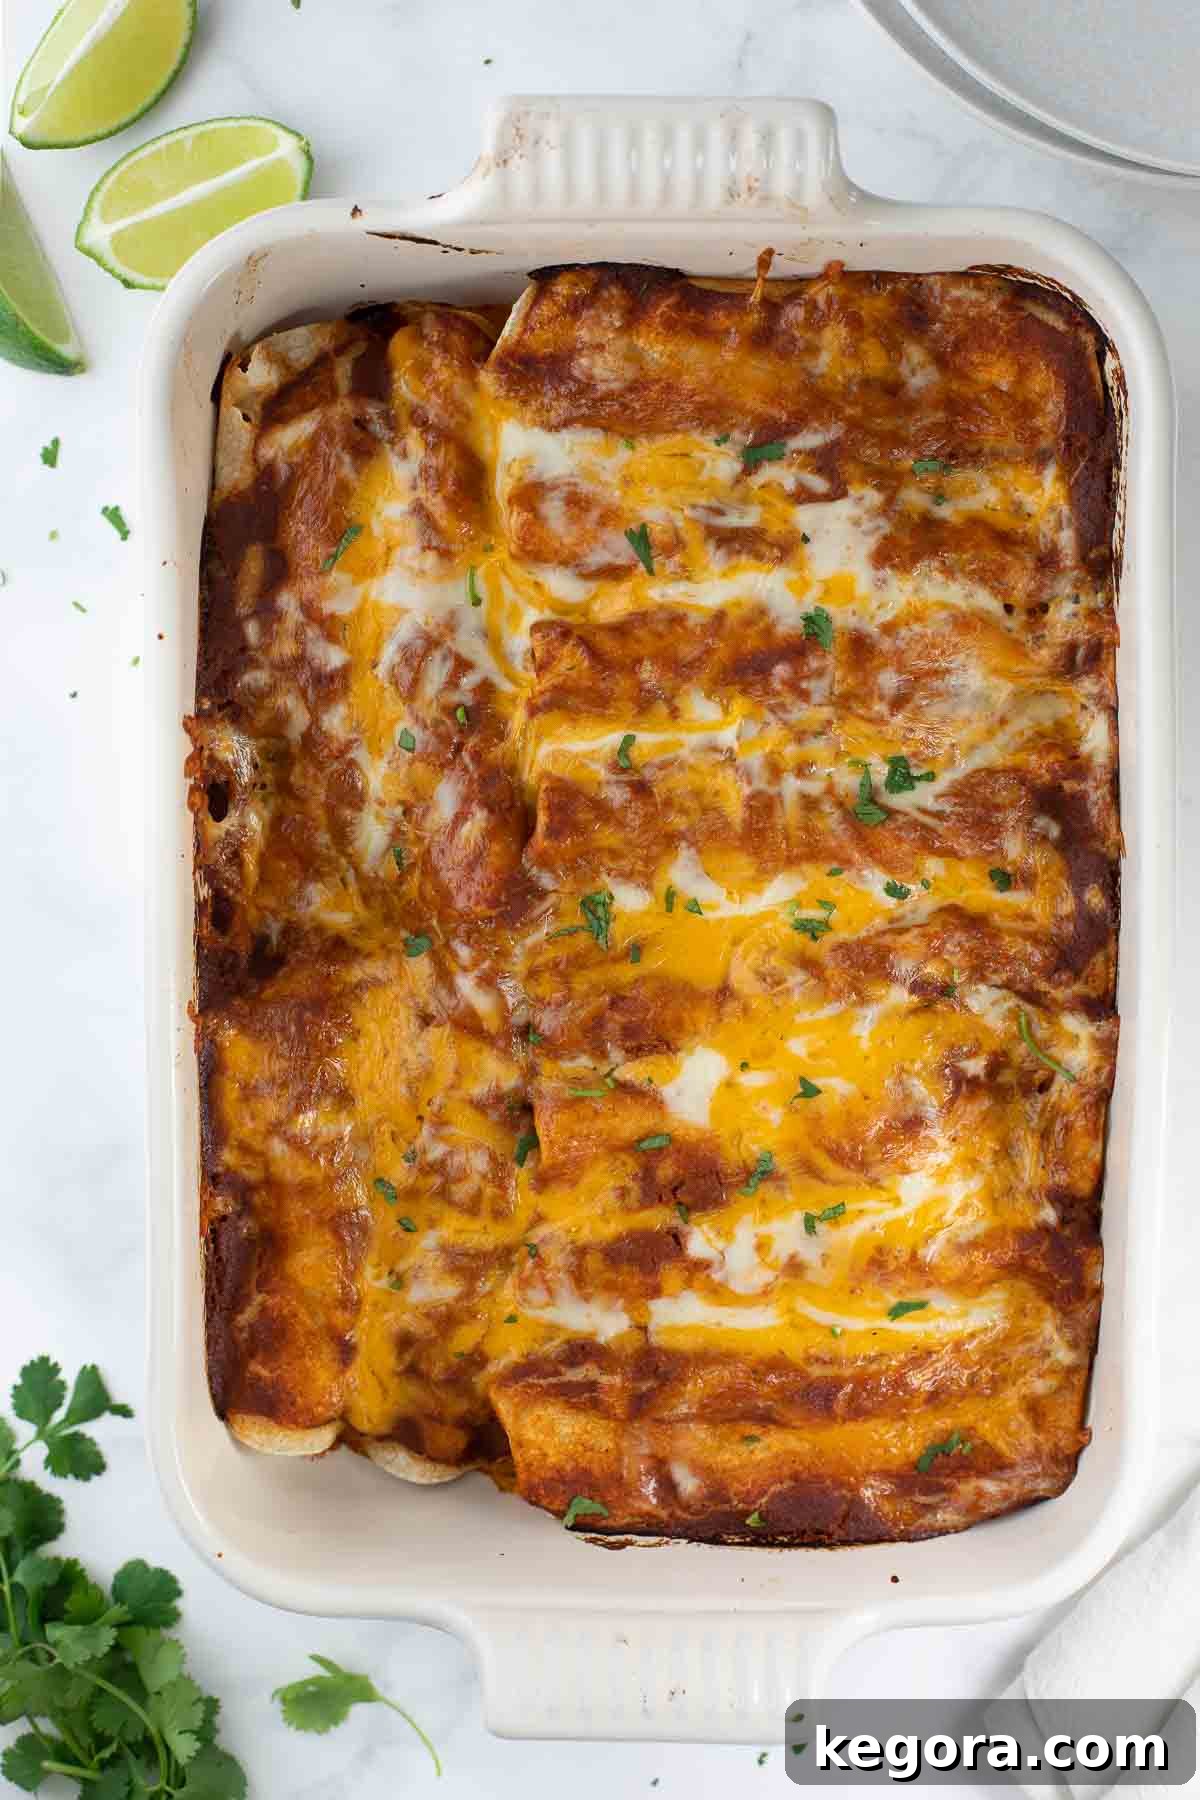
The quest for the perfect gluten-free enchiladas ends here! This recipe consistently ranks as my absolute favorite for crafting mouthwatering chicken enchiladas with a rich, vibrant red sauce. Forget bland, store-bought alternatives; this homemade version promises an explosion of authentic Mexican flavors.
These savory chicken enchiladas are a beloved dinner staple in my family, renowned for their incredible taste and the thoughtful layering of flavors, all built upon readily available pantry staples. Each ingredient plays a crucial role in creating a harmonious and deeply satisfying meal that just happens to be entirely gluten-free.
Featured Comment
From Sheila: “Just made these tonight. AMAZING!!!! I bought a can of gluten-free enchilada sauce just in case the flavor wasn’t what I was looking for in this recipe, but I’m sooo glad I made the scratch. Whole family loved it. Going to be in a regular rotation around here.”
See 39 more comments
Table of Contents
- Erin’s Recipe Overview
- Why Homemade Enchilada Sauce?
- Key Ingredients You’ll Need
- How to Make Gluten-Free Chicken Enchiladas
- How to Serve Gluten-Free Enchiladas
- Are Enchiladas Gluten-Free? FAQs Answered
- Storage, Make-Ahead, and Freezing Instructions
- More Delicious Gluten-Free Dinner Recipes
- Complete Gluten-Free Chicken Enchiladas Recipe
Looking for more Mexican-inspired gluten-free delights? Be sure to try my homemade gluten-free tortillas, my incredibly tender slow-cooker pork tacos, and these rich, flavorful slow-cooker pinto beans. They all pair wonderfully with these enchiladas!
Why Homemade Enchilada Sauce Makes All the Difference
The secret to truly outstanding enchiladas lies in the sauce, and this recipe delivers a homemade red enchilada sauce that is leagues beyond anything you’ll find in a can. Crafted in just about 15 minutes, it’s bursting with fresh, authentic flavors that elevate the entire dish. Making your own sauce allows for complete control over ingredients, avoiding unwanted additives, high sodium, and potential hidden gluten often found in commercial products. The process is simple, resulting in a robust, deeply satisfying sauce that perfectly complements the savory chicken filling.
Key Ingredients You’ll Need for Flavorful Gluten-Free Enchiladas
One of the many advantages of this recipe is its reliance on simple, easy-to-find pantry staples. You’ll begin by whisking together a robust homemade enchilada sauce that forms the flavorful foundation of this dish.
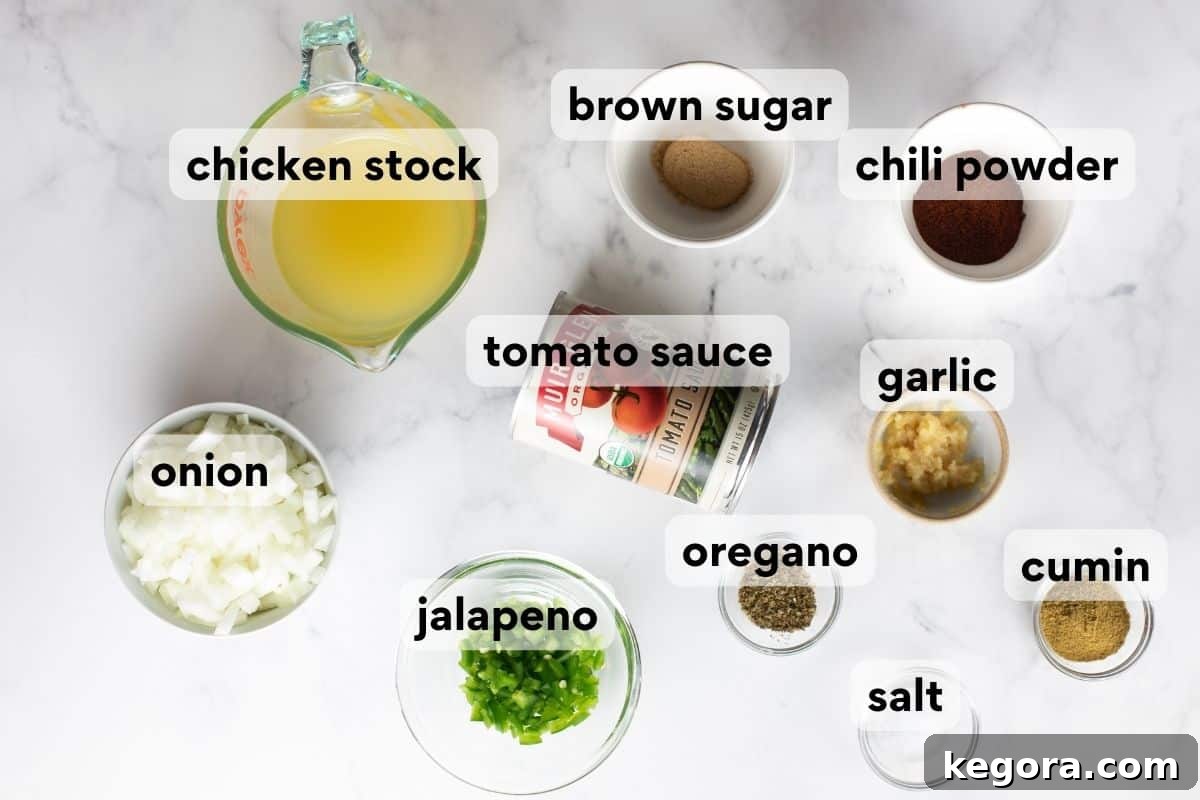
Below are some important notes on the ingredients required for these delicious gluten-free enchiladas. You can find the precise measurements in the complete recipe card further down.
- Onion & Jalapeño: Fresh vegetables are essential for building the rich flavor base of this sauce. After simmering, these ingredients are blended until smooth, contributing not only to the taste but also naturally thickening the sauce for a perfect consistency.
- Tomato Sauce: Choose a high-quality canned tomato sauce that you enjoy. Brands like Muirglen are often praised for their fresh, clean tomato flavor, which shines through in this enchilada sauce.
- Brown Sugar: A touch of brown sugar might seem unusual, but it plays a vital role. It balances the acidity of the tomatoes and spices, enhancing the overall depth and bringing out the nuanced flavors of the sauce.
- Chicken Stock: Using chicken stock (or vegetable stock for a vegetarian option) instead of water significantly amplifies the flavor profile of the sauce. It creates a richer, more savory base for your enchiladas.
- Corn Tortillas: This is crucial for keeping the enchiladas gluten-free! Ensure you select corn tortillas that are certified gluten-free. They also contribute to the authentic texture and taste of traditional enchiladas.
- Chicken: For maximum flavor infusion, I highly recommend simmering whole boneless, skinless chicken breasts directly in the enchilada sauce. This method ensures the chicken absorbs all the delicious spices and remains incredibly tender. Alternatively, for a quicker preparation, you can use pre-cooked rotisserie chicken or leftover cooked chicken. If using pre-cooked chicken, simply shred it and mix it with the other filling ingredients as instructed, omitting the simmering step in the sauce.
Tip: To achieve a milder sauce, carefully remove the ribs and seeds from the jalapeño before chopping. For those who prefer a spicier kick, leave some or all of the seeds and ribs intact.
How to Make Irresistible Gluten-Free Chicken Enchiladas: A Step-by-Step Guide
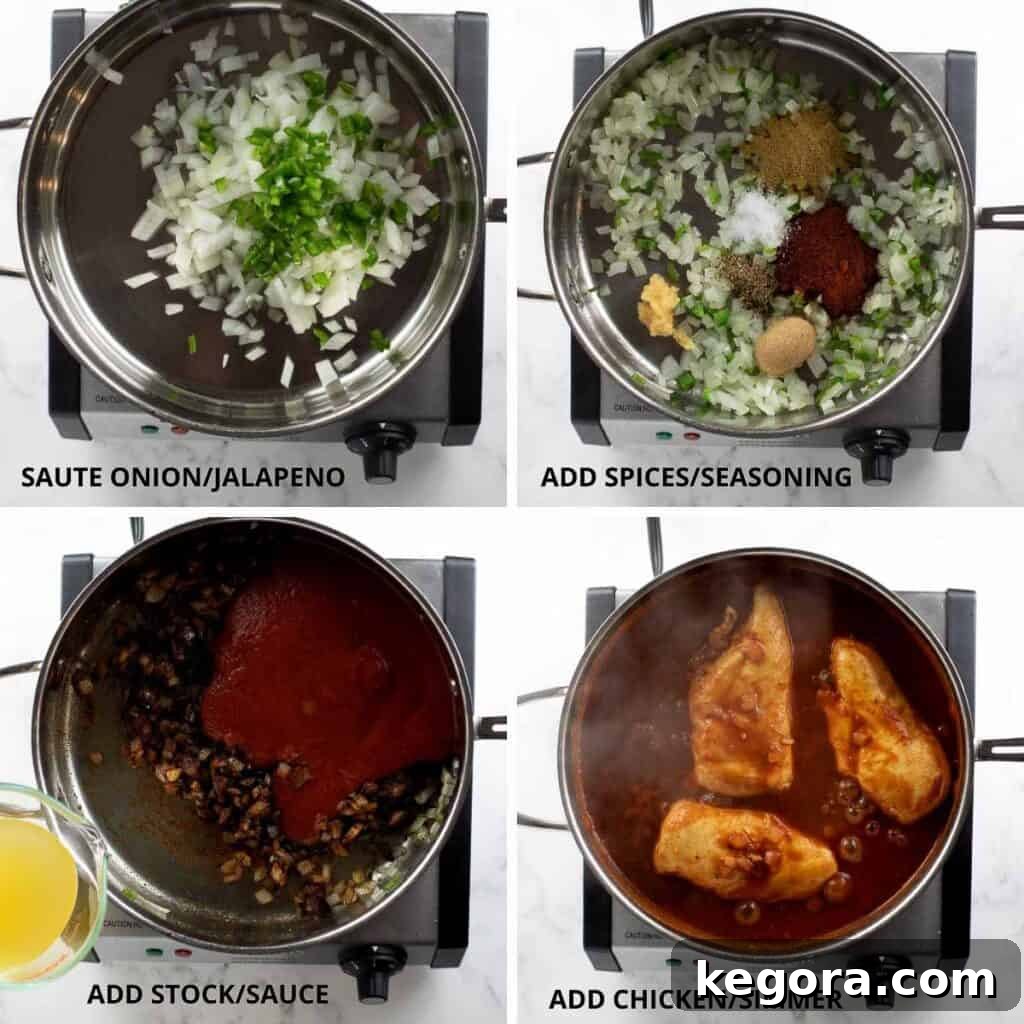
The journey to these fantastic gluten-free enchiladas begins with our homemade red sauce. Once your aromatic sauce has been prepared, the next step involves adding your chicken. I prefer to nestle whole chicken breasts into the simmering sauce, allowing them to cook through and absorb all the incredible flavors. This technique results in exceptionally tender and deeply flavored chicken. If you’re short on time, pre-cooked rotisserie chicken works wonderfully; simply shred it and stir it into the sauce after it has simmered for 15 minutes.
After the chicken is cooked and removed from the sauce, you have an optional but recommended step: blending the sauce. For a silky-smooth consistency typical of restaurant-style enchiladas, carefully transfer the sauce to a blender and process until uniform. However, if you appreciate a sauce with a bit more texture from the diced vegetables, feel free to leave it as is—it will be delicious either way!
Crafting the Perfect Gluten-Free Enchilada Filling
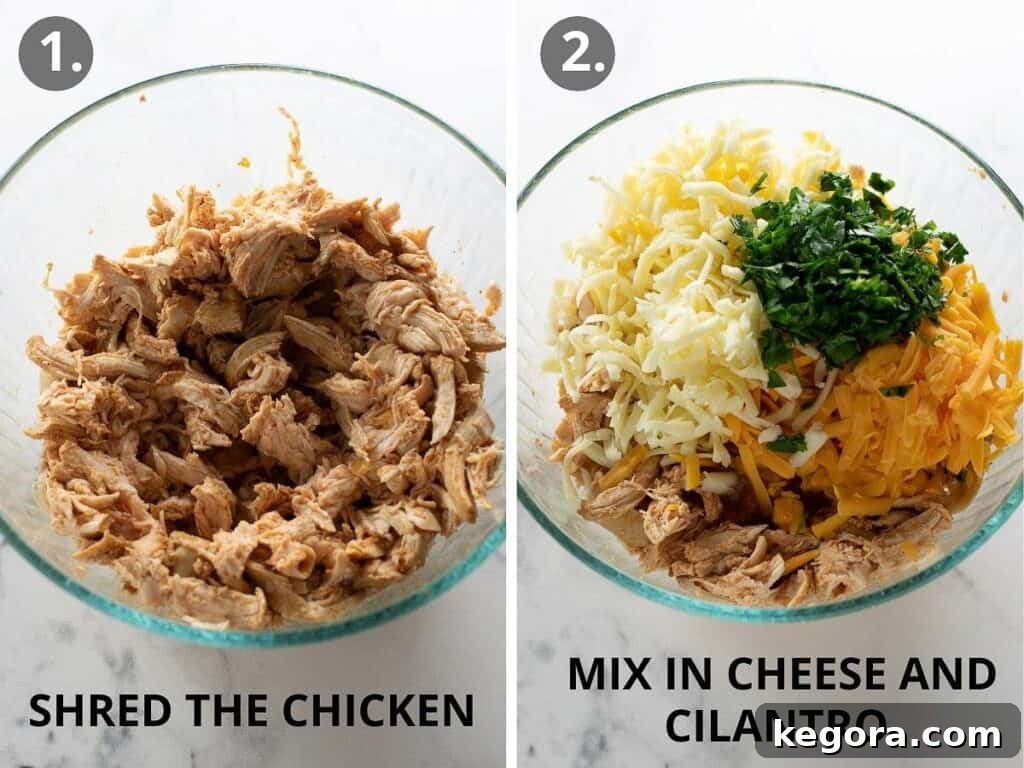
Once your chicken is cooked and infused with the rich sauce, it’s time to prepare the delectable filling. Shred the cooked chicken into bite-sized pieces and combine it with vibrant fresh cilantro, a squeeze of bright lime juice, a small amount of the luscious enchilada sauce, and generous portions of freshly shredded Monterey Jack and sharp cheddar cheese. The combination of these cheeses ensures a creamy, melty interior that is simply irresistible.
Tip: Always opt for freshly shredded cheese from a block rather than pre-shredded varieties. Freshly grated cheese melts more smoothly and offers a superior flavor and texture, ensuring your enchiladas are gooey and delicious.
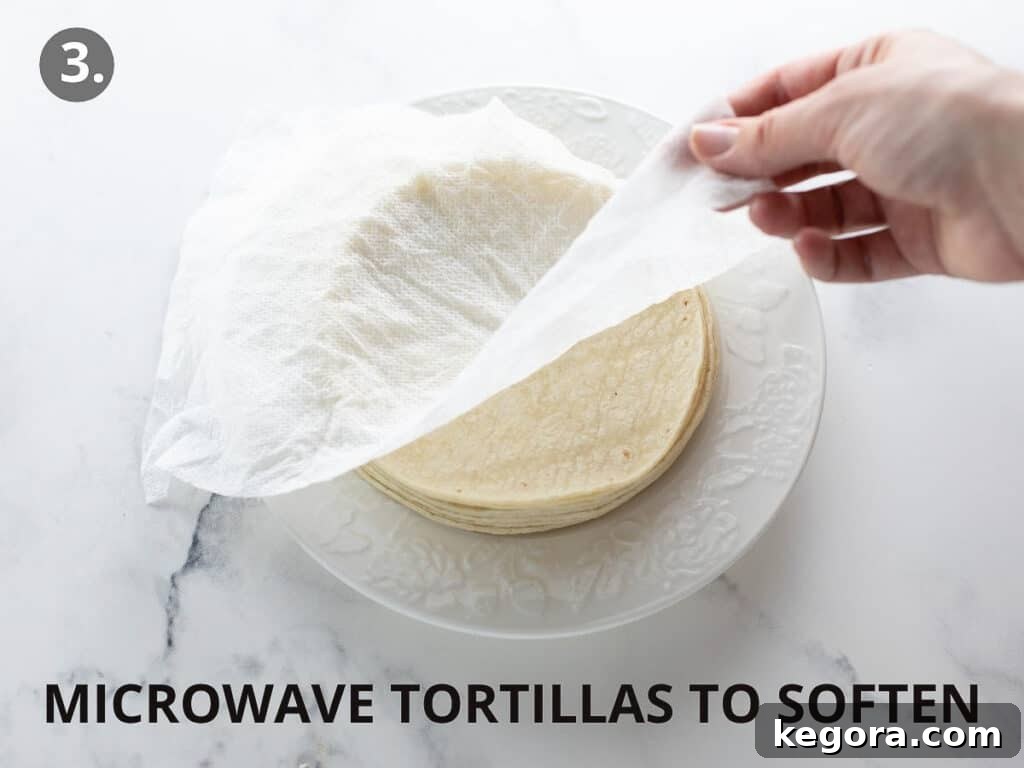
Before you begin assembling your enchiladas, a crucial step is to gently soften the corn tortillas. Stack them on a plate, cover them with a damp paper towel or plastic wrap, and microwave them briefly. This makes the tortillas pliable and prevents them from cracking or tearing when you roll them with the filling, ensuring perfectly formed enchiladas.
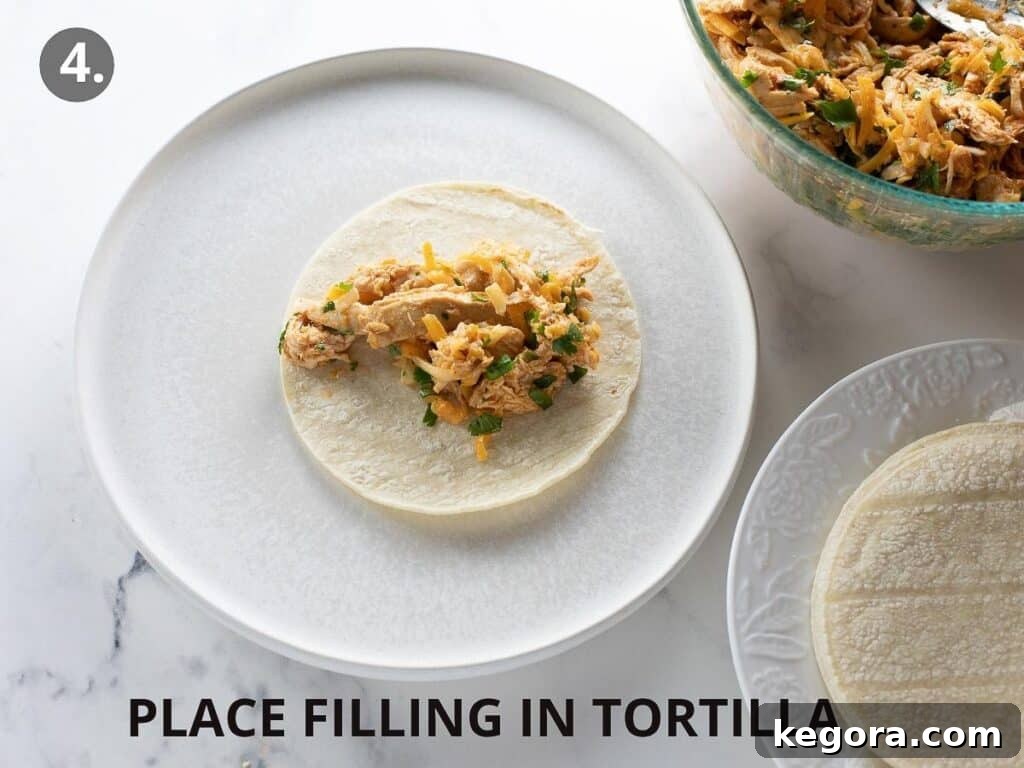
With softened tortillas in hand, take a generous scoop of the chicken and cheese filling, spreading it evenly down the center of each tortilla. Roll each tortilla tightly, creating neat enchilada bundles. This recipe is designed to yield 12 satisfying enchiladas, perfect for a family meal or entertaining guests.
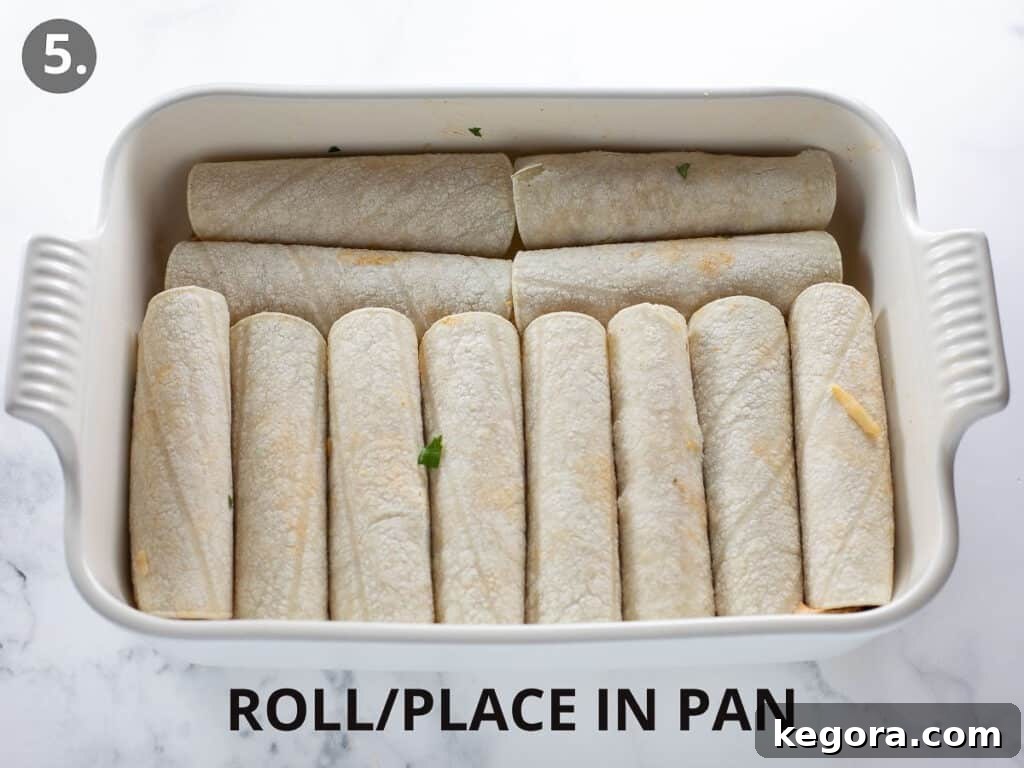
Once filled and rolled, carefully arrange the enchiladas seam-side down in a baking pan. A standard 9×13 inch baking dish works perfectly, typically accommodating 8 enchiladas in two rows, with the remaining 4 placed horizontally on top, ensuring they fit snugly.
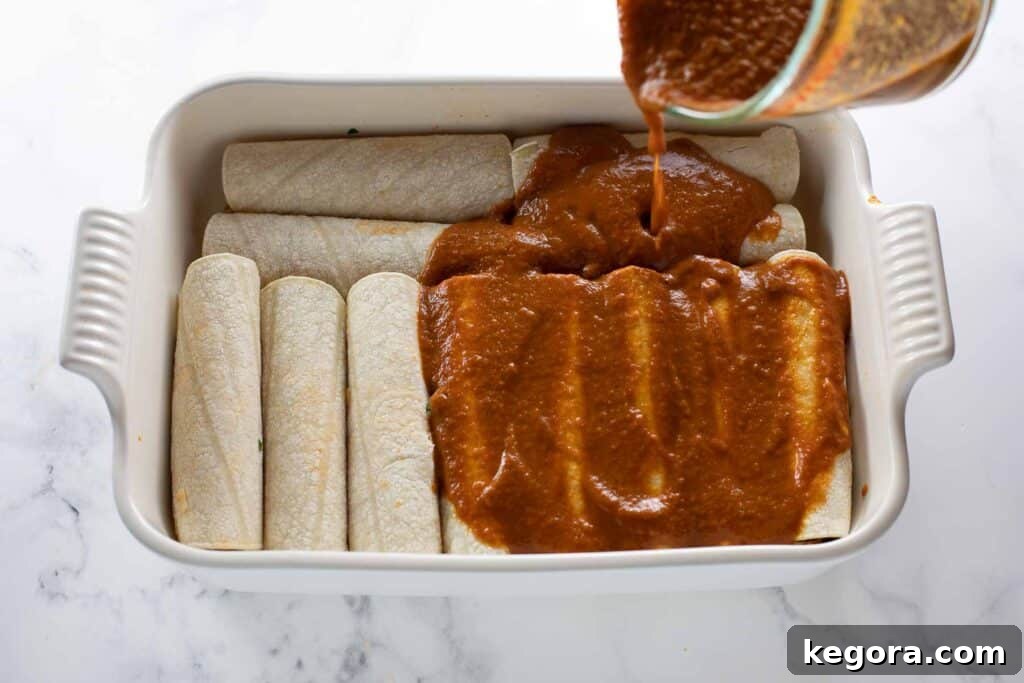
Now, pour the glorious homemade enchilada sauce generously over the rolled enchiladas, ensuring every part is covered. If you chose to blend your sauce, it will flow beautifully. There’s no need to coat the bottom of the pan with sauce; as the enchiladas bake, the sauce will naturally distribute and bubble up, coating them perfectly.
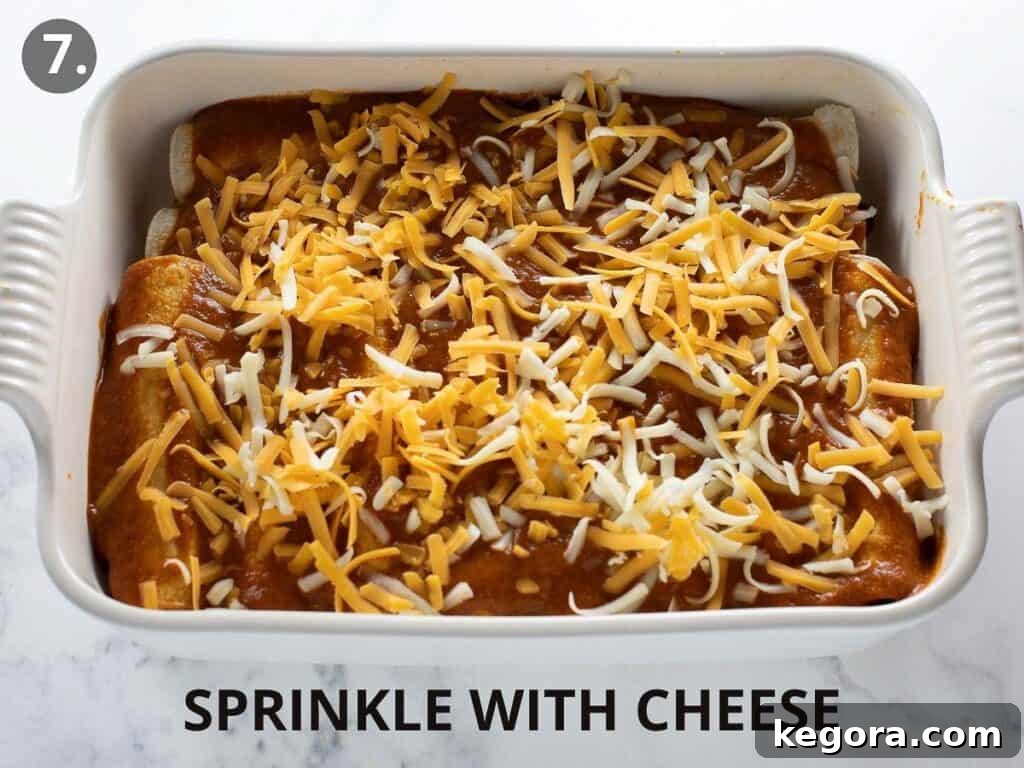
Finally, crown your enchiladas with an additional sprinkle of the remaining shredded cheese. This top layer will melt into a golden, bubbly crust during baking, adding another layer of irresistible flavor and texture.
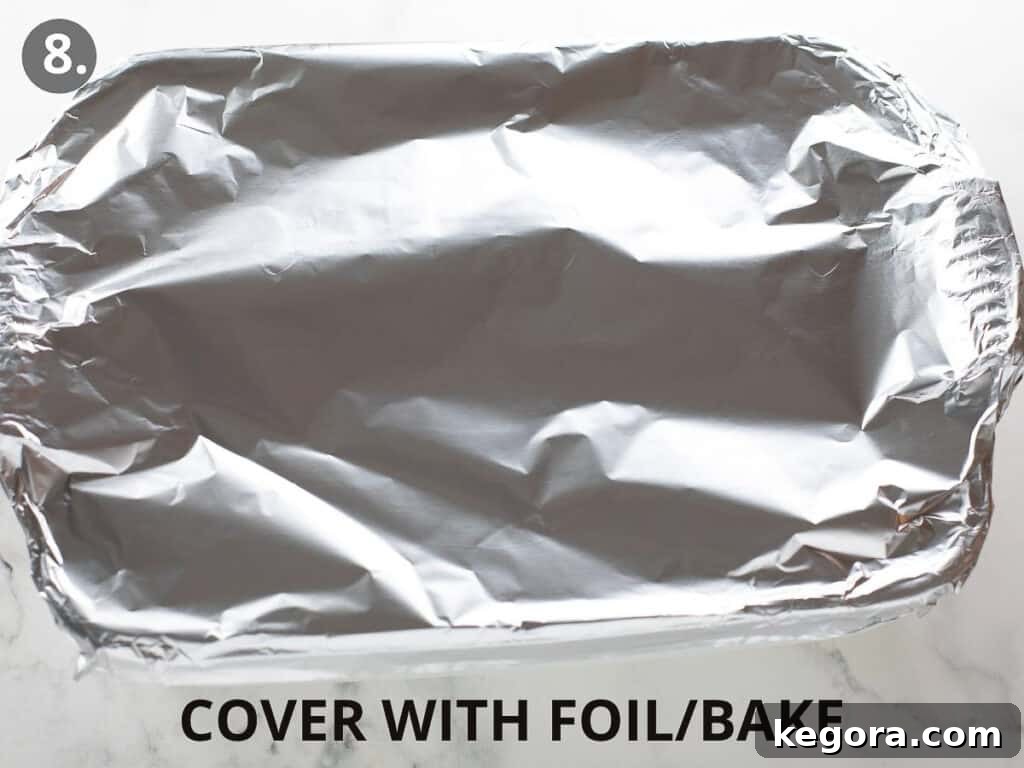
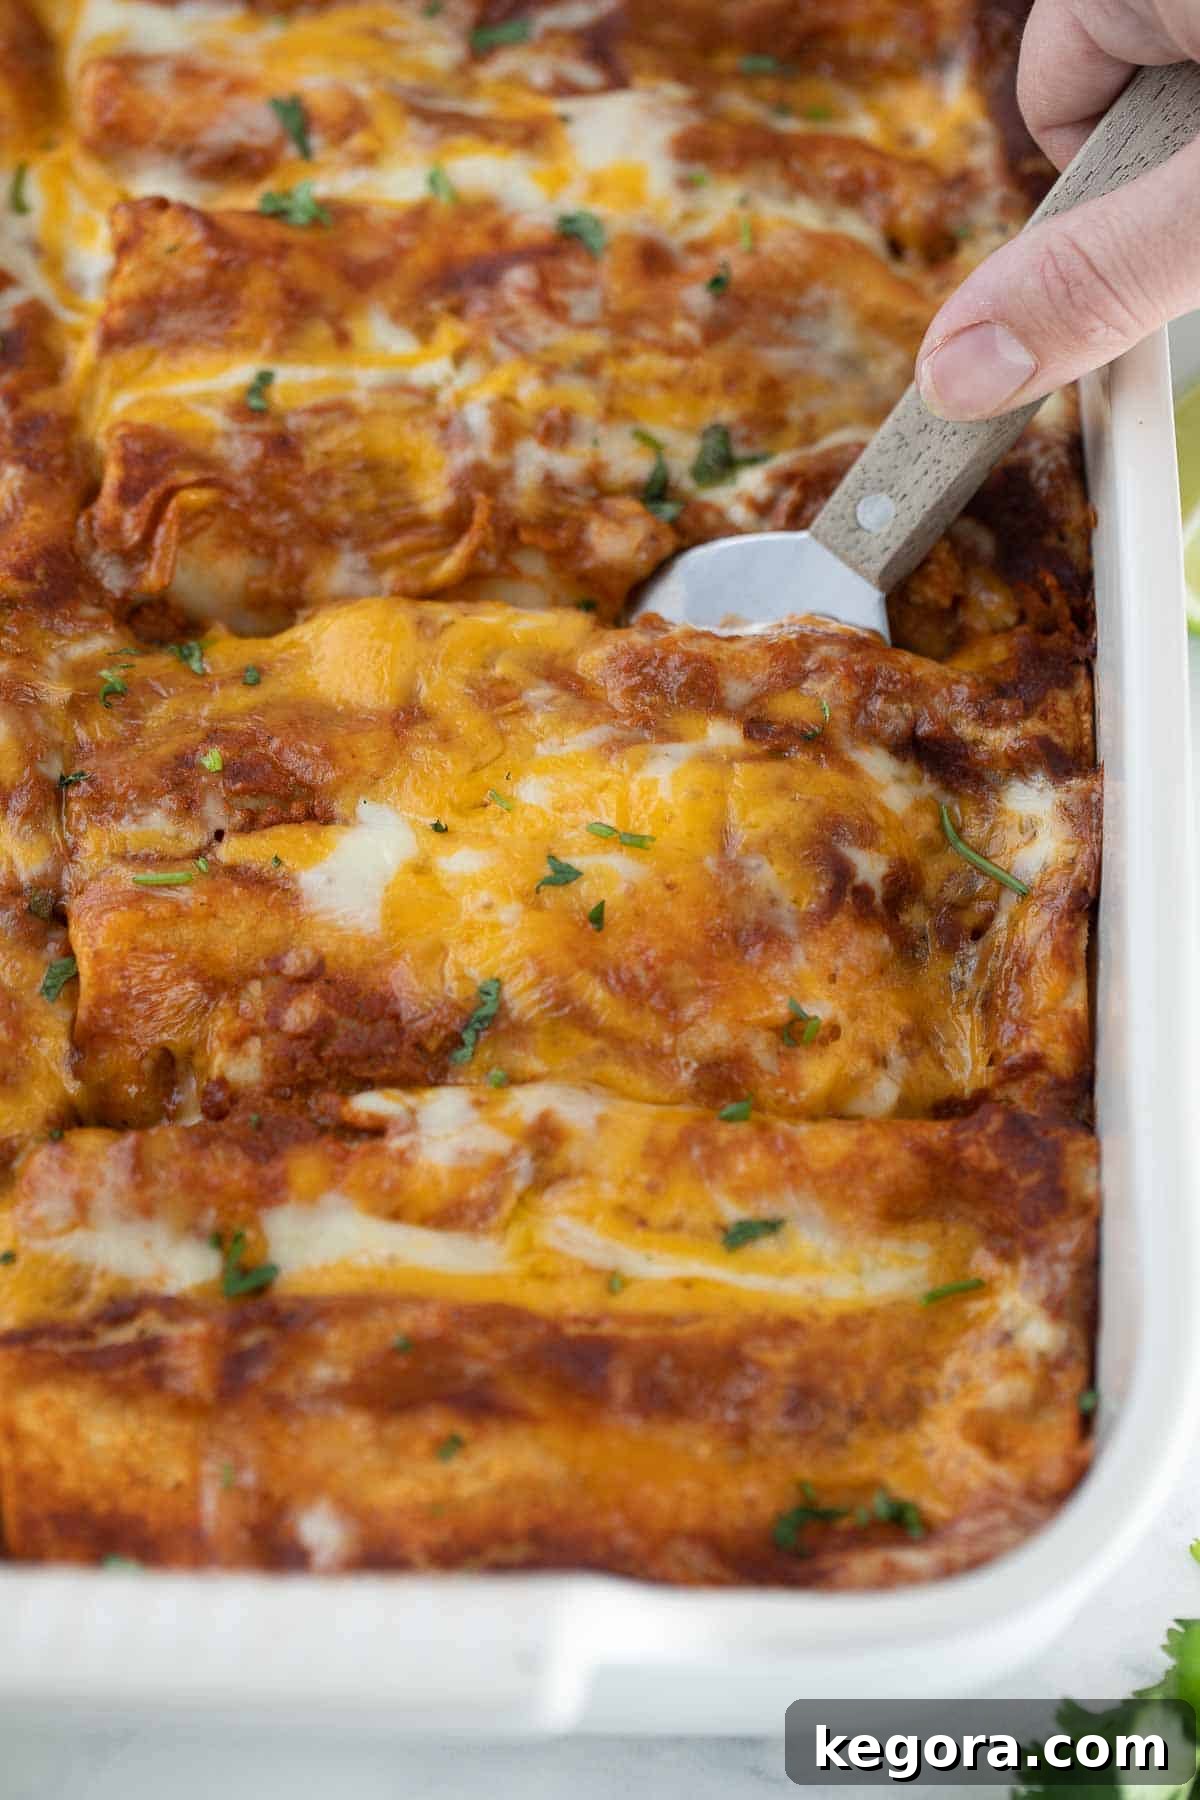
Cover the baking pan tightly with aluminum foil to trap moisture and allow the flavors to meld beautifully. Bake for 20-25 minutes, then remove the foil and continue baking for another 5-10 minutes, or until the cheese is gloriously golden brown and bubbly. This final step creates a perfect crust while the interior remains wonderfully moist.
You might also enjoy these other gluten-free Mexican favorites: my easy gluten-free tacos and my flavorful homemade gluten-free taco seasoning.
How to Serve Your Irresistible Gluten-Free Enchiladas
These chicken enchiladas are fantastic on their own, but truly shine when served with an array of complementary sides and toppings. We love garnishing ours with a dollop of cool sour cream and a drizzle of your favorite hot sauce for an extra kick. For a complete and satisfying meal, I typically serve them alongside a comforting side of Mexican rice and a crisp, refreshing green salad.
If you’re hosting a gathering or feeding a large family, these enchiladas are incredibly versatile. I often prepare a double batch and assemble them directly in foil baking pans. This makes for effortless transport, easy baking, and best of all, a super quick cleanup after the feast!
Are Enchiladas Gluten-Free? Your FAQs Answered
Many traditional enchilada recipes are naturally gluten-free. This is because authentic enchiladas are typically made with corn tortillas, a sauce free of added flour, and a filling of meat or cheese. However, it’s always essential to carefully check the ingredients of your tortillas, sauces, and any pre-made fillings to ensure they don’t contain any hidden wheat or gluten-containing ingredients, especially when using packaged items.
Are Enchiladas Made of Corn or Flour Tortillas?
Traditionally, authentic enchiladas are prepared with corn tortillas. Corn tortillas are naturally gluten-free, making them the perfect choice for keeping these chicken enchiladas entirely gluten-free without altering their classic taste or texture. While flour tortillas can be used, they are not traditional for enchiladas and would make the dish not gluten-free.
Can I Make These Enchiladas Dairy-Free?
Absolutely! This recipe can be easily adapted to be dairy-free. The homemade enchilada sauce is naturally dairy-free and wonderfully flavorful on its own. Simply substitute your favorite high-quality dairy-free shredded cheese in place of the Monterey Jack and sharp cheddar. Ensure all other ingredients remain dairy-free, and you’ll have a delicious, dietary-friendly meal.
Storage, Make-Ahead, and Freezing Instructions for Convenience
- To Store Leftovers: Any leftover enchiladas can be stored in an airtight container in the refrigerator for up to 3-4 days. For extended storage, wrap individual portions tightly in aluminum foil or plastic wrap, then place them in a freezer-safe bag or container and freeze for up to three months.
- To Make-Ahead: These enchiladas are an excellent candidate for meal prep! You can assemble the entire dish as instructed, then cover and refrigerate for up to 24 hours before baking. Alternatively, you can prepare the sauce and chicken filling separately, store them in airtight containers in the refrigerator, and assemble the enchiladas just before you’re ready to bake.
- To Freeze Uncooked Enchiladas: For the freshest taste when reheating from frozen, I recommend freezing the enchiladas unbaked. Assemble them completely, then wrap the baking dish tightly with aluminum foil or transfer the rolled enchiladas to a freezer-safe container or bag. When ready to bake, place the covered frozen enchiladas directly into a preheated oven at 375°F (190°C) and bake for approximately 35-40 minutes, or until thoroughly heated through and bubbly. Remove the foil for the last 5-10 minutes if you desire a browned, crispy cheese topping.
More Delicious Gluten-Free Dinner Recipes to Explore
- The Best Gluten-Free Meatloaf
- 30-Minute Gluten-Free Beef Stroganoff
- Hearty Gluten-Free Lasagna
- Comforting Gluten-Free Chicken Pot Pie
- The Best Gluten-Free Chili for Game Day
- Dairy-Free Chicken Broccoli Rice Casserole (Gluten-Free)
Gluten-Free Chicken Enchiladas with Homemade Red Sauce
Erin Collins
25 mins
30 mins
55 mins
6
people
With its vibrant homemade gluten-free red enchilada sauce, succulent chicken, and a delightful blend of cheeses, these enchiladas are guaranteed to be a crowd-pleasing dinner every time.
Comments
Print Recipe
Ingredients
For the Homemade Red Enchilada Sauce:
- 1 medium onion diced
- 1 jalapeño seeded and chopped (adjust for spice preference)
- 1 tablespoon oil
- 3 medium cloves garlic finely minced
- 2 tablespoons chili powder
- 1 tablespoon brown sugar
- 2 teaspoons ground cumin
- ½ teaspoon oregano
- ½ teaspoon salt
- 15 oz can tomato sauce
- 1 cup chicken or vegetable stock
For the Chicken Filling & Assembly:
- 1- 1 1/2 lbs boneless skinless chicken breasts (2-3 large breasts, or pre-cooked/rotisserie chicken)
- 1 1/2 cups (6 ounces) sharp cheddar cheese freshly shredded
- 1 1/2 cups (6 ounces) Monterey Jack cheese freshly shredded
- 1/2 cup fresh cilantro minced
- 1 lime (for juice)
- 12 6-inch soft corn tortillas (ensure gluten-free)
Instructions
Step 1: Prepare the Homemade Enchilada Sauce & Chicken
-
In a large saucepan or Dutch oven, heat 1 tablespoon of oil over medium heat. Add the diced onion and chopped jalapeño. Sauté for 8-10 minutes until the vegetables become soft and translucent.
-
Stir in the minced garlic, chili powder, ground cumin, oregano, brown sugar, and salt. Cook for an additional 30 seconds to 1 minute, stirring constantly, until the spices are fragrant. Pour in the tomato sauce and chicken stock, stirring well to combine all ingredients.
-
Gently place the boneless, skinless chicken breasts into the sauce. Bring the mixture to a gentle simmer. Reduce the heat to low, cover, and let it simmer for 15-20 minutes, or until the chicken is cooked through and the sauce has slightly thickened. Remove the cooked chicken and place it in a separate bowl to cool slightly.
-
Optional (but recommended for a smoother sauce): Carefully transfer the simmering sauce into a blender. Blend until completely smooth. Taste the sauce and adjust seasoning with a touch more salt if needed. Set the sauce aside.
Step 2: Assemble the Enchiladas
-
Preheat your oven to 400°F (200°C). Lightly grease a 9×13 inch baking dish.
-
Once cool enough to handle, shred the cooked chicken into bite-sized pieces using two forks. In a large bowl, combine the shredded chicken with 1 cup of sharp cheddar cheese, 1 cup of Monterey Jack cheese, the minced fresh cilantro, and the juice of one lime. Mix thoroughly to create the filling. (Reserve the remaining cheese for topping the enchiladas.)
-
Stack the 12 corn tortillas on a microwave-safe plate. Cover them with plastic wrap or a damp paper towel. Microwave on high for 20-30 seconds, or until they are warm and pliable. This prevents them from breaking when rolled.
-
Lay a softened tortilla flat. Spoon approximately 1/3 cup of the chicken mixture down the middle of the tortilla. Roll the tortilla up tightly and place it seam-side down in the prepared baking dish. Repeat this process with the remaining tortillas and filling, arranging them snugly in the dish.
-
Pour the reserved homemade red enchilada sauce evenly over the rolled enchiladas. Ensure they are well covered. Sprinkle the remaining 1 cup of shredded cheese (½ cup cheddar, ½ cup Monterey Jack) over the top of the sauced enchiladas.
-
Cover the baking dish tightly with aluminum foil. Bake in the preheated oven for 20-25 minutes. Then, remove the foil and continue to bake for another 5-10 minutes, or until the cheese is melted, golden, and bubbly.
-
Remove the enchiladas from the oven and let them stand for 10 minutes before serving. This allows the flavors to settle and makes for easier serving. Serve warm with your favorite toppings and enjoy!
Recipe Notes & Tips
- Cheese Quality Matters: For the best flavor and melt, always shred your own cheese from a block. Pre-shredded cheeses often contain anti-caking agents that can affect texture and melting quality.
- Gluten-Free Tortillas: Double-check that your corn tortillas are explicitly labeled as gluten-free to ensure the entire dish is safe for those with gluten sensitivities.
- Spice Level Control: To achieve a milder sauce, meticulously remove all ribs and seeds from the jalapeño. For a more intense, spicier flavor, you can leave some or all of the seeds and ribs in.
Using Pre-Cooked Chicken: If you opt for convenience and use pre-cooked chicken (like rotisserie chicken or leftover cooked chicken breast), simply skip the step of simmering the chicken in the sauce. Shred the cooked chicken and proceed directly to mixing it with the other filling ingredients as instructed.
Making it Dairy-Free: These enchiladas are easily adaptable for a dairy-free diet. The homemade red sauce is naturally dairy-free. Simply replace the regular Monterey Jack and sharp cheddar cheeses with your preferred brand of dairy-free shredded cheese. The flavors will still be outstanding!
Nutrition Information (per serving)
Carbohydrates: 11g |
Protein: 42g |
Fat: 8g |
Saturated Fat: 1g |
Trans Fat: 1g |
Cholesterol: 121mg |
Sodium: 1013mg |
Potassium: 1069mg |
Fiber: 3g |
Sugar: 7g |
Vitamin A: 1391IU |
Vitamin C: 15mg |
Calcium: 48mg |
Iron: 3mg