
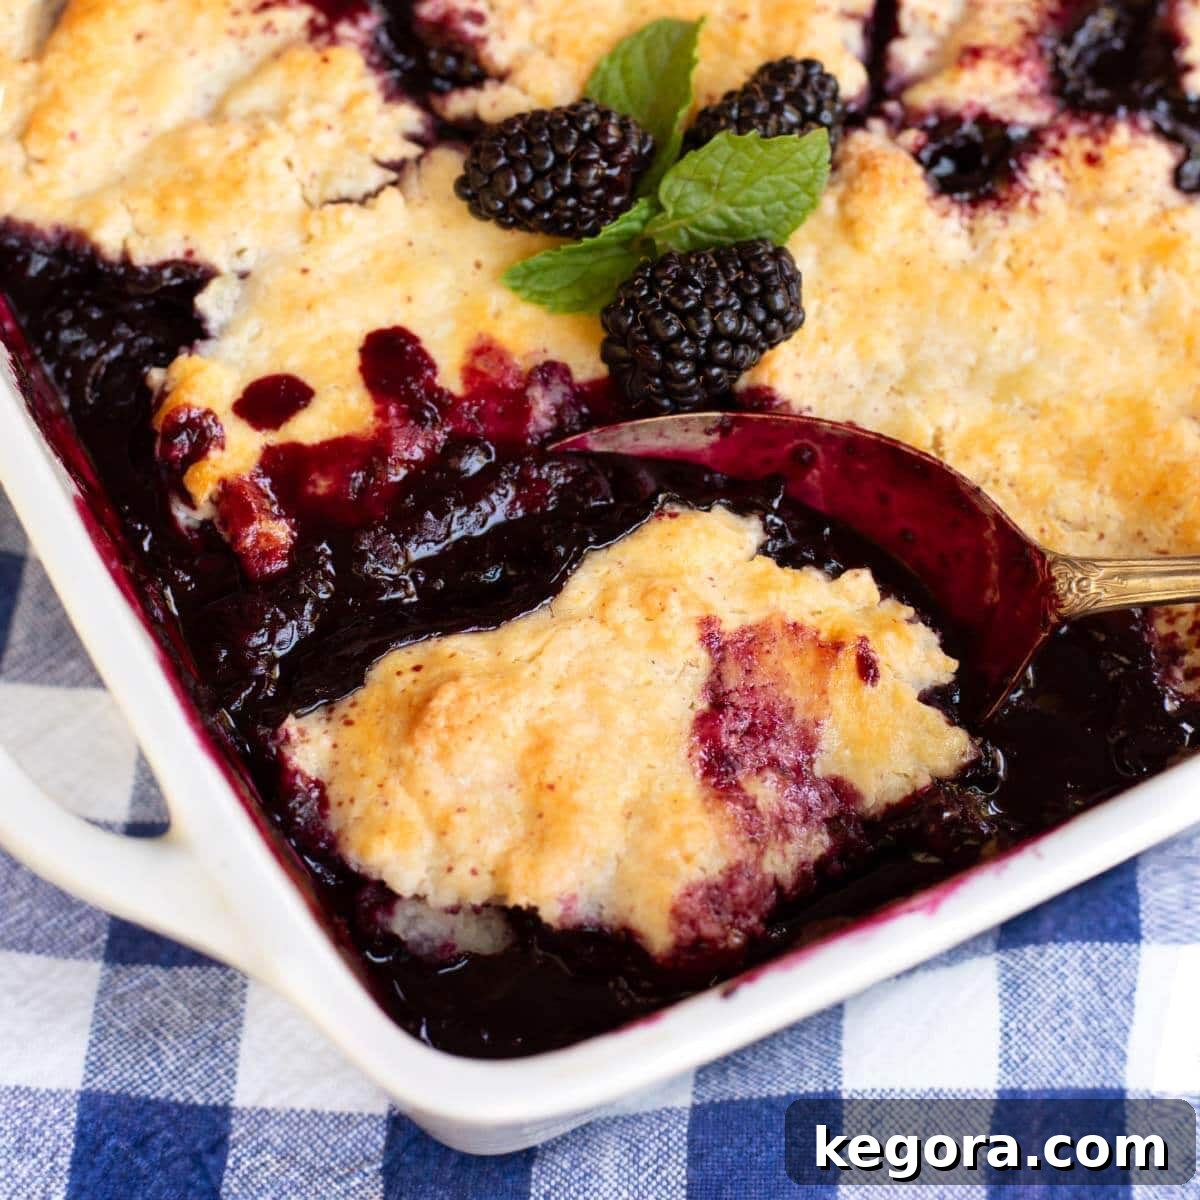
Homemade Blackberry Cobbler: The Best Classic Summer Dessert Recipe
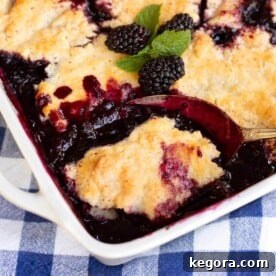
There’s something uniquely comforting about a Homemade Blackberry Cobbler. It’s a rustic, timeless dessert that instantly transports you back to simpler times, evoking memories of warm summer days and family gatherings. This particular recipe captures that essence perfectly, featuring an abundance of sweet, juicy blackberries nestled beneath a tender, golden-brown biscuit crust. It’s a quintessential summer treat, especially when served warm with a generous scoop of melting vanilla ice cream – a combination guaranteed to make you feel like a kid again! Whether you choose fresh, ripe berries or opt for the convenience of frozen ones, this crowd-pleasing dessert is designed to easily serve a family or a small gathering, making it a staple for any occasion.
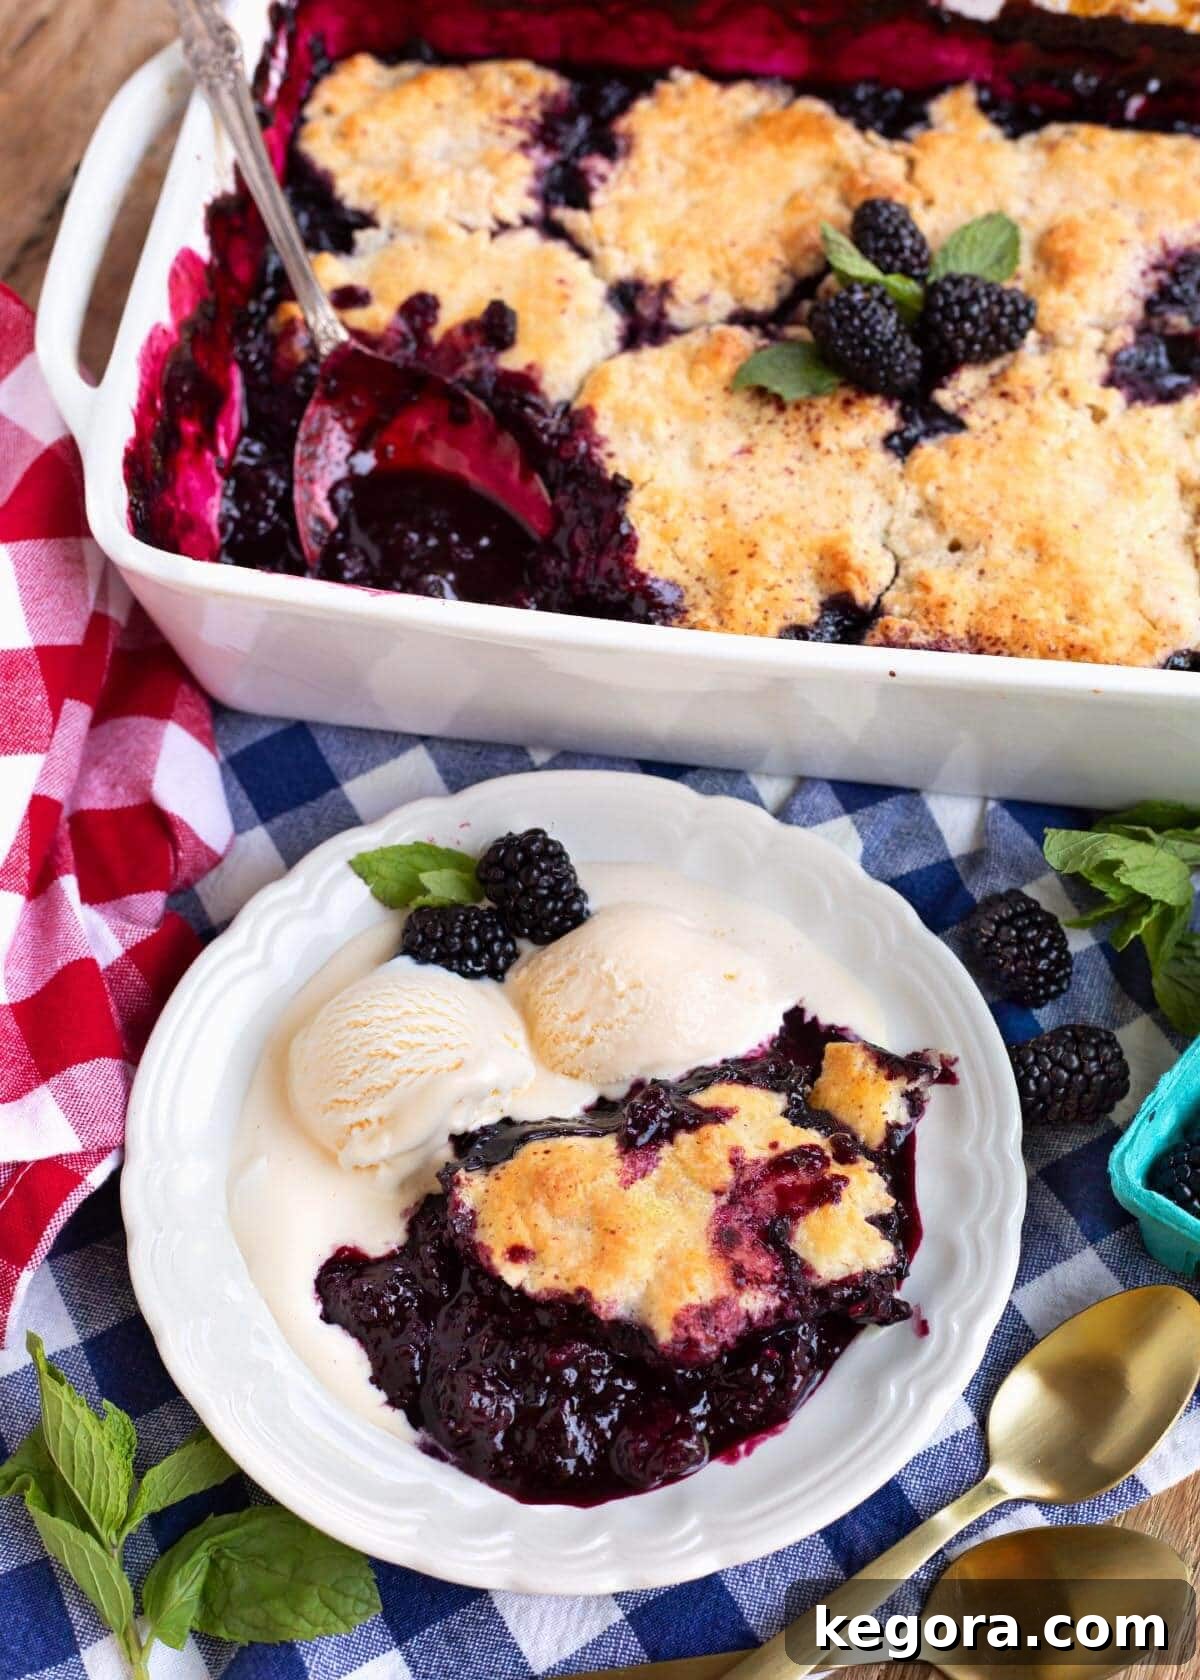
Blackberry Cobbler from Scratch: A Deep Dive into a Beloved Dessert
A cobbler is a delightful baked fruit dessert, distinct for its topping of biscuit-style dough rather than a traditional pie crust. Unlike fruit crisps, which are characterized by a crumbly oat topping, or some cobblers that employ a pour-over batter for a softer finish, this specific recipe boasts soft, fluffy, golden biscuits baked directly on top of a vibrant, bubbling blackberry filling. The name “cobbler” itself comes from the way the biscuit topping is “cobbled” or dropped onto the fruit, giving it a charmingly rustic and homemade appearance that simply feels like a warm embrace.
If you’re a true enthusiast of fruit cobblers, you absolutely must try my Easy Peach Cobbler next! It uses a pour-over style batter, resulting in an incredibly tender and moist topping that is surprisingly simple to prepare and equally delicious.
Why This Homemade Blackberry Cobbler Will Become Your Favorite
- Generous Batch for All: This recipe is designed to serve approximately 10 people, making it absolutely perfect for feeding a hungry family, sharing with friends at a potluck, or bringing to any summer celebration. You’ll have plenty to go around, ensuring everyone gets a taste of this delicious comfort food.
- Versatile Berry Options: Enjoy the flexibility of using either fresh, peak-season blackberries or convenient frozen blackberries. There’s no need to thaw frozen berries beforehand; simply toss them with a bit of flour and incorporate them into the filling, making this dessert accessible year-round.
- Convenient Make-Ahead Potential: For busy schedules, the fruit filling can be prepared up to two days in advance and stored in the refrigerator, or even frozen for longer keeping. This allows for easy assembly closer to serving time, ensuring the biscuit topping is always fresh and perfect.
- Irresistible Classic Comfort: Experience the perfect harmony of sweet and tart blackberries, beautifully complemented by a rich, buttery biscuit topping. This combination creates a truly nostalgic flavor profile that embodies the warmth and comfort of homemade goodness.
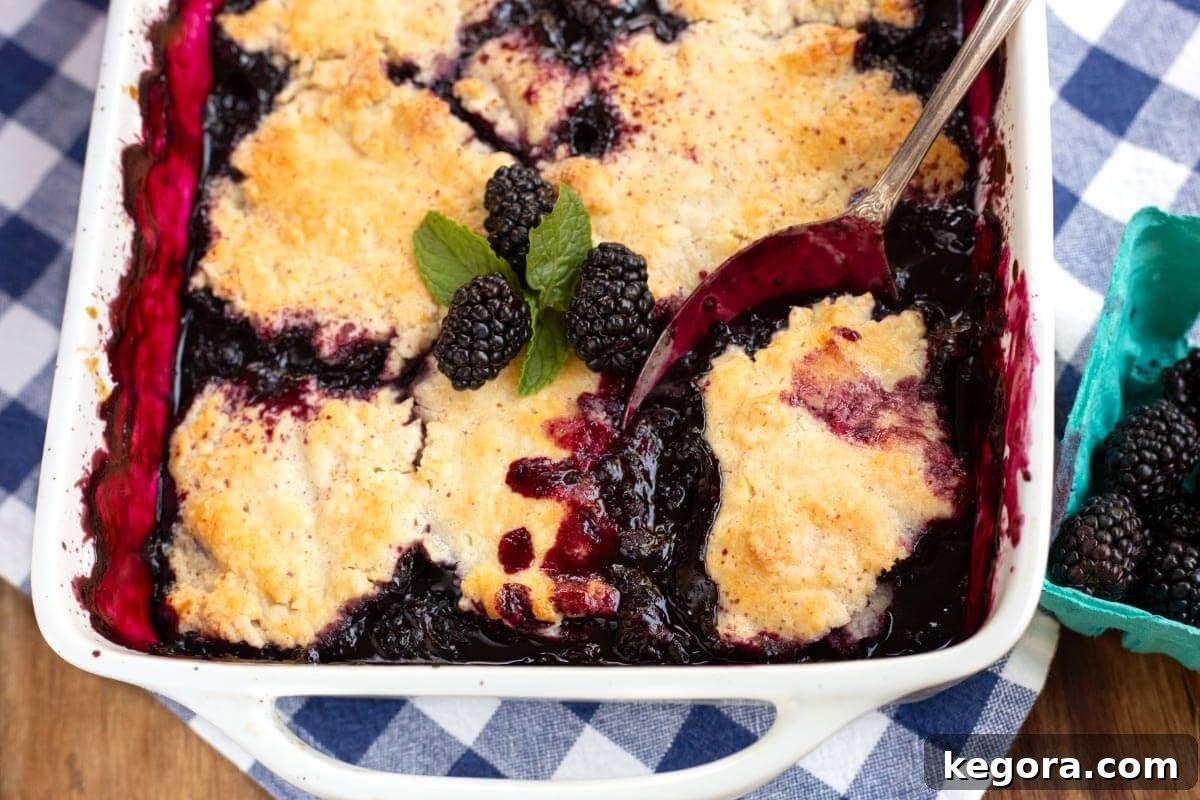
While our fruit cobblers are always best enjoyed warm, fresh from the oven, they truly shine when paired with complementary toppings. The classic choice is, of course, a few scoops of creamy vanilla ice cream, which melts beautifully into the warm fruit. Alternatively, a dollop of freshly whipped cream adds a lighter, airy touch. Depending on the fruit used in the cobbler, a decadent caramel drizzle can also be an exquisite addition, enhancing the flavors with its rich sweetness.
Essential Ingredients for Your Blackberry Cobbler Masterpiece
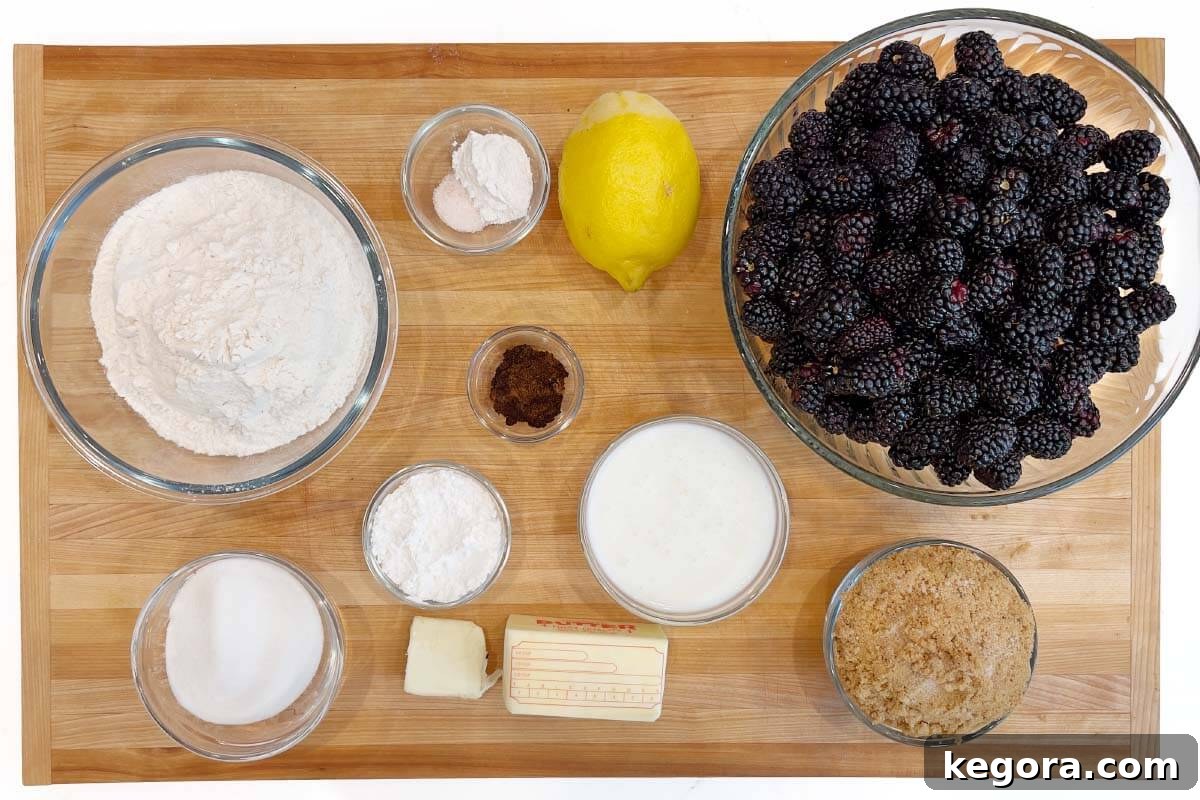
FOR THE JUICY BLACKBERRY FILLING:
- Fresh or Frozen Blackberries: The star of the show! Use fresh when in season for the best flavor, or frozen for convenience. If using frozen, simply mix them with a small amount of flour directly from the freezer; no thawing required.
- Brown Sugar: Adds a rich, molasses-like sweetness and depth of flavor that complements the tartness of the blackberries beautifully.
- Cornstarch: This acts as a thickener, ensuring your filling is perfectly luscious and not too watery, allowing the berries to shine.
- Lemon Juice: A splash of fresh lemon juice brightens the overall flavor profile, balancing the sweetness and enhancing the natural tang of the blackberries.
- Vanilla Extract: Infuses the filling with warm, aromatic undertones, adding a layer of classic dessert comfort.
FOR THE GOLDEN BISCUIT TOPPING:
- All-Purpose Flour: The base for our tender biscuits, providing structure and texture.
- Granulated Sugar: Sweetens the biscuit dough, making it a perfect complement to the fruit filling without being overly sweet.
- Baking Powder: The leavening agent that gives the biscuits their signature rise and airy texture.
- Salt: A crucial ingredient that balances the sweetness and enhances all the other flavors in the dough.
- Cold, Cubed Unsalted Butter: The secret to flaky, tender biscuits! Keeping the butter very cold prevents it from fully incorporating too soon, creating pockets of steam during baking for that desired flakiness.
- Buttermilk: Adds moisture, a slight tang, and contributes to the tender crumb of the biscuits. Its acidity also reacts with the baking powder for a better rise.
- Extra Buttermilk + Coarse Sugar (for brushing): Brushed on top before baking, this combination creates a beautiful golden crust with a delightful sugary crunch. Granulated sugar can be used if coarse sugar isn’t available.
Creative Variations to Customize Your Cobbler
While this classic blackberry cobbler recipe is perfect as is, it also serves as a fantastic base for culinary creativity. Feel free to experiment with these delicious variations:
- Mixed Berry Medley Cobbler: Why stick to just one berry? Combine blackberries with an equal amount of raspberries, blueberries, or even sliced strawberries for a vibrant medley of flavors and colors.
- Warmly Spiced Cobbler: Elevate the flavor profile by adding a pinch of warm spices. A ¼ teaspoon of ground cinnamon or nutmeg can be incorporated into either the fruit filling or the biscuit topping for an extra layer of cozy aroma and taste.
- Crisp-Style Topping: If you’re in the mood for a different texture, you can easily swap the biscuit topping for an oat crumble. A simple mixture of oats, flour, brown sugar, butter, and a hint of cinnamon makes for a delightful crisp-style cobbler.
- Citrus Zest Boost: For an even brighter flavor, add a teaspoon of fresh orange or lemon zest to the blackberry filling along with the lemon juice.
- Nutty Crunch: Fold ½ cup of chopped pecans or walnuts into the biscuit topping mixture for added texture and a nutty flavor dimension.
A Quick Solution if You Don’t Have Buttermilk
Don’t let the absence of buttermilk deter you from making this incredible cobbler! You can effortlessly create your own homemade buttermilk substitute right in your kitchen:
- Measure 1 ½ teaspoons of white vinegar or fresh lemon juice into a liquid measuring cup.
- Add enough cold milk (any percentage works, but whole milk is ideal for richness) to the cup until it reaches the ¾ cup mark.
- Stir the mixture thoroughly and let it sit undisturbed for about 5 to 10 minutes.
- When ready, the milk will appear slightly thickened and curdled, indicating it’s ready to be used in your biscuit recipe just like regular buttermilk.
Exploring Other Convenient Biscuit Topping Options
While I wholeheartedly recommend crafting the homemade biscuit topping for the absolute best flavor and texture, sometimes time is of the essence. Here are a few shortcut options that can still yield a delicious blackberry cobbler, keeping in mind that the texture and flavor will differ slightly:
- Canned Biscuits: These offer undeniable convenience, but it’s important to choose wisely. Many store-bought canned biscuits, especially savory varieties, may not perfectly complement a sweet fruit filling. Look for “honey butter” or “Southern-style” versions that tend to be sweeter. To enhance them for a dessert, gently flatten each biscuit and brush the tops with a little extra buttermilk or melted butter, then sprinkle generously with granulated or coarse sugar before arranging them over the filling and baking as directed.
- Bisquick-Style Drop Biscuits: For a quick, semi-homemade approach, a Bisquick-style mix works wonderfully. Simply combine 2 cups of Bisquick mix with 2 tablespoons of granulated sugar and ⅔ cup of milk. This creates a lightly sweetened, easy-to-handle dough. Drop spoonfuls of this dough directly onto the prepared blackberry filling, leaving some gaps, and bake according to the recipe’s instructions.
- Frozen Biscuit Dough: Brands like Mary B’s offer frozen buttermilk biscuits that are often less salty than their canned counterparts. Allow them to thaw slightly until pliable, then flatten them a bit and sprinkle with sugar before placing them over the fruit filling. This option provides a good balance between homemade quality and convenience.
Each of these alternatives will lend a unique texture and taste to your cobbler, so select the option that best fits your schedule and desired outcome!
How to Make the Best Homemade Blackberry Cobbler: A Step-by-Step Guide
Step 1: Prep and Preheat for Baking Success
- Before you begin, gather and accurately measure all of your ingredients. This practice, known as “mise en place,” ensures a smooth and stress-free baking process.
- Preheat your oven to a consistent 350°F (175°C). While the oven heats, lightly grease a standard 9×13-inch baking dish to prevent sticking and ensure easy serving.
Step 2: Craft the Irresistible Blackberry Filling
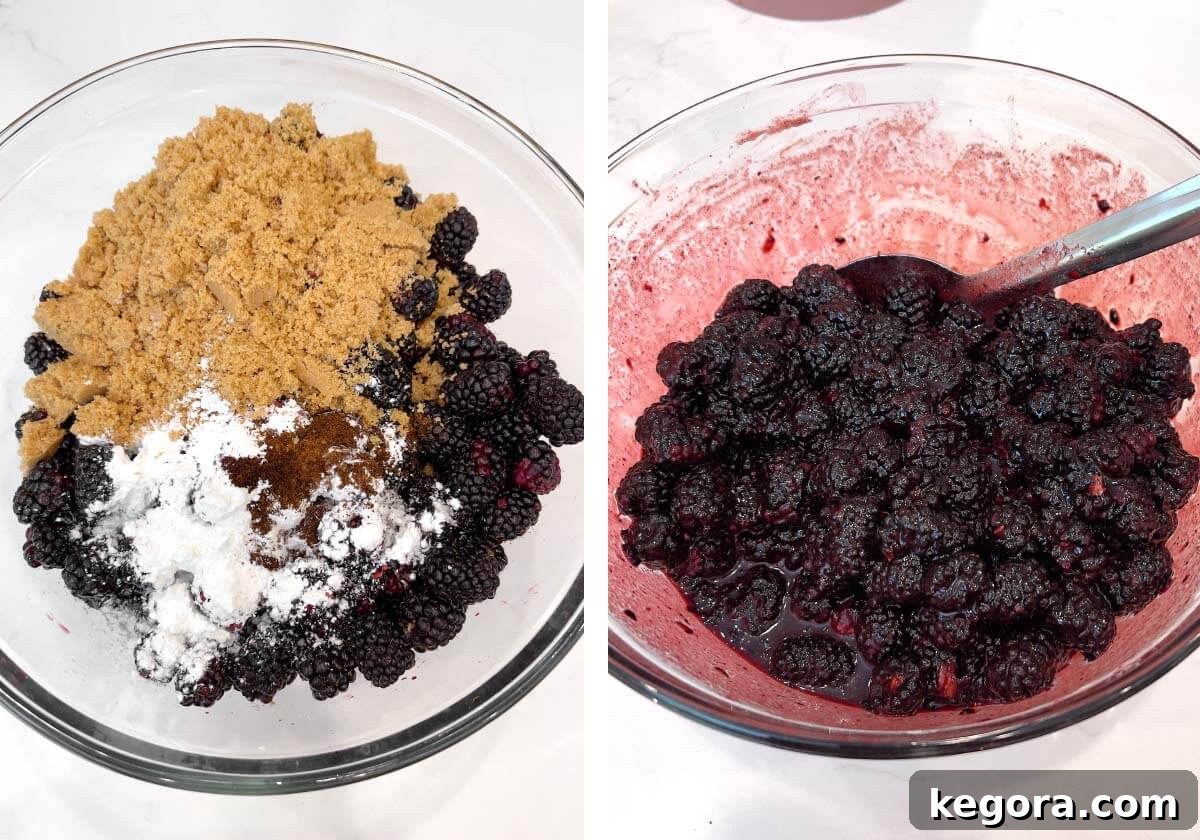
- In a large mixing bowl, gently combine the fresh or frozen blackberries with the brown sugar, cornstarch, lemon juice, and vanilla extract. Toss everything together until the berries are evenly coated. The cornstarch is key here, as it will thicken the berry juices into a luscious sauce as it bakes.
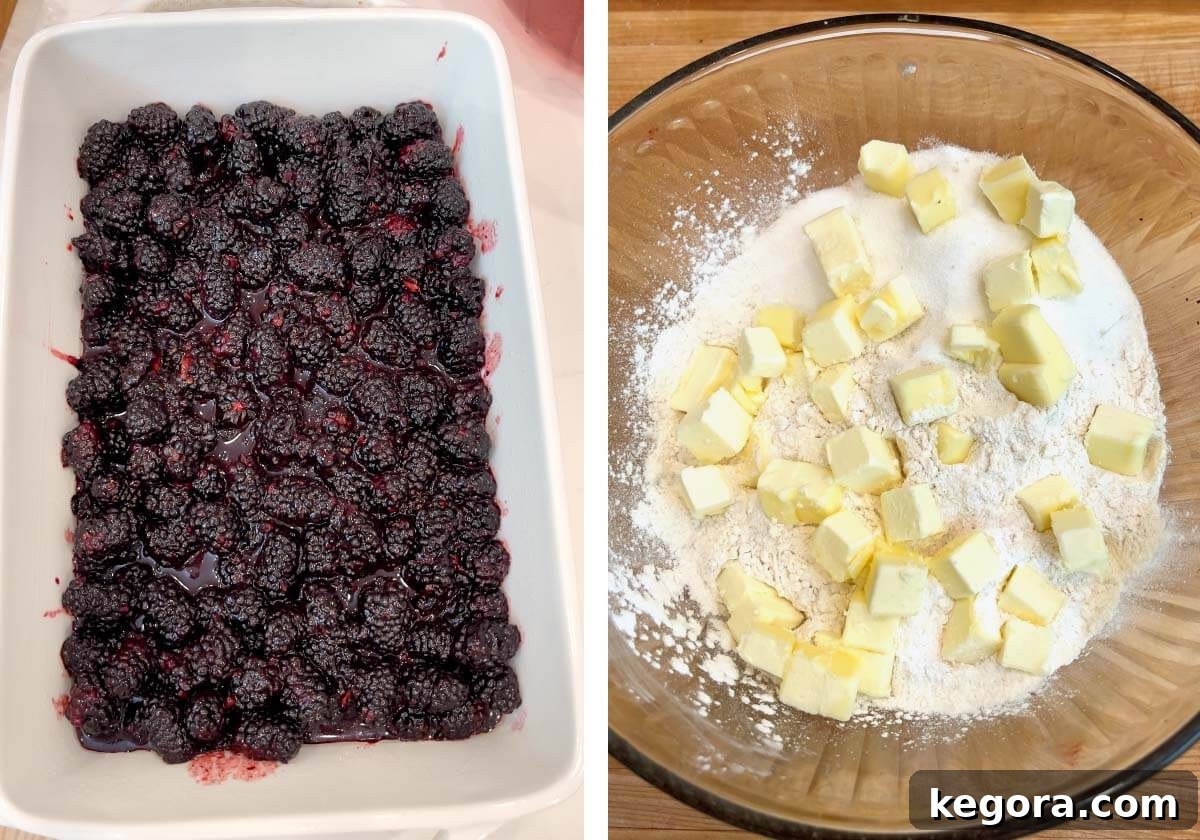
- Pour the prepared blackberry filling evenly into your greased 9×13-inch baking dish. Spread it out to form a uniform layer.
Step 3: Prepare the Flaky Biscuit Dough
- In a separate large bowl, whisk together the all-purpose flour, granulated sugar, baking powder, and salt. Make sure these dry ingredients are well combined.
- Add the very cold, cubed unsalted butter to the dry mixture.
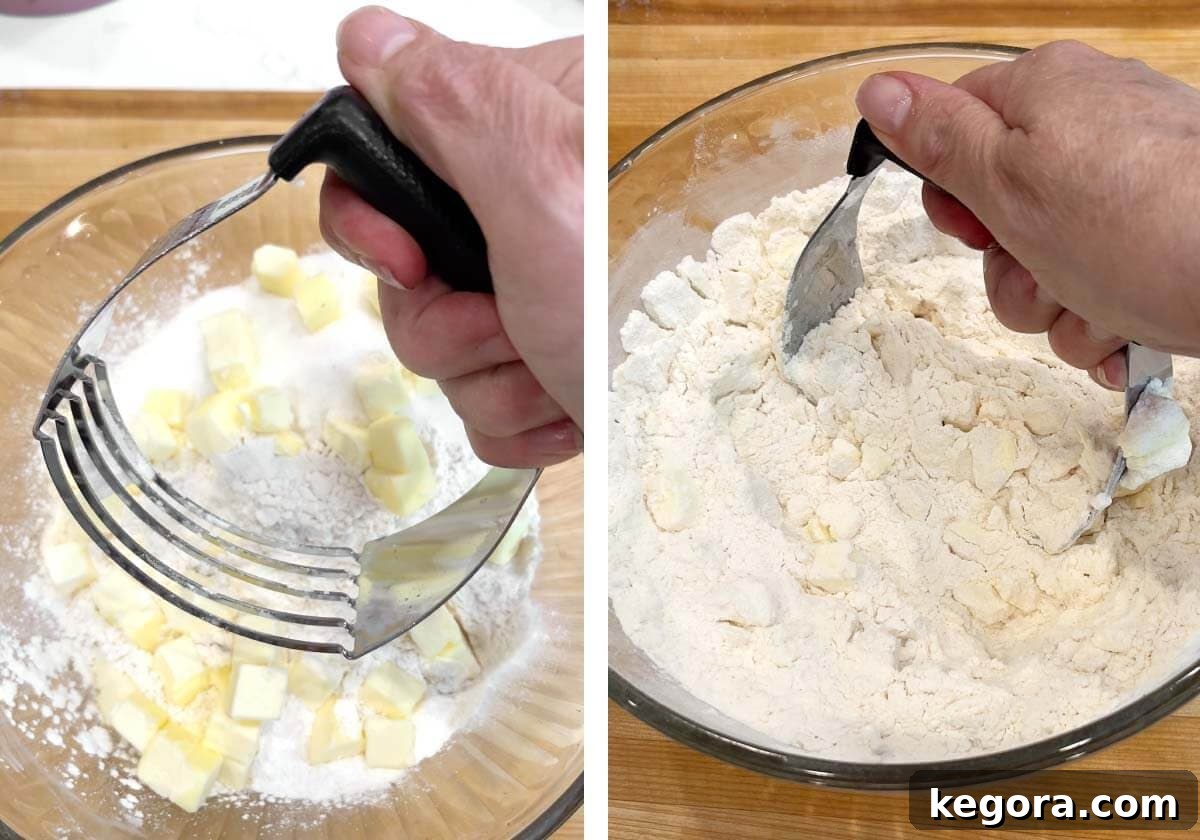
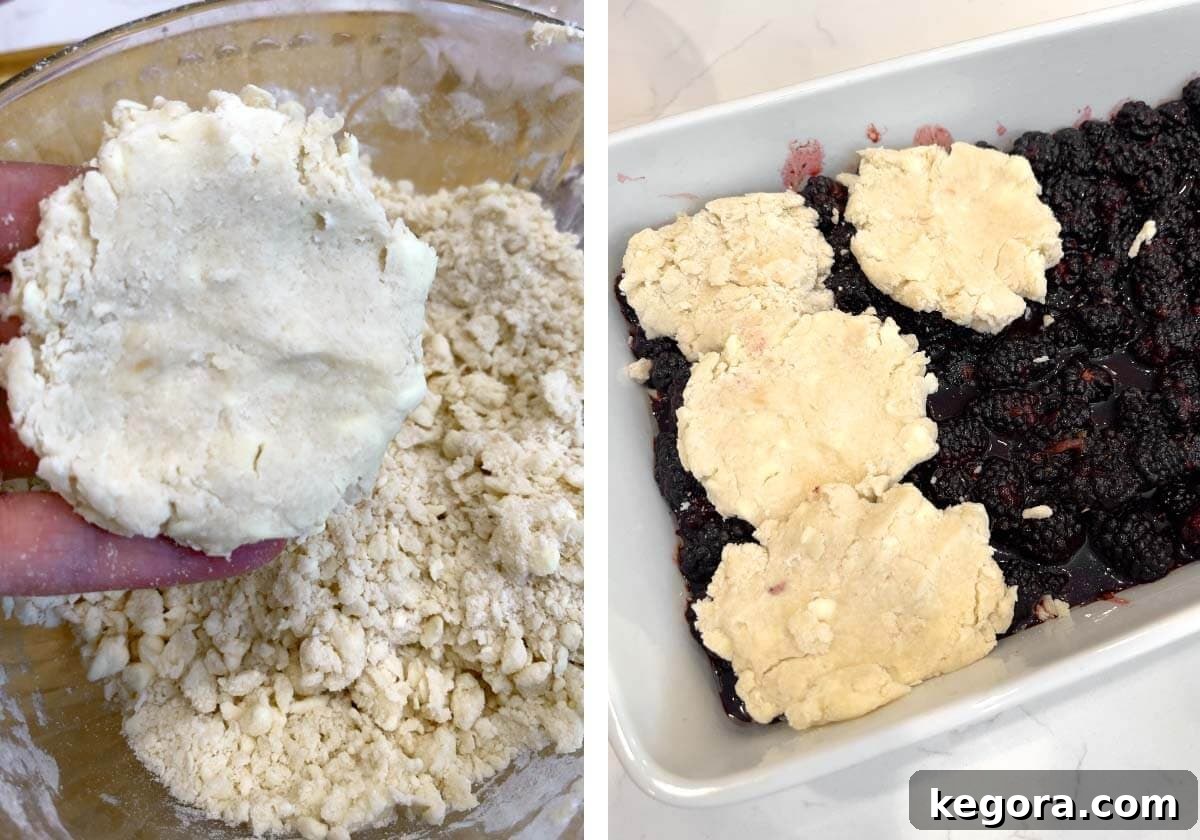
- Using a pastry cutter, or two forks if you don’t have one, cut the cold butter into the flour mixture. Continue until the mixture resembles coarse crumbs, with some pieces of butter still visible and roughly pea-sized. This is essential for achieving a flaky biscuit texture.
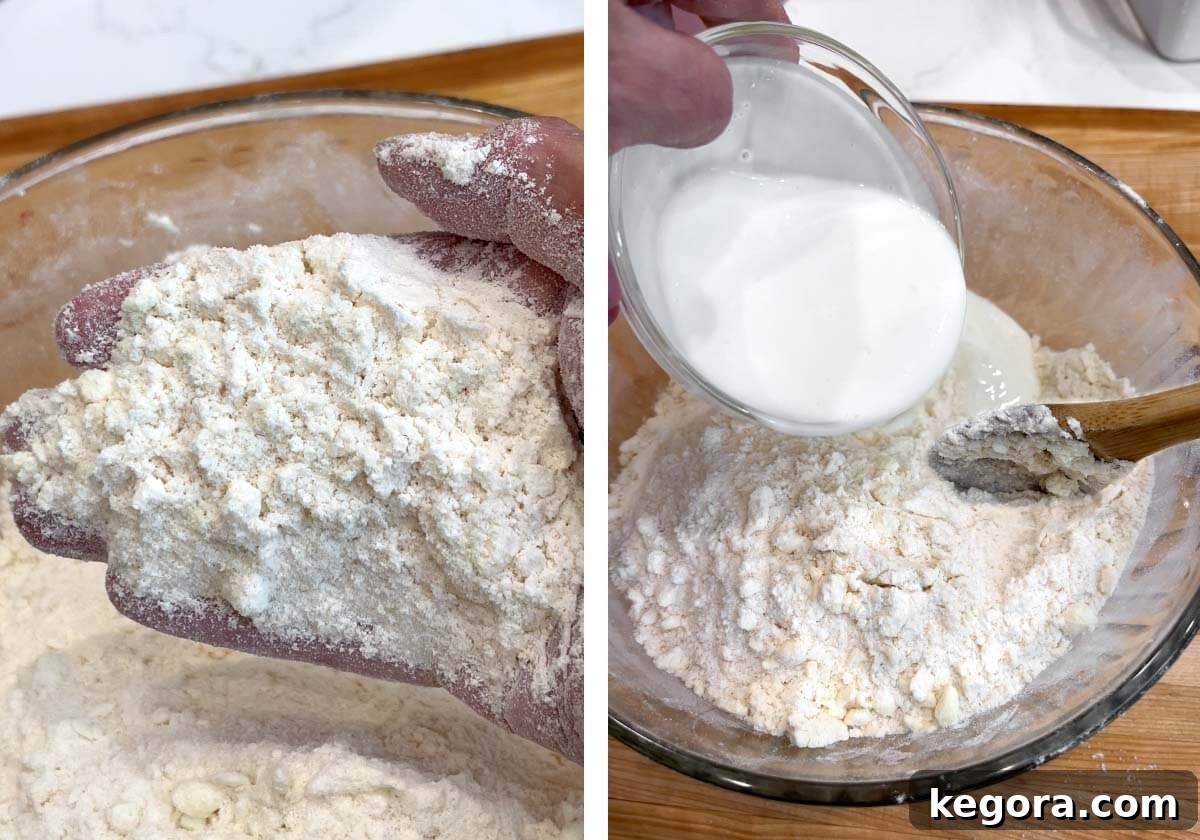
- Once you have achieved the coarse crumb consistency, gently stir in the cold buttermilk until the ingredients are just combined. Be careful not to overmix the dough, as this can lead to tough biscuits. A few streaks of flour are perfectly fine.
Step 4: Artfully Top the Filling
- Take small handfuls of the biscuit dough and gently flatten them into rustic discs or irregular shapes. There’s no need for perfection; the charm of a cobbler lies in its homemade look.
- Arrange these dough pieces over the blackberry filling in the baking dish. It’s important to leave some small gaps between the biscuits. These gaps allow steam to escape during baking and let the vibrant blackberry juices bubble up, creating a beautiful and appetizing appearance.
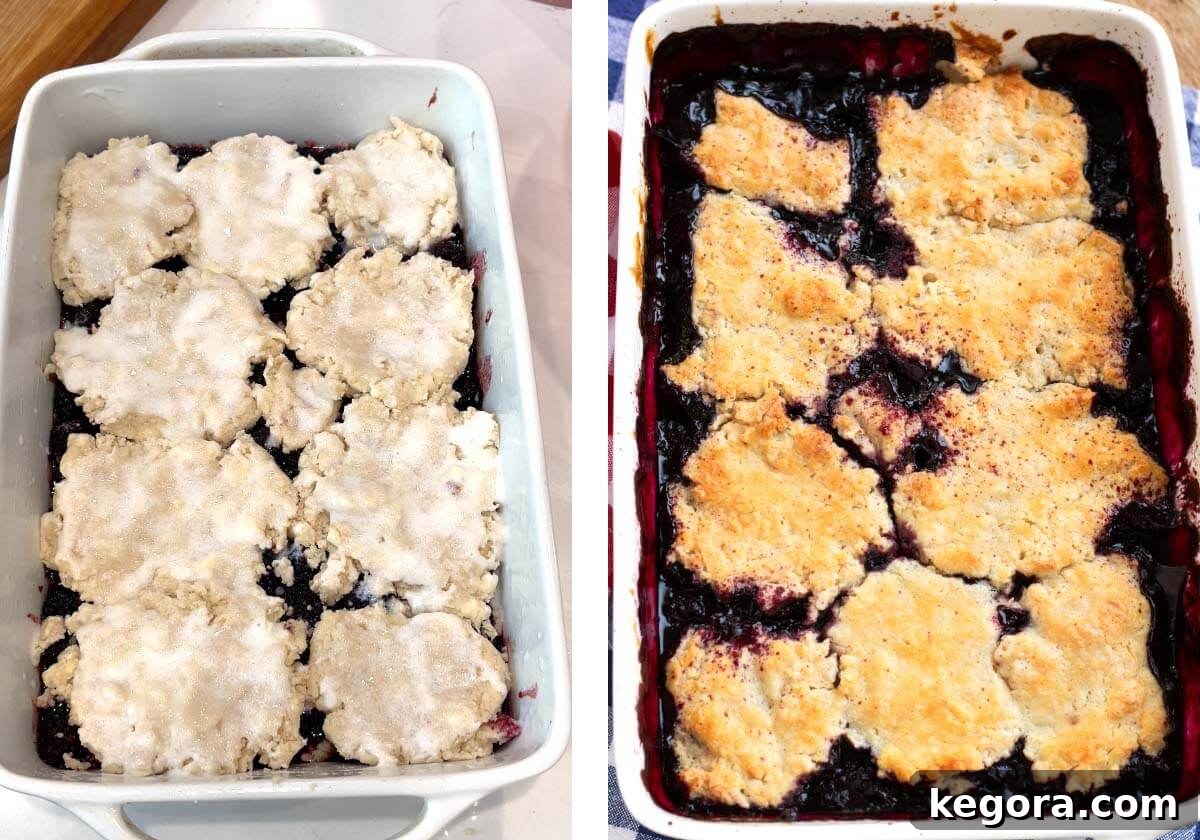
- Before baking, lightly brush the tops of the biscuit dough with a bit of extra buttermilk. Then, generously sprinkle them with coarse sugar (or granulated sugar). This step contributes to a beautiful golden-brown color and adds a delightful crunchy texture to the crust.
Step 5: Bake to Golden Perfection
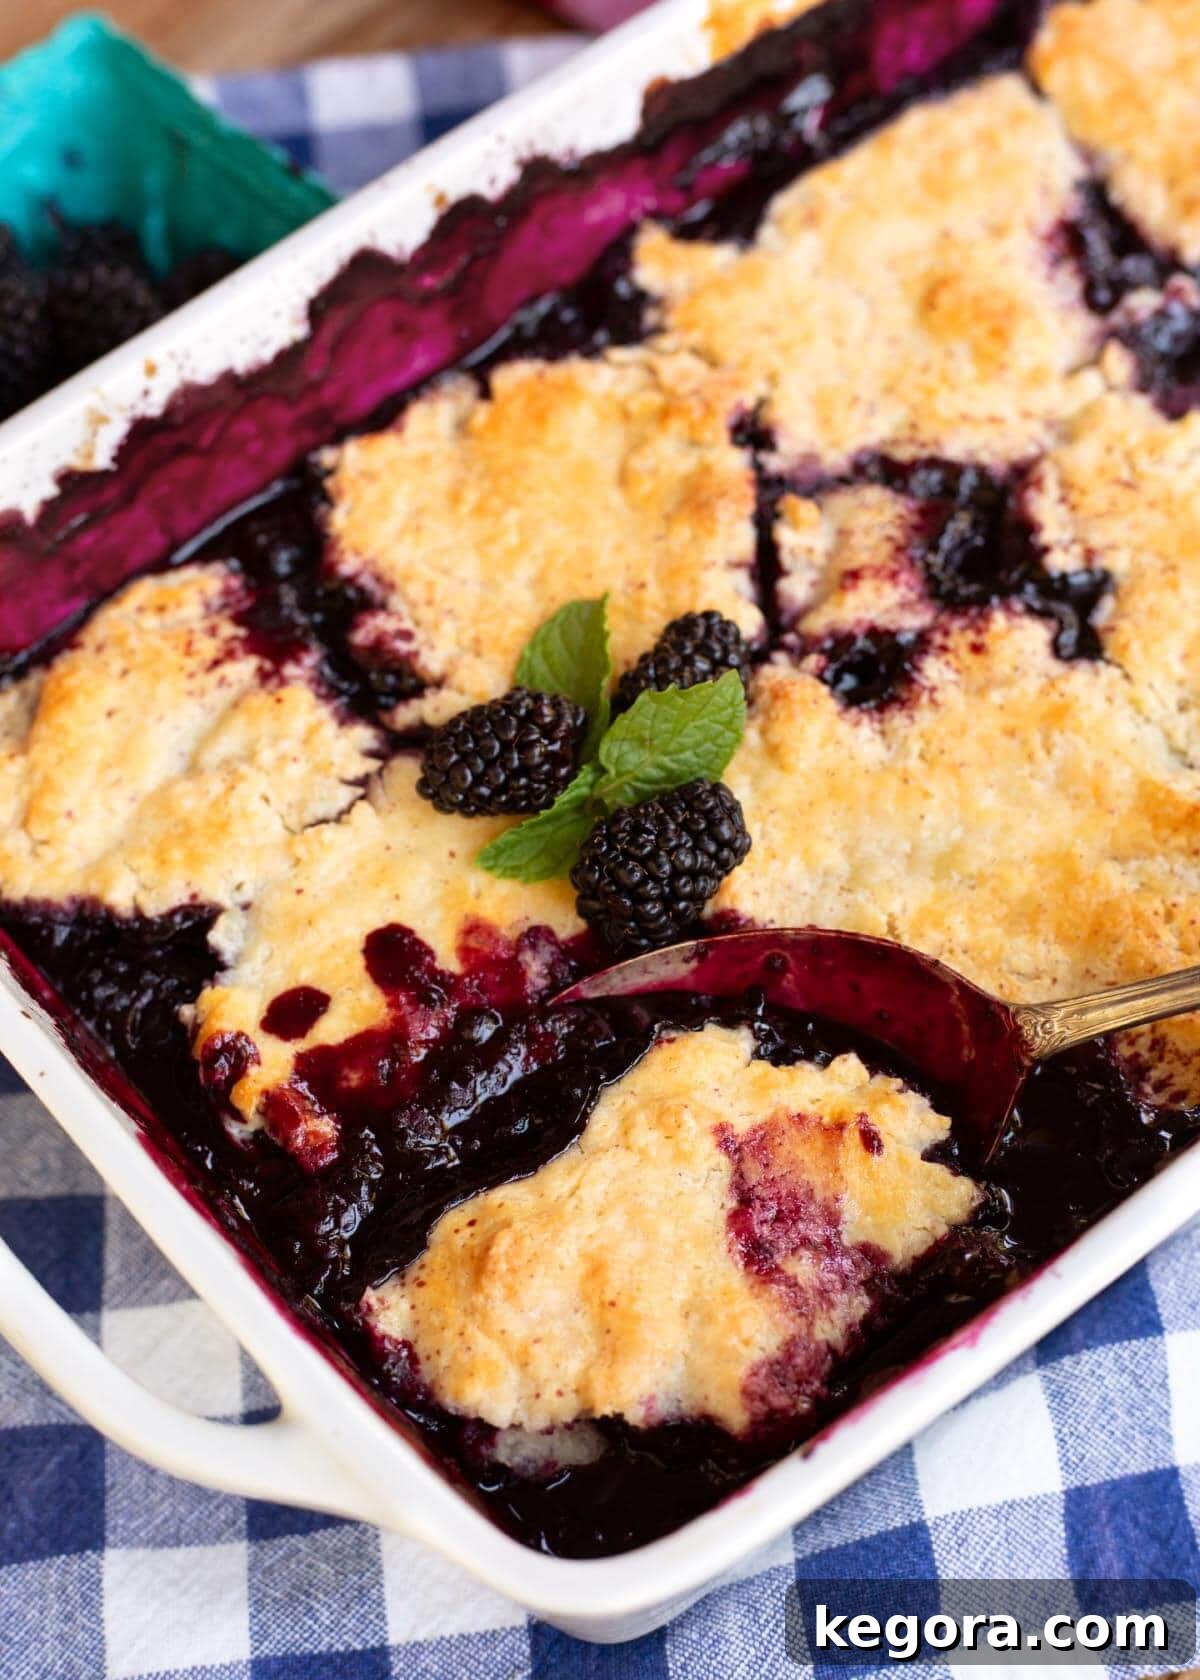
- Place the baking dish in your preheated oven and bake for 45 to 60 minutes. Baking time can vary slightly depending on your oven. The cobbler is ready when the blackberry filling is visibly bubbling around the edges and through the gaps, and the biscuit topping has turned a lovely golden brown and is cooked through (a toothpick inserted into the center of a biscuit should come out clean).
Step 6: Cool Slightly and Serve Warm
- Once baked, carefully remove the cobbler from the oven and set it on a wire rack to cool for 5 to 10 minutes. This brief cooling period allows the filling to set slightly, preventing it from being too runny when served.
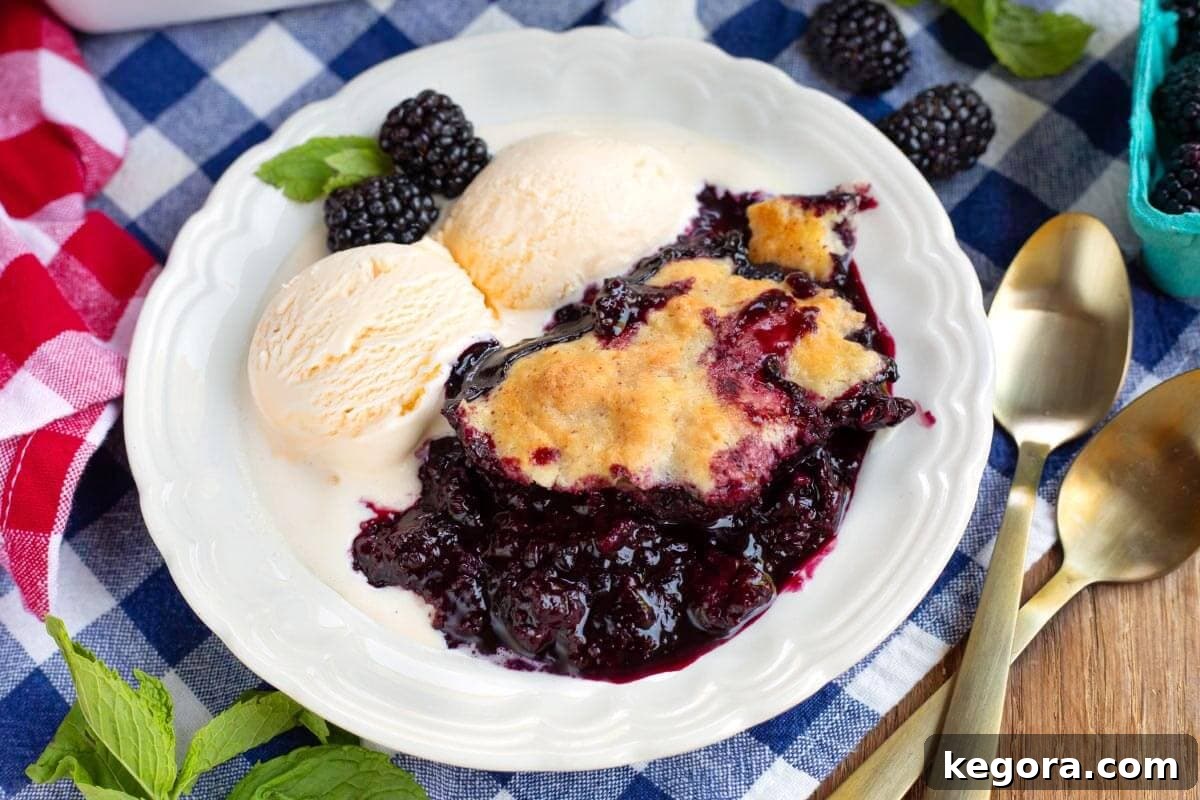
- Serve your delicious Homemade Blackberry Cobbler warm. It’s absolutely divine on its own, but truly exceptional with a scoop of premium vanilla ice cream or a cloud of freshly whipped cream. Enjoy every comforting bite!
Top Tips for Blackberry Cobbler Success
Achieving the perfect homemade blackberry cobbler is easier than you think with these simple tips:
- Handle Dough Gently: Avoid overmixing your biscuit dough. Overworking the dough develops the gluten too much, which can result in tough, dense biscuits instead of light, tender ones. Mix just until the ingredients are combined.
- Embrace Cold Butter: The secret to truly flaky biscuits lies in using very cold butter. Cold butter creates steam pockets as it melts in the oven, which pushes apart the layers of dough, resulting in that desirable flaky texture.
- Allow for Steam Escape: When arranging your biscuit topping, don’t cover the entire filling tightly. Leave small gaps between the dough pieces. These openings are crucial for allowing steam to escape and for the delicious berry juices to bubble up and caramelize slightly on top, indicating doneness.
- No Thawing for Frozen Berries: If you’re using frozen blackberries, there’s no need to thaw them first. Simply toss the still-frozen berries with a tablespoon or two of flour (this helps absorb the extra moisture they’ll release) and then mix them with the other filling ingredients. This prevents the cobbler from becoming too watery.
- Choose Ripe Blackberries: For the best flavor, select ripe, plump blackberries that are firm and deeply colored. If they are too tart, a little extra sugar can be added to the filling.
Frequently Asked Questions About This Blackberry Cobbler Recipe
- Can I use frozen blackberries?
Absolutely! Frozen blackberries work wonderfully in this recipe. Just make sure to toss them with a little bit of extra flour (about 1-2 tablespoons) straight from the freezer before mixing them with the other filling ingredients. This extra flour helps to absorb any additional moisture that frozen berries release during baking, ensuring your filling thickens nicely. - How do I know when the cobbler is perfectly done?
You’ll know your cobbler is ready when the fruit filling is visibly bubbling vigorously around the edges and through the gaps in the topping. The biscuit topping itself should be beautifully golden brown and appear fully baked through. For extra assurance, a thin skewer or toothpick inserted into a biscuit should come out clean. - Can I bake this cobbler in a smaller pan?
Yes, you can easily halve this recipe and bake it in a 9×9-inch (23×23 cm) square baking dish. When using a smaller pan, be sure to reduce the baking time slightly and keep a close eye on the topping to prevent overbrowning. - Is it possible to make blackberry cobbler ahead of time?
Indeed! The blackberry filling can be prepared up to 2 days in advance and stored covered in the refrigerator. For longer storage, you can even freeze the filling for up to 3 months. For the best texture, always prepare and assemble the biscuit topping fresh right before baking. If using a frozen filling, thaw it overnight in the refrigerator before assembling the cobbler. - My cobbler filling is too runny. What went wrong?
A runny filling can happen for a few reasons. Ensure your cornstarch is fresh and measured accurately. If using very juicy fresh berries or frozen berries that weren’t mixed with additional flour, they might release more liquid. A slight increase in cornstarch (an extra teaspoon) can often solve this. Also, ensure the cobbler bakes long enough for the cornstarch to fully activate and thicken the juices. - Can I use other types of fruit in this cobbler recipe?
This recipe is very versatile! You can substitute blackberries with other berries like raspberries or blueberries, or even stone fruits such as sliced peaches or nectarines. Adjust the sugar content slightly depending on the sweetness of your chosen fruit.
Delightful Pairings: What to Serve with Blackberry Cobbler
Blackberry cobbler is fantastic on its own, but these accompaniments elevate it to an extraordinary dessert experience:
- Classic Vanilla Ice Cream: The quintessential pairing! The cold, creamy vanilla melts into the warm, fruity cobbler, creating a perfect hot-and-cold sensation.
- Freshly Whipped Cream: A lighter alternative, offering a delicate sweetness and airy texture that complements the rich fruit.
- A Drizzle of Heavy Cream or Sweetened Condensed Milk: For a touch of elegant simplicity, a generous pour of cold heavy cream or a rich drizzle of sweetened condensed milk adds a luscious finish.
- Lemon Zest: A little sprinkle of fresh lemon zest over the top before serving can brighten the flavors even further.
Storage & Freezing Instructions for Your Cobbler
- Storage: Any leftover blackberry cobbler should be covered tightly and stored in the refrigerator. It will remain fresh and delicious for up to 5 days. Reheat individual servings gently in the microwave or oven.
- Freezing: To freeze the baked cobbler, first allow it to cool completely. Then, wrap it securely in several layers of plastic wrap and aluminum foil to prevent freezer burn. It can be frozen for up to 3 months. To serve, thaw the cobbler overnight in the refrigerator, then cover it with foil and warm in a preheated oven at 350°F (175°C) for 15-20 minutes, or until heated through.
- Make Ahead: The blackberry filling can be made up to 2 days in advance and stored in an airtight container in the fridge. Alternatively, the filling can be frozen for up to 3 months. When you’re ready to bake, simply prepare the biscuit topping fresh and assemble the cobbler as directed. If using frozen filling, ensure it’s thawed in the fridge and comes to room temperature before assembling.
More Delicious Summer Fruit Dessert Recipes to Try
If you loved this blackberry cobbler, you’ll surely enjoy these other delightful summer fruit desserts:
- Fresh Peach Cobbler
- Peach Upside Down Cake
- Blueberry Lemon Popsicles
- Caramel Apple Poke Cake
- Instant Pot Apple Crisp
Homemade Blackberry Cobbler
By Sandy Clifton
This Homemade Blackberry Cobbler is a cozy, crowd-pleasing dessert made with juicy blackberries and a golden biscuit topping. Easy to make and perfect served warm with ice cream!
Prep: 20 mins
Cook: 1 hr
Total: 1 hr 20 mins
Servings: 10
Equipment
- 2 Large Mixing Bowls
- Pastry Cutter (or 2 Forks)
- 9×13-inch Baking Dish
- Measuring Spoons & Cups
Ingredients
Blackberry Filling
- 3 pounds Blackberries* (approx. 10 cups)
- 1 cup Brown Sugar
- 3 Tablespoons Cornstarch
- 1 Tablespoon Lemon Juice
- 1 teaspoon Vanilla Extract
Biscuit Topping
- 2 ¼ cups All-Purpose Flour, spooned & leveled
- ½ cup Granulated Sugar
- 2 ½ teaspoons Baking Powder
- ½ teaspoon Salt
- 9 Tablespoons Unsalted Butter, cold, cubed
- ¾ cup Buttermilk, cold
For Brushing Topping (just before baking):
- 2 Tablespoons Buttermilk
- 2 Tablespoons Coarse Sugar (or granulated)
Instructions
Prep
- Gather all ingredients and measure them before beginning. Preheat the oven to 350°F (175°C) and grease a 9×13-inch baking dish.
Make the Filling
- In a large mixing bowl, gently combine the blackberries, brown sugar, cornstarch, lemon juice, and vanilla extract until thoroughly mixed. Spread the filling evenly into the prepared baking dish.
Make the Biscuit Topping
- In a second large bowl, whisk together the flour, sugar, baking powder, and salt. Add the cold, cubed butter.
- Using a pastry cutter (or two forks), cut the butter into the dry ingredients until the mixture resembles coarse meal with pea-sized crumbs. (Alternatively, you can pulse briefly in a food processor).
- Stir in ¾ cup of cold buttermilk until just combined. Be careful not to overmix.
- Take small handfuls of dough and gently flatten them into rustic discs. Arrange these dough discs over the blackberry filling, leaving some gaps for steam to escape and berries to peek through.
Brush Dough with Buttermilk
- Brush the tops of the biscuit dough with the extra buttermilk and then sprinkle generously with coarse sugar (or granulated sugar).
Bake
- Bake for 45-60 minutes, or until the filling is bubbling, and the biscuit topping is golden brown and cooked through.
- Set the baking dish on a wire rack to cool for 5-10 minutes before serving. Serve warm with a scoop of vanilla ice cream or a dollop of whipped cream.
Notes
Storage: Cover and store any leftover cobbler in the refrigerator for up to 5 days. To freeze, wrap the cooled cobbler tightly and freeze for up to 3 months. Thaw overnight in the refrigerator, then cover with foil and bake at 350°F for 15-20 minutes until heated through.
Make-Ahead Instructions: The blackberry filling can be prepared up to 2 days in advance and stored in an airtight container in the fridge, or frozen for up to 3 months. Prepare the biscuit topping fresh right before baking for the best texture. If using frozen filling, thaw it completely in the fridge and let it come to room temperature before assembling.
Berries: You can use frozen blackberries (do not thaw them). Frozen berries may produce slightly more juice. Toss them with an additional 1-2 tablespoons of flour while still frozen before adding them to the recipe.
Nutrition
Approx. Nutrition per serving:
- Calories: 390 kcal
- Fat: 13g
- Carbohydrates: 67g
- Fiber: 5g
- Sugar: 32g
- Protein: 5g
(Values are estimates and will vary depending on exact ingredients and brands used.)
Additional Info
Course: Dessert
Cuisine: American