
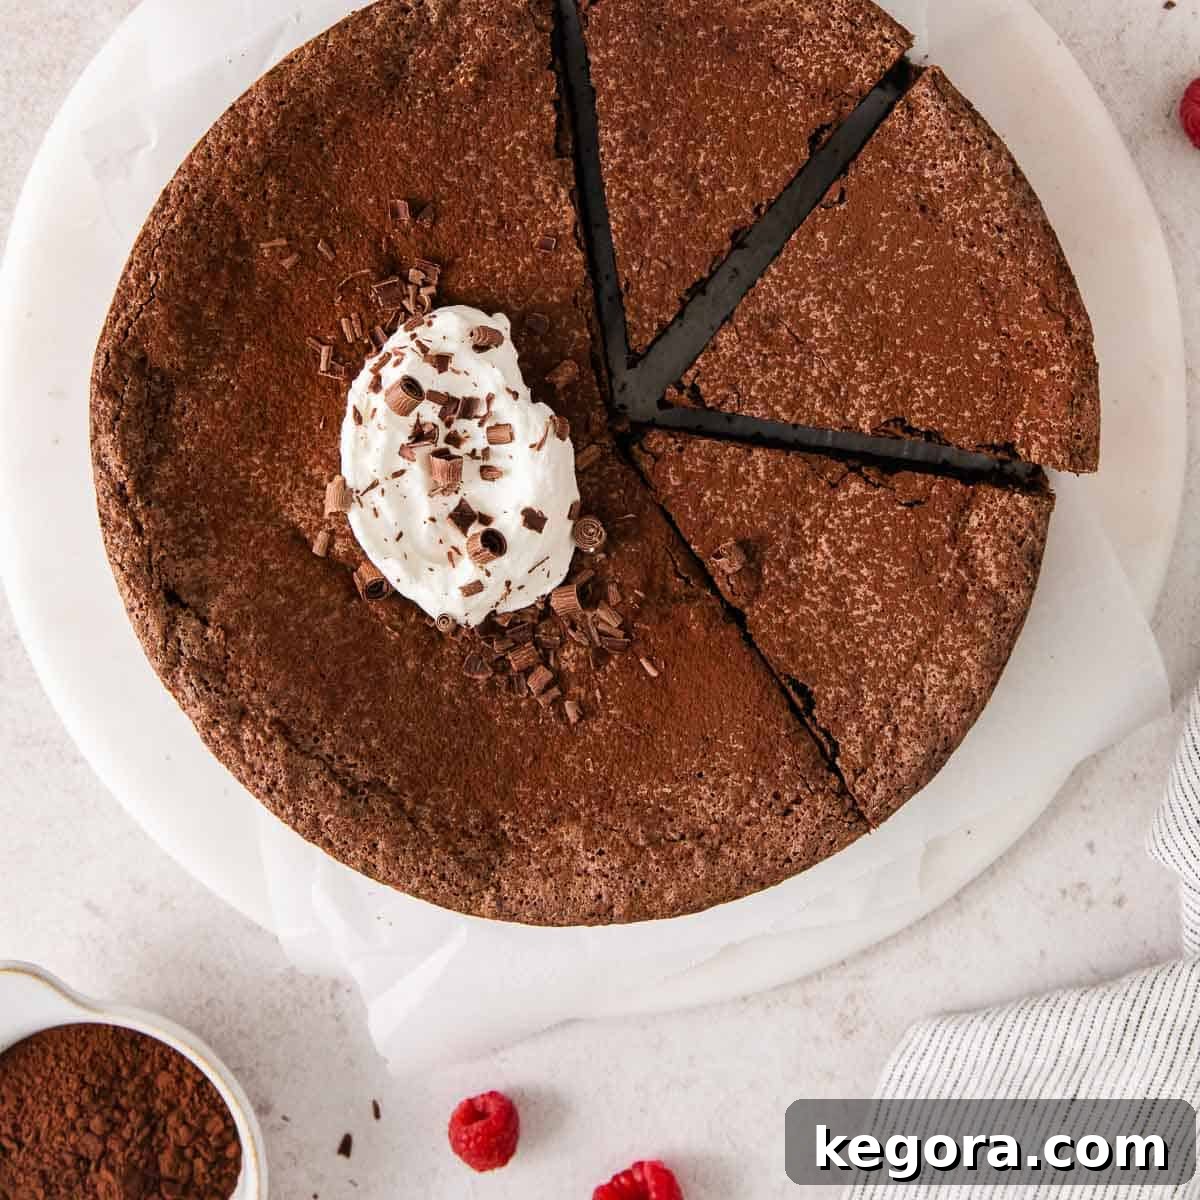
Erin’s Recipe Rundown: A Deep Dive into Perfection
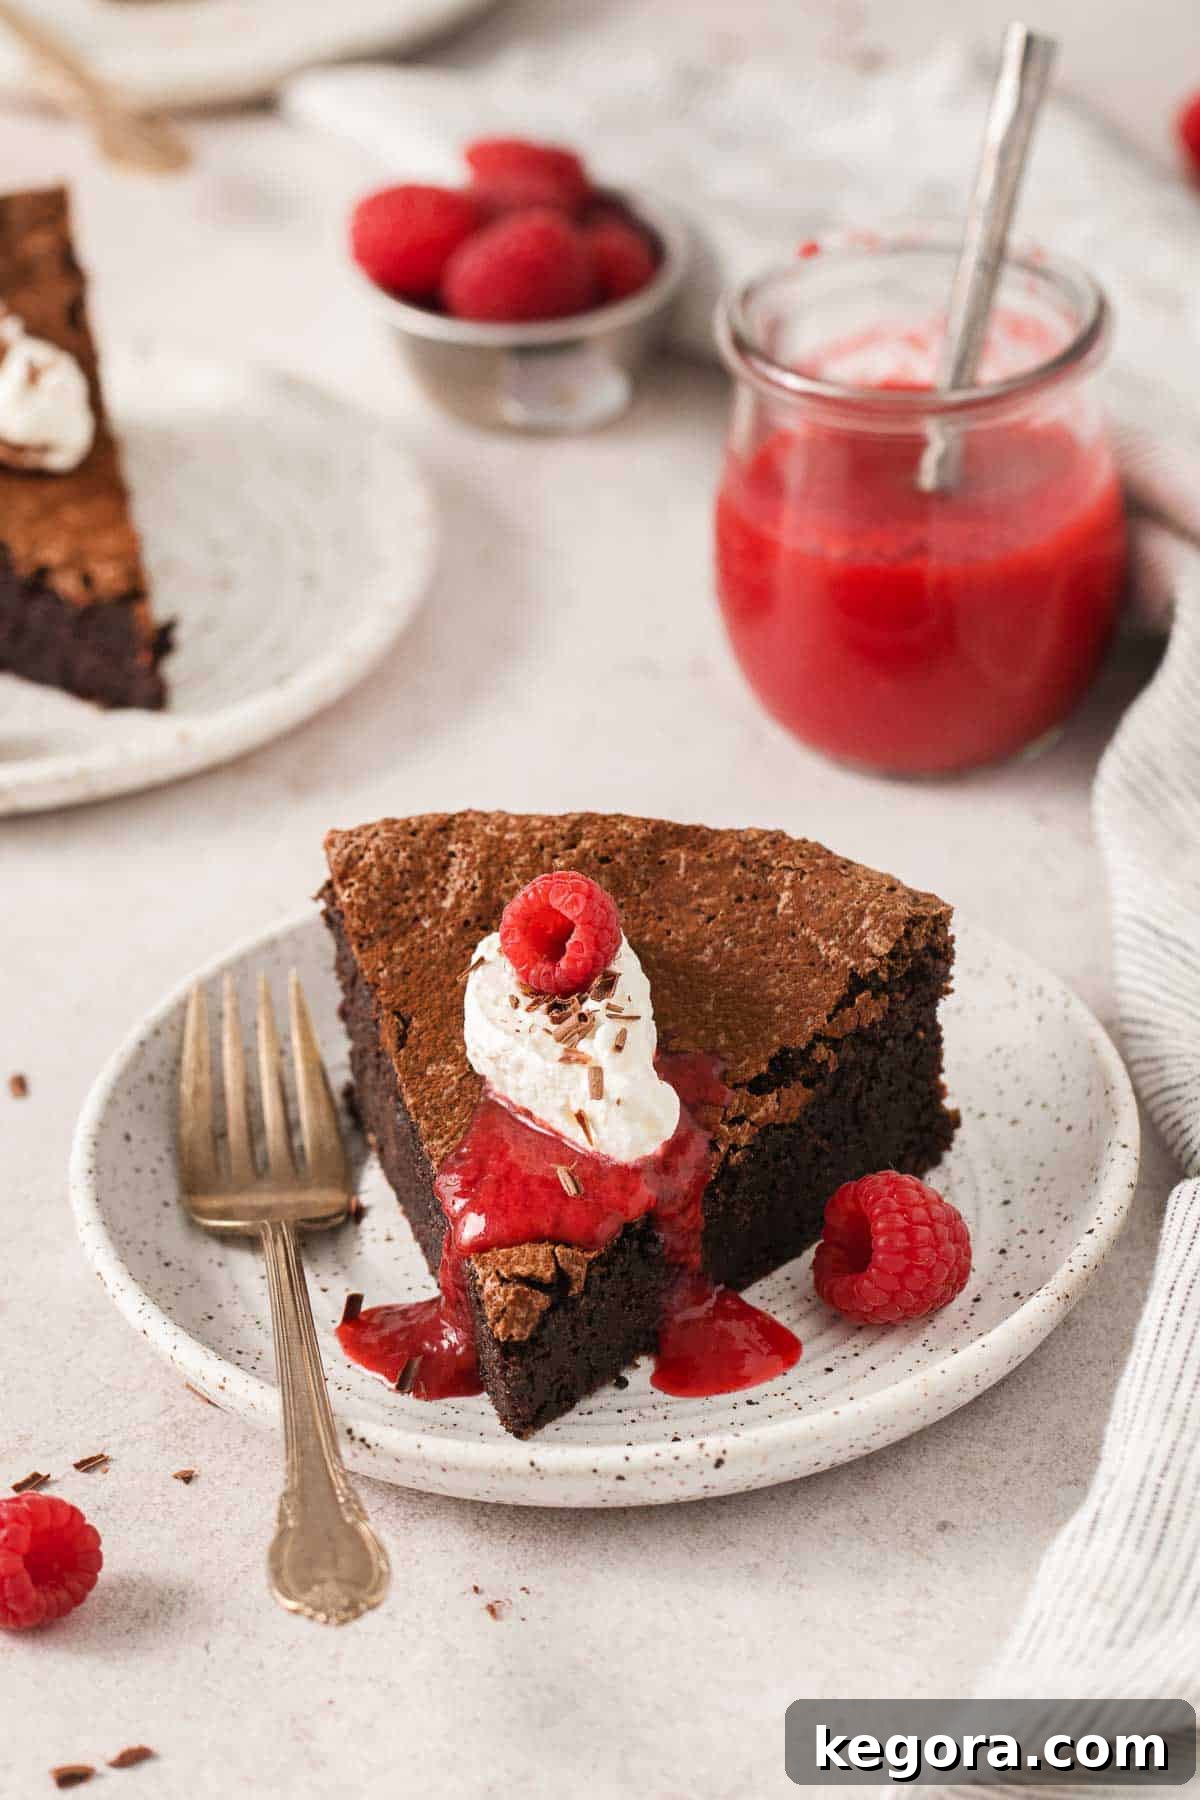
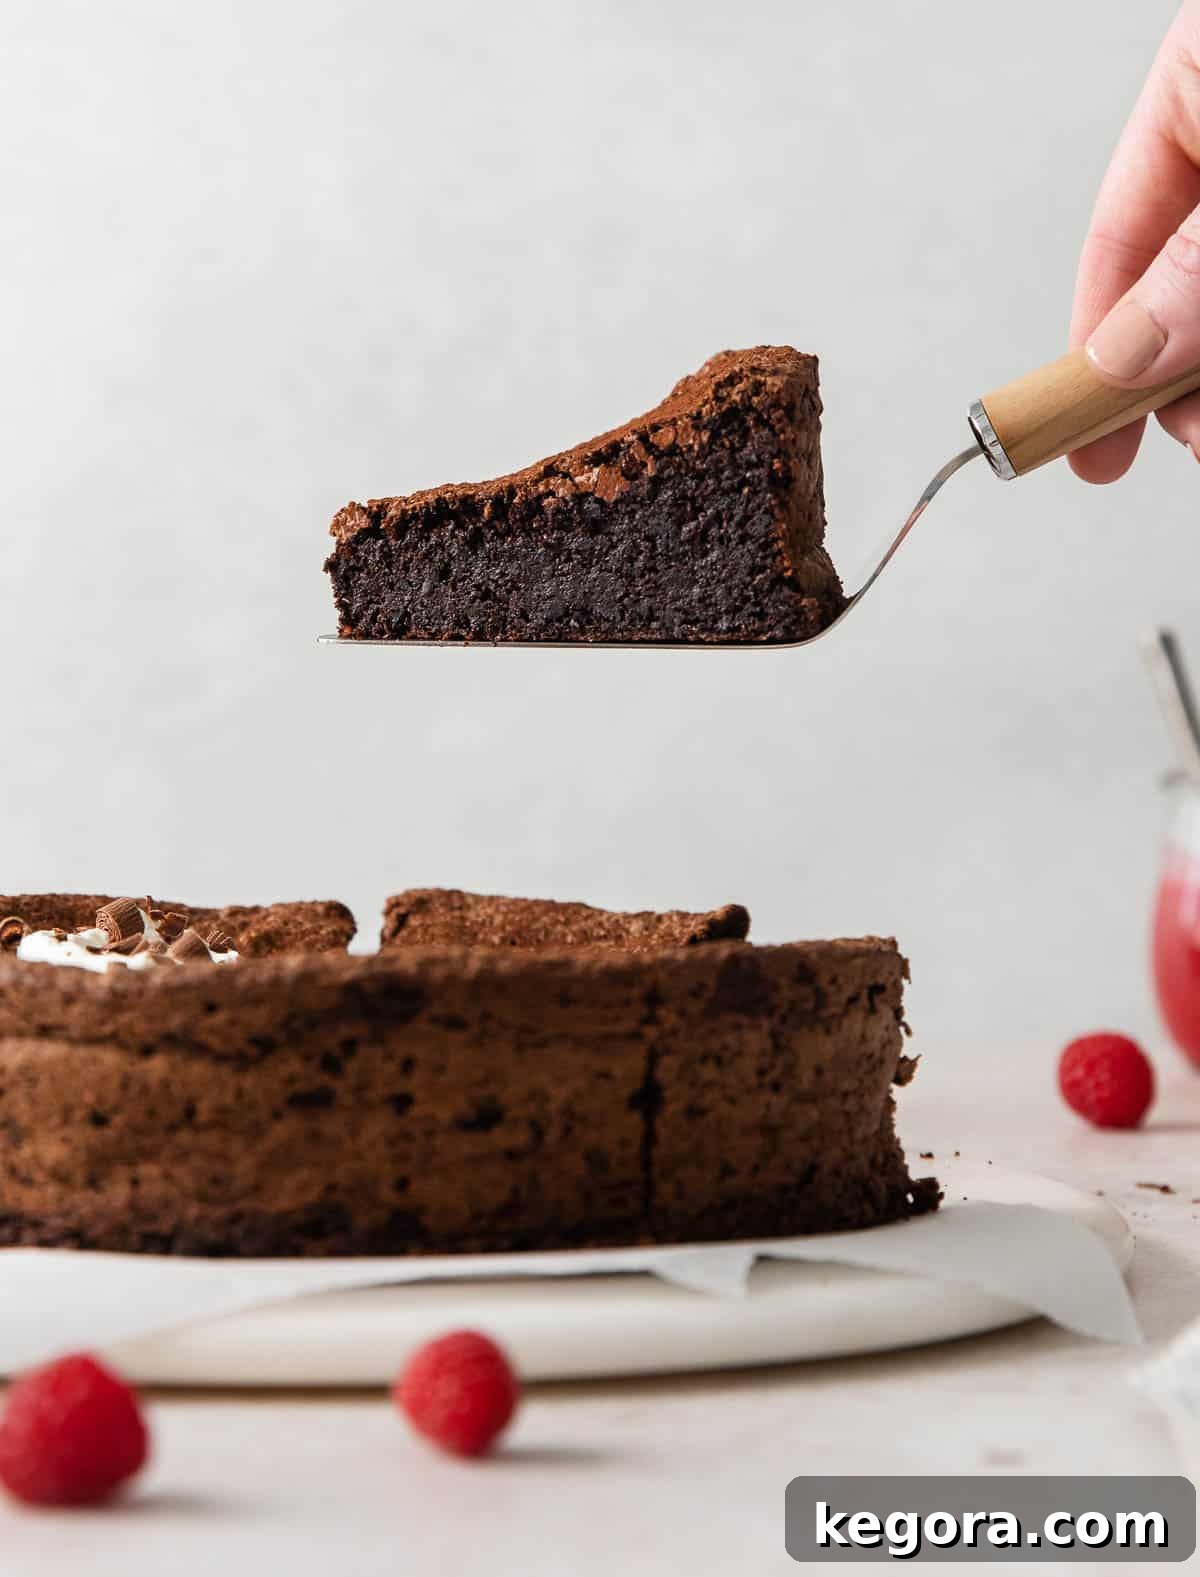
Texture: This flourless chocolate torte delivers an incredibly fudgy, dense, and rich interior. It’s almost brownie-like, yet remarkably smooth and melt-in-your-mouth. The surface boasts a delicate, crackled top, similar to a meringue, adding a delightful textural contrast that elevates every bite.
Taste: Prepare for an intensely rich and profound chocolate experience. Made with high-quality dark chocolate, this torte offers a deep, complex chocolate flavor that isn’t overly sweet, allowing the true essence of cocoa to shine through. It’s a chocolate lover’s dream, providing a luxurious taste that lingers beautifully.
Ease: Despite its gourmet appearance and sophisticated flavor, this flourless chocolate torte is surprisingly simple to prepare. It requires minimal ingredients and straightforward steps, making it an excellent choice for both novice bakers and experienced chefs looking for an impressive yet easy dessert. Don’t let its elegance fool you – it’s a truly achievable masterpiece!
Top Tips: The secret to an extraordinary flourless chocolate torte lies in the quality of your chocolate. Invest in premium dark chocolate chips or, even better, chop up a high-quality dark chocolate bar. This isn’t the place to skimp; superior chocolate will yield a superior flavor profile, making all the difference in the final taste and texture of your torte. Aim for a cocoa content of 60-70% for optimal richness without bitterness.
Would I make these again? Absolutely, without a doubt! This flourless chocolate torte has become my ultimate go-to dessert for any occasion where I want to impress guests with something that looks incredibly fancy but is remarkably easy to execute. It’s perfect for romantic Valentine’s Day dinners, celebratory anniversaries, festive holiday gatherings, or simply when you crave an exceptionally decadent treat. Its gluten-free nature also makes it a versatile choice for catering to various dietary needs without compromising on flavor or indulgence.
xoxo erin
This post was originally published in February 2024 and was thoroughly updated with new photos, detailed instructions, and expanded tips in January 2025 to bring you the most comprehensive guide to this incredible dessert.
Indulge in the Ultimate Flourless Chocolate Torte: A Rich, Fudgy, and Gluten-Free Delight
If you consider yourself a true chocolate aficionado, prepare to fall head over heels for this exquisite flourless chocolate torte. It’s not just a dessert; it’s an experience. Each bite is a journey into a world of intense chocolate flavor, with a texture that is simultaneously rich, dense, and wonderfully fudgy. This isn’t your average chocolate cake; it’s a sophisticated torte designed to satisfy the deepest chocolate cravings.
But here’s even more good news for all aspiring bakers and dessert lovers: despite its luxurious appearance and gourmet taste, this incredible dessert is surprisingly forgiving and an excellent recipe for beginners. It looks and tastes elegant enough to grace the most special occasions, yet its preparation is delightfully straightforward. Trust me, this isn’t just another dessert; it’s one of those truly crowd-pleasing, naturally gluten-free masterpieces that will have everyone asking for the recipe and dreaming about it long after the last crumb is gone!
Why You’ll Adore This Flourless Chocolate Torte
- Unforgettable Flavor: Delivers a deep, intense chocolate flavor that is truly unparalleled.
- Luxurious Texture: Exceptionally fudgy, dense, and smooth, melting in your mouth with every bite.
- Naturally Gluten-Free: Perfect for those with gluten sensitivities or anyone seeking a naturally flourless option.
- Elegantly Simple: Looks incredibly impressive and sophisticated, yet is surprisingly easy to make.
- Versatile for Any Occasion: Ideal for special celebrations like Valentine’s Day, anniversaries, birthdays, or an indulgent everyday treat.
- Make-Ahead Friendly: Can be prepared in advance, making entertaining stress-free.
Featured Comment
From Sarah: “This torte is amazing! The instructions are incredibly easy to follow, and it has turned out perfectly both times I have made it. I wholeheartedly recommend this recipe to anyone looking for a show-stopping dessert!”
View 28 more comments
Table of Contents
- Erin’s Recipe Rundown: A Deep Dive into Perfection
- Why You’ll Adore This Flourless Chocolate Torte
- Essential Ingredients for Your Flourless Chocolate Torte
- How to Create a Flawless Flourless Chocolate Torte
- Make-Ahead, Storage, and Freezing Instructions
- Serving Suggestions: What to Pair with Your Torte
- Frequently Asked Questions About Flourless Chocolate Torte
- Is “Flourless” Always “Gluten-Free”?
- Flourless Chocolate Torte vs. Regular Chocolate Cake: What’s the Difference?
- Can This Torte Be Made Dairy-Free or Nut-Free?
- Expert Tips for a Perfect Flourless Chocolate Torte
- More Irresistible Gluten-Free Chocolate Recipes
- The Best Flourless Chocolate Torte Recipe
Essential Ingredients for Your Flourless Chocolate Torte
Creating this decadent flourless chocolate torte requires just a few key ingredients, but their quality is paramount to the final taste and texture. Here are a few detailed notes on the star players you’ll need to gather. For exact measurements and a complete list, please refer to the recipe cardbelow.
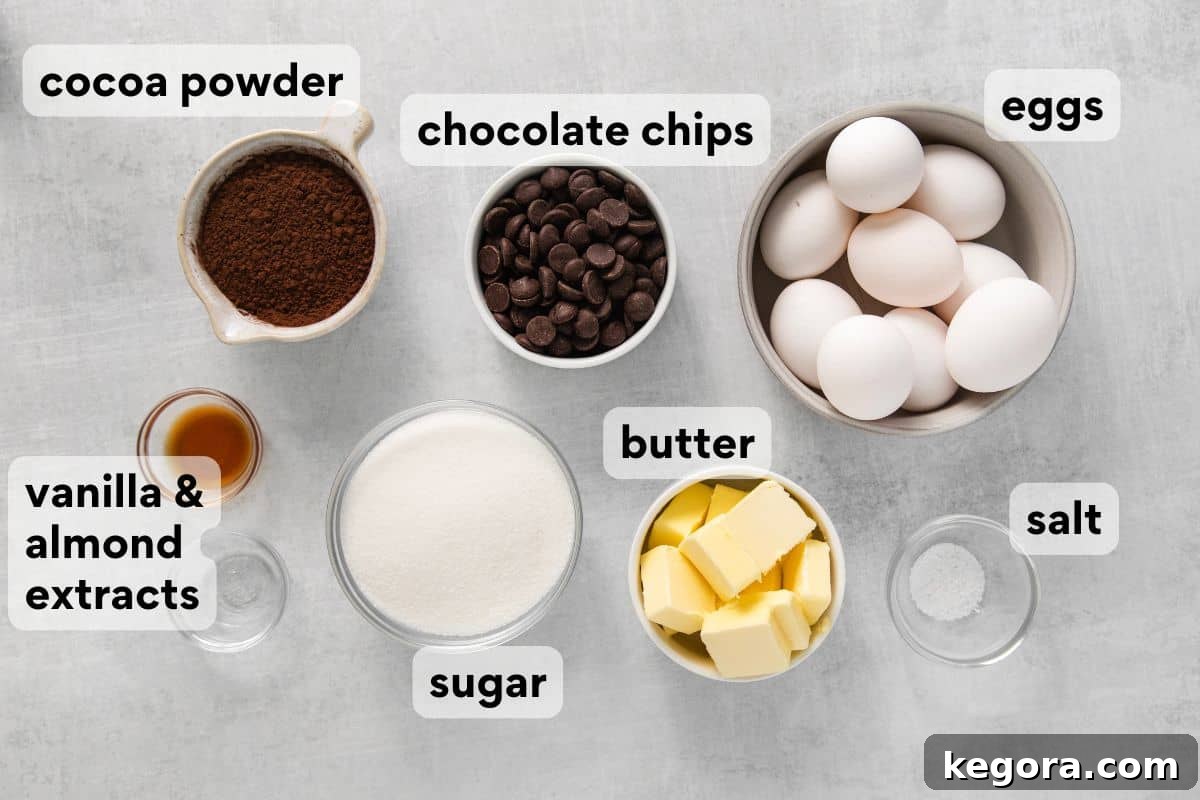
- High-Quality Chocolate Chips or Bar: This is truly the cornerstone of your torte’s flavor. The type of chocolate you select will significantly impact the richness and depth. I highly recommend using a premium dark chocolate, ideally with a cocoa content between 60% and 70%. Brands like Guittard semi-sweet or extra dark chocolate chips are fantastic choices. If you opt for a chocolate bar, ensure you chop it into small, uniform pieces for even melting. Avoid unsweetened chocolate, as the recipe relies on the sweetness from the chocolate itself and the added sugar. The richer the chocolate, the more intense and satisfying your torte will be.
- Unsalted Butter: Butter provides richness and moisture, contributing to the torte’s signature fudgy texture. Using unsalted butter allows you to control the overall salt content in the recipe. Ensure your butter is at room temperature for smooth incorporation, though for melting with chocolate, it can be cold.
- Cocoa Powder: Beyond merely adding more chocolatey goodness, cocoa powder plays a vital role in both enhancing the intense chocolate flavor and contributing to the torte’s structure. It helps create that desirable dense, fudgy texture. Just like with chocolate, using a high-quality cocoa powder, such as Guittard, will yield a noticeably superior flavor. Dutch-processed cocoa powder can offer a darker color and milder flavor.
- Large Eggs (Separated): Eggs are absolutely crucial in this flourless recipe, acting as both a binder and a leavening agent.
- Whipped Egg Whites: These are meticulously whipped with sugar to stiff peaks, incorporating air into the batter. This aeration is what gives the torte its characteristic slight rise and, more notably, creates the beautiful, delicate meringue-like crackled top layer that sets it apart.
- Egg Yolks: The yolks are essential for adding incredible richness to the flavor profile of the torte. They also act as a natural emulsifier and binder, bringing all the ingredients together to form a cohesive, decadent batter.
- Granulated Sugar: Sugar sweetens the torte, balancing the intensity of the dark chocolate, and also aids in stabilizing the whipped egg whites, contributing to the torte’s structure.
- Vanilla Extract: A staple in most dessert recipes, vanilla extract works wonders in enhancing and rounding out the complex chocolate flavors. It adds a subtle warmth and balances the overall taste of the torte, preventing it from being one-note.
- Almond Extract (Optional, but Recommended): As with many of my cherished chocolate desserts, a splash of almond extract can truly elevate this torte to an extraordinary level. It introduces a nuanced, sophisticated nutty undertone that complements the chocolate beautifully. If you need a nut-free version or prefer a pure chocolate flavor, simply omit the almond extract.
- Kosher Salt: A pinch of salt is vital for balancing the sweetness and intensifying the chocolate flavor, making it taste even richer and more profound.
For more decadent gluten-free treats, you might also enjoy this gluten-free chocolate caramel tart, a classic gluten-free tiramisu, or this delightful dairy-free chocolate fondue!
How to Create a Flawless Flourless Chocolate Torte
Crafting this elegant flourless chocolate torte is a rewarding process, and surprisingly manageable. Here’s a detailed overview of the key steps to achieve perfection. For the complete, step-by-step instructions with all measurements, make sure to jump to the recipe card for the full instructions!
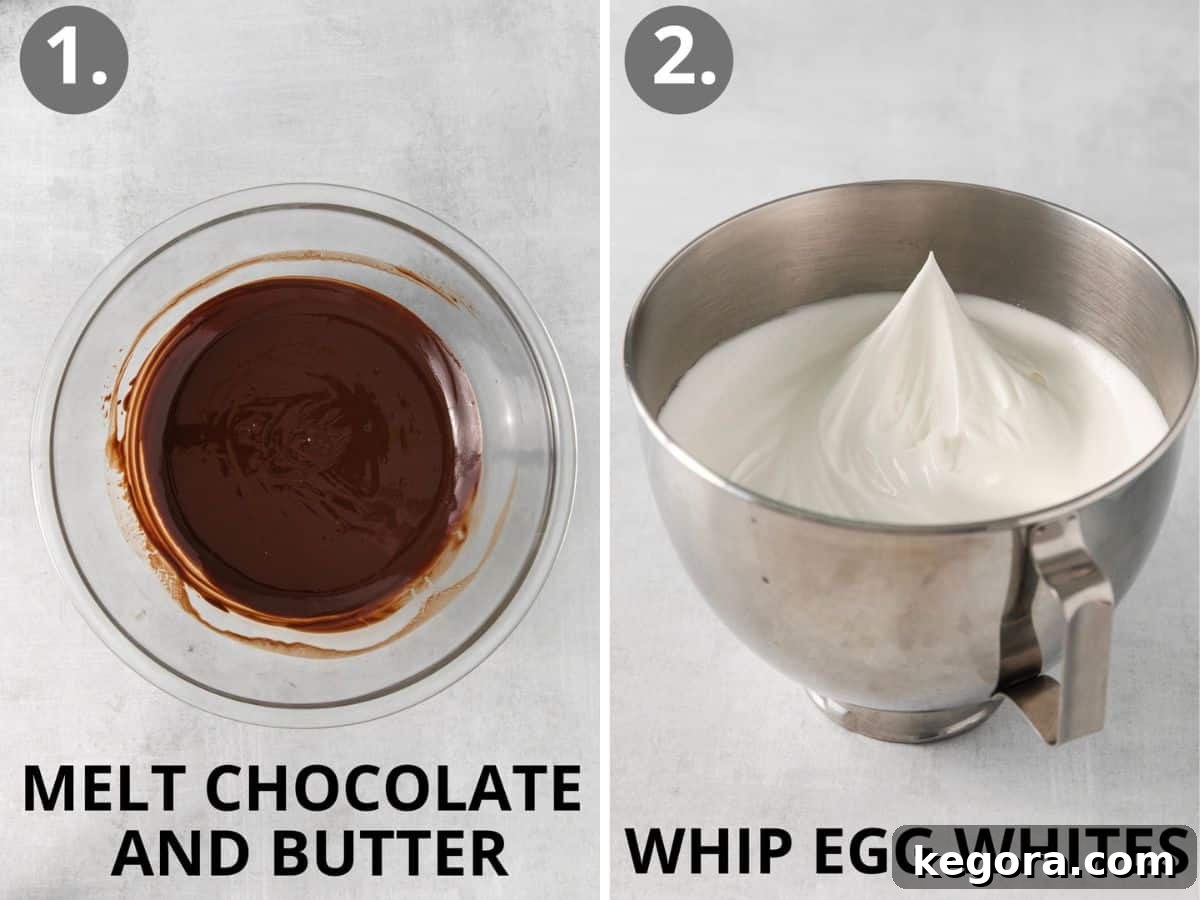
- Prepare Your Pan and Melt Chocolate: Begin by preheating your oven to 350°F (175°C) and preparing a 9-inch springform pan. Spray the bottom and sides thoroughly with cooking spray, then line the bottom with a circle of parchment paper and spray again. In a large, microwave-safe bowl, combine your high-quality chocolate chips (or chopped chocolate bar) and butter. Microwave on 50% power for 2-3 minutes, stirring every 30 seconds, until the mixture is completely melted and beautifully smooth. Set this luscious chocolate mixture aside to cool slightly while you prepare the egg whites.
- Whip Egg Whites to Perfection: Using a stand mixer fitted with a whisk attachment, or a hand mixer, combine the separated egg whites and granulated sugar. Whip on medium-high speed until you achieve stiff, glossy peaks. This process usually takes about 5-7 minutes. The stiff peaks are crucial for giving the torte its characteristic lift and contributing to the delicate crackled top. This technique is similar to what you’d use for a light and airy gluten-free angel food cake or a fluffy 7-minute frosting!
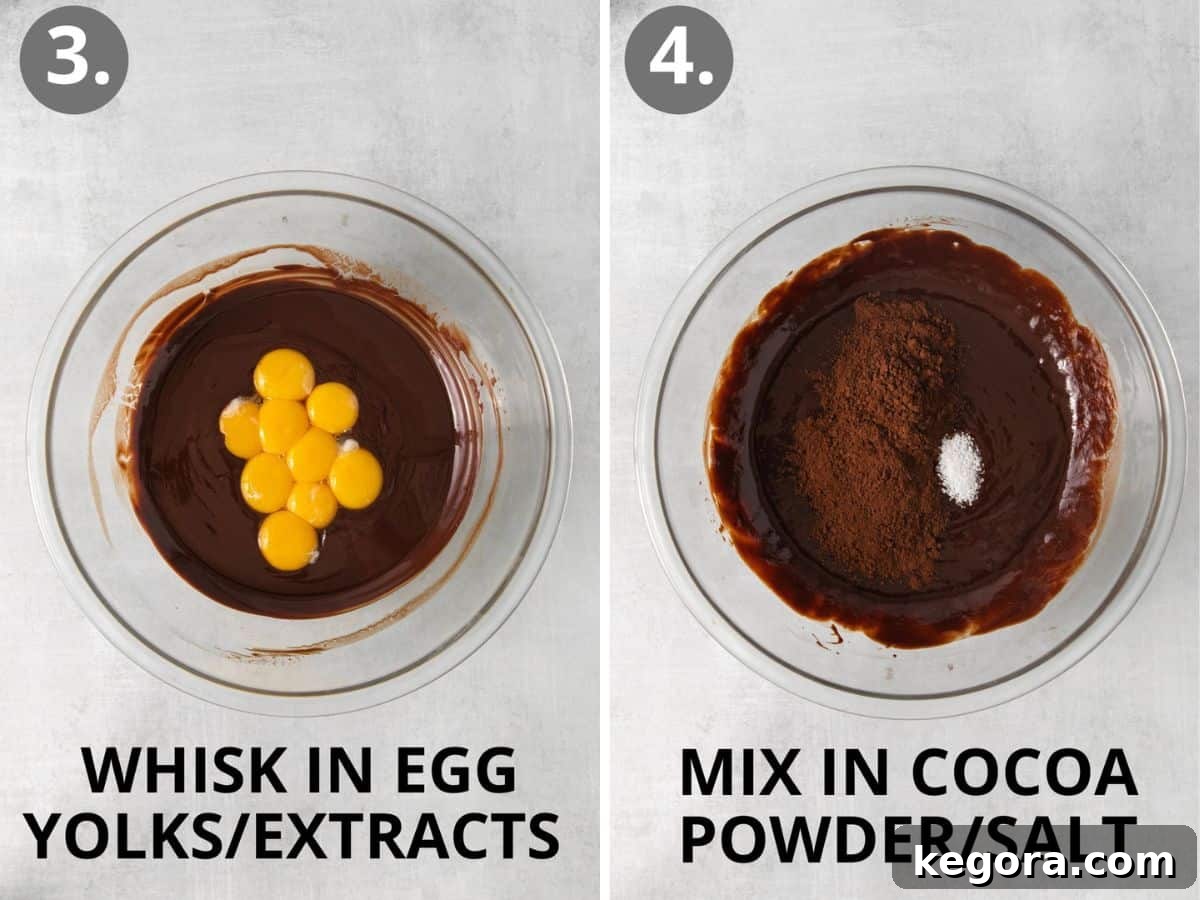
- Combine with Cooled Chocolate: Once the melted chocolate and butter mixture has cooled slightly, whisk in the vanilla extract, the optional almond extract (if using), and the egg yolks. Continue whisking until the mixture is perfectly smooth and well combined. The egg yolks will add richness and help emulsify the mixture.
- Incorporate Dry Ingredients: Gently whisk the cocoa powder and kosher salt into the chocolate-yolk mixture. Mix until everything is just combined and no streaks of dry powder remain. Be careful not to overmix at this stage; a gentle hand ensures the best texture.
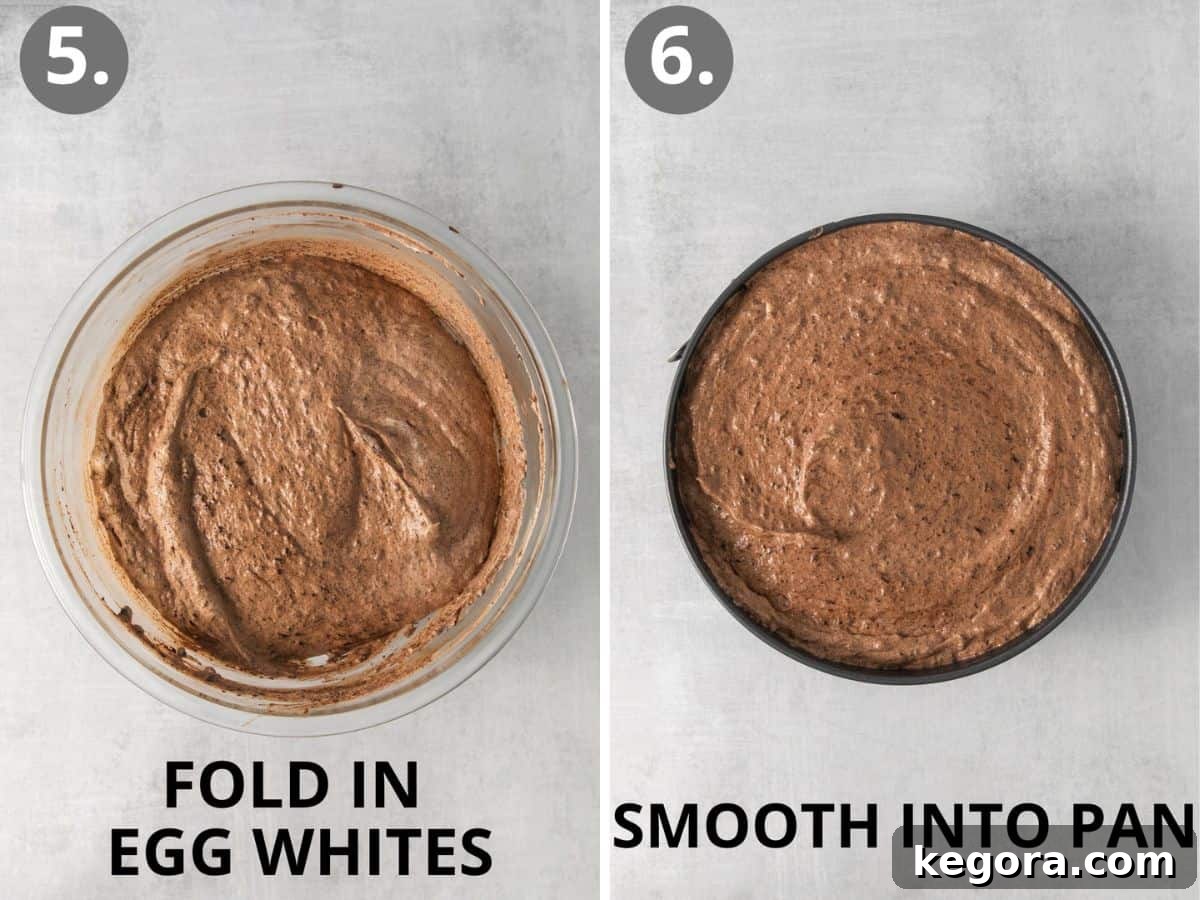
- Gently Fold in Egg Whites: This step is critical for maintaining the torte’s delicate structure. Using a rubber spatula, carefully fold about one-third of the whipped egg whites into the chocolate mixture. This “lightens” the chocolate base, making it easier to incorporate the remaining egg whites without deflating them. Then, gently fold in the rest of the whipped egg whites. The goal here is to preserve as much air as possible, ensuring a lighter, fudgier torte. Use a gentle, sweeping motion, folding from the bottom up.
- Bake to Perfection: Carefully pour the beautifully aerated batter into your prepared springform pan. Gently smooth out the top with your spatula. Bake in the preheated oven for approximately 40-45 minutes, or until the surface of the torte is visibly cracked and appears dry. You can test for doneness by inserting a toothpick into the center; it should come out with just a few moist crumbs attached, indicating a perfectly fudgy center.
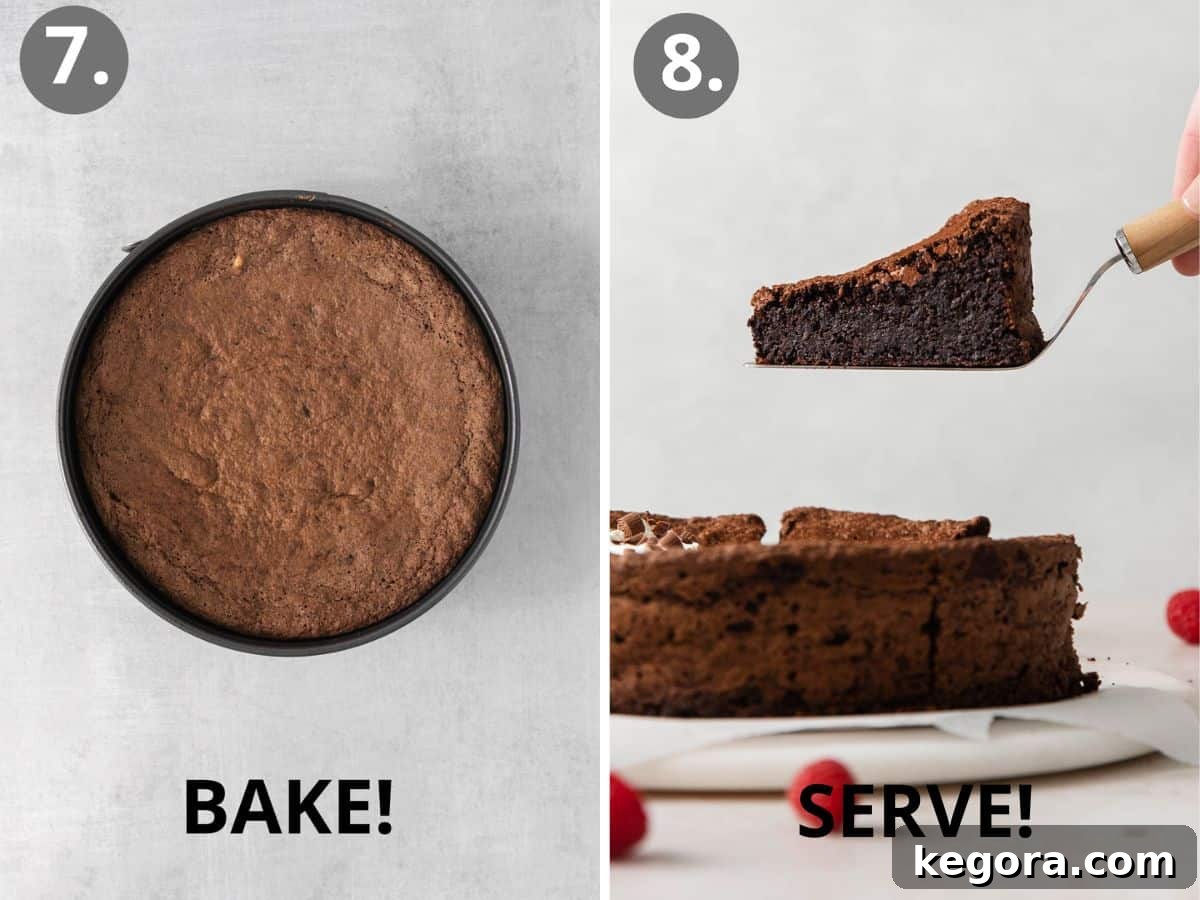
- Cooling and Pan Release: As soon as you remove the torte from the oven, immediately slide a thin knife around the edges of the pan. This crucial step helps prevent excessive cracking as the torte cools. Let it cool in the pan for about 10-15 minutes. Run the knife around the edges once more to ensure it’s completely loosened, then carefully release and remove the springform pan. Transfer the torte to a serving plate or wire rack to continue cooling completely. Don’t be alarmed if the center gently collapses as it cools – this is entirely normal and expected for a flourless torte, giving it its characteristic dense, fudgy center and unique charm!
- Serve and Enjoy: Once fully cooled, give your magnificent torte a final flourish with a dusting of cocoa powder or powdered sugar. Serve slices as is, or with your favorite accompaniments. Get ready to impress!
Make-Ahead, Storage, and Freezing Instructions for Your Torte
Planning ahead or managing leftovers is easy with this versatile flourless chocolate torte:
To Make-Ahead: This flourless chocolate torte truly shines within the first day or two of being baked, when its fudgy texture and crackled top are at their peak. If you’re preparing it for an event, you can bake it a day in advance. For the freshest presentation, I recommend waiting to dust it with cocoa powder or add any other toppings until just before serving. This ensures a pristine, elegant look for your guests.
To Store: Once cooled, store your torte in an airtight container to maintain its moisture and flavor. It will keep beautifully at room temperature for up to 2 days. For extended freshness, especially in warmer climates, you can refrigerate it for up to 5 days. If refrigerated, allow it to come to room temperature for about 30 minutes before serving to achieve the optimal fudgy consistency.
To Freeze: This torte freezes exceptionally well! First, ensure the torte is completely cooled to prevent ice crystals from forming. Wrap the entire torte (or individual slices) tightly in plastic wrap, then an additional layer of aluminum foil. This double-layer protection is key to preventing freezer burn. Freeze for up to 2 months. When you’re ready to enjoy it, thaw the torte overnight in the refrigerator or at room temperature for 1-2 hours until softened. It will taste just as delicious as when freshly baked!
Serving Suggestions: What to Pair with Your Decadent Torte
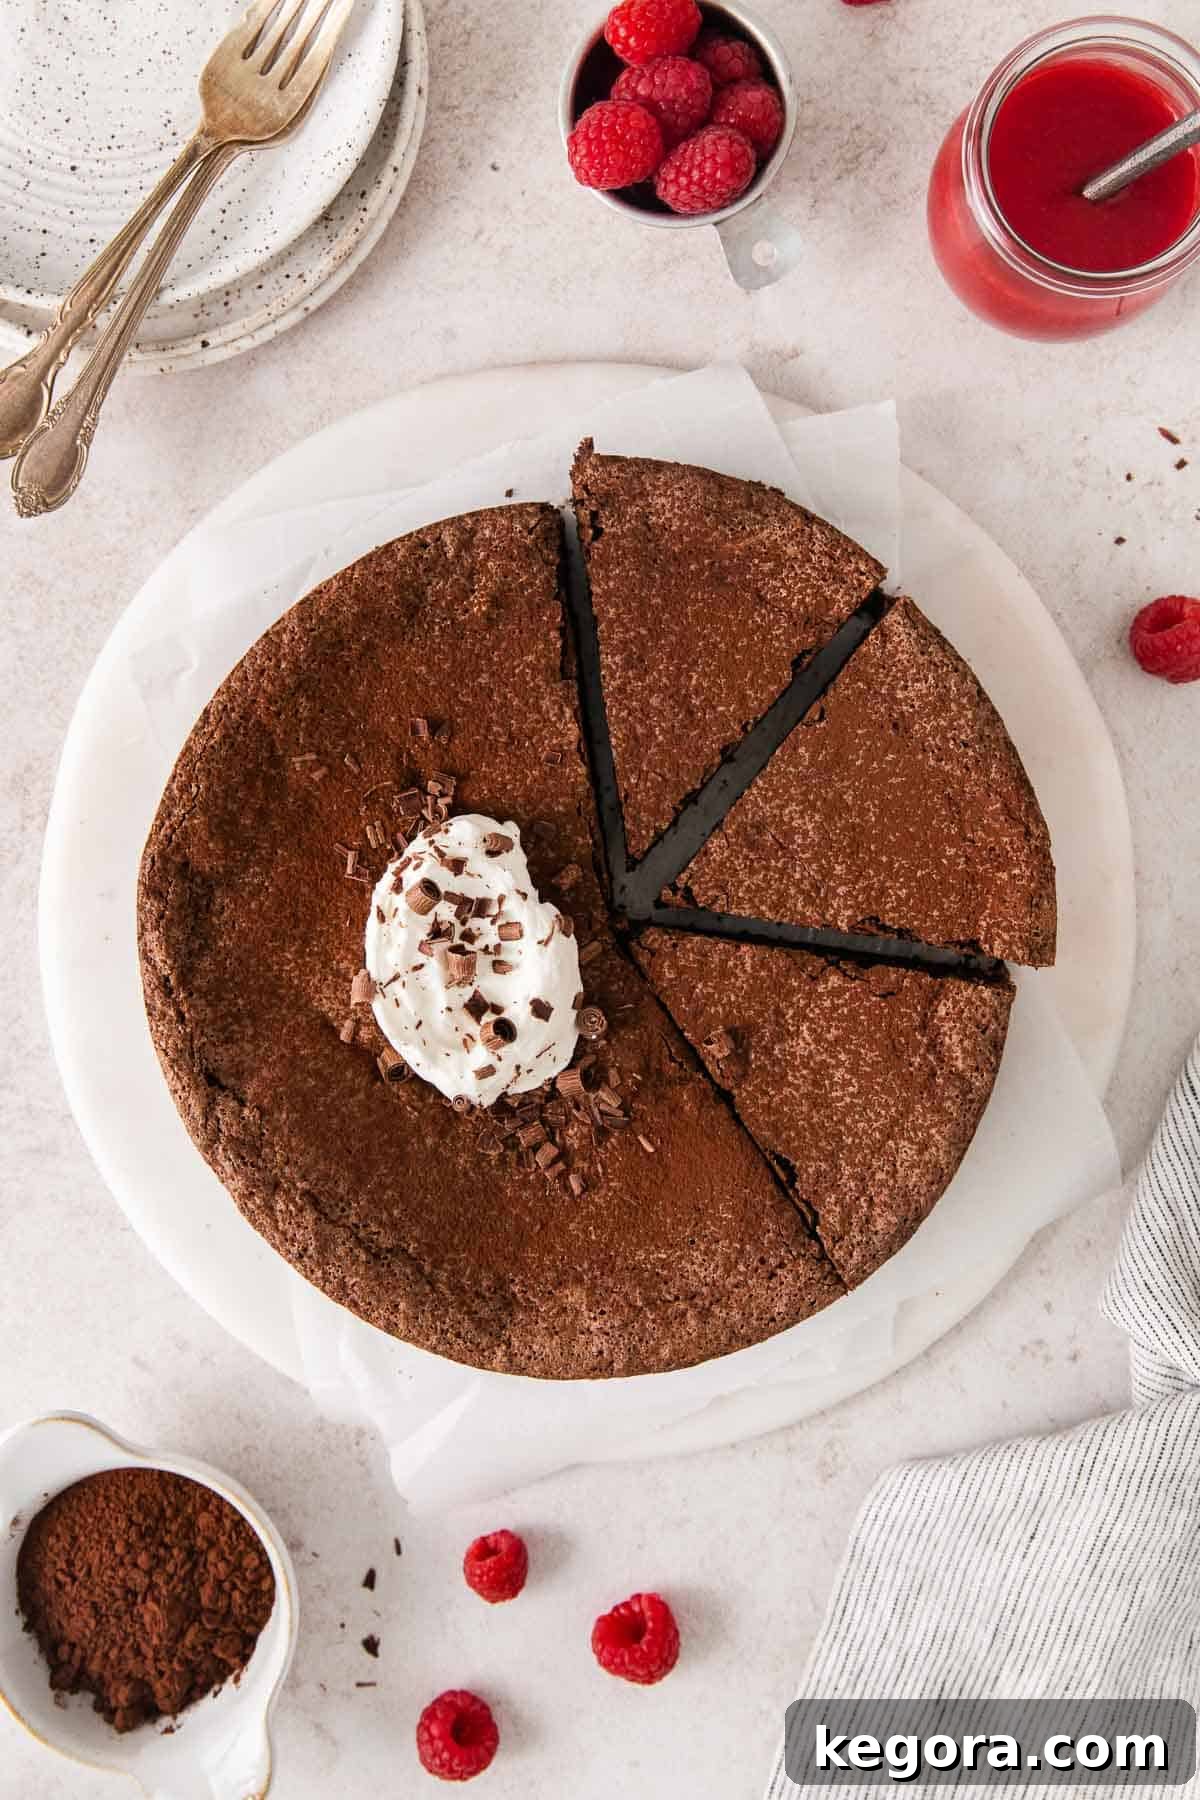
This rich flourless chocolate torte is delicious on its own, but it truly transforms into an unforgettable dessert with the right accompaniments. Its deep chocolate flavor makes it a perfect canvas for a variety of complementary toppings and pairings:
- Simple Dusting: A light dusting of cocoa powder or powdered sugar adds a classic, elegant finish and a subtle hint of extra sweetness or bitterness, depending on your choice.
- Berry Sauces: The tartness of berries cuts through the richness of the chocolate beautifully. Consider a vibrant raspberry coulis for a sophisticated touch, or a homemade fruit compote like luscious raspberry compote or sweet strawberry compote.
- Fresh Fruit: A handful of fresh berries – raspberries, strawberries, blueberries, or blackberries – provides a burst of freshness and color. Sliced oranges or cherries also pair wonderfully with dark chocolate.
- Whipped Cream: A dollop of freshly whipped cream, perhaps lightly sweetened with vanilla, offers a creamy, light contrast to the dense torte. For a dairy-free option, coconut whipped cream is an excellent choice.
- Chocolate Accents: Elevate the chocolate experience with delicate chocolate shavings, a rich chocolate glaze, or a drizzle of warm chocolate ganache.
- Caramel Drizzle: The salty-sweet notes of caramel complement chocolate beautifully. A homemade caramel sauce or a dairy-free caramel sauce can add another layer of indulgence.
- Ice Cream or Sorbet: A scoop of vanilla bean ice cream provides a delightful creamy contrast, while a raspberry or passion fruit sorbet can add a refreshing, tangy counterpoint.
- Coffee or Liqueur: Serve alongside a robust espresso, a rich coffee, or a glass of port wine, Grand Marnier, or a raspberry liqueur for an ultimate after-dinner treat.
Frequently Asked Questions About Flourless Chocolate Torte
Is “Flourless” Always “Gluten-Free”?
While a flourless cake is *typically* gluten-free, it’s important to exercise caution if you are strictly adhering to a gluten-free diet. The term “flourless” simply means no wheat flour is used in the main cake batter. However, some flourless desserts might contain other gluten-containing ingredients in their frosting, fillings, or garnishes. Always check the full ingredient list if you have celiac disease or a severe gluten sensitivity. Rest assured, this specific flourless chocolate torte recipe is completely gluten-free, making it a safe and delicious option for everyone!
Flourless Chocolate Torte vs. Regular Chocolate Cake: What’s the Difference?
The distinction between a flourless chocolate torte and a regular chocolate cake lies primarily in their structure, texture, and flavor intensity.
- Flourless Chocolate Torte: This torte derives its structure and richness almost entirely from eggs and high-quality chocolate. Without flour to absorb moisture, it results in an incredibly dense, fudgy, and often mousse-like texture that melts in your mouth. The flavor is intensely chocolatey, pure, and profound, without the “cakey” mouthfeel. The top often develops a natural, meringue-like crackle.
- Regular Chocolate Cake: Traditional chocolate cakes rely on wheat flour (or gluten-free flour blends) and leavening agents like baking powder or baking soda. This combination creates a lighter, airier, and more crumbly “sponge” texture. The chocolate flavor, while delicious, tends to be milder and sweeter, often complemented by various frostings and fillings.
Can This Torte Be Made Dairy-Free or Nut-Free?
Absolutely! This recipe is wonderfully adaptable to cater to various dietary needs:
- For a Dairy-Free Version: Simply substitute the butter with a high-quality vegan butter (ensure it’s suitable for baking) and use dairy-free dark chocolate chips or a chopped dairy-free dark chocolate bar. The results will be equally rich and delicious!
- For a Nut-Free Version: The only ingredient containing nuts in the original recipe is the almond extract. To make it completely nut-free, simply omit the almond extract. The torte will still have a fantastic, pure chocolate flavor without it.
Do I Need a Springform Pan for This Torte?
While it’s possible to make this torte in a regular round cake pan, a springform pan is highly recommended. The springform pan’s removable sides make it incredibly easy to release the delicate torte without damaging its edges or fudgy interior. This ensures a beautifully presented dessert every time. If using a regular pan, you’ll need to carefully invert the cooled torte onto a serving plate.
Why Did My Torte Crack (Beyond the Normal Crackle)?
A beautiful, slightly crackled top is a signature of this flourless chocolate torte and is perfectly normal and desired. However, if your torte developed excessive, deep cracks, it might be due to a few factors:
- Overbaking: Overbaking can dry out the torte and cause more pronounced cracking. The torte is done when a toothpick inserted in the center comes out with moist crumbs, not completely clean.
- Sudden Temperature Changes: Rapid cooling can also lead to more severe cracking. Allowing the torte to cool gradually in the pan before removing it helps minimize this.
- Not Running a Knife Around the Edges Immediately: As mentioned in the instructions, running a knife around the perimeter of the torte immediately after removing it from the oven helps the edges pull away from the pan gracefully as it cools and contracts, significantly reducing cracking.
Can I Use Milk Chocolate Instead of Dark Chocolate?
While technically possible, using milk chocolate will significantly alter the flavor and texture of this torte. The recipe is designed around the intense, complex flavor of dark chocolate. Milk chocolate is sweeter and contains more milk solids, which could result in a much sweeter torte with a different, possibly less dense and fudgy, texture. For the best results and the intended luxurious experience, stick to high-quality dark or semi-sweet chocolate as recommended.
Expert Tips for a Perfect Flourless Chocolate Torte
Achieving a truly spectacular flourless chocolate torte is easy with these insider tips:
- Prioritize High-Quality Chocolate: This cannot be stressed enough. Since chocolate is the primary flavor and structural component, using premium dark chocolate (60-70% cocoa) and quality cocoa powder will make an enormous difference in taste, richness, and overall success. Brands like Guittard are excellent choices.
- Ensure Ingredients are at Room Temperature: While not all ingredients need to be room temperature (like the chocolate and butter for melting), having your eggs at room temperature is beneficial. Room temperature egg whites whip up with greater volume and stability, which is crucial for the torte’s lift and texture.
- Don’t Overmix the Batter: After incorporating the cocoa powder and particularly when folding in the whipped egg whites, mix gently and only until just combined. Overmixing will deflate the egg whites, leading to a denser, less fudgy torte. The goal is to retain as much air as possible.
- Embrace the Collapse: It’s perfectly normal, and indeed expected, for this flourless chocolate torte to collapse slightly in the center as it cools. This signature sunken center is part of its charm and contributes to its dense, fudgy character. Do not be alarmed; it’s a sign of a well-made torte!
- Minimize Cracking with a Quick Knife Run: To help prevent excessive cracking on the top surface, run a thin knife around the edge of the torte immediately after removing it from the oven. This helps release the torte from the pan as it cools and shrinks, allowing for a smoother contraction.
- Cool Completely Before Serving: While it’s tempting to dive in right away, allowing the torte to cool completely (and ideally chill slightly) allows its fudgy texture to fully set and the flavors to deepen.
- Proper Pan Preparation: Thoroughly greasing and lining your springform pan with parchment paper prevents sticking and ensures an easy release, preserving the torte’s beautiful appearance.
More Irresistible Gluten-Free Chocolate Recipes
If you’re a fan of rich, chocolatey, and gluten-free desserts, you’ll love exploring these other delicious recipes:
- Dark Chocolate Pots De Crème
- Gluten-Free Chocolate Lava Cake
- Gluten-Free Chocolate Mousse Cake
- Gluten-Free Chocolate Cupcakes
- Gluten-Free Chocolate Cake
- Gluten-Free Brownies
- Gluten-Free Chocolate Crinkle Cookies
- Flourless Chocolate Cookies
The Best Flourless Chocolate Torte
Forget traditional flourless chocolate cake! This chocolate torte offers an even richer, more luxurious experience. It boasts a deeply fudgy chocolate interior crowned with a delicate, meringue-like crackled top – a truly irresistible gluten-free dessert.
Comments
Sign up for our newsletter to never miss a delicious recipe. We respect your privacy!
Click to Save (Email)
Ingredients
- 12 ounces (340g) high-quality chocolate chips or chopped chocolate bars
- ¾ cup (170g) unsalted butter
- 9 large eggs, separated
- 1¼ cups (250g) granulated sugar
- 1 teaspoon vanilla extract
- ¼ teaspoon almond extract (optional, for enhanced flavor)
- ½ cup (41g) high-quality cocoa powder, plus extra for dusting
- ½ teaspoon kosher salt
Instructions
-
Preheat your oven to 350°F (175°C). Prepare a 9-inch round springform pan by spraying the bottom and sides thoroughly with cooking spray. Line the bottom of the pan with a circle of parchment paper, then spray the paper with a little more cooking spray. Set the prepared pan aside.
-
In a large, microwave-safe bowl, combine the chocolate chips (or chopped chocolate bar) and butter. Microwave on 50% power for 2-3 minutes, stirring gently every 30 seconds, until the mixture is completely smooth and melted. Allow the melted chocolate mixture to cool slightly.
-
In the bowl of a stand mixer fitted with the whisk attachment (or using a hand mixer), whip together the separated egg whites and granulated sugar on medium-high speed until stiff, glossy peaks form. This process should take approximately 5-7 minutes.
-
Once the chocolate mixture has cooled, add the vanilla extract, almond extract (if using), and egg yolks to it. Whisk thoroughly until the mixture is smooth and well combined. Next, whisk in the cocoa powder and kosher salt until just incorporated and no dry streaks remain.
-
Using a rubber spatula, carefully fold about one-third of the whipped egg whites into the chocolate mixture to lighten it. Then, gently fold in the remaining egg whites, taking great care to maintain as much air as possible in the batter. Overmixing will deflate the egg whites.
-
Pour the torte batter into the prepared springform pan and gently smooth out the top. Bake for 40-45 minutes, or until the surface appears cracked and dry. A toothpick inserted into the center should come out with a few moist crumbs attached, indicating a perfectly fudgy interior.
-
Remove the torte from the oven and immediately run a thin knife around the edges of the pan. Let the cake cool in the pan for 10-15 minutes. Run the knife around the sides of the pan again to ensure it’s completely loosened, then carefully remove the springform pan. Transfer the torte to a serving plate or wire rack to cool completely.
-
As the torte cools, its center will gently collapse. This is completely normal and expected, giving it a dense, fudgy character. Before serving, dust generously with additional cocoa powder for a beautiful finish. Enjoy your exquisite flourless chocolate torte!
Notes
Expected Collapse: Do not be alarmed if the torte collapses in the center as it cools. This is a characteristic feature of flourless tortes and contributes to its dense, fudgy texture and rustic charm.
Minimize Cracking: Immediately after removing the torte from the oven, run a knife around the edge of the pan. This helps the torte pull away cleanly as it cools and contracts, minimizing excessive cracking on the surface.
Topping Ideas: This versatile torte pairs wonderfully with a variety of toppings. Consider a simple dusting of cocoa powder or powdered sugar, a tangy raspberry coulis, fresh berries, whipped cream, chocolate shavings, or a drizzle of caramel sauce.
Dairy-Free Option: For a dairy-free version, substitute unsalted butter with a good quality vegan butter and use dairy-free dark chocolate chips or a dairy-free chocolate bar.
Nut-Free Option: If you need a nut-free dessert, simply omit the almond extract from the ingredients. The torte will still be incredibly flavorful.
Make-Ahead: This torte tastes best within 1-2 days of baking. If preparing in advance, wait to dust with cocoa powder until just before serving for the freshest look.
Storage: Store the cooled torte in an airtight container at room temperature for up to 2 days, or refrigerate for up to 5 days. Allow to come to room temperature before serving if refrigerated.
Freezing: Once completely cooled, wrap the torte tightly in plastic wrap, then in aluminum foil, and freeze for up to 2 months. Thaw overnight in the refrigerator or at room temperature for 1-2 hours before serving.