
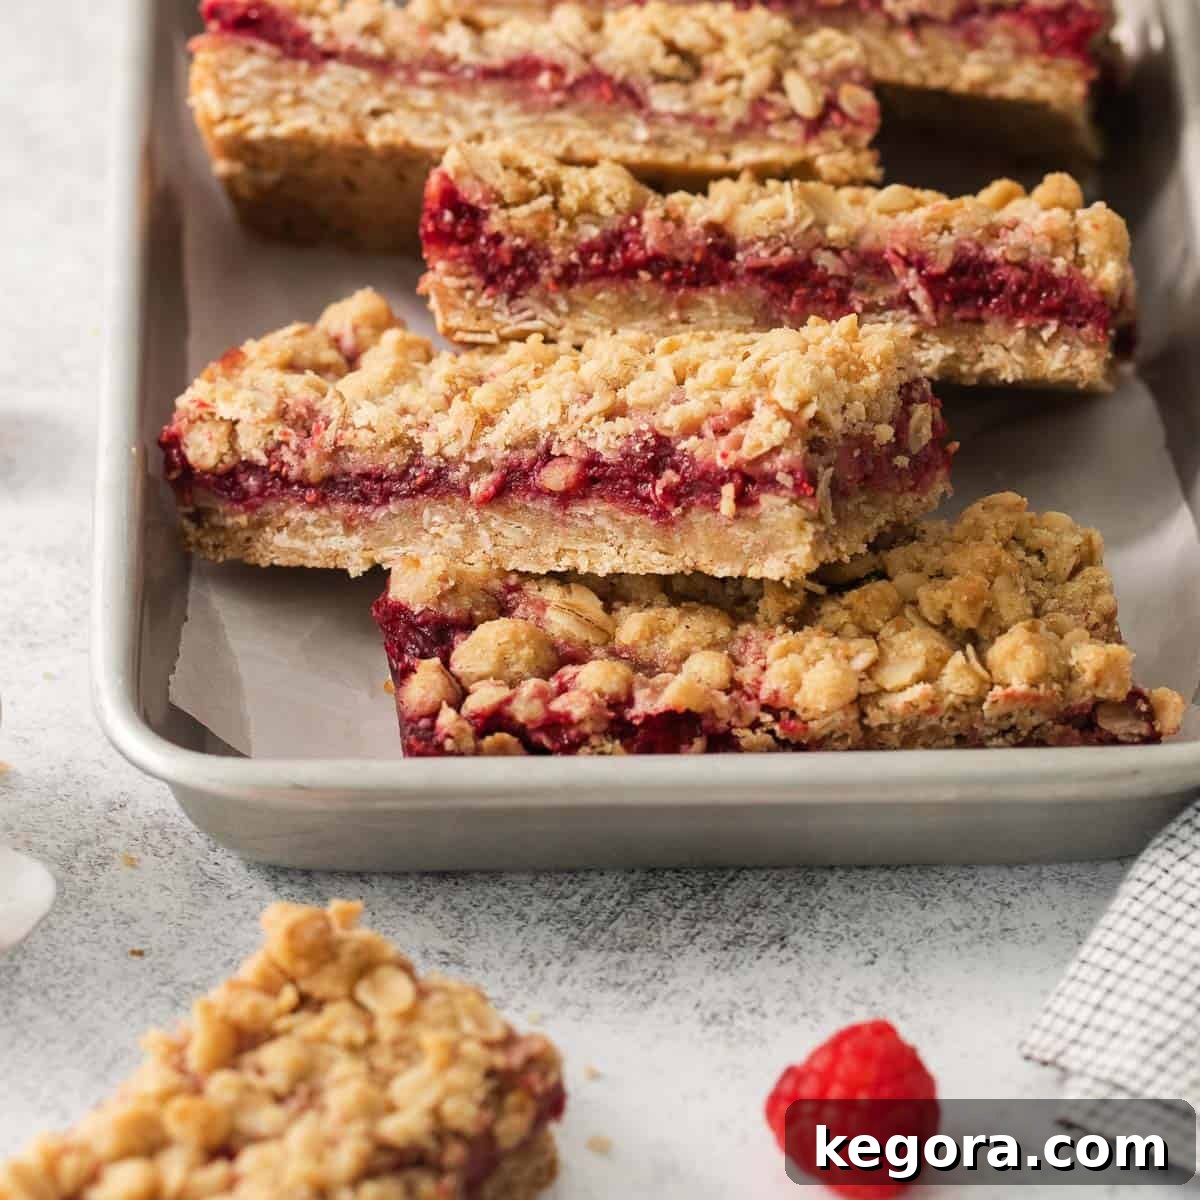
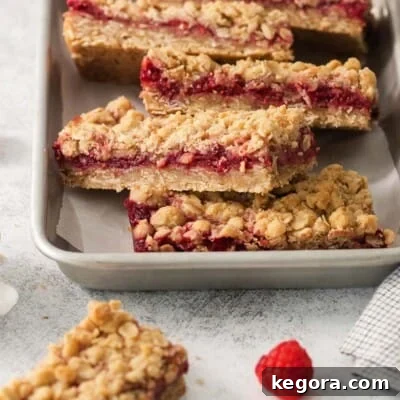
Craving a sweet and tangy treat that’s also entirely gluten-free? Look no further than these utterly irresistible Gluten-Free Raspberry Bars! Imagine a tender, buttery brown sugar oat crumble paired with a vibrant, luscious homemade raspberry filling – it’s a match made in heaven that captures the essence of summer in every single bite. Perfect for picnics, potlucks, or simply enjoying with a cup of coffee, these bars are poised to become your new favorite dessert, no matter the season.
What sets this recipe apart and guarantees a flawless filling every time? It’s all in the details! Our secret weapon involves two key steps: first, opting for frozen raspberries instead of fresh, and second, incorporating a crucial tablespoon of gluten-free flour into the fruit mixture. These simple tricks ensure a perfectly set, deliciously flavorful raspberry layer that won’t disappoint. Get ready to discover all the expert tips that will elevate your baking to the next level!
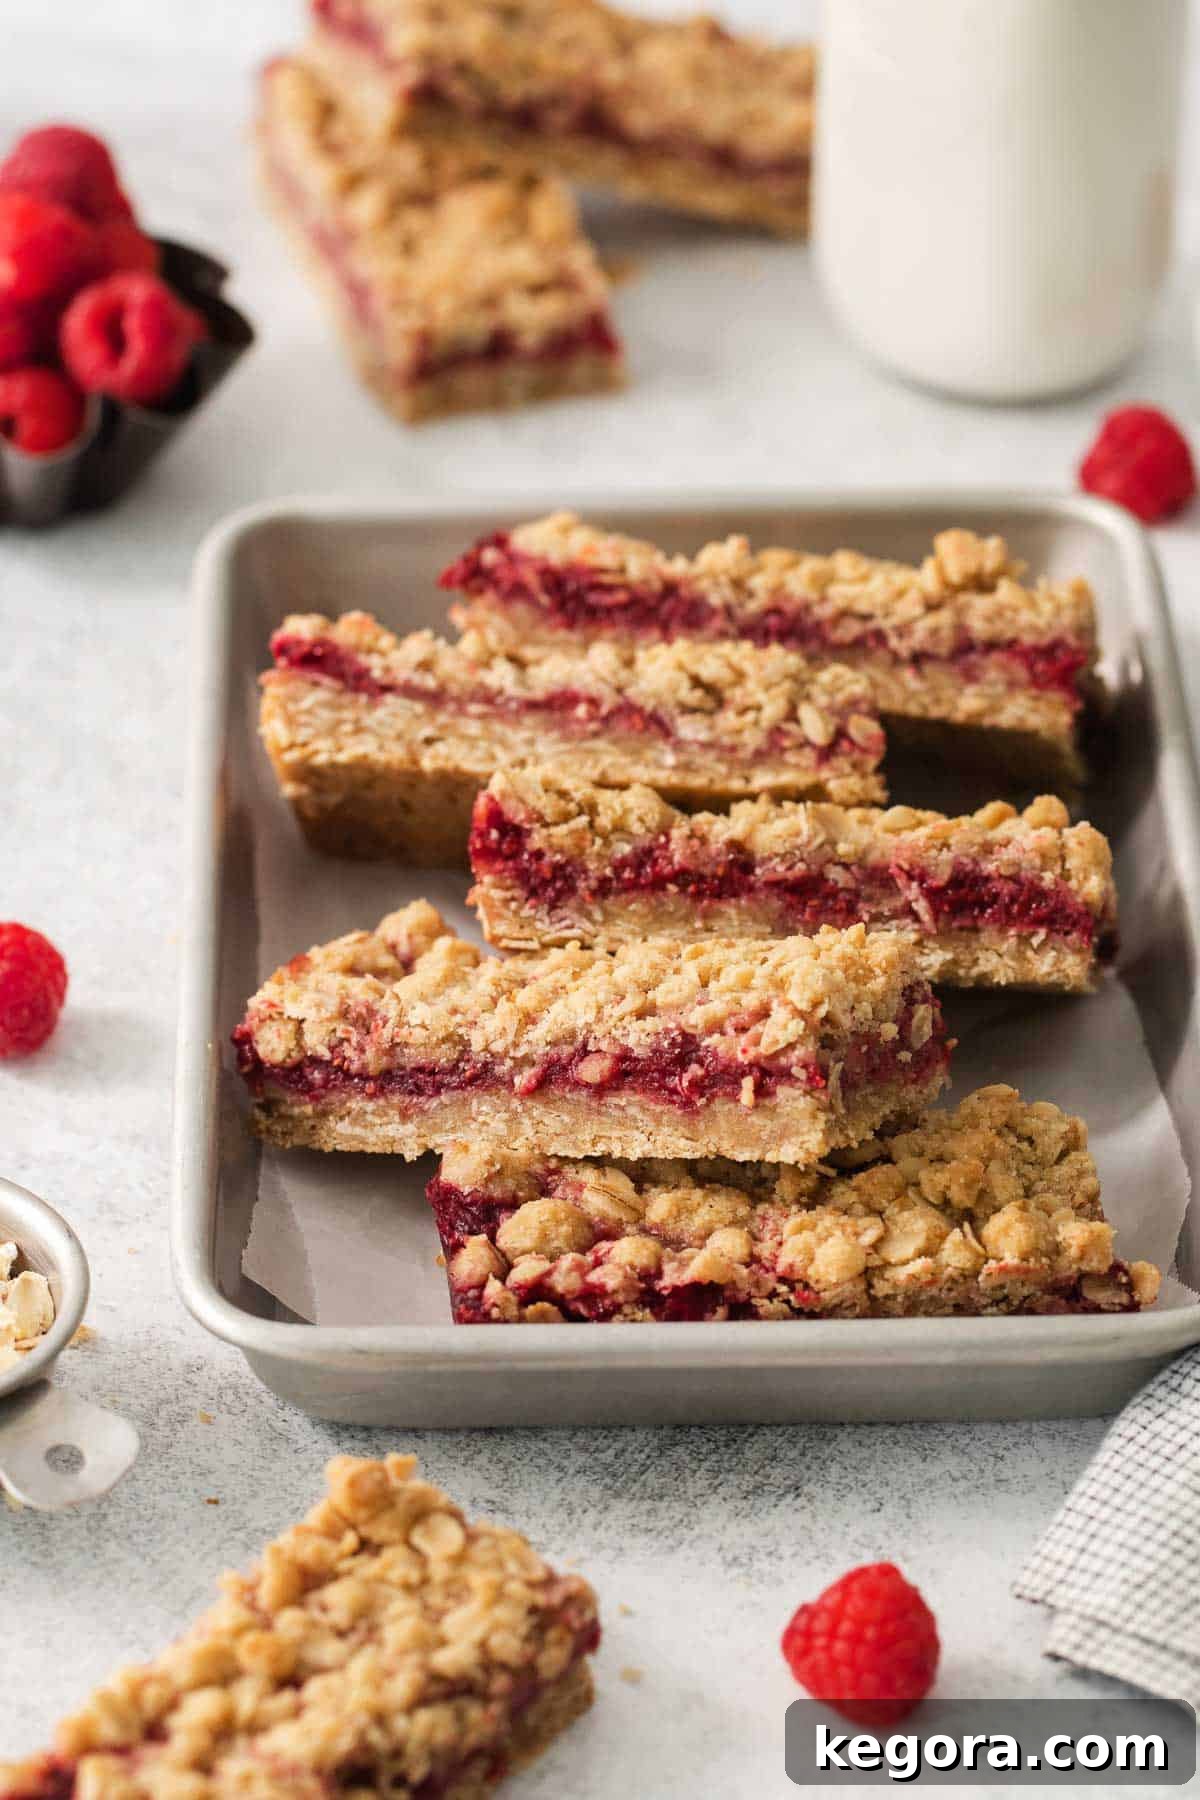
These raspberry crumble bars are a true delight, especially cherished during the warmer months. They offer all the comforting, rustic charm of your favorite fruit crumble or cobbler, but with the added convenience of being in a portable, easy-to-serve bar form. This makes them ideal for sharing with friends and family at gatherings, or simply packing into lunchboxes for a special treat.
As someone living with Celiac disease, I’m passionately committed to crafting gluten-free recipes that not only meet dietary needs but also taste absolutely indistinguishable from their gluten-containing counterparts. These raspberry bars are a testament to that commitment! By thoughtfully substituting traditional oats and flour with high-quality gluten-free alternatives, I’ve created a dessert that is every bit as rich, satisfying, and delicious as any classic recipe. You won’t miss a thing!
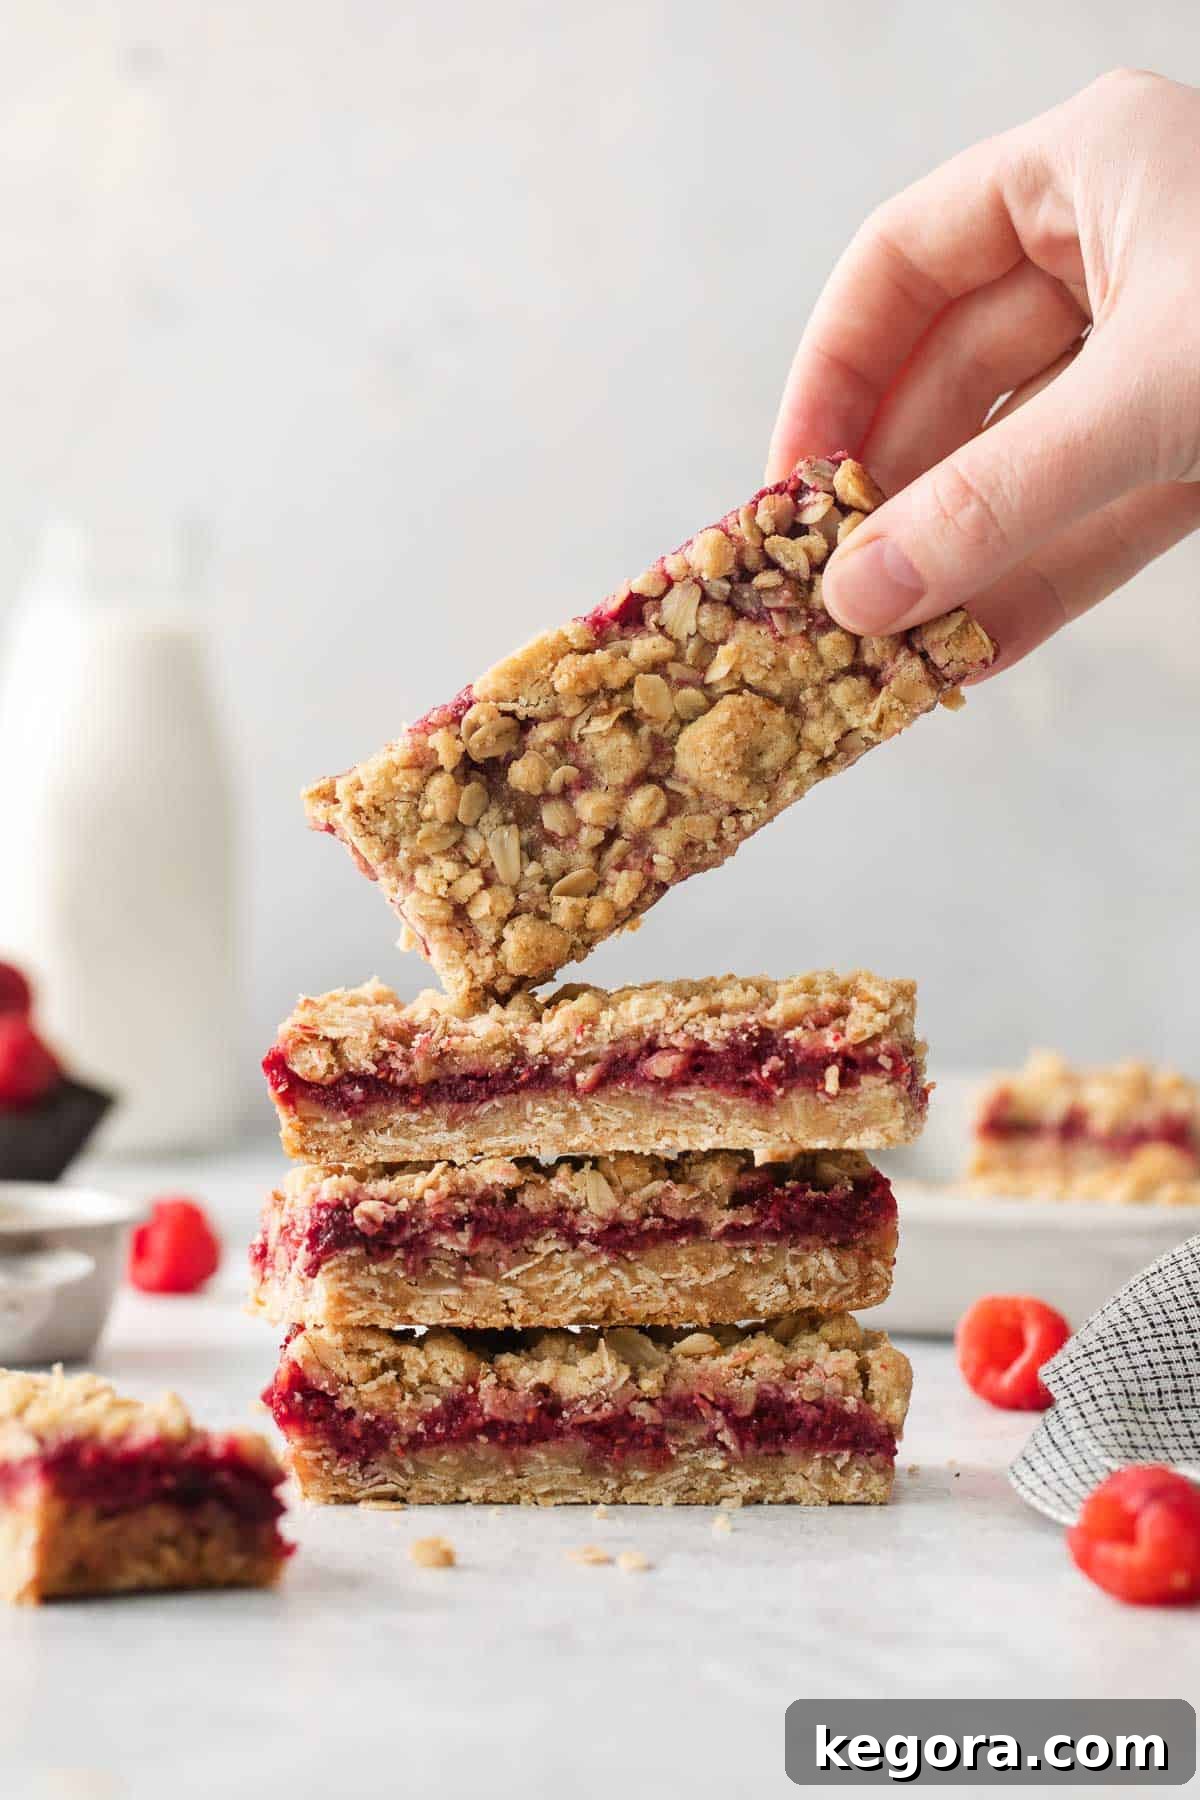
The foundation of these exquisite bars is a buttery, golden crust that evokes the nostalgic warmth of a perfectly baked oatmeal cookie. This delectable base provides a delightful contrast to the homemade raspberry filling, which bursts with a bright, tangy zing, balancing the sweetness beautifully. And because you can never have too much of a good thing, we crown these gluten-free raspberry bars with an extra generous layer of that irresistible crumble topping, adding an extra dimension of texture and flavor.
One of the unexpected joys of this recipe is the discovery that frozen raspberries often yield even better results than fresh ones. They contribute to a filling with an ideal consistency and an intensified berry flavor, making these bars exceptionally delicious. This also means you can whip up a batch of these glorious gluten-free raspberry bars any time of year, enjoying a taste of summer even in the depths of winter! I adore this recipe, and I have no doubt that you will too.
If you’re on the hunt for more incredible gluten-free bar recipes, be sure to explore these other fantastic options: indulgent Gluten-Free Starbucks Bliss Bars, nostalgic Gluten-Free S’mores Bars, zesty Gluten-Free Lemon Bars, decadent Gluten-Free 7 Layer Bars, chewy Gluten-Free Blondies, and the ultimate Gluten-Free Brownies. You might also find yourself falling in love with this comforting Gluten-Free Apple Crumble and this delightful Gluten-Free Peach Crisp.
Why These Gluten-Free Raspberry Bars Will Be Your New Favorite
These aren’t just any dessert bars; they’re a celebration of flavor and convenience. Here’s why these gluten-free raspberry bars are destined for your regular baking rotation:
- Effortlessly Simple Ingredients: You won’t need a trip to a specialty store for exotic items. This recipe calls for readily available pantry staples, making it accessible and easy to whip up whenever a craving strikes.
- The Ultimate Summer Dessert: With their bright, fruity flavor and comforting crumble topping, these bars perfectly encapsulate the joyful spirit of summer. They are light enough for a warm evening, yet satisfying enough to feel like a true indulgence.
- Perfect for Any Crowd: Whether you’re hosting a barbecue, bringing a dish to a potluck, or simply treating your family, these bars are a fantastic choice. They’re easy to transport, serve, and everyone appreciates a delicious, thoughtfully made gluten-free option.
- Brilliant Use of Frozen Raspberries: Don’t underestimate the power of frozen fruit! In this recipe, frozen raspberries actually perform better than fresh, creating a perfectly set, intensely flavored filling without extra fuss, and allowing you to enjoy this treat year-round.
- Guaranteed Gluten-Free Deliciousness: Crafted with certified gluten-free oats and a high-quality 1:1 gluten-free baking flour, these bars are safe for those with celiac disease or gluten sensitivities, without compromising on taste or texture.
- Portable Perfection: Unlike pies or crumbles that require plates and forks, these sturdy bars are wonderfully portable, making them ideal for grab-and-go snacks or dessert on the move.
Essential Ingredients for Your Raspberry Bar Masterpiece
Crafting these delectable gluten-free raspberry bars requires a few key components, each playing a vital role in achieving the perfect balance of flavors and textures. Let’s dive into what you’ll need for both the signature crumble and the luscious raspberry filling.
Ingredients for the Irresistible Oat Crumble (Base & Topping)
The foundation and crown of these bars come from a rich, textured crumble. Here’s what you’ll need to create this essential component:
- Gluten-Free Rolled Oats: The star of our crumble, these oats provide a wonderful chewy texture and a nutty flavor reminiscent of classic oatmeal cookies. It is absolutely crucial to use certified gluten-free oats to ensure the bars remain safe for those with gluten sensitivities or Celiac disease. Rolled oats are preferred over quick oats for their superior texture and ability to hold up well during baking. If you’re curious about oats and gluten, learn more about whether oats are truly gluten-free.
- High-Quality Gluten-Free 1:1 Baking Flour: This is not just any flour! For the best results, opt for a high-quality 1:1 gluten-free baking flour blend that explicitly contains xanthan gum. The xanthan gum acts as a binder, mimicking the elasticity of gluten and preventing the bars from becoming crumbly or dry. This specific type of flour makes an enormous difference in the overall texture and structure of your gluten-free raspberry bars, ensuring they are perfectly tender and moist.
- Brown Sugar: This provides a deep, caramelized sweetness that complements the oats and butter beautifully. Any brand of brown sugar will work perfectly, adding that quintessential rich, molasses-like flavor that elevates the crumble beyond a simple sweet topping. It’s essential for that “oatmeal cookie” crust taste!
- Salted Butter: The unsung hero that brings richness and binds our crumble together. I highly recommend using salted butter, as its slight saltiness wonderfully enhances the overall depth of flavor in the bars, creating a delightful contrast with the sweet and tart elements. For those looking to make these bars both gluten-free and dairy-free, simply substitute with your favorite high-quality dairy-free butter alternative, ensuring it melts well.
- Baking Powder and Salt: A touch of baking powder gives the crust a subtle lift and tenderness, ensuring it’s not too dense. Salt, on the other hand, is crucial for balancing the sweetness from the brown sugar and bringing out the nuanced flavors of the other ingredients. It prevents the bars from tasting overwhelmingly sweet. For dietary considerations, you might also find this article useful: Is Baking Powder Gluten-Free?
Ingredients for the Luscious Raspberry Filling
The heart of these bars is a vibrant, perfectly set raspberry filling. Here’s what you’ll need to achieve that sweet and tangy perfection:
- Frozen Raspberries: As mentioned, frozen raspberries are truly the secret weapon here. They break down more consistently than fresh raspberries when thawed and cooked, releasing just the right amount of liquid to create a jam-like filling. It is absolutely essential to drain off any excess liquid after thawing to prevent a runny filling. I also find frozen berries incredibly convenient for other recipes, like this easy, homemade berry lemonade!
- Fresh Lemon Juice: A squeeze of fresh lemon juice is non-negotiable! It’s the bright, zesty component that awakens the natural sweetness of the raspberries, adding a beautiful tartness and a lively zing that prevents the filling from being one-dimensional. Real, freshly squeezed lemon juice will always deliver the most vibrant and authentic flavor.
- Granulated Sugar: This provides the necessary sweetness to balance the tartness of the raspberries and lemon. While Domino granulated fine sugar is a personal favorite for its consistent texture, any good quality white granulated sugar will work perfectly in this recipe. Adjust to your sweetness preference if desired.
- Gluten-Free 1:1 Baking Flour: Much like in the crumble, a high-quality 1:1 gluten-free baking flour blend containing xanthan gum is key for thickening the raspberry filling. It works synergistically with cornstarch to create a stable, spoonable consistency that sets beautifully once cooled, preventing a watery filling.
- Cornstarch: A naturally gluten-free thickening agent, cornstarch is vital for achieving that perfect, jammy consistency in your raspberry filling. It helps to bind the liquids and creates a glossy, appealing texture that holds its shape when sliced.
If your love for raspberries extends beyond these bars, you must try these other delightful recipes: a refreshing Gluten-Free Raspberry Pretzel Salad, a versatile Raspberry Coulis perfect for drizzling, and a comforting Raspberry Compote that can be made from either fresh or frozen berries. You might also enjoy expanding your fruit compote repertoire with Strawberry Compote and a general guide on how to make various fruit compotes.
Step-by-Step: How to Craft Your Gluten-Free Raspberry Bars
Creating these delightful bars is a straightforward process broken down into three simple stages. Follow these detailed instructions for a perfectly baked treat every time.
1. Prepare the Golden Oatmeal Crumble
- Preheat and Prepare Your Pan: Begin by preheating your oven to 350°F (175°C). Line an 8×8-inch or 9×9-inch baking pan with parchment paper, allowing some overhang on the sides to easily lift the bars later. Lightly spray the parchment paper with cooking spray to prevent sticking.
- Combine Dry Ingredients: In a large mixing bowl, combine the gluten-free rolled oats, 1:1 gluten-free baking flour, brown sugar, baking powder, and salt. Whisk these dry ingredients together thoroughly to ensure even distribution.
- Add Butter and Form Crumble: Pour the melted salted butter over the dry ingredients. Using a fork or your fingertips, mix the butter into the mixture until it forms a cohesive yet crumbly texture, resembling coarse sand with some larger clumps. Be sure all dry ingredients are moistened.
- Form the Base: Press about two-thirds (⅔) of this delicious crumble mixture firmly and evenly into the bottom of your prepared baking pan. This will form the sturdy and flavorful crust for your raspberry bars.
- Pre-Bake the Crust: Place the pan with the pressed crust into the preheated oven and bake for 10 minutes. This pre-baking step helps create a crisp base and prevents it from becoming soggy once the filling is added.
2. Craft the Luscious Raspberry Filling
- Thaw Raspberries: Place the frozen raspberries in a medium, microwave-safe bowl. Microwave on high for 2-3 minutes, stirring halfway through, until they are just thawed and soft. Alternatively, you can thaw them gently on the stovetop over medium heat.
- Drain Excess Liquid: This is a critical step for a firm filling! Once thawed, carefully drain any excess liquid from the raspberries. You can do this by tilting the bowl or using a fine-mesh sieve. Return the drained raspberries to the bowl.
- Mix Filling Ingredients: To the drained raspberries, add the granulated sugar, 1:1 gluten-free baking flour, cornstarch, and fresh lemon juice. Stir gently but thoroughly until all ingredients are well combined and the mixture is slightly thickened. The flour and cornstarch will work to ensure the filling sets beautifully.
3. Assemble and Bake to Golden Perfection
- Layer the Filling: Carefully pour the prepared raspberry mixture evenly over the pre-baked crumble crust in the baking pan. Spread it gently with a spatula to cover the entire base.
- Add Final Crumble Topping: Generously sprinkle the remaining one-third (⅓) of the oatmeal crumble mixture over the raspberry layer. This creates that iconic, rustic crumble topping.
- Bake to Perfection: Return the pan to the oven and bake for an additional 25-30 minutes, or until the topping is golden brown and the raspberry filling is visibly bubbling around the edges. This bubbling indicates the filling is thickening and setting correctly.
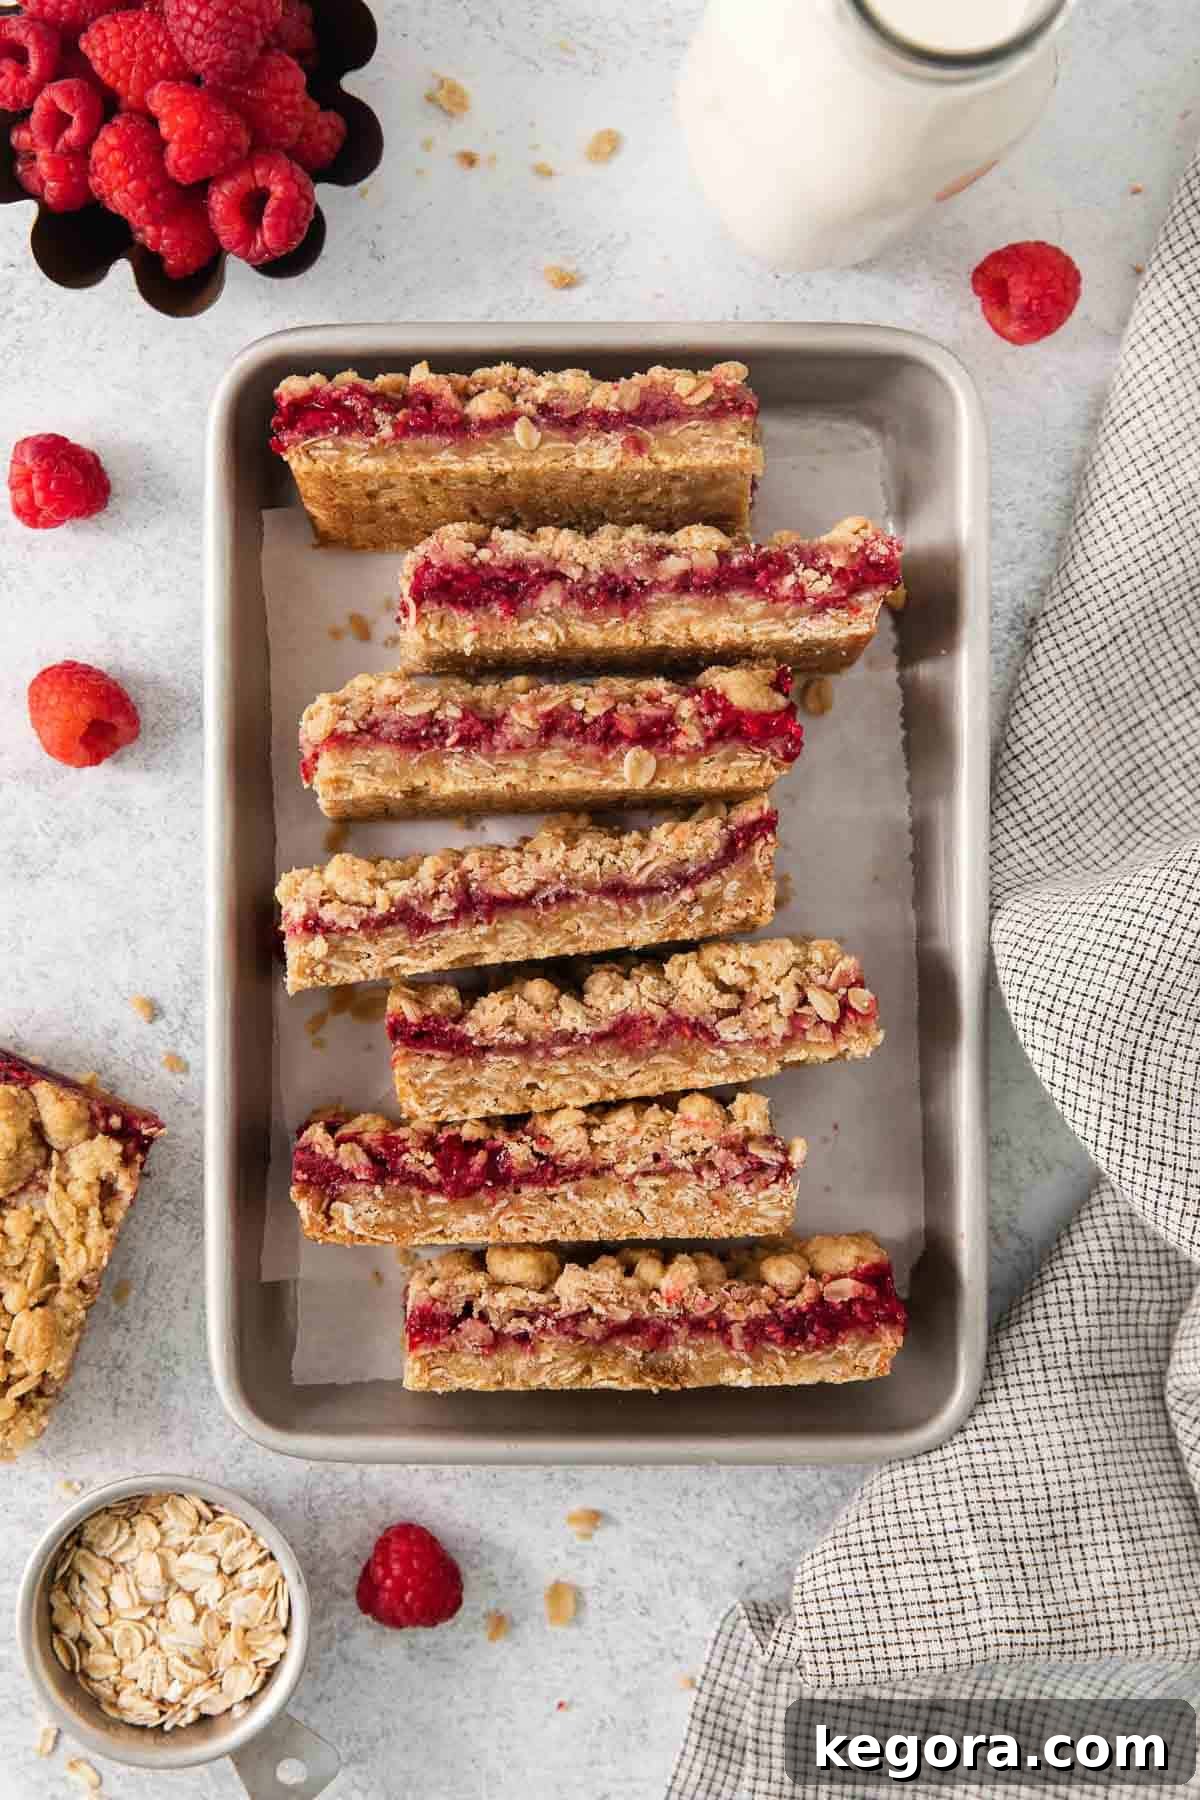
- Cool Completely: This step requires patience but is absolutely essential! Let the gluten-free raspberry bars cool completely in the pan on a wire rack before attempting to slice and serve. The filling needs this time to fully set, ensuring clean, perfect bars. Once cooled, use the parchment paper overhang to lift the entire slab out of the pan, then slice into desired bar shapes. Enjoy your homemade masterpiece!
Storing Your Delicious Raspberry Bars
To keep your gluten-free raspberry oatmeal bars fresh and flavorful, store them in an airtight container at room temperature for up to five days. For longer storage, you can refrigerate them for up to a week. If you wish to freeze them, wrap individual bars tightly in plastic wrap, then place them in a freezer-safe bag or container for up to 2-3 months. Thaw at room temperature or gently warm in the microwave for a few seconds before serving.
Frequently Asked Questions About Gluten-Free Raspberry Bars
There are a few common reasons why your raspberry filling might turn out too runny. Firstly, ensure you’re using enough cornstarch and gluten-free flour in your raspberry mixture – these are crucial thickening agents. Secondly, make sure your bars are baked long enough to allow the starches to activate and thicken the filling. Finally, and perhaps most importantly, patience is key! The filling continues to set and firm up considerably as the bars cool completely. Resist the urge to slice them while warm; waiting for full cooling will result in perfectly set bars.
To create these delightful raspberry crumble bars, you’ll need two main sets of ingredients. For the buttery, oat-filled crust and crumble topping, you’ll use gluten-free 1:1 baking flour, certified gluten-free rolled oats, brown sugar, melted salted butter, baking powder, and salt. The vibrant raspberry filling is made with frozen raspberries (thawed and drained), granulated sugar, fresh lemon juice, cornstarch, and a touch more gluten-free 1:1 baking flour for added thickness and stability.
Absolutely! This recipe is specifically designed to be gluten-free, proving that dietary restrictions don’t mean sacrificing deliciousness. You can easily make raspberry bars gluten-free by ensuring you use certified gluten-free rolled oats and a high-quality 1:1 gluten-free baking flour blend (preferably one containing xanthan gum). The raspberry filling is naturally thickened using cornstarch, along with the gluten-free flour, ensuring a perfectly set and delicious result without any gluten.
While the recipe specifically calls for frozen raspberries for optimal consistency and flavor (as they break down better), you can certainly use fresh raspberries. If you do, ensure they are ripe and juicy. You might need to gently mash them a bit to release their juices before combining them with the other filling ingredients. Be extra diligent about draining any excess liquid, as fresh raspberries can sometimes release more water, which could lead to a runnier filling. You may also consider adding an extra half teaspoon of cornstarch if using fresh.
Making these raspberry bars dairy-free is incredibly simple! The only dairy ingredient in the recipe is butter. To adapt, simply substitute the salted butter with an equal amount of your favorite high-quality vegan butter (dairy-free butter) alternative. Ensure the vegan butter melts well and has a good flavor profile. Follow the rest of the recipe instructions as usual, and you’ll have delicious gluten-free and dairy-free raspberry bars!
Expert Tips & Tricks for Perfect Raspberry Bars
Unlock the secrets to baking truly exceptional gluten-free raspberry bars with these insider tips and tricks:
- Embrace Frozen Raspberries: As highlighted, frozen raspberries truly work wonders in this gluten-free raspberry bars recipe. When thawed, they release their juices more consistently, contributing to a more intensely flavored and perfectly set filling. Remember to thoroughly drain off any excess liquid after thawing to prevent your filling from becoming watery. This simple step is key to avoiding a runny center!
- Choose Certified Gluten-Free Oats Wisely: To guarantee these bars are genuinely gluten-free and safe for those with sensitivities, be sure to use certified gluten-free oats. This designation ensures the oats have not been cross-contaminated with gluten-containing grains during processing. I personally prefer the heartier texture of rolled oats over quick-cooking oats for these bars, as they hold up better and add more character to the crumble.
- Invest in Quality Gluten-Free Flour: The type of gluten-free flour you use significantly impacts the final texture of your bars. Opt for a high-quality 1:1 gluten-free flour blend that specifically states it contains xanthan gum. Xanthan gum is a crucial ingredient in gluten-free baking, providing the elasticity and structure that gluten would otherwise offer, resulting in a much better texture for both the crumble and the filling.
- For Dairy-Free Perfection: If you or your guests have dairy sensitivities, these bars are easily adaptable. Simply replace the traditional butter with an equal amount of your favorite vegan butter (dairy-free butter). Ensure it’s a brand that bakes well and has a pleasant flavor profile. Follow all other recipe steps as instructed, and you’ll have wonderfully delicious gluten-free and dairy-free raspberry bars.
- Don’t Rush the Cooling Process: This is arguably the most important tip! It’s tempting to cut into these delicious bars while they’re still warm, but resist the urge. The filling continues to set and firm up as the bars cool completely. Cutting them too soon will result in a messy, runny filling. Allow them to cool fully on a wire rack for at least 2-3 hours, or even longer, for clean, perfectly sliceable bars.
- Parchment Paper is Your Friend: Lining your baking pan with parchment paper, allowing for an overhang on the sides, makes removing the cooled bars incredibly easy. Once completely cool, simply lift the entire slab out of the pan using the parchment paper, and then transfer it to a cutting board for neat slicing.
- Adjust Sweetness to Taste: The amount of sugar in the raspberry filling provides a balanced sweet and tart flavor. If your raspberries are particularly tart, or if you prefer a sweeter filling, you can add an extra tablespoon or two of granulated sugar. Taste the filling mixture before baking and adjust if necessary.
EXPLORE MORE GLUTEN-FREE DESSERT RECIPES
If you’ve enjoyed these delectable Gluten-Free Raspberry Bars, you’ll be thrilled to discover more of our tried-and-true gluten-free recipes that never compromise on flavor or texture. Dive into our collection and find your next favorite sweet treat!
Easy Gluten-Free Blondies
Gluten-Free Lemon Bars
Gluten-Free Funfetti Sugar Cookies
The Best Gluten-Free Brownie Recipe
Easy Raspberry Compote
Gluten-Free Strawberry Cream Cheese Trifle
I sincerely hope you love this incredible recipe as much as my family and I do! If you try these gluten-free raspberry bars, please take a moment to leave a comment and rating below. Your feedback means the world to me, and I’d be absolutely thrilled to hear about your baking success!
Gluten-Free Raspberry Crumb Bars
| Author | Erin Collins |
| Prep Time | 20 mins |
| Cook Time | 30 mins |
| Total Time | 50 mins |
| Servings | 12 servings |
Gluten-free raspberry bars! Brown sugar oat crumble and homemade raspberry filling are a match made in heaven. This is one of my favorite summer desserts!
The trick with this recipe is to use frozen raspberries instead of fresh. Also add 1 tablespoon of gluten-free flour to the filling. With these tricks, the raspberry layer turns out perfect every time!
Comments
Print Recipe
Ingredients
Raspberry Filling:
- 12 ounces frozen raspberries
- 1/4 cup granulated sugar
- 1 tablespoon gluten-free 1:1 baking flour
- 2 teaspoons cornstarch
- 1 tablespoon lemon juice
Oatmeal Crumble:
- 1 ½ cups (128g) gluten-free rolled oats
- 1 ¼ cups (188g) gluten-free 1:1 baking flour
- 1 cup (210g) brown sugar
- ½ teaspoon baking powder
- ¼ teaspoon salt
- 3/4 cup (170g) salted butter, melted
Instructions
Make the Oatmeal Crumble
- Preheat the oven to 350°F (175°C). Line an 8×8 or 9×9 baking pan with parchment. Lightly spray with cooking spray.
- In a large mixing bowl, combine the oats, gluten-free flour, brown sugar, baking powder, salt, and melted butter with a fork until it forms a crumble-like mixture.
- Press ⅔ of the mixture into the bottom of the prepared baking pan. Bake for 10 minutes.
Make the Raspberry Filling
- Place raspberries in a medium, microwave-safe bowl. Microwave until just thawed, 2-3 minutes, stirring halfway through. (You can also thaw raspberries on the stovetop over medium heat.)
- Drain any excess liquid off the raspberries and return to the bowl. This step is crucial for a non-runny filling.
- Add the sugar, gluten-free flour, cornstarch, and lemon juice and mix to combine until thoroughly incorporated.
Assemble & Bake
- Pour the raspberry mixture evenly on top of the baked bottom crust. Sprinkle the remaining crumble topping over the raspberries.
- Bake for another 25-30 minutes, or until the topping is golden and the filling is bubbly.
- Let the bars cool completely in the pan on a wire rack before slicing and serving. This allows the filling to set. Enjoy!
Notes
RECIPE NOTES
- I find frozen raspberries work even better than fresh raspberries in this gluten-free raspberry bars recipe. You want to drain off the extra liquid after thawing the raspberries so the filling will set properly.
- Be sure to use certified gluten-free oats to keep these bars gluten-free. I prefer the texture of rolled oats for these gluten-free raspberry bars as they provide a better chew.
- Use a high-quality 1:1 gluten-free flour blend that contains xanthan gum. This is critical for achieving a superior texture with these gluten-free bars, preventing them from being too crumbly.
- For dairy-free bars: Simply replace the salted butter with an equal amount of good quality vegan butter (dairy-free butter), and follow the rest of the recipe as usual.
Nutrition Information (per serving, based on 12 servings)
Calories: 3437kcal | Carbohydrates: 508g | Protein: 38g | Fat: 154g | Saturated Fat: 89g | Polyunsaturated Fat: 10g | Monounsaturated Fat: 39g | Trans Fat: 6g | Cholesterol: 366mg | Sodium: 1753mg | Potassium: 1533mg | Fiber: 50g | Sugar: 285g | Vitamin A: 4368IU | Vitamin C: 95mg | Calcium: 564mg | Iron: 15mg