
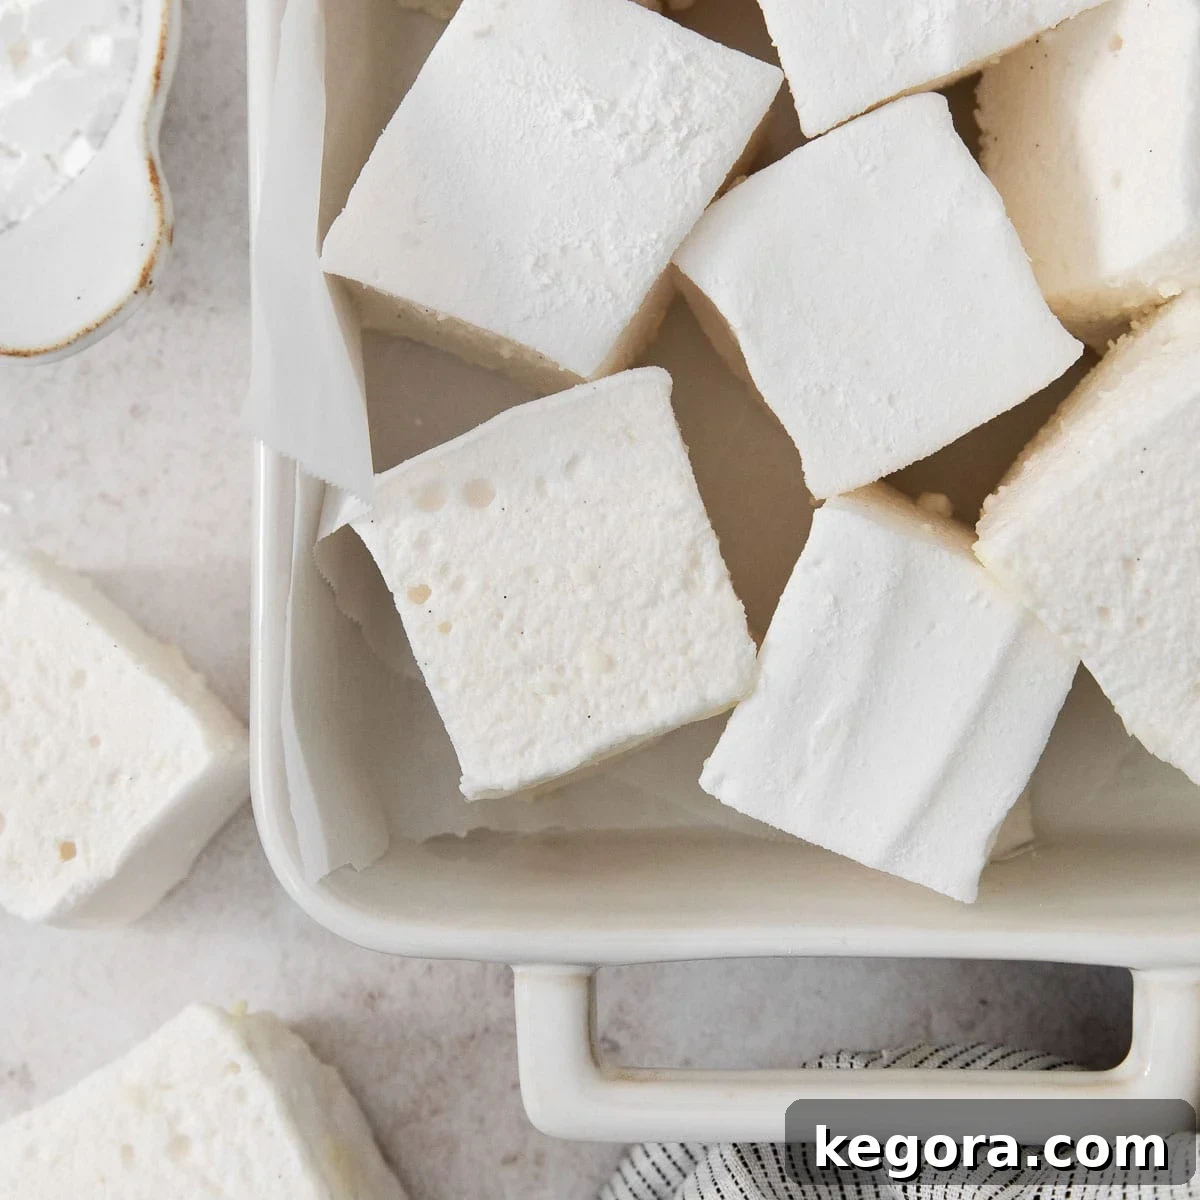
Erin’s Homemade Vanilla Bean Marshmallows: A Timeless Treat
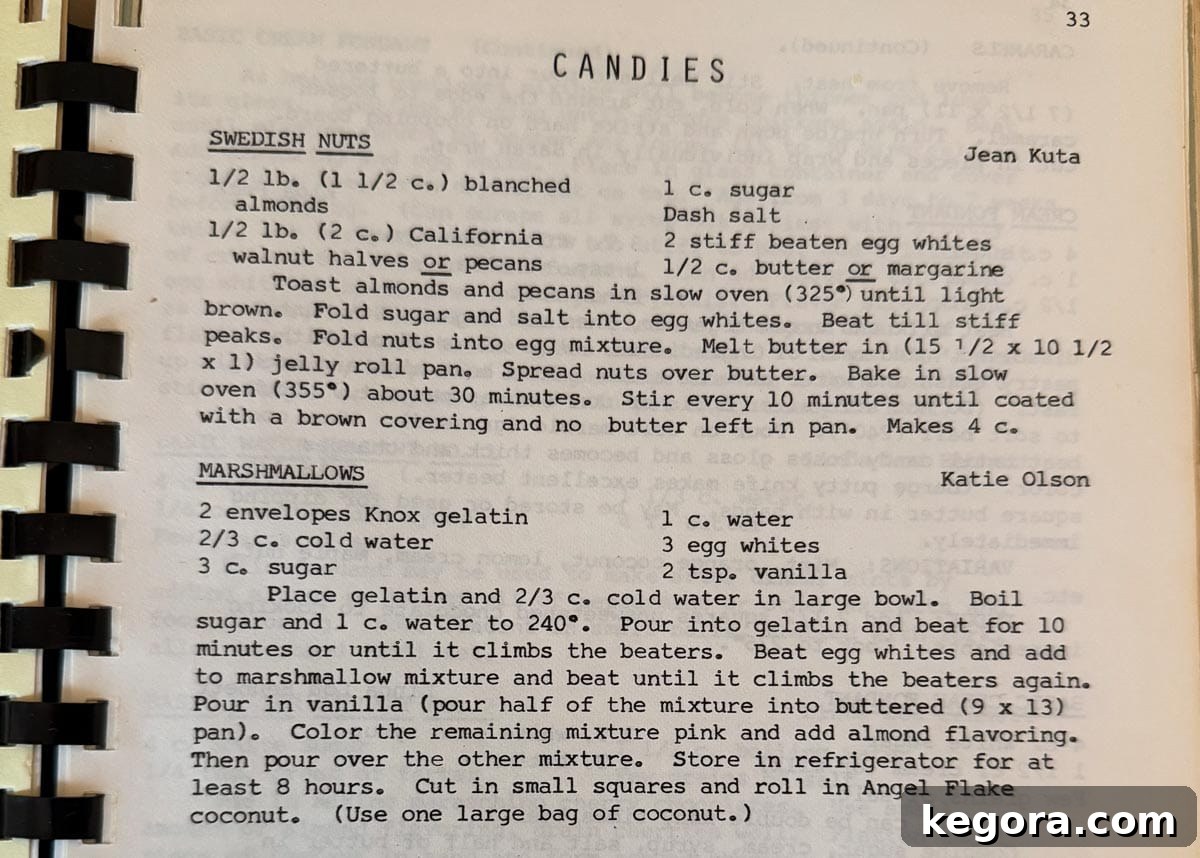
There’s nothing quite like the melt-in-your-mouth delight of a perfectly crafted marshmallow. And when it comes to homemade treats, this particular recipe holds a profoundly special place in my heart. It’s an absolute gem, straight from my Grandma’s cherished church cookbook, a treasured collection of culinary wisdom she compiled with her friends back in the vibrant 1970s. Every single recipe I’ve ever attempted from that book has proven to be pure gold, and these homemade vanilla bean marshmallows are certainly no exception to that rule! They evoke a sense of nostalgia with every soft, sweet bite.
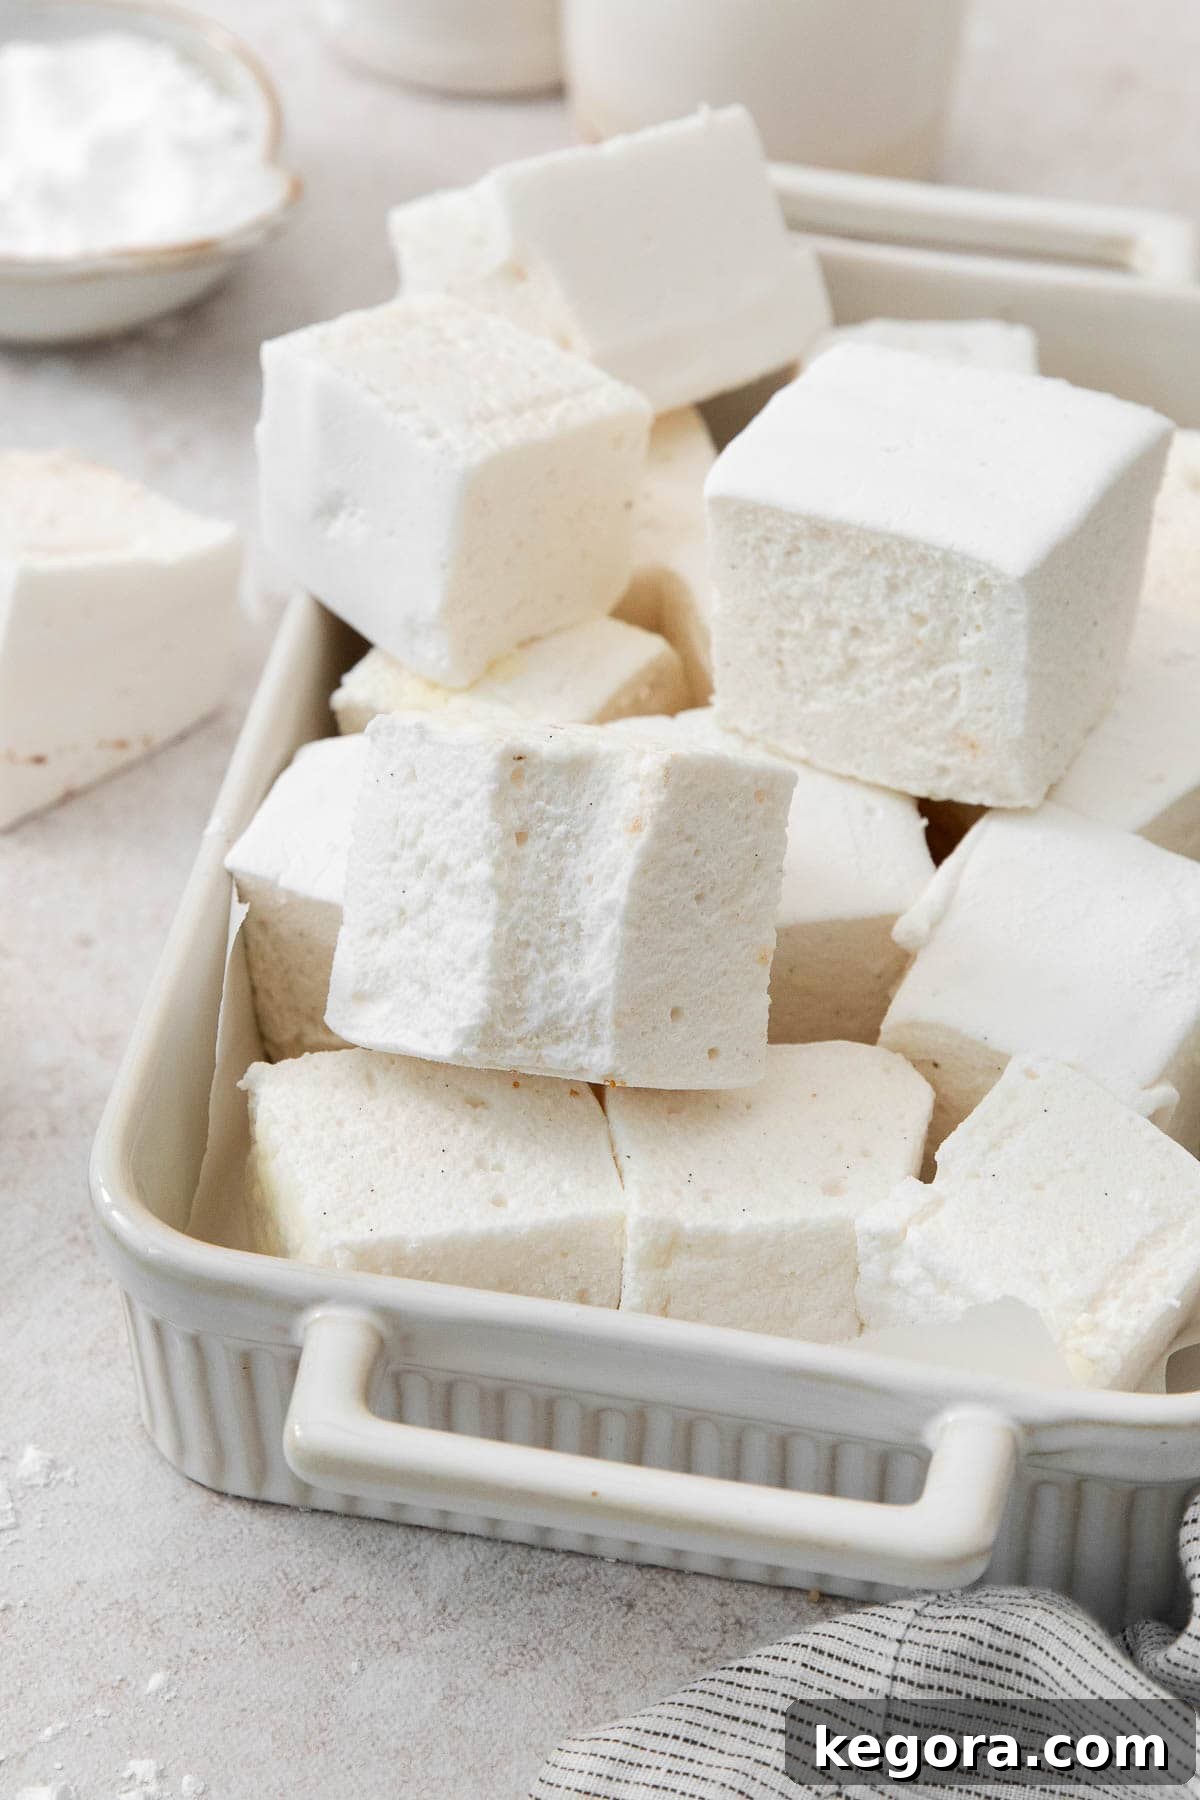
What truly sets this recipe apart, and why I adore it so much, is its unwavering commitment to authenticity and quality ingredients. Unlike many store-bought options that rely heavily on artificial flavors, questionable additives, and high-fructose corn syrup, these delightful marshmallows are refreshingly corn-syrup free. Instead, they are lovingly made with nothing but real, simple ingredients—components you can easily pronounce and trust. I’ve taken Grandma’s original masterpiece and meticulously tweaked the ratios just a bit, refining it to achieve the ideal balance of texture and sweetness. The secret weapon that elevates these fluffy clouds to truly gourmet status? The generous addition of genuine vanilla bean, infusing them with an unparalleled depth of aromatic flavor and beautiful, visible specks.
Why You’ll Fall in Love with These Homemade Marshmallows:
- Unmatched Lightness and Fluffiness: Prepare for a revelation! These marshmallows boast an incredibly light, wonderfully airy, and delicate fluffiness that practically dissolves on your tongue. They offer a luxurious mouthfeel that mass-produced marshmallows can only dream of achieving.
- Gourmet Vanilla Bean Flavor: Thanks to the precious vanilla bean, these aren’t just sweet; they are infused with deep, complex, and aromatic vanilla notes, complete with those appealing visible specks that hint at their exquisite quality. They taste and feel undeniably gourmet, making any occasion feel extra special.
- Versatile Culinary Delight: Imagine the bliss of stirring one into a steaming mug of hot chocolate, allowing it to slowly melt into a creamy, vanilla-scented swirl. Or, better yet, lightly toasting them over an open flame for truly fancy s’mores that will impress even the most discerning dessert connoisseurs. They’re also perfect for topping desserts, adding to coffee, or simply enjoying as a standalone treat.
- Naturally Corn-Syrup Free: For those seeking a more natural and wholesome indulgence, this recipe provides a fantastic alternative, completely free from the high-fructose corn syrup commonly found in commercial marshmallows. You control exactly what goes into them.
- A Heartwarming Touch of Nostalgia: Creating these marshmallows from my Grandma’s time-tested recipe connects me to a simpler era and brings a wonderful sense of tradition, heritage, and comfort into my kitchen. It’s more than just a dessert; it’s a taste of cherished family history, made fresh with love.
Top Tips for Achieving Marshmallow Perfection:
Achieving marshmallow mastery is entirely within your reach, especially with these expert pointers:
- Harness the Power of a Stand Mixer: This piece of equipment is your absolute secret weapon for whipping in an abundance of air, which is fundamental to creating that signature light, airy, and fluffy marshmallow texture. While a powerful hand mixer can work, a stand mixer truly excels at maintaining consistent speed and incorporating maximum volume.
- Generously Dust Your Pan: Marshmallows are notoriously sticky! This step cannot be overstated. Be exceptionally generous with the powdered sugar and cornstarch mixture when preparing your baking pan. This crucial dusting prevents the marshmallow from adhering irrevocably to the pan and ensures a clean, effortless release.
- Coat Your Knife for Clean Cuts: For beautifully clean, precise, and non-sticky slices, always re-coat your sharp knife (or run it under hot water and thoroughly dry it) with the dusting mixture before each individual cut. This simple trick prevents the sticky marshmallow from clinging to the blade and maintains the pristine appearance of your finished squares.
If you’re as fond of nostalgic, time-honored candy recipes as I am, you’ll love exploring some of my other favorite treats from Grandma’s treasured collection. Be sure to try this classic nougat recipe, the incredibly rich and creamy penuche vanilla fudge, our delightful old-fashioned candy popcorn, or the irresistible crunch of homemade English toffee. Each one promises a delicious trip down memory lane!
xoxo erin
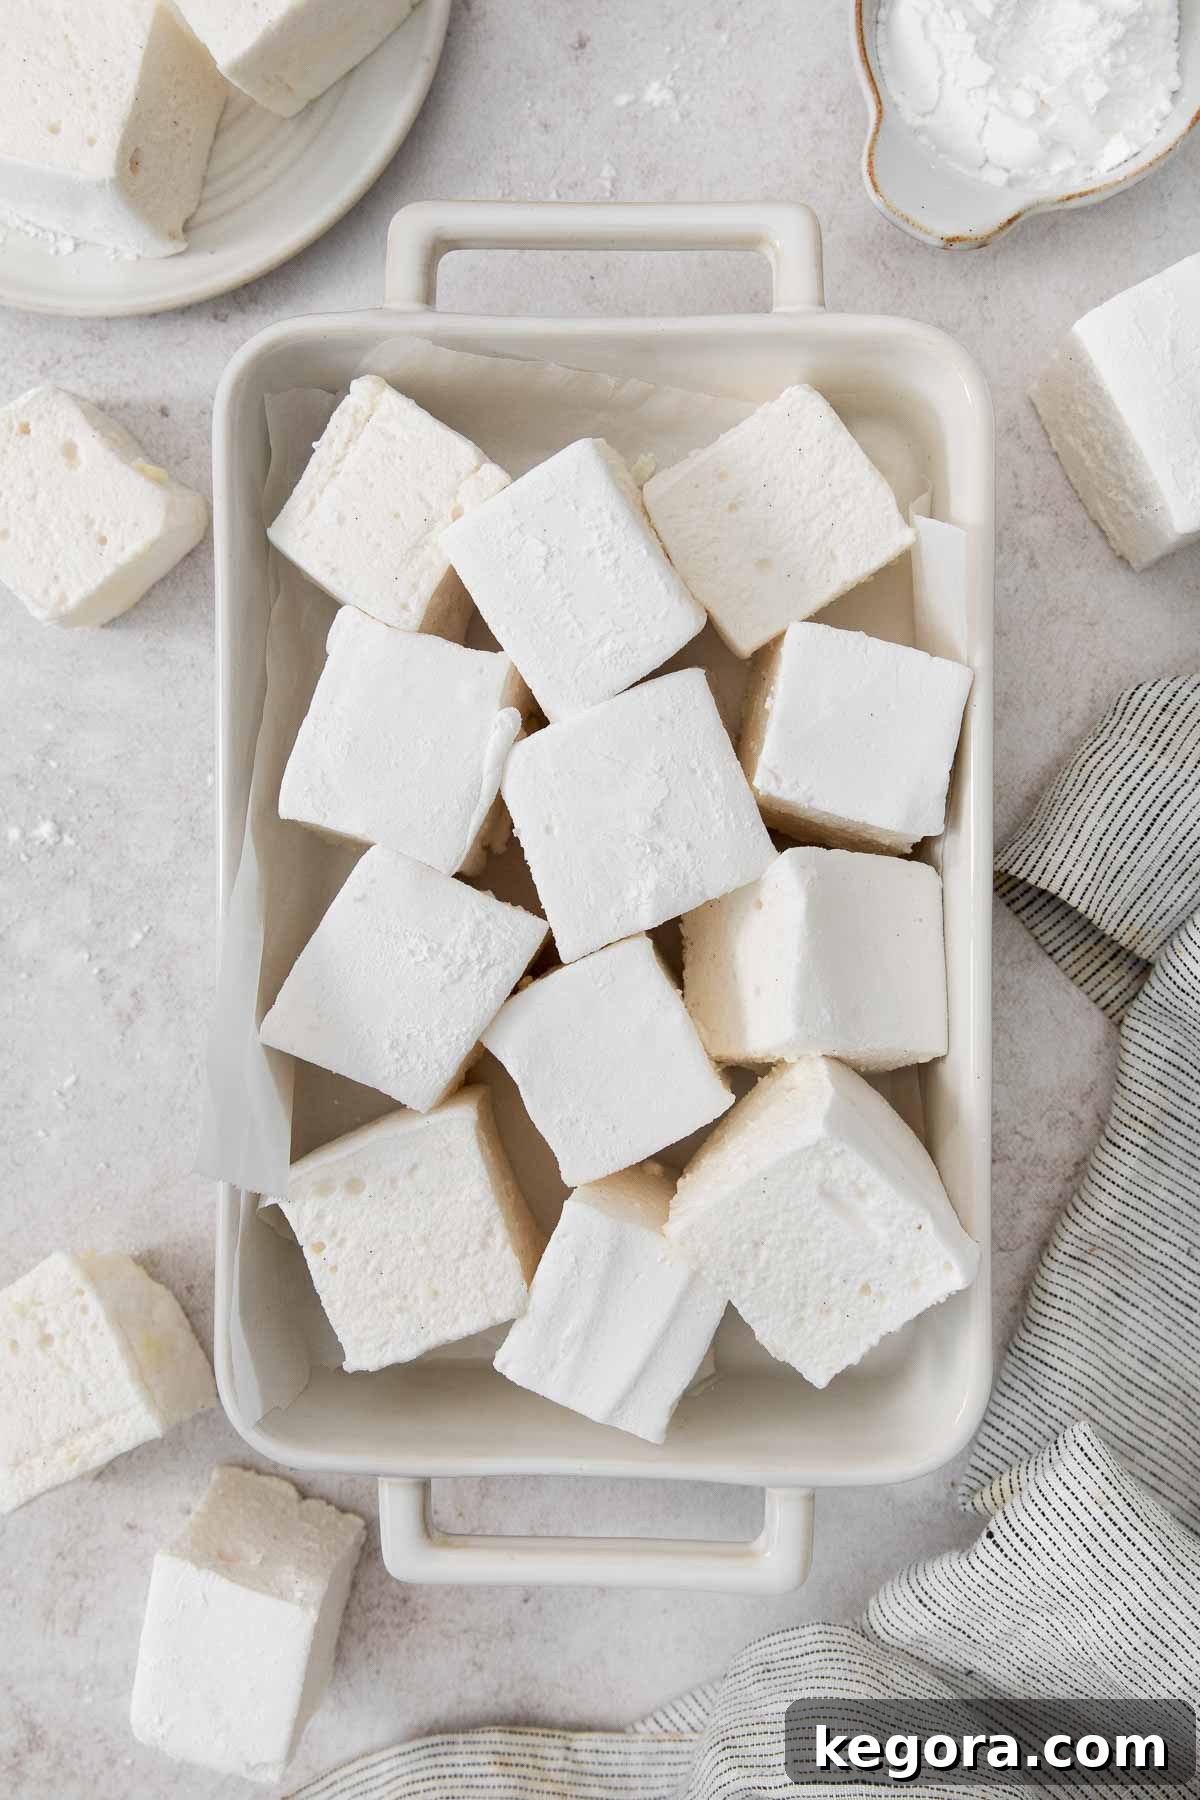
Essential Ingredients for Perfect Homemade Vanilla Bean Marshmallows
Crafting these delectable homemade vanilla bean marshmallows requires just a handful of simple, yet high-quality ingredients. Each component plays a vital role in achieving that signature fluffy texture, irresistible bounce, and rich, complex flavor. While the full, precise measurements are readily available in the recipe card below, here are some key notes on what you’ll need and why each ingredient is so crucial:
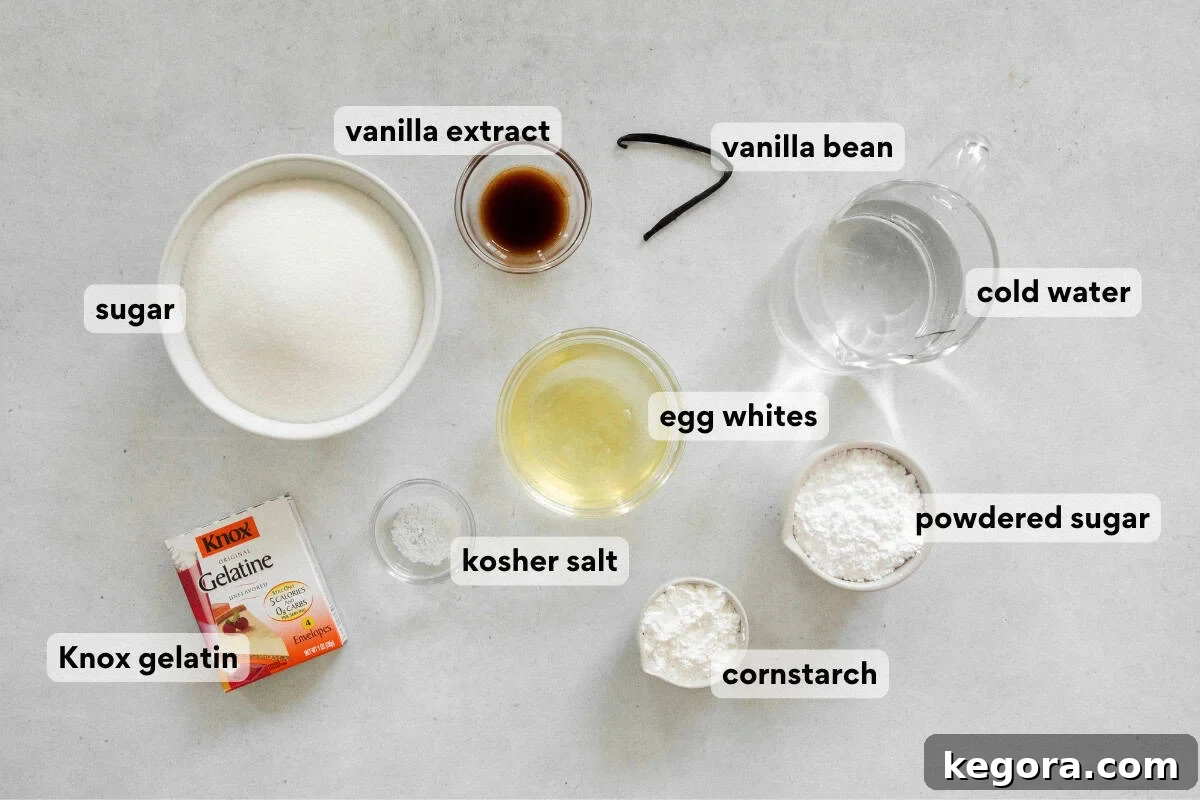
- Vanilla Bean: This is truly where the magic happens and what unequivocally elevates these marshmallows from ordinary to extraordinary. Real vanilla bean adds beautiful, tiny, dark speckles and an incredibly deep, nuanced, complex vanilla flavor that vanilla extract alone simply cannot replicate. It’s an investment worth making for that truly gourmet touch. If you absolutely cannot find a whole bean, a high-quality vanilla bean paste can be a decent substitute, though it might lack the exact visual appeal and full depth of flavor.
- Gelatin (Knox Brand Recommended): Gelatin is the fundamental structural backbone of your marshmallows, providing that irresistible soft, bouncy spring and chew. I specifically recommend Knox brand unflavored gelatin because, through extensive testing and personal experience, it consistently delivers the perfect marshmallow texture – firm enough to hold its shape but tender enough to melt deliciously. Other brands may result in marshmallows that are either too soft, too firm, or even grainy, affecting the overall experience. Always ensure you let the gelatin “bloom” in cold water as instructed; this crucial hydration step ensures a smooth, lump-free, and evenly textured marshmallow mixture.
- Egg Whites: These are instrumental in creating the incredibly light, airy, and delicate structure that sets homemade marshmallows far apart from their commercial counterparts. Whipped egg whites incorporate a significant amount of air into the mixture, resulting in an ethereal, cloud-like texture you simply won’t find in store-bought varieties. For optimal whipping volume and stability, always use large egg whites that are at room temperature.
- Powdered Sugar and Cornstarch: This dynamic duo serves two indispensable purposes in this recipe. Firstly, a generous dusting of this mixture in your baking pan is absolutely essential to prevent the marshmallow from sticking irrevocably. Secondly, it provides that classic, powdery, non-sticky finish to your cut marshmallows, making them easy to handle, store, and preventing them from clumping together. Do not skimp on this crucial step!
- Granulated Sugar & Water: These two form the base of our essential sugar syrup, which is not only the primary sweetener but also contributes significantly to the marshmallow’s body, structure, and chewiness.
- Kosher Salt: A small but vital pinch of kosher salt plays a critical role in balancing the sweetness of the marshmallows and, more importantly, enhances and amplifies all the other flavors, particularly making those beautiful vanilla notes truly pop and sing.
With these quality ingredients meticulously gathered and understood, you’re well on your way to creating the most delicious, fluffy, and gourmet homemade vanilla bean marshmallows you’ve ever tasted!
Crafting Homemade Vanilla Bean Marshmallows: An In-Depth Step-by-Step Guide
Embarking on the journey to make homemade marshmallows might seem like a grand culinary endeavor at first, but with a clear and detailed guide, it’s a truly rewarding and enjoyable experience. The process involves a few distinct stages, each critically contributing to the final soft, pillowy, and utterly delicious perfection. This overview will walk you through each key step, providing valuable insights and tips. However, for precise measurements and detailed timings, you can always jump directly to the recipe card below!
Stage 1: Preparing for Success – The Foundation of Fluffy Marshmallows
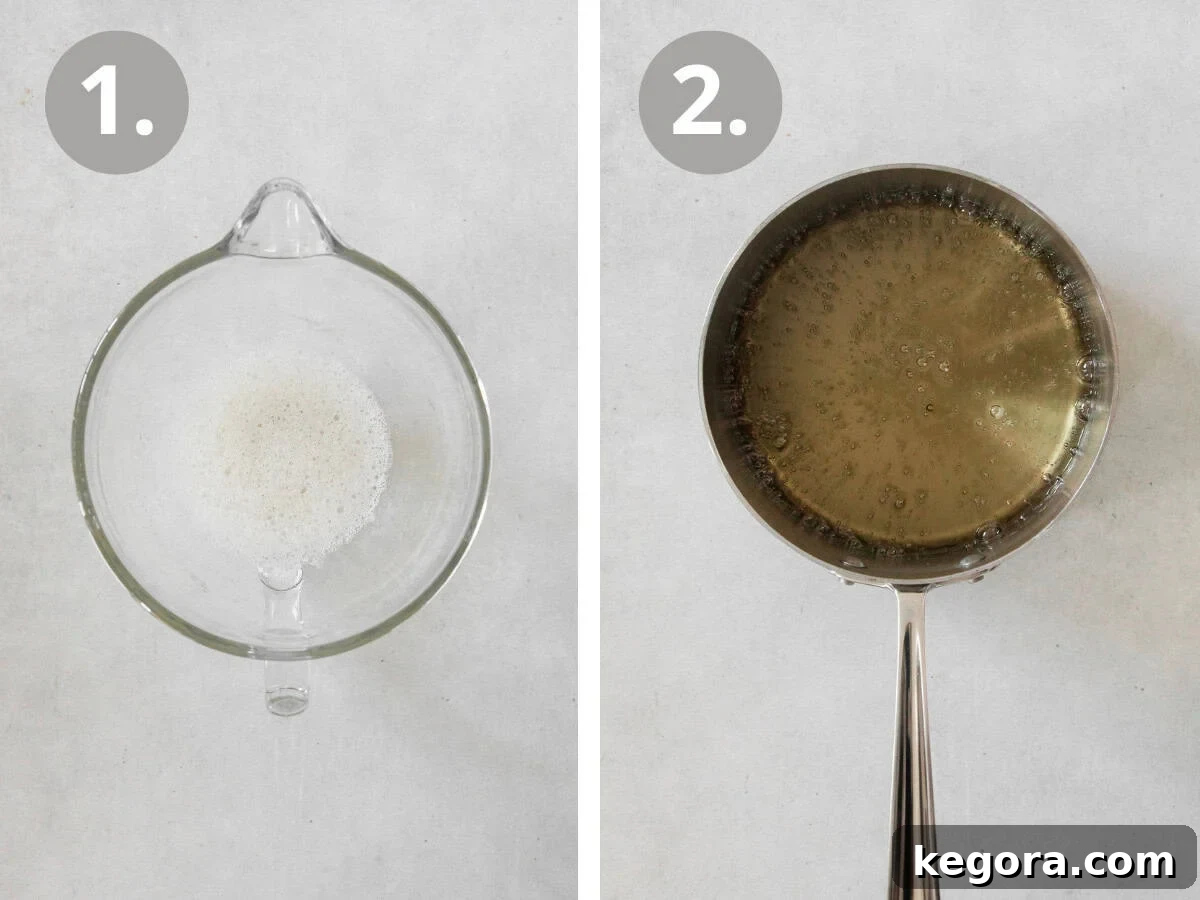
Before you even turn on the stove, thorough preparation is paramount for a smooth and successful marshmallow-making experience:
1. Prepare Your Pan with Utmost Care: Begin by selecting a 9×13-inch glass or ceramic baking pan. It’s important to avoid metal pans, as certain metals can sometimes react with the ingredients, potentially affecting the marshmallow’s flavor or color. Lightly spray the pan generously with cooking spray. In a small, separate bowl, combine your powdered sugar and cornstarch. This mixture is absolutely vital for preventing stickiness. Now, liberally dust the entire bottom and all sides of your prepared pan with this mix. Ensure every surface that will come into contact with the marshmallow is thoroughly coated. Crucially, remember to reserve a good portion of this mixture for dusting your finished marshmallows later on!
2. Expertly Bloom the Gelatin: In the bowl of your stand mixer (or a large mixing bowl if you’re using a powerful hand mixer), carefully sprinkle the gelatin evenly over ⅔ cup of cold water. Stir them together gently for about 30 seconds to ensure the gelatin is fully moistened. At first, it will appear grainy, but then it will rapidly begin to absorb the water and thicken into a soft, gel-like mass. Let this mixture sit undisturbed for approximately 20 minutes. This essential process, known as “blooming,” allows the gelatin granules to fully hydrate, ensuring a smooth, lump-free, and perfectly evenly textured marshmallow in the end.
3. Craft the Perfect Sugar Syrup: In a medium-sized, heavy-bottomed saucepan, whisk together the granulated sugar, kosher salt, and the remaining 1 cup of water. Place the saucepan over medium-high heat. Bring the mixture to a rolling boil, stirring occasionally just until the sugar is completely dissolved. Once boiling, stop stirring. Continue boiling without interruption until the syrup reaches precisely 240°F (115°C) on a reliable candy thermometer. This exact temperature is absolutely critical for the marshmallow’s final texture. If the syrup temperature is too low, your marshmallows will be excessively soft and won’t set properly; if it’s too high, they can become unpleasantly hard, brittle, or grainy. Pay close attention to the bubbles: they’ll visibly transition from loose and large to tight, smaller, and shiny as you approach the 240°F mark. Remove the saucepan immediately from the heat once this precise temperature is reached.
Stage 2: Whipping Up the Fluff – The Magical Transformation
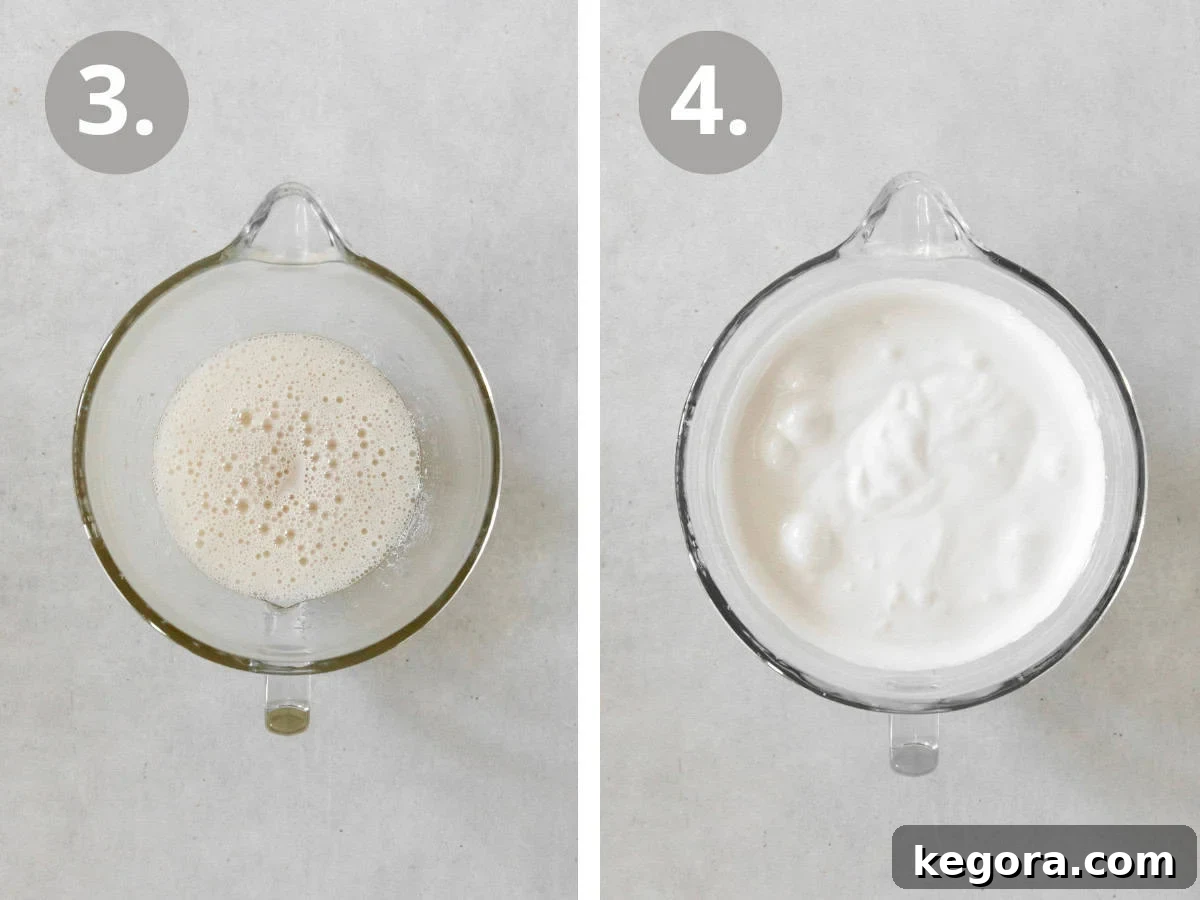
This is where the mixture begins its truly magical metamorphosis into light, airy, and fluffy marshmallow:
4. Carefully Incorporate Syrup into Gelatin: With your stand mixer running on low speed (or using a hand mixer on low), slowly and carefully pour the hot sugar syrup in a thin, steady stream into the bloomed gelatin mixture. Take care not to pour directly onto the whisk or beaters, as this can cause hot splashing and potential burns. Once all the syrup has been added, increase the mixer speed to medium-high. Beat this mixture continuously and vigorously for a full 10 minutes. During this remarkable whipping process, you’ll witness a profound change: the clear, warm syrup will transform into a thick, opaque, wonderfully glossy, and incredibly fluffy mixture that forms beautiful soft peaks when the whisk is lifted. This vigorous whipping incorporates a significant amount of air and simultaneously cools the mixture, creating the marshmallow’s characteristic volume and irresistible texture.
5. Enhance with Egg Whites: After the syrup and gelatin have been thoroughly whipped to soft peak stage, it’s time to enhance the fluffiness even further. Carefully add the large egg whites to the mixer bowl. Continue mixing for another 5 minutes on medium-high speed until the egg whites are fully incorporated and the entire mixture appears even lighter in color, more voluminous, and truly airy, achieving that delicate, cloud-like texture we desire in exceptional homemade marshmallows. The mixture should hold its shape well.
Stage 3: The Finishing Touches – Flavor, Form, and Patience
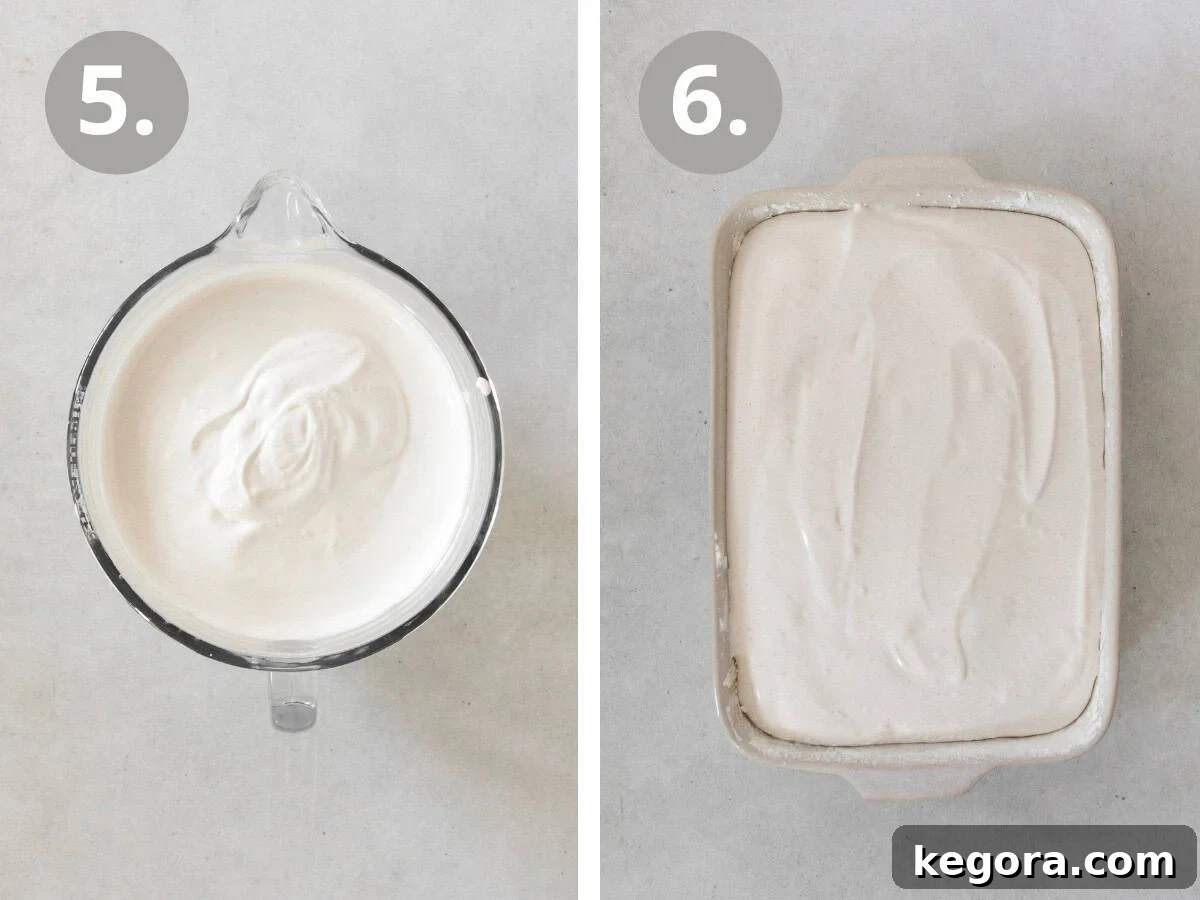
You’re almost there! These last steps bring everything together for the ultimate homemade marshmallow experience:
6. Infuse with Divine Vanilla: Now for the grand finale of flavor! Add the vanilla extract to the whipped marshmallow mixture. Then, introduce the true star of this recipe: the meticulously scraped seeds from your real vanilla bean. The aroma at this stage will be absolutely incredible – a rich, authentic, and deep vanilla scent that unequivocally promises deliciousness. Mix just until these aromatic ingredients are thoroughly combined and evenly distributed throughout the fluffy mixture.
7. Pour and Patiently Rest: Working quickly (as the marshmallow mixture will begin to set fairly rapidly), carefully pour the fluffy marshmallow batter into your generously prepared and dusted pan. It will be a bit sticky and thick, so use an offset spatula or a greased rubber spatula to swiftly spread it into an even, uniform layer across the pan. Don’t worry about absolute perfection here, just aim for a relatively flat surface. Once smoothed, leave the pan completely uncovered at room temperature to rest and firm up. This resting period is absolutely crucial for the marshmallows to properly set and develop their characteristic texture. It should last for at least 8 hours, or ideally, overnight, and can extend up to 48 hours for optimal firmness and stability. Resist the urge to peek or touch!
8. Cut and Flawlessly Coat Your Marshmallows: After the marshmallow slab has fully rested and firmed up (it should feel distinctly springy and firm to the touch), prepare a clean, flat working surface. Line it with parchment paper and dust it liberally with the remaining cornstarch/powdered sugar mixture. Use a sharp, thin knife to gently loosen the edges of the marshmallow from the sides of the pan. Then, carefully invert the pan and gently peel the entire slab of marshmallow onto your prepared, dusted surface.
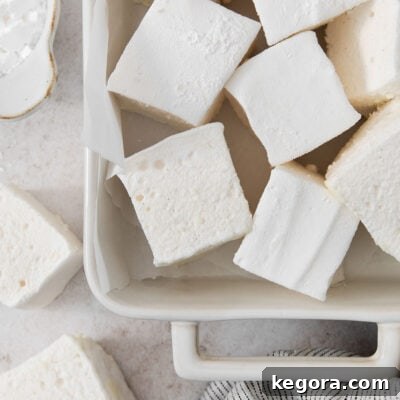
For the cleanest, most professional-looking cuts, lightly coat your sharp knife with the reserved cornstarch/sugar mixture before each slice. Alternatively, you can run your knife under very hot water and thoroughly dry it before each cut; this helps create a clean, non-sticky blade. Slice the marshmallow slab into your desired shapes, typically 1.5-inch squares for classic marshmallows. As you cut each individual square, immediately dust all of its freshly cut edges in the remaining cornstarch/sugar mixture. This final, generous coating is essential as it prevents the individual marshmallows from sticking together, ensuring they remain perfectly separate, delightfully soft, and easy to handle and store.
Common Questions & Troubleshooting for Marshmallow Success:
Even seasoned bakers encounter questions or minor hiccups. Here are some answers to frequently asked questions and helpful tips for overcoming common hurdles when making homemade marshmallows:
- Why are my marshmallows too sticky? This is a very common issue! It could be due to not dusting your pan generously enough, or not properly coating your knife during the cutting process. High humidity in your kitchen can also play a significant role; marshmallows readily absorb moisture from the air, making them sticky. Ensure they rest uncovered in a cool, very dry place.
- My marshmallows are too hard or dense. What went wrong? The most likely culprit here is overheating the sugar syrup. If the syrup goes significantly above 240°F (115°C), it will become too concentrated and will result in marshmallows that are firm, overly chewy, or even brittle. Invest in a reliable candy thermometer and measure the temperature with extreme accuracy.
- My marshmallows didn’t get fluffy enough. Why? Insufficient whipping time is usually the primary reason. The gelatin and syrup mixture requires at least 10-15 minutes of vigorous whipping in a stand mixer to incorporate enough air and achieve that signature volume. Additionally, ensure your egg whites are at room temperature before whipping, as cold whites don’t whip to their full, airy volume.
- Can I use a hand mixer instead of a stand mixer? Yes, a powerful hand mixer can certainly work, but it will require more effort and likely longer, more sustained whipping times to achieve the desired volume and texture. A stand mixer is highly recommended for convenience and best results.
- Can I skip the vanilla bean? You can, but doing so will significantly affect the gourmet quality and the deep, complex flavor profile of these marshmallows. If you choose to omit the bean, I recommend increasing the vanilla extract slightly, or consider using high-quality vanilla bean paste for some speckled appearance and a more concentrated vanilla flavor than extract alone.
- Why is the sugar syrup temperature so important? The precise temperature of the sugar syrup dictates the final texture of your marshmallows. Reaching 240°F (the soft ball stage) creates marshmallows that are perfectly soft, pliable, and resilient. Any higher, and they become too hard; any lower, and they won’t set properly and will remain too liquid.
- How do I store them properly for lasting freshness? Please refer to the detailed notes section in the recipe card for comprehensive storage instructions. Generally, store them in an airtight container at room temperature, away from humidity and extreme temperature fluctuations.
By diligently following these steps, understanding the role of each ingredient, and applying these troubleshooting tips, you’ll be well on your way to creating a magnificent batch of homemade vanilla bean marshmallows that are truly a cut above the rest – a perfect sweet treat for any occasion!
MORE TREASURES FROM MY GRANDMA’S CHURCH COOKBOOK
Soft, Buttery Homemade Caramels
Classic Homemade Nougat Recipe
Homemade Peanut Brittle
Old-Fashioned Pecan Log
Homemade Vanilla Bean Marshmallows
Erin Collins
1 hour
8 hours
16 large marshmallows (approx.)
Pin Recipe
Leave a Comment
Print Recipe
Ingredients
- ½ cup (60g) powdered sugar
- ¼ cup (32g) cornstarch
- 3 envelopes (21g) Knox gelatin
- 1⅔ cups (400ml) cold water, divided
- 3 cups (600g) granulated sugar
- ½ teaspoon kosher salt
- 3 large egg whites
- 2 teaspoons vanilla extract
- 1 vanilla bean split lengthwise, seeds scraped
Instructions
- Spray a 9×13-inch glass or ceramic baking pan with cooking spray (avoid metal, as it may affect the flavor). In a small bowl, mix the powdered sugar and cornstarch, then generously dust the pan with the mixture, reserving some for dusting the marshmallows at the end.
- In the bowl of a stand mixer fitted with a whisk attachment, or using a hand mixer, add the gelatin and ⅔ cup cold water. Mix together for 30 seconds, then let sit to bloom for 20 minutes.
- In a medium heavy-bottomed saucepan over medium-high heat, whisk together the sugar, salt, and remaining 1 cup of water. Bring to a boil and boil for about 15 minutes, until the mixture reaches exactly 240°F (115°C) on a candy thermometer.
- With the mixer running on low speed, slowly pour the hot sugar mixture into the bloomed gelatin in a steady stream. Increase the speed to medium-high and beat for 10 minutes, until it becomes thick and fluffy and forms soft peaks.
- Beat in the egg whites and mix for another 5 minutes until fully incorporated and the mixture is very airy. Mix in the vanilla extract and the scraped vanilla bean seeds.
- Pour the marshmallow mixture into the prepared pan, then smooth it into an even layer using an offset or greased spatula. Let it sit uncovered at room temperature for at least 8 hours, or up to 48 hours, until completely firm.
- Once the marshmallow is firm, prepare a parchment-lined surface dusted liberally with the remaining cornstarch/sugar mixture.
- Use a sharp knife to loosen the edges of the marshmallow from the pan, then gently peel the slab from the pan and turn it out onto the prepared surface.
- Lightly coat a sharp knife with the cornstarch/sugar mixture (or run it under hot water and dry) for clean cuts. Cut the marshmallow into 1.5-inch squares. Immediately dust all the freshly cut edges of each square in the remaining cornstarch/sugar mixture to prevent sticking.
Recipe Notes & Storage Tips
- Gluten-Free: This recipe is naturally gluten-free, making it a safe and delicious indulgence for those with sensitivities.
- Dairy-Free: Enjoy these marshmallows knowing they are naturally dairy-free, perfect for various dietary needs and preferences.
- Nut-Free: This recipe is naturally nut-free, providing a delightful and safe treat for individuals with nut allergies.
Make Ahead & Storage:
- To Make Ahead: You can easily prepare this homemade marshmallow recipe up to 2 days in advance. For the absolute freshest texture and best presentation, it’s ideal to let the marshmallow slab fully rest and firm up uncovered, then cut and coat them with the sugar/cornstarch mixture just before you plan to serve them.
- To Store: Once your vanilla bean marshmallows are cut and thoroughly coated, store them in an airtight container at room temperature. They will remain wonderfully fresh, soft, and delicious for up to 2 weeks. It’s crucial to avoid high humidity or significant temperature fluctuations, as these environmental conditions can cause the marshmallows to become sticky and affect their texture.
- To Freeze: Freezing is generally not recommended for these delicate homemade marshmallows. The freezing and subsequent thawing process can significantly alter their unique, delicate texture, often making them watery, grainy, or overly chewy upon defrosting. For the best culinary experience, enjoy them fresh!
Nutrition Information (per serving)
Carbohydrates: 43 g |
Protein: 1 g |
Fat: 0.2 g |
Polyunsaturated Fat: 0.001 g |
Monounsaturated Fat: 0.001 g |
Sodium: 84 mg |
Potassium: 11 mg |
Fiber: 0.02 g |
Sugar: 41 g |
Calcium: 2 mg |
Iron: 0.04 mg