
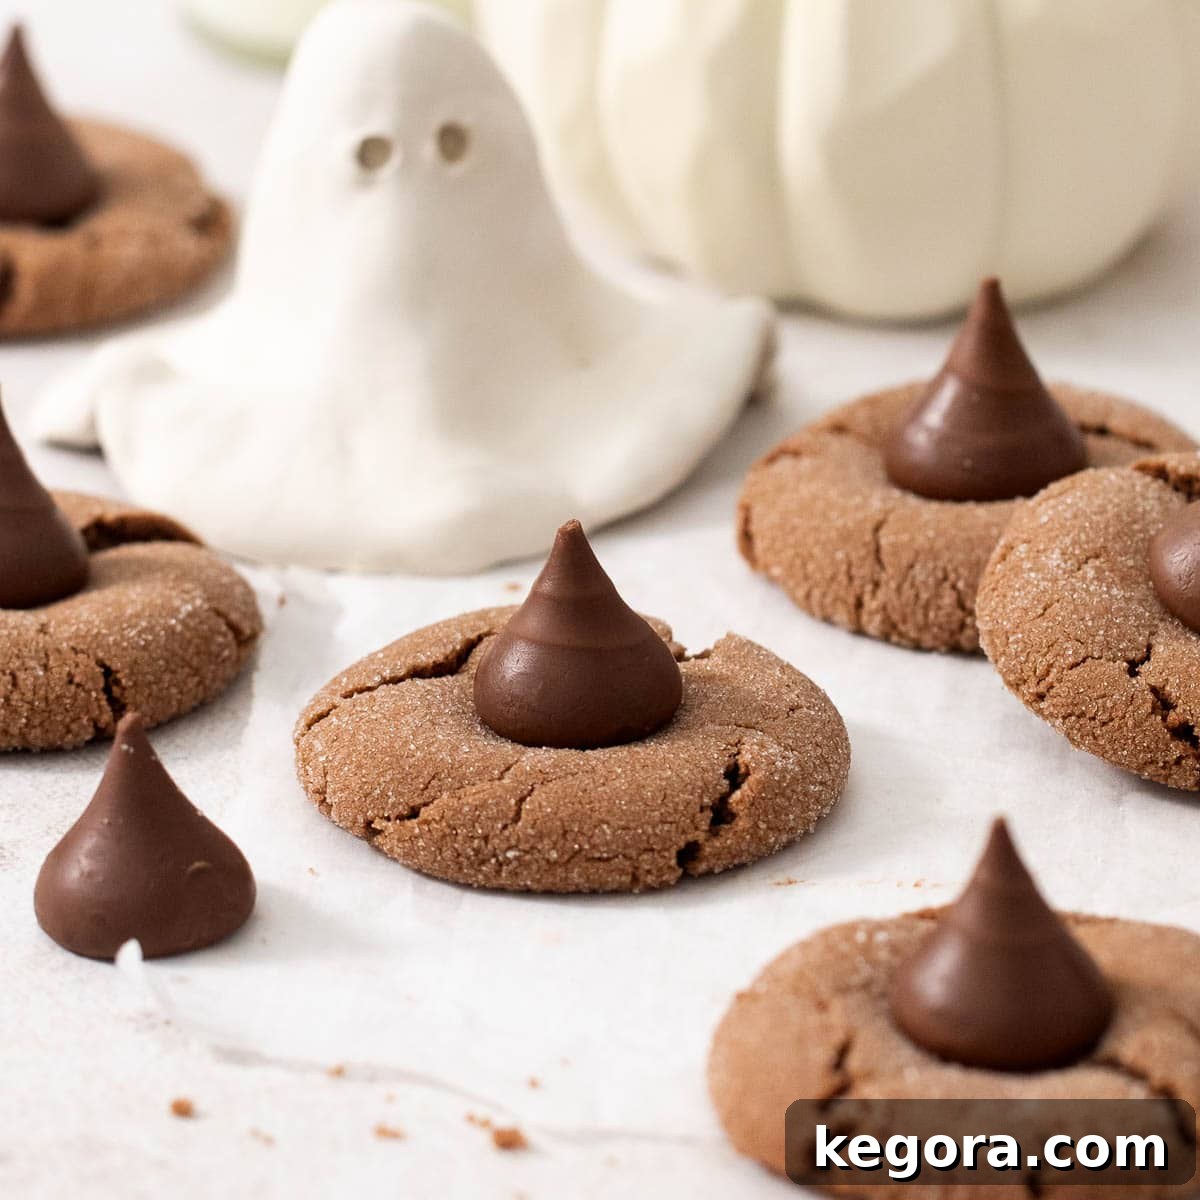
Spooktacularly Delicious: Gluten-Free Nutella Witch Hat Cookies for a Magical Halloween
Halloween is a time for spooky fun, creative costumes, and, of course, delightful treats! If you’re searching for a festive yet simple recipe that’s sure to be a hit with everyone, especially those with gluten sensitivities, look no further than these enchanting Gluten-Free Nutella Witch Hat Cookies. These cookies are not only incredibly fun to make but also boast a soft, chewy texture and a rich chocolate-Nutella flavor that will surprise even the most discerning palates – no one will ever guess they’re gluten-free!
Baking these cookies has quickly become a cherished family tradition in my home. My kids absolutely adore getting involved in the process, from mixing the dough to carefully placing the iconic chocolate Kisses. It’s a wonderful activity that brings us all together in the spirit of Halloween, creating lasting memories along with delicious snacks.
Why You’ll Love These Bewitching Cookies:
- Irresistibly Soft and Chewy: Each bite offers a perfect balance of a soft, melt-in-your-mouth center and slightly crisp edges, a hallmark of a truly great cookie.
- Decadent Nutella-Chocolate Fusion: The rich cocoa combined with the creamy, hazelnut notes of Nutella creates a flavor profile that is deeply satisfying and utterly addictive.
- Kid-Friendly Fun: The process is simple enough for little hands to help, making it an ideal baking project for families during the Halloween season.
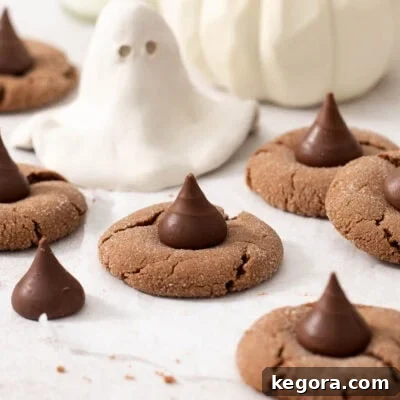
- Perfect for Parties: Their charming witch hat appearance makes them a fantastic centerpiece or treat for any Halloween gathering, sparking joy and conversations.
- Naturally Gluten-Free: Crafted with high-quality gluten-free flour, these cookies are accessible to a wider audience without compromising on taste or texture.
Top Tip for Picture-Perfect Witch Hats:
For the most magical results, make sure to freeze your chocolate Kiss candies before baking! This simple trick is a game-changer. Pressing the frozen Kisses into the warm, fresh-out-of-the-oven cookies helps them maintain their distinct shape as they cool, ensuring each cookie proudly sports its adorable witch hat.
If you’re looking for more gluten-free Halloween inspiration, don’t miss these other fantastic recipes: classic gluten-free Halloween cookies, healthy Halloween snacks for kids, easy Halloween snack mix, and a vibrant Halloween fruit salad.
xoxo Erin
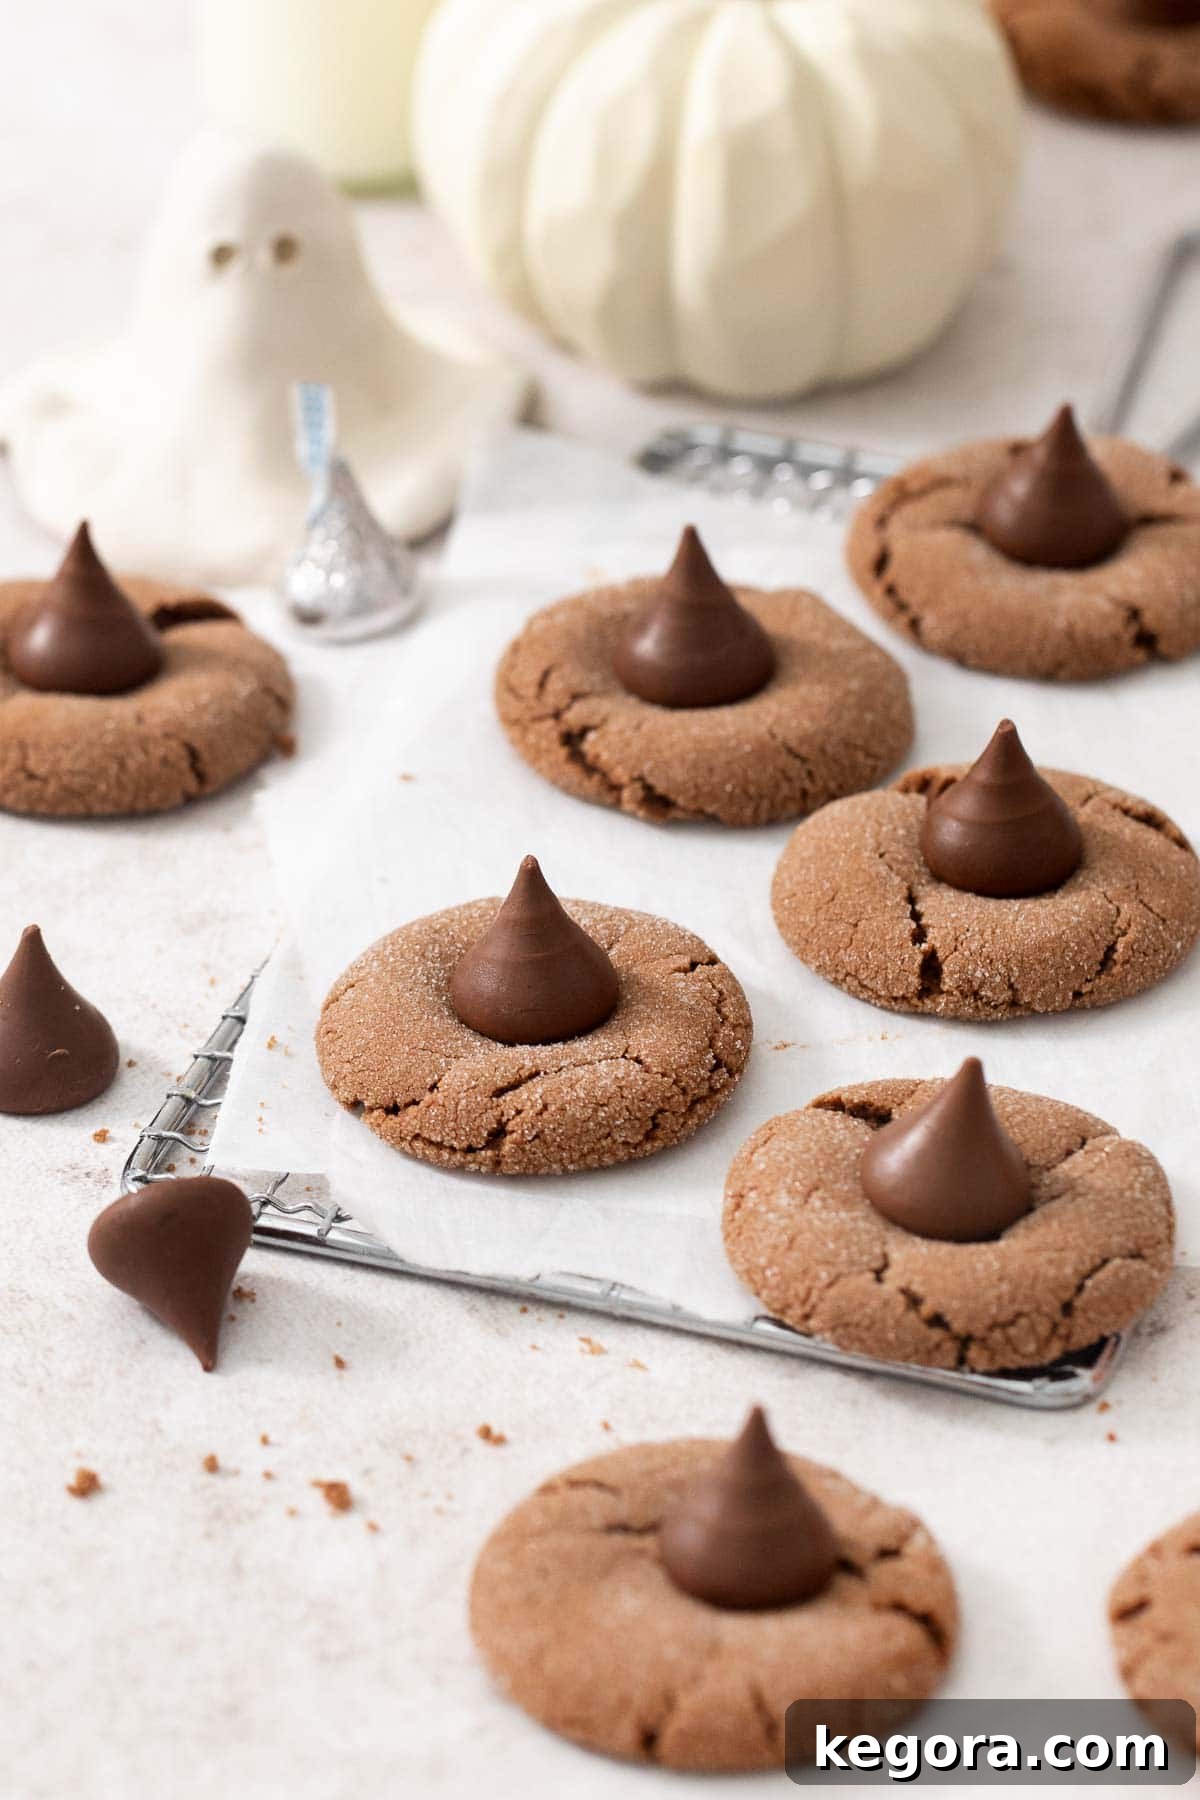
Unlock the Magic: Essential Ingredients for Your Gluten-Free Witch Hat Cookies
Crafting the perfect cookie begins with understanding your ingredients. Here are some detailed notes on the key components that give these gluten-free Nutella witch hat cookies their exceptional flavor and texture. Scroll down to the full recipe card below for precise measurements and a complete list.
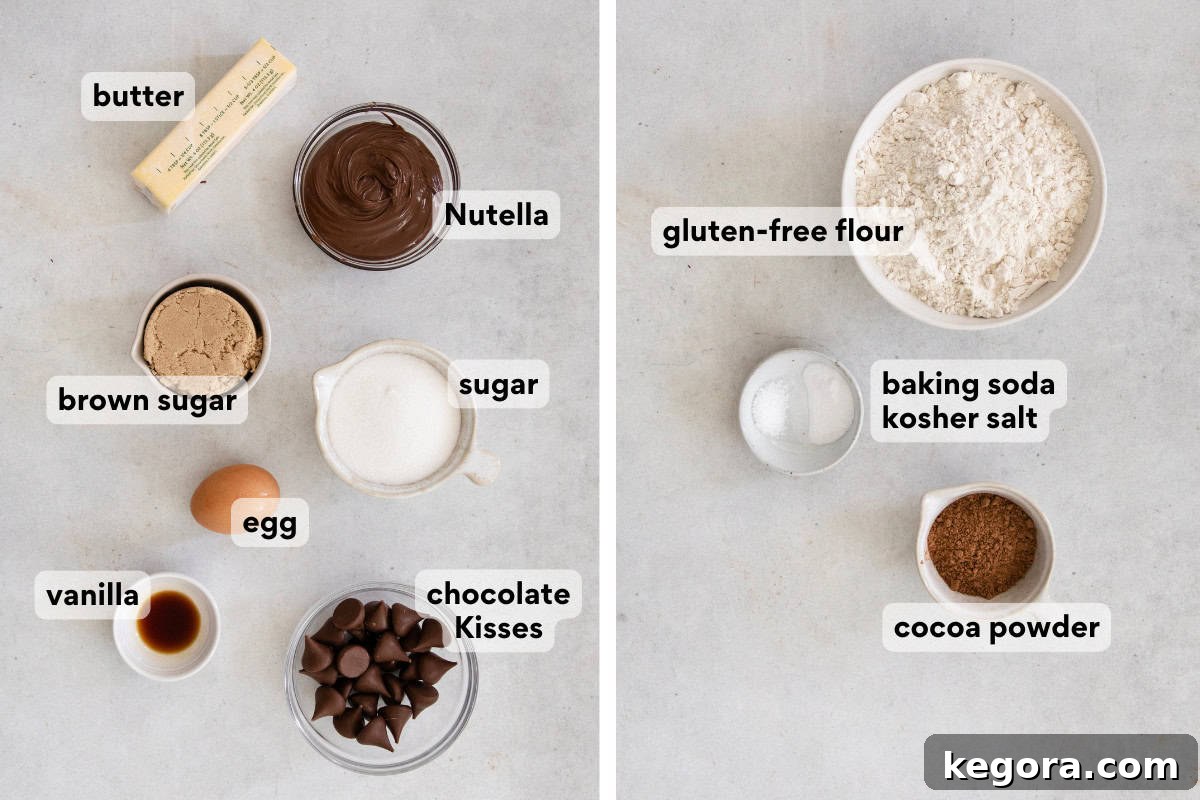
- Gluten-Free Flour Blend: The foundation of our gluten-free success! Using a high-quality measure-for-measure (or “cup-for-cup”) gluten-free flour blend is absolutely crucial. These blends are specifically formulated to mimic the properties of wheat flour, providing the perfect soft, yet chewy texture that makes these cookies so delightful. Brands like King Arthur Gluten-Free Measure for Measure Flour are highly recommended for their consistent results. Avoid using single-grain gluten-free flours, as they will not yield the same structure or texture.
- Cocoa Powder: This is where the rich chocolatey essence comes from. You have a couple of options:
- Unsweetened Natural Cocoa Powder: This provides a classic, robust chocolate flavor with a slightly reddish hue. It’s acidic and reacts with baking soda to help the cookies rise.
- Dutch-Process Cocoa Powder: For a deeper, darker, and milder chocolate taste, Dutch-process cocoa is an excellent choice. It has been alkalized, making it less acidic, and will create a very rich, dark cookie. Either option works beautifully, depending on your preferred chocolate intensity and color.
- Unsalted Butter: Ensure your butter is at **room temperature** before you begin. This is not just a suggestion – it’s essential for achieving that light, fluffy, and fudgy cookie texture. Room temperature butter creams smoothly with the Nutella and sugars, incorporating air into the mixture, which contributes to the cookies’ tender crumb. Using cold butter will result in a denser cookie.
- Nutella: The star ingredient that gives these cookies their signature hazelnut-chocolate flavor and an extra layer of moisture and richness. Ensure your Nutella is also at room temperature or slightly warmed for easier blending.
- Granulated and Brown Sugar: The combination of both sugars plays a vital role in the cookie’s final texture. Granulated sugar contributes to the crispness of the edges, while brown sugar adds moisture, chewiness, and a subtle caramel note, enhancing the overall depth of flavor.
- Large Egg: Acts as a binder, helping to hold the dough together and providing structure. It also contributes to the cookies’ richness and moisture.
- Vanilla Extract: A touch of vanilla enhances all the other flavors, especially the chocolate and hazelnut, adding a warm, aromatic depth to the cookies.
- Chocolate Kiss Candies: These are the adorable “hats” for our witches! As mentioned in our top tip, freezing them before baking is paramount. This allows them to be pressed into the warm cookies without melting completely, helping them retain their iconic shape and creating that perfect witch hat silhouette. Make sure they are unwrapped and ready to go into the freezer at least 30 minutes before you bake.
Crafting Your Confections: Step-by-Step Guide to Gluten-Free Nutella Witch Hat Cookies
Ready to bring these magical treats to life? This overview provides a clear, step-by-step guide to making your gluten-free Nutella witch hat cookies. For a full, printable version with exact measurements and detailed instructions, remember you can jump directly to the recipe card below!
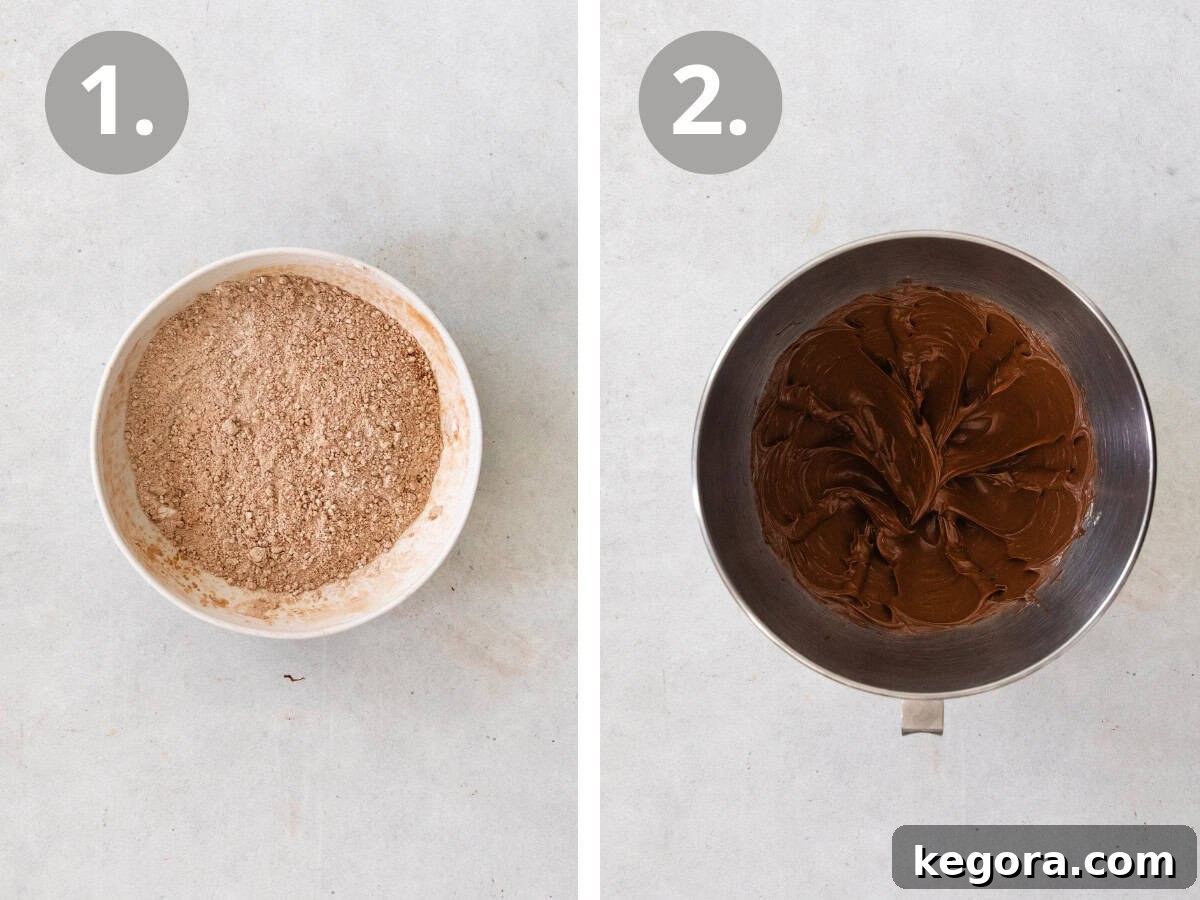
Phase 1: Preparing the Foundation
Step 1: Combine the Dry Ingredients. In a medium-sized bowl, meticulously whisk together your gluten-free flour blend, cocoa powder, baking soda, and a pinch of kosher salt. Whisking ensures all ingredients are evenly distributed and helps to eliminate any clumps, creating a uniform base for your cookies. Set this mixture aside.
Step 2: Cream the Butter and Nutella. In the bowl of a stand mixer fitted with a paddle attachment, or using a hand mixer, combine the room-temperature butter and Nutella. Beat them together on medium-high speed for approximately 1 minute. You’re looking for a mixture that is light, fluffy, and creamy. This crucial step incorporates air, which contributes to the cookies’ soft and tender texture.
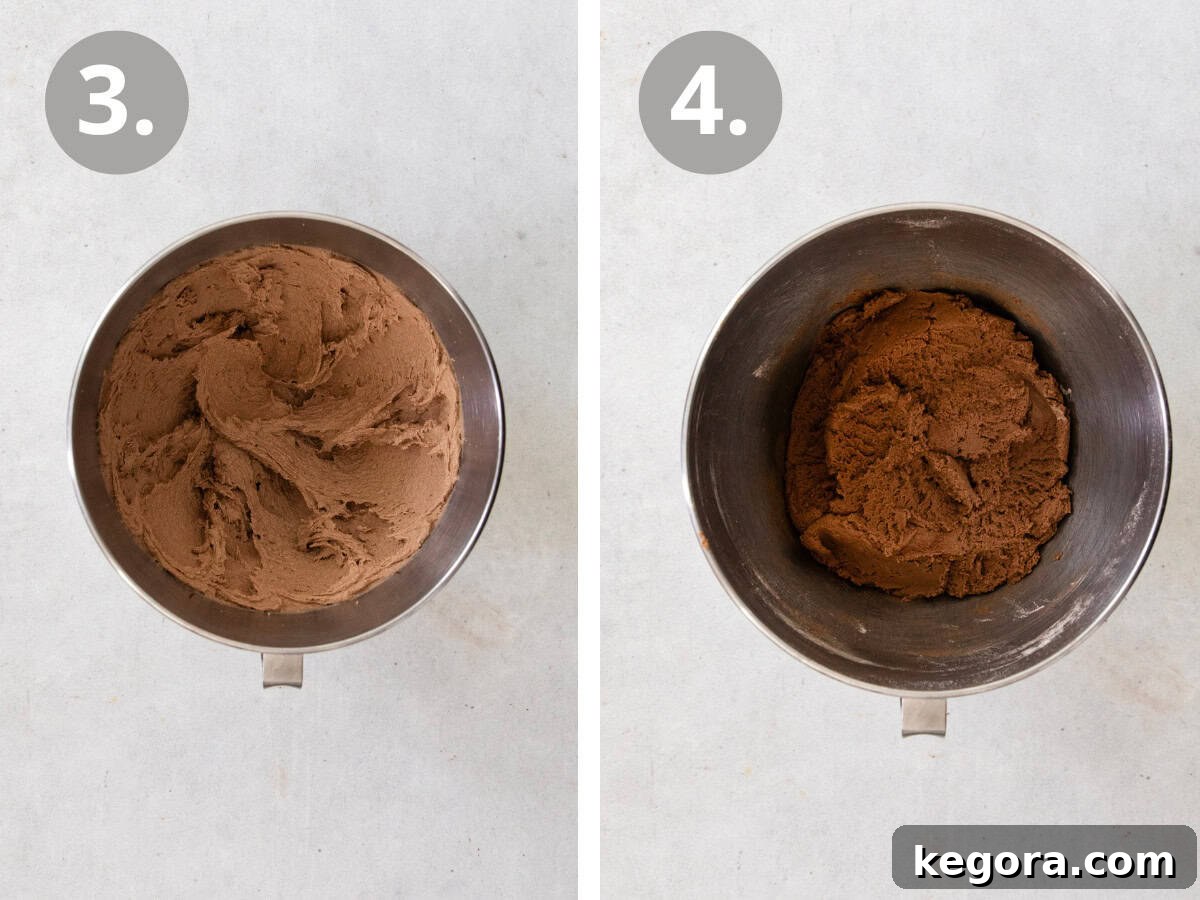
Phase 2: Building the Dough
Step 3: Introduce the Sugars. Add both the brown sugar and granulated sugar to the butter-Nutella mixture. Continue beating for about 2-3 minutes until the mixture is fully creamed, appearing light in color and fluffy in texture. The sugars should be fully incorporated, dissolving slightly into the fats.
Step 4: Finish the Dough. Crack in the large egg and pour in the vanilla extract. Mix until just combined, ensuring everything is well-integrated. At this point, stop the mixer and scrape down the sides and bottom of the bowl with a spatula to ensure all ingredients are evenly mixed. With the mixer running on low speed, gradually add your dry ingredient mixture to the wet ingredients. Mix until a thick, cohesive dough forms. Be careful not to overmix once the flour is added; just mix until no streaks of dry flour remain. The dough should be soft, pliable, and easily pull away from the sides of the bowl without being overly sticky.
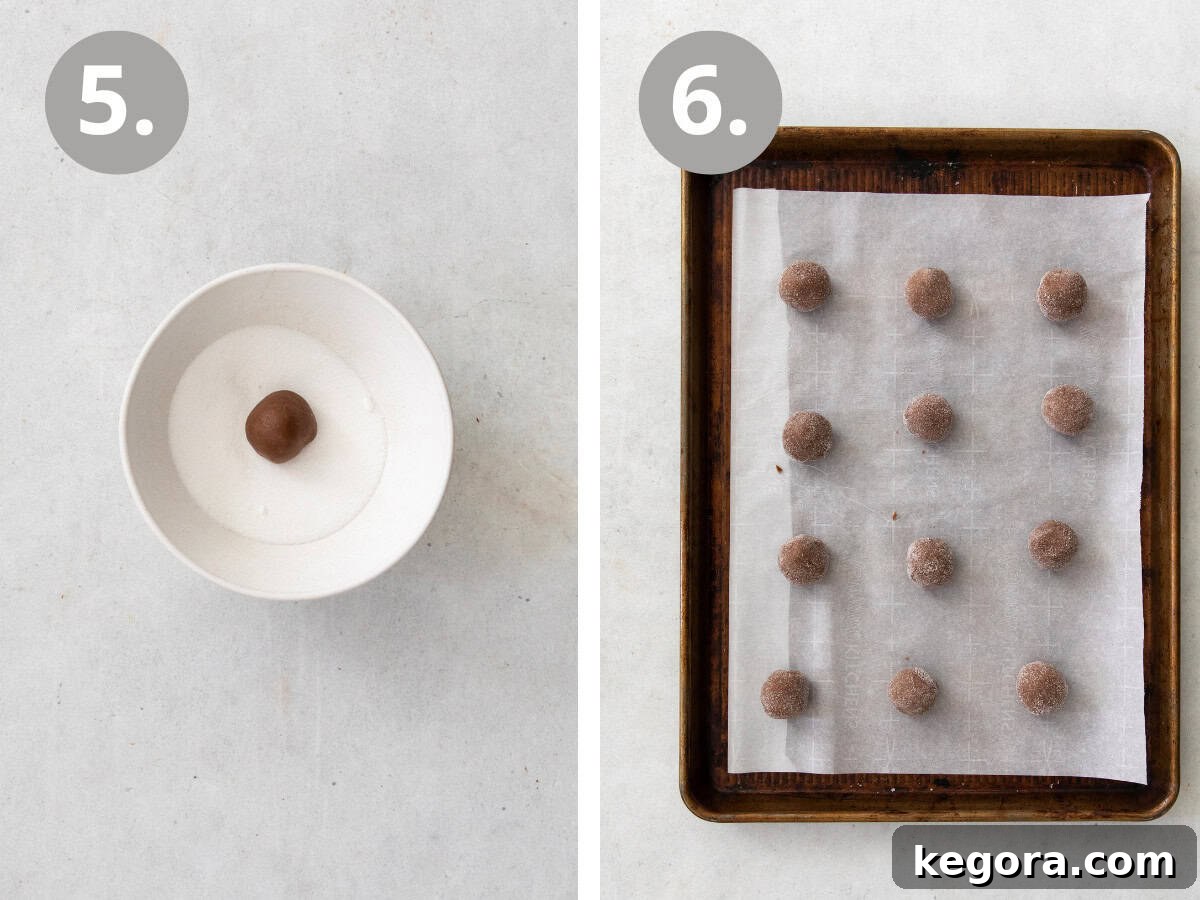
Phase 3: Shaping, Baking, and Finishing
Step 5: Rest the Dough. Cover the bowl containing your prepared cookie dough and allow it to rest at room temperature for at least 20 minutes. This resting period is particularly beneficial for gluten-free doughs, allowing the flour to fully hydrate and the flavors to meld, leading to a better texture and less spreading during baking.
Step 6: Prepare for Baking. While the dough rests, preheat your oven to 350°F (175°C). Line large baking sheets with parchment paper or silicone baking mats to prevent sticking and ensure even baking. Don’t forget to place your unwrapped chocolate Kiss candies into a bowl and put them in the freezer – this is essential for their witch hat shape!
Step 7: Shape and Bake. Scoop the cookie dough into round balls, each about 1 tablespoon in size. It’s important not to make them too large, as a bigger cookie might dwarf the chocolate Kiss and disrupt the “witch hat” aesthetic. For an added touch of sparkle and a subtle crunch, you can roll each dough ball in granulated sugar before placing them on the prepared baking sheets. Arrange them about 2 inches apart to allow for spreading. Bake for 10-12 minutes, or until the edges are just set, the tops begin to show slight cracks, and the centers still look slightly soft. Remember, cookies continue to cook slightly as they cool.
Step 8: Top with Kisses. As soon as the cookies emerge from the oven, immediately take your frozen chocolate Kiss candies from the freezer. Gently but firmly press one frozen Kiss into the center of each warm cookie. The residual heat from the cookie will slightly soften the chocolate, allowing it to adhere without fully melting and losing its shape. This is how you achieve that perfect witch hat look!
Step 9: Cool Completely. Allow the cookies to cool on the baking sheets for at least 5 minutes before carefully transferring them to a wire rack to cool completely. This initial cooling on the hot baking sheet helps them firm up and prevents them from breaking when moved. Once cooled, your enchanting gluten-free Nutella Witch Hat Cookies are ready to be devoured!
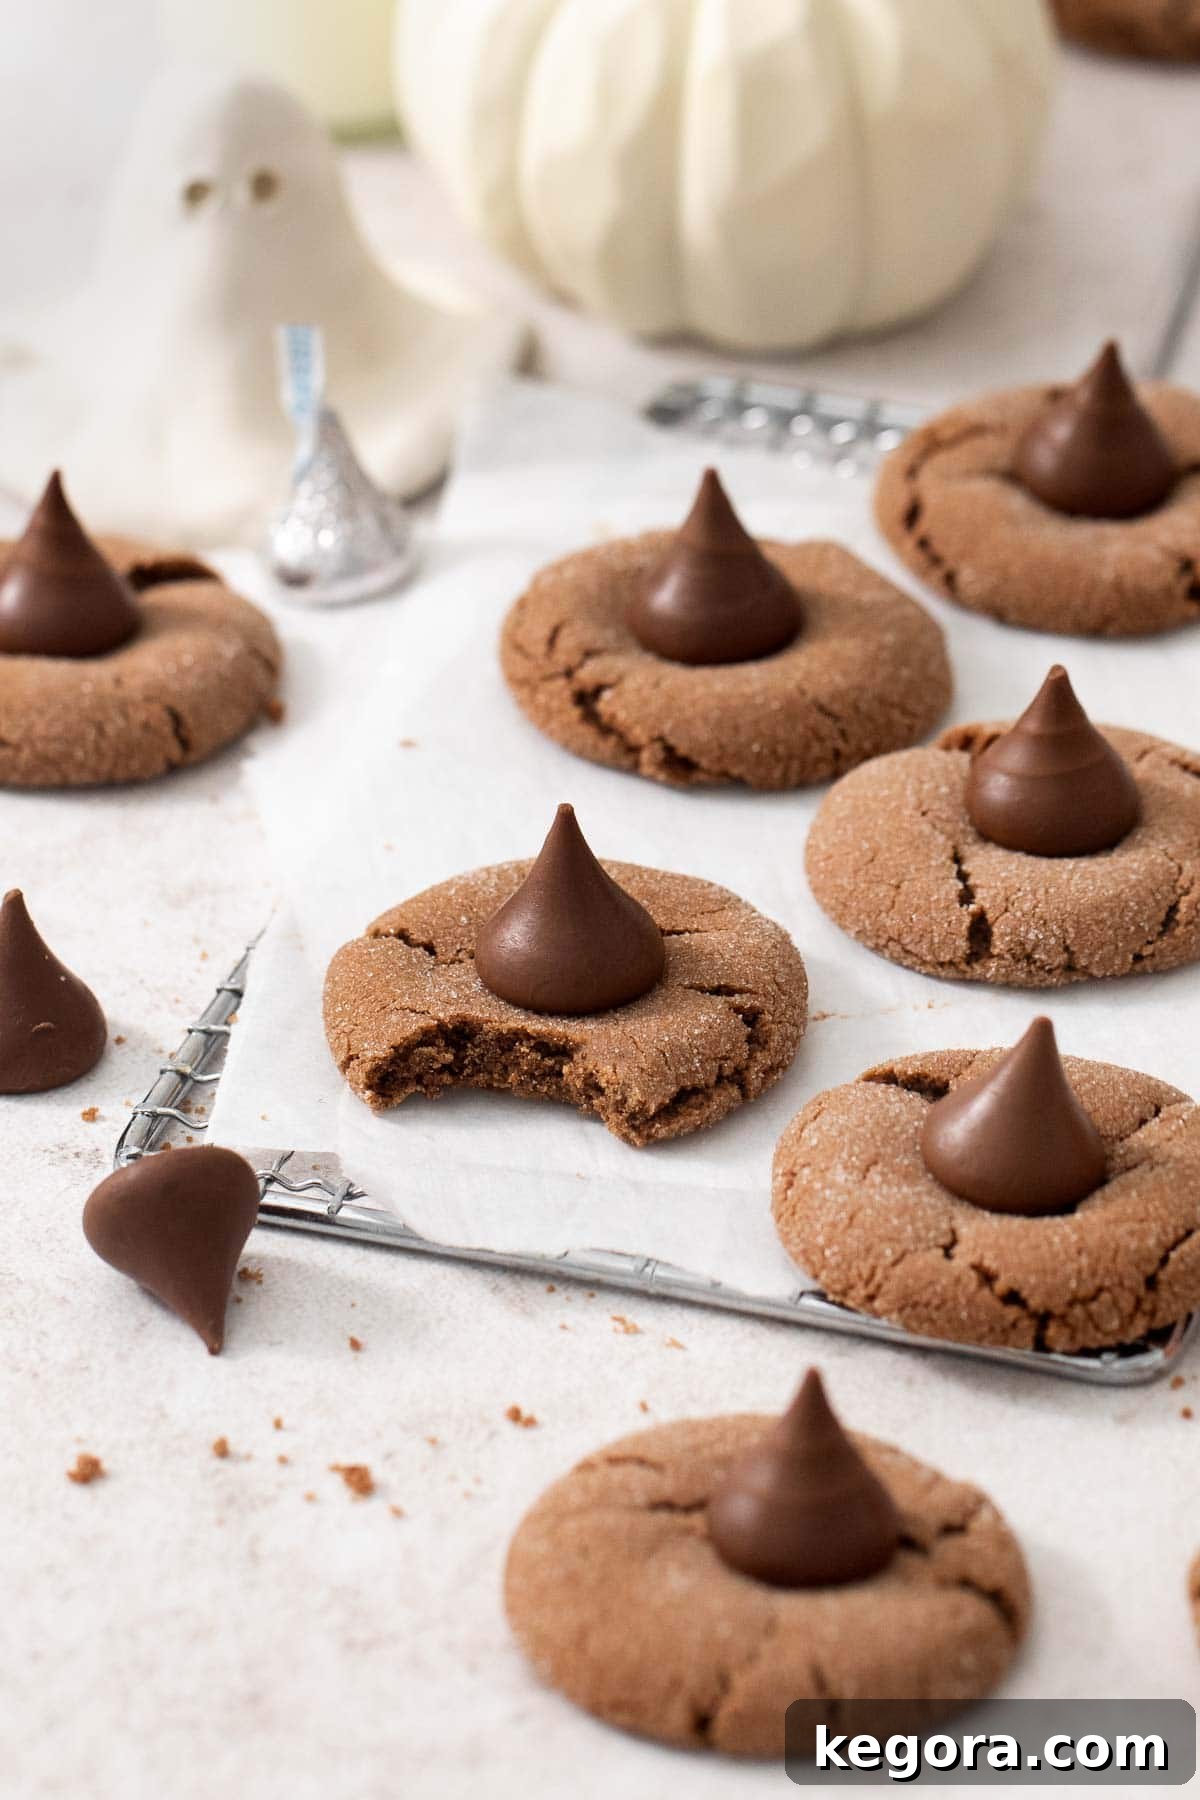
Gluten-Free Nutella Witch Hat Cookies
Erin Collins
15 mins
10 mins
20 mins
36 small cookies
Comments
Ingredients
Dry Ingredients
- 1 ½ cups (225g) gluten-free measure-for-measure flour
- 3 tablespoons (15g) unsweetened cocoa powder
- 1 teaspoon baking soda
- ½ teaspoon kosher salt
Other
- ½ cup (150g) Nutella
- ½ cup (113g) butter, at room temperature
- ½ cup (106g) brown sugar
- ½ cup (100g) granulated sugar
- 1 large egg
- 1 teaspoon vanilla extract
- ½ cup (100g) granulated sugar, for rolling (optional)
- 36 chocolate Kiss candies, unwrapped
Instructions
- In a medium bowl, whisk together the gluten-free flour, cocoa powder, baking soda, and salt until no clumps remain. Set aside.
- In the bowl of a stand mixer fitted with a paddle attachment, or using a hand mixer, beat the butter and Nutella on medium-high speed for 1 minute until creamy and light.
- Add the brown sugar and granulated sugar. Mix until creamed and fluffy, about 2-3 minutes, scraping the sides of the bowl as needed.
- Add the egg and vanilla extract, mixing until well-combined. Scrape down the sides and bottom of the bowl thoroughly.
- With the mixer running on low speed, slowly add the whisked dry ingredients to the wet ingredients. Mix until just combined and a thick dough forms, avoiding overmixing. Scrape the bowl again to ensure full incorporation.
- Cover the bowl and let the dough sit at room temperature for 20 minutes to allow the gluten-free flour to hydrate.
- Preheat your oven to 350°F (175°C). Line large baking sheets with parchment paper or silicone baking mats.
- Place the unwrapped chocolate Kiss candies in a small bowl and set them in the freezer.
- Scoop the cookie dough into round balls, using about 1 tablespoon of dough per ball. If desired, roll each dough ball in granulated sugar for a sparkly finish. Ensure cookies are not too large to maintain the proper cookie-to-chocolate ratio.
- Place the dough balls on the prepared baking sheets, spacing them about 2 inches apart. Bake for 10-12 minutes, or until the edges are lightly set and the tops just begin to crack.
- Remove the baking sheets from the oven. Immediately press a frozen chocolate Kiss candy into the center of each warm cookie.
- Allow the cookies to cool on the baking sheets for 5 minutes to firm up, then carefully transfer them to a wire rack to cool completely.
Notes & Tips for Success
Dairy-Free Adaptation: To make these cookies suitable for a dairy-free diet, simply swap the butter for your favorite dairy-free butter alternative (like Earth Balance sticks). Additionally, replace Nutella with a dairy-free chocolate hazelnut spread or another chocolate spread of choice.
Nut-Free Option: If you need to avoid nuts, substitute the Nutella with a nut-free chocolate spread. You can even create your own by blending sunflower seed butter with cocoa powder and a touch of powdered sugar for a similar rich flavor profile.
Make Ahead: The cookie dough can be prepared up to 2 days in advance. Store the covered bowl of dough in the refrigerator. Before baking, let it sit at room temperature for about 10-15 minutes to soften slightly, making it easier to scoop and roll. Alternatively, you can form the dough balls and then refrigerate them on a baking sheet before baking.
Storage: Once completely cooled, store your Gluten-Free Nutella Witch Hat Cookies in an airtight container at room temperature. They will stay fresh and delicious for up to 4 days, though they rarely last that long!
Freezing Options: These cookies are fantastic for freezing! You can freeze baked cookies in a single layer in an airtight container for up to 2 months. Thaw at room temperature. For future convenience, you can also freeze raw dough balls. Simply bake them straight from frozen, adding a few extra minutes (typically 2-4 minutes) to the baking time until golden brown and set.
Nutrition
| Carbohydrates: 18 g
| Protein: 1 g
| Fat: 6 g
| Saturated Fat: 4 g
| Polyunsaturated Fat: 0.1 g
| Monounsaturated Fat: 1 g
| Trans Fat: 0.1 g
| Cholesterol: 12 mg
| Sodium: 91 mg
| Potassium: 30 mg
| Fiber: 1 g
| Sugar: 14 g
| Vitamin A: 86 IU
| Calcium: 22 mg
| Iron: 1 mg