
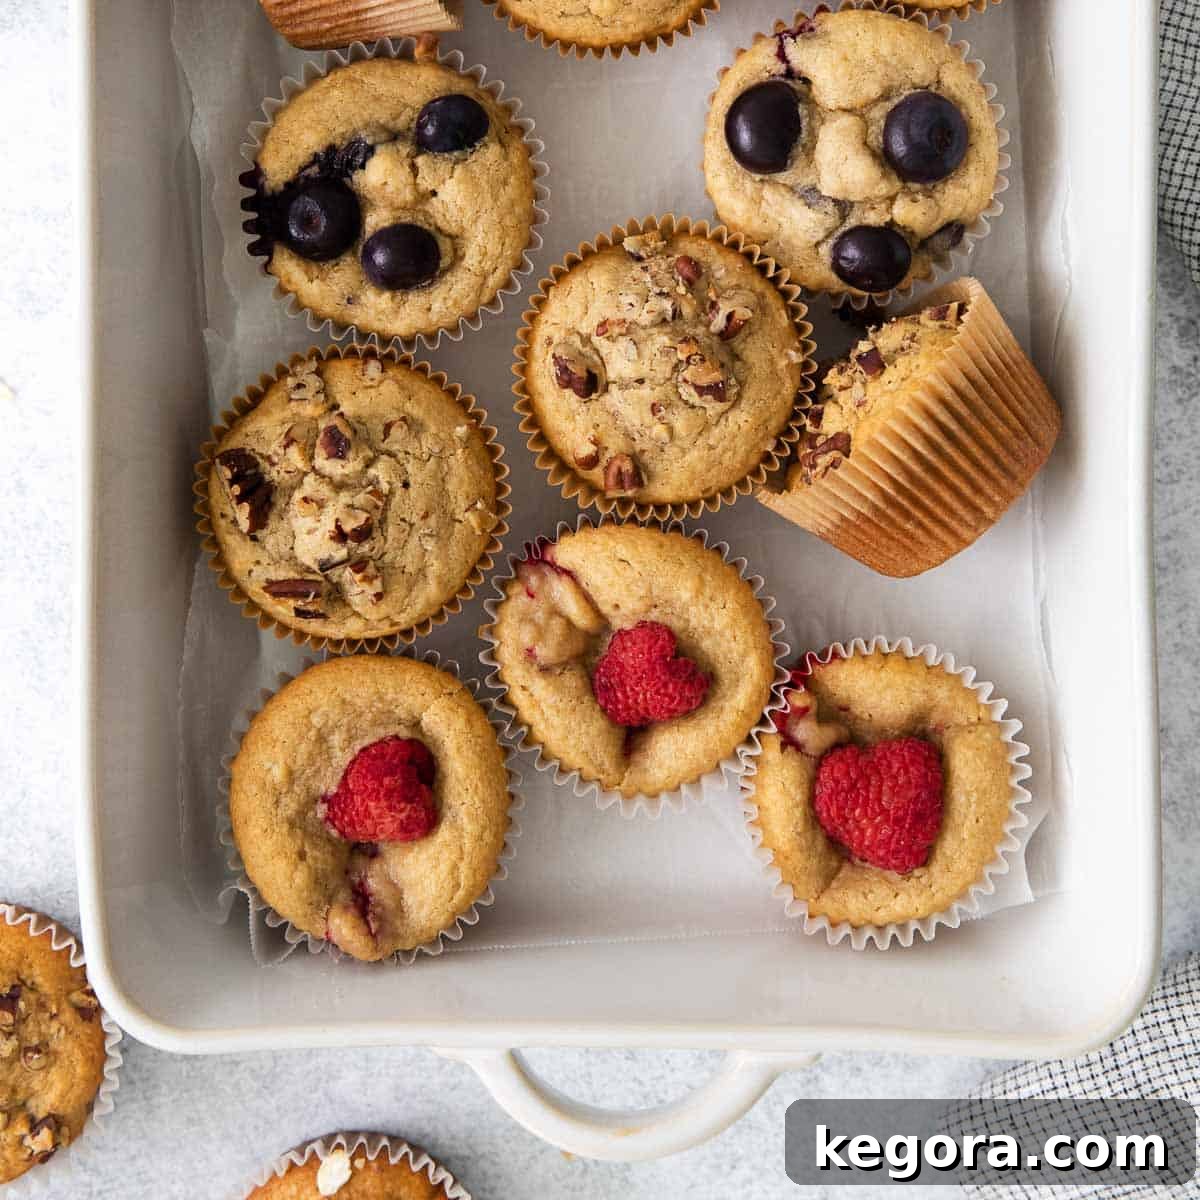
Deliciously Moist Oat Flour Muffins: Your Go-To Gluten-Free & Customizable Recipe
Erin’s Recipe Rundown: Why You’ll Love These Muffins
Get ready to discover your new favorite muffin recipe! These oat flour muffins are a true game-changer, especially if you’re looking for a delicious, naturally gluten-free, and easily adaptable treat. Here’s a quick overview of what makes them stand out:
Texture: Experience pure bliss with muffins that are incredibly soft, light, and wonderfully moist. They boast a tender crumb that holds together beautifully, ensuring every bite is perfect without being crumbly or dense.
Taste: Perfectly balanced sweetness, complemented by a warm hint of nutmeg and the subtle, earthy nuttiness of high-quality oat flour. These muffins are satisfying without being overly sweet, making them ideal for any time of day.
Ease: Simplicity is key! This is a no-fuss, one-bowl-friendly recipe that even absolute beginners can master with confidence. Minimal cleanup means more time to enjoy your freshly baked treats.
Top Tips for Bakery-Style Muffins: To achieve those coveted tall, domed tops found in bakeries, incorporate two simple yet effective techniques. First, chill your batter for at least 20 minutes before baking. Second, start baking at a high temperature (425°F) to kickstart the rise, then reduce the temperature for even baking through to the center.
Recommended Gluten-Free Oat Flour: For the best results and to ensure these muffins are truly gluten-free, always opt for certified gluten-free oat flour. Our top recommendations include King Arthur Flour and Bob’s Red Mill, known for their consistent quality and reliability.
Will I Make These Again? Absolutely! These muffins have become a beloved staple in our home. Their endless customization possibilities, freezer-friendly nature, and consistent popularity with my family make them a recipe we return to again and again.
xoxo erin
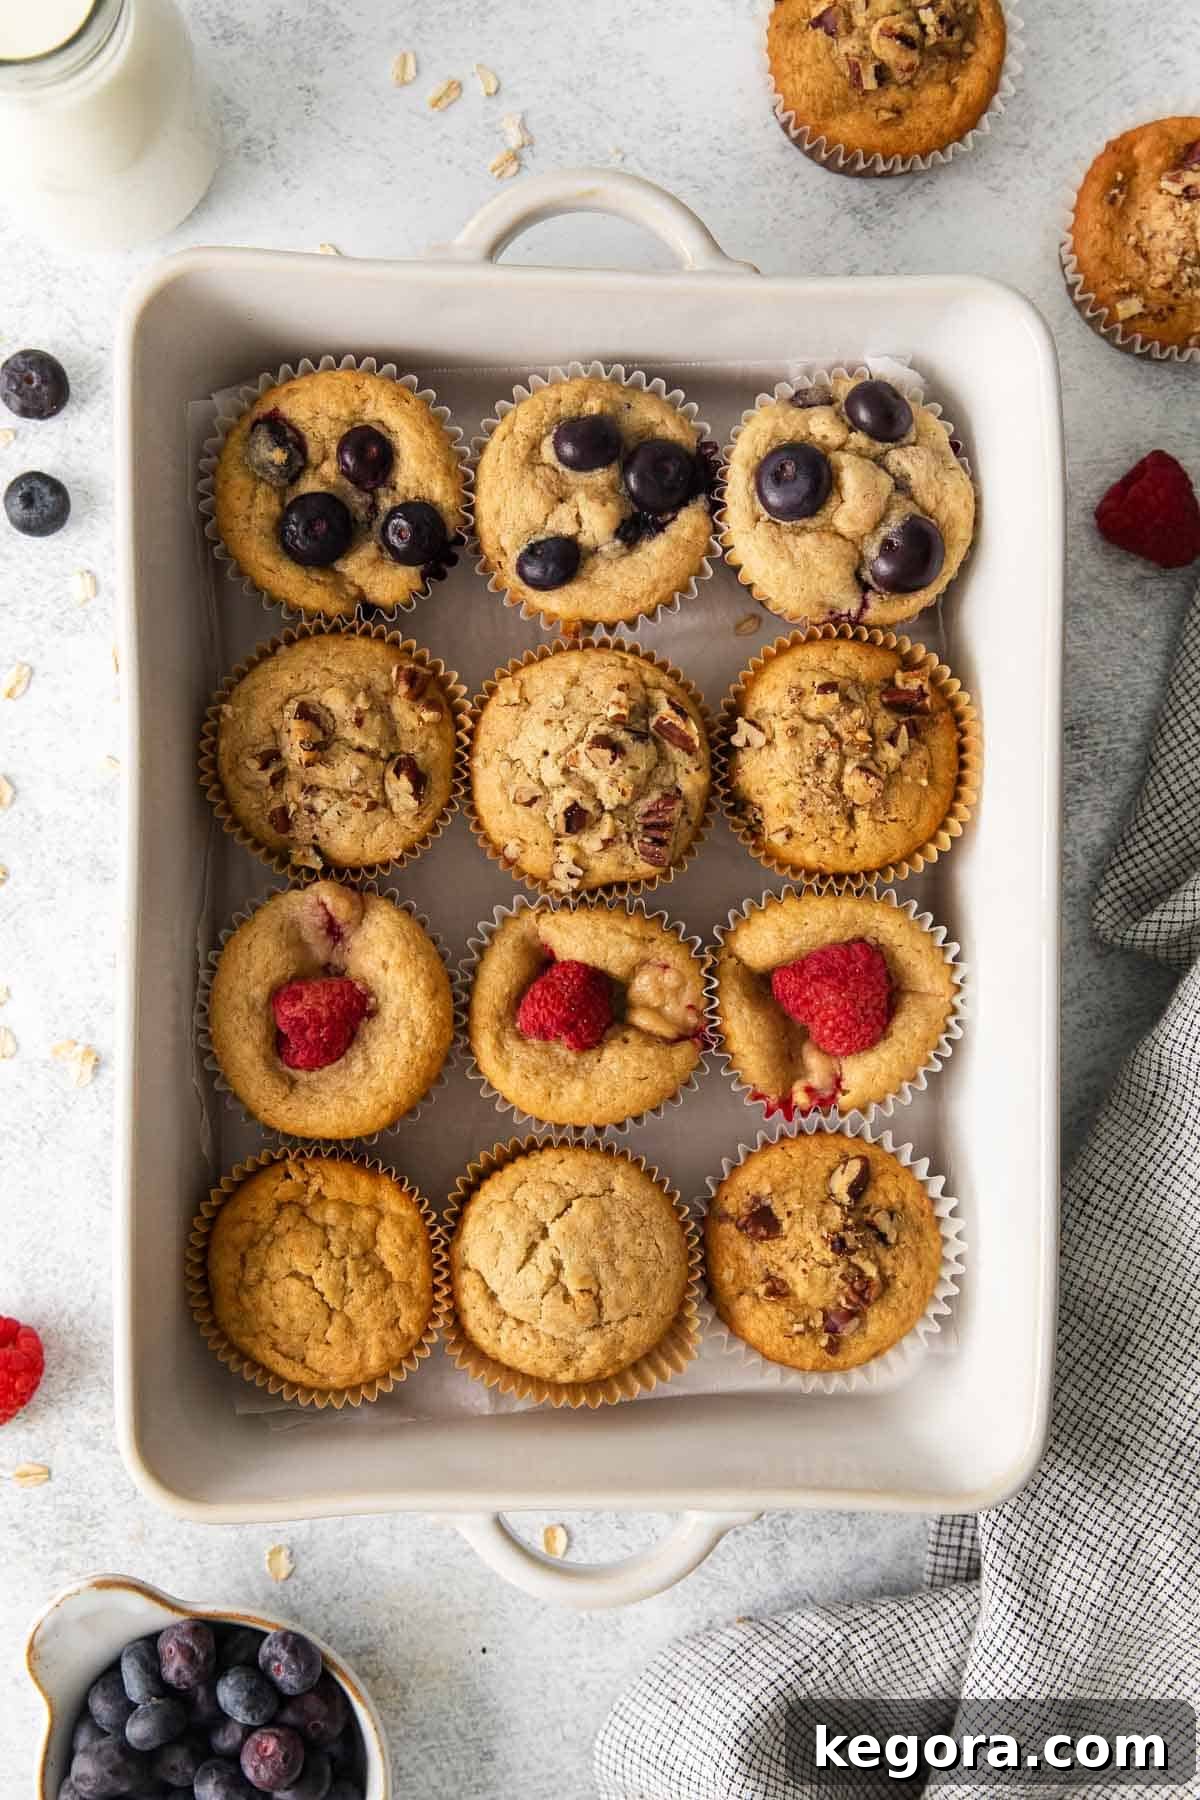
This post was originally published in March 2023. It was updated with new photos and enhanced instructions in May 2025 to provide even more value and guidance to our readers.
For years, this oat flour muffin recipe has been my unwavering go-to, and for good reason! It’s not only incredibly simple to customize, but it’s also naturally gluten-free and effortlessly adaptable to be dairy-free. What truly sets these muffins apart are the specialized tricks I’ve refined over time, ensuring every batch emerges from the oven consistently moist, wonderfully fluffy, and delightfully light.
Many gluten-free muffins unfortunately suffer from being dry, crumbly, or overly dense. However, with this recipe, you can confidently expect a consistently perfect texture and taste every single time. Bid farewell to disappointing gluten-free baked goods and welcome these truly exceptional oat flour muffins into your kitchen.
Featured Comment
From Winter: “I made these today with the following additions: 1 tsp cinnamon, 1/4 shredded unsweetened coconut and 1/2 cup fresh raspberries. Absolutely delicious and so happy to have found a great recipe using oat flour. Definitely on my muffin recipe rotation – thanks Erin!”
22 more comments available
Table of Contents
- Erin’s Recipe Rundown
- The Magic of Oat Flour in Baking
- Key Ingredients You’ll Need
- Wet Ingredients Spotlight
- Dry Ingredients Spotlight
- Baking with Certified Gluten-Free Oat Flour
- How to Make Perfect Oat Flour Muffins: A Step-by-Step Guide
- Storage, Make-Ahead, & Freezer Instructions
- Can these muffins be made dairy-free?
- Can you use homemade oat flour instead of store-bought?
- Can these muffins be made egg-free?
- Expert Oat Flour Muffin Tips & Tricks for Success
- More Irresistible Oat Flour Recipes
- Oat Flour Muffins (Endless Mix-Ins!) Full Recipe
The Magic of Oat Flour in Baking
Oat flour is a fantastic ingredient, especially for those seeking gluten-free baking alternatives. It brings a unique flavor profile and nutritional benefits to these muffins. Unlike some other gluten-free flours that can result in gritty or heavy textures, oat flour typically yields a soft, tender, and slightly chewy crumb. It’s rich in soluble fiber, which not only contributes to the muffins’ moistness but also aids in digestion and can help stabilize blood sugar levels.
The subtle, nutty flavor of oat flour pairs wonderfully with a variety of mix-ins, making it an excellent base for creating truly customizable muffins. Plus, for those with gluten sensitivities or Celiac disease, certified gluten-free oat flour provides a safe and delicious option that doesn’t compromise on taste or texture. This recipe harnesses the best qualities of oat flour to deliver muffins that are not just gluten-free, but genuinely delightful.
Key Ingredients You’ll Need for Your Oat Flour Muffins
Crafting these perfectly moist and fluffy oat flour muffins begins with understanding the role of each ingredient. Below are some essential notes on the key components. For precise measurements, please refer to the full recipe cardbelow.
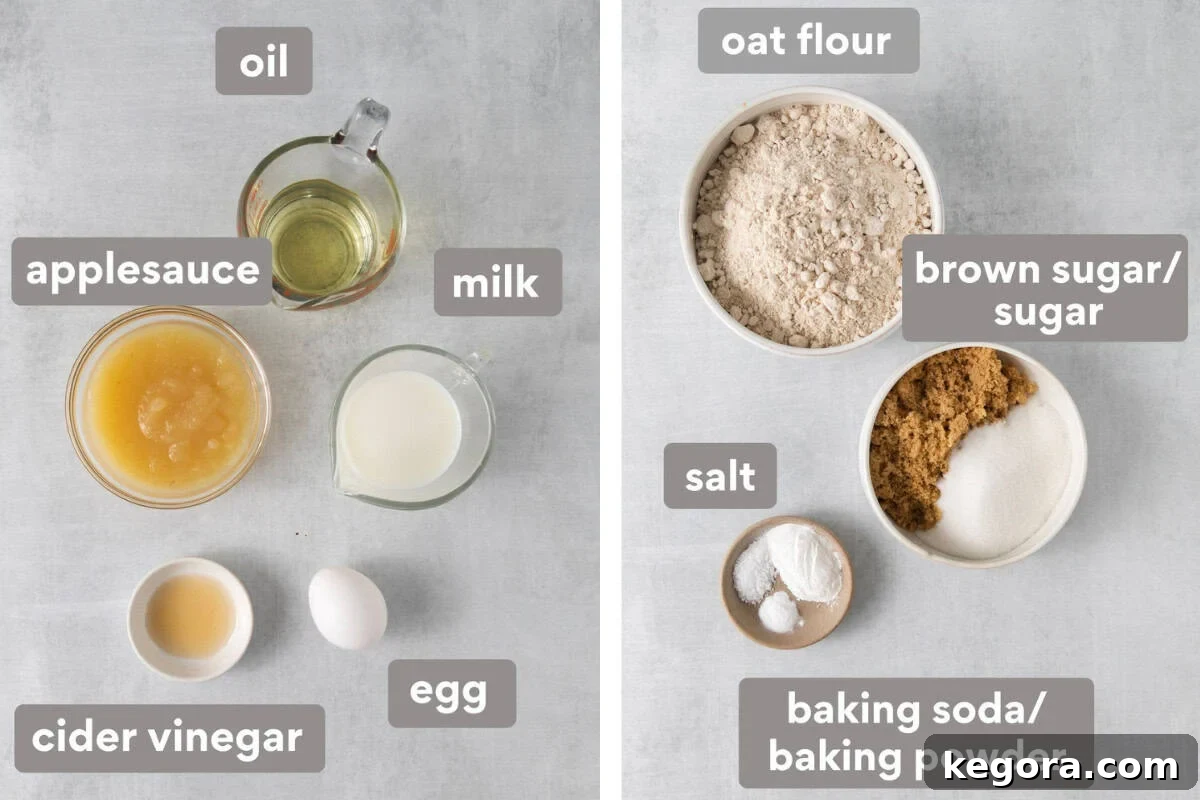
Wet Ingredients Spotlight
- Oil: The choice of oil greatly influences the final texture and moistness of your muffins. Feel free to use a neutral-flavored oil such as canola oil, vegetable oil, or a lighter olive oil. Coconut oil is also an excellent option, adding a subtle richness and ensuring a beautifully tender crumb.
- Milk: This recipe is incredibly versatile when it comes to milk. While any type of milk will work, I frequently use unsweetened almond milk for a lighter touch. Opting for any non-dairy milk – such as oat, soy, or cashew milk – makes these muffins dairy-free without compromising on flavor or texture.
- Applesauce: Unsweetened applesauce is my secret weapon for adding natural sweetness and incredible moisture without making the muffins heavy. It acts as a fantastic binder and also helps reduce the need for excessive added sugars. For variety, you can also substitute with an equal amount of mashed ripe banana, canned pumpkin puree, baked and mashed sweet potato, or even finely shredded zucchini (ensure to squeeze out excess moisture).
- Apple Cider Vinegar: Don’t skip this! Apple cider vinegar is a crucial element in gluten-free baking. When combined with baking soda, it creates a gentle chemical reaction that helps to leaven the muffins, resulting in a lighter and more tender crumb. It subtly enhances the flavor balance without leaving any vinegary taste.
- Egg: A single egg contributes to the structure, richness, and binding of the muffins, helping them rise beautifully and maintain their shape. For egg-free options, see our FAQ section below.
Dry Ingredients Spotlight
- Oat Flour: As mentioned, using certified gluten-free oat flour is paramount for those with gluten sensitivities or Celiac disease. This ensures your muffins are safe for consumption and have the optimal texture. This is my favorite brand. For more detailed information, please see our dedicated section on baking with gluten-free oat flour.
- Brown Sugar and Granulated Sugar: My preferred blend for this recipe is ½ cup of brown sugar and ¼ cup of white granulated sugar. This combination provides a nuanced sweetness and moisture from the brown sugar, alongside the structural integrity offered by white sugar. If you prefer, coconut sugar can be used as a healthier alternative. However, it is generally best to avoid liquid sweeteners like pure maple syrup or honey, as they can alter the batter’s consistency, making it too wet and potentially impacting the final texture.
- Baking Powder & Baking Soda: These leavening agents work in harmony to give the muffins their signature rise and airy texture. The baking powder provides initial lift, while baking soda reacts with the acidic applesauce and apple cider vinegar to create additional bubbles, ensuring a light and fluffy result.
- Salt: A touch of salt is essential for balancing the sweetness and enhancing all the other flavors in the muffins. It brings out the subtle nutty notes of the oat flour and prevents the muffins from tasting flat.
If you’re looking to explore more delicious muffin varieties, be sure to try these popular recipes: our gluten-free blueberry muffins, comforting gluten-free apple muffins, festive gluten-free pumpkin muffins, and classic gluten-free banana muffins.
You also might appreciate this versatile base recipe for gluten-free muffins, designed for endless customization!
Baking with Certified Gluten-Free Oat Flour: What You Need to Know
Understanding the importance of certified gluten-free oat flour is crucial for successful and safe gluten-free baking. If you or someone you’re baking for has Celiac disease, a severe gluten sensitivity, or even a mild intolerance, selecting the right oat flour is non-negotiable.
While oats themselves are naturally free of gluten, they are highly susceptible to cross-contamination during the harvesting, processing, and manufacturing stages. This often happens when oats are grown in fields adjacent to wheat, barley, or rye, or processed on shared equipment. Consequently, “regular” oats or oat flour can, and often do, contain detectable levels of gluten.
This is why the “certified gluten-free” label is so important. Certified gluten-free oats are specifically grown and processed in dedicated facilities that are free from gluten-containing grains. They undergo rigorous testing to ensure that their gluten content is below 20 parts per million (ppm), which is the universally accepted standard for gluten-free products. So, when purchasing oat flour for this recipe, always look for that clear gluten-free certification on the packaging, such as this brand.
If you prefer to make your own oat flour at home, you absolutely can! Simply blend certified gluten-free rolled oats in a high-speed blender or food processor until they reach a fine, powdery consistency. Just remember, the starting oats must be certified gluten-free to ensure your homemade flour is also safe.
How to Make Perfect Oat Flour Muffins: A Step-by-Step Guide
Creating these delectable oat flour muffins is straightforward and rewarding. Follow these steps for consistently perfect results. For the complete list of ingredients and detailed instructions, refer to the full recipe card below!
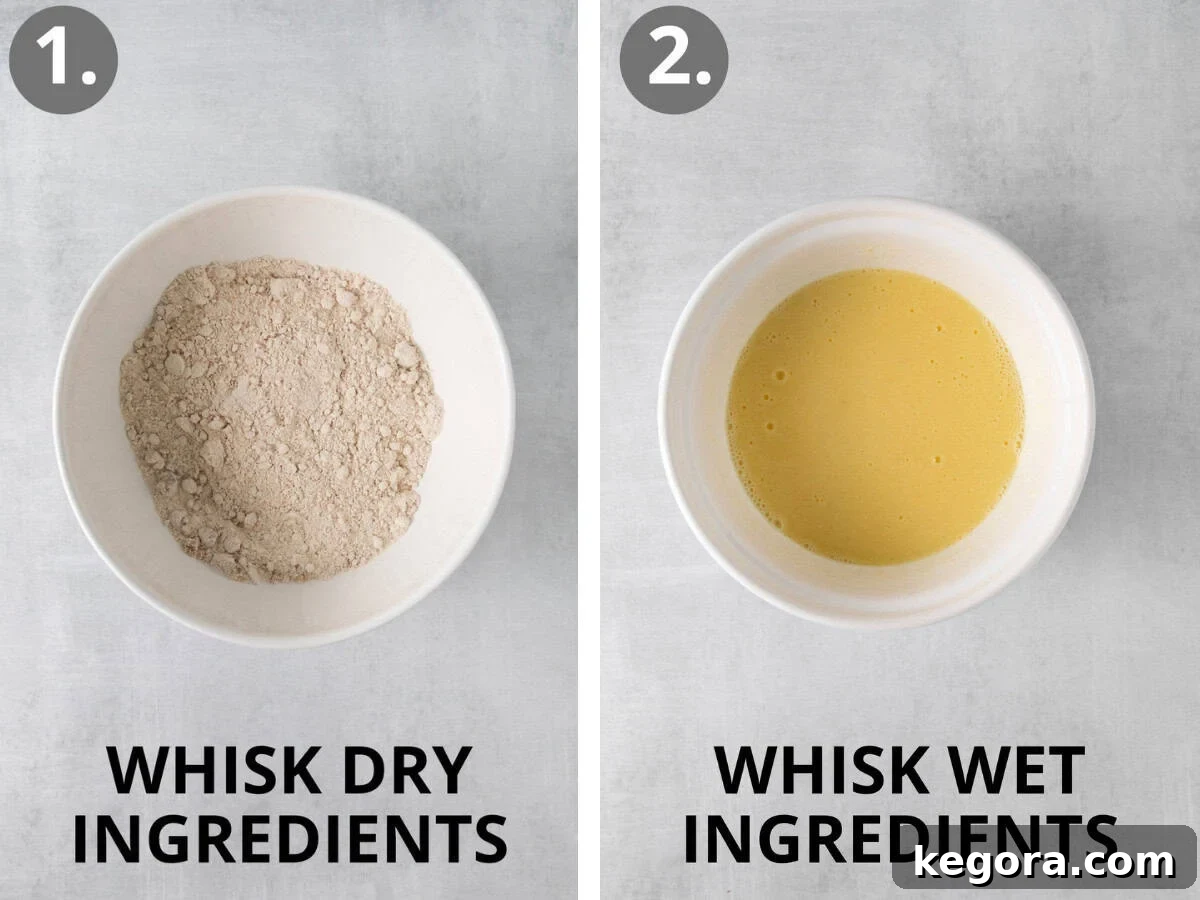
- Prepare Your Dry Ingredients: In a large mixing bowl, combine your oat flour, sugars, baking powder, baking soda, and salt. Whisk these dry ingredients together thoroughly to ensure even distribution of the leavening agents and flavorings. This step prevents pockets of unmixed ingredients and contributes to an even rise.
- Prepare Your Wet Ingredients: In a separate, medium-sized bowl, whisk together the applesauce, milk, oil, egg, and apple cider vinegar until they are well combined and smooth. Ensuring all wet ingredients are uniform helps in creating a consistent batter.

- Combine Wet and Dry & Fold in Mix-ins: Pour the wet ingredients into the bowl with the dry ingredients. Using a rubber spatula, gently fold everything together until just combined. It’s crucial not to overmix the batter; a few small lumps are perfectly fine. Overmixing can lead to tough muffins. If you’re adding any mix-ins like chocolate chips, berries, or nuts, gently fold them in at this stage until evenly distributed.
- Scoop and Chill the Batter: Using a large food scoop or an ice cream scoop, portion the batter evenly into your prepared muffin tin (lined with paper liners or greased). This ensures consistent muffin sizes. For that bakery-style dome and ultra-moist texture, refrigerate the filled muffin tin for 20 minutes before baking. This chilling time allows the oat flour to fully hydrate and the batter to firm up slightly, contributing to a better rise.

- Bake to Perfection: Preheat your oven to 425°F (220°C). Once hot, place the muffin tin in the oven and bake for 10 minutes. This initial high heat creates a burst of steam and helps the muffins rise quickly, forming those beautiful domed tops. After 10 minutes, reduce the oven temperature to 350°F (175°C) and continue baking for another 10-15 minutes, or until a toothpick inserted into the center of a muffin comes out clean. The tops should be golden brown and spring back gently when lightly touched.
- Cool and Enjoy: Allow the muffins to cool in the muffin tin for 3-5 minutes before carefully transferring them to a wire rack to cool completely. This prevents them from becoming soggy on the bottom and allows their internal structure to set. Once cooled, savor the soft, moist, and delicious results!
Looking for even more amazing muffin recipes? Check out these delightful options: coconut flour blueberry protein muffins, our highly-rated gluten-free zucchini muffins, and crowd-pleasing gluten-free chocolate chip muffins.
Don’t forget to explore our comprehensive collection of oat flour recipes for more gluten-free inspiration!
Storage, Make-Ahead, & Freezer Instructions for Optimal Freshness
Ensuring your delicious oat flour muffins stay fresh for as long as possible, or are ready when you need them, is simple with these guidelines:
To Store: Once your muffins have completely cooled to room temperature, transfer them to an airtight container or a reliable Ziplock bag. Stored this way, the muffins will maintain their delicious moistness and freshness for up to five days at room temperature. Avoid storing warm muffins in an airtight container, as this can create condensation and lead to sogginess.
To Make Ahead: For ultimate convenience, you can prepare the muffin batter in advance! Simply mix the batter as directed, cover the bowl tightly with plastic wrap, and refrigerate it for up to 24 hours. When you’re ready to bake, give the batter a gentle stir, scoop it into your prepared muffin tins, and bake according to the recipe instructions. Alternatively, you can bake the muffins completely, let them cool, and then store them for quick grab-and-go breakfasts or snacks throughout the week. This is perfect for meal prepping!
To Freeze: Freezing is an excellent way to extend the life of your oat flour muffins. Once the muffins are entirely cool, arrange them in a single layer in a freezer-safe bag or container. This prevents them from sticking together. They can be frozen for up to 3 months. To enjoy a frozen muffin, you have a couple of options: thaw it overnight at room temperature for a gentle defrost, or quickly warm it in the microwave for 20–30 seconds for a delicious, warm treat. You can also toast them lightly for a crispy exterior.
Can these oat flour muffins be made dairy-free?
Absolutely, and with fantastic results! This recipe is already designed with flexibility in mind. To make these muffins completely dairy-free, simply substitute regular milk with your favorite non-dairy alternative. Unsweetened almond milk, oat milk, or soy milk all work wonderfully and will yield muffins that are just as moist, fluffy, and delicious. The beauty of this recipe is that the dairy-free version tastes so similar to the original, no one will even notice the difference!
Can you use homemade oat flour instead of store-bought?
Yes, homemade oat flour is a perfectly viable option for this recipe, provided you start with certified gluten-free rolled oats if gluten-free is a necessity. To make it, simply blend rolled oats in a high-speed blender or food processor until they achieve a very fine, powdery consistency similar to store-bought flour. It’s important to measure your oat flour *after* blending to ensure accuracy, as the volume can change. While homemade oat flour is convenient, keep in mind that commercial oat flour is often milled to a more consistent, finer texture, which can sometimes contribute to slightly more uniform baking results. However, with a powerful blender, homemade versions work beautifully.
Can these muffins be made egg-free?
They certainly can! For an egg-free version, which also makes this recipe suitable for vegans, you can easily replace the single egg with a flax egg. To prepare a flax egg, combine 1 tablespoon of ground flaxseed with 3 tablespoons of water. Stir it well and let the mixture sit for about 5–10 minutes until it thickens into a gelatinous consistency. Once it has thickened, simply add it to the wet ingredients as you would the regular egg. This substitution works remarkably well to maintain the structure and moisture of the muffins.
Expert Oat Flour Muffin Tips & Tricks for Perfect Baking
Mastering these oat flour muffins is easy with a few insider tips:
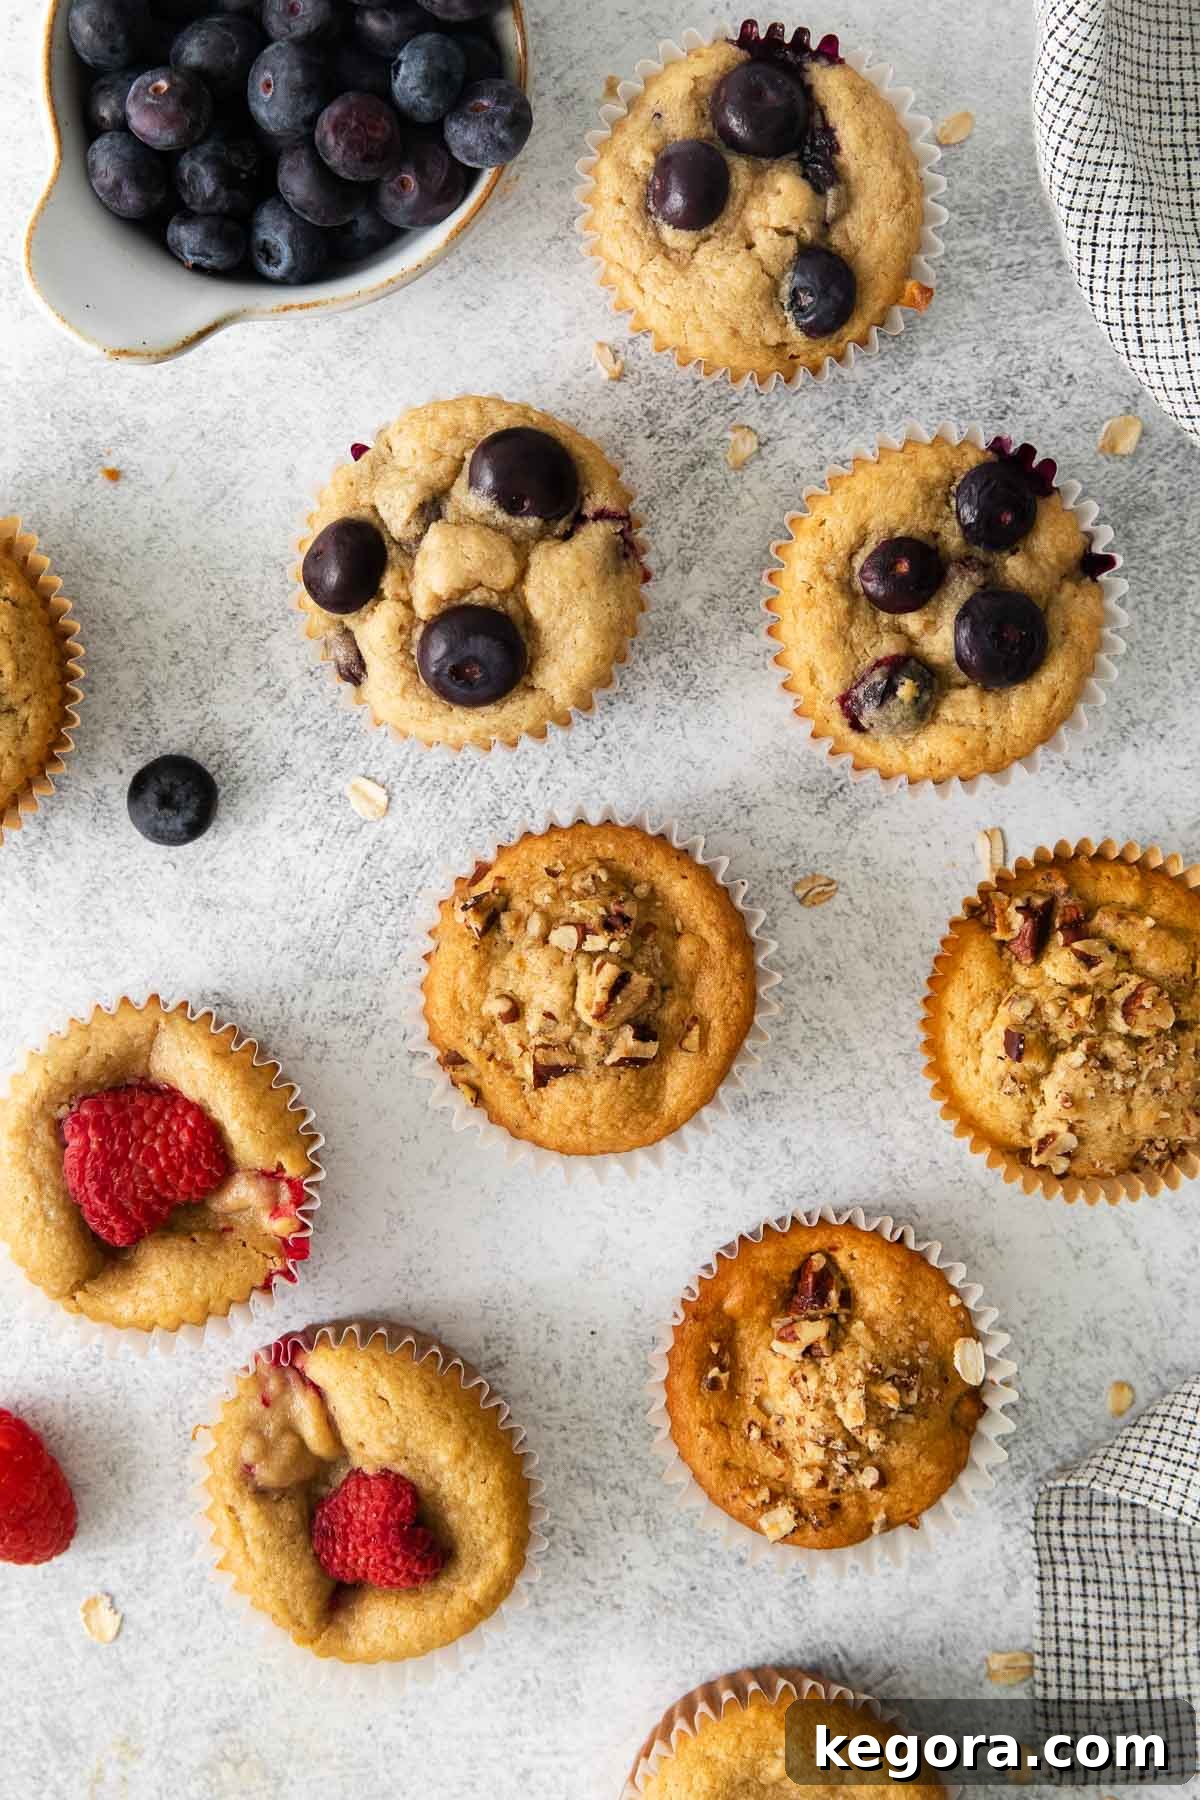
- Unleash Your Creativity with Custom Mix-ins: Consider this recipe a versatile canvas for your culinary imagination! It’s designed to be a fundamental base, inviting you to customize it with your favorite additions. Explore a wide array of mix-ins such as rich chocolate chips (dark, milk, or white), creamy peanut butter chips, flaky shredded coconut, tiny poppyseeds, nutrient-packed chia seeds, crunchy chopped walnuts or pecans, vibrant fresh or frozen berries (blueberries, raspberries, cranberries), or even dried fruits like raisins or chopped apricots. The possibilities are truly endless, allowing you to create a unique muffin experience every time.
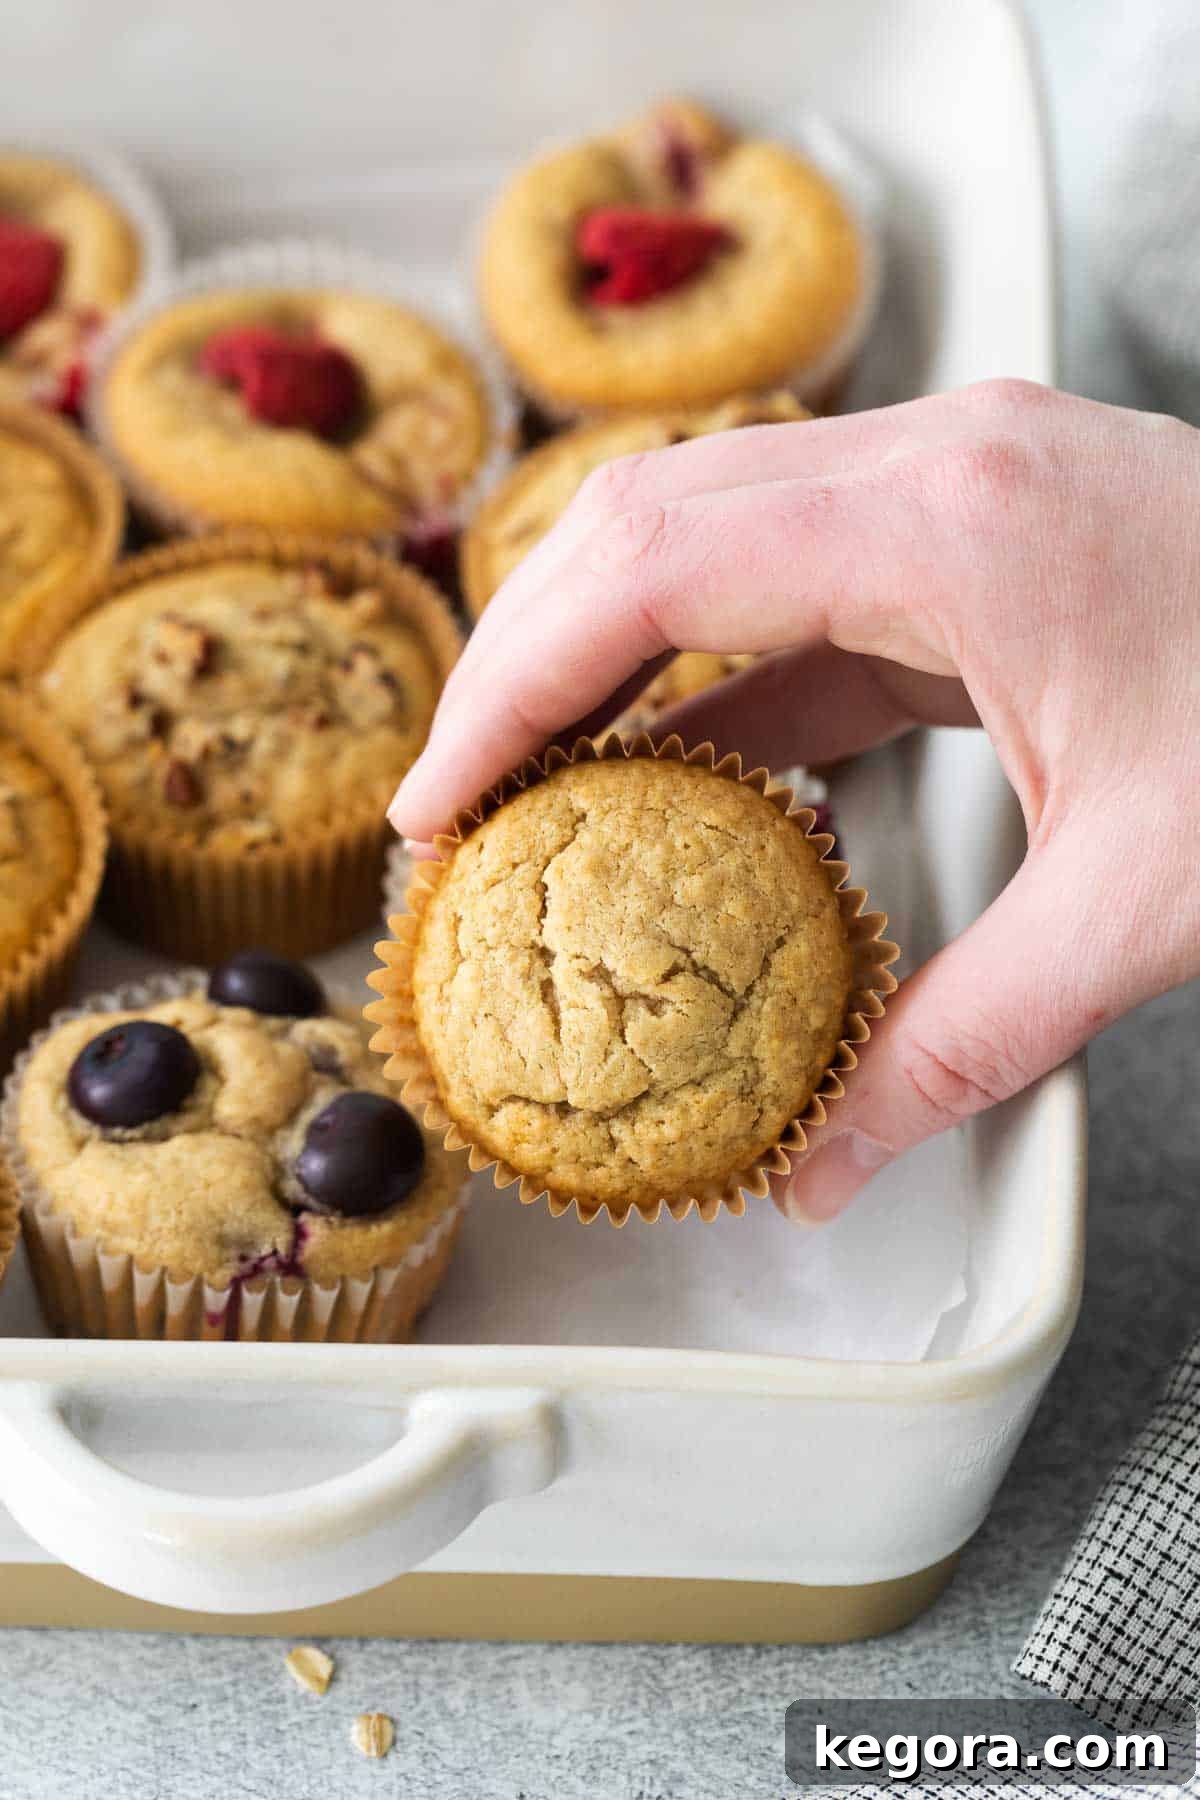
- Achieve Impressively TALL, Bakery-Style Muffins: For those beautifully domed tops reminiscent of a professional bakery, our two-temperature baking method is key. By starting the muffins at a high temperature (425°F / 220°C), you create a powerful burst of steam that rapidly lifts the batter, forming a tall crown. After this initial high-heat period, reducing the oven temperature allows the muffins to bake through gently and evenly, preventing them from browning too quickly on the outside while ensuring the inside cooks perfectly without drying out.
- Guarantee Ultra-MOIST Muffins Every Time: One of the most effective secrets to achieving incredibly moist and tender oat flour muffins is to let the batter rest and chill. After mixing, refrigerate the batter for at least 20 minutes before scooping it into the muffin tin. This crucial step allows the oat flour ample time to fully hydrate and absorb the liquids, which significantly improves the texture. Furthermore, chilling the batter helps to prevent over-spreading and contributes to a lighter, fluffier end product. This small pause makes a big difference in the final moistness and tenderness of your muffins.
- Avoid Overmixing: This is a golden rule for all muffin recipes! Overmixing the batter can develop the gluten (even in gluten-free flours, overmixing can lead to a tougher texture), resulting in dense, chewy muffins rather than light and tender ones. Mix until the ingredients are just combined and no dry streaks of flour remain. A few lumps are perfectly acceptable.
- Proper Muffin Tin Preparation: Whether you’re using paper liners or greasing your muffin tin directly, ensure each cup is adequately prepared. If using liners, a light spray with cooking oil inside the liner can prevent sticking, especially with fruit-filled muffins. If greasing, make sure to coat every crevice for easy release.
More Irresistible Oat Flour Recipes to Explore
If you’ve fallen in love with baking with oat flour, you’re in luck! This versatile, gluten-free grain is perfect for a wide array of delicious baked goods and breakfast treats. Expand your repertoire with these other fantastic oat flour recipes:
- Fluffy Oat Flour Waffles: Start your day with these light and wholesome waffles.
- Perfect Oat Flour Pancakes: A healthier twist on a breakfast classic, wonderfully soft.
- Moist Oat Flour Banana Bread: A comforting, naturally sweet loaf that’s perfect for snacking.
- Chewy Oat Flour Chocolate Chip Cookies: Indulge in these gluten-free cookies that taste just like the traditional version.
- Rich Oat Flour Brownies: Fudgy and decadent brownies, made with the goodness of oat flour.
- Sweet Oat Flour Banana Muffins: Another delightful muffin variant, perfect for using up ripe bananas.
- How to Make Oat Flour at Home: Learn how to easily prepare your own oat flour from certified gluten-free oats.
- Finding a Substitute for Oat Flour: Handy guide if you ever need an alternative for your baking.
Oat Flour Muffins (Endless Mix-Ins!)
These muffins are light, fluffy, and incredibly moist! This is a great base oat flour muffin recipe that you can easily customize with your favorite mix-ins for healthy, on-the-go gluten-free breakfasts or snacks!
Comments
Print Recipe
Ingredients
DRY INGREDIENTS
- 2 1/4 cups oat flour (280 grams, certified gluten-free if needed)
- ¾ cup sugar of choice (150 grams; I use ½ cup brown sugar and ¼ cup granulated sugar)
- 2 teaspoons baking powder
- ¼ teaspoon baking soda
- ½ teaspoon salt
WET INGREDIENTS
- 1 cup mashed or pureed applesauce (250 grams; pumpkin or banana can also be used)
- ½ cup milk of choice (120 grams; I use almond milk)
- ½ cup oil of choice (100 grams)
- 1 egg
- 1 teaspoon apple cider vinegar
OPTIONAL ADDITIONS
- ½-1 cup mix-ins (e.g., chocolate chips, blueberries, nuts, dried fruit)
Instructions
- Preheat your oven to 425°F (220°C). Line two 12-cup muffin tins with paper liners or lightly grease them with cooking spray.
- In a large bowl, whisk together all the dry ingredients until well combined. In a separate medium bowl, whisk together all the wet ingredients until smooth.
- Pour the wet ingredients into the dry ingredients. Mix with a rubber spatula until just combined and no dry streaks remain. Be careful not to overmix. Gently fold in any mix-ins you are using.
- Scoop the batter evenly into the prepared muffin tins, filling each cup about two-thirds full. Refrigerate the muffins for 20 minutes before baking.
- Place the chilled muffin tins in the preheated 425°F (220°C) oven. Bake for 10 minutes. Then, reduce the oven temperature to 350°F (175°C) and continue baking for another 10-15 minutes, or until a toothpick inserted into the center of a muffin comes out clean and the tops are golden brown and spring back when lightly touched.
- Let the muffins cool in the tin for 3-5 minutes before carefully transferring them to a wire rack to cool completely. Enjoy your deliciously moist oat flour muffins!
Notes
To Store: Store cooled muffins in an airtight container or a Ziplock bag. Muffins will last up to five days at room temperature, or three months in the freezer.
To Make Ahead: Prepare the batter ahead of time and refrigerate it (covered) for up to 24 hours. When ready to bake, give it a gentle stir, scoop into muffin tins, and bake as directed. Or, bake the muffins completely in advance and store them for grab-and-go breakfasts or snacks all week.
To Freeze: Once muffins are completely cool, place in a single layer in a freezer-safe bag or container. Freeze for up to 3 months. To enjoy, thaw overnight at room temperature or warm in the microwave for 20–30 seconds.
OAT FLOUR: Be sure to use certified gluten-free oat flour to keep these muffins gluten-free. This is my favorite brand. See the dedicated section on “Baking with Certified Gluten-Free Oat Flour” for more detailed information.
RECIPE NOTES
- Customize your muffins: This recipe is designed to be a versatile base! Feel free to add 1/2 to 1 cup of your favorite mix-ins, such as chocolate chips, peanut butter chips, shredded coconut, poppyseed, chia seeds, chopped walnuts or pecans, or various berries (fresh or frozen).
- For TALL muffins: Baking these muffins at an initial high temperature (425°F) for 10 minutes, then reducing the heat, helps them achieve a beautiful, professional-looking dome.
- For MOIST muffins: Letting the batter rest and chill for 20 minutes before baking allows the oat flour to fully hydrate. This simple step is key to producing ultra-moist, light, and fluffy muffins.
Nutrition Information (per serving)
Calories: 106 kcal
|
Carbohydrates: 16g
|
Protein: 4g
|
Fat: 3g
|
Saturated Fat: 1g
|
Polyunsaturated Fat: 1g
|
Monounsaturated Fat: 1g
|
Trans Fat: 0.002g
|
Cholesterol: 15mg
|
Sodium: 138mg
|
Potassium: 171mg
|
Fiber: 1g
|
Sugar: 1g
|
Vitamin A: 36IU
|
Calcium: 56mg
|
Iron: 1mg
We hope this comprehensive guide inspires you to create your own batch of perfect oat flour muffins. Whether you’re a seasoned baker or just starting your gluten-free journey, this recipe offers simplicity, deliciousness, and endless possibilities. Enjoy the delightful process and the scrumptious results!