
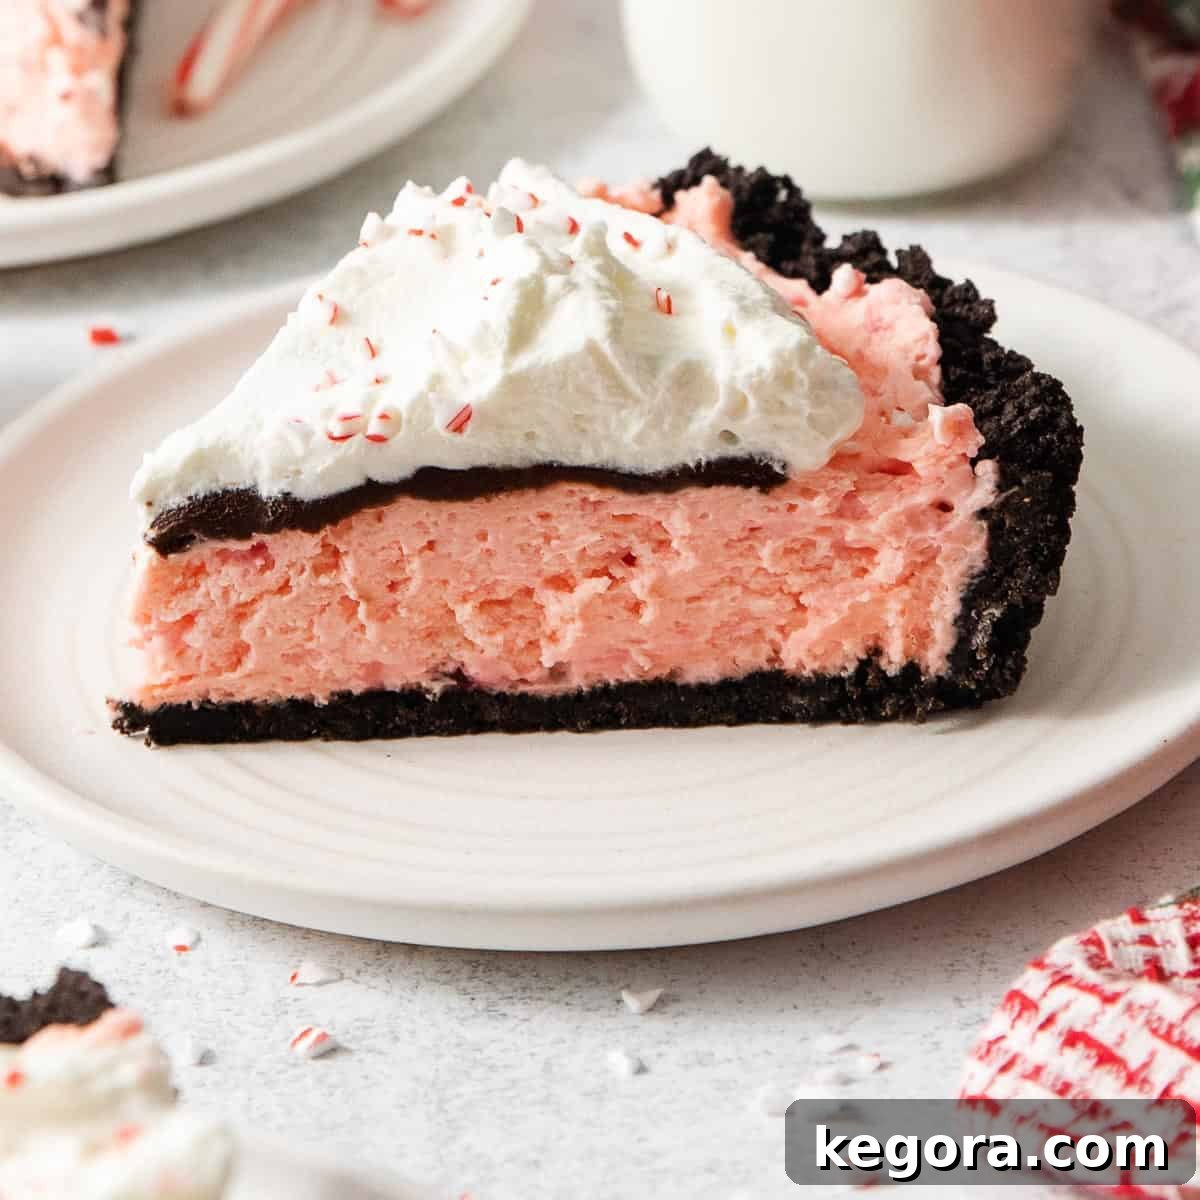
This gluten-free peppermint oreo pie is a festive and EASY gluten-free Christmas dessert! With a crisp Oreo crust, fluffy peppermint mousse, and real whipped cream, nobody will be able to tell it’s gluten-free!
For more delightful gluten-free holiday treats, you might also like this gluten-free gingerbread cake or our luscious gluten-free cheesecake.
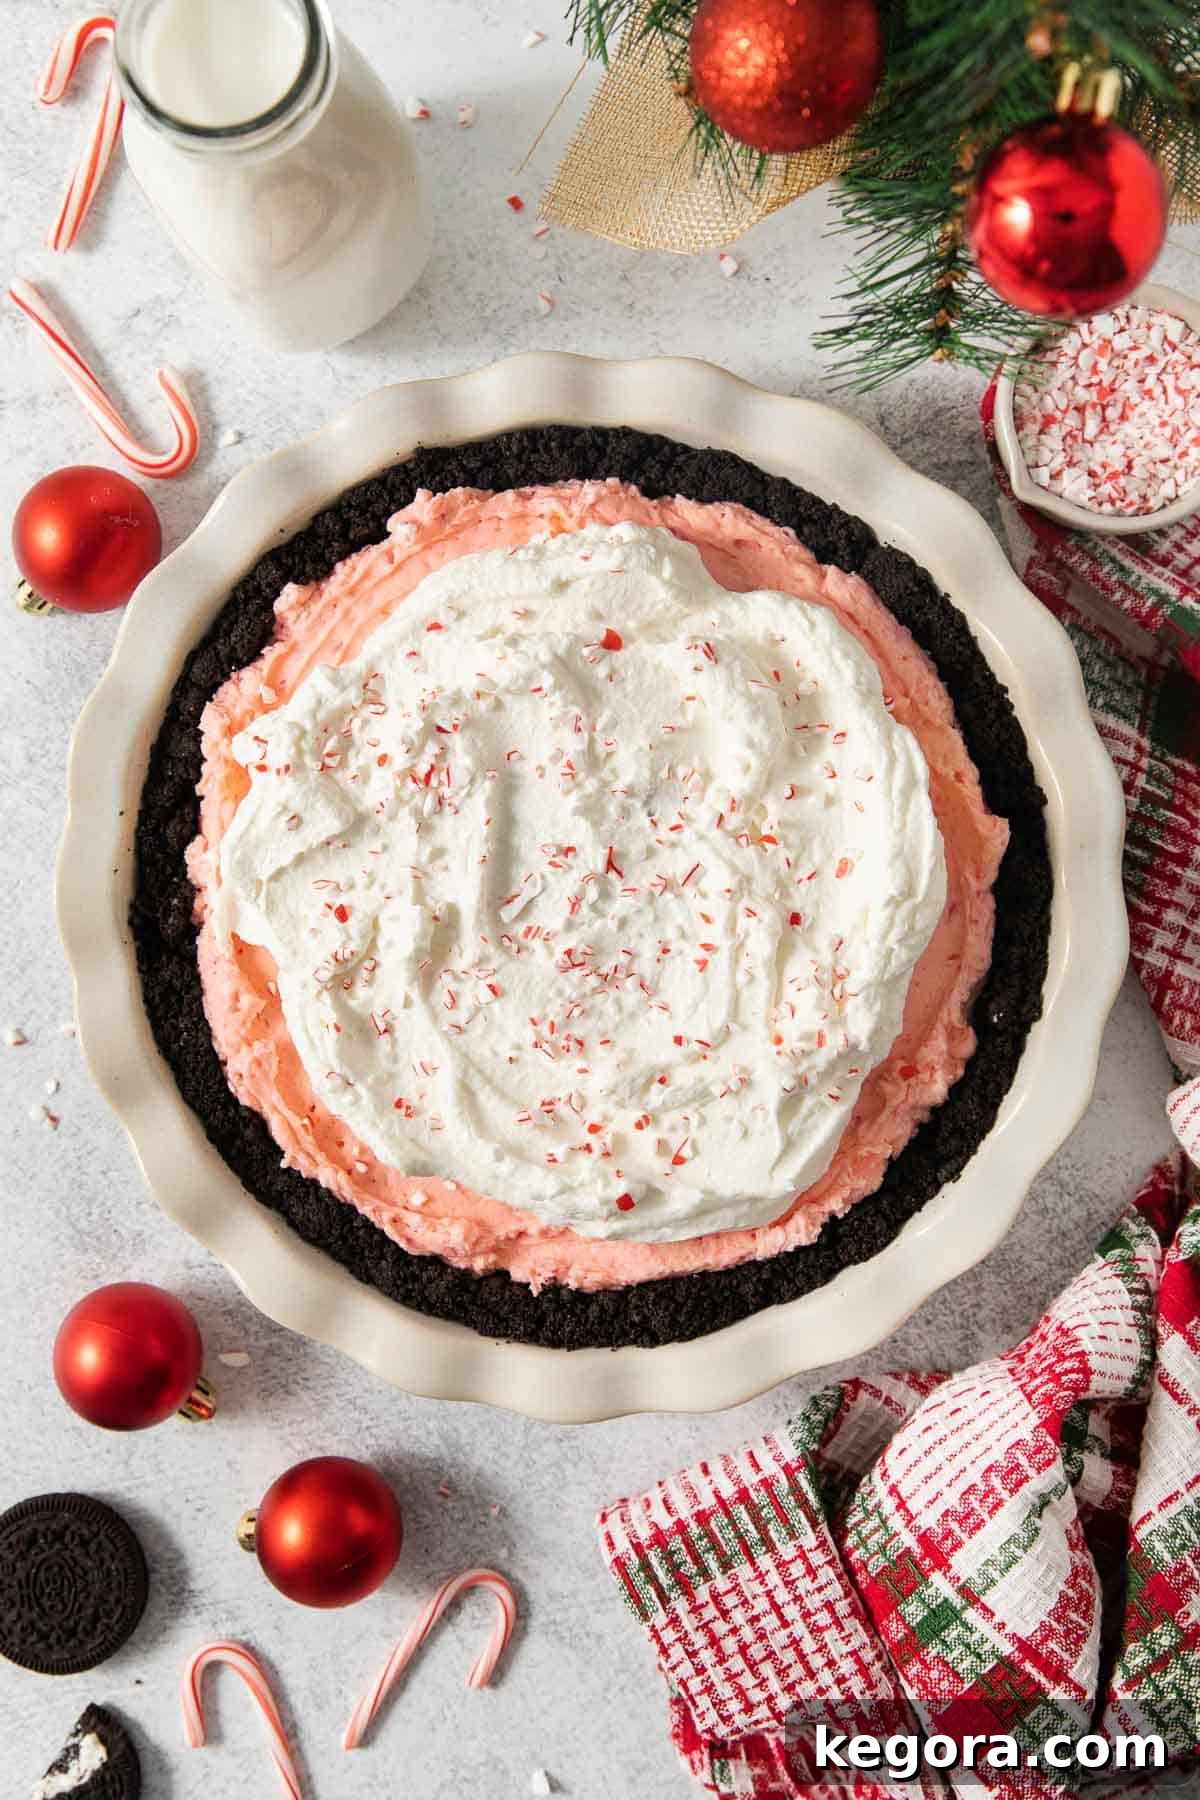
As the holiday season draws near, the quest for delightful, stress-free desserts becomes a top priority for many. For those navigating a gluten-free lifestyle, this can often mean missing out on traditional treats. But fear not! This Gluten-Free Peppermint Oreo Pie is here to revolutionize your holiday dessert table. It’s more than just a pie; it’s a celebration of festive flavors, an irresistible texture symphony, and a testament to how utterly delicious gluten-free baking can be. Prepare to be amazed, as this pie is so incredibly good, no one will even guess it’s gluten-free!
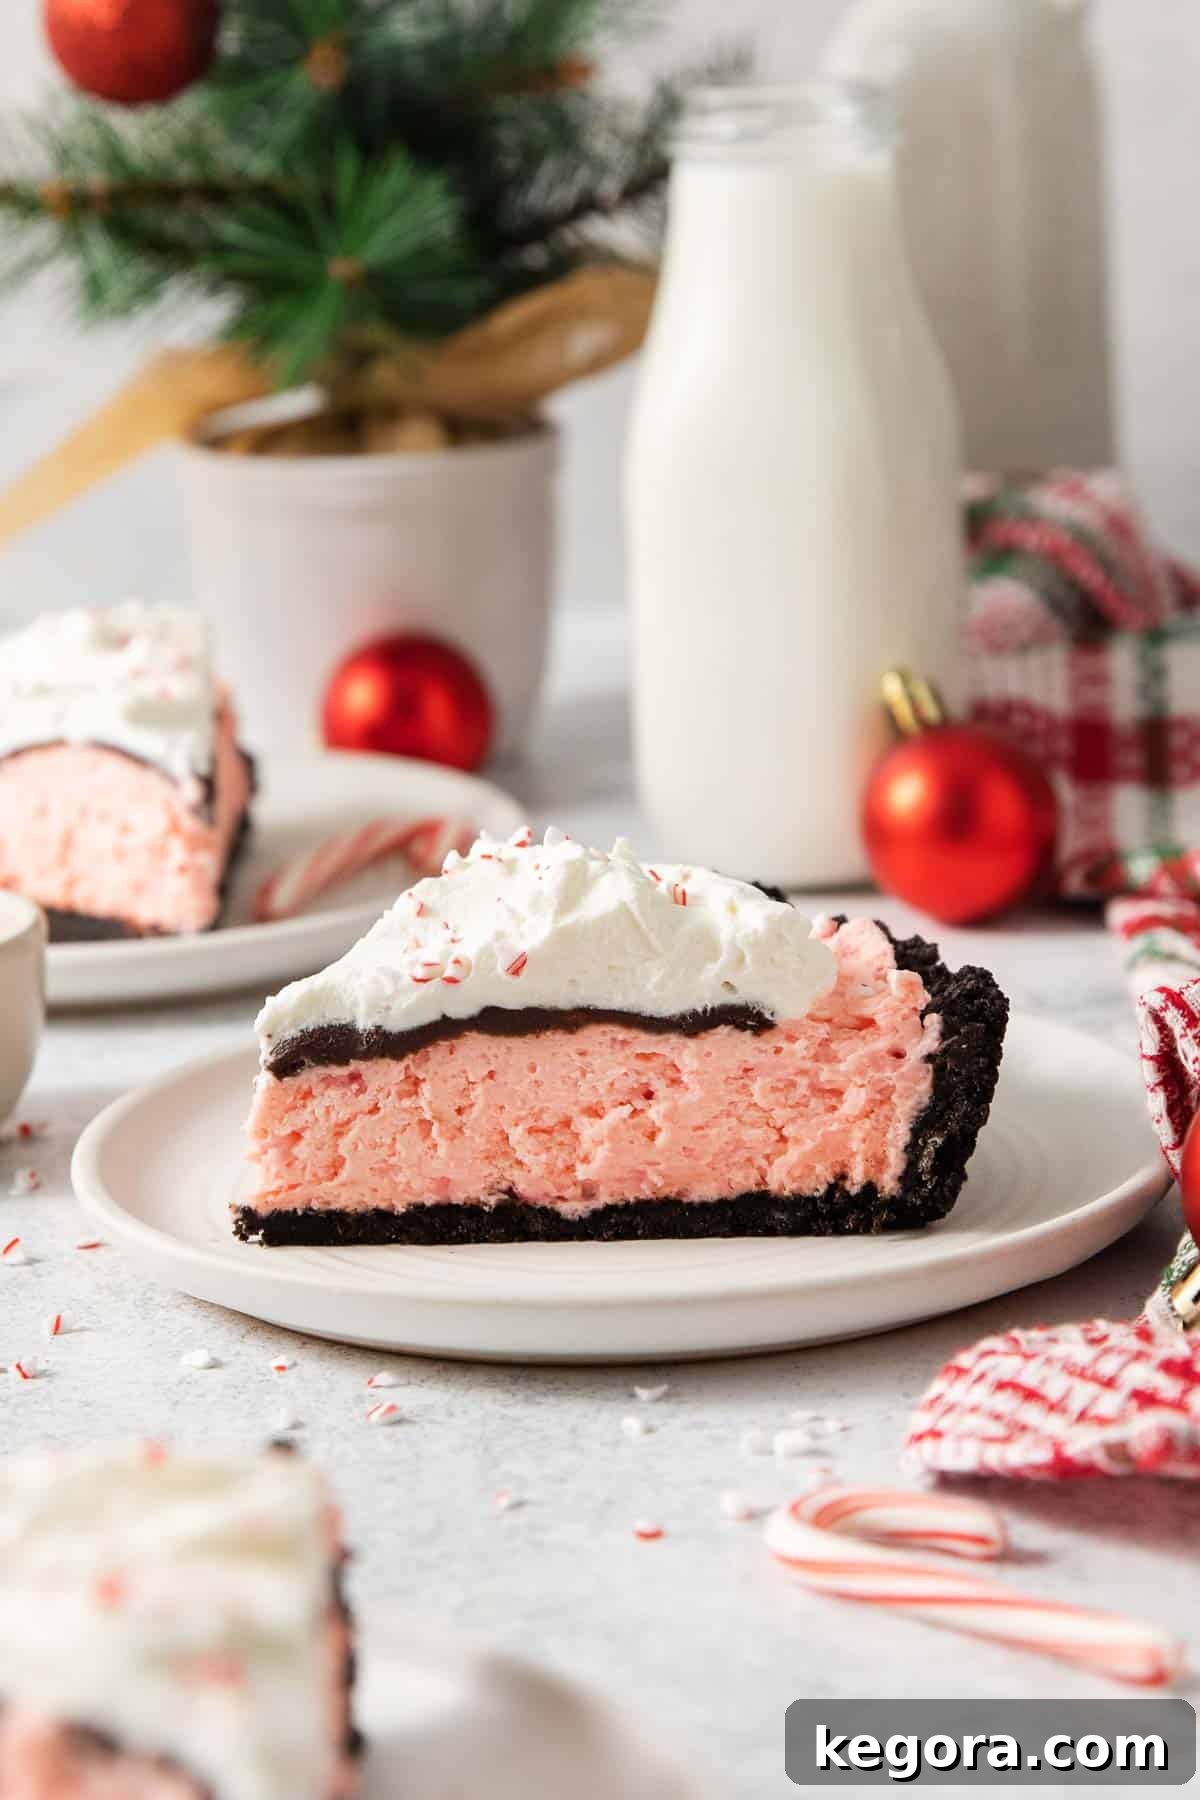
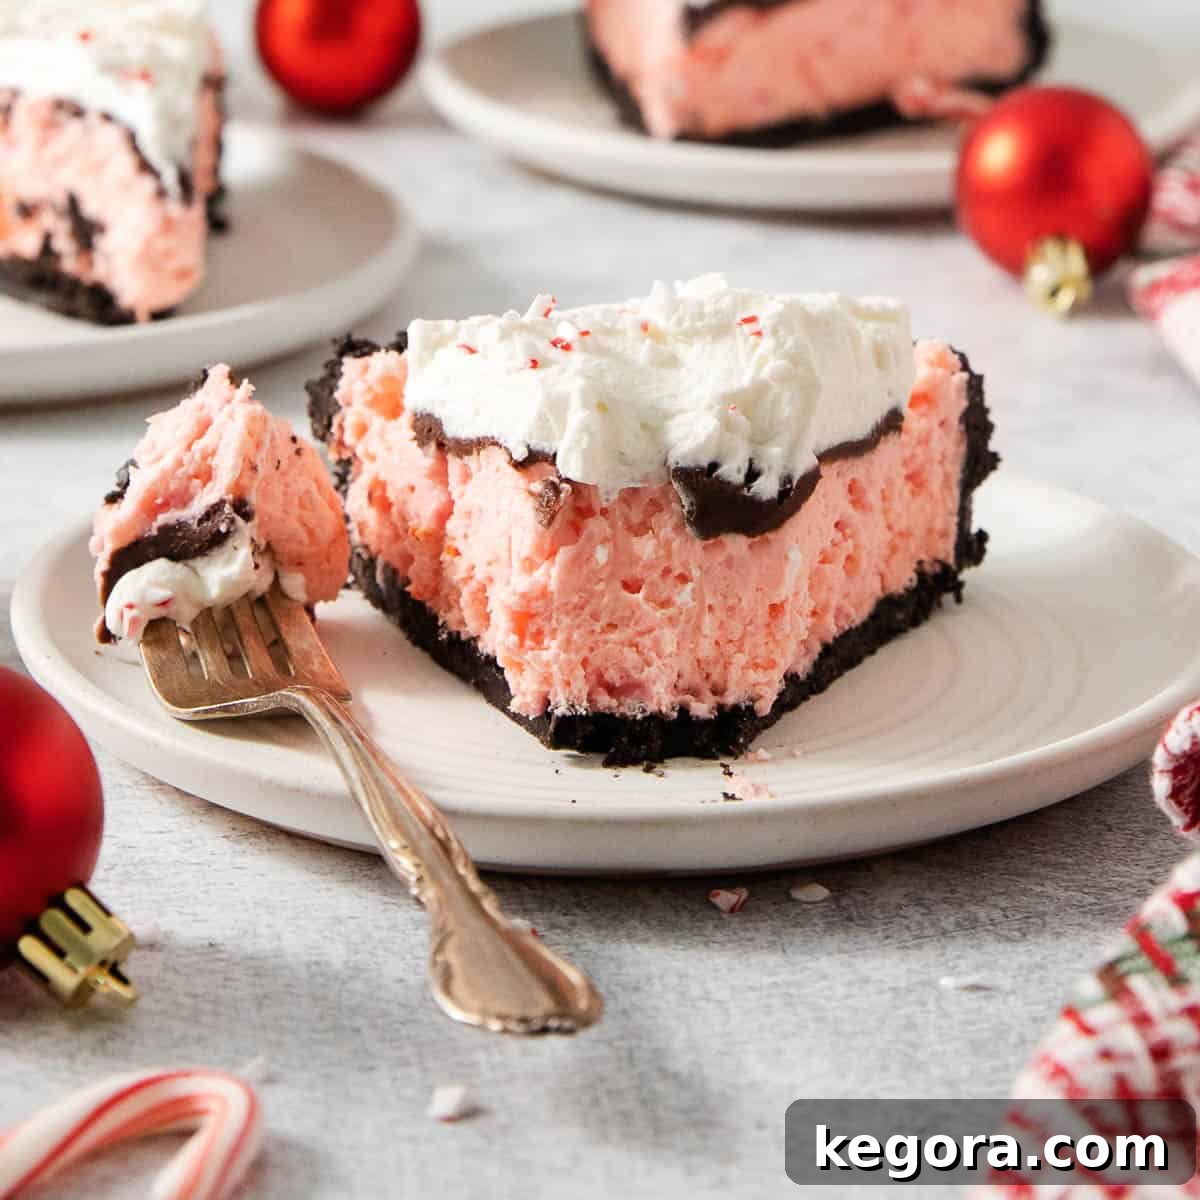
Imagine sinking your fork into a rich, crunchy gluten-free Oreo cookie crust, perfectly complementing a light and airy peppermint mousse. Each bite is infused with a refreshing burst of pure peppermint, balanced by the indulgent creaminess of the filling. Topped with a luscious layer of homemade chocolate ganache and a generous swirl of freshly whipped cream, this pie isn’t just a dessert – it’s an experience. It’s elegant enough for your most special holiday gatherings yet surprisingly simple to prepare, making it a perfect addition to any festive menu, from Thanksgiving to Christmas dinner and beyond.
What makes this recipe truly special is its accessibility. We’ve seamlessly incorporated gluten-free Oreo cookies into a classic peppermint pie recipe, ensuring that everyone at your holiday table can enjoy this decadent treat without compromise. The subtle swap makes all the difference, transforming a beloved dessert into a safe and sensational option for those with gluten sensitivities. This easy gluten-free Christmas dessert is proof that going gluten-free doesn’t mean sacrificing flavor or fun!
Why This Gluten-Free Peppermint Oreo Pie is Your New Holiday Favorite
When it comes to holiday baking, we all look for recipes that deliver on flavor, ease, and festive appeal. This Gluten-Free Peppermint Oreo Pie ticks all those boxes and more. Here’s why it’s destined to become a cherished part of your seasonal traditions, standing out as a truly exceptional holiday dessert:
- A True Festive Showstopper: With its vibrant pink peppermint filling, dark chocolate ganache, and snowy white whipped cream, adorned with crushed candy canes, this pie is visually stunning. It embodies the spirit of the holidays, bringing a pop of color and cheer to any dessert spread. Its classic holiday flavors—peppermint and chocolate—are universally loved, making it an instant hit at any party, dinner, or family gathering. It’s guaranteed to impress your guests, even before they take their first bite.
- Remarkably Easy to Make: Don’t let its impressive appearance fool you; this peppermint pie is incredibly straightforward to prepare. Utilizing readily available ingredients and simple steps, it’s a recipe that even novice bakers can confidently tackle. For an even quicker route, you can opt for a store-bought gluten-free pie crust, transforming this into a delightful no-bake dessert that saves you valuable oven space during busy holiday cooking. Minimal effort, maximum reward!
- Perfect for Planning Ahead: The holiday season is hectic, and any recipe that allows for advance preparation is a lifesaver. This gluten-free peppermint pie is ideal for making the night before, or even two days in advance. Preparing it ahead of time allows the flavors to meld beautifully and the filling to set perfectly, reducing last-minute stress. Simply add the final flourish of whipped cream and extra crushed peppermint just before serving to ensure a fresh, stunning presentation that will have everyone reaching for a slice.
- A Gluten-Free Delight That Everyone Will Love: The most significant advantage of this pie is its “secret” gluten-free nature. The combination of the rich chocolate Oreo crust and the creamy peppermint mousse is so satisfying and delicious that it appeals to all palates, regardless of dietary needs. You can confidently serve this pie knowing that everyone at your table will enjoy a truly exceptional dessert experience, without any compromise on taste or texture. It’s a crowd-pleaser that fosters inclusivity at your festive feasts.
Essential Ingredients for Your Perfect Peppermint Pie
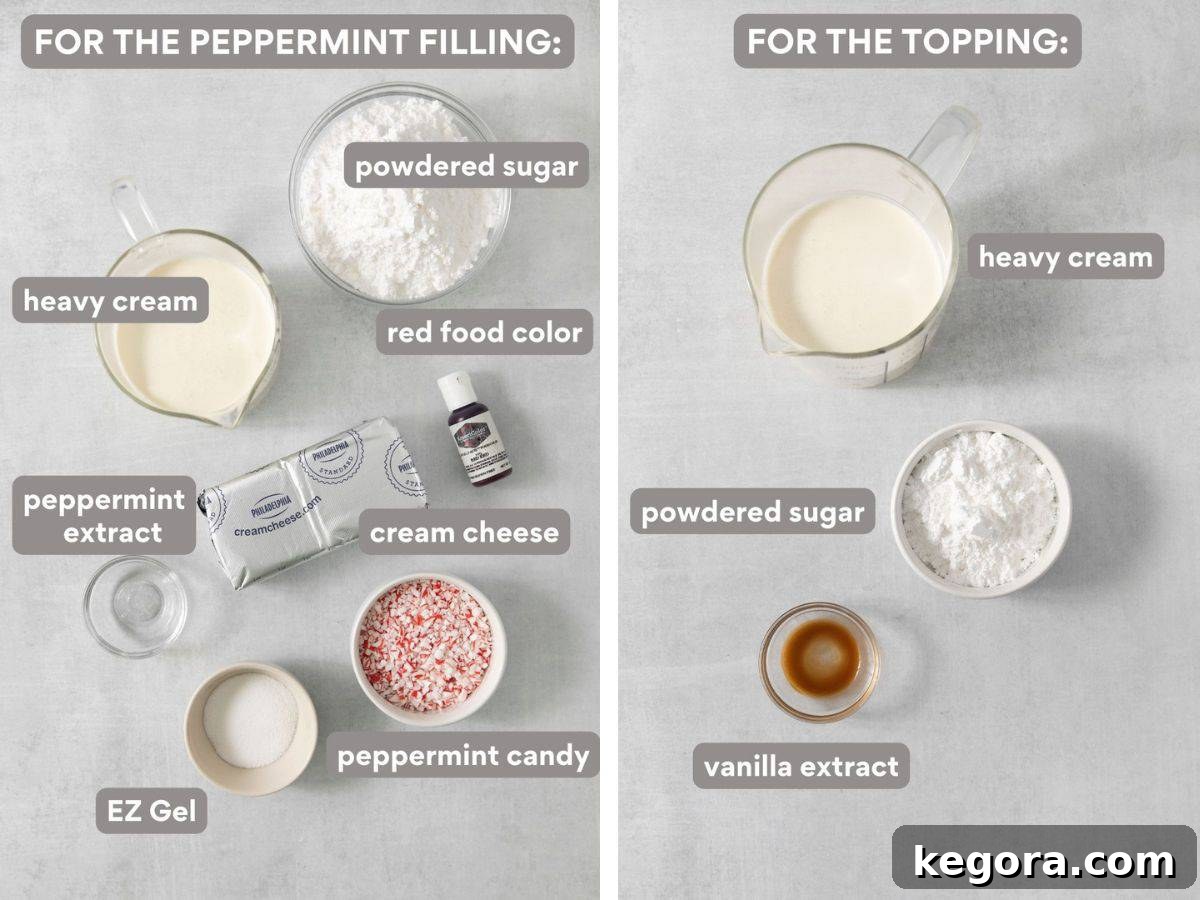
Crafting this irresistible Gluten-Free Peppermint Oreo Pie relies on a few key ingredients, each playing a crucial role in achieving its perfect flavor and texture. Here’s a detailed look at what you’ll need to create this amazing holiday dessert:
- Gluten-Free Oreo Cookies: These are the star of our crust! Ensure you purchase certified gluten-free chocolate sandwich cookies. Many popular brands now offer delicious gluten-free versions that are virtually indistinguishable from their traditional counterparts. They provide that iconic chocolatey crunch and rich flavor that forms the perfect base for our peppermint filling, making this a true gluten-free Oreo pie.
- Crushed Peppermint Candy: The quintessential holiday flavor! For convenience, look for bags of pre-crushed candy canes in the baking aisle of your grocery store, especially during the festive season. If you can’t find them, a fun alternative is to place whole candy canes in a sturdy freezer bag and crush them with a rolling pin or meat mallet. The irregular pieces add a wonderful textural contrast and burst of peppermint flavor throughout the mousse and as a garnish, bringing that unmistakable festive cheer.
- Cream Cheese: This forms the luxurious, creamy base of our peppermint mousse. Using full-fat cream cheese is highly recommended for the richest flavor and best texture. Make sure it’s softened to room temperature before you start mixing to ensure a smooth, lump-free filling. This secret ingredient is what elevates the mousse, giving it a delightful tang and depth that beautifully complements the sweet peppermint, much like it does in our gluten-free chocolate mousse cake.
- EZ Gel: This is a game-changer for achieving a stable, fluffy, and perfectly set filling without relying on traditional gelatin. EZ Gel is a naturally gluten-free thickener that provides excellent body and helps prevent the pie from becoming watery. It’s an essential ingredient for the ideal mousse consistency, ensuring your slices hold their shape beautifully. You can usually find EZ Gel online or at specialty baking stores. If you choose to omit it, your filling will still be delicious but might have a softer, less firm texture, akin to a richer pudding.
- Peppermint Extract: The heart of our peppermint flavor! It’s crucial to use pure peppermint extract, not mint extract. Mint extract often has a spearmint flavor profile, which can taste more like toothpaste than a festive dessert. Pure peppermint extract delivers that clean, crisp, and authentic holiday peppermint taste we’re aiming for, creating that signature peppermint pie experience.
- Heavy Whipping Cream: This ingredient is used twice – once for the peppermint filling and again for the luscious whipped topping. Ensure it’s very cold before whipping to achieve maximum volume and stiffness, resulting in a light and airy texture.
- Powdered Sugar: Also known as confectioners’ sugar, this fine sugar blends seamlessly into the filling and topping, providing sweetness without a grainy texture. Its delicate consistency is key for a smooth mousse and topping.
- Red Food Coloring (Optional): Just a single drop can transform your peppermint mousse into a festive pink hue, enhancing the visual appeal and truly making it a Christmas dessert.
- Chocolate Chips: For the decadent chocolate ganache layer. Use your favorite type – semi-sweet or dark chocolate chips work wonderfully, providing a rich counterpoint to the peppermint.
- Unsalted Butter: Essential for binding the Oreo cookie crumbs together to form a firm, flavorful crust. Melted butter ensures the crust is perfectly crispy and holds its shape.
For another festive and incredibly easy gluten-free treat that features the beloved Oreo, consider whipping up these delightful Gluten-Free Oreo Balls.
Crafting Your Gluten-Free Peppermint Oreo Pie: A Step-by-Step Guide
Creating this show-stopping dessert is a rewarding process, and with these clear instructions, you’ll have a stunning pie ready to chill in no time. Follow along for the perfect Gluten-Free Peppermint Oreo Pie that will become a holiday favorite.
Step 1: Prepare the Flawless Gluten-Free Oreo Crust
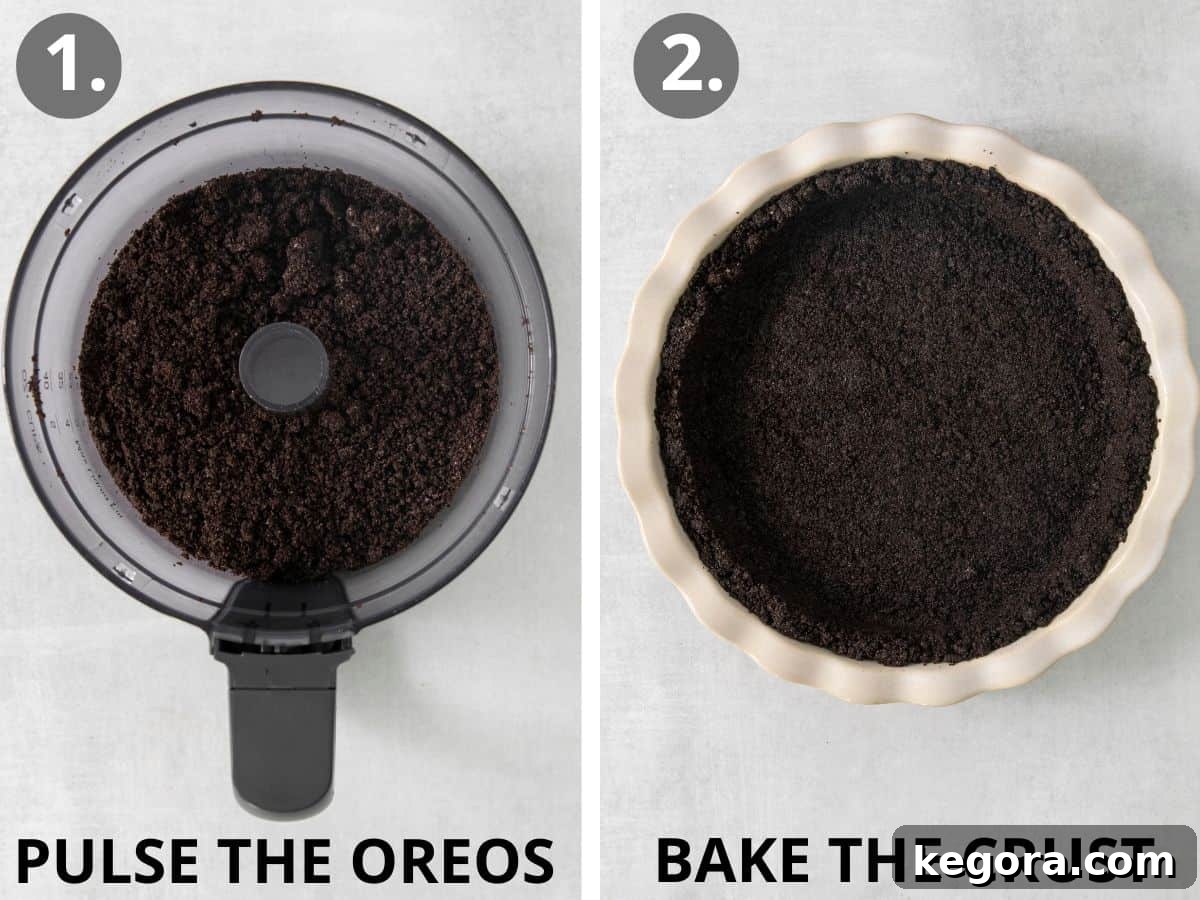
- Preheat Oven: Begin by preheating your oven to 350°F (175°C). This ensures your crust bakes evenly to a perfect crispness, providing a sturdy foundation for your pie.
- Crush Oreos: In a food processor or a sturdy blender, add 24 whole gluten-free chocolate sandwich cookies. There’s no need to remove the cream filling – it adds to the richness and binds the crumbs! Pulse the cookies until they are transformed into fine, even crumbs. Ensure there are no large chunks remaining, as this will affect the crust’s texture and ability to hold its shape.
- Combine with Butter: Transfer the fine Oreo crumbs to a large mixing bowl. Pour in 4 tablespoons of melted unsalted butter. Stir thoroughly with a spoon or spatula until all the cookie crumbs are evenly moistened and resemble wet sand. This ensures the crust holds together beautifully when pressed.
- Press into Pan: Using your hands or the bottom of a flat-bottomed measuring cup, firmly press the buttered cookie mixture into the bottom and evenly up the sides of a 9-inch pie pan. Take your time to create a uniform layer for a professional finish and a solid crust.
- Bake and Cool: Bake the crust in the preheated oven for precisely 10 minutes. This quick bake helps to set the crust and enhance its chocolatey flavor. Once baked, remove it from the oven and allow it to cool completely on a wire rack. A cool crust is essential before adding the moist filling to prevent it from becoming soggy.
Step 2: Create the Rich Chocolate Ganache
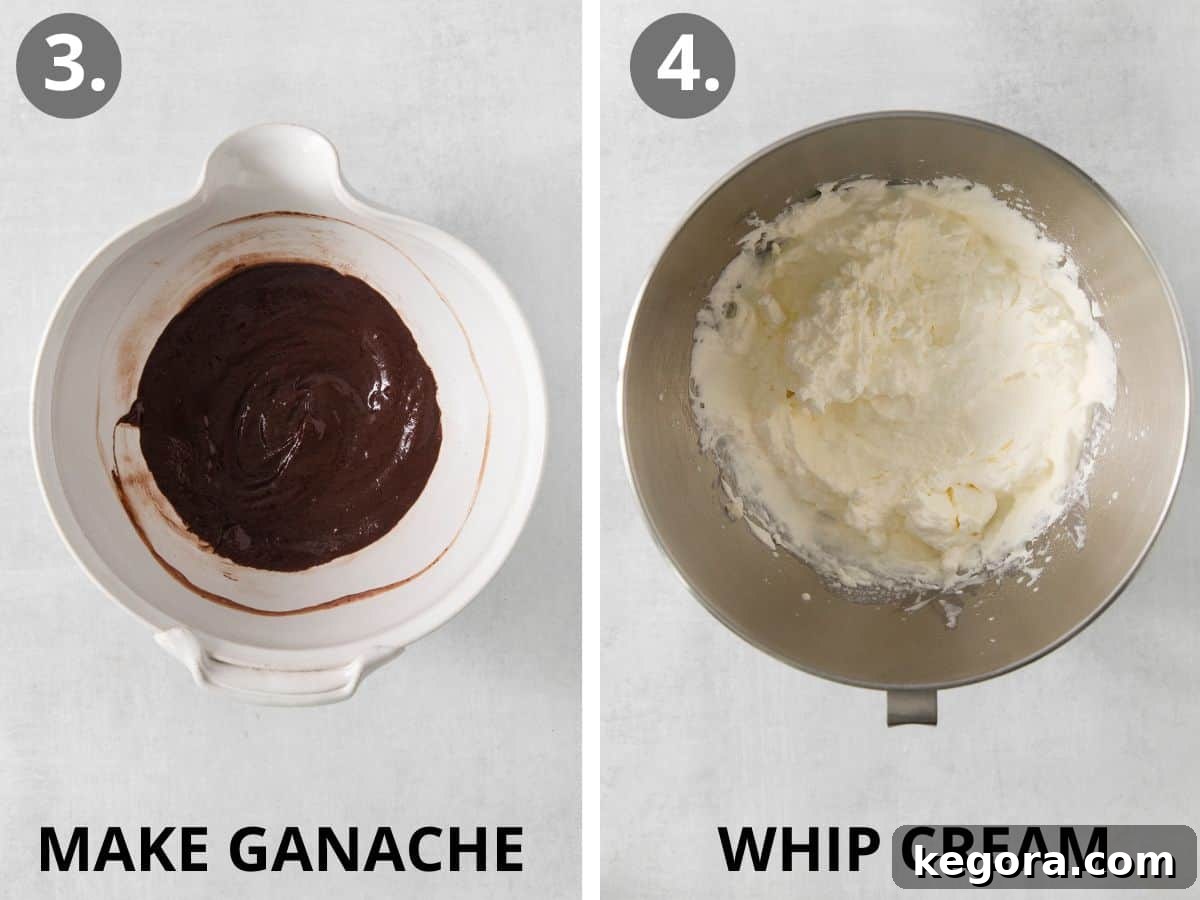
- Prepare Chocolate: Place 1/3 cup of your favorite chocolate chips (semi-sweet or dark work best) in a medium, heatproof bowl.
- Heat Cream: In a glass measuring cup or small saucepan, microwave or gently heat 3 tablespoons of heavy cream until it just begins to simmer around the edges (30-60 seconds in a microwave). Be careful not to let it boil vigorously, as this can scorch the cream.
- Combine and Stir: Immediately pour the hot cream over the chocolate chips. Let it sit undisturbed for about 5 minutes; this allows the residual heat to melt the chocolate evenly. Then, stir gently with a whisk or spoon, starting from the center and working your way outwards, until the ganache is completely smooth, glossy, and lump-free.
- Cool and Thicken: Set the melted chocolate ganache aside at room temperature. It will slowly thicken as it cools, reaching a spreadable consistency perfect for layering over your pie filling. This cooling process is crucial for the ganache’s texture.
Step 3: Whip Up the Fluffy Peppermint Mousse Filling
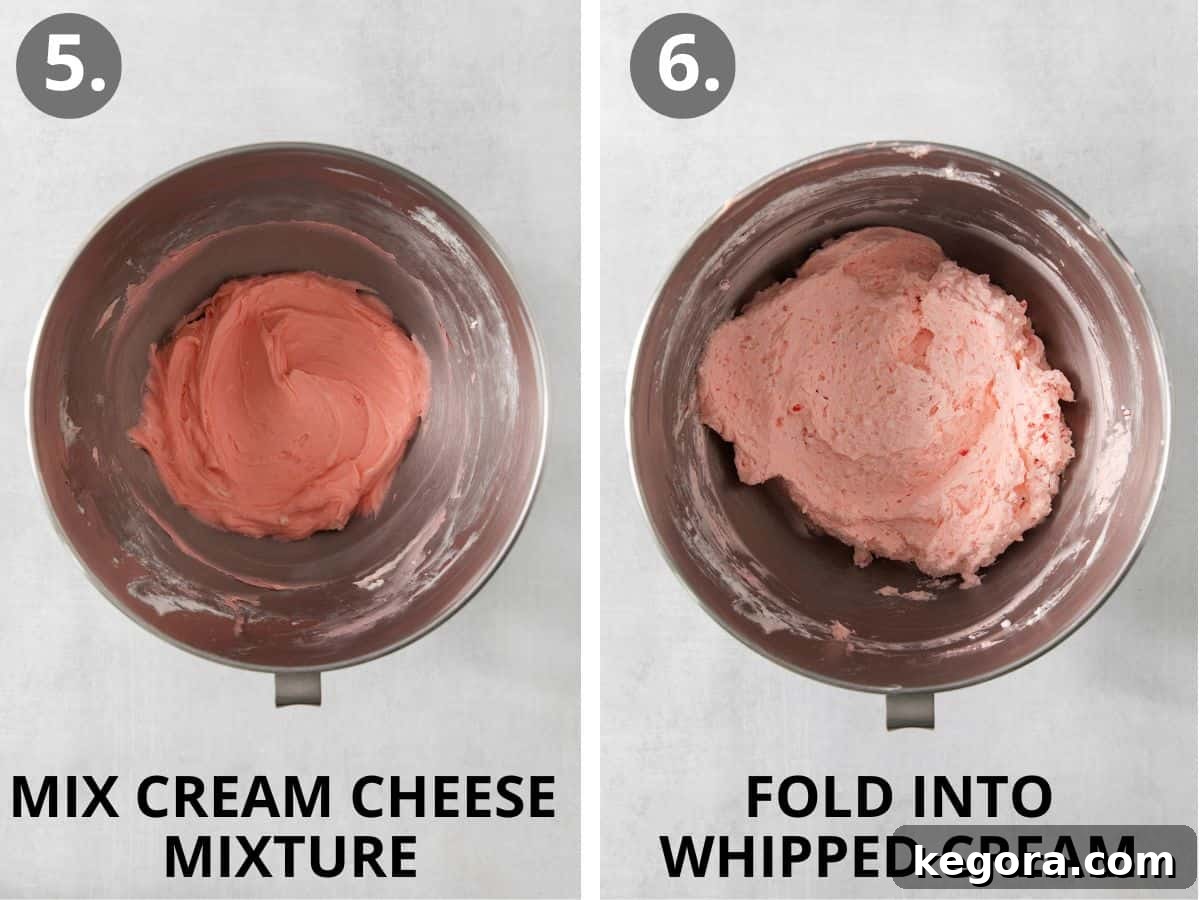
- Whip Cream with EZ Gel: In a large mixing bowl (preferably chilled for best results), using a hand mixer or a stand mixer fitted with a whisk attachment, begin whipping 1½ cups (360ml) of very cold heavy whipping cream on medium speed. Slowly sprinkle in 1 tablespoon of EZ Gel as the cream begins to thicken. Continue mixing on medium-high speed until semi-stiff peaks form, typically 3-5 minutes. The peaks should hold their shape but still be soft enough to fold. Gently spoon this whipped cream into a separate bowl and set it aside.
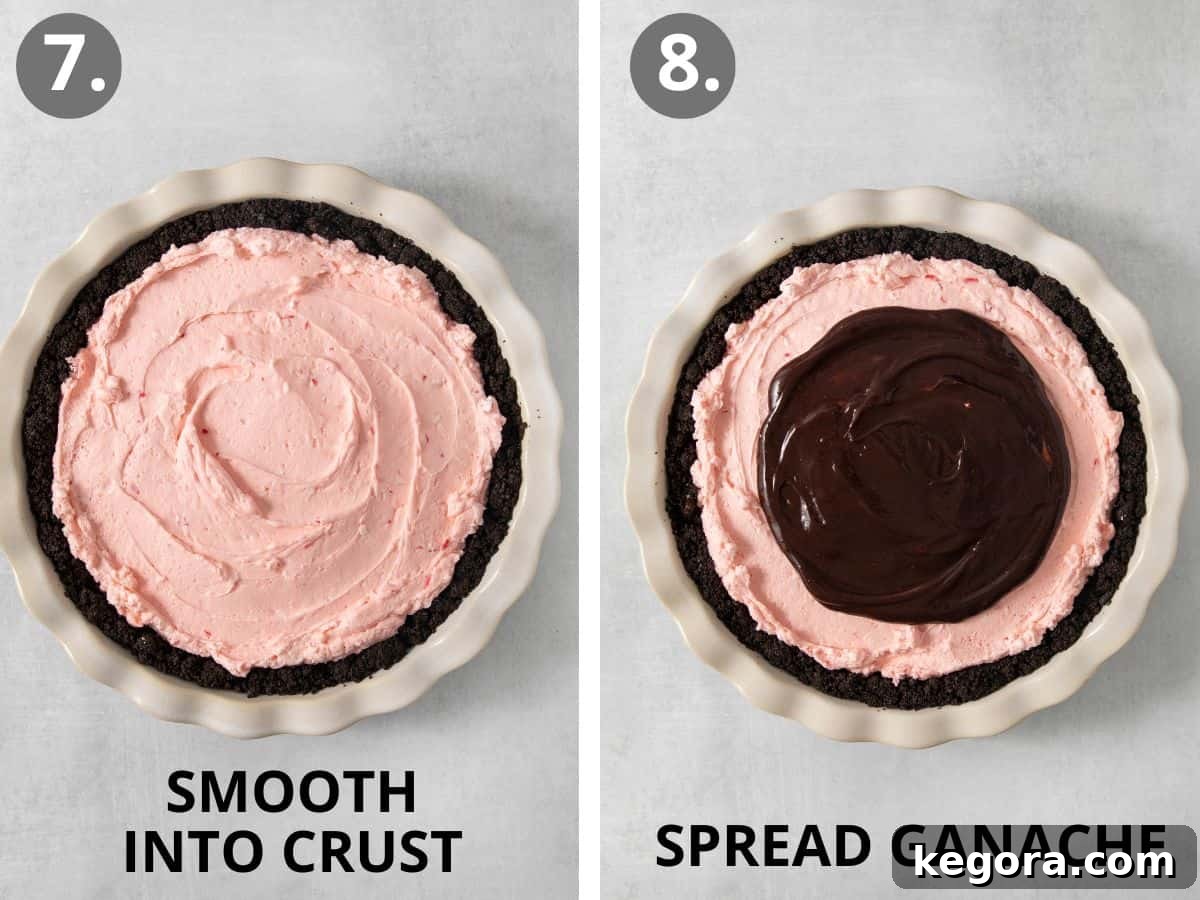
- Prepare Cream Cheese Mixture: Using the *same* mixing bowl (no need to wash it after the whipped cream!), beat 8 ounces of softened full-fat cream cheese, 1½ cups (180g) of powdered sugar, 1 teaspoon of pure peppermint extract, and 1 drop of red food coloring (if desired, for a festive pink hue) together on medium-high speed. Beat until the mixture is light, fluffy, and well combined, with no lumps of cream cheese remaining. Scrape down the sides of the bowl as needed to ensure everything is thoroughly mixed.
- Fold in Whipped Cream and Peppermint: With a rubber spatula, gently fold the reserved whipped cream into the cream cheese mixture until smooth and no streaks remain. The key here is to be gentle to maintain the airiness of the whipped cream, ensuring a light and fluffy mousse. Overmixing will deflate the mousse. Finally, fold in 1/3 cup of crushed peppermint candies or candy canes, distributing them evenly throughout the filling for bursts of flavor and crunch.
Step 4: Assemble and Chill Your Decadent Pie
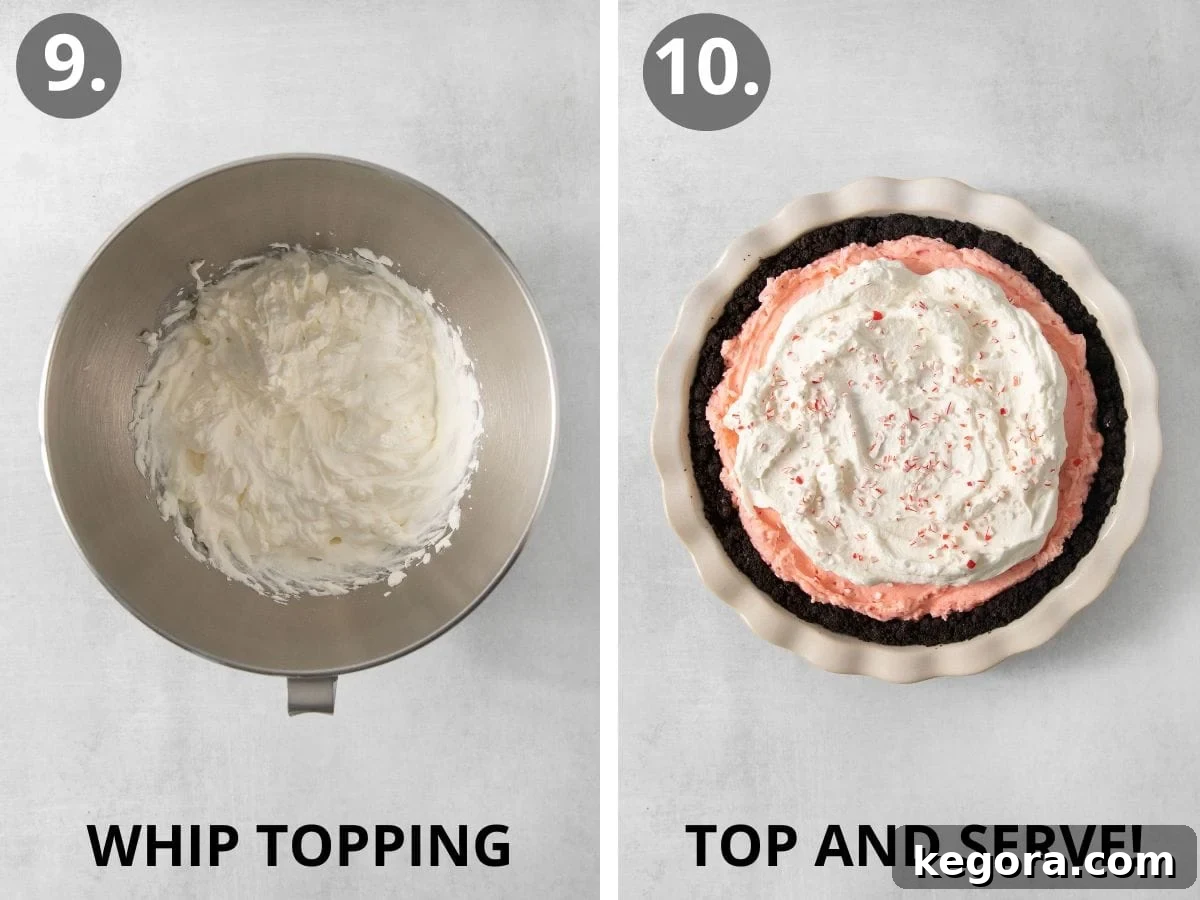
- Layer the Filling: Carefully spread the prepared peppermint filling evenly into your completely cooled gluten-free chocolate cookie crust. Use an offset spatula or the back of a spoon to create a smooth, appealing surface that sets the stage for the next layer.
- Add Ganache Layer: Once the chocolate ganache has cooled to room temperature and slightly thickened (it should be easily spreadable but not runny), gently spread it over the top of the peppermint filling. For a beautiful presentation, I recommend leaving about a ½ inch border around the edge of the pie so that the cheerful pink peppermint filling is still visible, creating a lovely contrast.
- Chill to Perfection: Cover the pie loosely with plastic wrap to prevent any crusting or absorption of refrigerator odors, and transfer it to the refrigerator. Allow it to chill for a minimum of 3-4 hours, or ideally, overnight. This chilling time is crucial for the filling to set properly and for all the flavors to fully develop and meld together, resulting in a firm, sliceable pie.
Step 5: Add the Finishing Touches and Serve
- Prepare Whipped Topping: Just before you’re ready to serve, use a hand mixer or stand mixer with a whisk attachment to whip 1 cup (160ml) of very cold heavy whipping cream, ¼ cup (30g) of powdered sugar, and ½ teaspoon of vanilla extract. Whip on medium-high speed until semi-stiff peaks form, about 3-5 minutes. The topping should be light and airy, yet hold its shape.
- Garnish and Serve: Spoon or pipe the freshly whipped cream topping generously over the chilled pie. For an extra festive touch and added peppermint flavor, sprinkle additional crushed peppermint candy or candy canes over the top just before serving. Slice into generous portions with a sharp knife and serve cold. Enjoy this truly unforgettable gluten-free holiday dessert!
Expert Tips for the Best Gluten-Free Peppermint Oreo Pie
Achieving pie perfection is easy with these insider tips and tricks, ensuring your Gluten-Free Peppermint Oreo Pie is a resounding success every time:
- Temperature is Key for Whipping: For the fluffiest whipped cream and the most stable peppermint filling, ensure all your ingredients, especially the heavy whipping cream and cream cheese, are very cold. I often place my stand mixer bowl and whisk attachment in the freezer for 10-15 minutes before whipping cream. This helps the cream whip up faster and hold its volume longer, preventing it from collapsing.
- Understanding EZ Gel: EZ Gel is a fantastic, naturally gluten-free thickener that plays a vital role in giving our peppermint mousse its signature fluffy yet stable texture. It helps prevent weeping and ensures your slices hold their shape beautifully, making it perfect for this gluten-free Christmas dessert. While you *can* omit it, please note that the filling will be significantly softer and may not set as firmly. If you skip the EZ Gel, be prepared for a more pudding-like consistency, which is still delicious, but different.
- The Art of Gentle Folding: When combining the whipped cream with the cream cheese mixture for the peppermint filling, it’s crucial to fold gently. Use a rubber spatula to carefully incorporate the whipped cream, lifting from the bottom of the bowl and folding it over the cream cheese mixture. Overmixing will deflate the whipped cream, resulting in a less airy and fluffy mousse. Take your time to preserve that delightful lightness.
- Advance Preparation for Stress-Free Holidays: This peppermint pie is a dream for make-ahead convenience. You can assemble the entire pie (crust, filling, and ganache) up to 2 days in advance. Store it covered in the refrigerator. The flavors will deepen, and the pie will set perfectly. Just remember to add the fresh whipped topping and final crushed peppermint garnish right before serving for optimal freshness and presentation.
- Pure Peppermint Flavor: Always opt for pure peppermint extract over “mint” extract. Mint extracts can sometimes have a spearmint flavor, which isn’t what we want for this festive dessert. Pure peppermint offers that classic, clean, and invigorating holiday taste that defines this easy gluten-free Christmas dessert.
- Crushing Candy Canes: If you’re crushing whole candy canes, place them in a sturdy zip-top bag and use a rolling pin or the flat side of a meat tenderizer. Don’t pulverize them into dust; aim for a mix of fine and small chunky pieces for interesting texture and visual appeal in the filling and as a garnish.
Storing Your Gluten-Free Peppermint Oreo Pie
To keep your Gluten-Free Peppermint Oreo Pie fresh and delicious, proper storage is essential. Once assembled and fully chilled, cover the pie loosely with plastic wrap, ensuring it doesn’t touch the whipped topping, or transfer individual slices to an airtight container. Store it in the refrigerator for up to three days. For the best taste and texture, it is best enjoyed within this timeframe. While you can freeze individual slices for longer storage (up to a month), the texture of the whipped cream and mousse may change slightly upon thawing. If freezing, it’s best to omit the fresh whipped topping and add it just before serving after thawing in the refrigerator for several hours.
Frequently Asked Questions About Peppermint Oreo Pie
Here are answers to some common questions you might have when making this delightful and easy gluten-free Christmas dessert:
- Can I make this pie dairy-free? While the current recipe uses dairy, you might be able to adapt it. You would need to use a dairy-free cream cheese alternative, dairy-free gluten-free Oreos, and a dairy-free heavy whipping cream substitute (like full-fat canned coconut cream, chilled overnight, with the solid part scooped out). Please note that the texture and flavor profile might vary slightly from the original.
- What if my ganache doesn’t get smooth? This usually happens if the cream wasn’t hot enough, or if you stirred too vigorously initially, causing the chocolate to seize. If it’s still lumpy, you can gently heat the bowl over a double boiler (a pot of simmering water) while stirring constantly until smooth. Be careful not to overheat, which can cause the chocolate to burn or become greasy.
- Can I use a different crust for this peppermint pie? Absolutely! While the gluten-free Oreo crust adds amazing chocolatey flavor and crunch, you could certainly use a store-bought gluten-free graham cracker crust, a simple gluten-free shortbread crust, or even a basic gluten-free vanilla wafer crust for a different twist.
- My whipped cream isn’t stiffening. What went wrong? Ensure your heavy whipping cream is very cold, and your mixing bowl and whisk are also chilled. Humidity can sometimes affect whipping. If it’s still not stiffening after a few minutes of high-speed whipping, try adding an additional tablespoon of powdered sugar (if you haven’t added it all) or a pinch of cream of tartar, which can help stabilize it.
- How can I make the peppermint flavor stronger or milder? The recipe calls for 1 teaspoon of pure peppermint extract, which provides a balanced and refreshing flavor. If you prefer a stronger minty kick, you can add an additional 1/4 to 1/2 teaspoon. For a milder flavor, start with 3/4 teaspoon and adjust to your preference after tasting a small amount of the filling mixture.
- Can I add chocolate chips to the filling? Yes, for an extra chocolatey dimension that complements the peppermint beautifully, feel free to fold in about ½ cup of mini chocolate chips along with the crushed peppermint candies into the mousse filling. This will add another layer of texture and flavor.
More Irresistible Gluten-Free Holiday Recipes to Explore
The joy of gluten-free holiday baking doesn’t stop with this incredible Peppermint Oreo Pie. If you’re looking to expand your repertoire of delicious and safe festive treats, here are some other fantastic gluten-free recipes that are perfect for any special occasion during the festive season:
- Gluten-Free Yule Log: A classic holiday centerpiece, beautifully decorated and surprisingly easy to make gluten-free, bringing elegance to your table.
- Gluten-Free Oreo Cheesecake: If you love the rich Oreo crust in this pie, you’ll adore an entire cheesecake dedicated to it, featuring a creamy, decadent filling.
- Gluten-Free Cranberry Orange Bread: A wonderfully aromatic and moist quick bread, bursting with seasonal flavors, perfect for breakfast or a festive snack.
- Gluten-Free Cinnamon Rolls: Start your holiday mornings with warm, gooey, and incredibly soft cinnamon rolls that are completely gluten-free and utterly irresistible.
- Dairy-Free Creme Brulee: An elegant and decadent dessert for those seeking a dairy-free option without sacrificing luxury or flavor, featuring that signature crackly sugar topping.
- Gluten-Free Sticky Toffee Pudding: A rich, moist, and utterly comforting British classic, reimagined for a gluten-free diet, served warm with a luscious toffee sauce.
I sincerely hope this Gluten-Free Peppermint Oreo Pie becomes a beloved tradition in your home, bringing joy and deliciousness to your holiday celebrations! If you try this easy gluten-free Christmas dessert, please share your thoughts and leave a comment or rating below. Your feedback truly helps others discover and enjoy these delightful gluten-free creations! Happy baking!
Gluten-Free Peppermint Oreo Pie
Erin Collins
20 mins
10 mins
3 hrs
3 hrs 30 mins
8 servings
Comments
Ingredients
For the Gluten-Free Oreo Crust:
- 24 gluten-free regular Oreo cookies
- 4 tablespoons butter, melted
For the Chocolate Ganache:
- 1/3 cup chocolate chips
- 3 tablespoons heavy whipping cream
For the Peppermint Filling:
- 1 1/2 cups (360ml) heavy whipping cream
- 1 tablespoon EZ Gel (see note)
- 8 ounces cream cheese
- 1 1/2 cups (180g) powdered sugar
- 1 teaspoon peppermint extract
- 1 drop red food coloring (optional)
- 1/3 cup crushed peppermint candy or candy canes (plus extra for garnish)
For the Topping:
- 1 cup (160ml) heavy whipping cream
- 1/4 cup (30g) powdered sugar
- 1/2 teaspoon vanilla extract
Instructions
Make the Gluten-Free Oreo Crust:
- Preheat the oven to 350°F (175°C).
- In a food processor or blender, pulse the whole gluten-free Oreos (no need to remove the cream filling) into fine crumbs. Remove any large pieces of Oreos.
- Pour the Oreo crumbs into a large mixing bowl. Add the melted butter and stir until evenly combined.
- Using your hands or a measuring cup, press the cookie mixture evenly into the bottom and up the sides of a 9-inch pie pan.
- Bake the crust for 10 minutes. Cool completely.
Make the Chocolate Ganache:
- Place the chocolate chips in a medium bowl. Microwave the heavy cream in a glass measuring cup for 30-60 seconds, until just starting to simmer.
- Immediately pour the hot cream over the chocolate. Stir gently until the ganache is smooth. Set aside and allow to cool to room temperature. During this time, it will slowly thicken as well.
Make the Peppermint Filling:
- Using a hand mixer or a stand mixer fitted with a whisk attachment, whip the heavy whipping cream on medium speed. Slowly sprinkle in the EZ Gel. Continue mixing on medium-high speed until semi-stiff peaks form, about 3-5 minutes. Spoon the whipped cream into a bowl and set aside.
- Using the same mixing bowl (no need to rinse clean!), beat the cream cheese, powdered sugar, peppermint extract and red food coloring together on medium-high speed until combined.
- Fold the whipped cream into the cream cheese mixture until smooth. Be gentle, you don’t want to deflate that cream. Fold in the crushed peppermint candies.
Assemble the Pie:
- Spread the peppermint filling evenly into the cooled pie crust. Once the chocolate ganache is cooled to room temperature, spread over the top of the filling. I like to leave about ½ inch border around the pie so you can still see the pink peppermint filling.
- Chill the pie in the refrigerator for 3-4 hours or even overnight.
Make the Topping:
- Using a hand mixer or a stand mixer fitted with a whisk attachment, whip the heavy whipping cream, powdered sugar, and vanilla extract on medium-high speed until semi-stiff peaks form, about 3-5 minutes.
- Top the pie with the whipped cream topping. Top with more crushed peppermint candy just before serving. Slice and serve cold – enjoy!
Notes
RECIPE TIPS
- For best results, be sure everything is very cold when whipping up the peppermint filling. Sometimes I even put the stand mixer bowl into the freezer before making the filling!
- EZ Gel is a naturally gluten-free thickener that helps create a fluffy, stabilized filling. I highly recommend using it but if you don’t have it you can simply omit it. The filling might be a little softer.
- If you want to save time, make this gluten-free peppermint pie the night before. Then add the whipped topping just before serving!
Nutrition
Calories: 759kcal | Carbohydrates: 68g | Protein: 6g | Fat: 53g | Saturated Fat: 31g | Polyunsaturated Fat: 3g | Monounsaturated Fat: 15g | Trans Fat: 0.3g | Cholesterol: 135mg | Sodium: 301mg | Potassium: 201mg | Fiber: 1g | Sugar: 53g | Vitamin A: 1749IU | Vitamin C: 1mg | Calcium: 99mg | Iron: 5mg