
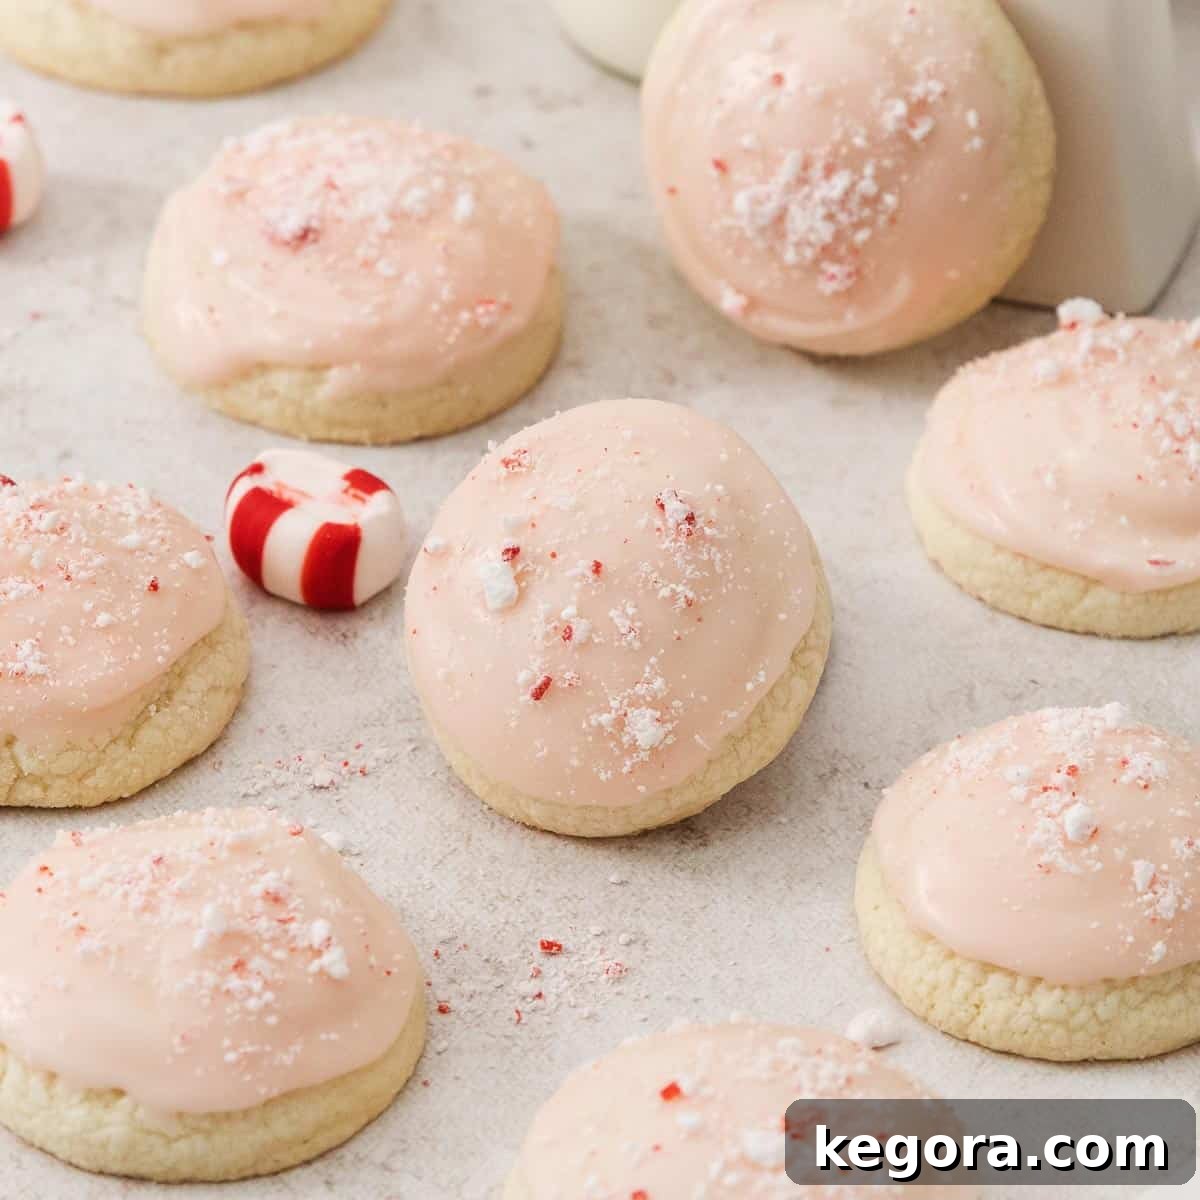
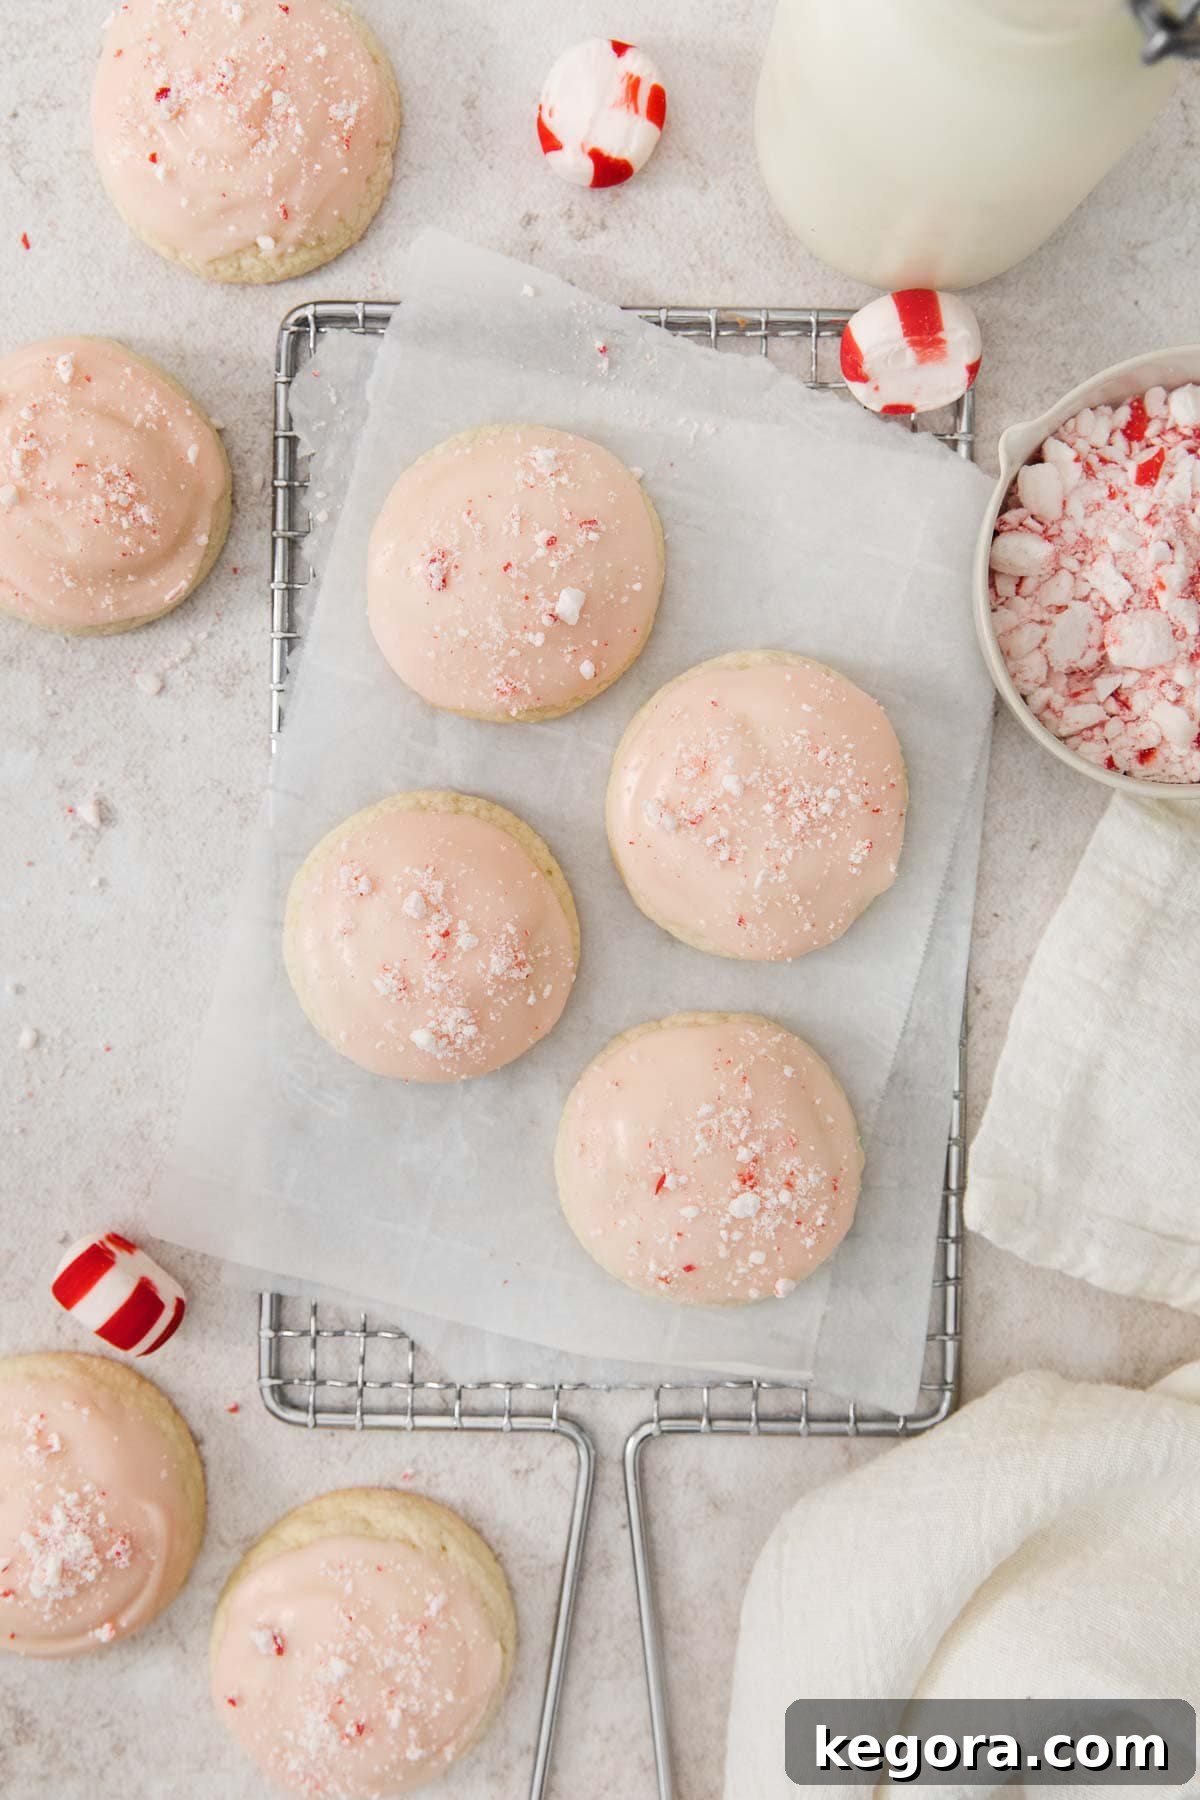
Irresistible Gluten-Free Peppermint Meltaways: Your Ultimate Holiday Cookie Recipe
Welcome to the enchanting world of holiday baking, where flavors dance and memories are made! If you’re on the hunt for an **effortlessly easy**, **delightfully festive**, and undeniably **beautiful** gluten-free cookie that comes together in a flash, you’ve found your match. This recipe for Gluten-Free Peppermint Meltaways is designed to bring the joy and magic of baking into your home, even amidst the busiest holiday season. Imagine the aroma of peppermint filling your kitchen without the stress of complicated steps or endless chilling. This recipe truly ticks all the boxes for a perfect holiday treat!
Why These Peppermint Meltaways Will Be Your New Holiday Favorite
These cookies are more than just a sweet treat; they’re an experience. Picture a cookie that’s wonderfully **buttery soft** and **tender**, melting in your mouth with every bite, yet offering a delightful, subtle crunch from perfectly crushed peppermint candies. The classic, vibrant peppermint flavor infused throughout the cookie and its luscious glaze is the epitome of holiday cheer. What makes them truly special for busy times? A remarkably simple **no-chill process**, meaning you can go from craving to confection in record time.
These gluten-free peppermint meltaways are incredibly versatile, making them ideal for:
- Holiday Parties: Their festive appearance and irresistible taste make them a standout on any dessert table.
- Thoughtful Gifting: Package them beautifully for a homemade gift that speaks volumes of care and effort.
- Baking with Kids: The straightforward steps and fun decoration process make it a fantastic activity for little helpers, creating cherished family memories.
Say goodbye to dry, crumbly gluten-free cookies! With our carefully selected ingredients and techniques, these meltaways redefine what a gluten-free cookie can be – soft, flavorful, and utterly addictive.
Pro Tip for Perfect Meltaways
For that signature melt-in-your-mouth texture and consistent baking, these cookies are intentionally designed to be smaller. Aim for approximately 1 tablespoon of dough per cookie. This ensures they bake evenly and achieve their delicate consistency.
Explore More Minty Holiday Delights
If you’re as enamored with peppermint as we are, you’ll love exploring these other festive, minty treats from our kitchen. Expand your holiday baking repertoire with:
- Gluten-Free Peppermint Frosted Chocolate Cookies
- Gluten-Free Peppermint Sour Cream Sugar Cookies
- Gluten-Free Chocolate Mint Cookies
- White Chocolate Peppermint Rice Krispies Treats
Happy baking! xoxo Erin
Essential Ingredients for Your Gluten-Free Peppermint Meltaways
Crafting the perfect gluten-free peppermint meltaway cookie relies on understanding the role of each key ingredient. While exact measurements are detailed in the recipe card below, here’s a deeper dive into what makes these cookies truly special:
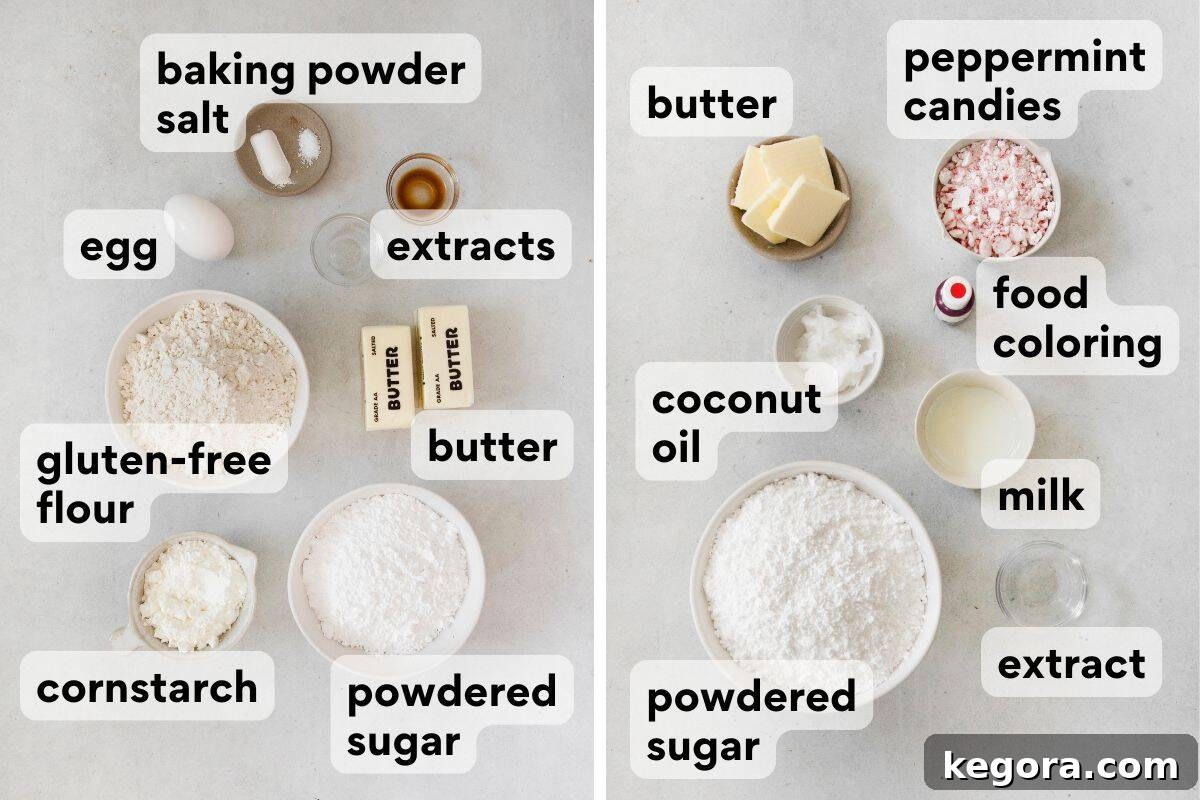
- Gluten-Free Flour: The foundation of our meltaways. I cannot stress enough the importance of using a high-quality gluten-free measure-for-measure flour blend that already contains xanthan gum. Xanthan gum acts as a vital binder, replacing the elasticity typically found in gluten, which prevents your cookies from becoming crumbly and helps them maintain a soft, tender texture. Inferior blends can lead to a dry or gritty result. This is my absolute favorite brand for consistent results.
- Powdered Sugar: This is a non-negotiable ingredient for achieving the desired cookie texture. Unlike granulated sugar, which can create a firmer, chewier, or even drier cookie, powdered sugar (also known as confectioners’ sugar) dissolves beautifully into the butter, contributing to that incredibly buttery, soft, and tender crumb that defines a true meltaway. Don’t substitute with other sugar types!
- Cornstarch: Here lies the true secret to the delicate, melt-in-your-mouth quality of these cookies. Cornstarch works by inhibiting gluten development (even in GF flours, its addition further softens the texture) and tenderizing the dough. It’s what makes these cookies literally “melt away” on your tongue. Skipping this ingredient would compromise the signature texture, so please, include it!
- Peppermint Extract: For that unmistakable holiday flavor, a quality peppermint extract is essential for both the cookie dough and the glaze. Be sure to use pure peppermint extract, not generic “mint” flavor or spearmint, which can have a different, less festive profile. The quality of your extract will significantly impact the final taste, providing that crisp, refreshing, and genuinely Christmassy note.
- Unsalted Butter: Ensure your butter is at perfect room temperature. This allows it to cream properly with the powdered sugar, creating an airy, light base for your cookies, crucial for their tender texture.
- Large Egg: The egg acts as a binder and adds moisture, contributing to the cookie’s structure and richness.
- Baking Powder & Kosher Salt: These are crucial for the cookies’ slight lift and to balance the sweetness, enhancing the overall flavor profile.
- Vanilla Extract: A touch of vanilla enhances and rounds out the peppermint flavor, preventing it from being too sharp.
- Coconut Oil (for glaze): When melted with butter, coconut oil helps the glaze set beautifully, providing a lovely sheen and firm finish.
- Milk of Choice (for glaze): Any milk works perfectly here, allowing for dairy-free variations if needed.
- Red Food Coloring (optional): A tiny drop can transform your glaze into a festive pink, adding visual appeal. Use sparingly with a toothpick for precise control.
- Crushed Soft Peppermint Candies: These provide the perfect textural contrast – a gentle crunch – and an extra burst of peppermint flavor, making the cookies visually stunning and even more delicious.
Step-by-Step: How to Make Gluten-Free Peppermint Meltaways
Creating these delightful gluten-free peppermint meltaways is a straightforward process, perfect for bakers of all skill levels. Here’s a clear overview of each stage to guide you:
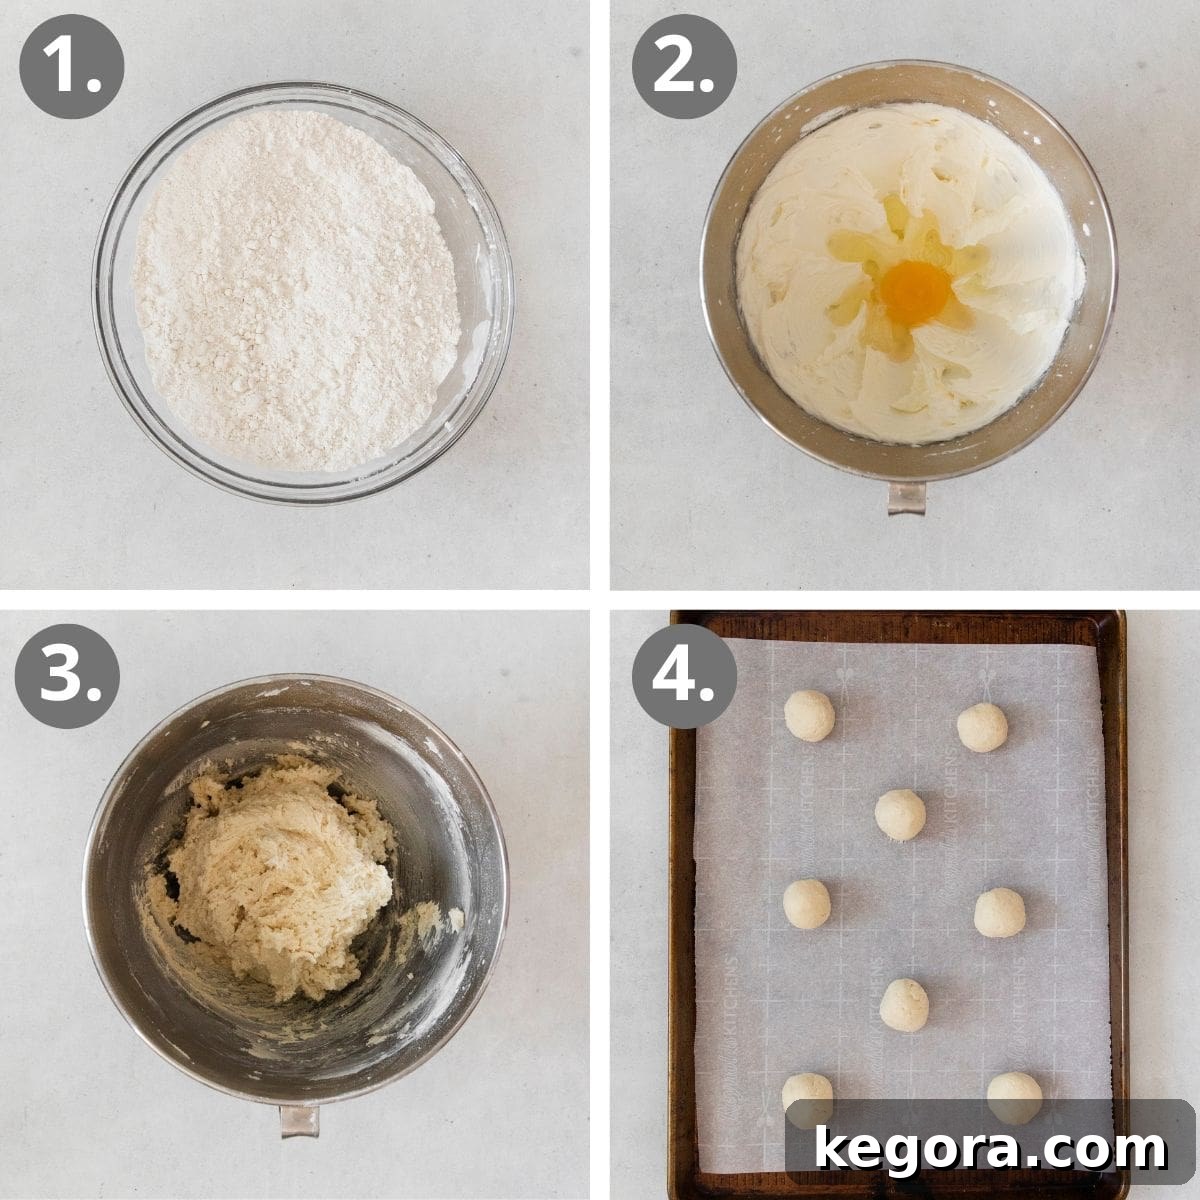
Preparing the Cookie Dough
- Preheat Oven & Prep Baking Sheets: Begin by preheating your oven to 350°F (175°C). Line large baking sheets with parchment paper or silicone baking mats to prevent sticking and ensure easy cleanup.
- Whisk Dry Ingredients: In a medium bowl, thoroughly whisk together your gluten-free flour, cornstarch, baking powder, and kosher salt. Whisking ensures these ingredients are evenly distributed, leading to a consistent cookie texture. Set this mixture aside.
- Cream Butter & Sugar: In the bowl of a stand mixer fitted with a paddle attachment (or using a hand mixer), combine the room-temperature butter and powdered sugar. Beat on medium speed for 2-3 minutes until the mixture is visibly light, fluffy, and pale in color. This creaming process incorporates air, which is vital for the meltaway texture.
- Add Wet Ingredients: Introduce the large egg, peppermint extract, and vanilla extract to the creamed mixture. Mix until everything is fully incorporated, making sure to scrape down the sides and bottom of the bowl with a spatula to ensure all ingredients are evenly combined.
- Combine Wet and Dry: With your mixer running on low speed, gradually add the dry ingredient mixture to the wet ingredients. Mix until the dough is just well-combined and no streaks of dry flour remain. Be careful not to overmix, even with gluten-free dough. A fantastic feature of this recipe is that the dough does not need to rest or chill, making it a perfect choice for last-minute baking!
- Shape and Arrange Cookies: Scoop the dough into small, round balls, using approximately 1 tablespoon of dough for each. Roll them gently between your palms until smooth. Place the dough balls on your prepared baking sheets, ensuring they are about 2 inches apart to allow for slight spreading.
- Bake to Perfection: Bake the cookies for 11-13 minutes, or until the edges are just set and the centers look firm. The cookies won’t brown significantly.
- Cooling Process: Once baked, remove the baking sheets from the oven. Let the cookies cool on the sheets for about 10 minutes before carefully transferring them to a wire rack to cool completely. This prevents them from breaking and ensures they are firm enough for glazing.
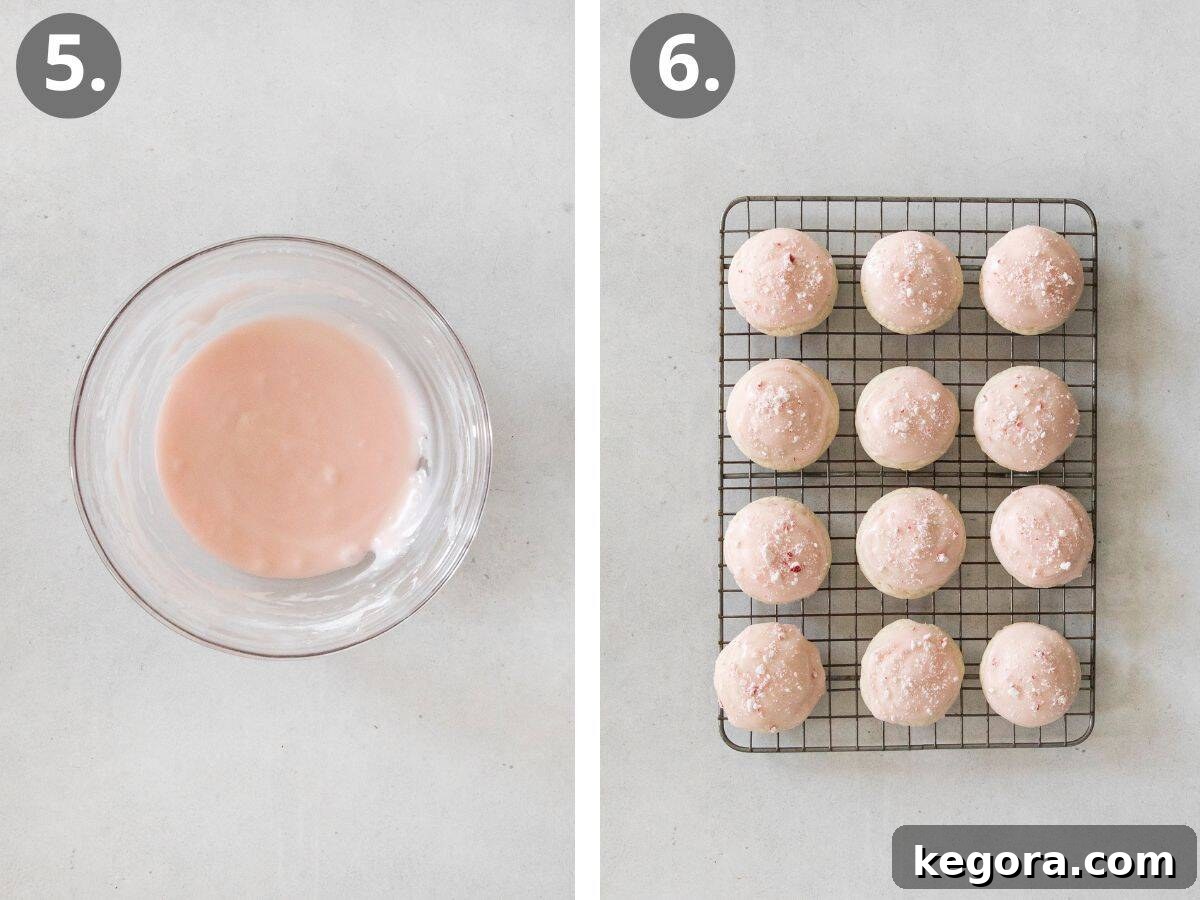
Crafting the Peppermint Glaze and Decorating
- Prepare the Glaze Base: For the delightful peppermint glaze, melt the butter and coconut oil together in a small saucepan over low heat or in a microwave-safe bowl (in short bursts). Once melted, remove from heat.
- Whisk in Glaze Ingredients: Add the powdered sugar, milk of your choice, and peppermint extract to the melted butter and coconut oil. Whisk continuously until the glaze is completely smooth and free of lumps. Its consistency should be pourable yet thick enough to coat the cookies.
- Add Festive Color (Optional): If you desire a festive pink hue for your glaze, use a toothpick to add the tiniest amount of red food coloring to the icing. Stir it in thoroughly. Repeat this process, adding very small amounts of coloring, until you achieve your desired shade of pink. It’s always easier to add more color than to take it away!
- Glaze and Decorate: Now for the fun part! You can either dip the tops of the completely cooled cookies directly into the warm glaze, or use a spoon or pastry brush to spread/brush the glaze evenly over the tops of each cookie. Be mindful that the glaze may thicken as it cools. If this happens, simply pop it back into the microwave for about 10 seconds to thin it out to a workable consistency again. The key is to work quickly: immediately after glazing each cookie, generously sprinkle it with the crushed peppermint candy pieces before the glaze sets. This ensures the candies adhere perfectly.
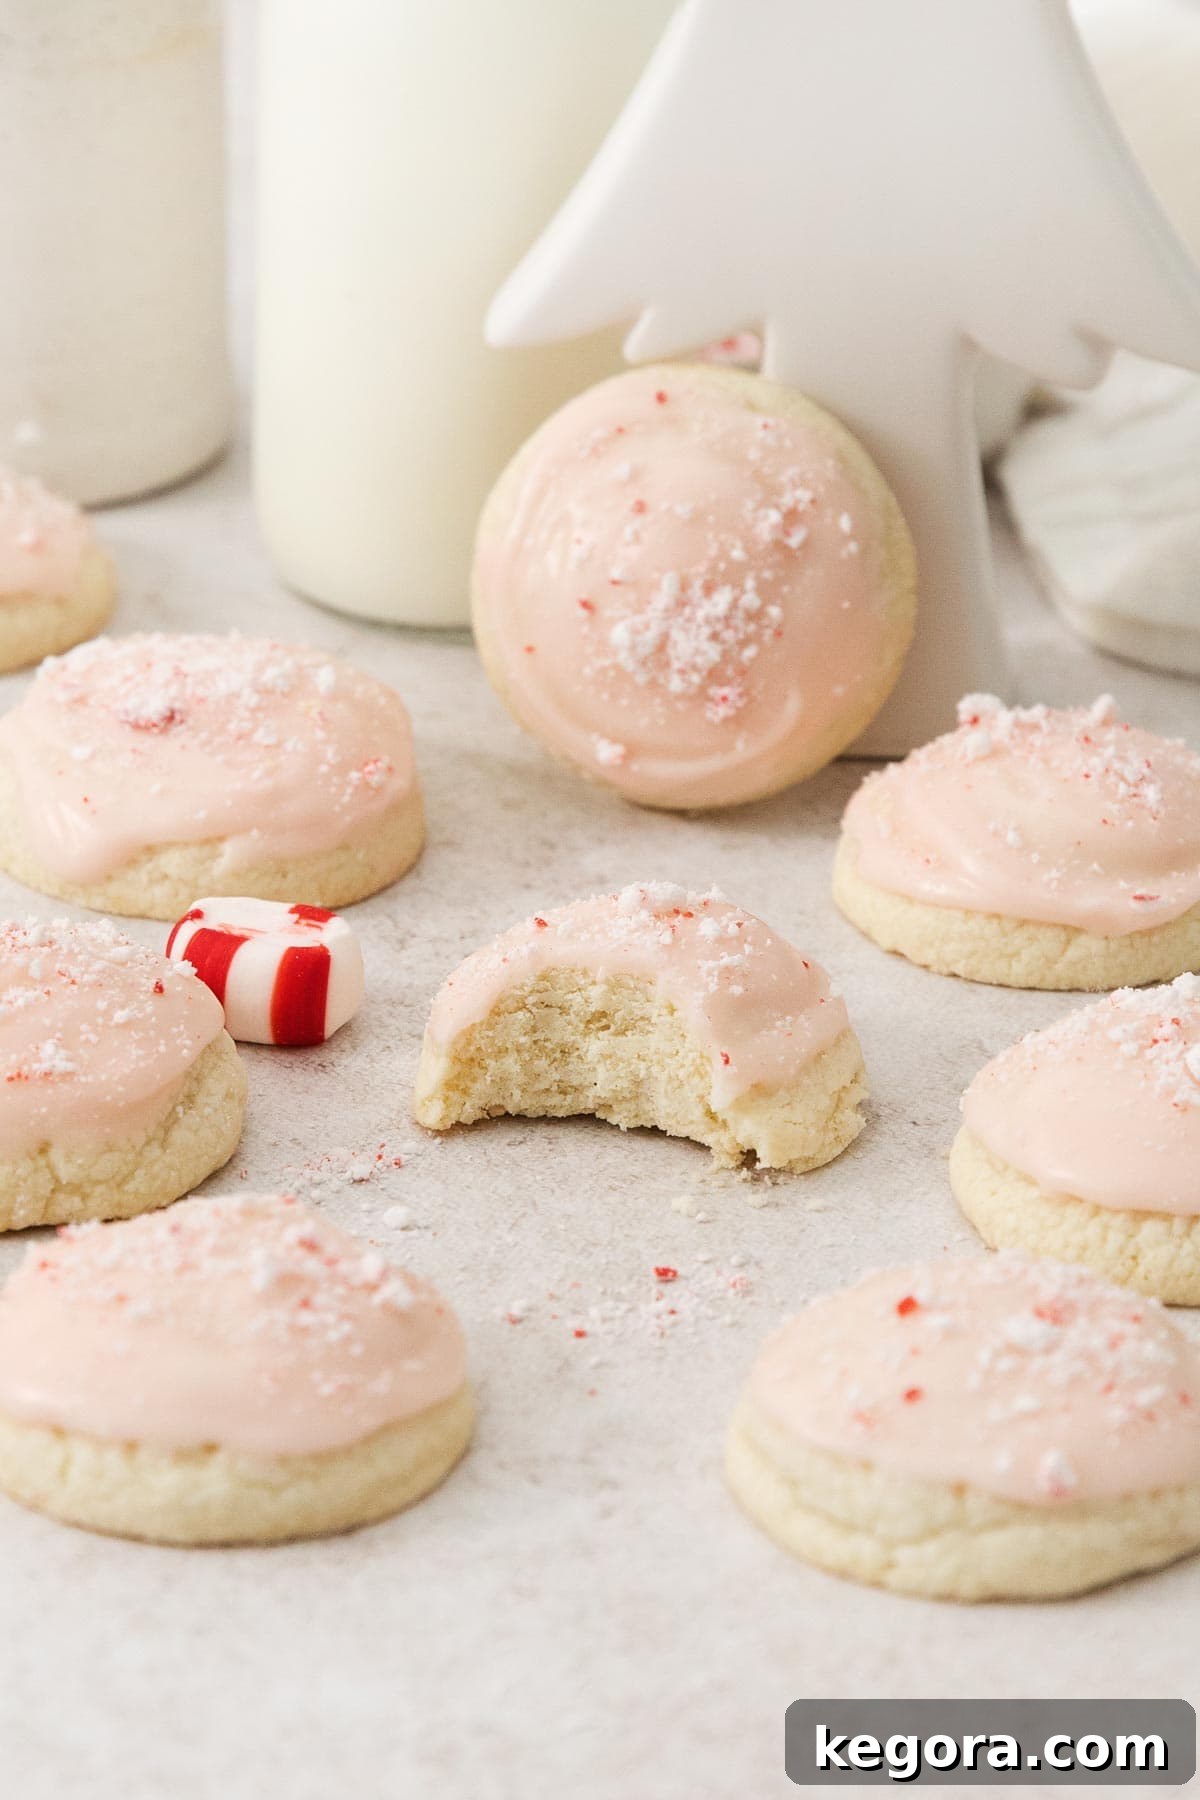
Tips for Success and Variations
Achieving bakery-quality gluten-free peppermint meltaways is simple with a few expert tips:
- Room Temperature Butter: This is critical! Cold butter won’t cream properly, affecting the texture. If you forget to take it out, you can quickly soften it by cutting it into small cubes and letting it sit for 15-20 minutes, or gently microwave for a few seconds (but don’t melt it).
- Measure Flour Accurately: For gluten-free baking, precision is key. Use a kitchen scale for the most accurate results, or the “spoon and level” method (spoon flour into a measuring cup, then level off with a straight edge) to avoid compacting the flour.
- Don’t Overmix: Once the dry ingredients are added, mix only until just combined. Overmixing can lead to tougher cookies, even with gluten-free flour.
- Cool Completely Before Glazing: Glazing warm cookies will cause the glaze to melt and slide off. Ensure your cookies are entirely cool for the best glaze application.
- Glaze Consistency: If your glaze is too thick, add milk a teaspoon at a time. If it’s too thin, add more powdered sugar a tablespoon at a time. A perfect glaze coats the back of a spoon and drips off slowly.
Flavor Variations for Your Meltaways
While peppermint is classic, feel free to experiment with different extracts for other holiday themes:
- Citrus Meltaways: Replace peppermint extract with lemon or orange extract for a bright, zesty cookie.
- Almond Meltaways: Use almond extract for a delicate, nutty flavor, perhaps with a simple vanilla glaze and chopped nuts.
- Chocolate Swirl: After forming the dough balls, gently swirl in a tiny bit of melted chocolate before baking for a marbled effect.
MORE GLUTEN-FREE CHRISTMAS COOKIES
Gluten-Free Thumbprint Cookies
Gluten-Free Shortbread
Gluten-Free Ginger Snaps
Gluten-Free Snowball Cookies
Gluten-Free Peppermint Meltaways
Erin Collins
20 minutes
12 minutes
32 minutes
36 cookies
These cookies come together quickly with no chilling required, making them your go-to for last-minute holiday baking or festive gifting.
Comments
Ingredients
Cookie Dough
- 2 cups (300g) gluten-free measure-for-measure flour
- ½ cup (64g) cornstarch
- 1 teaspoon baking powder
- ¼ teaspoon kosher salt
- 1 cup (226g) butter, at room temperature
- 1½ cups (180g) powdered sugar
- 1 large egg
- 1 teaspoon peppermint extract
- ½ teaspoon vanilla extract
Peppermint Glaze
- 4 tablespoons (56g) butter
- 1 tablespoon coconut oil
- 2 cups (240g) powdered sugar
- 1 tablespoon milk of choice
- ½ teaspoon peppermint extract
- 1 small drop of red food coloring (optional)
- ½ cup (85g) crushed soft peppermint candies
Instructions
-
Preheat the oven to 350°F (175°C). Line large baking sheets with parchment paper or silicone baking mats.
-
In a medium bowl, whisk together the gluten-free flour, cornstarch, baking powder, and salt until well combined.
-
In the bowl of a stand mixer fitted with a paddle attachment, or using a hand mixer, add the butter and powdered sugar. Mix on medium speed for 2-3 minutes, until the mixture is light and fluffy.
-
Add the egg, peppermint extract, and vanilla extract. Mix until fully incorporated, then scrape down the sides and bottom of the bowl to ensure even mixing.
-
With the mixer running on low speed, slowly add the whisked dry ingredients to the wet ingredients. Mix until the dough is just well-combined and fully incorporated. Scrape down the bowl again if needed. The dough does not need to chill.
-
Scoop the cookie dough into round balls, using about 1 tablespoon of dough per ball. Roll each ball until smooth. Place them on the prepared baking sheet, ensuring they are about 2 inches apart.
-
Bake for 11-13 minutes, or until the cookies are set and the edges are lightly golden (they won’t brown much).
-
Remove from the oven and let the cookies cool on the baking sheets for 10 minutes. Afterwards, transfer them carefully to a wire rack to cool completely before glazing.
-
For the peppermint glaze: Melt the butter and coconut oil in a small saucepan or microwave-safe bowl. Whisk in the powdered sugar, milk of choice, and peppermint extract until the glaze is smooth and has a pourable consistency.
-
If desired, use a toothpick to add the tiniest amount of red food coloring to the icing. Stir well and repeat as necessary until you reach your desired pink shade.
-
Dip the tops of the completely cooled cookies in the warm glaze, or brush/spread the glaze on top. If the glaze thickens too much, microwave it for about 10 seconds to thin it out again. Immediately sprinkle the crushed peppermint candies on top of each cookie before the glaze has a chance to set.
Notes
Dairy-Free Option: Easily make these cookies dairy-free by substituting the butter in both the cookies and the glaze with your favorite dairy-free butter alternative. Also, use an unsweetened dairy-free milk of choice for the glaze.
Nut-Free: These meltaways are naturally nut-free, making them a great option for those with nut allergies.
Make-Ahead Instructions: Prepare the cookie dough and store it in an airtight container in the refrigerator for up to 2 days. If the dough is too firm to work with directly from the fridge, let it sit at room temperature for 10-15 minutes to soften slightly. You can also freeze individual dough balls for up to 3 months. When ready to bake, place frozen dough balls on a baking sheet and bake, adding a few extra minutes to the baking time.
Storage: Once cooled and glazed, store the cookies in an airtight container at room temperature for up to 4 days. To protect the delicate glaze, arrange cookies in a single layer or separate layers with parchment paper.
Freezing Glazed/Unglazed Cookies: Unglazed cookies freeze best; store them in an airtight container or freezer bag for up to 3 months. Thaw at room temperature before glazing. Glazed cookies can also be frozen for up to 1 month, but note that freezing and thawing may slightly impact the glaze’s texture and color.
Nutrition
|
Carbohydrates: 20g
|
Protein: 1g
|
Fat: 7g
|
Saturated Fat: 4g
|
Polyunsaturated Fat: 0.3g
|
Monounsaturated Fat: 2g
|
Trans Fat: 0.3g
|
Cholesterol: 21mg
|
Sodium: 69mg
|
Potassium: 16mg
|
Fiber: 1g
|
Sugar: 13g
|
Vitamin A: 204IU
|
Calcium: 13mg
|
Iron: 0.3mg