
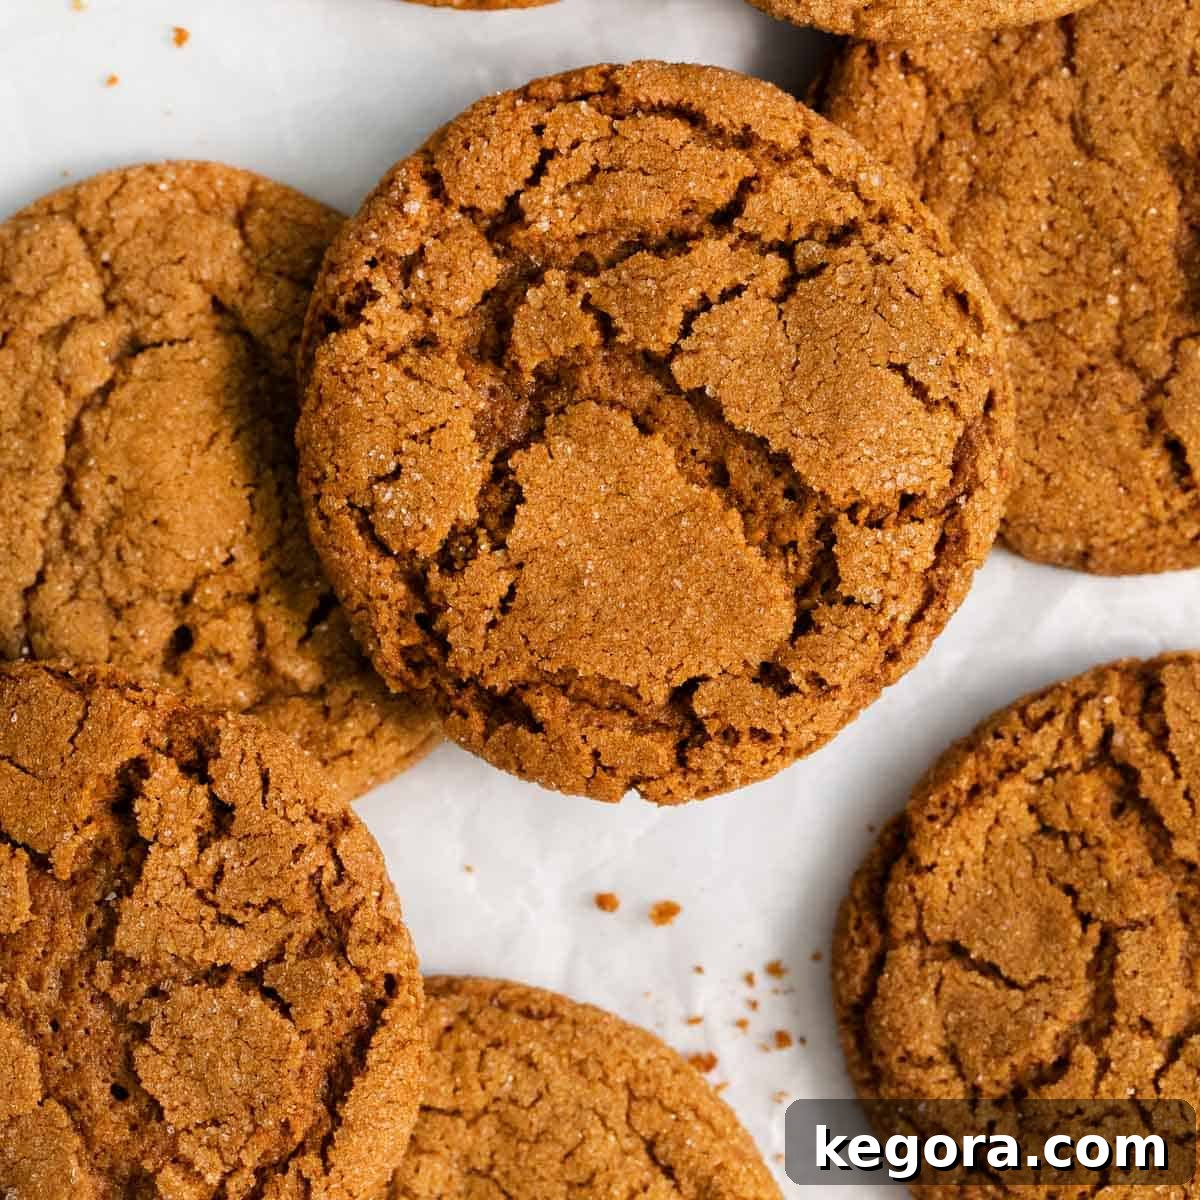
Erin’s Ultimate Guide to Gluten-Free Gingersnaps
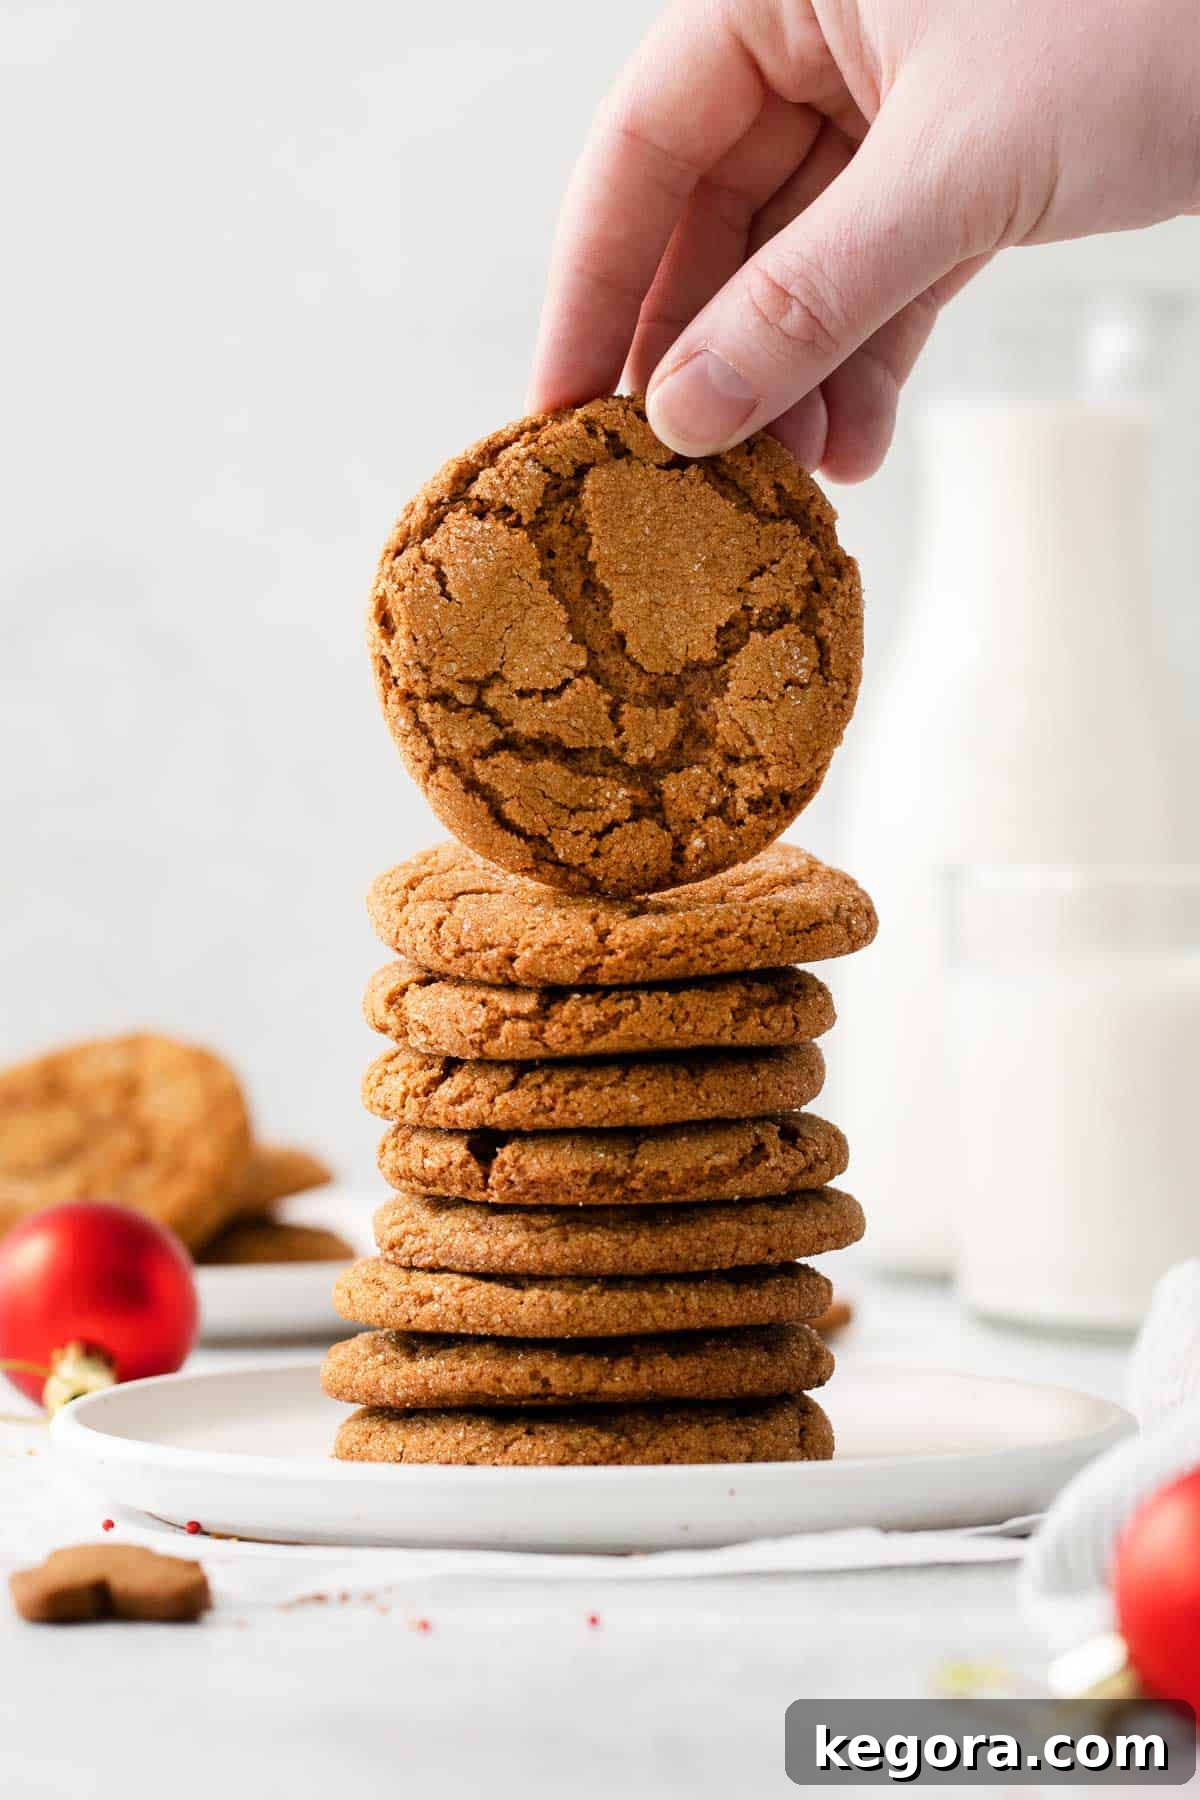
There’s nothing quite like the comforting aroma of freshly baked gingersnaps filling your home, especially during the festive holiday season. These old-fashioned gluten-free gingersnaps are a beloved tradition in my kitchen, offering a perfect blend of sweet, spicy, and satisfying textures. Whether you’re planning a quiet evening with a cup of tea or preparing an impressive spread for a Christmas party or cookie exchange, these cookies are remarkably versatile and always a crowd-pleaser.
What makes this recipe truly special is its incredible ease and adaptability. It’s a fantastic make-ahead option, allowing you to streamline your holiday baking and enjoy more time with loved ones. The robust, timeless flavor profile of ginger and molasses makes them an irresistible treat that can be savored any time of year, not just for special occasions. Plus, I’ve included detailed instructions so you can customize them to be perfectly chewy or wonderfully crispy, depending on your preference!
Why You’ll Adore These Gluten-Free Gingersnaps
- Irresistible Flavor Profile: Experience the perfect harmony of deep, rich molasses paired with a blend of warm, cozy spices that truly define a classic gingersnap. Each bite is a delightful journey of flavor.
- Customizable Texture: Unlike many cookie recipes, this one empowers you to choose your ideal texture. Crave a soft, bendable cookie? Or perhaps a satisfying snap with every bite? My baking guide offers precise timings for both chewy and crispy perfection.
- Effortless Make-Ahead Option: Simplify your holiday preparations. The dough can be prepared days in advance and stored in the refrigerator or even frozen for longer, making spontaneous baking a breeze.
- Naturally Gluten-Free: Specially crafted for those with gluten sensitivities or anyone seeking delicious gluten-free alternatives, these cookies don’t compromise on flavor or texture. They are so good, no one will guess they’re gluten-free!
- Simple & Straightforward: Despite their impressive taste, the steps involved are incredibly easy to follow, making this a rewarding recipe for bakers of all skill levels.
Erin’s Top Tip for Perfect Gingersnaps: Don’t Skip the Chill!
Chilling the dough for at least 30 minutes is a crucial step that contributes significantly to the success of these gluten-free gingersnaps. This seemingly simple pause in the baking process allows the gluten-free flour blend to fully hydrate, absorbing moisture from the wet ingredients. This hydration is vital as it helps the cookies maintain their shape during baking, preventing excessive spreading. Furthermore, it’s the secret to achieving that coveted, signature crackly top and develops a deeper, more robust flavor. So, resist the urge to rush – your patience will be rewarded with a batch of perfectly textured, intensely flavored cookies!
If you’re a fan of these delightful gingersnaps, I highly recommend exploring other ginger and molasses-infused treats. You might love these gluten-free molasses cookies for another chewy delight, or these festive gluten-free gingerbread cookies. For a fun holiday project, try constructing a gluten-free gingerbread house! And for a quicker bake, my gluten-free gingerbread bars or this rich gluten-free gingerbread cake are excellent choices.
xoxo erin
Rave Reviews: What Our Readers Say
From Brianne: “I think these were the best gingersnaps I’ve ever had, gluten free or not. Perfect recipe.”
We absolutely love hearing from you! Positive feedback like Brianne’s truly motivates us to keep creating and sharing delicious gluten-free recipes that everyone can enjoy. It’s wonderful to know that these gingersnaps stand up to (and even surpass!) traditional versions.
Read 89 more comments
Essential Ingredients for Gluten-Free Gingersnaps
Crafting the perfect gluten-free gingersnap begins with understanding the role of each key ingredient. Below, I’ll share some specific notes on the components that make these cookies shine. For the precise quantities, remember to jump to the full recipe card below.
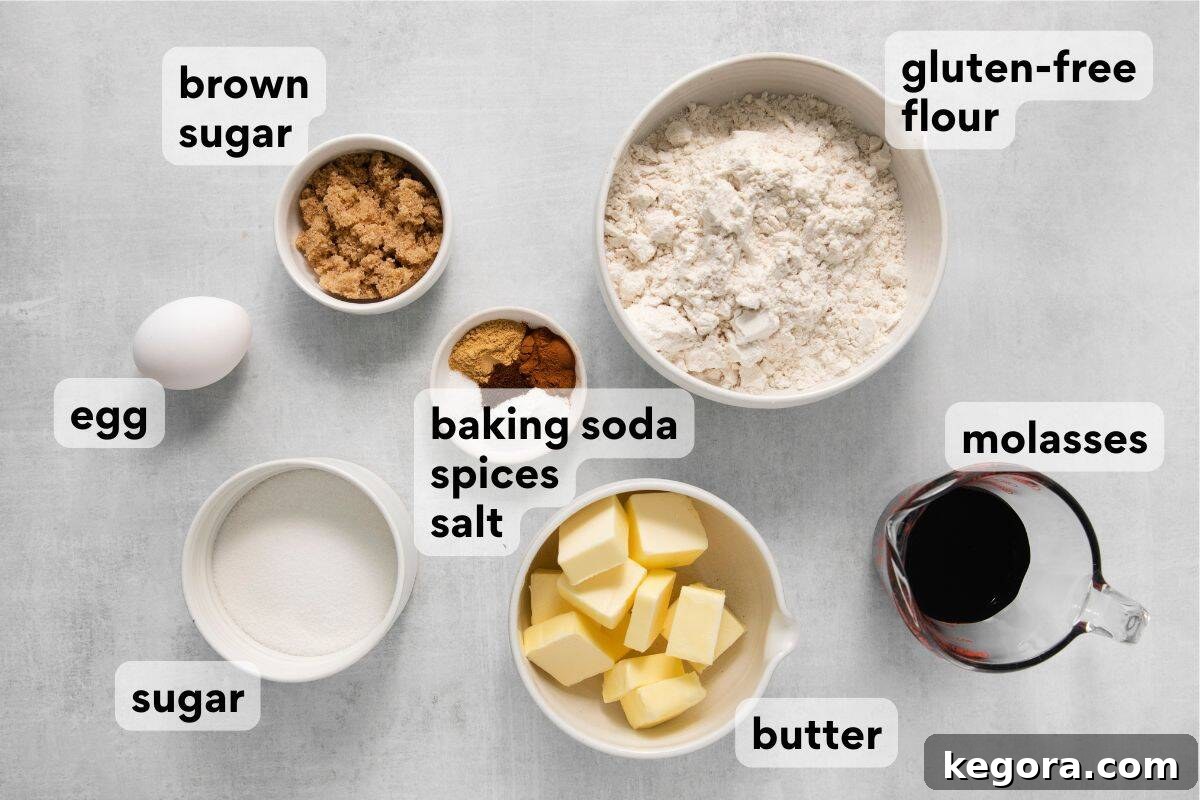
- Gluten-Free Flour Blend: The foundation of any good gluten-free cookie! I cannot stress enough the importance of using a high-quality, measure-for-measure gluten-free flour blend that *includes* xanthan gum. Xanthan gum acts as a binder and provides the elasticity usually supplied by gluten, preventing crumbly cookies. Using a blend with it already incorporated saves you an extra step and ensures the best texture. This is my absolute favorite brand for consistent results.
- Molasses: This ingredient is non-negotiable for authentic gingersnap flavor. It imparts a deep, caramelized sweetness and helps create that signature chewy texture. It’s crucial to use unsulfured molasses for this recipe, specifically avoiding blackstrap molasses. Blackstrap is much more bitter and robust, and its intense flavor can easily overpower the delicate balance of spices in these cookies, leading to a less pleasant taste. Unsulfured molasses offers the natural sweetness and viscosity needed for perfect gingersnaps.
- Aromatic Spices: The soul of a gingersnap! Our blend relies on classic ground ginger, warm cinnamon, and a hint of pungent cloves. These three spices work in harmony to create the iconic cozy, slightly spicy, and deeply aromatic flavor profile. For an extra touch of warmth and convenience, you can substitute these individual spices with a good quality pumpkin pie spice blend. If you love a stronger, more vibrant ginger kick, consider adding a small amount of freshly grated ginger to the dough.
- Brown Sugar: Sugar not only sweetens but also plays a role in texture. You can use either light or dark brown sugar in this recipe. Dark brown sugar contains more molasses than light brown sugar, which will contribute an even richer, deeper molasses flavor to your cookies and result in a wonderfully chewier texture. Light brown sugar will still yield delicious cookies with a slightly milder flavor and texture.
- Butter: Use unsalted butter, softened to room temperature. This allows it to cream properly with the sugars, incorporating air which contributes to the cookies’ light texture. For a dairy-free option, a good quality plant-based butter substitute works beautifully.
- Egg: A single large egg binds the ingredients together, adding moisture and structure to the dough, ensuring your cookies don’t crumble.
Looking for more festive, gluten-free treats to brighten your holiday table? Dive into my comprehensive collection of gluten-free Christmas cookies or browse the full category of holiday recipes! Among our cherished favorites are the best gluten-free sugar cookies, delightful gluten-free snowball cookies, and charming gluten-free thumbprint cookies, each guaranteed to bring joy to your gluten-free celebrations.
Mastering the Art: How to Bake Perfect Gluten-Free Gingersnaps
Baking these gluten-free gingersnaps is a straightforward and enjoyable process. Here’s a detailed overview of the steps to ensure you achieve delicious results every time. Remember to jump to the full recipe card for complete instructions and measurements!
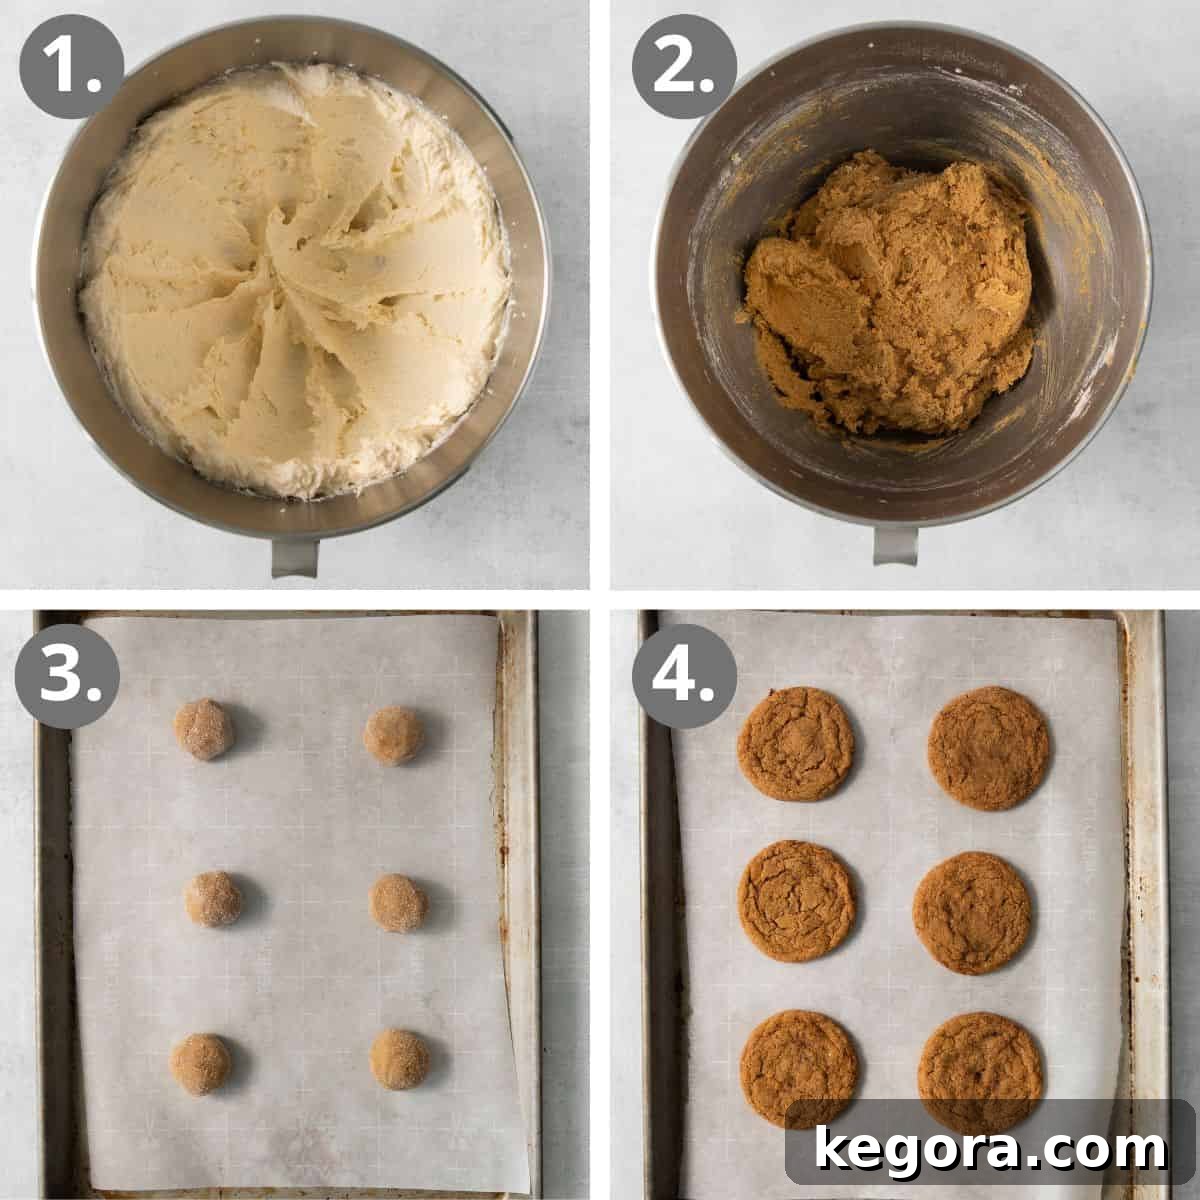
Step 1: Prepare Your Dry and Wet Foundations
Start by preparing your ingredients in separate bowls. In a medium bowl, thoroughly whisk together all the dry ingredients – that’s your gluten-free flour blend, baking soda, ground ginger, cinnamon, cloves, and kosher salt. Whisking ensures an even distribution of leavening and spices. In a separate, larger bowl (preferably a stand mixer bowl or one suitable for a hand mixer), cream the room-temperature butter and both granulated and brown sugars on medium-high speed. Continue mixing until the mixture becomes light, fluffy, and noticeably paler in color. This step is crucial for incorporating air, which contributes to the cookies’ final texture.
Step 2: Combine and Scrape for Perfection
Once your butter and sugars are perfectly creamed, it’s time to add the flavorful liquids. Mix in the unsulfured molasses and the large egg until they are thoroughly combined with the butter mixture. After this, pause your mixer and use a rubber spatula to carefully scrape down the sides and bottom of the bowl. This ensures all ingredients are uniformly incorporated, preventing any unmixed pockets. Then, with the mixer running on a low speed, gradually add the whisked dry ingredient mixture to the wet ingredients. Mix until just combined, scrape the bowl one more time, and give it a final short mix to ensure everything is perfectly blended without overworking the dough.
Step 3: Chill, Roll, and Coat
This step is vital for the signature crackly top and overall texture. Cover the bowl with plastic wrap and refrigerate the dough for a minimum of 30 minutes. This chilling period allows the gluten-free flour to fully hydrate and the flavors to meld beautifully, making the dough easier to handle. If your dough chills for longer than a few hours (or up to 3 days), let it sit at room temperature for about 30 minutes before proceeding. You want the dough to be slightly tacky so that the granulated sugar coating adheres properly. Once ready, scoop the dough into 1½ tablespoon-sized balls and roll each one generously in granulated sugar for that classic sparkly, crackly finish.
Step 4: Bake to Your Desired Texture
Preheat your oven to 350°F (175°C) and line large baking sheets with parchment paper or silicone baking mats. Place the sugar-coated dough balls on the prepared sheets, ensuring they are about 3 inches apart to allow for proper spreading. Now for the crucial decision: chewy or crispy? For delightfully chewy cookies, bake them for approximately 13-15 minutes. If you prefer a crispier gingersnap with a more pronounced snap, extend the baking time to 16-18 minutes. Keep an eye on them, as oven temperatures can vary.
Step 5: Cool and Enjoy
Once baked to your liking, remove the cookies from the oven. Let them cool on the baking sheets for about 10 minutes. This allows them to set up and firm slightly. After 10 minutes, gently transfer them to a wire rack to cool completely. Cooling on a rack ensures air circulation, preventing soggy bottoms and allowing the cookies to reach their optimal texture.
EXPLORE MORE GLUTEN-FREE CHRISTMAS TREATS
Chewy Gluten-Free Gingerbread Bars
Gluten-Free Iced Oatmeal Cookies
Gluten-Free Gingerbread Cookies
Gluten-Free Chocolate Crinkle Cookies
Gluten-Free Gingersnaps (Old Fashioned!)
No matter your preference, these buttery, perfectly spiced cookies are a must-have for the holiday season and beyond. Their rich flavor and adaptable texture make them a family favorite year after year!
Comments
Print Recipe
Ingredients
Dry Ingredients
- 2¼ cups (337g) gluten-free measure-for-measure flour
- 2 teaspoons baking soda
- 1½ teaspoons ground ginger
- 1 teaspoon ground cinnamon
- ¼ teaspoon ground cloves
- ½ teaspoon kosher salt
Other Ingredients
- ¾ cup (170g) butter, at room temperature
- ¾ cup (150g) granulated sugar
- ¼ cup (53g) brown sugar
- ⅓ cup (80ml) unsulfured molasses
- 1 large egg
- ½ cup (100g) granulated sugar, for rolling
Instructions
-
In a medium bowl, whisk together the gluten-free flour blend, baking soda, ground ginger, cinnamon, cloves, and kosher salt until well combined. Set aside.
-
In the bowl of a stand mixer fitted with a paddle attachment (or using a hand mixer in a large bowl), cream together the softened butter, granulated sugar, and brown sugar on medium-high speed for 2-3 minutes, until the mixture is light and fluffy.
-
Add the molasses and large egg to the creamed butter and sugar mixture. Mix until everything is well-combined, then scrape down the sides and bottom of the bowl with a spatula to ensure even mixing.
-
With the mixer running on low speed, slowly add the dry ingredients to the wet ingredients. Mix until just combined. Scrape down the sides and bottom of the bowl again, then mix one more time until all ingredients are fully incorporated into a cohesive dough. Be careful not to overmix.
-
Cover the bowl of dough tightly with plastic wrap and refrigerate for at least 30 minutes. This chilling period can extend up to 3 days. If the dough has been chilled for more than a few hours, let it sit at room temperature for about 30 minutes before shaping, so it becomes slightly tacky and easier to roll.
-
While the dough is chilling, preheat your oven to 350°F (175°C). Line large baking sheets with parchment paper or silicone baking mats to prevent sticking.
-
Scoop the cookie dough into uniform round balls, using approximately 1½ tablespoons of dough per ball. Roll each dough ball generously in the remaining granulated sugar, ensuring it’s fully coated for that beautiful crackly top.
-
Place the sugar-coated dough balls on the prepared baking sheets, spacing them about 3 inches apart to allow for spreading during baking. For soft and chewy cookies, bake for 13-15 minutes. For a crispier gingersnap, bake for 16-18 minutes.
-
Once baked, remove the cookies from the oven and allow them to cool on the baking sheets for 10 minutes. This helps them set and firm up. After 10 minutes, transfer the cookies to a wire rack to cool completely.
Notes for Success and Variations
Gluten-Free Flour: The quality of your gluten-free flour blend is key! Choose a high-quality, ‘measure-for-measure’ blend that already contains xanthan gum. Xanthan gum is essential for binding gluten-free dough and preventing a crumbly texture. I highly recommend this one for consistent results!
Dairy-Free Option: These cookies can easily be made dairy-free by substituting regular butter with your favorite high-quality dairy-free butter alternative. Ensure it’s softened to room temperature for optimal creaming.
Nut-Free Assurance: Great news for those with nut allergies! These gingersnaps are naturally nut-free, making them a safe and delicious treat for many.
Make-Ahead Mastery: This recipe is perfect for planning. The prepared cookie dough can be covered and refrigerated for up to 3 days, allowing you to bake fresh cookies on demand. For longer storage, the dough can be frozen for up to 3 months. In either case, always allow the dough to sit at room temperature until it’s slightly tacky before rolling it in sugar and baking.
Storing Baked Cookies: Once completely cooled, store your gluten-free gingersnaps in an airtight container at room temperature for up to 5 days. This helps maintain their fresh texture and flavor.
Freezing Baked Cookies: To extend their shelf life, cool baked cookies completely, then store them in an airtight container or a freezer-safe bag for up to 2 months. Thaw them at room temperature for a delicious treat anytime.
Nutrition Information (per serving)
This comprehensive guide to gluten-free gingersnaps was originally published in November 2022. It has since been updated and enhanced with new photos, expanded instructions, and expert tips in November 2025 to bring you the most delicious and successful baking experience.