
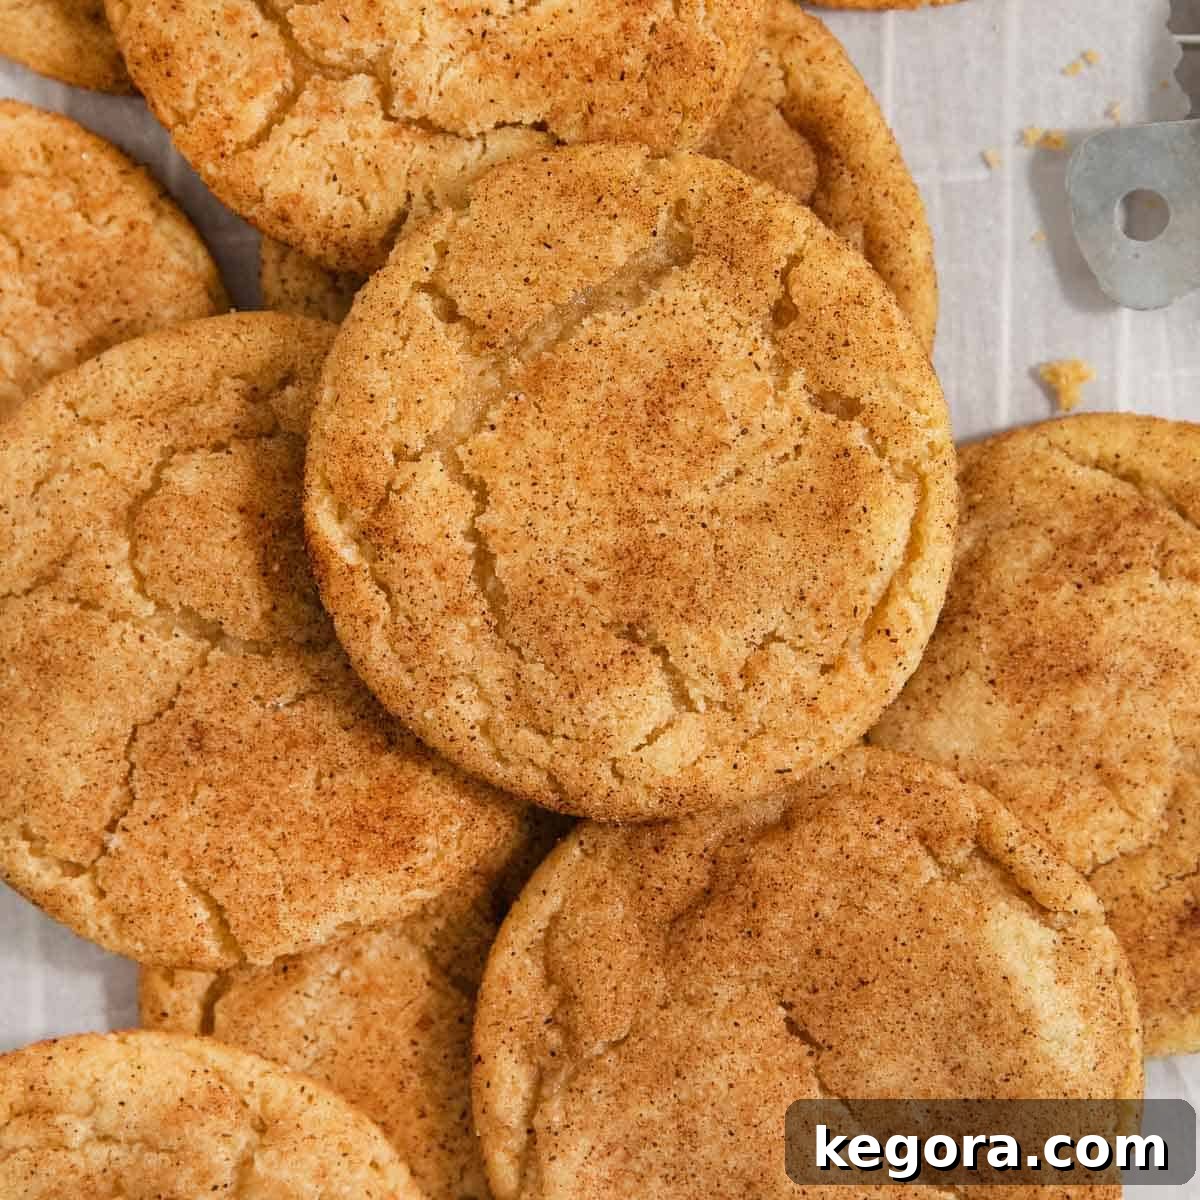
The Best Brown Butter Gluten-Free Snickerdoodles You’ll Ever Make
Erin’s Secret to Perfect Snickerdoodles
Snickerdoodles are more than just a cookie; they’re a warm hug in dessert form, a timeless classic that brings joy to every bite. And these aren’t just any snickerdoodles – these are my absolute favorite brown butter gluten-free snickerdoodles, perfected to deliver an irresistible experience that even gluten-eaters won’t believe is gluten-free! I’ve yet to meet anyone who could turn one down!
The magic truly happens with the brown butter in this recipe. It transforms these cookies, infusing them with a nutty, caramelized depth that elevates the familiar cinnamon-sugar flavor to an entirely new level. Whether you’re baking for cookie exchanges, festive parties, or simply craving an anytime treat, these cookies are guaranteed to be a hit. They’re a staple in my kitchen, bringing smiles and satisfaction without compromise.
Why You’ll Fall in Love with This Recipe:
- Unbeatable Texture: Imagine a cookie that’s perfectly chewy in the center, giving way to delightfully crisp, golden edges. That’s exactly what you’ll get!
- Rich Flavor Profile: The brown butter adds an unparalleled nutty richness that complements the sweet, spicy cinnamon sugar coating beautifully.
- Effortlessly Delicious: This easy-to-follow recipe ensures fantastic results every time, making it a stress-free baking adventure.
- Gluten-Free Perfection: You’d never guess these are gluten-free! They boast the exact taste and texture of traditional snickerdoodles, making them suitable for everyone to enjoy.
Erin’s Top Tips for Snickerdoodle Success:
For the absolute best flavor and texture, there are two crucial steps you simply cannot skip: browning the butter and chilling the dough. These aren’t optional; they are the secrets to achieving snickerdoodle perfection!
Looking for more delightful gluten-free cookie recipes? You’ll adore these:
- Chewy Gluten-Free Pumpkin Snickerdoodles
- Gluten-Free White Chocolate Macadamia Nut Cookies
- Gluten-Free Molasses Crinkle Cookies
- Gluten-Free Almond Cookies
- Gluten-Free Iced Oatmeal Cookies
xoxo Erin
Featured Comment
From Maggie: “Thank goodness for this amazing recipe! Snickerdoodles are my son’s favorite. Then he had to go gluten-free. But hooray! I found this recipe! The cookies have a great taste and texture and my son loves them! I made these for other members of the family who can eat gluten and they don’t even know the difference.”
Read 52 more comments
Essential Ingredients for Gluten-Free Snickerdoodles
Crafting the perfect gluten-free snickerdoodles requires a few key ingredients, each playing a vital role in achieving that sought-after flavor and texture. Here are some notes on the stars of our show. For the precise measurements, please jump to the full recipe card below.
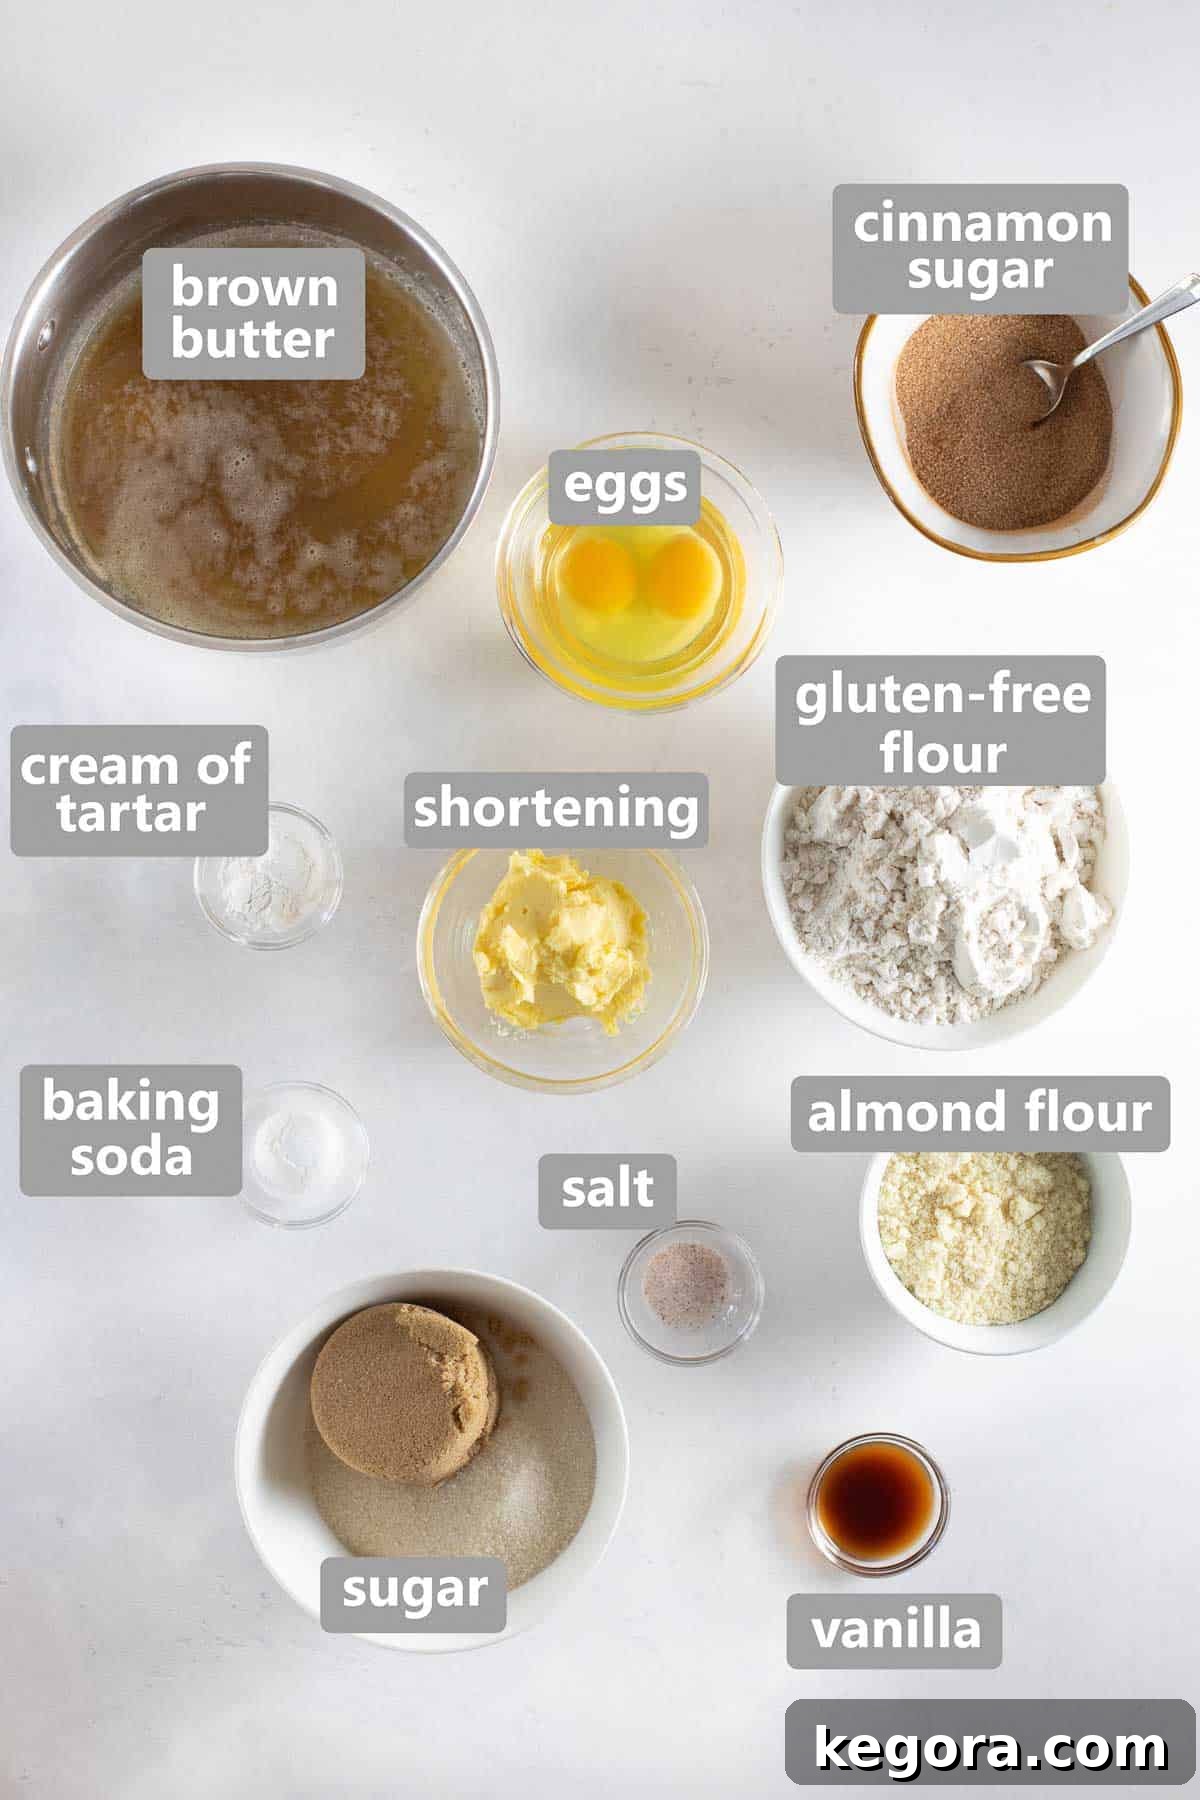
- Gluten-Free Measure-for-Measure Flour: This is the foundation of our gluten-free cookies. It’s absolutely critical to use a high-quality blend that specifically states “measure-for-measure” or “cup-for-cup” and, most importantly, contains xanthan gum. Xanthan gum acts as a binder, mimicking gluten’s elasticity and helping prevent crumbling, which is common in gluten-free baking. My top recommendation is this specific brand for consistent, delicious results.
- Almond Flour: I often incorporate a touch of almond flour into my cookie recipes, and for good reason! It’s a game-changer for texture, contributing to that desired chewiness that makes these snickerdoodles so satisfying. Additionally, almond flour helps the cookies achieve a beautiful golden-brown finish, adding to their visual appeal.
- Butter: While any butter works, browning the butter is a non-negotiable step for these snickerdoodles. It’s truly worth the extra few minutes! The browning process develops a complex, caramelized, and nutty flavor that perfectly complements the spiced cinnamon sugar. This simple technique transforms a good cookie into an extraordinary, one-of-a-kind treat.
- Shortening: Don’t underestimate the power of shortening in this recipe. I prefer using organic palm shortening for its neutral flavor and excellent performance, but any quality shortening will do. It’s essential for both moisture retention and structural stability, ensuring your cookies have that wonderfully chewy and tender texture we all crave in a snickerdoodle.
- Cream of Tartar: This classic snickerdoodle ingredient is a must-have! Cream of tartar is what gives snickerdoodles their signature tangy flavor and helps create their characteristic crinkled tops. More importantly, it reacts with baking soda to give the cookies their distinct light, airy, and chewy texture. Don’t skip it if you want authentic snickerdoodle perfection!
How to Bake Irresistible Gluten-Free Snickerdoodles
Making these gluten-free snickerdoodles is a rewarding process, and while the full detailed instructions are in the recipe card below, here’s an overview of the key steps to guide you to delicious results!
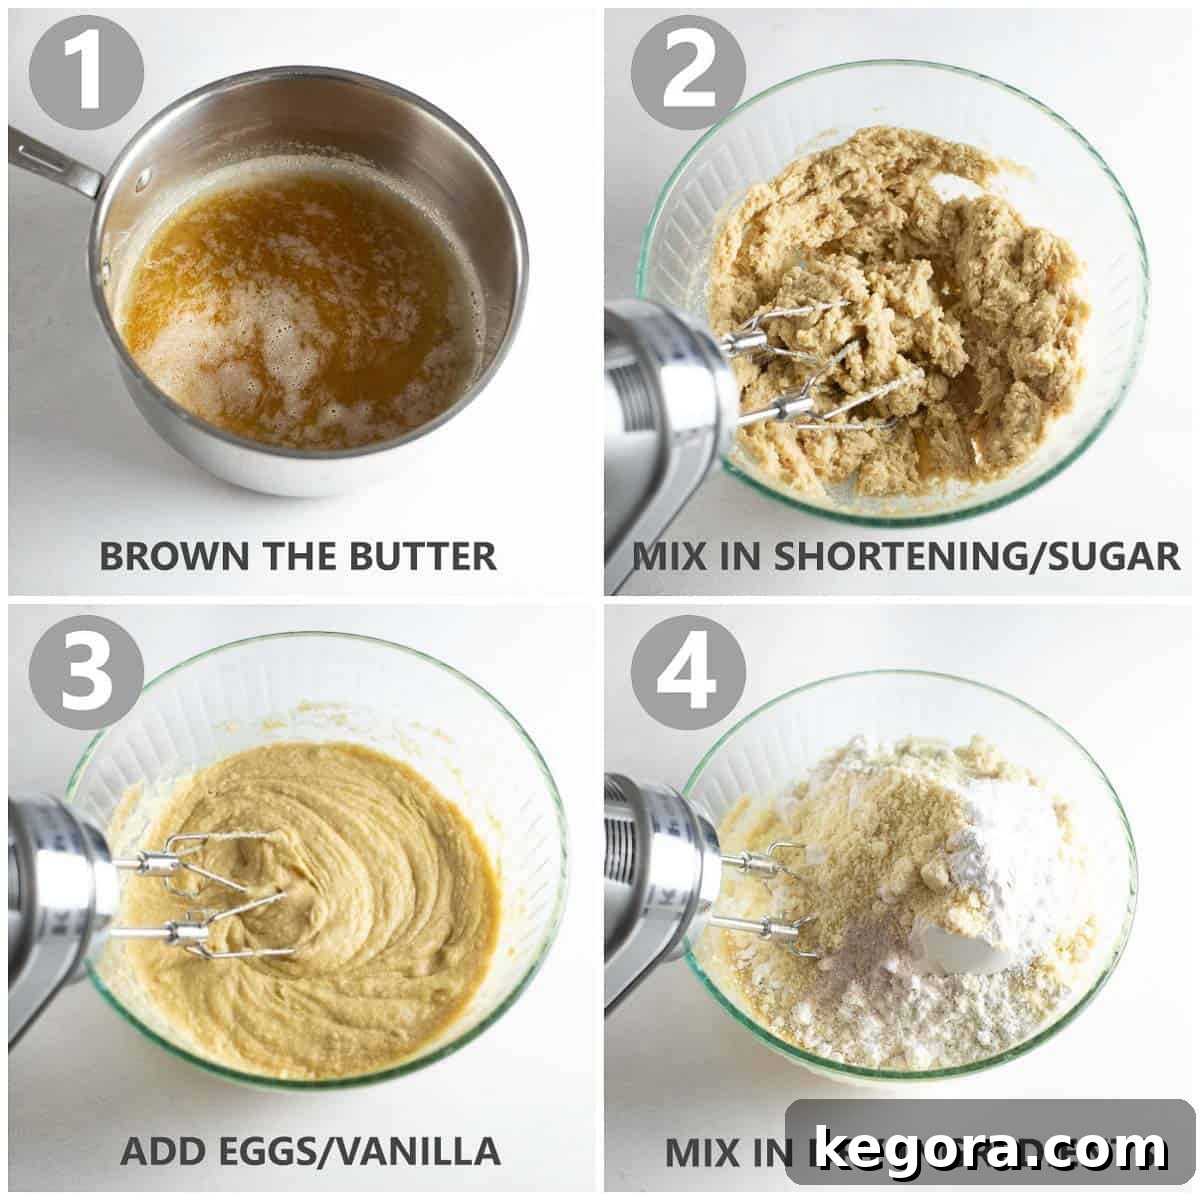
1. Master the Brown Butter Technique
Just like with my famous gluten-free chocolate chip cookies, browning the butter is the secret weapon here. It infuses the dough with an incredibly rich, nutty, and subtly caramel-like flavor that takes these snickerdoodles from great to unforgettable. To brown the butter, melt it gently in a light-colored saucepan over medium heat. Keep a close eye on it, whisking occasionally. It will foam, then sizzle, and eventually, golden-brown bits will form at the bottom, releasing a beautiful nutty aroma. As soon as you see these amber solids and smell that distinct scent, immediately remove it from the heat. Don’t let it burn! Pour the browned butter into a separate glass mixing bowl to halt the cooking process and prevent it from scorching.
2. Creaming the Fats and Sugars
Once your brown butter is ready and slightly cooled, combine it with the shortening, granulated sugar, and brown sugar in your mixing bowl. Cream these ingredients together until the mixture is light, fluffy, and well combined. This step incorporates air into the dough, which contributes to the cookies’ final texture. Then, beat in the eggs and vanilla extract until the mixture is smooth and cohesive. This dough is wonderfully simple to prepare, making it a joy to work with!
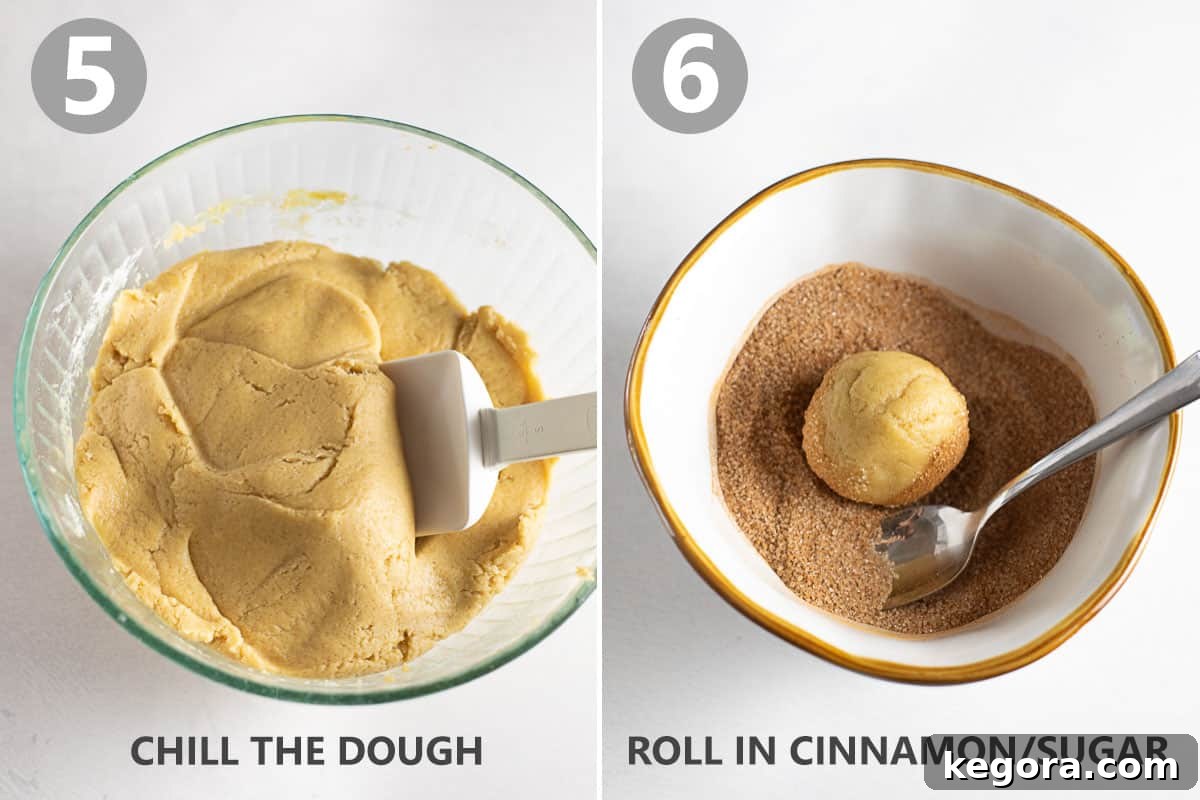
3. The Importance of Chilling the Dough
Don’t skip or rush this crucial step! Once your dry ingredients are mixed into the wet, cover the dough and refrigerate it for at least 1 hour. This chilling period is vital for several reasons: it allows the gluten-free flours to fully hydrate, preventing a gritty texture, and firms up the butter and shortening, which prevents the cookies from spreading too much in the oven. For ultimate convenience, you can even chill this dough for up to 2 days, making it an excellent make-ahead option for busy schedules or upcoming events.
4. Roll, Bake, and Enjoy!
Once the dough is adequately chilled, preheat your oven to 400°F (200°C) and prepare a baking sheet with a silicone baking mat or parchment paper. In a small bowl, whisk together the granulated sugar and ground cinnamon for rolling. Shape the dough into rounded 1-inch balls, ensuring they’re uniform for even baking. Generously roll each dough ball in the cinnamon-sugar mixture until fully coated, then place them about 2 inches apart on your prepared baking sheet.
Bake for 9-11 minutes, or until the edges are set and lightly golden, but the centers still look slightly soft. Overbaking will lead to dry cookies, so keep a close eye on them! Let the cookies cool on the baking sheet for just 2 minutes to allow them to set slightly before carefully transferring them to a wire rack to cool completely. Like most cookies, they will firm up a little more as they cool. Now, they’re ready to be savored. Enjoy every soft, chewy, cinnamon-spiced bite!
Tips for Baking Flawless Gluten-Free Snickerdoodles
- Don’t Overmix: Once you add the dry ingredients, mix just until combined. Overmixing can develop the starches in gluten-free flour, leading to tougher cookies.
- Use a Cookie Scoop: For perfectly uniform cookies that bake evenly, invest in a cookie scoop. A 1-inch scoop is ideal for this recipe.
- Room Temperature Eggs: Ensure your eggs are at room temperature. They incorporate more easily into the butter and sugar mixture, creating a smoother dough.
- Baking Sheet Material: Light-colored baking sheets are best for cookies as they prevent over-browning on the bottom. If you only have dark sheets, reduce the oven temperature by 25°F (15°C) and keep a closer eye on baking time.
- Cooling is Key: While it’s tempting to eat them hot, allowing the cookies to cool on the baking sheet for a few minutes before transferring them to a wire rack helps them set and prevents breakage. They develop their final texture as they cool.
Gluten-Free Snickerdoodle Variations
- Spice It Up: Add a pinch of nutmeg or cardamom to the cinnamon-sugar coating for an extra layer of warmth and complexity.
- Add Chocolate: While not traditional, a handful of mini white chocolate chips or cinnamon chips can be folded into the dough for a delightful twist.
- Citrus Zest: For a brighter flavor, incorporate a teaspoon of fresh orange or lemon zest into the cookie dough.
- Dairy-Free Option: See the notes in the recipe card for guidance on making these snickerdoodles dairy-free.
Serving Suggestions
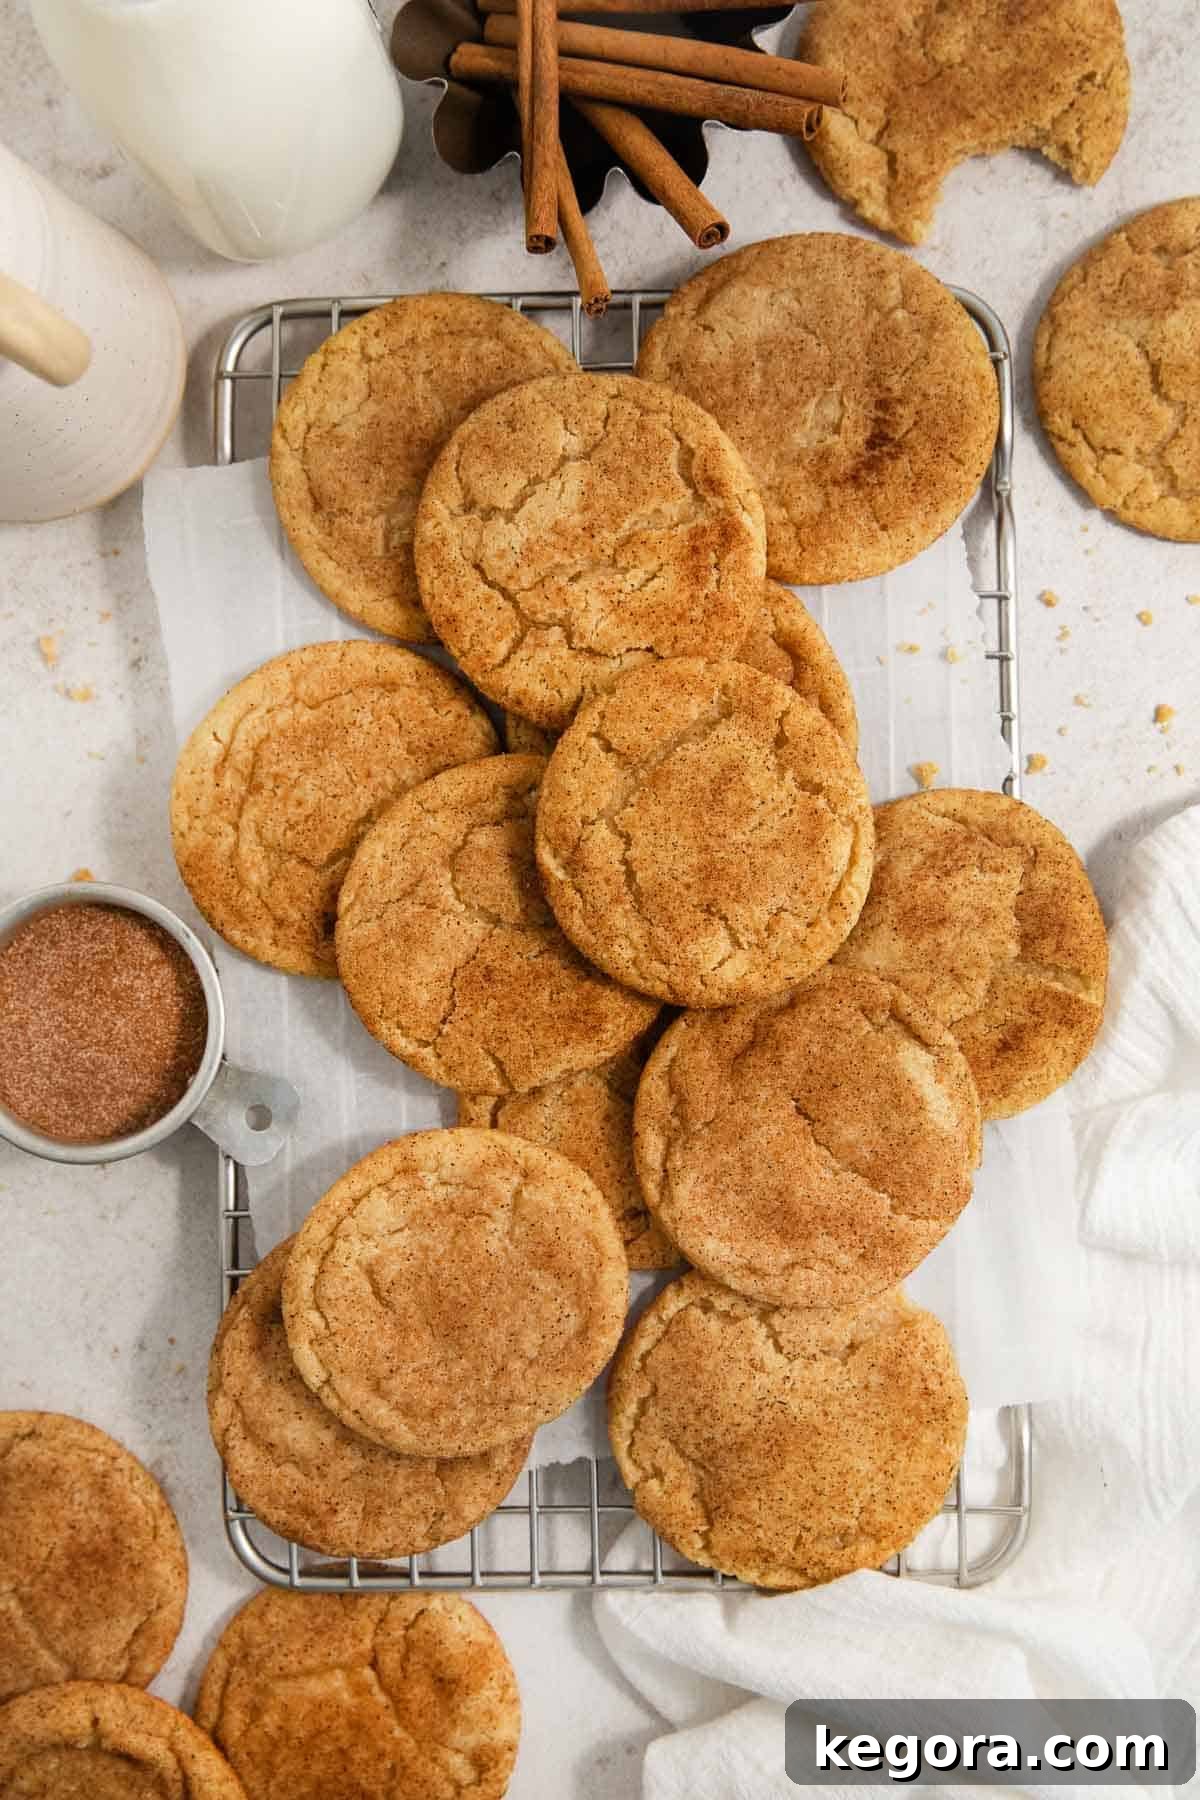
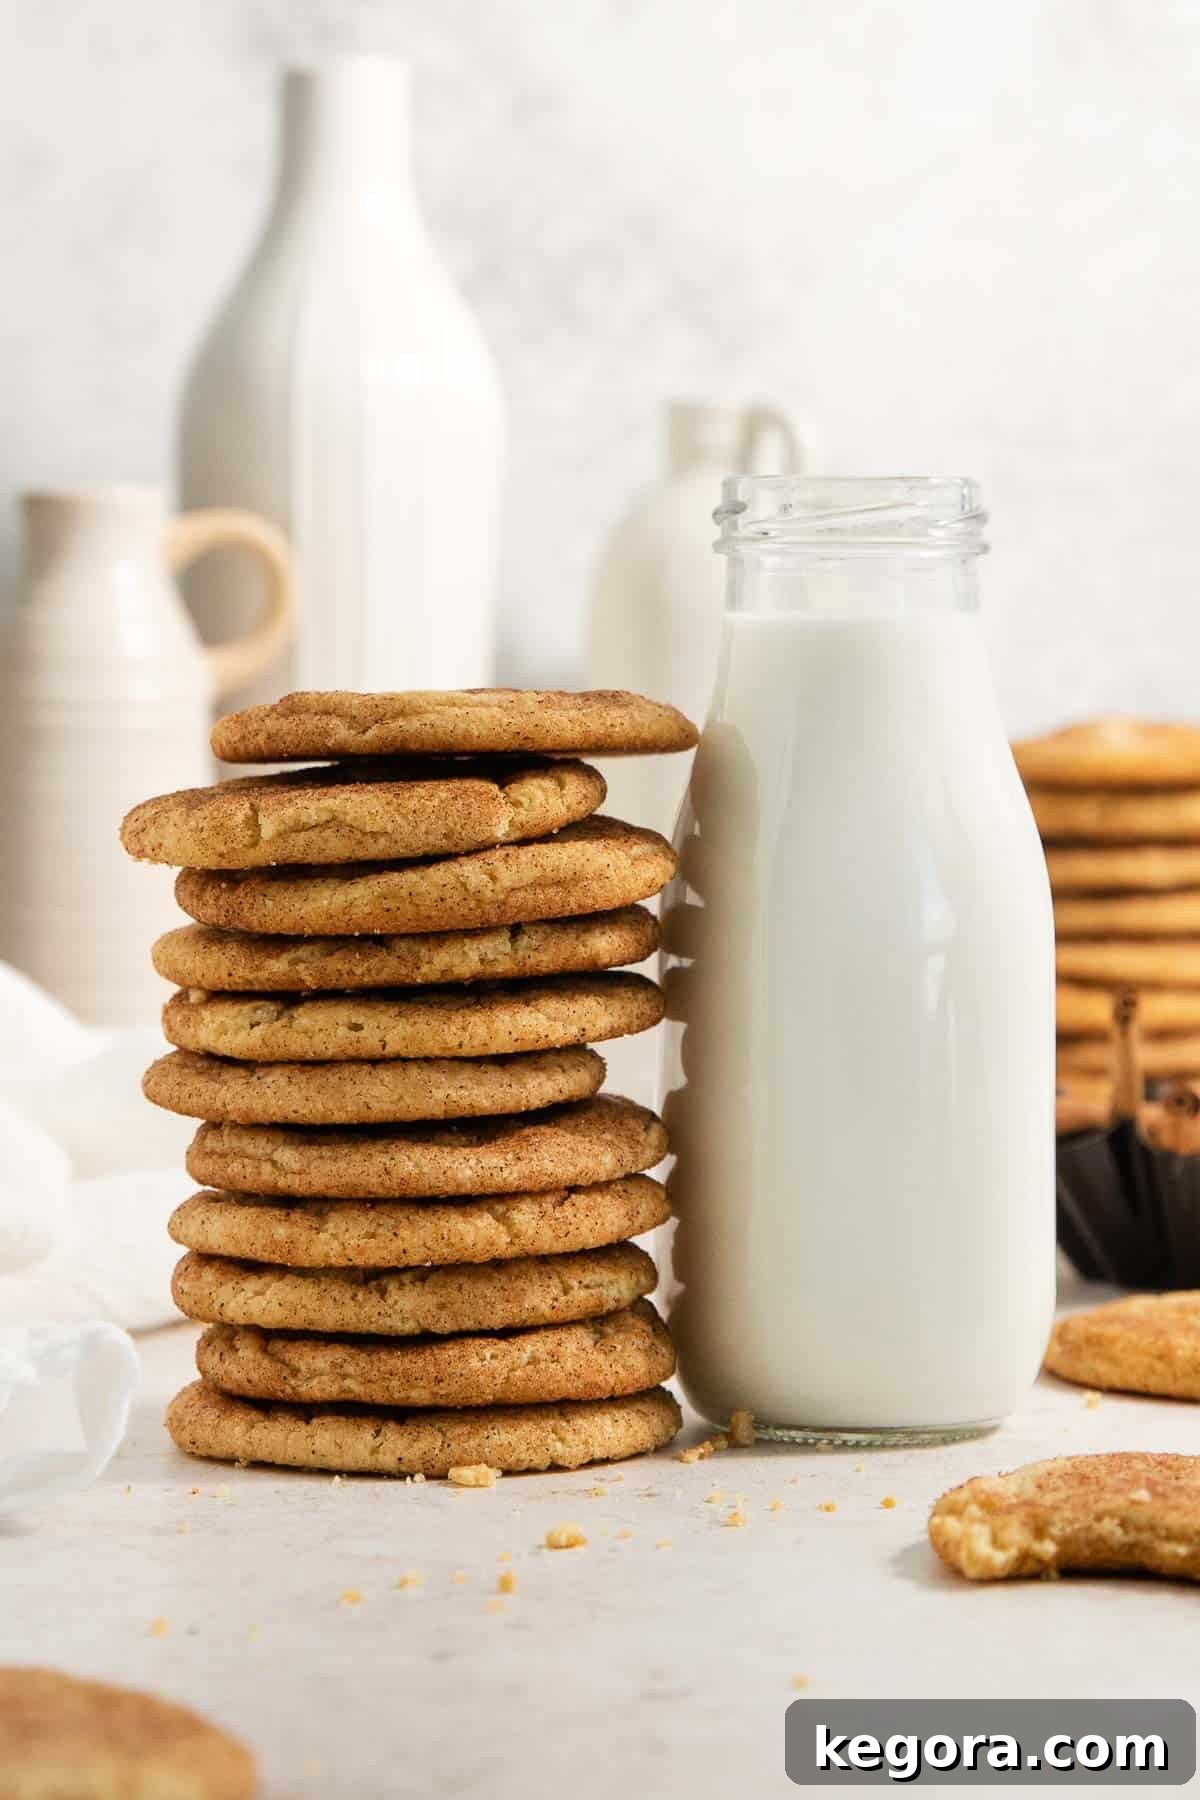
These brown butter gluten-free snickerdoodles are absolutely delicious on their own, perhaps with a glass of cold milk or a cup of coffee. They also make a fantastic addition to a holiday cookie platter, a potluck dessert table, or as a thoughtful homemade gift. For an extra special treat, serve them warm with a scoop of vanilla bean ice cream or a drizzle of caramel sauce.
Frequently Asked Questions (FAQs) About Gluten-Free Snickerdoodles
What makes snickerdoodles chewy and light?
The secret to the classic snickerdoodle texture – chewy in the center with light edges – lies in the combination of cream of tartar and baking soda. Cream of tartar provides the signature tangy flavor and reacts with the baking soda to create gases that give the cookies their distinct puffy, then crinkled, appearance and tender crumb. Shortening also contributes to a stable, chewy texture.
Why is chilling the dough so important for these gluten-free snickerdoodles?
Chilling the dough is critical for gluten-free cookies. It allows the gluten-free flours to properly hydrate and absorb moisture, preventing a grainy or crumbly texture. Additionally, chilling solidifies the fats (butter and shortening), which helps prevent the cookies from spreading too much during baking, ensuring they retain their shape and achieve that perfect chewy center and crisp edge.
Can I make these snickerdoodles dairy-free?
Yes, you can adapt this recipe to be dairy-free. You would substitute vegan butter for regular butter. However, it’s important to note that most vegan butter brands do not brown in the same way real dairy butter does. While the flavor profile will differ slightly without the brown butter element, the cookies will still be delicious.
What is the best type of gluten-free flour to use?
For this recipe, a high-quality “measure-for-measure” or “cup-for-cup” gluten-free flour blend that *already contains xanthan gum* is essential. These blends are specifically formulated to replace wheat flour in recipes at a 1:1 ratio. Using a single gluten-free flour like rice flour or oat flour alone will not yield the same results, as a blend is needed to mimic wheat flour’s complex structure.
How do I know when the brown butter is ready?
Browning butter requires attention but is straightforward. Melt the butter over medium heat, stirring occasionally. It will foam, then the milk solids will start to separate and sink to the bottom. Continue cooking until these solids turn a golden-brown color and the butter emits a rich, nutty aroma. At this point, immediately remove it from the heat and pour it into a cool bowl to stop the cooking, preventing it from burning.
Gluten-Free Snickerdoodles (Brown Butter)
Erin Collins
30 mins
10 mins
1 hr
36 cookies
Soft and chewy gluten-free snickerdoodles with crisp, golden edges!
My #1 tip for amazing gluten-free snickerdoodles: brown the butter! It gives these cookies delicious flavor and texture. You’d never know they’re gluten-free!
Comments
Print Recipe
Ingredients
- 1/2 cup (113g) butter
- 1/2 cup (98g) shortening
- 1 cup (200g) granulated sugar
- 1/2 cup (107g) brown sugar
- 2 large eggs
- 2 teaspoons vanilla extract
Dry Ingredients:
- 2 cups + 2 tablespoons (319g) gluten-free measure-for-measure flour
- 1/2 cup (50g) almond flour
- 2 teaspoons cream of tartar
- 1 teaspoon baking soda
- 1/4 teaspoon kosher salt
For Rolling:
- 1/4 cup (50g) granulated sugar
- 1 tablespoon ground cinnamon
Instructions
-
Brown the butter: In a light-colored saucepan, melt the butter over medium heat. Continue to whisk constantly as the butter melts and begins to foam. After a couple of minutes, the milk solids at the bottom of the saucepan will start to brown and a distinct nutty aroma will emerge. As soon as the solids turn golden brown, immediately turn off the heat and pour the browned butter into a glass mixing bowl to prevent it from burning further.
-
Cream wet ingredients: To the bowl with the cooled brown butter, add the shortening, granulated sugar, and brown sugar. Mix thoroughly until these ingredients are well combined and fluffy. Incorporate the eggs one at a time, followed by the vanilla extract, mixing until the mixture is smooth and cohesive.
-
Combine and chill dough: Gradually add the dry ingredients (gluten-free flour, almond flour, cream of tartar, baking soda, and kosher salt) to the wet mixture, mixing until just well-combined. Be careful not to overmix. Cover the dough tightly with plastic wrap and refrigerate for at least 1 hour. For best results and flexibility, the dough can be chilled for up to 2 days.
-
Prepare for baking: Preheat your oven to 400°F (200°C). Line a large baking sheet with a silicone baking mat or parchment paper.
-
Roll in cinnamon sugar: In a small, shallow bowl, mix together the granulated sugar and ground cinnamon for the coating. Shape the chilled dough into rounded 1-inch balls. Roll each dough ball generously in the cinnamon-sugar mixture until it’s completely coated. Place the coated dough balls about 2 inches apart on the prepared baking sheet to allow for spreading.
-
Bake and cool: Bake for 9-11 minutes, or until the edges are set and lightly golden, but the centers still appear slightly soft. Do not overbake. Allow the cookies to cool on the baking sheet for 2 minutes before gently transferring them to a wire rack to cool completely. This helps them firm up and achieve their perfect chewy texture. Enjoy your homemade gluten-free snickerdoodles!
Notes
Dairy-Free Option: To make these cookies dairy-free, substitute the butter with a high-quality vegan butter alternative. Please note that most vegan butter brands do not brown in the same way dairy butter does, so the nutty flavor from brown butter may be less pronounced.
Nut-Free Option: If you need a nut-free version, simply omit the almond flour. Replace it by adding an additional 1/3 cup of your chosen gluten-free measure-for-measure flour to maintain the desired dry-to-wet ratio and texture.
To Make-Ahead (Dough): The prepared cookie dough can be refrigerated in an airtight container for up to 2 days. For longer storage, shape the dough into balls, place them on a lined baking sheet, and freeze for 1-2 hours until solid. Once frozen, transfer the dough balls to an airtight container or freezer bag for up to 3 months. You can bake them directly from frozen, adding a couple of minutes to the baking time.
To Store (Baked Cookies): Once baked and completely cooled, store the gluten-free snickerdoodles in an airtight container at room temperature. They will maintain their freshness and delicious texture for up to 4 days.
To Freeze (Baked Cookies): For longer preservation of baked cookies, allow them to cool completely. Then, place them in an airtight container or freezer bag, separating layers with parchment paper to prevent sticking. They can be frozen for up to 3 months. To enjoy, thaw at room temperature for about 30 minutes.
Nutrition Information (per cookie)
Calories: 141kcal | Carbohydrates: 20g | Protein: 2g | Fat: 7g | Saturated Fat: 2g | Polyunsaturated Fat: 1g | Monounsaturated Fat: 2g | Trans Fat: 0.5g | Cholesterol: 16mg | Sodium: 71mg | Potassium: 37mg | Fiber: 2g | Sugar: 10g | Vitamin A: 93IU | Vitamin C: 0.01mg | Calcium: 19mg | Iron: 1mg
This post was originally published in June 2020. It was updated with new instructions and expanded content in September 2025 to provide even more helpful tips and details for baking the perfect gluten-free snickerdoodles.
Share Your Snickerdoodle Success!
I hope you love this brown butter gluten-free snickerdoodle recipe as much as I do! There’s truly nothing better than a homemade cookie that caters to dietary needs without sacrificing an ounce of flavor or texture. If you try this recipe, please come back and leave a comment below with your thoughts and any delicious variations you’ve experimented with. Your feedback means the world to me and helps others in our wonderful community discover new favorites!