
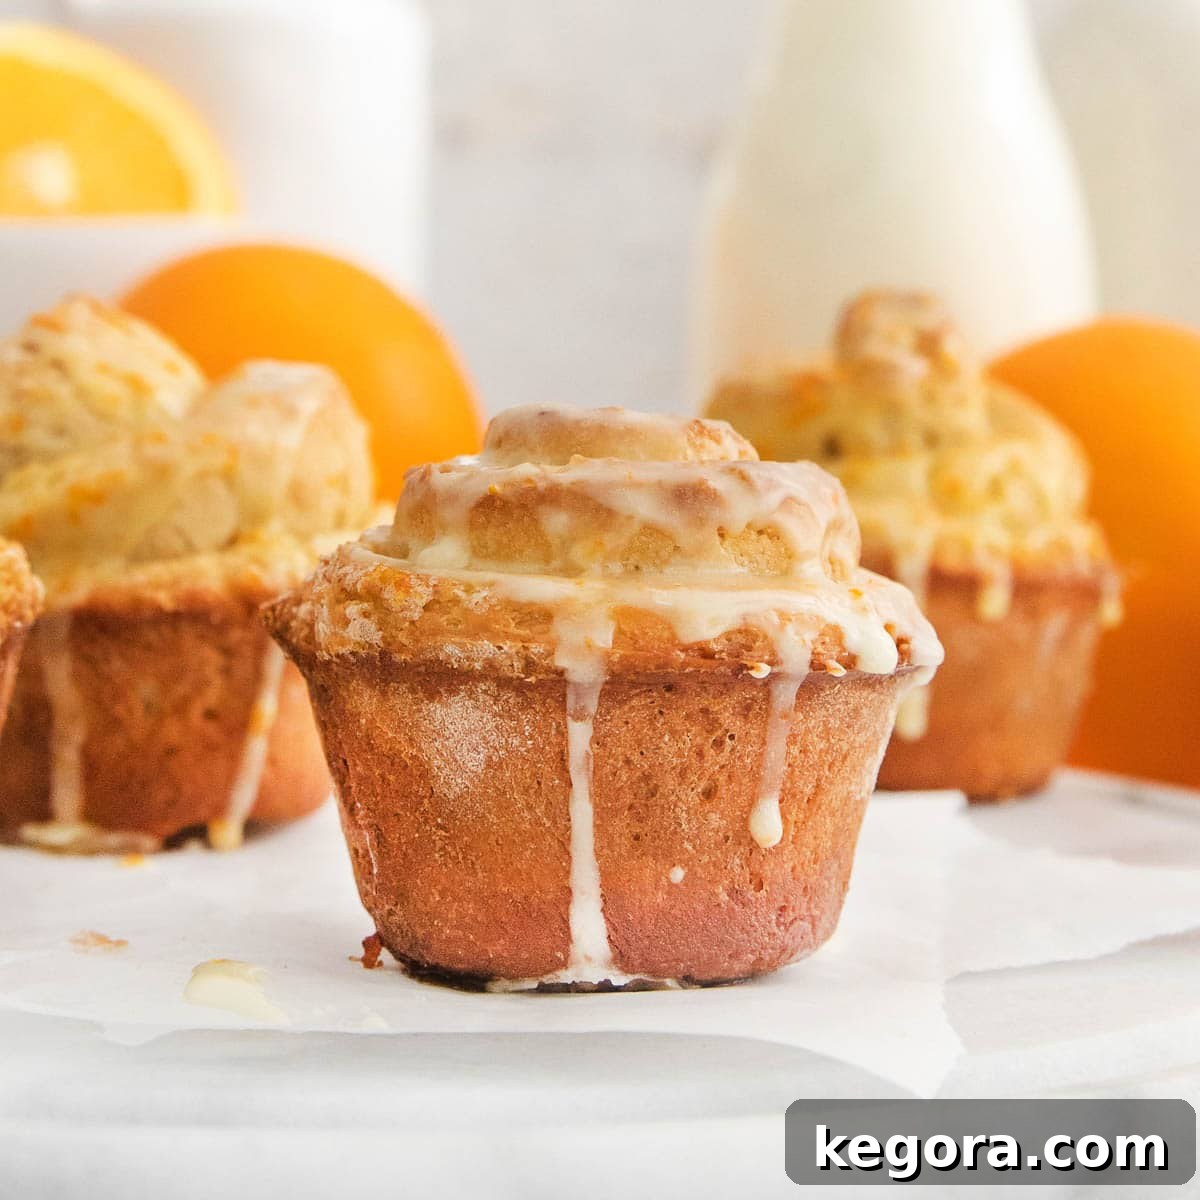
Unveiling Erin’s Signature Gluten-Free Orange Rolls
Welcome to a special edition of my recipe rundown, where we delve into the magic behind my latest creation: truly irresistible **gluten-free orange rolls**! As someone passionate about making delicious gluten-free baking accessible to everyone, I’m thrilled to share this vibrant, citrus-infused twist on a beloved classic. These rolls aren’t just a treat; they’re an experience, designed to bring joy and a touch of sunshine to any morning or gathering. Let’s break down what makes these rolls an absolute must-try.
Texture: Prepare for an incredibly soft, pillowy, and fluffy delight. Achieving this delicate texture in gluten-free baking can be a challenge, but with the right ingredients and techniques, these orange rolls rise beautifully, offering a tender crumb that melts in your mouth. Forget dry or dense gluten-free pastries – these are light as air!
Taste: Each bite bursts with a harmonious blend of fresh, zesty citrus, complemented by a rich, buttery dough. The sweetness is perfectly balanced, never overpowering, allowing the bright orange notes to truly shine through. From the aromatic orange zest woven into the filling to the smooth, tangy glaze, every component sings with flavor, creating a truly memorable taste sensation.
Ease: While these rolls deliver an impressive result, the recipe itself is an easy and enjoyable twist on a classic yeast dough. Don’t be intimidated by working with gluten-free yeast dough; I’ve streamlined the process to ensure success even for novice bakers. With clear, step-by-step instructions, you’ll find the journey to these incredible orange rolls surprisingly straightforward and rewarding.
Top Tips: The secret to a perfectly pliable gluten-free dough lies in a simple, yet crucial step: chilling. Just 20 minutes in the refrigerator makes a world of difference. This brief chill allows the flour to fully hydrate and the dough to firm up, making it significantly easier to roll out and shape without any sticky struggles. Trust me, this small step saves a lot of hassle and ensures beautifully formed rolls.
Recommended GF Flour: For these gluten-free orange rolls, the choice of flour is paramount. This recipe has been meticulously developed and tested to achieve optimal results specifically with King Arthur Gluten-Free Bread Flour. Its unique composition and protein content are key to the rolls’ structure, rise, and signature soft texture. I cannot stress enough that no other gluten-free flour blend will yield the same exceptional outcome. Using a different blend may result in variations in texture and overall success.
Would I make these again? Absolutely, without a doubt! These gluten-free orange rolls are more than just a recipe; they are a celebration of sweet citrus flavor, perfectly suited for making any day feel extraordinary. Whether it’s a special holiday breakfast, a weekend brunch, or simply a craving for something wonderfully sweet and comforting, these rolls are my go-to. They consistently deliver that “wow” factor, proving that gluten-free baking can be utterly decadent and truly special.
xoxo erin
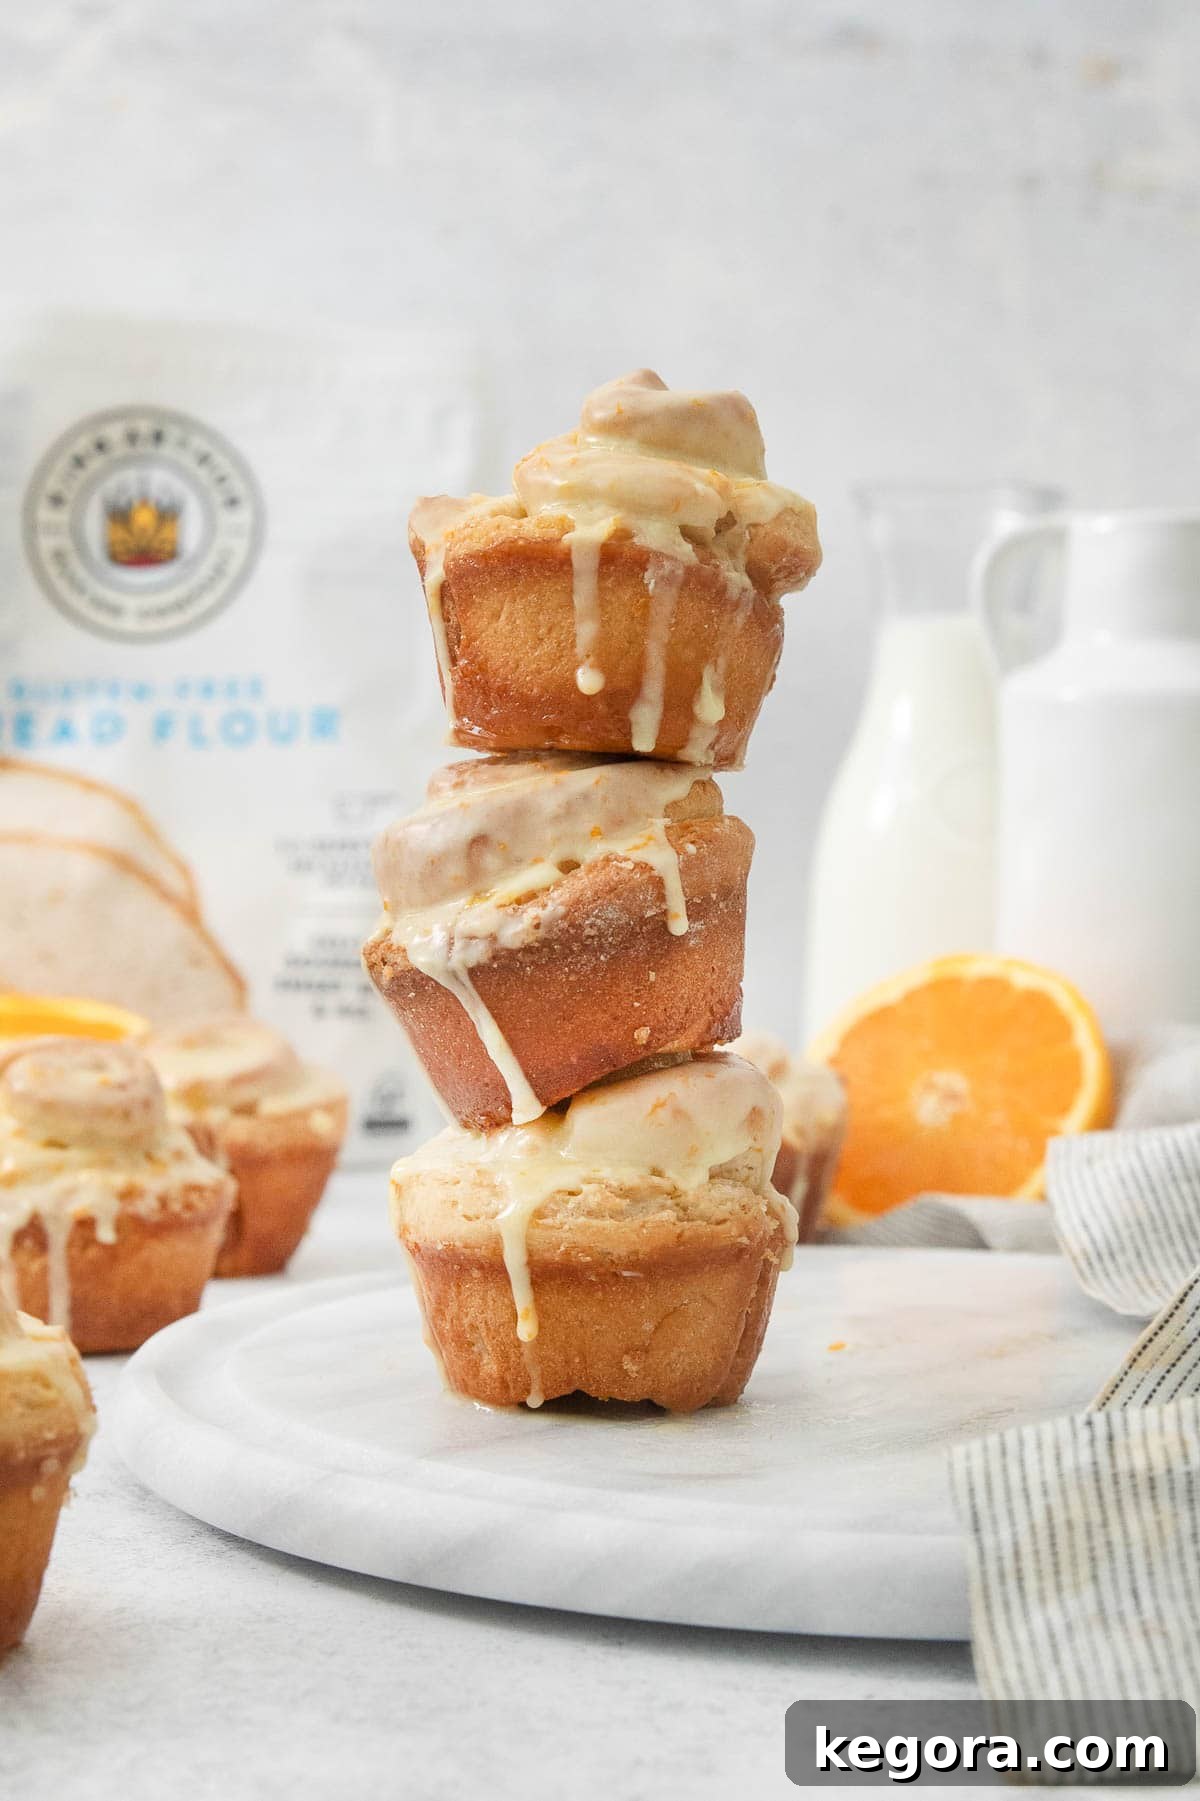
This post is proudly sponsored by King Arthur Baking Company, a brand dedicated to quality and innovative baking.
If you’ve been a long-time reader, you know that my gluten-free cinnamon roll recipe holds a special place in the hearts of many, consistently ranking as a top favorite. Its pillowy softness and rich flavor have brought joy to countless gluten-free kitchens. Today, I am beyond excited to introduce you to its equally delightful cousin: a fresh, vibrant orange take on that very same classic recipe. This new creation promises all the comfort and indulgence you love, but with a zesty, bright twist perfect for any season.
The magic behind these incredibly soft and fluffy **gluten-free orange rolls** lies significantly in the use of King Arthur Gluten-Free Bread Flour. This innovative flour blend is a game-changer for gluten-free yeast baking, providing the structure and rise needed to achieve that coveted tender, pillowy texture usually associated with traditional wheat-based rolls. Each roll is generously filled with a sweet, aromatic orange mixture that spirals through the tender dough, creating pockets of citrusy goodness. To crown this masterpiece, a decadently smooth and tangy orange glaze drizzles over the warm rolls, adding the perfect finishing touch of sweetness and a burst of fresh flavor. These rolls are truly a testament to how utterly delicious and completely irresistible gluten-free baking can be, transforming an ordinary breakfast into an extraordinary culinary experience.
Featured Comment
From Courtney: “I made these for Easter morning and they were perfect! Not too sweet, bright and airy. Perfect for spring!!!”
Courtney’s comment perfectly captures the essence of these rolls – their ideal balance of sweetness and their wonderfully light, airy texture make them a seasonal favorite. They truly embody the fresh, uplifting spirit of spring, making any celebration or casual breakfast feel extra special.
17 more comments
Table of Contents: Your Guide to Gluten-Free Orange Rolls
- Erin’s Signature Gluten-Free Orange Rolls Rundown
- Essential Ingredients for Perfect Orange Rolls
- Step-by-Step Guide: Crafting Your Gluten-Free Orange Rolls
- Make-Ahead, Storage, and Freezing Tips
- Dairy-Free Adaptations for Your Orange Rolls
- Understanding King Arthur Gluten-Free Bread Flour & Celiac Safety
- Mastering Dough Handling: Tips for Easier Rolling
- Discover More Recipes Using Gluten-Free Bread Flour
- Full Gluten-Free Orange Rolls Recipe Card
Essential Ingredients for Perfect Gluten-Free Orange Rolls
Crafting these delectable **gluten-free orange rolls** begins with selecting the right ingredients. Each component plays a vital role in achieving their signature texture and vibrant flavor. Below, I’ve highlighted some key ingredients and provided notes on their importance. For precise quantities, please refer to the comprehensive recipe card located further down.
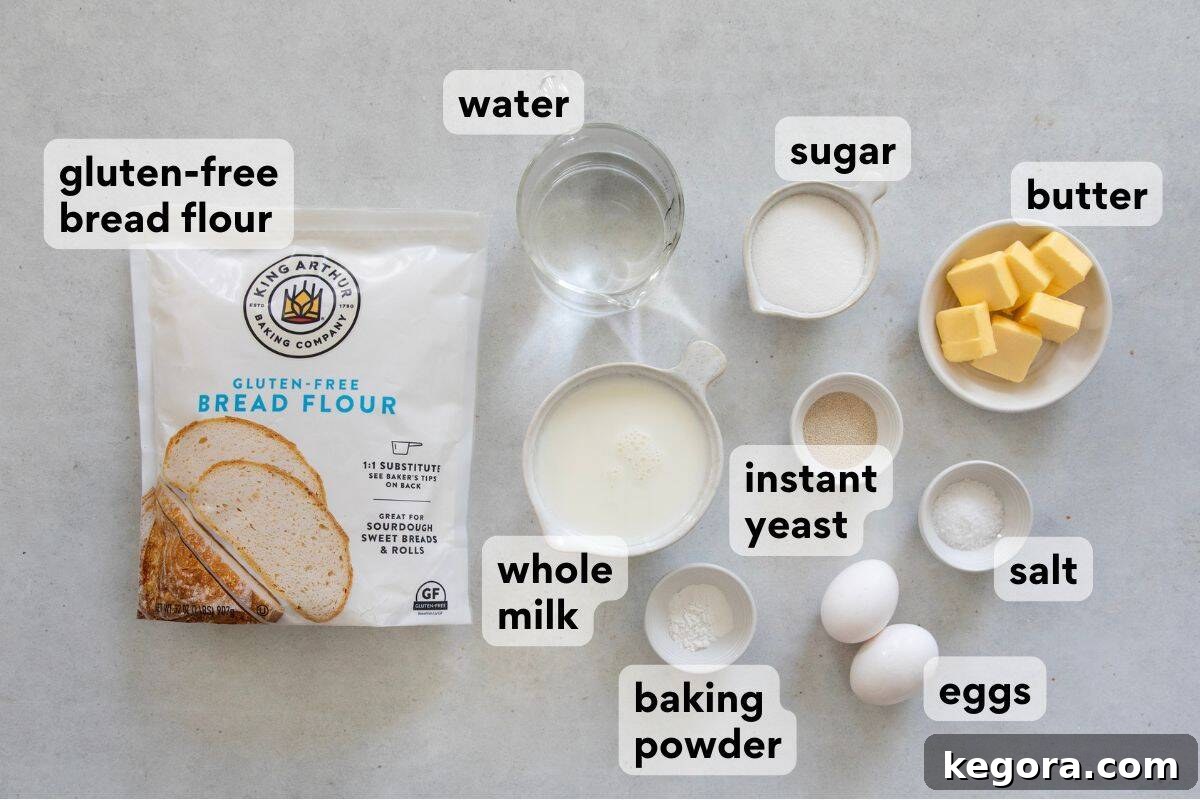
- Gluten-Free Flour: The star of our show is undoubtedly King Arthur Gluten-Free Bread Flour. This specific blend is non-negotiable for achieving the perfect rise, elasticity, and wonderfully soft, chewy texture that these rolls are famous for. Unlike general “measure-for-measure” gluten-free flours, King Arthur’s bread flour is formulated to mimic the properties of traditional wheat flour in yeast-leavened baking. Substituting with any other gluten-free flour blend will unfortunately not yield the same exceptional results, so stick to this recommendation for success.
- Instant Yeast: This recipe utilizes instant yeast for its convenience and reliability. Instant yeast can be mixed directly with the dry ingredients without prior proofing, simplifying the dough preparation process. It’s essential for providing the lift and airy structure that makes these rolls so fluffy and light, allowing the dough to rise effectively and create those beautiful spirals.
- Warm Water: The temperature of your water is critical. Warm water, specifically within the ideal range (around 105-115°F or 40-46°C), is crucial for activating the instant yeast. This gentle warmth kickstarts the yeast’s activity, encouraging it to produce carbon dioxide, which in turn causes the dough to rise. It also helps to create a pliable and workable dough, ensuring proper structure when baked.
- Eggs: In gluten-free yeast baking, eggs play a multi-faceted role. They act as a vital binder, helping to hold the dough together and providing essential structure that gluten typically offers. Furthermore, eggs contribute significantly to the rolls’ tender texture and moisture content, preventing them from becoming dense or crumbly – a common pitfall in gluten-free baking.
- Milk and Butter: I highly recommend using whole milk for its richness, which imparts a deeper flavor, greater tenderness, and aids in achieving a beautiful golden-brown crust during baking. Melted butter adds unparalleled depth of flavor, moisture, and fat, ensuring the rolls are incredibly soft, moist, and pillowy. For those following a dairy-free diet, fear not! You can easily substitute with your favorite dairy-free milk (I’ve had great success with unsweetened cashew milk) and a high-quality vegan butter for equally delicious results.
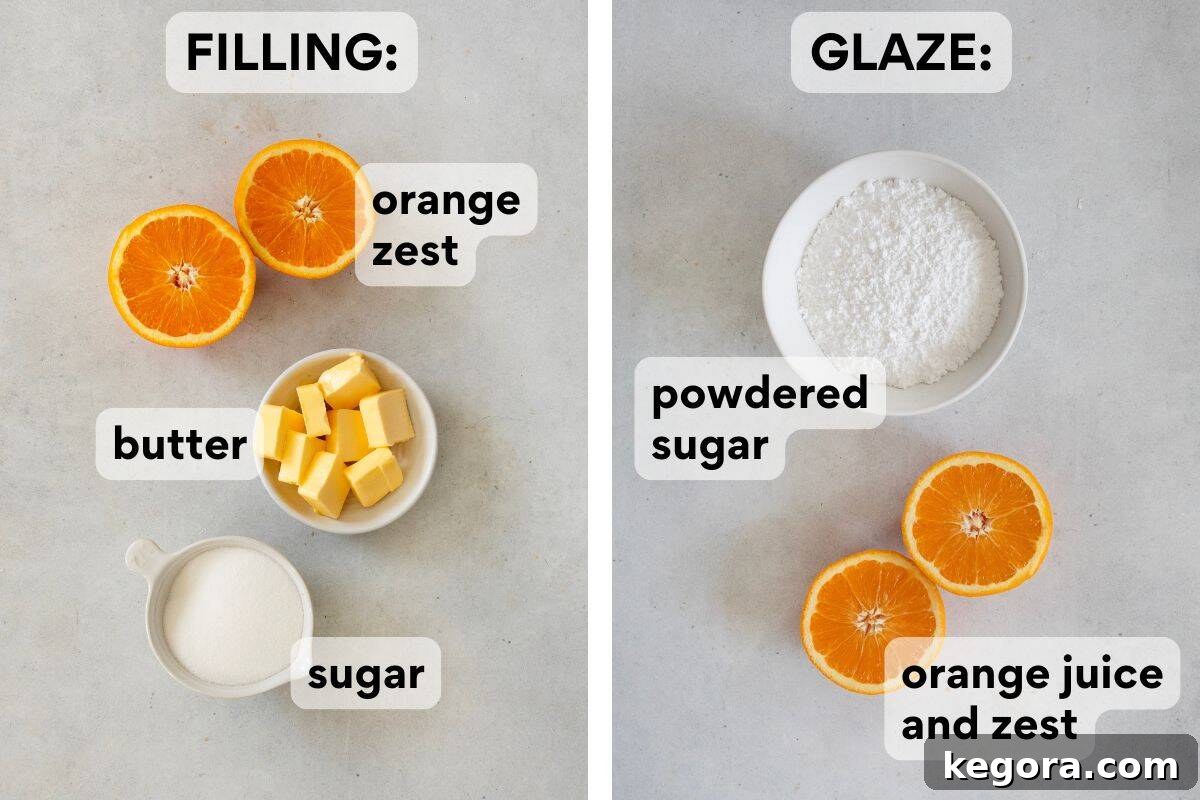
- Filling Ingredients: The heart of these orange rolls lies in their vibrant filling. Melted butter acts as the perfect vehicle, binding together the granulated sugar and copious amounts of fresh orange zest. This combination creates a spreadable, aromatic filling that infuses every swirl of the roll with bright, sweet, and tangy citrus flavor, making each bite an absolute delight.
- Glaze Ingredients: No orange roll is complete without a luscious glaze! Our glaze features powdered sugar as its base, transformed by freshly squeezed orange juice and additional orange zest. The juice not only provides the ideal liquid for a smooth, pourable consistency but also intensifies the natural orange flavor. The extra zest further deepens that quintessential citrus punch, ensuring that the bright, sweet orange notes are present in every single irresistible bite.
Step-by-Step Guide: Crafting Your Fluffy Gluten-Free Orange Rolls
Making these **gluten-free orange rolls** is a fun and rewarding process that I’ve broken down into simple, manageable steps. This overview will give you a clear picture of the journey from ingredients to delicious, warm rolls. For the comprehensive, detailed instructions and exact measurements, make sure to jump directly to the full recipe card at the end of this post!
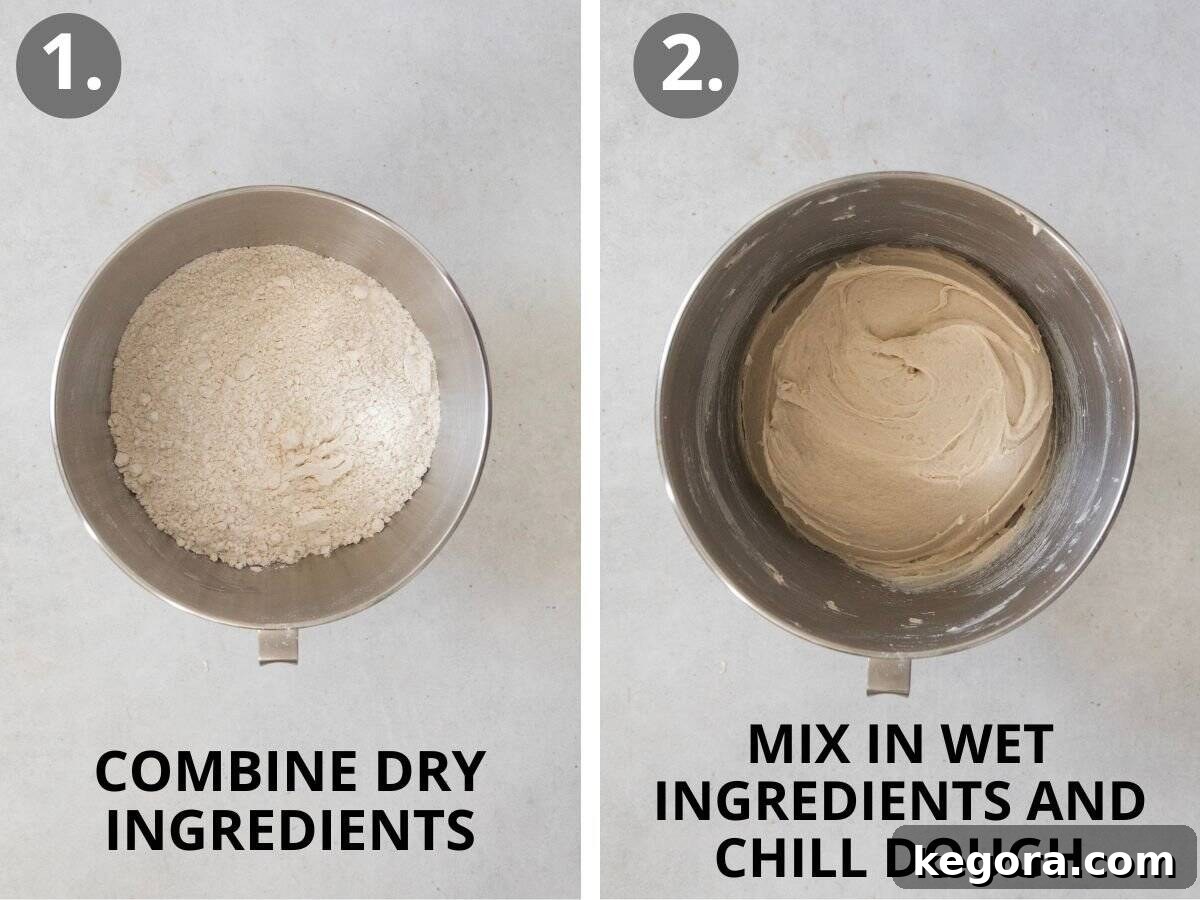
- Step 1: Combine the Dry Ingredients in a Stand Mixer. Begin by gathering all your dry ingredients – the crucial King Arthur Gluten-Free Bread Flour, granulated sugar, instant yeast, kosher salt, and baking powder. Place them into the bowl of your stand mixer, fitted with the paddle attachment. Give them a quick mix on low speed to ensure they are thoroughly combined and evenly distributed. This foundational step is important for an even rise and consistent texture throughout your rolls.
- Step 2: Incorporate Wet Ingredients and Chill the Dough. With the mixer running on its lowest setting, slowly drizzle in the warm water, warm whole milk, eggs, and melted butter. Once all liquids are added, increase the mixer speed to medium and let it work its magic for about 3 minutes. At this point, don’t be alarmed if your dough resembles a thick cookie dough rather than a traditional elastic bread dough – this is perfectly normal for gluten-free yeast dough. Use an oiled rubber spatula to scrape down the sides and bottom of the bowl, ensuring all ingredients are fully incorporated, then mix briefly again. Form the dough into a cohesive ball, cover the bowl tightly with plastic wrap to prevent drying, and refrigerate for 20 minutes. This chilling period is a secret weapon, firming up the dough and making it much easier to handle and roll in the next steps, preventing any sticky situations.
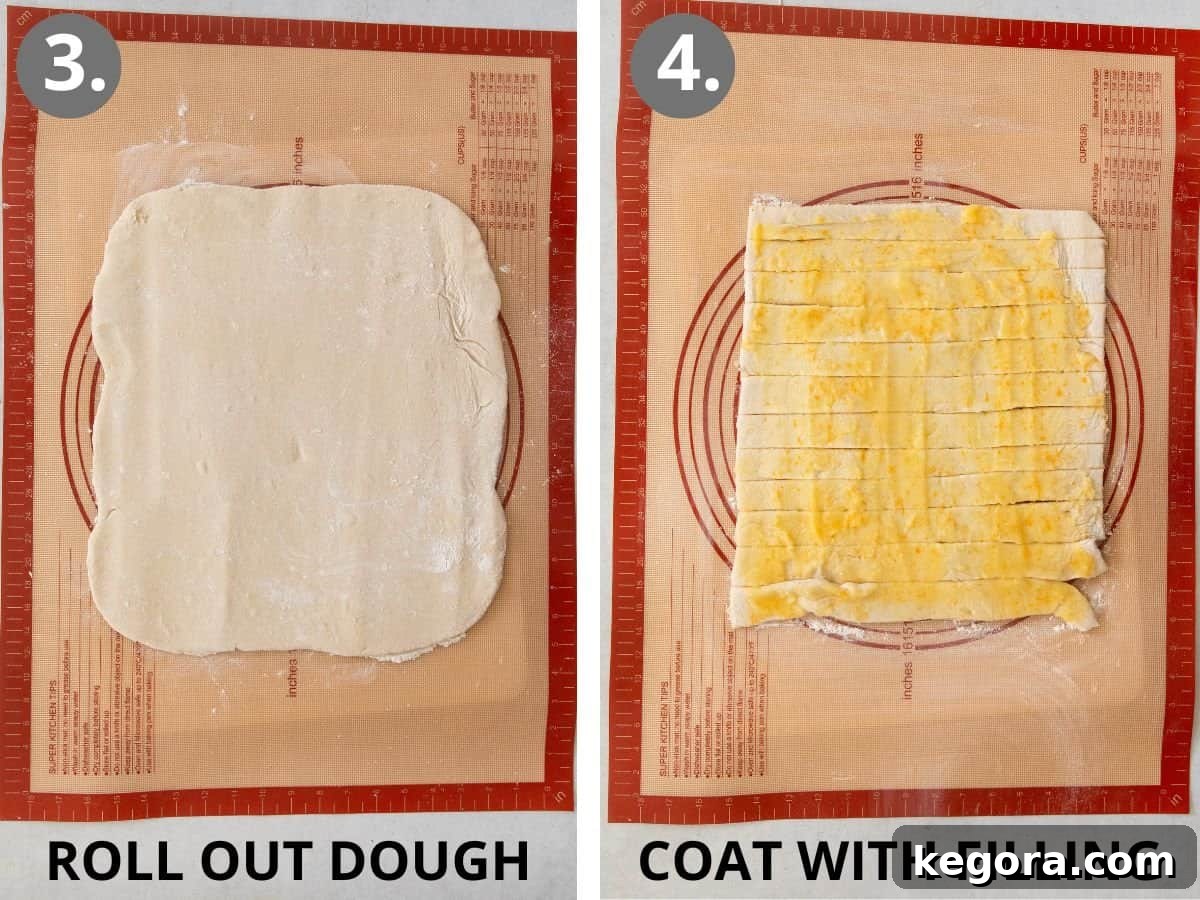
- Step 3: Roll Out the Dough. Prepare your workspace by lightly dusting a clean surface with a small amount of gluten-free flour. Turn the chilled dough out onto this prepared surface and gently shape it into a ball. Give the top of the dough another light sprinkle of gluten-free flour, then use a rolling pin to carefully roll it out into an even 15×15-inch square. Aim for consistent thickness across the entire square, as this will ensure your rolls bake evenly.
- Step 4: Prepare and Spread the Orange Filling. While your dough is ready, quickly prepare the irresistible orange filling. In a small bowl, combine the melted (and slightly cooled) butter, granulated sugar, and fragrant orange zest. Mix these ingredients thoroughly until they form a thick, spreadable paste. Using an offset spatula, or the back of a spoon, carefully and evenly spread this vibrant filling across the entire surface of your rolled-out dough square, extending almost to the edges. The rich aroma of orange will already begin to fill your kitchen!
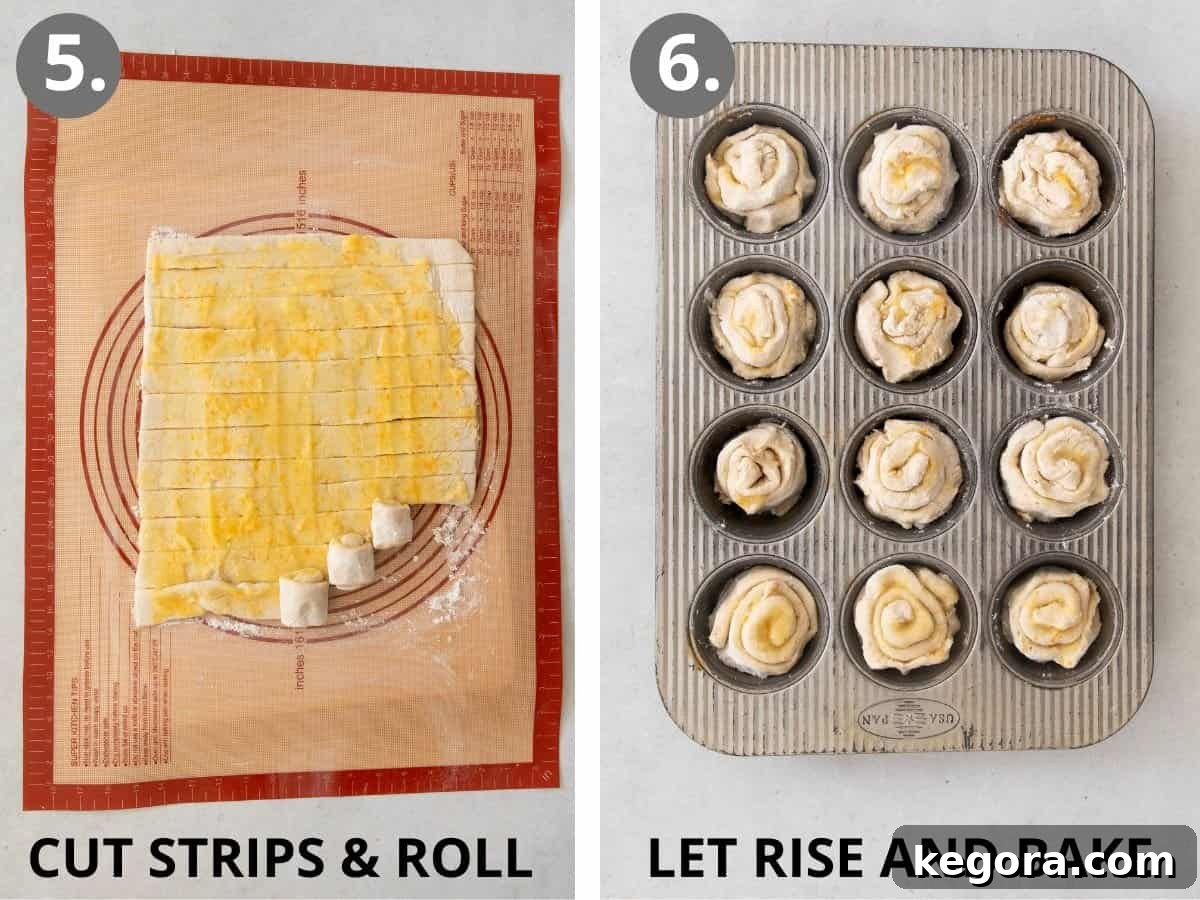
- Step 5: Cut and Form the Rolls. Now for the fun part: transforming the dough into individual rolls! Using a pizza cutter or a very sharp knife, carefully cut the filled dough square into twelve equal strips, each approximately 1¼ inches wide. Take each strip and gently roll it up from one end to the other, forming a beautiful spiral orange roll. As you finish each roll, place it into a standard muffin pan that has been lightly sprayed with cooking spray. Arranging them in the muffin pan helps them maintain their shape and encourages them to rise upwards during proofing and baking.
- Step 6: Proof, Bake, and Cool. Once all rolls are in the muffin pan, lightly spray a piece of plastic wrap with cooking spray and loosely cover the pan. Place the covered pan in a warm spot in your kitchen (a slightly warmed oven, or near a sunny window works well) to allow the rolls to rise for 45-60 minutes. They should appear visibly puffed and soft. While they rise, preheat your oven to 350°F (175°C). Once risen, remove the plastic wrap and transfer the pan to the preheated oven. Bake for 30-35 minutes, or until the tops are a lovely golden brown and the rolls are cooked through. Remove from the oven and let them cool in the pan for about 15 minutes before glazing. This cooling period allows them to set slightly and become easier to handle.
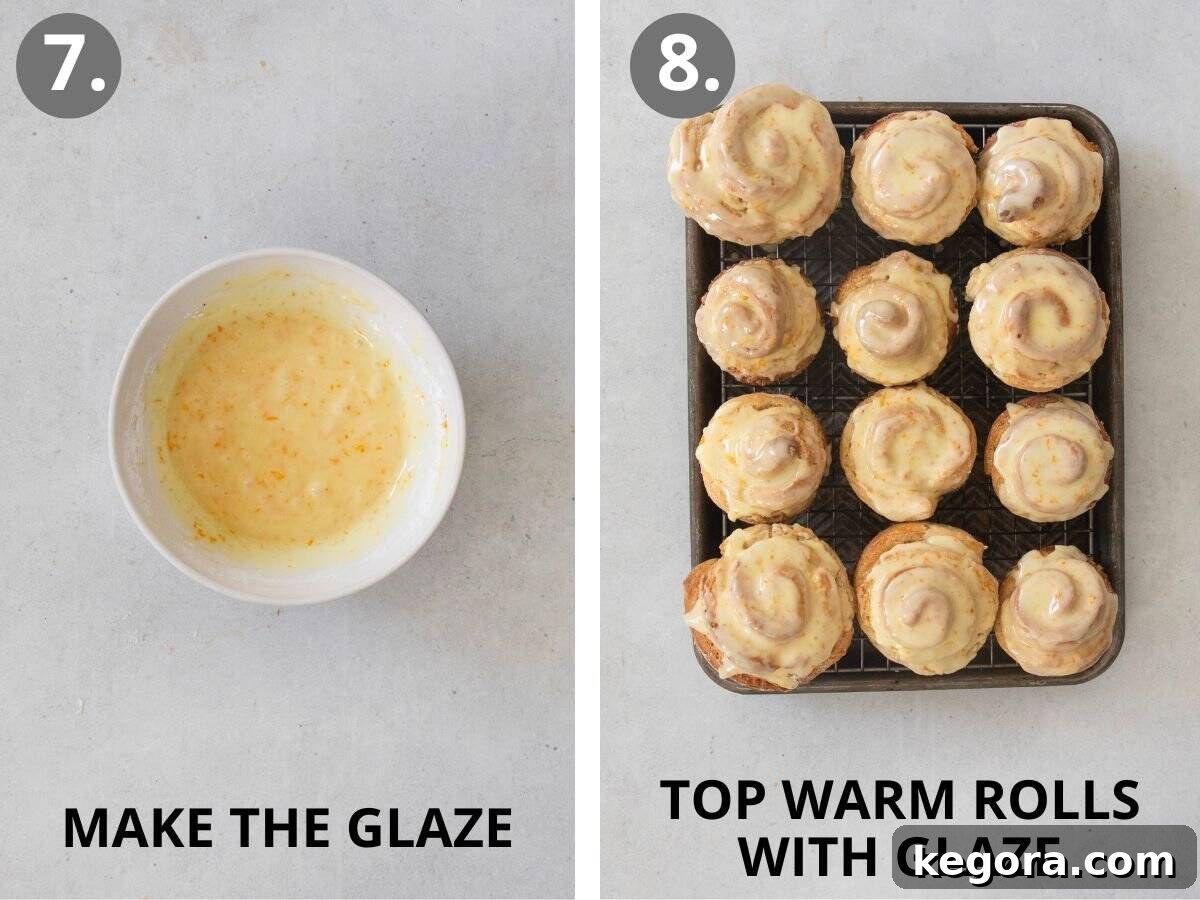
- Step 7: Prepare the Zesty Orange Glaze. While your rolls are cooling slightly, it’s time to prepare the crowning glory: the vibrant orange glaze. In a small bowl, whisk together the powdered sugar, freshly squeezed orange juice, and a hint of orange zest. Start with the recommended amounts and then, if needed, adjust the consistency to your preference. You’re aiming for a thick yet pourable glaze that will generously coat each roll without being too runny. Add more orange juice for a thinner glaze or more powdered sugar for a thicker one.
- Step 8: Glaze and Serve Immediately. The moment you’ve been waiting for! While the rolls are still warm (but not piping hot, as it will melt the glaze too quickly), generously drizzle the freshly prepared orange glaze over them. The warmth of the rolls will help the glaze set just perfectly, creating a beautiful sheen and locking in that irresistible citrus flavor. Serve these delightful **gluten-free orange rolls** immediately to enjoy them at their absolute best – warm, fluffy, and bursting with sweet orange goodness.
Make-Ahead, Storage, and Freezing Instructions for Your Convenience
These **gluten-free orange rolls** are undeniably best when enjoyed fresh and warm from the oven, but life can be busy! Luckily, they are remarkably versatile and can be prepared in advance, stored, or frozen, ensuring you can enjoy their deliciousness whenever the craving strikes. Here’s how to plan ahead:
To Make-Ahead: Imagine waking up to freshly baked orange rolls with minimal effort! You can assemble these rolls the day before you plan to bake them. Follow the recipe instructions precisely through the step where you roll the dough strips into individual orange rolls and place them into the muffin pan. Once they are nestled in the pan, cover it tightly with plastic wrap, ensuring no air can get in to dry out the dough. Refrigerate the pan for 8–12 hours. This overnight chill allows the flavors to meld and the dough to develop. While 8-12 hours is ideal for optimal results, they can be safely refrigerated for up to 16 hours if absolutely necessary, but do not exceed this time. The next morning, simply remove the pan from the refrigerator and let the dough rise on your counter for 45-60 minutes, allowing them to come to room temperature and puff up. Once visibly risen, remove the plastic wrap and bake as directed. You’ll be rewarded with warm, fresh rolls with very little morning prep!
To Store: If you find yourself with leftover orange rolls (a rare occurrence!), ensure they cool completely before storing. Once fully cooled, transfer them to an airtight container. They will remain wonderfully fresh and soft at room temperature for up to 3 days. For a quick refresh, you can gently warm them in the microwave for a few seconds or in a low oven.
To Freeze: For longer storage, these **gluten-free orange rolls** freeze beautifully. After baking, let the rolls cool completely, but hold off on adding the glaze. Once thoroughly cooled, wrap each roll tightly in plastic wrap, then wrap them again in aluminum foil, or place them in a freezer-safe airtight container. This double layer of protection helps prevent freezer burn and keeps them fresh. They can be frozen for up to 2 months. When you’re ready to enjoy them, thaw the frozen rolls at room temperature for several hours or overnight in the fridge. Once thawed, you can warm them in a preheated oven at 300°F (150°C) for 10-15 minutes until heated through. Only then, prepare and add the fresh orange glaze just before serving for the best possible experience. Freezing these rolls is a fantastic way to always have a delightful gluten-free treat on hand!
Dairy-Free Adaptations for Your Gluten-Free Orange Rolls
Absolutely! These **gluten-free orange rolls** can very easily be made completely dairy-free without compromising on their delicious taste or tender texture. To make this recipe dairy-free, simply swap out the traditional whole milk for your favorite dairy-free milk alternative and replace the butter with a high-quality vegan butter. My personal recommendation for dairy-free milk is Elmhurst Unsweetened Cashew Milk. I find it works exceptionally well in this recipe because it possesses a similar fat content to whole milk, which contributes to the richness and tenderness of the rolls. Crucially, Elmhurst cashew milk also lacks the added gums or stabilizers often found in other plant-based milks, which can sometimes interfere with the delicate rise and crumb structure of yeast-leavened gluten-free doughs. Using a good quality vegan butter will provide the necessary fat and flavor, ensuring your dairy-free orange rolls are just as rich and satisfying.
Understanding King Arthur Gluten-Free Bread Flour: Is it Safe for Celiacs?
This is a fantastic and very important question, especially for those with celiac disease or severe gluten sensitivities. The King Arthur Gluten-Free Bread Flour does indeed list “wheat starch” as an ingredient, which can understandably cause concern. However, it is crucial to understand that this wheat starch has undergone a specialized processing method designed to remove gluten, the specific protein that triggers celiac reactions. King Arthur Baking Company adheres to stringent gluten-free standards. Their Gluten-Free Bread Flour is rigorously tested to ensure it contains less than 20 parts per million (ppm) of gluten. This threshold is widely accepted by global health organizations and considered safe for the vast majority of individuals with celiac disease. Therefore, for celiacs, this flour is generally considered safe for consumption. It is, however, important to distinguish this from a wheat allergy, which is a different condition altogether. If you have a wheat allergy, this flour would not be suitable due to the presence of wheat starch. Speaking from personal experience, as someone with celiac disease myself, I consume this flour regularly without any adverse effects, and it allows me to enjoy baked goods that were previously off-limits. Always consult with your doctor or a registered dietitian if you have specific dietary concerns.
Mastering Dough Handling: Tips for Easier Rolling of Gluten-Free Dough
Working with gluten-free dough, especially yeast dough, can sometimes be a bit trickier than traditional wheat dough due to its lack of elasticity from gluten. However, there’s a simple, yet incredibly effective technique that makes handling and rolling out these **gluten-free orange rolls** a breeze: chilling the dough. Do not be tempted to skip Step 4 in the instructions! By forming the dough into a ball, covering the bowl tightly with plastic wrap, and refrigerating it for just 20 minutes, you allow the gluten-free flour to fully hydrate. Hydration is key because it gives the dough a much better, firmer, and more manageable texture. The slight chill also helps the butter in the dough to firm up, making it less sticky and more cohesive. This short chilling period transforms the dough from potentially sticky and difficult to a cooperative, workable canvas, ready for you to roll out into a perfect square. Following this tip will save you frustration and ensure beautifully shaped, uniform rolls every time – no sticky messes here!
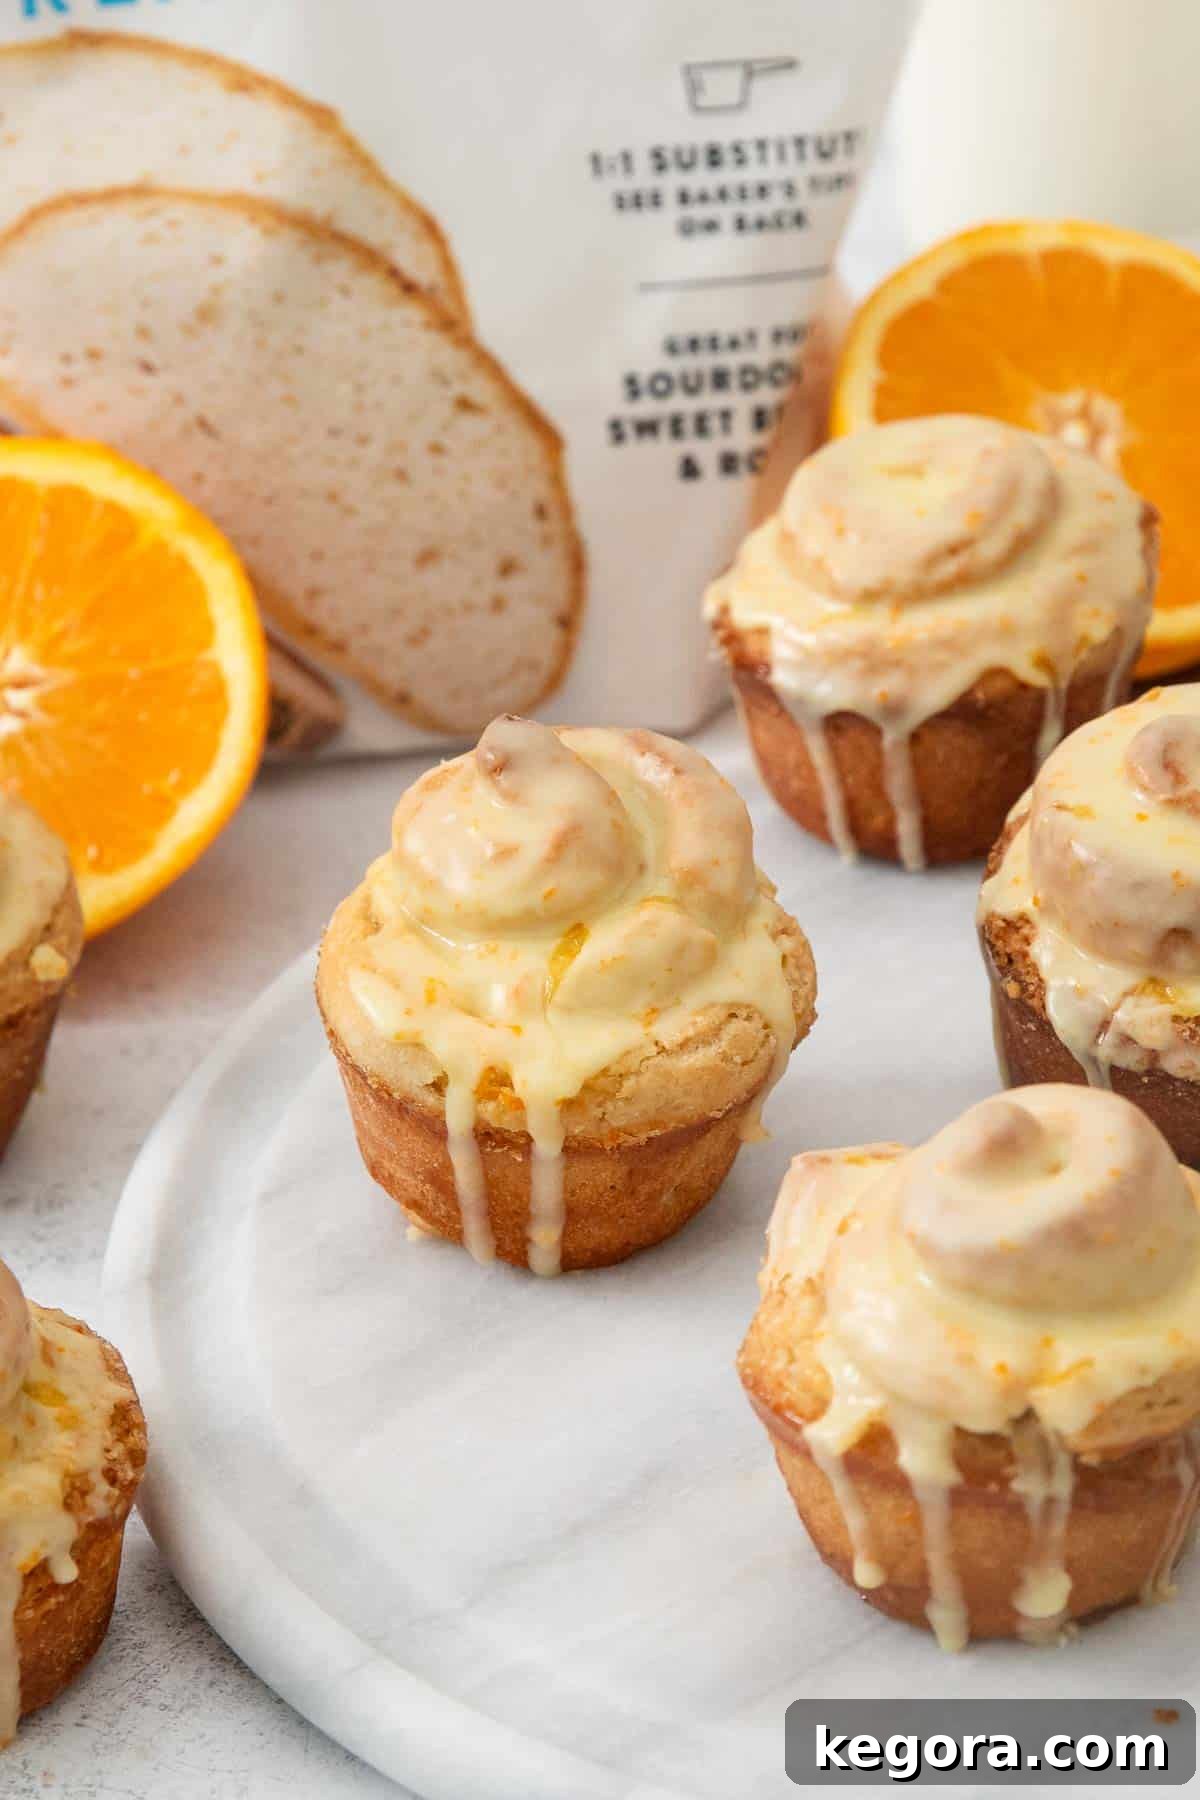
Explore More Recipes Using King Arthur Gluten-Free Bread Flour
If you’ve loved baking these **gluten-free orange rolls** and are impressed by the capabilities of King Arthur Gluten-Free Bread Flour, you’re in for a treat! This versatile flour blend opens up a world of possibilities for delicious yeast-leavened gluten-free baking. Its ability to create soft, fluffy, and perfectly structured baked goods makes it a staple in my kitchen. I encourage you to explore more of my recipes that specifically utilize this fantastic flour, allowing you to expand your gluten-free baking repertoire and enjoy even more traditional-tasting treats. From savory breads to other sweet morning pastries, you’ll find plenty to love!
- Gluten-Free Cinnamon Rolls: The beloved classic that inspired these orange rolls!
- Gluten-Free Monkey Bread: A fun, pull-apart treat perfect for sharing.
- Gluten-Free Hot Cross Buns: Traditional, spiced buns for special occasions.
- Gluten-Free Naan: Soft, chewy flatbreads perfect for curries and dips.
- Gluten-Free Crescent Rolls: Flaky and buttery, ideal for any meal.
- Gluten-Free Dinner Rolls: The perfect accompaniment to any dinner spread.

Truly Delicious Gluten-Free Orange Rolls
Comments
Ingredients
For the Roll Dough
- 4½ cups (675g) King Arthur Gluten-Free Bread Flour
- ⅓ cup (67g) granulated sugar
- 2¼ teaspoons instant yeast
- 2 teaspoons kosher salt
- 1 teaspoon baking powder
- 1¼ cups (300ml) water warm
- 1 cup (240ml) whole milk warm (or dairy-free milk)
- 2 large eggs
- 6 tablespoons (85g) butter melted (or vegan butter)
For the Filling
- ½ cup (113g) butter melted then cooled to room temperature (or vegan butter)
- 1 cup (200g) granulated sugar
- 2 tablespoons orange zest about the zest of 2 oranges
For the Orange Glaze
- 2 cups (240g) powdered sugar
- 2 tablespoons freshly squeezed orange juice
- ½ teaspoon orange zest
Instructions
Making the Dough
-
In the bowl of a stand mixer fitted with the paddle attachment, combine the King Arthur gluten-free bread flour, granulated sugar, instant yeast, kosher salt, and baking powder. Mix on low speed for 30 seconds to ensure all dry ingredients are thoroughly combined.
-
With the mixer running on low speed, slowly add the warm water, warm milk, eggs, and melted butter. Once all wet ingredients are incorporated, increase the speed to medium and mix for 3 minutes. The dough will have a thick, cookie dough-like consistency, which is characteristic of gluten-free yeast dough.
-
Using an oiled rubber spatula, scrape down the bottom and sides of the bowl to ensure all ingredients are fully combined. Mix again briefly until uniform.
-
Form the dough into a ball within the bowl. Cover the bowl tightly with plastic wrap and refrigerate for 20 minutes. This chilling step is essential for making the dough easier to handle and roll out later.
Assembling the Rolls
-
While the dough chills, prepare the filling: In a small bowl, mix together the melted butter (cooled to room temperature), granulated sugar, and orange zest until well combined.
-
Lightly spray a standard 12-cup muffin pan with cooking spray.
-
Turn out the chilled dough onto a lightly floured surface (using gluten-free flour) and shape it into a ball. Sprinkle the dough with a little more gluten-free flour, then roll it out into a 15×15-inch square of even thickness.
-
Using an offset spatula or the back of a spoon, evenly spread the prepared orange filling over the entire surface of the dough square, leaving a small border around the edges. With a pizza cutter or sharp knife, cut the square into twelve 1¼-inch wide strips.
-
Carefully roll each dough strip up from one end to the other to form individual orange rolls. Place each rolled-up dough spiral into a cup of the prepared muffin pan.
-
Loosely cover the pan with oiled plastic wrap and place it in a warm spot in your kitchen. Allow the rolls to rise for 45-60 minutes, or until visibly puffed.
-
Preheat your oven to 350°F (175°C). Once the rolls have risen, remove the plastic wrap. Bake for 30-35 minutes, or until the tops are beautifully golden brown and the rolls are cooked through.
-
Remove the pan from the oven and let the rolls cool in the muffin pan for 15 minutes before glazing. This allows them to set and makes them easier to remove.
Final Glaze and Serving
-
In a small bowl, whisk together the powdered sugar, freshly squeezed orange juice, and ½ teaspoon of orange zest until smooth. Adjust the consistency with more orange juice (for a thinner glaze) or more powdered sugar (for a thicker glaze) as needed, aiming for a thick but pourable consistency. Drizzle generously over the warm rolls and serve immediately to enjoy their ultimate freshness and flavor.
Notes
Dairy-Free Option: For a delicious dairy-free version, simply substitute the whole milk with your preferred dairy-free milk (Elmhurst Unsweetened Cashew Milk is highly recommended due to its fat content and lack of gums/stabilizers) and use a high-quality vegan butter in place of dairy butter.
Make-Ahead Instructions: To prepare these rolls in advance, follow the recipe through the step where you place the rolled-up dough strips into the muffin pan. Cover the pan tightly with plastic wrap and refrigerate for 8–12 hours (up to 16 hours if needed, but not longer). The next morning, remove the pan from the refrigerator and let the dough rise on the counter for 45-60 minutes before removing the plastic wrap and baking as directed.
Storage: Any leftover orange rolls should be stored in an airtight container at room temperature once they have cooled completely. They will remain fresh and delicious for up to 3 days.
Freezing Instructions: For longer preservation, bake the rolls as directed but do not apply the glaze. Allow them to cool completely. Wrap each roll tightly in plastic wrap, then again in aluminum foil, or store them in a freezer-safe airtight container. Freeze for up to 2 months. To serve, thaw at room temperature or in the fridge, then warm in a 300°F (150°C) oven for 10-15 minutes. Add the fresh orange glaze just before serving.