
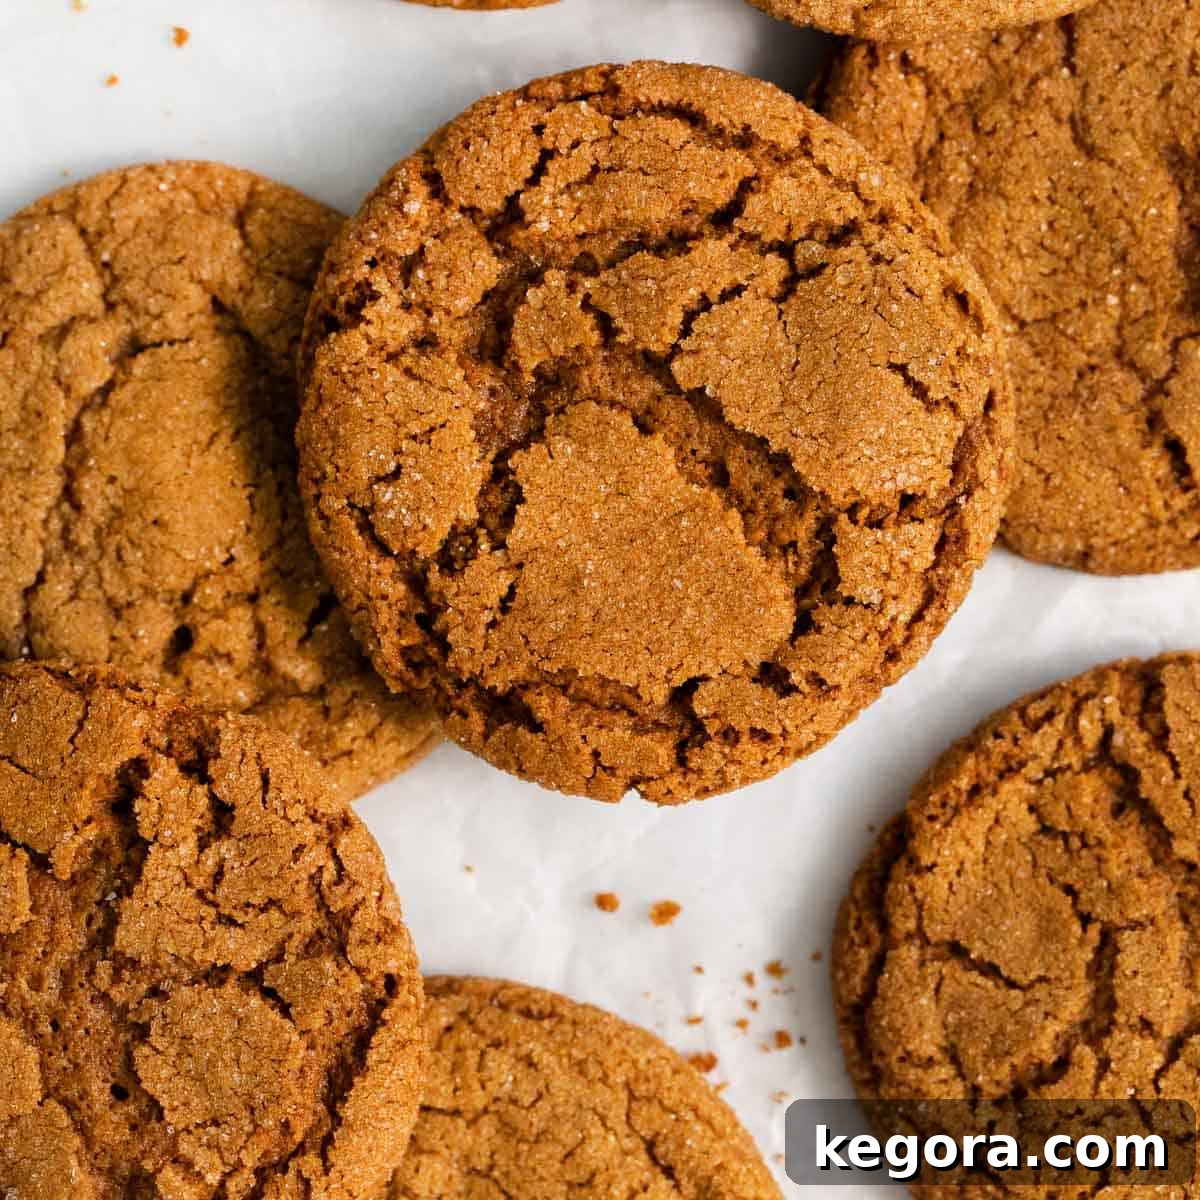
Erin’s Ultimate Guide to Gluten-Free Gingersnaps: Chewy or Crispy Holiday Perfection
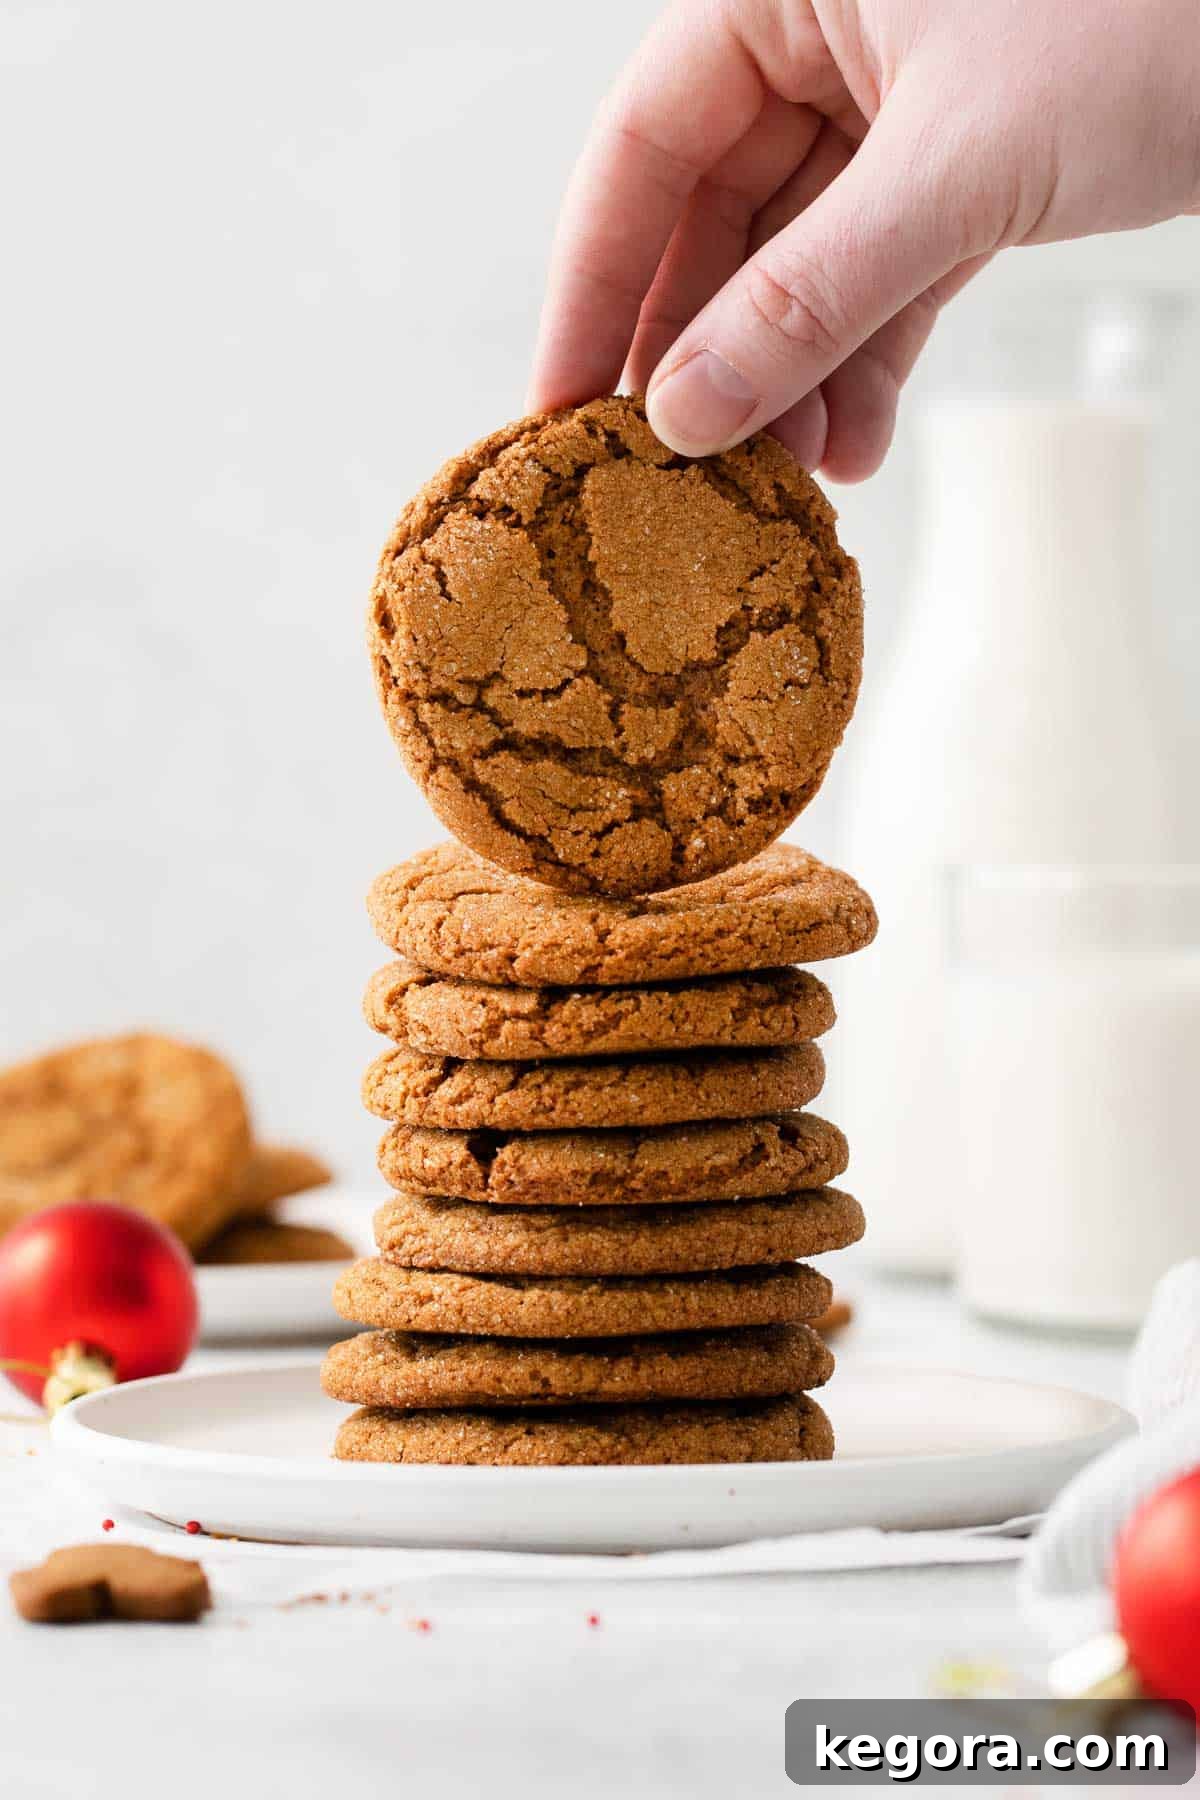
The enchanting aroma of gingersnaps instantly evokes cherished holiday memories. Their unique blend of sweet and spicy, combined with a comforting texture, makes them an undeniable classic. For those navigating gluten sensitivities, finding the perfect gingersnap recipe can be a delightful challenge. Look no further! This comprehensive guide reveals the secrets to baking exceptional gluten-free gingersnaps that are so good, no one will guess they’re gluten-free. Whether you crave a soft, chewy center or a wonderfully crisp bite, this recipe delivers both, making it a truly versatile and beloved addition to your holiday baking repertoire, or any time you desire a warm, spiced treat.
These cookies are designed to be effortlessly elegant, making them suitable for a quiet evening at home or a grand festive gathering. Their make-ahead convenience simplifies holiday preparations, allowing you to enjoy the season without stress. With a timeless flavor profile, these gingersnaps are truly the perfect treat, captivating palates year after year.
Why You’ll Fall in Love with These Gluten-Free Gingersnaps
Beyond being simply delicious, this recipe offers a multitude of reasons to become your new favorite:
- Authentic Old-Fashioned Flavor: We capture the heart of traditional gingersnaps with rich molasses and a harmonious blend of warming spices. Each bite is a nostalgic journey to holidays past, delivering that deep, comforting taste you expect from a classic ginger cookie.
- Customizable Texture: Unlike many recipes that dictate a single texture, ours empowers you to choose! With clear instructions, you can bake these cookies to be perfectly chewy and soft in the center, or wonderfully crispy and snappy around the edges. This flexibility ensures every batch is tailored exactly to your preference.
- Incredibly Easy to Make: Don’t let the “gluten-free” label intimidate you. This recipe uses straightforward steps and common ingredients, making it accessible for bakers of all skill levels. It’s a fantastic entry point for anyone new to gluten-free baking.
- Perfect for Any Occasion: While they shine brightly during Christmas, these gingersnaps are a welcome treat all year round. They’re fancy enough for a festive cookie exchange or holiday party, yet comforting enough for a simple afternoon snack with a cup of tea.
- A Fantastic Make-Ahead Option: Prepare the dough several days in advance, or even freeze it for future baking. This feature is a lifesaaver during busy periods, ensuring you always have fresh, homemade cookies ready when the craving strikes.
Top Tip for Flawless Gluten-Free Gingersnaps: The Chill Factor
For truly exceptional gluten-free gingersnaps, chilling the dough is not just a suggestion; it’s a non-negotiable step. Allow the dough to chill for a minimum of 30 minutes, and ideally longer. This crucial step serves multiple purposes:
- Hydration of Gluten-Free Flours: Gluten-free flours require time to properly absorb liquids. Chilling allows the starches to hydrate fully, resulting in a more cohesive dough that’s easier to handle and prevents a grainy texture in the final cookie.
- Improved Cookie Structure: A firm, chilled dough spreads less in the oven, helping your cookies maintain their shape and thickness. This prevents them from becoming too thin or brittle.
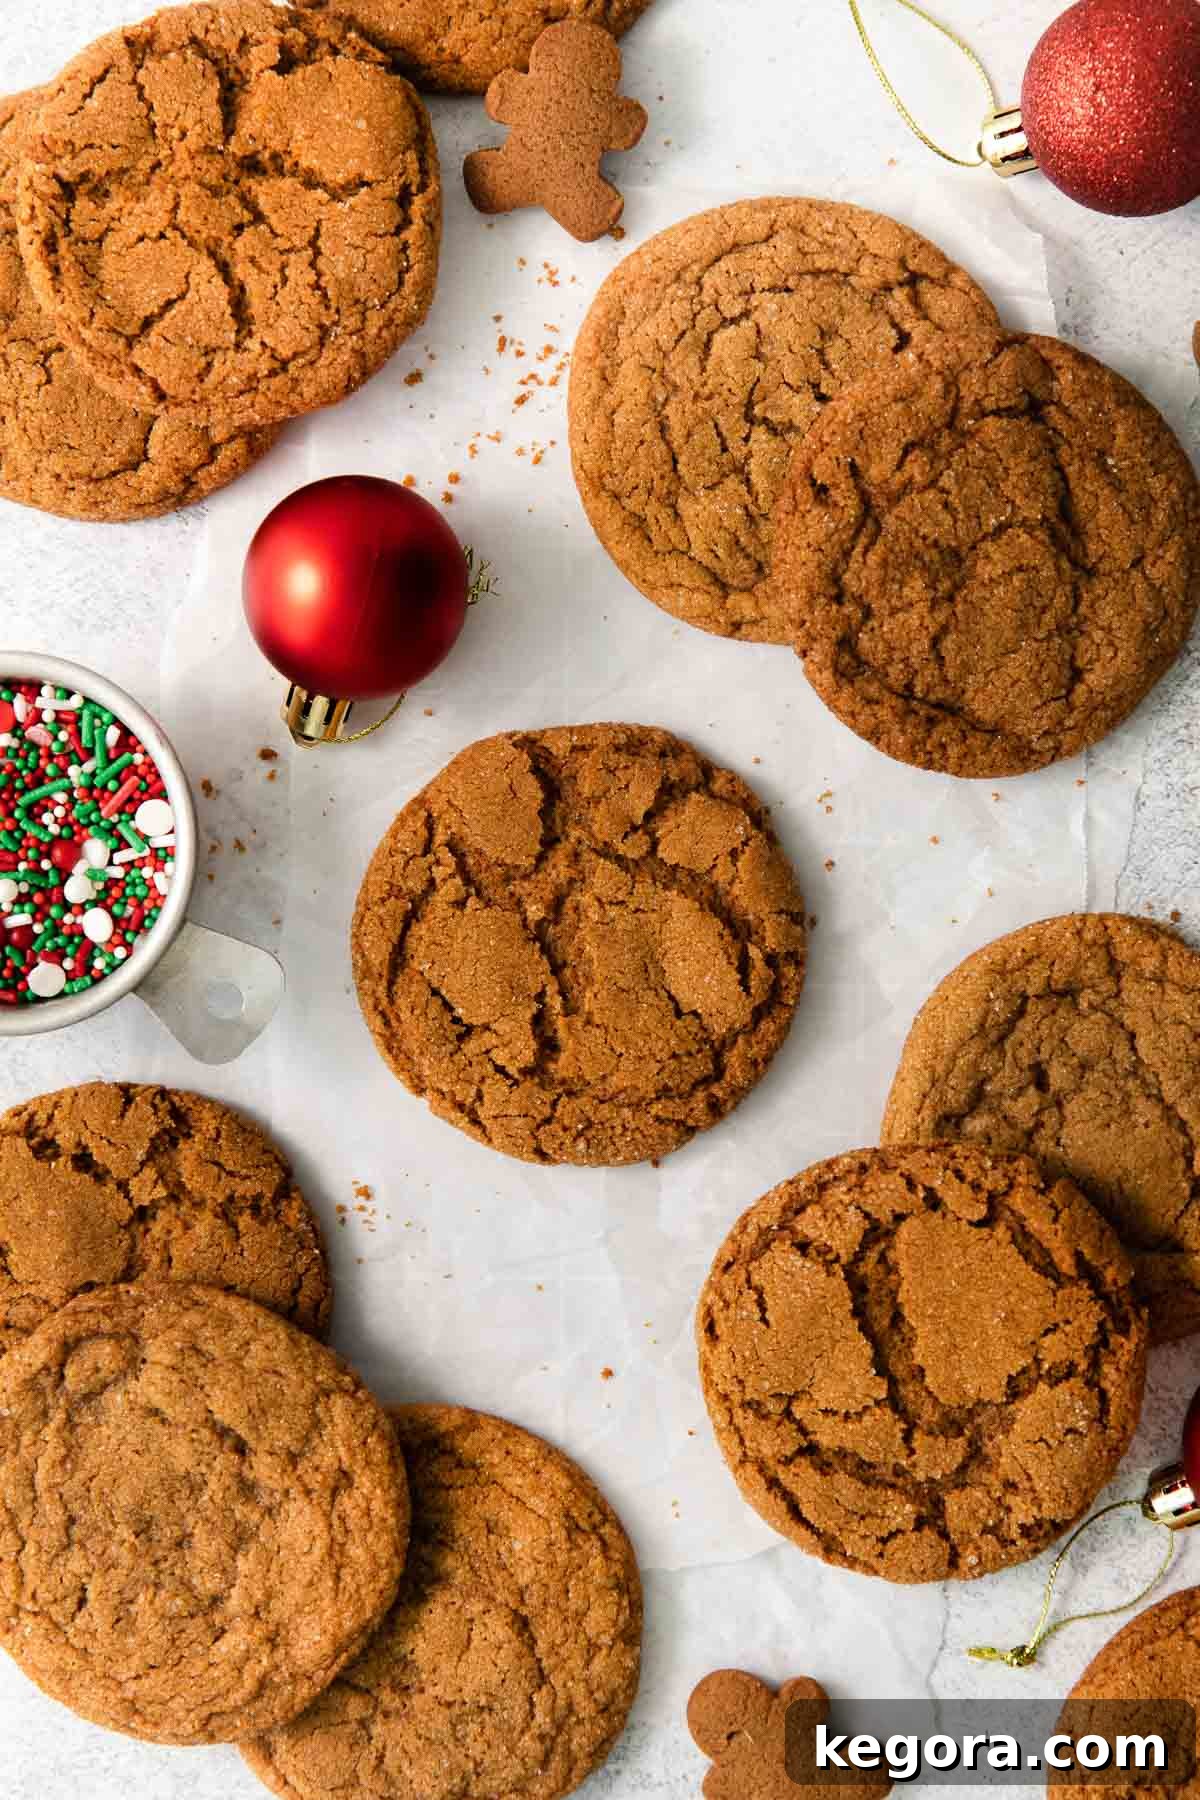
- The Signature Crackly Top: The contrast between the cold dough and the hot oven causes the surface of the cookie to set quickly and crack, creating that beautiful, iconic gingersnap appearance. This crackle also contributes to the delightful crispy-chewy texture.
Explore More Gluten-Free Ginger & Molasses Delights
If the warm, spiced flavor of these gingersnaps captivates your taste buds, you’ll love these other gluten-free recipes from our collection:
- Gluten-Free Chewy Molasses Crinkle Cookies: Another fantastic option for molasses lovers.
- Classic Gluten-Free Gingerbread Cookies: Perfect for cutting into festive shapes.
- Gluten-Free Gingerbread House: A fun and edible project for the holidays.
- Chewy Gluten-Free Gingerbread Bars: An easy alternative to traditional cookies.
- Gluten-Free Gingerbread Cake: A moist and flavorful cake that’s dairy-free.
Enjoy the rich, warming flavors of ginger and molasses in all their gluten-free glory!
Featured Comment
From Brianne: “I think these were the best gingersnaps I’ve ever had, gluten free or not. Perfect recipe.”
89 more comments
Key Ingredients for Your Delicious Gluten-Free Gingersnaps
Crafting the perfect gluten-free gingersnap begins with understanding the role of each ingredient. Here’s a closer look at the key components that give these cookies their signature flavor and texture. Jump to the recipe card below for the precise measurements.
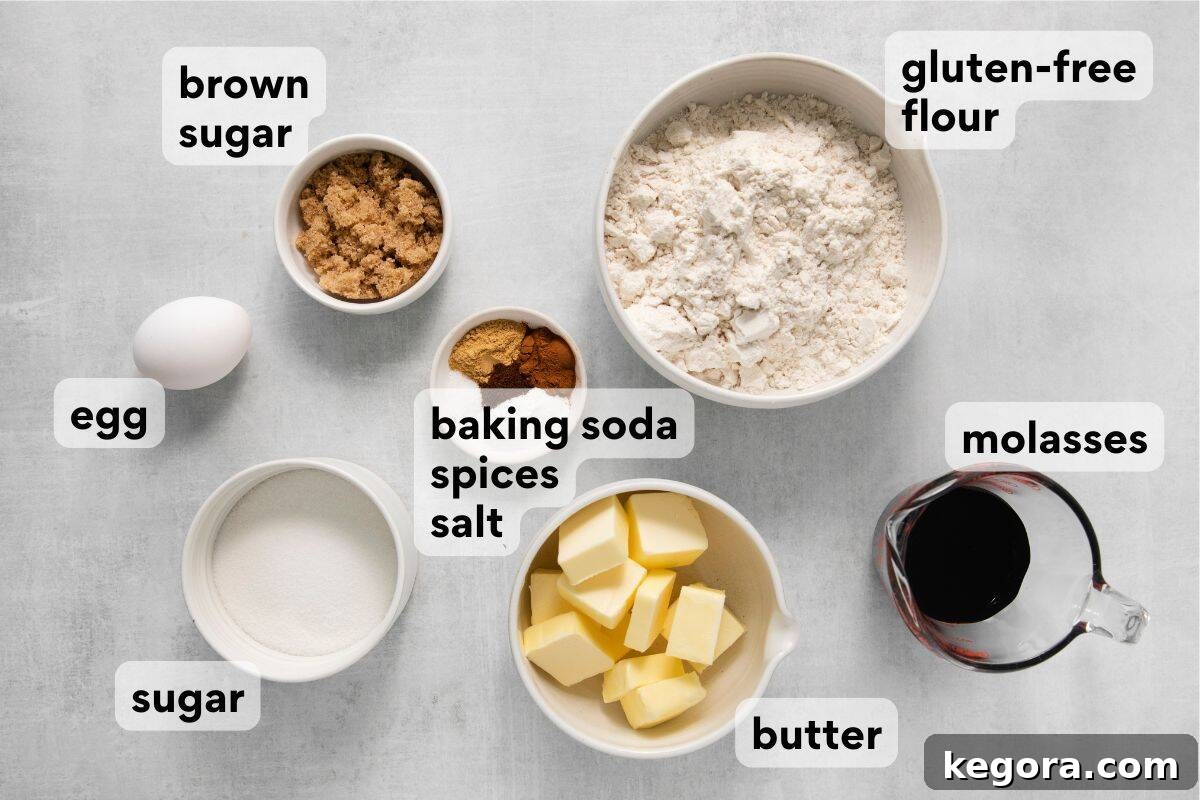
- High-Quality Gluten-Free Flour Blend: The foundation of any great gluten-free cookie! I highly recommend using a premium, “measure-for-measure” gluten-free flour blend that already contains xanthan gum. Xanthan gum is vital as it mimics the elasticity of gluten, providing structure and preventing your cookies from being crumbly. Using a blend ensures a balanced mix of flours and starches for optimal results. This is my absolute favorite brand for its consistent performance in baking.
- Unsulfured Molasses: This ingredient is non-negotiable for authentic gingersnap flavor. It provides a deep, rich, complex sweetness and contributes to the cookie’s characteristic chewiness. It’s crucial to use unsulfured molasses, not blackstrap. Blackstrap molasses has a much more robust, slightly bitter flavor that can easily overwhelm the delicate spice balance of these cookies. Unsulfured molasses offers the perfect natural sweetness and depth needed for this recipe.
- Warming Spices – Ginger, Cinnamon, and Cloves: These three spices are the heart and soul of any gingersnap. Ground ginger delivers that signature zesty kick, cinnamon adds warmth and a subtle sweetness, while ground cloves provide a deep, aromatic, and slightly pungent note that ties everything together. Together, they create the iconic cozy, festive flavor. For convenience, you could also substitute with an equal amount of pumpkin pie spice, or for an extra pop of heat, consider adding a touch of freshly grated ginger alongside the ground spices.
- Brown Sugar (Light or Dark): Both light and dark brown sugar work beautifully in this recipe, offering a delightful caramel undertone. Dark brown sugar, with its higher molasses content, will impart a richer, more intense molasses flavor to your cookies and also contribute to an even chewier texture. Light brown sugar will result in a slightly milder flavor. The choice is yours, depending on your preferred depth of flavor and chewiness.
- Butter, at Room Temperature: Softened butter is key for proper creaming with the sugars, creating air pockets that lead to a light and tender crumb. Ensure your butter is truly at room temperature (soft enough to indent with a finger, but not melted) for best results.
- Large Egg: The egg acts as a binder, holding the ingredients together, and adds moisture and richness to the dough, contributing to the cookie’s tender structure.
For more irresistible gluten-free Christmas cookies, be sure to check out our full collection of recipes! Some festive favorites include the best gluten-free sugar cookies, delightful gluten-free snowball cookies, and charming gluten-free thumbprint cookies.
How to Make Perfect Gluten-Free Ginger Snaps: A Detailed Guide
Creating these gluten-free ginger snaps is a rewarding process. Follow these detailed steps to ensure a flawless batch every time. Remember, the full, precise instructions and measurements are available in the recipe card below!
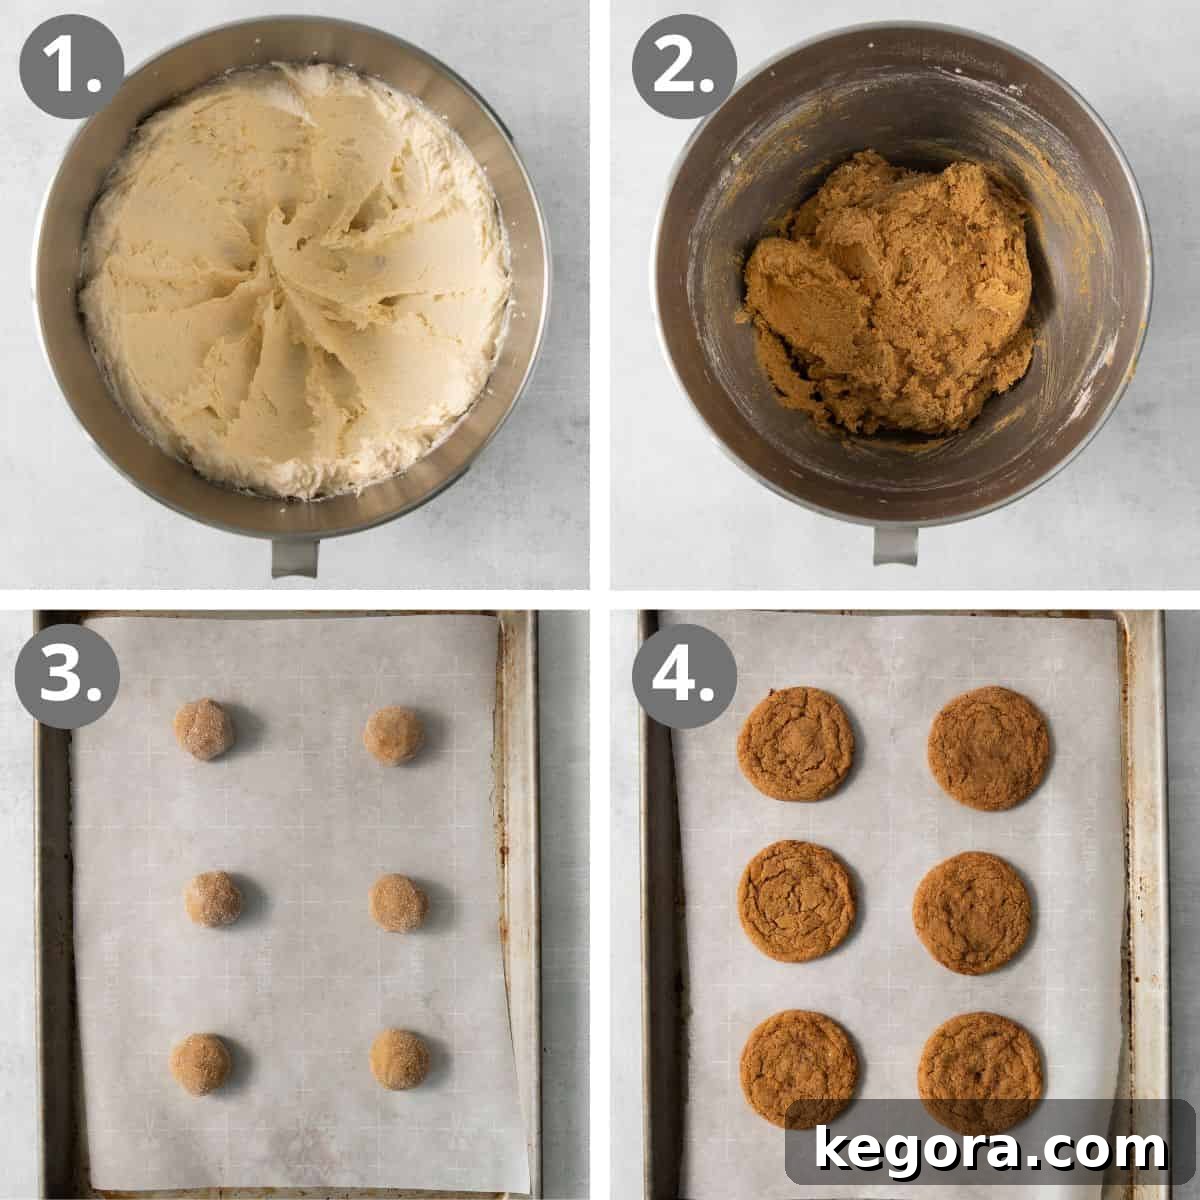
Step 1: Prepare Your Dry Ingredients
In a medium-sized bowl, begin by whisking together your gluten-free flour blend, baking soda, ground ginger, cinnamon, cloves, and kosher salt. Whisking ensures that all the dry ingredients, especially the leavening and spices, are evenly distributed throughout the flour. This prevents pockets of unmixed ingredients and guarantees a consistent flavor and rise in every cookie.
Step 2: Cream Butter and Sugars
In a separate, larger bowl, using either a stand mixer fitted with a paddle attachment or a hand mixer, cream together the softened butter, granulated sugar, and brown sugar. Beat on medium-high speed for approximately 2-3 minutes. You’re looking for a mixture that is light in color, fluffy in texture, and visibly aerated. This step incorporates air into the dough, which is essential for a tender cookie crumb.
Step 3: Incorporate Wet Ingredients
Next, add the molasses and the large egg to your creamed butter and sugar mixture. Continue to mix until these wet ingredients are thoroughly combined and the mixture is smooth. Pause and use a spatula to scrape down the sides and bottom of the bowl. This ensures all ingredients are fully incorporated and prevents any streaks of unmixed butter or sugar, leading to a more uniform dough.
Step 4: Combine Dry and Wet Mixtures
With your mixer running on low speed, gradually add the whisked dry ingredients to the wet mixture. Add about a third of the dry mix at a time, allowing it to mostly incorporate before adding the next portion. Mix until just combined. Overmixing gluten-free dough can sometimes lead to a tougher texture, so mix until no dry streaks remain but avoid excessive beating. Once again, scrape down the sides and bottom of the bowl to ensure everything is fully incorporated and homogenous.
Step 5: Chill the Dough (Crucial Step!)
Cover the bowl containing your gingersnap dough with plastic wrap and refrigerate it for at least 30 minutes. For even better results and if time allows, chilling for 2-3 hours, or even overnight (up to 3 days), is highly recommended. If the dough has been chilled for an extended period and is very firm, let it sit at room temperature for about 15-30 minutes before proceeding. This slight softening will make it easier to scoop and ensure the granulated sugar adheres well in the next step, which is key for that iconic crackly top.
Step 6: Preheat and Prepare Baking Sheets
While the dough is chilling (or after it’s had a chance to slightly soften), preheat your oven to 350°F (175°C). Line large baking sheets with parchment paper or silicone baking mats. This prevents sticking and promotes even baking and easy cleanup.
Step 7: Shape and Sugar the Cookies
Scoop the chilled cookie dough into uniform balls, using approximately 1½ tablespoons of dough per cookie. Roll each ball generously in granulated sugar. The sugar coating is vital for creating that beautiful, sparkling, and crackly exterior that is characteristic of gingersnaps. Ensure the dough is slightly tacky for the sugar to adhere properly.
Step 8: Bake to Your Preferred Texture
Place the sugared dough balls on the prepared baking sheets, ensuring they are about 3 inches apart to allow for spreading during baking. Now comes the moment of decision: Do you prefer chewy cookies or crisp cookies?
- For soft and chewy gluten-free gingersnaps, bake for 13-15 minutes. They will look slightly underbaked in the center when removed but will firm up as they cool.
- For crispy and snappy gluten-free gingersnaps, bake for 16-18 minutes. They will be golden brown and set all the way through.
Keep an eye on them, as oven temperatures can vary.
Step 9: Cool and Serve
Once baked to your desired consistency, remove the baking sheets from the oven. Allow the cookies to cool on the baking sheets for about 10 minutes. This allows them to finish setting and prevents them from breaking when transferred. After 10 minutes, carefully transfer the cookies to a wire rack to cool completely. Enjoy the warm, spiced goodness!
MORE GLUTEN-FREE CHRISTMAS TREATS
Ready to expand your holiday baking with more delicious gluten-free options? Discover a variety of festive cookies and bars that are perfect for sharing, gifting, or simply enjoying with your loved ones during the most wonderful time of the year. From rich gingerbread to delightful crinkles, these recipes are sure to bring joy.
Chewy Gluten-Free Gingerbread Bars
Gluten-Free Iced Oatmeal Cookies
Gluten-Free Gingerbread Cookies
Gluten-Free Chocolate Crinkle Cookies
Gluten-Free Gingersnaps (Old Fashioned!)
Erin Collins
15 minutes
15 minutes
30 minutes
1 hour
24 cookies
Either way, we can’t stop making these buttery, delightful cookies every holiday season!
Comments
Ingredients
Dry Ingredients
- 2¼ cups (337g) gluten-free measure-for-measure flour
- 2 teaspoons baking soda
- 1½ teaspoons ground ginger
- 1 teaspoon ground cinnamon
- ¼ teaspoon ground cloves
- ½ teaspoon kosher salt
Other Ingredients
- ¾ cup (170g) butter, at room temperature
- ¾ cup (150g) granulated sugar
- ¼ cup (53g) brown sugar
- ⅓ cup (80ml) molasses
- 1 large egg
- ½ cup (100g) granulated sugar, for rolling
Instructions
-
In a medium bowl, whisk together the gluten-free flour, baking soda, ginger, cinnamon, cloves and salt until well combined.
-
In the bowl of a stand mixer fitted with a paddle attachment, or using a hand mixer, cream together the butter, granulated sugar and brown sugar on medium-high speed until light and fluffy, about 2-3 minutes. Ensure butter is at room temperature for optimal creaming.
-
Add the molasses and egg to the creamed mixture and mix until just well-combined. Stop the mixer and scrape down the sides and bottom of the bowl thoroughly to ensure all ingredients are incorporated.
-
With the mixer running on low speed, slowly add the dry ingredients to the wet ingredients in small batches. Mix until the flour mixture is just combined and no dry streaks remain. Be careful not to overmix the dough. Scrape down the sides and bottom of the bowl one more time, then mix briefly to fully incorporate any remaining ingredients.
-
Cover the bowl tightly with plastic wrap and refrigerate the dough for at least 30 minutes, or up to 3 days. This chilling period is crucial for the gluten-free flour to hydrate and for the cookies to hold their shape and develop a crackly top. If chilling for more than a few hours, let the dough sit out at room temperature for about 30 minutes before scooping to make it slightly tacky and easier to roll.
-
While the dough is chilling, preheat your oven to 350°F (175°C). Line large baking sheets with parchment paper or silicone baking mats to prevent sticking.
-
Scoop the chilled cookie dough into uniform round balls, using about 1½ tablespoons of dough for each cookie. Then, roll each ball generously in the remaining granulated sugar, ensuring it’s fully coated. This sugar coating contributes to the beautiful crackly texture and sparkling finish.
-
Place the sugared dough balls on the prepared baking sheets, spacing them approximately 3 inches apart to allow for proper spreading. Now, decide on your preferred texture:
- For chewy cookies, bake for 13-15 minutes. The edges will be set, but the centers will appear slightly soft.
- For crisp cookies, bake for 16-18 minutes. They will be golden brown and firm when lightly touched.
-
Remove the cookies from the oven and let them cool on the baking sheets for 10 minutes. This allows them to firm up and prevents breakage. After 10 minutes, carefully transfer them to a wire rack to cool completely.
Notes & Expert Tips
Gluten-Free Flour Quality: The success of these cookies hinges on a good quality gluten-free flour blend. I highly recommend one that already contains xanthan gum, as it’s essential for structure. If your blend does not include xanthan gum, add 1 teaspoon per cup of flour. My top recommendation can be found here!
Dairy-Free Adaptation: Easily make these cookies dairy-free by substituting the butter with your favorite dairy-free butter alternative. Ensure it’s a solid, stick-style dairy-free butter for best results in creaming.
Nut-Free: These gingersnaps are naturally nut-free, making them a safe and delicious option for those with nut allergies.
Make-Ahead Options: The dough is wonderfully versatile! You can prepare it up to 3 days in advance and store it, covered, in the refrigerator. Alternatively, freeze the dough for up to 3 months for longer storage. When ready to bake, allow the chilled or frozen dough to sit at room temperature until it becomes slightly tacky before rolling in sugar and baking as directed.
Storage: Once completely cooled, store your baked gluten-free gingersnaps in an airtight container at room temperature for up to 5 days. They tend to soften slightly over time, maintaining a delightful chewiness.
Freezing Baked Cookies: For longer preservation, allow the baked cookies to cool completely. Then, transfer them to an airtight container or freezer bag and freeze for up to 2 months. Thaw at room temperature before serving for a delicious treat anytime.
Customization Ideas: Feel free to experiment with additional spices like a pinch of nutmeg or allspice. For a citrusy zing, add 1 teaspoon of orange or lemon zest to the wet ingredients. A small amount of finely chopped candied ginger can also be folded into the dough for extra chewiness and a burst of intense ginger flavor.
Nutrition
Carbohydrates: 24g |
Protein: 1g |
Fat: 6g |
Saturated Fat: 4g |
Polyunsaturated Fat: 0.3g |
Monounsaturated Fat: 2g |
Trans Fat: 0.2g |
Cholesterol: 22mg |
Sodium: 190mg |
Potassium: 78mg |
Fiber: 1g |
Sugar: 17g |
Vitamin A: 187IU |
Vitamin C: 0.004mg |
Calcium: 23mg |
Iron: 1mg
This post was originally published in November 2022. It was meticulously updated with enhanced instructions, new photography, and additional baking tips in November 2025 to ensure the most delightful baking experience for you.
We hope this comprehensive guide inspires you to bake a batch of these incredible gluten-free gingersnaps. Whether you prefer them soft and chewy or wonderfully crisp, these cookies are a testament to the fact that gluten-free baking can be just as, if not more, delicious and satisfying as traditional treats. Happy baking!