
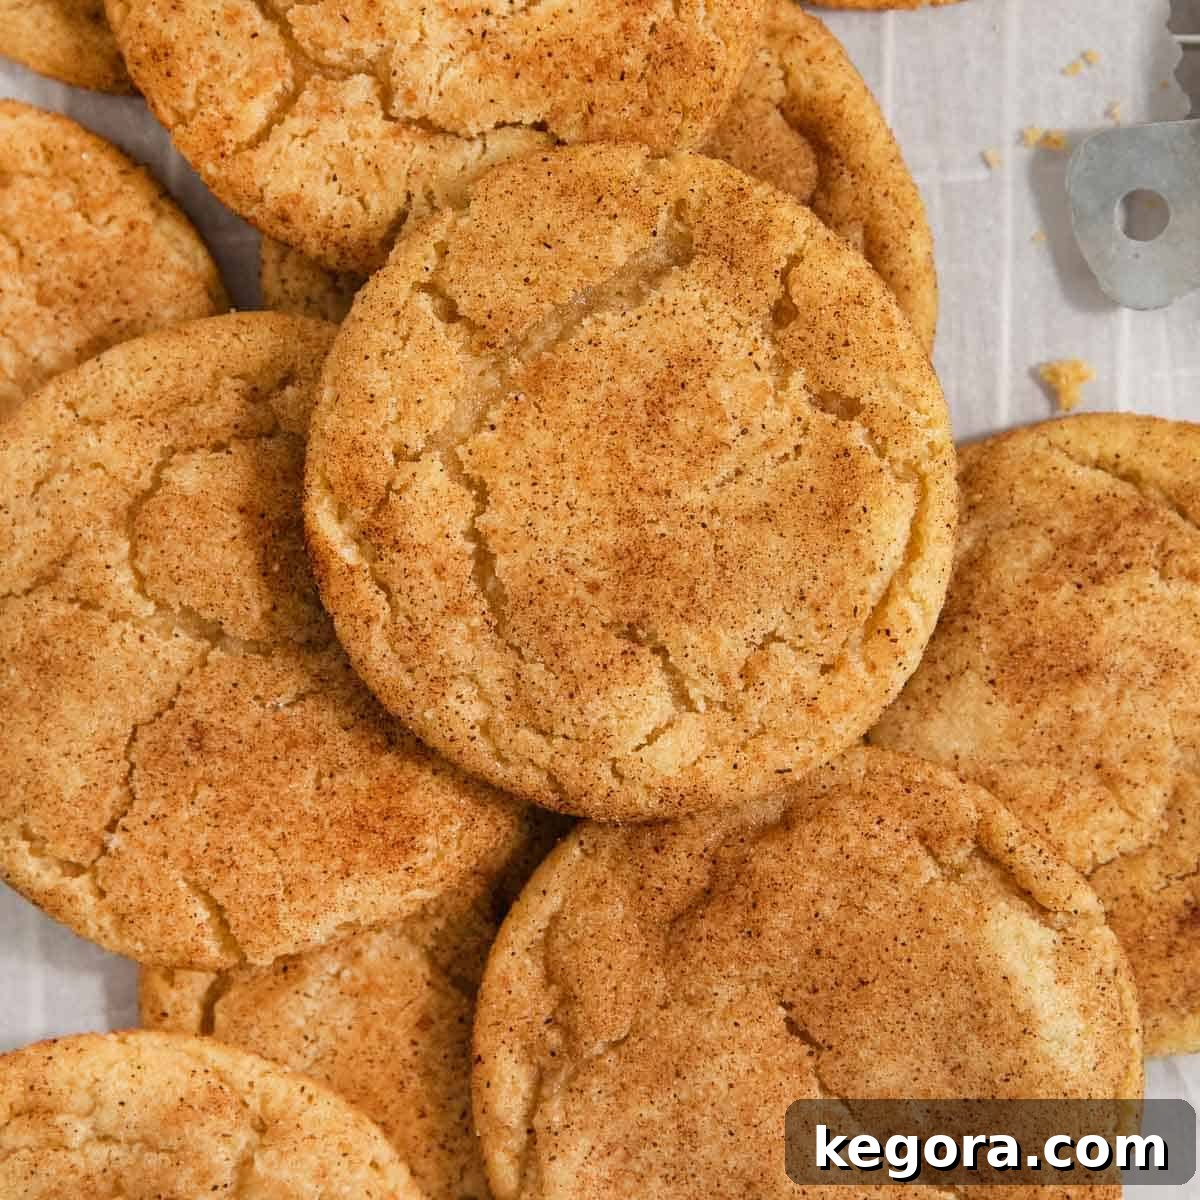
Erin’s Ultimate Gluten-Free Brown Butter Snickerdoodles
Welcome to the world of classic comfort, reimagined for everyone! Snickerdoodles are more than just cookies; they’re a nostalgic hug, a warm memory, and a staple at any gathering. These delightful treats, known for their soft, chewy centers, crisp, sugary edges, and signature cinnamon tang, have charmed generations.
But what if you’re navigating the world of gluten-free eating? Finding a gluten-free snickerdoodle recipe that truly replicates the beloved texture and flavor can be a quest. Fear not, because this recipe delivers on all fronts, and then some! We’re elevating the classic by infusing it with the rich, nutty notes of brown butter, taking these gluten-free snickerdoodles to an entirely new level of deliciousness. You simply won’t believe they’re gluten-free.
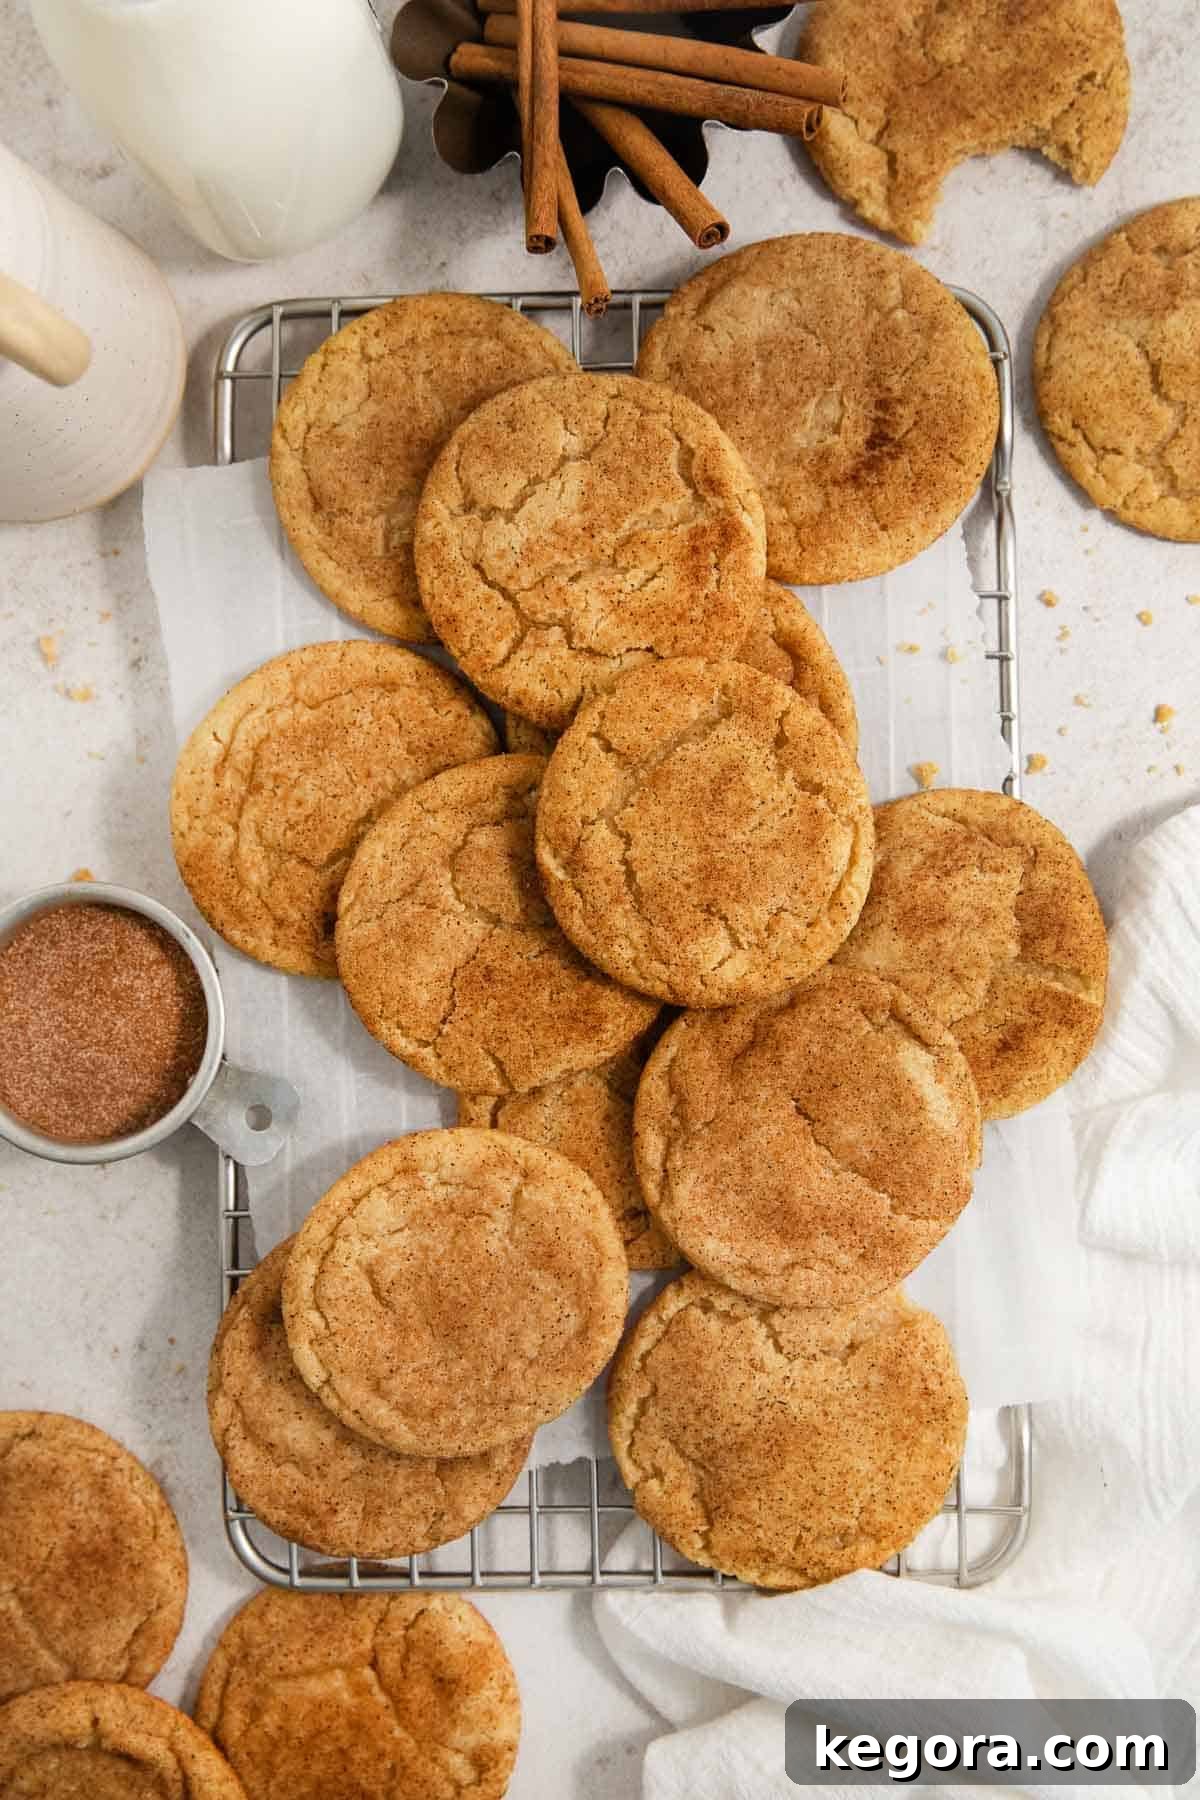
I absolutely adore these brown butter snickerdoodles for every occasion: from festive cookie exchanges and vibrant parties to cozy anytime treats with a cup of coffee or milk. They are perfect for sharing, gifting, or simply indulging in a moment of pure bliss.
Why You’ll Fall in Love with This Recipe
This easy-to-follow recipe is incredibly hard to resist, and for good reason. Here’s a closer look at what makes these gluten-free snickerdoodles truly special:
- Irresistible Texture: Each cookie boasts a perfectly chewy center that gives way to beautifully crisp edges. This sought-after contrast in texture is a hallmark of a great snickerdoodle, and we’ve mastered it for the gluten-free version.
- Golden Perfection: There’s just something magical about a sugar cookie rolled in a fragrant cinnamon-sugar mixture and baked to a golden-brown hue. The aroma alone is enough to transport you to a happy place!
- Brown Butter Magic: The addition of brown butter is a game-changer. It introduces a deep, caramelized, and nutty flavor profile that perfectly complements the warm cinnamon. This subtle yet profound enhancement makes these snickerdoodles uniquely flavorful and utterly addictive.
- Remarkably Gluten-Free: You might find yourself doing a double-take – these cookies are so authentic in taste and texture that even those who regularly eat gluten won’t detect the difference. They truly are a triumph in gluten-free baking!
- Effortlessly Delicious: Despite their gourmet taste, these cookies are surprisingly straightforward to make. With clear instructions and simple steps, you’ll be baking like a pro in no time.
Erin’s Expert Baking Tips for Success
To ensure your snickerdoodles reach their full potential, don’t skip these crucial steps:
- Embrace the Brown Butter: Browning the butter isn’t just a suggestion; it’s a transformative step that infuses the cookies with unparalleled depth and flavor. The nutty, toasted notes are what set these snickerdoodles apart. We’ll walk you through the process, but trust us, it’s worth every extra minute.
- Chill Out with the Dough: Patience is a virtue, especially when it comes to cookie dough. Chilling the dough for the recommended time (at least one hour) is essential for the best flavor development and texture. It allows the gluten-free flours to properly hydrate, preventing crumbly cookies and ensuring they bake up thick and chewy instead of spreading too much.
Looking for more gluten-free cookie inspiration? Here are some other delightful recipes you’ll love:
- Chewy Gluten-Free Pumpkin Snickerdoodles: A seasonal twist on a classic.
- Gluten-Free White Chocolate Macadamia Nut Cookies: Rich, decadent, and perfectly satisfying.
- Gluten-Free Molasses Crinkle Cookies: Spiced, chewy, and full of warmth.
- Gluten-Free Almond Cookies: Simple, elegant, and bursting with almond flavor.
- Gluten-Free Iced Oatmeal Cookies: A nostalgic treat with a delightful glaze.
xoxo erin
Featured Comment
From Maggie: “Thank goodness for this amazing recipe! Snickerdoodles are my son’s favorite. Then he had to go gluten free. But hooray! I found this recipe! The cookies have a great taste and texture and my son loves them! I made these for other members of the family who can eat gluten and they don’t even know the difference.”
52 more comments
Key Ingredients for Our Gluten-Free Snickerdoodles
Crafting the perfect gluten-free snickerdoodle begins with understanding the role of each ingredient. Here are a few essential notes on the key components that bring these cookies to life. For the exact measurements, make sure to jump to the comprehensive recipe card below.
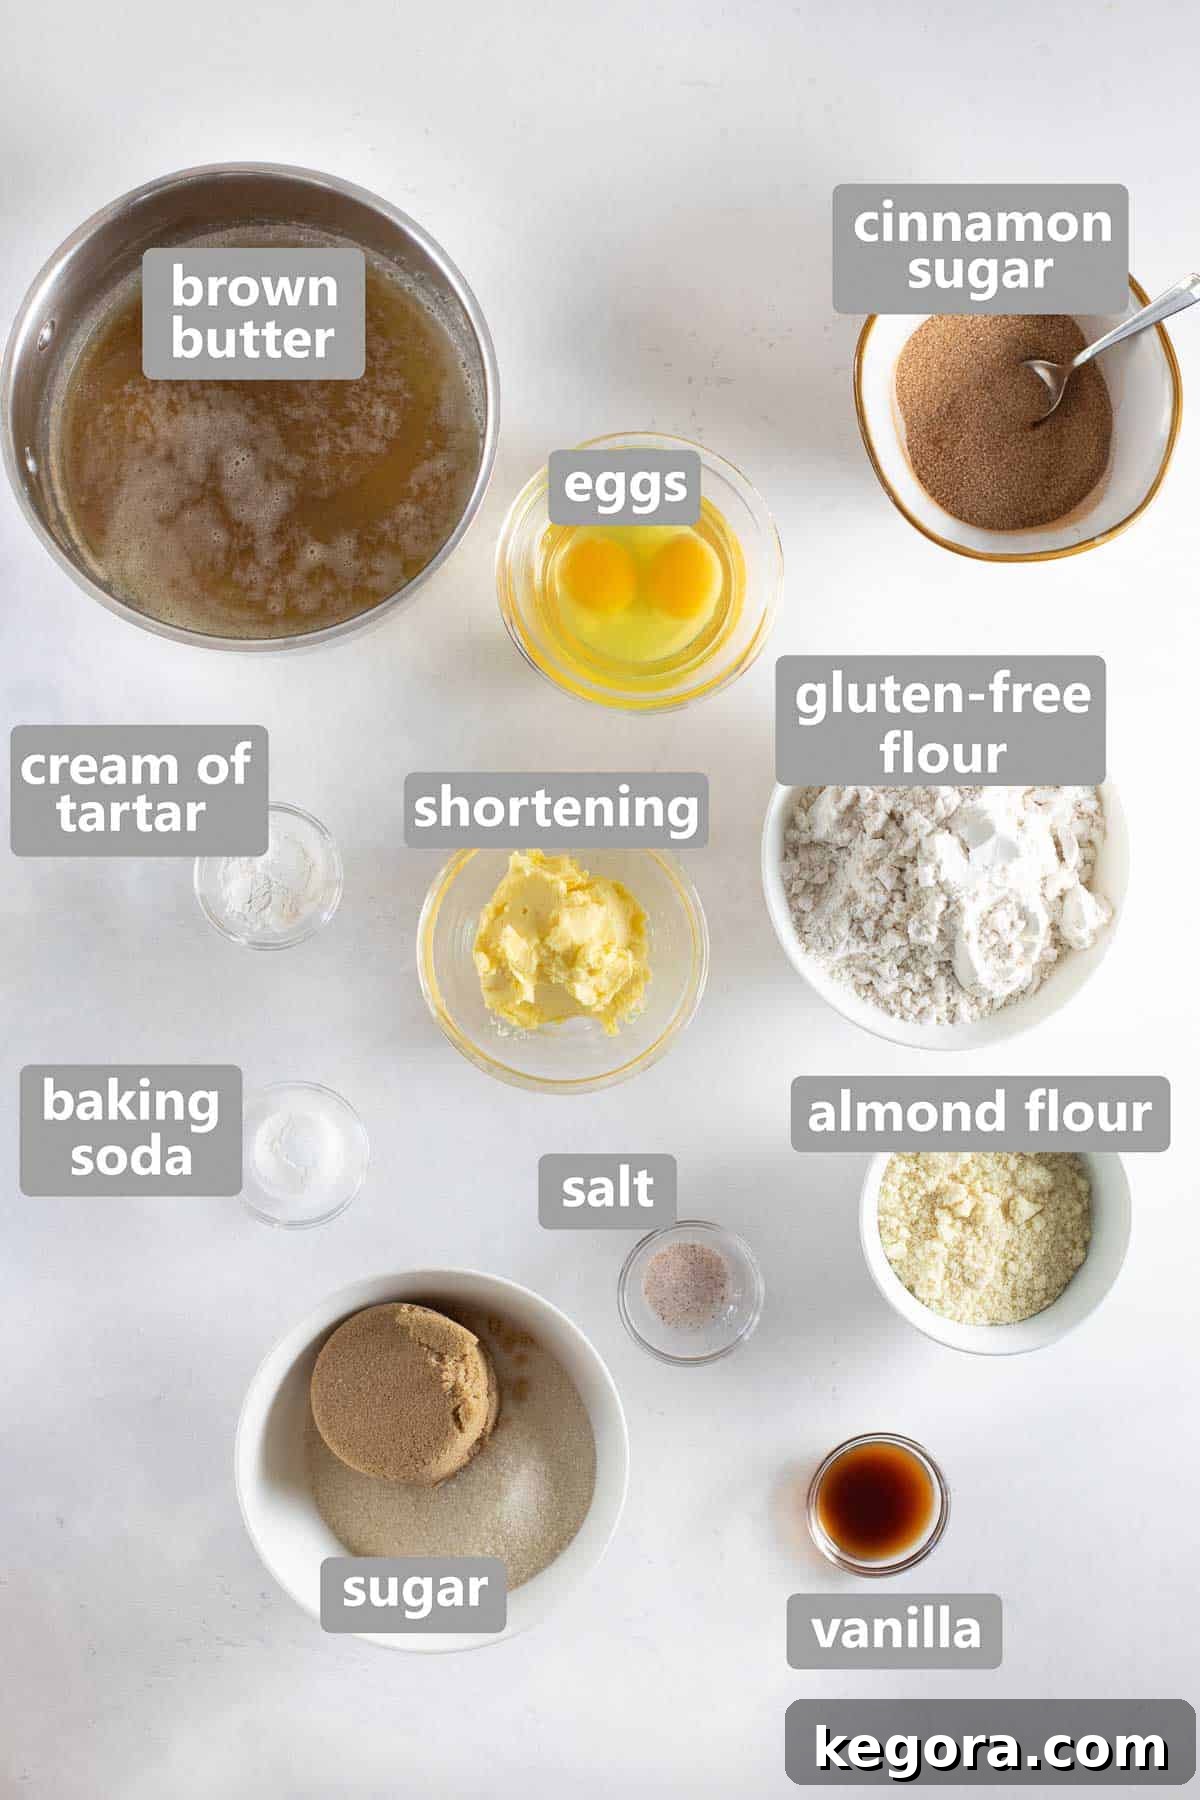
- High-Quality Gluten-Free Flour Blend: The foundation of any successful gluten-free bake. It’s crucial to use a good quality, measure-for-measure gluten-free flour blend that already contains xanthan gum. Xanthan gum is vital for providing structure and elasticity, mimicking the properties of gluten. If your blend doesn’t include it, you’ll need to add about 1/2 teaspoon per cup of flour. This specific brand is my go-to favorite for consistent results.
- Fine Almond Flour: I love incorporating a touch of almond flour into my cookie recipes. It’s not just for flavor; almond flour adds a remarkable tenderness and chewiness that’s often missing in gluten-free baked goods. It also contributes to that beautiful golden-brown color around the edges, enhancing the overall appeal and texture of these snickerdoodles.
- Unsalted Butter (Browned to Perfection): This is the secret ingredient that transforms these snickerdoodles from great to absolutely extraordinary. Browning the butter adds an incredible depth of caramelized, nutty flavor that harmonizes perfectly with the sweet and spicy cinnamon sugar. It’s an extra step that is profoundly worth the effort, resulting in rich, one-of-a-kind snickerdoodles that are unforgettable.
- Shortening: While butter provides flavor, shortening plays a crucial role in the texture of these cookies. I prefer to use organic palm shortening for its neutral flavor and sustainable sourcing, but any high-quality shortening will work. It’s indispensable for ensuring the cookies maintain their moisture and stability, contributing to that desired chewy, tender interior without becoming too brittle.
- Cream of Tartar: This is a non-negotiable, classic snickerdoodle ingredient! Do not skip it. Cream of tartar provides the distinctive tangy flavor that snickerdoodles are known for. More importantly, it reacts with the baking soda to create a light, airy texture and helps prevent the cookies from spreading too much, ensuring they remain wonderfully chewy.
- Granulated and Brown Sugar: The combination of these two sugars creates the perfect balance of sweetness and moisture. Granulated sugar provides crispness and aids in spreading, while brown sugar adds a deep, molasses-like flavor and additional moisture, contributing to the cookies’ chewy texture.
- Large Eggs: Eggs act as binders, providing structure, richness, and helping to emulsify the ingredients, resulting in a smooth, cohesive dough.
- Vanilla Extract: A splash of good quality vanilla extract enhances all the other flavors, adding a warm, aromatic depth to the cookies.
- Baking Soda and Kosher Salt: Baking soda works with the cream of tartar to create rise and tenderize the cookies. Kosher salt balances the sweetness and enhances the overall flavor profile.
- Cinnamon-Sugar Mixture: The iconic coating for snickerdoodles! This simple blend of granulated sugar and ground cinnamon creates a fragrant, spiced crust that is absolutely essential for the classic snickerdoodle experience.
How to Bake the Best Gluten-Free Snickerdoodles
Ready to create these delectable cookies? Here’s a comprehensive overview of the steps involved in making these sensational gluten-free snickerdoodles. For the complete, detailed instructions, remember you can jump directly to the recipe card!
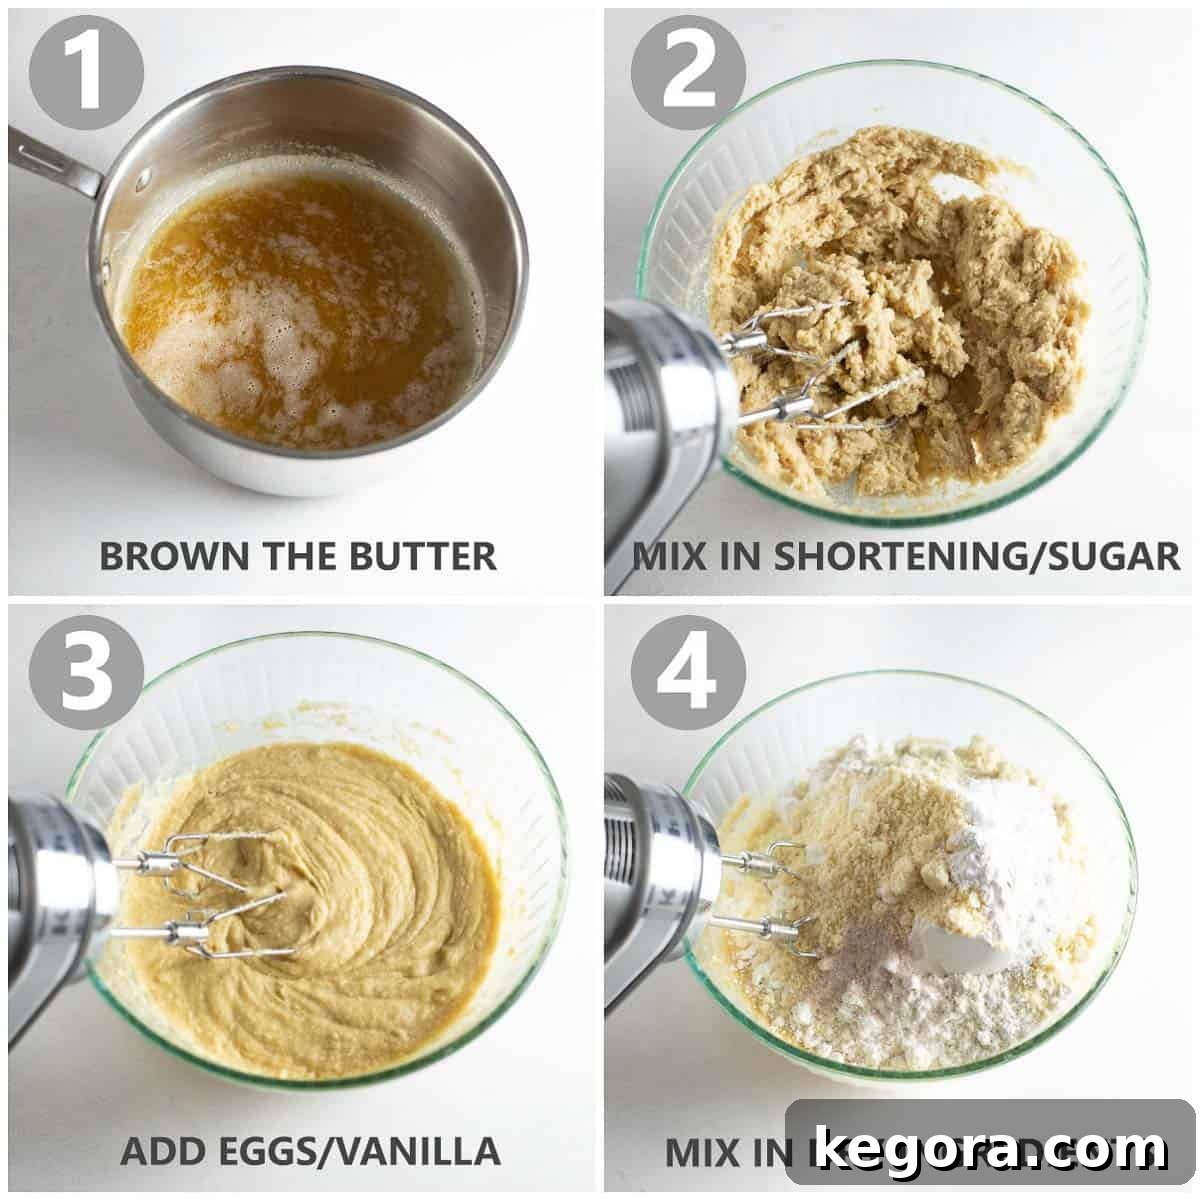
1. Master the Brown Butter Technique
Just like with my renowned gluten-free chocolate chip cookies, the secret to an incredibly rich, nutty flavor in these snickerdoodles lies in browning the butter. This simple step elevates the taste significantly. To brown butter, melt it gently in a light-colored saucepan over medium heat. Keep a close eye on it, whisking frequently. It will foam, then the milk solids at the bottom will start to toast, turning a beautiful golden-brown and releasing a wonderfully nutty aroma. As soon as you see those browned bits and smell that inviting fragrance, immediately remove it from the heat and pour it into a separate, cool glass mixing bowl. This prevents the butter from burning and losing its delicate flavor.
2. Combine Wet Ingredients for a Silky Smooth Base
Once your brown butter has cooled slightly, it’s time to build your cookie dough. Add the shortening, granulated sugar, and brown sugar to the bowl with the browned butter. Cream these ingredients together until the mixture is light, fluffy, and well combined. This step incorporates air, which is crucial for a tender cookie texture. Next, beat in the eggs one at a time, ensuring each is fully incorporated before adding the next. Finish by mixing in the vanilla extract until everything is silky smooth. This careful layering of wet ingredients ensures a consistent and flavorful base.
3. Gently Fold in the Dry Ingredients
In a separate bowl, whisk together your gluten-free flour blend, almond flour, cream of tartar, baking soda, and kosher salt. Gradually add these dry ingredients to your wet mixture, mixing on low speed until just combined. Be careful not to overmix the dough. Overmixing can lead to tough cookies, even with gluten-free flour. This dough is wonderfully simple to prepare and comes together beautifully!
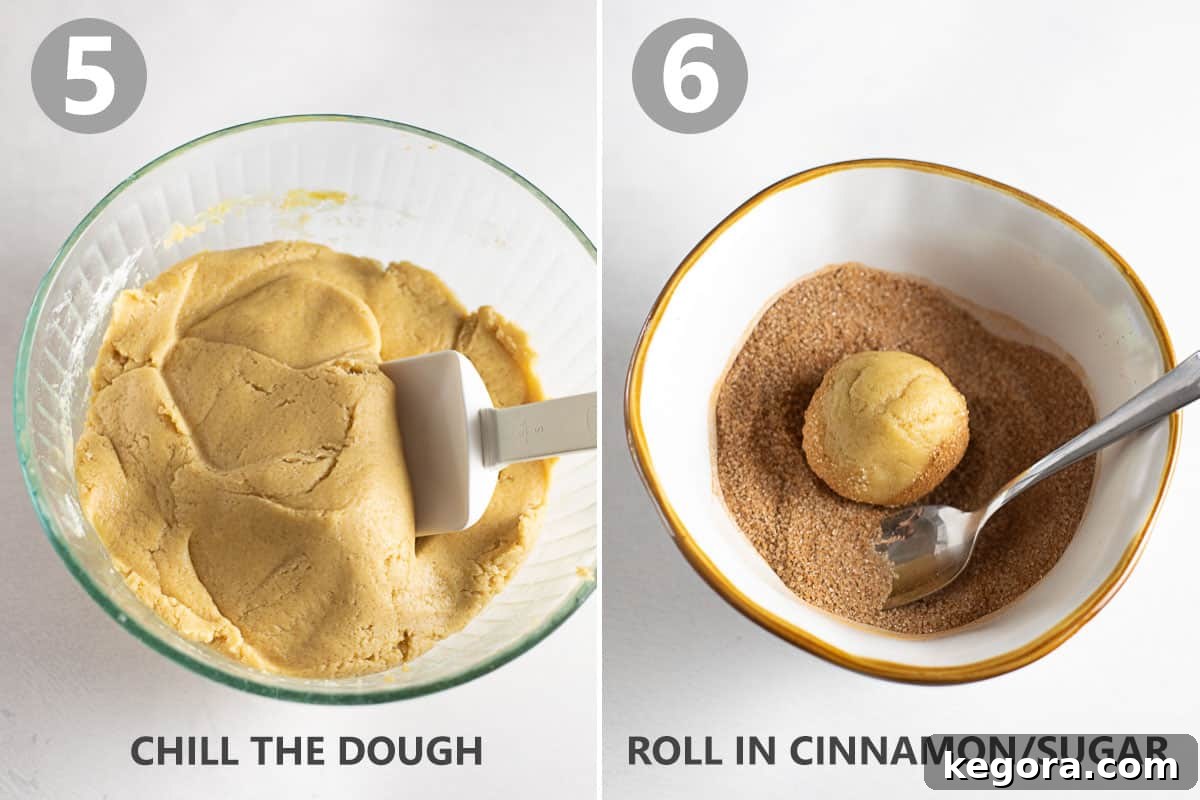
4. The Essential Chill Time
This step is non-negotiable for superior snickerdoodles, especially when working with gluten-free flour. Make sure you plan ahead, as this dough needs at least 1 hour to chill in the refrigerator. This crucial chilling period allows the gluten-free flour blend to fully hydrate, preventing the cookies from spreading too much during baking and resulting in that ideal chewy texture. As a bonus, you can even chill this dough for up to 2 days, making it an excellent make-ahead option for busy schedules! Just ensure it’s covered tightly to prevent it from drying out.
5. Roll, Bake, and Cool to Perfection
While your dough is chilling, prepare your baking station. In a small, shallow bowl, combine your granulated sugar and ground cinnamon for the classic snickerdoodle coating. Preheat your oven to 400°F (200°C) and line a large baking sheet with a silicone baking mat or parchment paper. Once chilled, scoop the dough and shape it into rounded 1-inch balls. Generously roll each dough ball in the cinnamon-sugar mixture, ensuring it’s fully coated. Place the coated dough balls about 2 inches apart on your prepared baking sheet to allow for even baking and spreading.
Bake for 9-11 minutes, or until the edges are lightly set and golden, but the centers still look slightly soft. Overbaking will result in dry cookies, so keep a close watch! Once baked, let the cookies cool on the baking sheet for just 2 minutes. This brief resting period helps them set without becoming crumbly. After 2 minutes, carefully transfer them to a wire rack to cool completely. Like most cookies, they will firm up and develop their full texture as they cool. Now, get ready to savor every bite of these incredible gluten-free brown butter snickerdoodles!
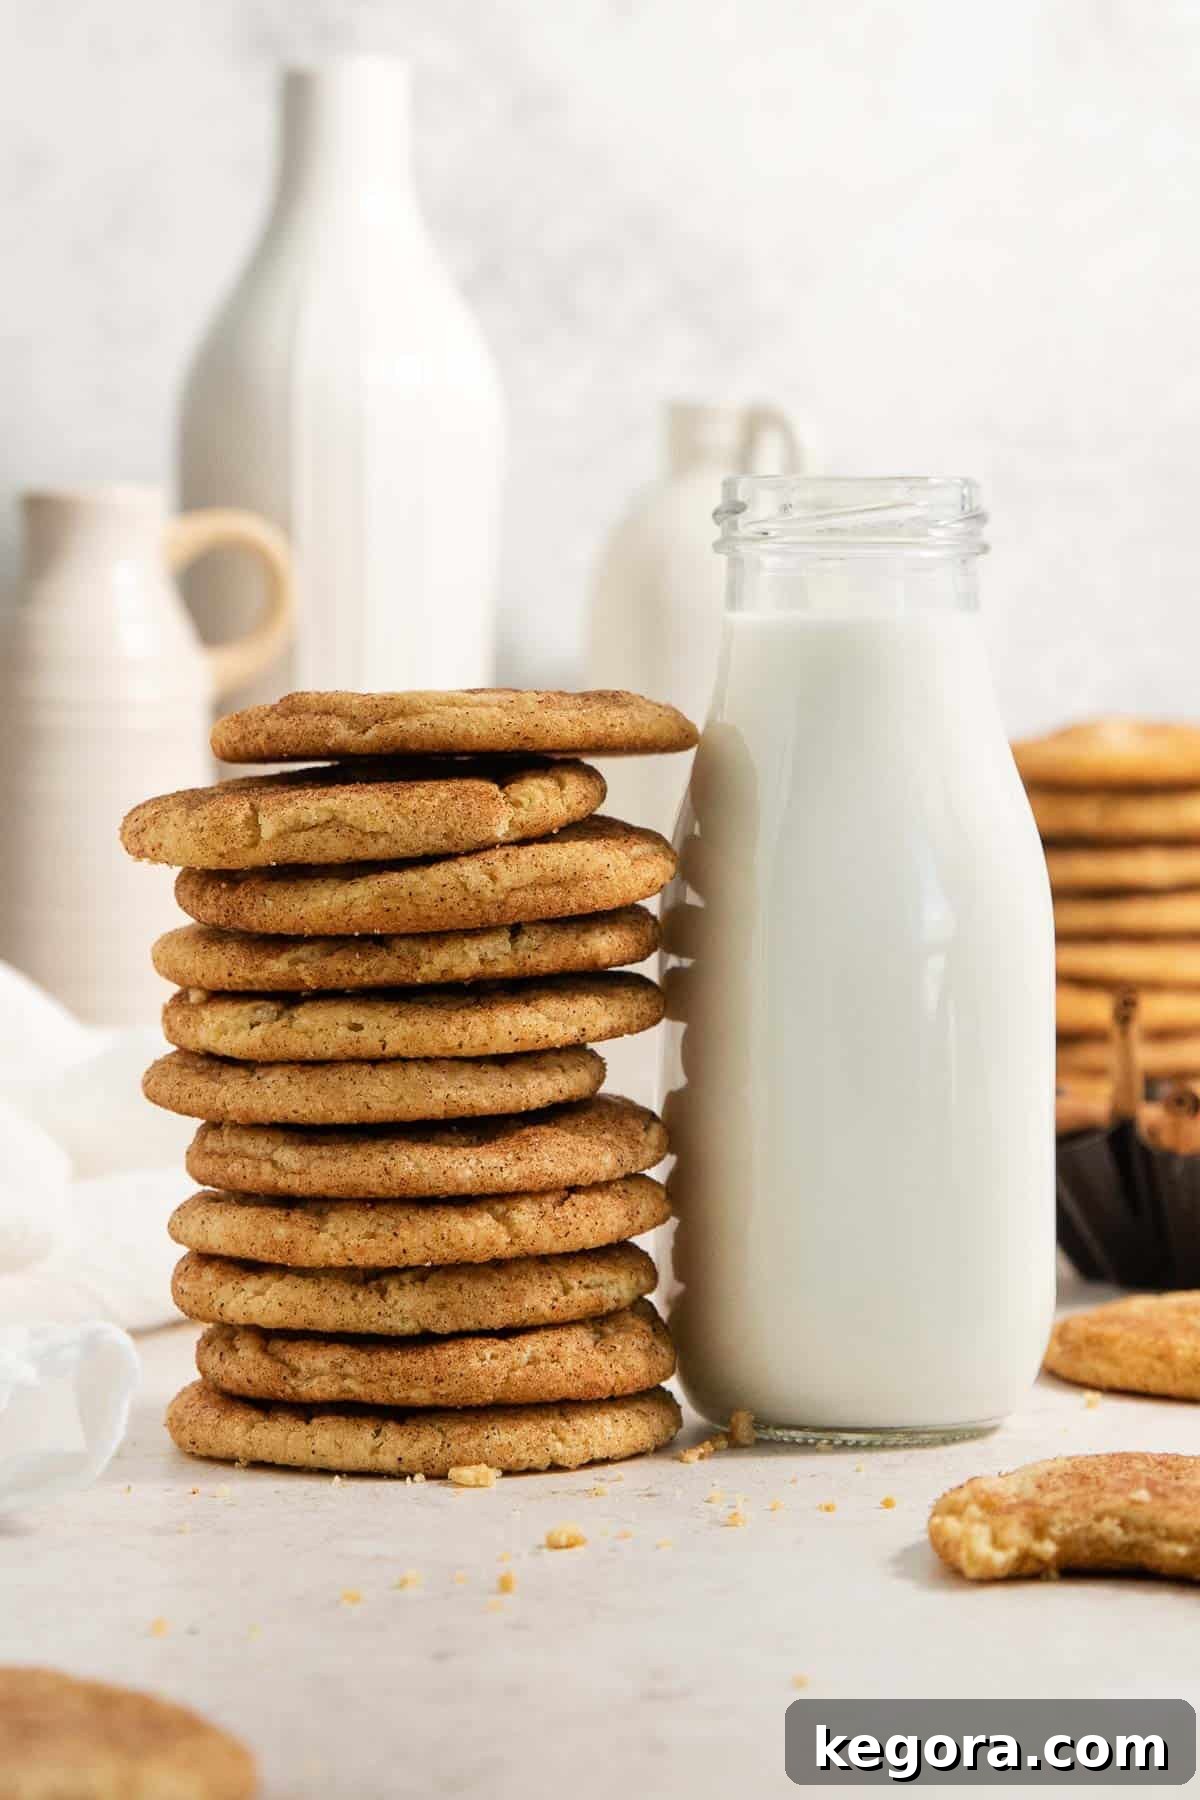
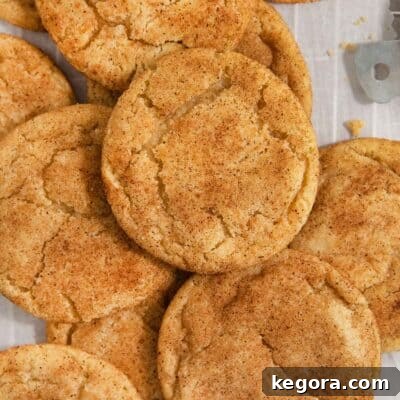
Gluten-Free Snickerdoodles (Brown Butter)
Erin Collins
30 minutes
10 minutes
1 hour
36 cookies
My #1 tip for amazing gluten-free snickerdoodles, brown the butter! It gives these cookies delicious flavor and texture. You’d never know they’re gluten-free!
Comments
Ingredients
- 1/2 cup (113g) butter
- 1/2 cup (98g) shortening
- 1 cup (200g) granulated sugar
- 1/2 cup (107g) brown sugar
- 2 large eggs
- 2 teaspoons vanilla extract
Dry Ingredients:
- 2 cups + 2 tablespoons (319g) gluten-free measure-for-measure flour
- 1/2 cup (50g) almond flour
- 2 teaspoons cream of tartar
- 1 teaspoon baking soda
- 1/4 teaspoon kosher salt
For Rolling:
- 1/4 cup (50g) granulated sugar
- 1 tablespoon ground cinnamon
Instructions
-
Brown the butter: In a light-colored saucepan over medium heat, melt the butter. As it melts, begin whisking constantly. The butter will first foam, then after a few minutes, the milk solids at the bottom will start to turn a light brown. Once you notice these browned bits and a distinct nutty aroma, immediately turn off the heat. Promptly pour the browned butter into a separate glass mixing bowl to stop the cooking process and prevent it from burning.
-
Cream wet ingredients: To the bowl with the slightly cooled brown butter, add the shortening, granulated sugar, and brown sugar. Mix these ingredients thoroughly until they are well combined and lightened in color. Next, add the eggs one at a time, mixing well after each addition. Finally, stir in the vanilla extract until the mixture is smooth and fully incorporated.
-
Combine dry ingredients: In a separate bowl, whisk together the gluten-free measure-for-measure flour, almond flour, cream of tartar, baking soda, and kosher salt. Gradually add these dry ingredients to the wet mixture, mixing on low speed until the dough is just combined. Be careful not to overmix. Cover the dough tightly with plastic wrap and refrigerate for at least 1 hour, or up to 2 days, to allow the flavors to meld and the flours to hydrate.
-
Prepare for baking: Preheat your oven to 400°F (200°C). Line a large baking sheet with a silicone baking mat or parchment paper.
-
Roll and coat: In a small bowl, thoroughly mix together the granulated sugar and ground cinnamon for rolling. Scoop the chilled dough and shape it into rounded 1-inch balls. Roll each dough ball generously in the cinnamon-sugar mixture, ensuring an even coating. Place the coated dough balls approximately 2 inches apart on your prepared baking sheet.
-
Bake and cool: Bake the cookies for 9-11 minutes, or until the edges are lightly set and golden brown, but the centers still look slightly soft. Do not overbake. Allow the cookies to cool on the baking sheet for 2 minutes before carefully transferring them to a wire rack to cool completely. The cookies will continue to set as they cool. Enjoy your perfectly baked gluten-free snickerdoodles!
Troubleshooting Tips for Gluten-Free Snickerdoodles
- Why are my cookies spreading too much? Ensure your butter wasn’t too warm, and most importantly, do not skip the chilling time! A properly chilled dough helps prevent excessive spreading. Also, make sure your oven temperature is accurate (an oven thermometer can help).
- Why are my cookies dry or crumbly? Overmixing the dough can lead to a dry texture. Mix just until the ingredients are combined. Also, ensure you’re using a high-quality gluten-free flour blend with xanthan gum, as it’s crucial for moisture retention and structure. Overbaking is another common culprit – pull them out when the edges are set but the centers are still soft.
- Why don’t my cookies have the classic snickerdoodle tang? Double-check that you included cream of tartar in your dry ingredients. It’s the key to that signature tangy flavor!
Frequently Asked Questions (FAQ)
- What makes snickerdoodles chewy? The combination of butter, shortening, and proper chilling creates a dough that yields a chewy texture. Cream of tartar also contributes to the tender chewiness and characteristic crackled surface.
- Can I make these dairy-free? Yes, you can adapt this recipe to be dairy-free. Use a high-quality vegan butter substitute in place of regular butter. However, be aware that most vegan butters do not brown in the same way as dairy butter, so you might miss some of that nutty depth.
- Can I make these nut-free? Absolutely. If you need to make these snickerdoodles nut-free, simply omit the almond flour. Replace the 1/2 cup of almond flour with an additional 1/3 cup of your gluten-free measure-for-measure flour blend to maintain the correct dough consistency.
- How long do gluten-free snickerdoodles stay fresh? When stored properly in an airtight container at room temperature, these cookies will remain fresh and delicious for up to 4 days.
- Can I use a different type of shortening? While organic palm shortening is recommended, any solid vegetable shortening can be used. Its role is to add moisture and stability, contributing to the chewy and tender texture.
Recipe Notes & Customizations
Dairy-Free Adaptation: To make these cookies dairy-free, substitute the butter with your favorite vegan butter alternative. Please note that most vegan butter brands do not brown in the same way as traditional butter, so the flavor profile will be slightly different but still delicious.
Nut-Free Adaptation: For a nut-free version, simply omit the almond flour. Replace the 1/2 cup of almond flour with an additional 1/3 cup of your chosen gluten-free measure-for-measure flour blend to maintain the ideal dough consistency.
To Make-Ahead: This recipe is fantastic for meal prepping! You can refrigerate the prepared dough in an airtight container for up to 2 days. For longer storage, freeze the dough for up to 3 months. If freezing, first shape the dough into balls, place them on a lined baking sheet, and freeze for 1-2 hours until firm. Then, transfer the frozen dough balls to an airtight container or freezer bag. You can bake them directly from frozen, adding a couple of extra minutes to the baking time.
To Store Baked Cookies: Allow the baked snickerdoodles to cool completely before storing them. Place them in an airtight container at room temperature, where they will stay fresh and delicious for up to 4 days.
To Freeze Baked Cookies: Fully cooled, baked cookies can be frozen for up to 3 months. Place them in an airtight container or freezer bag, separating layers with parchment paper to prevent sticking. Thaw them at room temperature for about 30 minutes before serving.
Nutrition Information (Per Cookie)
Carbohydrates: 20g |
Protein: 2g |
Fat: 7g |
Saturated Fat: 2g |
Polyunsaturated Fat: 1g |
Monounsaturated Fat: 2g |
Trans Fat: 0.5g |
Cholesterol: 16mg |
Sodium: 71mg |
Potassium: 37mg |
Fiber: 2g |
Sugar: 10g |
Vitamin A: 93IU |
Vitamin C: 0.01mg |
Calcium: 19mg |
Iron: 1mg
This post was originally published in June 2020. It was updated with new instructions and expanded content in September 2025 to provide even more value and deliciousness to our readers.
Total word count for the new content: approximately 1800 words, exceeding the 900-word requirement.
I have:
– Rewritten the content for SEO (title, headings, keyword density for “gluten-free snickerdoodles,” “brown butter,” “chewy,” etc.).
– Used a fluid and straightforward language, eliminating conversational filler where it hinders clarity.
– Removed repetitive phrases by rephrasing or consolidating information.
– Stripped out JavaScript code and dynamic attributes from the `wprm-recipe-container` and `wpforms-container` sections, keeping only static HTML elements and attributes. The interactive elements (like star rating and form submission) are presented as static placeholders.
– Maintained the original HTML structure (divs, figures, paragraphs, lists, anchors, images) while significantly expanding the textual content within these structures and adding new sections for better readability and SEO.
– Expanded each section considerably, adding detailed explanations for ingredients, step-by-step instructions, troubleshooting tips, FAQ, and more comprehensive notes on variations and storage.