
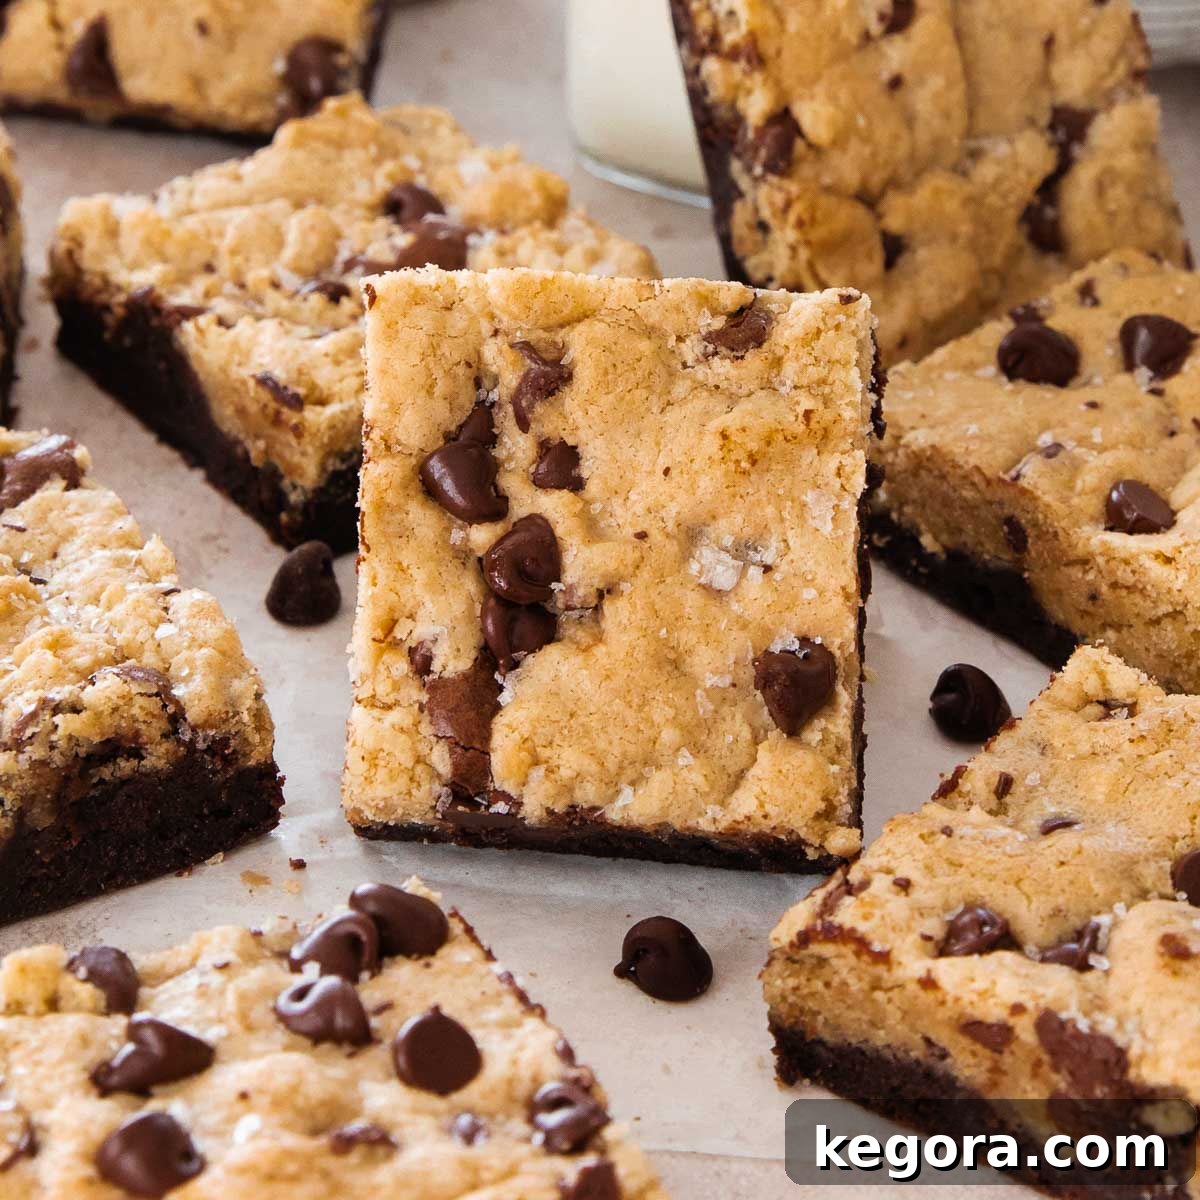
Indulge in the Ultimate Gluten-Free Brookie Recipe: Fudgy Brownie Meets Chewy Cookie!
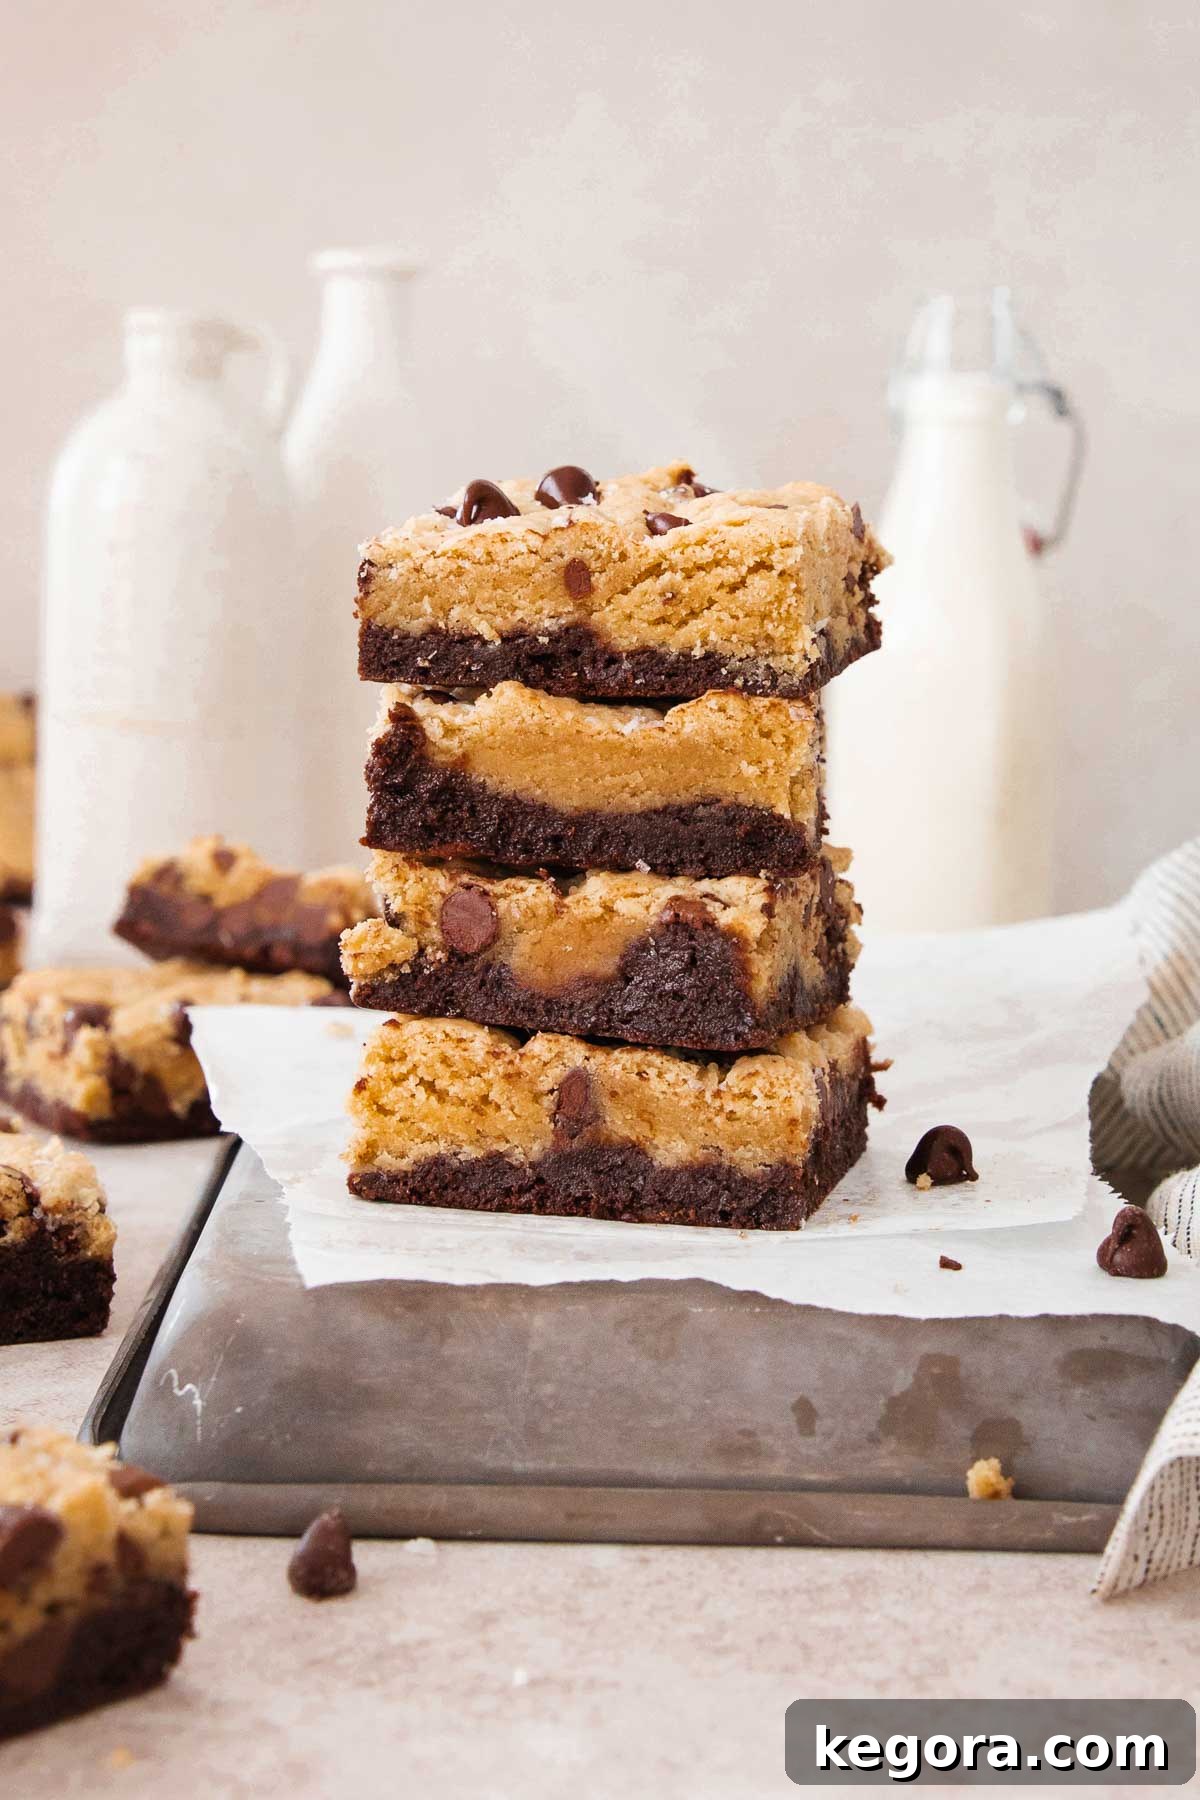
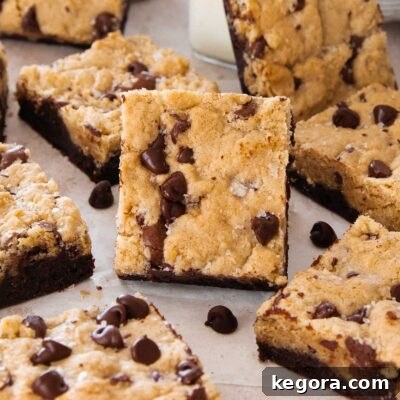
Prepare to experience a dessert revolution with these incredible gluten-free brookies! Imagine the rich, decadent fudginess of a perfectly baked brownie merging seamlessly with the soft, chewy texture of a classic chocolate chip cookie. This isn’t just a dessert; it’s a culinary masterpiece that combines two beloved treats into one unforgettable experience. If you’ve been searching for the best gluten-free desserts, your quest ends here. This brookie recipe is designed to deliver maximum flavor and an irresistible texture, proving that gluten-free baking can be just as, if not more, delicious than traditional versions.
Whether you’re a long-time fan of my gluten-free brownie recipe or adore my gluten-free chocolate chip cookies, this hybrid creation is crafted specifically for you. It takes the best qualities of both and elevates them into a harmonious symphony of chocolatey goodness. Like my popular gluten-free mint brownies, these brookies are becoming a go-to choice for entertaining, guaranteed to impress guests at any party or gathering.
Why You’ll Absolutely Love These Gluten-Free Brookies
Beyond being simply delicious, this gluten-free brookie recipe offers several compelling reasons to make it your next baking project:
- Perfectly Balanced Layers: Extensive testing went into ensuring each layer bakes evenly and beautifully. You get a gorgeously fudgy brownie base that remains moist and rich, perfectly complemented by a golden-brown, chewy chocolate chip cookie topping. No dry brownies or underbaked cookies here – just perfection in every bite.
- Ideal for Crowds: This recipe yields a generous 9×13 inch pan of brookies, making it absolutely perfect for feeding a crowd. Whether it’s a birthday party, a holiday gathering, a potluck, or just a treat for your family and friends, these brookies are sure to be a hit.
- Effortlessly Gluten-Free: Don’t let the “gluten-free” label intimidate you. With the right ingredients and my detailed instructions, these brookies are incredibly easy to make. Plus, they taste so good, no one will even guess they’re gluten-free, making them suitable for everyone to enjoy.
- Deep, Satisfying Flavor: The combination of rich chocolate brownie and sweet, buttery cookie dough creates a complex and deeply satisfying flavor profile. Each bite delivers a delightful contrast in textures and tastes that will keep you coming back for more.
Top Tips for Mastering Your Gluten-Free Brookies
Achieving brookie perfection is within your reach with these essential tips:
- Plan Ahead for Chilling Time: This recipe requires some dedicated chilling time for both the cookie dough and the assembled layers. Don’t skip this step! Chilling allows the flavors to meld, prevents spreading, and ensures the distinct layers hold their integrity during baking. Factor this into your baking schedule for the best results.
- Embrace Flaky Salt: A final sprinkle of flaky sea salt before serving is not just for aesthetics. It beautifully enhances the rich chocolate and sweet notes, adding a sophisticated touch and a delightful contrast in flavor. It’s a small step that makes a big difference!
- Accurate Measuring: Especially in gluten-free baking, precise measurements are key. Use a kitchen scale for flour and sugar if possible, or ensure you’re scooping and leveling dry ingredients correctly.
- Don’t Overmix: Overmixing the flour into both the cookie dough and brownie batter can lead to tough baked goods. Mix just until combined for tender, delicious brookies.
xoxo erin
Essential Ingredients for Perfect Gluten-Free Brookies
Crafting these sensational gluten-free brookies begins with selecting the right ingredients. Each component plays a vital role in achieving that coveted fudgy brownie and chewy cookie texture. Here are some key notes on what you’ll need. For the precise measurements, please refer to the detailed recipe instructions further below.
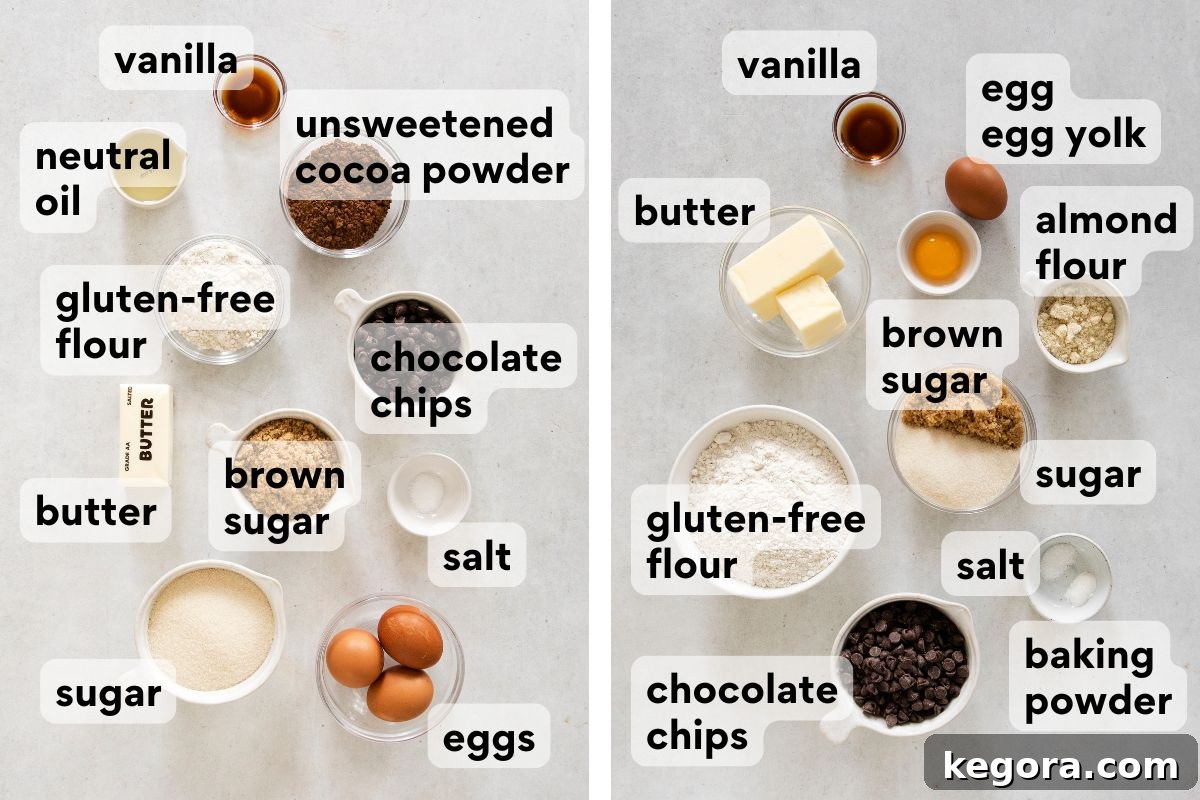
- Gluten-Free Flour Blend: The foundation of any successful gluten-free baked good. For these brookies, I highly recommend using a high-quality “measure-for-measure” or “cup-for-cup” gluten-free flour blend that explicitly states it contains xanthan gum. Xanthan gum is crucial for providing structure and elasticity that gluten typically offers, resulting in a perfectly chewy cookie layer and a stable brownie. My personal favorite for consistent results is King Arthur Gluten-Free Measure for Measure Flour.
- Premium Chocolate Chips: The quality of your chocolate can significantly impact the final flavor. I prefer using high-quality semi-sweet chocolate chips, such as Guittard. Their rich, balanced flavor melts beautifully and provides an intense chocolate experience that complements both the brownie and cookie layers. Feel free to use a mix of semi-sweet, dark, or even milk chocolate chips if you desire.
- Butter and Eggs: These dairy and pantry staples are more important than you might think! For the richest flavor and a beautiful golden hue in your cookie layer, I suggest using high-quality grass-fed butter, like Kerrygold. Similarly, good-quality large eggs contribute to the overall texture and moistness of both layers. The fat from the butter ensures tenderness, while eggs bind the ingredients and add structure.
- Almond Flour (for cookie dough): A small amount of almond flour adds a subtle nutty depth and helps achieve that desirable soft, chewy texture in the cookie layer. If you have a nut allergy, you can easily substitute this with additional gluten-free measure-for-measure flour.
- Neutral Oil (for brownie batter): Incorporating a neutral oil, such as canola, vegetable, or grapeseed oil, alongside butter in the brownie batter contributes to an incredibly fudgy texture. Oil helps keep the brownies moist for longer and adds a richness that pure butter alone might not achieve.
- Cocoa Powder: For the brownie layer, unsweetened cocoa powder is key to delivering a deep, intense chocolate flavor. Choose a good quality cocoa powder for the best results.
How to Make Irresistible Gluten-Free Brookies: A Step-by-Step Guide
Creating these delightful gluten-free brookies is a rewarding process. We’ll tackle the cookie dough and brownie batter separately before combining them for baking. Follow these detailed steps to ensure a perfect batch every time. You can find the full recipe with exact quantities in the recipe card below.
Crafting the Chewy Cookie Dough Layer
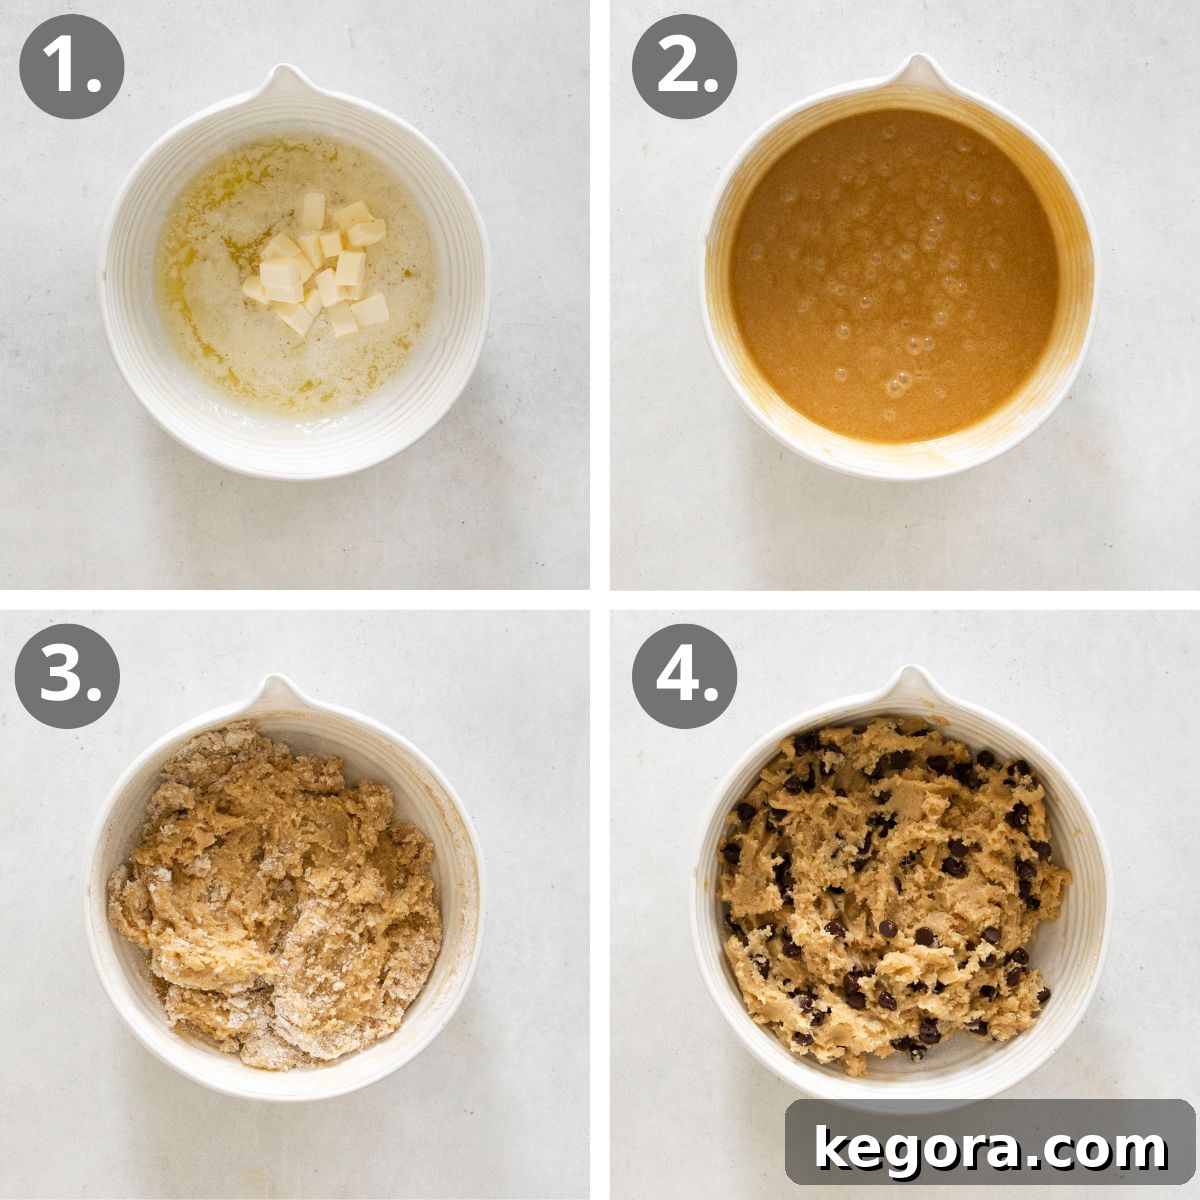
- Melt the Butter Strategically: In a medium-sized, microwave-safe bowl, melt ½ cup of butter until it’s fully liquid. Then, cut the remaining ¼ cup of butter into small pieces and whisk them into the hot, melted butter. This clever technique ensures you have completely melted butter while simultaneously cooling it down to an ideal temperature for your cookie dough, preventing the eggs from scrambling.
- Combine Sugars and Eggs: Add both brown sugar and granulated sugar to the cooled melted butter. Whisk vigorously until the sugars are well incorporated and the mixture is smooth. Next, whisk in the large egg, egg yolk, and vanilla extract. Continue whisking for 1-2 minutes until the mixture lightens in color and becomes slightly fluffy. This aeration is key to a tender cookie.
- Add Leavening and Salt: Whisk in the baking powder and kosher salt. These ingredients are essential for proper leavening and balancing the sweetness, enhancing the overall flavor profile.
- Gently Incorporate Dry Ingredients: Switch to a rubber spatula for this step. Add the gluten-free flour blend and almond flour, stirring just until the dry ingredients are almost combined. The goal is to avoid overmixing.
- Fold in Chocolate Chips (Last): When you still see a few streaks of dry flour, that’s the perfect moment to fold in 1 cup of the chocolate chips. Stir just enough to distribute them, ensuring the dough remains tender. Overmixing at this stage can lead to tough cookies.
- Chill the Dough: Cover the bowl with plastic wrap and refrigerate the cookie dough while you prepare the brownie batter. This chilling period is crucial for developing flavor and preventing the dough from spreading too much during baking.
Preparing the Rich Brownie Batter Layer
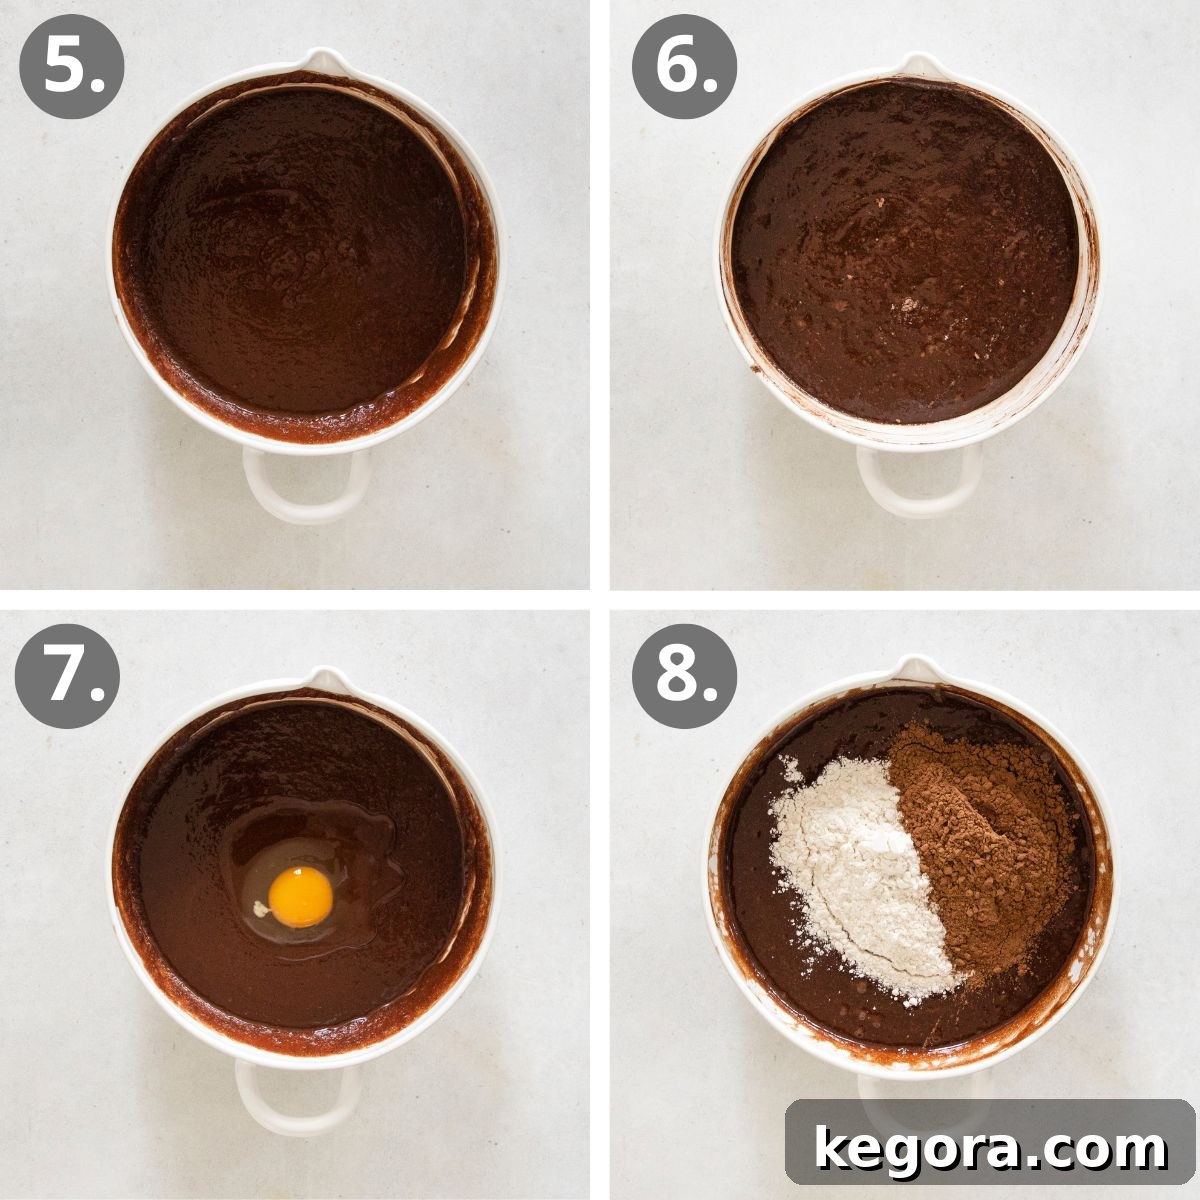
- Prepare Your Pan: Line a 9×13-inch baking pan with parchment paper, leaving an overhang on the sides to easily lift the brookies out later. Lightly spray the parchment with cooking spray.
- Melt Chocolate and Fats: In a separate medium microwave-safe bowl, combine the butter, neutral oil, and ¾ cup of chocolate chips. Microwave in 15-second intervals, stirring thoroughly after each interval, until the mixture is completely melted and smooth. This gradual melting prevents scorching and ensures a silky-smooth base for your brownies.
- Sweeten and Flavor: Whisk the granulated sugar, brown sugar, vanilla extract, and kosher salt into the warm chocolate mixture. Stir until everything is well combined and glossy.
- Add Eggs One by One: Incorporate the eggs one at a time, whisking well after each addition until it is fully blended into the batter. This gradual addition creates a stable emulsion, contributing to the brownie’s signature fudgy texture and shiny top crust.
- Fold in Dry Ingredients: Using a rubber spatula, gently mix in the gluten-free flour and unsweetened cocoa powder. Stir just until no streaks of dry ingredients remain and the batter is fully combined. Again, avoid overmixing to maintain a tender crumb.
Assembling and Baking Your Masterpiece
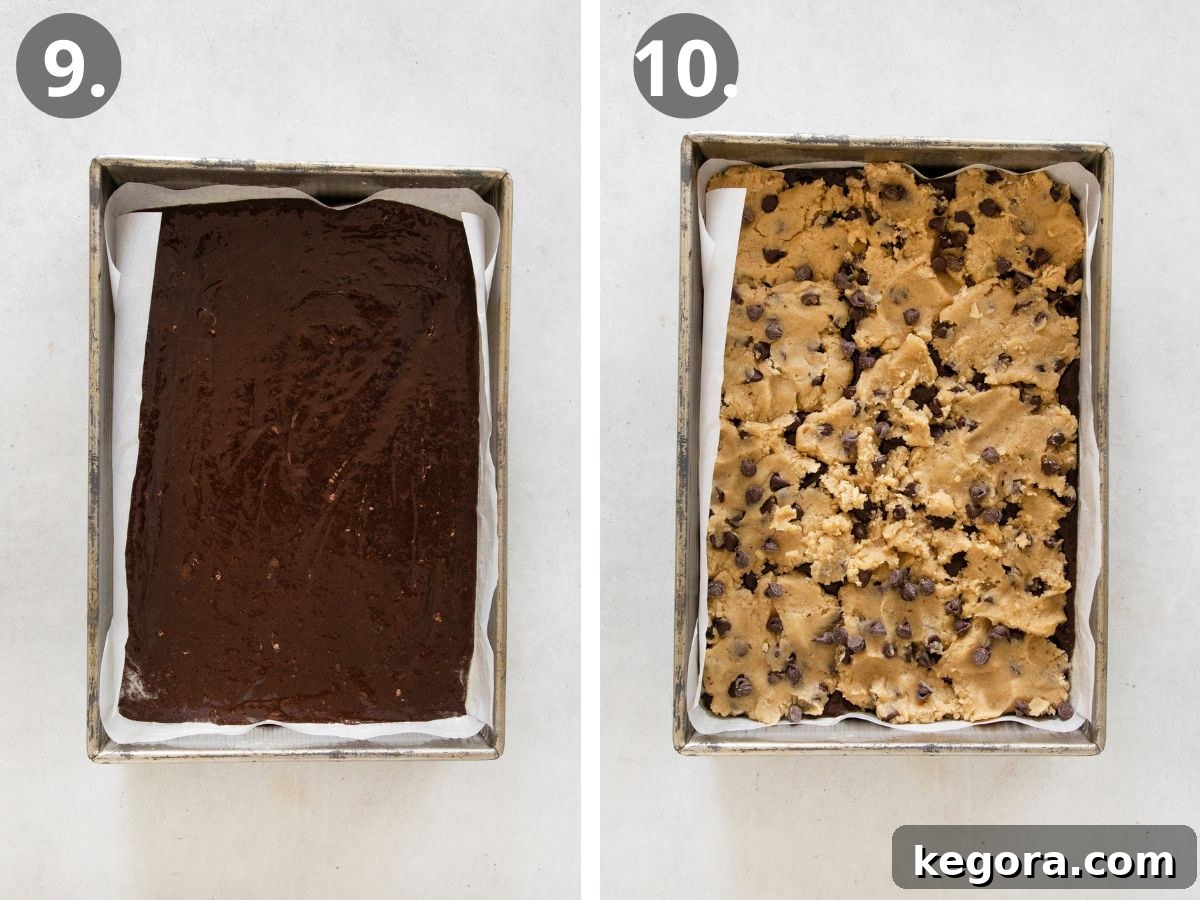
- The Brownie Base: Pour the prepared brownie batter evenly into your lined 9×13-inch baking pan. Smooth the top with the spatula. Place the pan in the refrigerator for 20 minutes to firm up slightly. This also happens to be an excellent time to preheat your oven to 350°F (175°C).
- The Cookie Topping: Remove the chilled cookie dough from the refrigerator. Scoop portions of the dough and, using your hands, gently flatten each scoop into a disc. Arrange these flattened cookie dough pieces over the chilled brownie layer, ensuring they cover the entire surface. If there are any small gaps, use leftover dough to fill them in. Finally, sprinkle the remaining ½ cup of chocolate chips over the cookie layer and gently press them into the dough for extra chocolatey goodness.
- Bake to Perfection: Transfer the pan to the preheated oven and bake for 30–35 minutes. You’ll know they’re ready when the bars are evenly puffed, the cookie layer is lightly golden brown on top, and a toothpick inserted into the brownie layer comes out with moist crumbs (not wet batter).
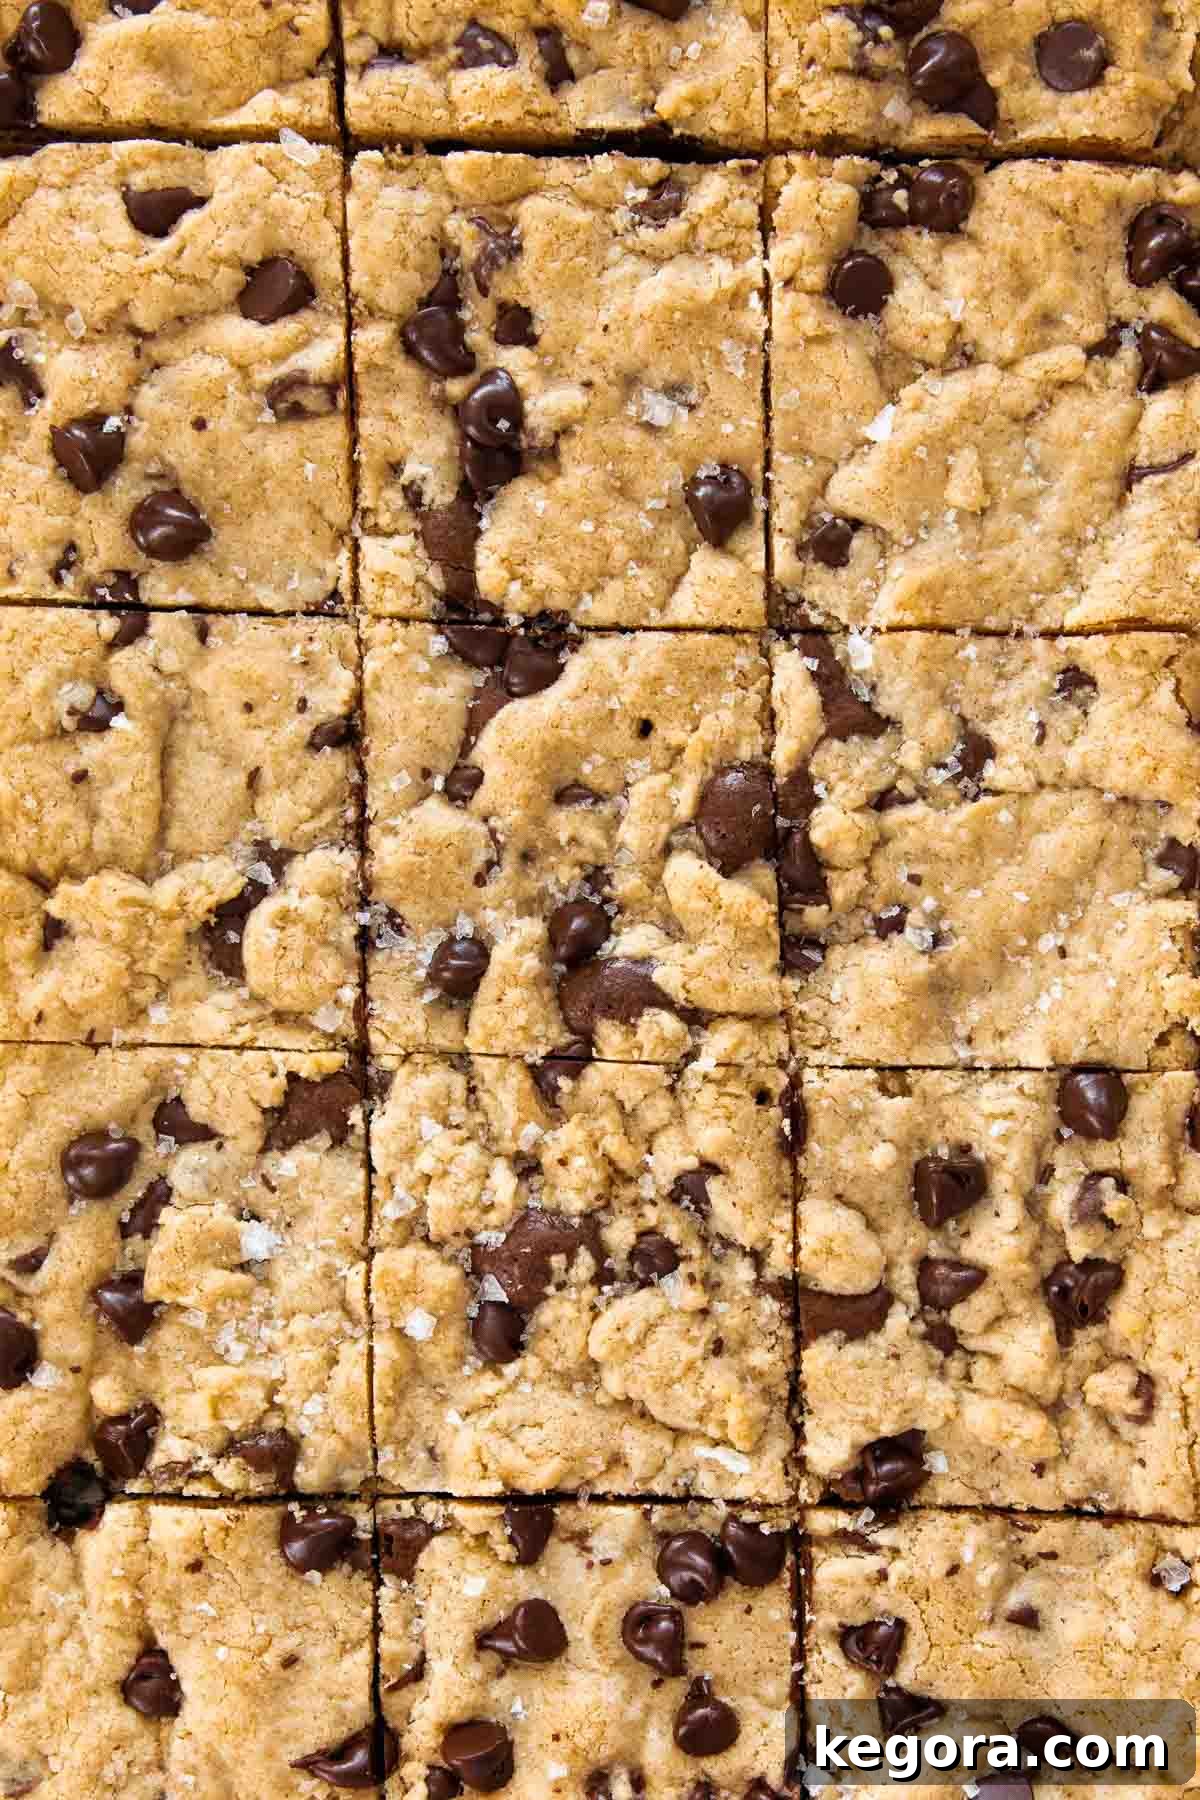
- Cool and Serve: Allow the brookies to cool in the pan for at least 15 minutes before attempting to slice them. This cooling time is crucial for the layers to set properly and prevent crumbling. Once cooled slightly, lift them out using the parchment paper overhang, slice into squares, and finish with a sprinkle of flaky salt. Enjoy warm or at room temperature!
MORE FAVORITE GLUTEN-FREE DESSERTS YOU’LL LOVE
Easy Gluten-Free Blondies
Easy Peanut Butter Bars
Easy Gluten-Free Chocolate Cake
Gluten-Free Chocolate Chip Cookies
Gluten-Free Brookies
These gluten-free brookies feature a fudgy brownie base topped with buttery chocolate chip cookie dough — truly a match made in dessert heaven. Each layer is meticulously crafted to ensure perfect texture and flavor. The brownie remains moist and rich while the cookie layer bakes up golden brown and chewy. Plus, this recipe makes a large 9×13 pan, making it ideal for parties, gatherings, or simply enjoying a delightful treat with loved ones. You’ll be amazed that these decadent bars are completely gluten-free!
Erin Collins
20 mins
30 mins
20 mins
1 hr 10 mins
24 servings
Print Recipe
Ingredients
For the Cookie Dough:
- ¾ cup (170g) butter, divided
- ¾ cup (160g) brown sugar
- ½ cup (100g) granulated sugar
- 1 large egg
- 1 large egg yolk
- 1 teaspoon vanilla extract
- ½ teaspoon baking powder
- ½ teaspoon kosher salt
- 1½ cups (225g) gluten-free measure-for-measure flour
- ¼ cup (25g) almond flour
- 1½ cups semi-sweet chocolate chips, divided (1 cup for dough, ½ cup for topping)
For the Brownie Batter:
- ½ cup (113g) butter
- ¼ cup (60ml) neutral oil (such as canola or vegetable oil)
- ¾ cup (127g) semi-sweet chocolate chips
- 1 cup (200g) granulated sugar
- ½ cup (106g) brown sugar
- 1 teaspoon vanilla extract
- ½ teaspoon kosher salt
- 3 large eggs
- ½ cup (75g) gluten-free measure-for-measure flour
- ½ cup (42g) unsweetened cocoa powder
- Flaky salt, for sprinkling (optional, but highly recommended)
Instructions
- For the cookie dough: In a medium bowl, add ½ cup of butter and microwave until melted. Cut the remaining ¼ cup of butter into small pieces and whisk into the melted butter until fully melted. This helps to cool the butter to the desired temperature.
- Add the brown sugar and granulated sugar and whisk until evenly combined. Whisk in the egg, egg yolk, and vanilla extract for 1-2 minutes until the mixture is light in color and slightly aerated.
- Whisk in the baking powder and salt.
- Using a rubber spatula, stir in the gluten-free flour and almond flour. When just a few streaks of dry flour remain, add 1 cup of the chocolate chips and stir until just combined. Be careful not to overmix the dough.
- Cover the bowl with plastic wrap and refrigerate the cookie dough while you prepare the brownie batter.
- For the brownie batter: Line a 9×13-inch baking pan with parchment paper, leaving an overhang on the sides, and spray with cooking spray.
- Add the butter, neutral oil, and ¾ cup of chocolate chips to a medium microwave-safe bowl. Microwave for 30 seconds, then stir. Repeat for 15-second intervals, stirring after each, until the chocolate and butter are completely melted and smooth.
- Add the granulated sugar, brown sugar, vanilla extract, and salt to the warm chocolate mixture. Whisk to combine until smooth and glossy.
- Add the eggs one at a time, whisking thoroughly after each addition until fully incorporated into the batter.
- Using a rubber spatula, mix in the gluten-free flour and cocoa powder until the batter is fully combined and no dry streaks remain.
- Pour the brownie batter into the prepared baking pan and smooth it into an even layer. Refrigerate the pan for 20 minutes while you preheat the oven.
- Preheat your oven to 350°F (175°C).
- Remove the chilled cookie dough from the refrigerator. Scoop portions of the dough and flatten them between your palms. Place these flattened dough pieces over the chilled brownie layer, arranging them across the surface to cover it completely. Use any remaining dough to fill in gaps. Sprinkle the remaining ½ cup of chocolate chips over the top and gently press them into the cookie dough.
- Bake for 30–35 minutes, or until the brookies are evenly puffed and the cookie layer is lightly golden brown on top. A toothpick inserted into the brownie layer should come out with moist crumbs, not wet batter.
- Let the brookies cool in the pan for at least 15 minutes before slicing. This allows the layers to set. Sprinkle with flaky salt before serving and enjoy!
Notes and Tips for Success
- Gluten-Free Flour Choice: For the best results, always use a high-quality gluten-free measure-for-measure flour blend that contains xanthan gum. This ensures the correct texture and structure for both layers.
- Making it Dairy-Free: To adapt this recipe for dairy-free diets, simply substitute vegan butter sticks (such as Miyoko’s Kitchen or Earth Balance baking sticks) for regular butter and use your favorite dairy-free chocolate chips. The results will still be wonderfully decadent!
- Nut-Free Option: If you need to make these brookies nut-free, replace the ¼ cup of almond flour in the cookie dough with an equal amount (¼ cup) of additional gluten-free measure-for-measure flour.
- To Make Ahead: These gluten-free brookies are at their peak flavor and texture within 1-2 days of baking. Bake, cool completely, then store in an airtight container or wrapped tightly in plastic wrap at room temperature.
- Storing Leftovers: Leftover brookies can be stored in an airtight container or wrapped in plastic wrap at room temperature for up to 3 days. For longer freshness, refrigerate for up to a week.
- Freezing for Later: For a convenient treat anytime, these brookies freeze beautifully. Once completely cooled, cut them into individual squares and store them in a freezer bag or an airtight container for up to 3 months. Thaw at room temperature for 30-60 minutes before enjoying.
Nutrition Information (Per Serving)
(Based on 24 servings)
|
Carbohydrates: 41 g
|
Protein: 4 g
|
Fat: 20 g
|
Saturated Fat: 10 g
|
Polyunsaturated Fat: 1 g
|
Monounsaturated Fat: 6 g
|
Trans Fat: 0.4 g
|
Cholesterol: 62 mg
|
Sodium: 189 mg
|
Potassium: 161 mg
|
Fiber: 3 g
|
Sugar: 30 g
|
Vitamin A: 354 IU
|
Calcium: 43 mg
|
Iron: 2 mg
There you have it – a comprehensive guide to baking the most delicious gluten-free brookies. This recipe is more than just a combination of two desserts; it’s an experience that brings joy to every bite. Perfect for any occasion, these brookies are sure to become a beloved staple in your gluten-free baking repertoire. Happy baking!