
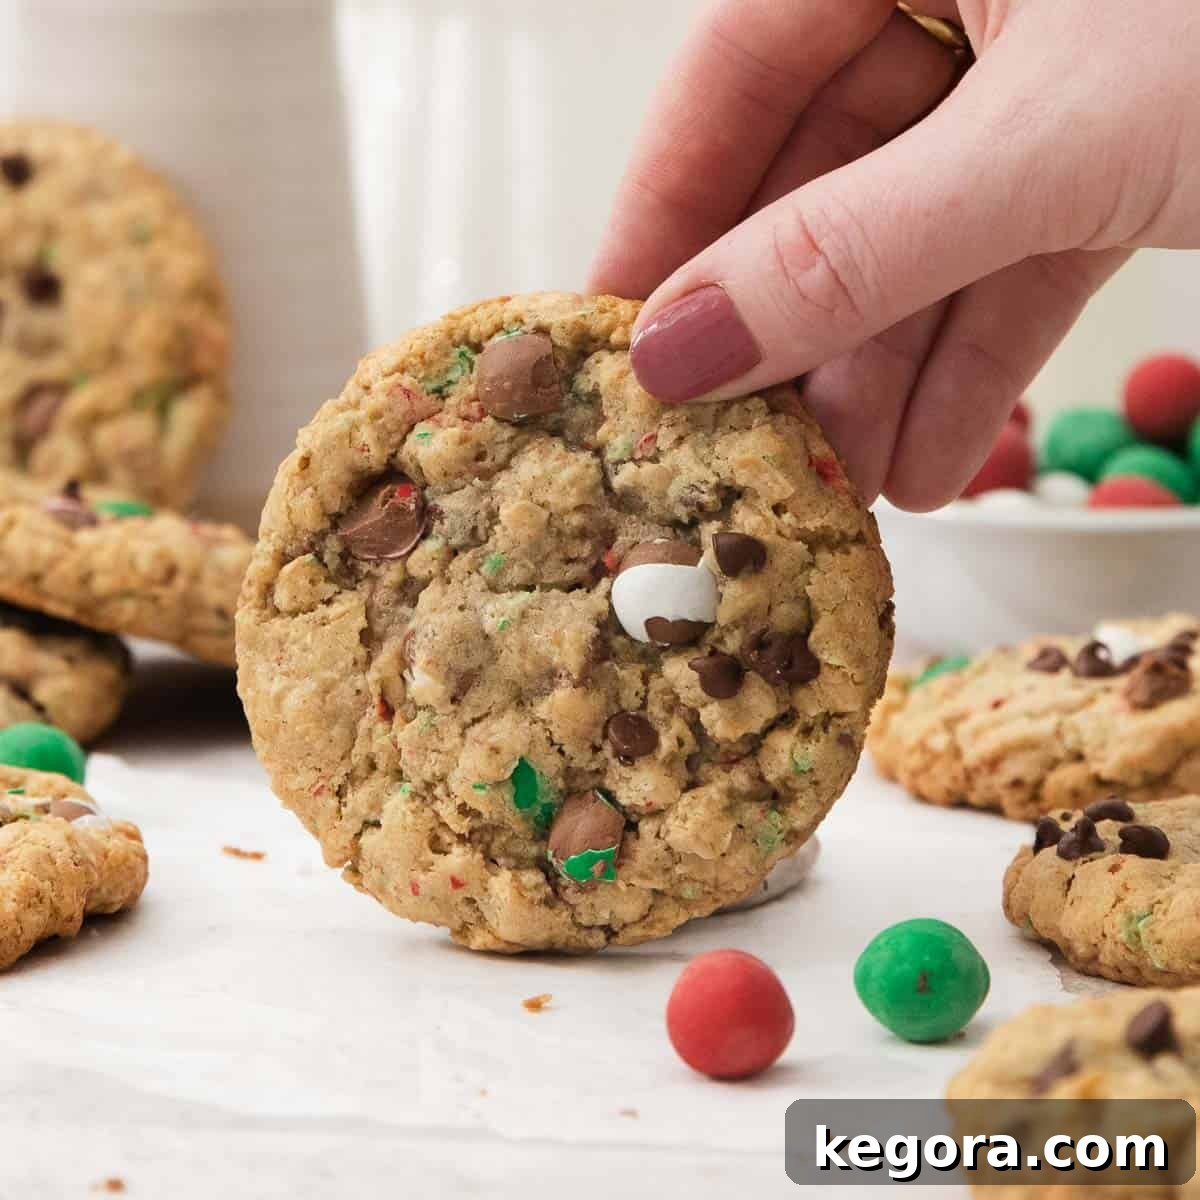
Erin’s Festive Cookie Creations: Introducing Gluten-Free Cadbury Snowball Cookies
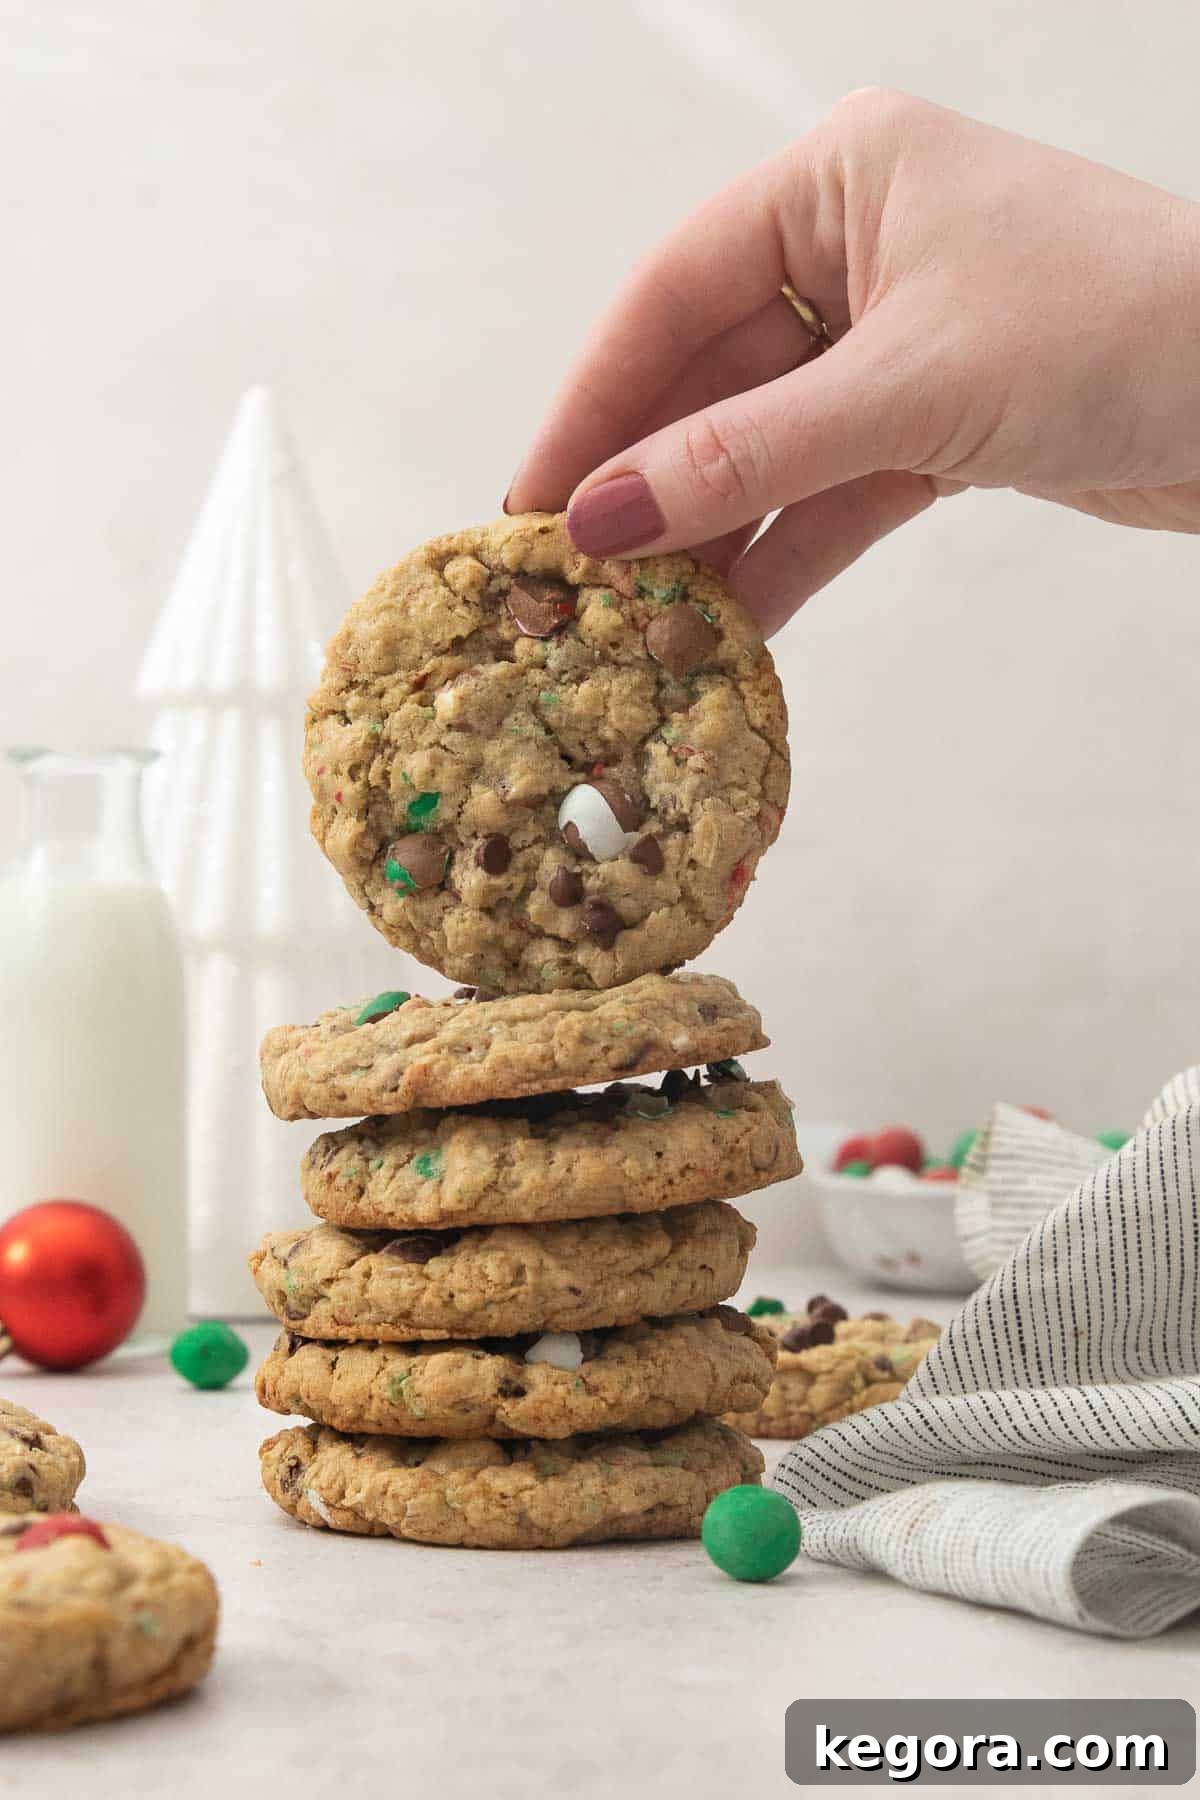
As the holiday season twinkles into view, it’s time to don your apron and fill your home with the irresistible aroma of freshly baked cookies! For years, my gluten-free Cadbury Egg Cookies have been an Easter sensation, loved by countless readers for their delightful taste and perfect texture. That beloved recipe, in turn, evolved from my foundational gluten-free oatmeal chocolate chip cookies – a true fan favorite for any occasion. So, when I discovered the enchanting Christmas edition of Cadbury eggs, the miniature Cadbury Mini Snowballs, I knew instantly that a festive, holiday-inspired version of these acclaimed cookies simply had to be created!
Imagine sinking your teeth into a cookie that perfectly balances wholesome oats with creamy, delightful chocolate. The charming addition of **Cadbury Mini Snowballs** introduces a unique textural element and a burst of festive sweetness that complements the rich, buttery oatmeal cookie base exquisitely. Each snowball melts slightly in the oven, creating pockets of smooth, white chocolatey goodness with a subtle crisp shell. What truly elevates these cookies, making them a standout holiday treat, is the thoughtful inclusion of **mini chocolate chips**. Their smaller size ensures a consistent and satisfying layer of **chocolate in every single bite**, guaranteeing that no mouthful is left wanting. It’s a double dose of chocolatey joy!
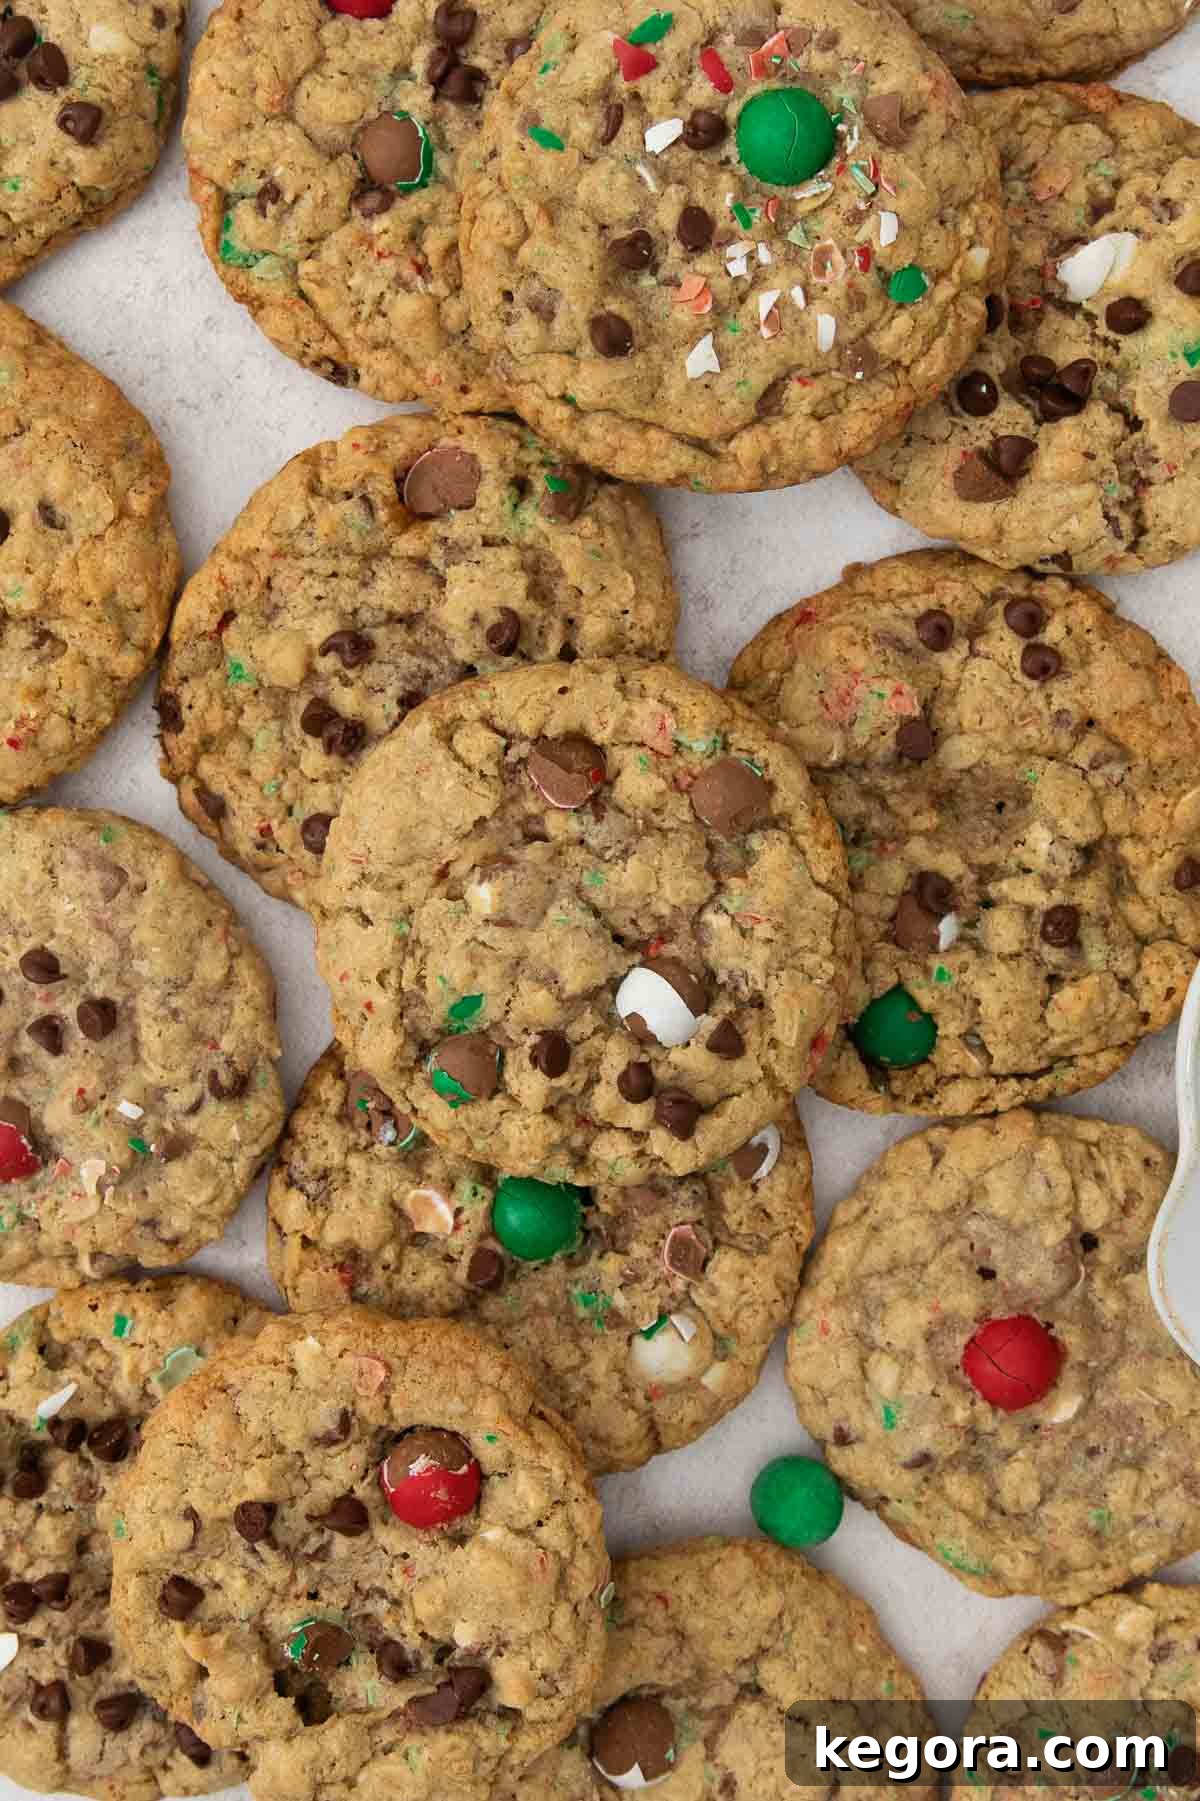
Why These Gluten-Free Cadbury Snowball Cookies Will Become Your Holiday Obsession: The magic lies in the foundational recipe – it’s undeniably SO good! These aren’t just any cookies; they boast an exquisite combination of textures and flavors that will tantalize your taste buds and leave you craving more. Each cookie features gloriously **crisp, golden edges** that give way to a wonderfully **soft and chewy center**. Nestled within are generous pockets of **gooey, melted chocolate** from both the mini chips and the Cadbury Snowballs, alongside a delightful, subtle crackle and creamy melt from the festive snowballs. It’s a symphony of sweet satisfaction that makes them utterly irresistible and a must-have for your holiday cookie platter.
Erin’s Expert Baking Tip: Embrace the Chill Time for Perfect Cookies! This isn’t just an optional step; it’s a game-changer for achieving cookie perfection and should never be skipped. Allowing the dough ample time to chill in the refrigerator serves multiple crucial purposes that directly impact the final texture and flavor. Firstly, it gives the gluten-free flours sufficient time to **fully hydrate**, preventing dry or crumbly cookies and leading to a more tender, cohesive crumb. Secondly, this resting period allows the various flavors to **develop deeply and meld together**, resulting in a richer, more nuanced taste profile. Most importantly, chilling firms up the butter and coconut oil in the dough, which is absolutely essential for preventing your cookies from spreading too much in the oven. This ensures they maintain their beautiful, thick, and wonderfully chewy shape, giving you bakery-quality results every time. Trust me, the wait is absolutely worth it for these sensational, perfectly formed cookies!
Looking to expand your repertoire of holiday treats? I’ve got you covered with even more delightful gluten-free Christmas recipes, perfect for gifting or sharing at festive gatherings. Be sure to explore these festive favorites: my elegant gluten-free thumbprint cookies with their jammy centers, the deliciously fudgy gluten-free chocolate crinkle cookies dusted with powdered sugar, classic gluten-free sugar cookies perfect for decorating with family, fun gluten-free monster cookies packed with delicious mix-ins, comforting gluten-free oatmeal raisin cookies, and the warmly spiced gluten-free oatmeal scotchies. Each recipe is crafted to bring joy to your holiday baking without compromising on taste or texture!
xoxo erin
Essential Ingredients for Perfect Gluten-Free Cadbury Snowball Cookies
Crafting these delectable Gluten-Free Cadbury Snowball Cookies requires a selection of quality ingredients, each playing a vital role in achieving their signature taste and texture. Below, I’ll share some insightful notes on the key components to ensure your baking experience is a resounding success. Understanding the purpose of each ingredient can elevate your baking prowess! For precise measurements and the complete ingredient list, remember you can always jump directly to the detailed recipe card located further down the page.
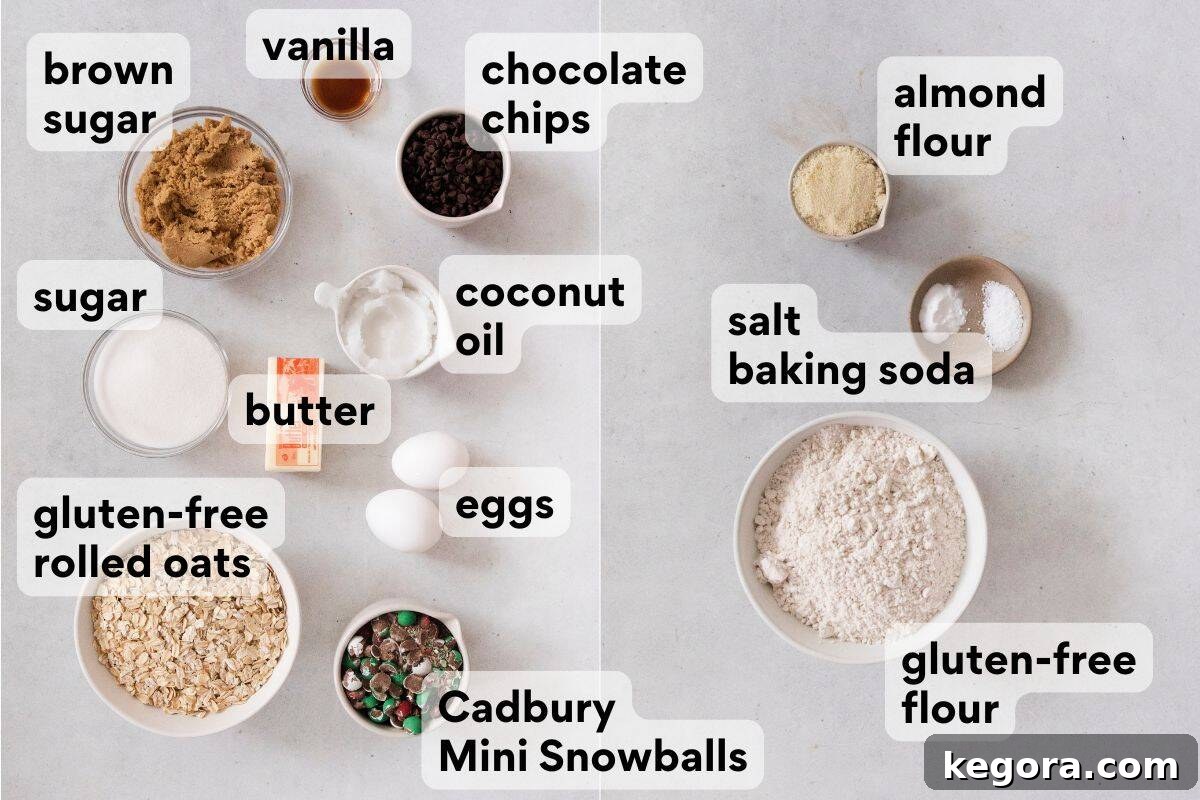
- High-Quality Gluten-Free Measure-for-Measure Flour: The foundation of any excellent gluten-free cookie is, of course, the flour blend. For consistently superb results, I cannot stress enough the importance of using a premium gluten-free all-purpose flour blend that specifically states it contains xanthan gum. Xanthan gum is crucial as it provides the elasticity and structure often missing in gluten-free baking, mimicking the role of gluten and preventing a crumbly texture. My personal go-to, and one I highly recommend for its reliability and texture, is King Arthur Gluten-Free Measure-for-Measure Flour. Using a reputable brand will make all the difference in achieving cookies that are tender, not brittle, and hold their shape beautifully.
- Fine Almond Flour: A secret weapon in many of my beloved baked goods, a modest addition of almond flour elevates these cookies to another level. It contributes a wonderful richness and depth of flavor, adding a subtle nuttiness that perfectly complements the other ingredients. Beyond taste, almond flour aids in achieving that coveted perfectly golden-brown finish on your cookies, enhancing their visual appeal and promoting a more tender, moist crumb. Make sure to use blanched, super-fine almond flour for the best results, as it blends seamlessly into the dough.
- Certified Gluten-Free Rolled Oats: While oats are naturally free from gluten, they are unfortunately highly susceptible to cross-contamination during the harvesting and processing stages if handled in facilities that also process wheat, barley, or rye. To ensure these cookies remain truly gluten-free and safe for those with sensitivities or Celiac disease, it is absolutely essential to use certified gluten-free old-fashioned rolled oats. These oats will provide the classic chewy texture and hearty, wholesome flavor characteristic of traditional oatmeal cookies without any dietary concerns.
- Unsalted Butter (Room Temperature): Butter is fundamental for flavor and texture in these cookies, providing richness and helping with spread. Using unsalted butter allows you to control the salt content in the recipe precisely. Crucially, ensure your butter is at **room temperature**, meaning it’s soft enough to indent with your finger but not melted or greasy. This consistency is key for creaming it properly with the sugars, creating tiny air pockets that contribute to the cookies’ light and fluffy texture, which is vital for a soft center.
- Coconut Oil (Room Temperature): This ingredient works in harmony with the butter to achieve the ideal cookie texture. The coconut oil is instrumental in contributing to those wonderfully crisp edges that snap just right, while simultaneously ensuring the cookie centers remain incredibly soft and delightfully chewy. Like butter, it should be at room temperature; if yours is solid, gently warm it until it’s just softened but not liquid. This balance of fats creates a cookie that truly stands out in both taste and texture, providing depth that butter alone might not achieve.
- Granulated Sugar & Brown Sugar: This dynamic duo of sugars is carefully selected for both flavor and texture. Granulated sugar contributes to the crispness of the cookie edges and helps the cookies spread slightly for that classic cookie shape. Brown sugar, with its molasses content, adds a deep, caramel-like flavor and ensures a moist, chewy interior. The combination creates a beautifully balanced sweetness and a complex texture profile that makes these cookies so addictive and gives them their signature comforting taste.
- Large Eggs: Eggs act as a vital binder, providing structure and essential moisture to the cookie dough. They help emulsify the fats and liquids, creating a smooth and cohesive dough that bakes evenly. Using large eggs is standard for most baking recipes and ensures the correct moisture balance, contributing to the perfect chewiness.
- Pure Vanilla Extract: A staple in almost all cookie recipes, vanilla extract enhances and rounds out all the other flavors, adding a warm, aromatic depth that is essential for a truly delicious cookie. Don’t skimp on quality here; pure vanilla extract makes a noticeable difference in the overall flavor profile and aroma of your baked goods.
- Cadbury Mini Snowballs: The undisputed star of our holiday show! These delightful miniature Cadbury chocolates, with their crisp candy shell and creamy white chocolatey center, are what give these cookies their unique festive twist and a wonderful textural contrast. Crushing them slightly before adding them ensures they distribute evenly throughout the dough and provide a delightful “crackle” and melty surprise in every bite, truly embodying the spirit of the season.
- Mini Chocolate Chips: To further amplify the chocolatey goodness and ensure no bite is left wanting, mini chocolate chips are incorporated. Their smaller size means they spread more uniformly throughout the dough, guaranteeing a rich pocket of melted chocolate in almost every morsel. You can use semi-sweet, milk, or even dark chocolate mini chips based on your preference, adding another layer of indulgent flavor to these already decadent cookies.
Crafting Perfection: A Step-by-Step Guide to Gluten-Free Cadbury Snowball Cookies
Embark on the joyful journey of baking these irresistible Gluten-Free Cadbury Snowball Cookies! While the complete, detailed instructions with exact timings and temperatures are conveniently available in the full recipe card below, this overview provides a clear, concise roadmap to guide you through each essential stage of the baking process, ensuring your success from start to finish. Follow these steps for truly delightful results.
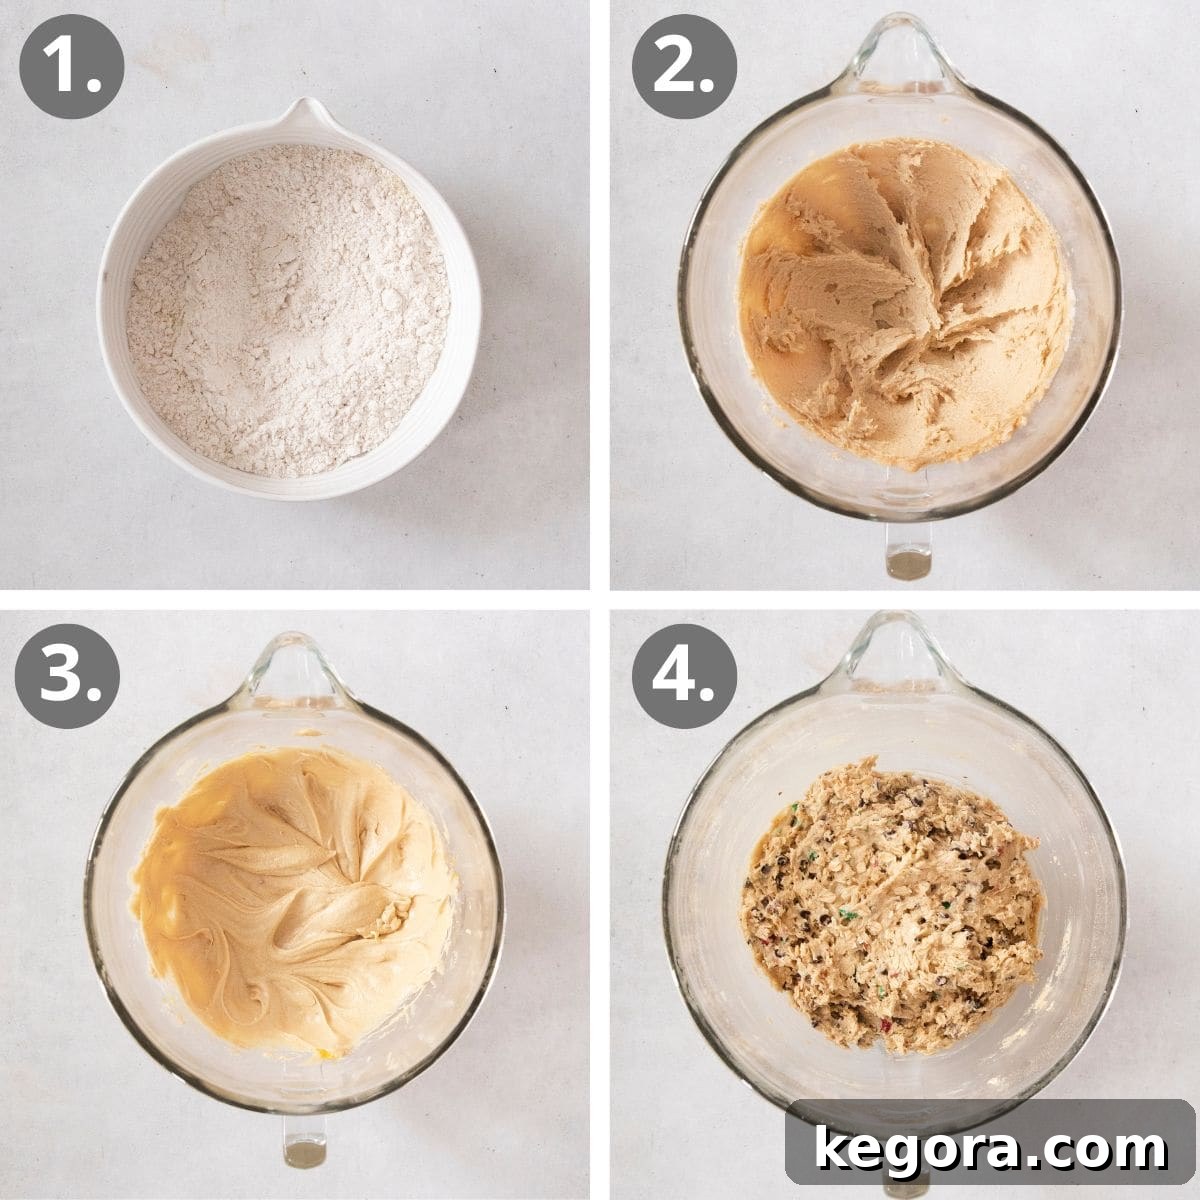
Step 1: Prepare Your Dough with Precision. The secret to truly exceptional cookies begins with meticulous dough preparation. Start by gathering all your dry ingredients – the gluten-free flour blend, almond flour, kosher salt, and baking soda – and whisk them thoroughly together in a medium-sized bowl. This crucial step ensures that leavening agents and flavor enhancers are evenly distributed throughout the dough. In a separate, larger bowl (preferably the bowl of a stand mixer fitted with a paddle attachment, though a hand mixer works wonderfully too), combine your wet ingredients: the softened butter, coconut oil, brown sugar, and granulated sugar. Cream these together on medium-high speed until the mixture becomes wonderfully light, fluffy, and visibly pale, typically taking about 2-3 minutes. This creaming process incorporates air, contributing to the cookies’ final tender texture. Once perfectly creamed, add the eggs one at a time and then the vanilla extract, mixing until everything is thoroughly combined, then pause to scrape down the sides and bottom of the bowl to ensure all ingredients are incorporated. Finally, with your mixer running on low speed, gradually add the dry mixture to the wet ingredients, mixing just until a cohesive dough forms. Avoid overmixing, as this can lead to tough cookies.
Step 2: Fold in the Festive Delights and Chill. With your base dough ready, it’s time to introduce the stars of the show! Gently fold in the certified gluten-free rolled oats, the delightfully crunchy **Cadbury Mini Snowballs** (I recommend crushing them slightly for better distribution and a more even crackle in every bite), and a generous helping of mini chocolate chips. I specifically favor mini chocolate chips because their smaller size allows them to disperse more uniformly throughout the dough, ensuring that every single bite delivers that perfect burst of chocolatey goodness. Once everything is beautifully incorporated, cover the bowl tightly with plastic wrap and transfer it to the refrigerator. Allow the dough to chill for a minimum of 1 hour, or even up to 3 days for maximum flavor development and optimal baking performance. This chilling period is non-negotiable for achieving cookies that hold their shape, prevent excessive spreading, and develop rich, nuanced flavors – patience truly pays off here!
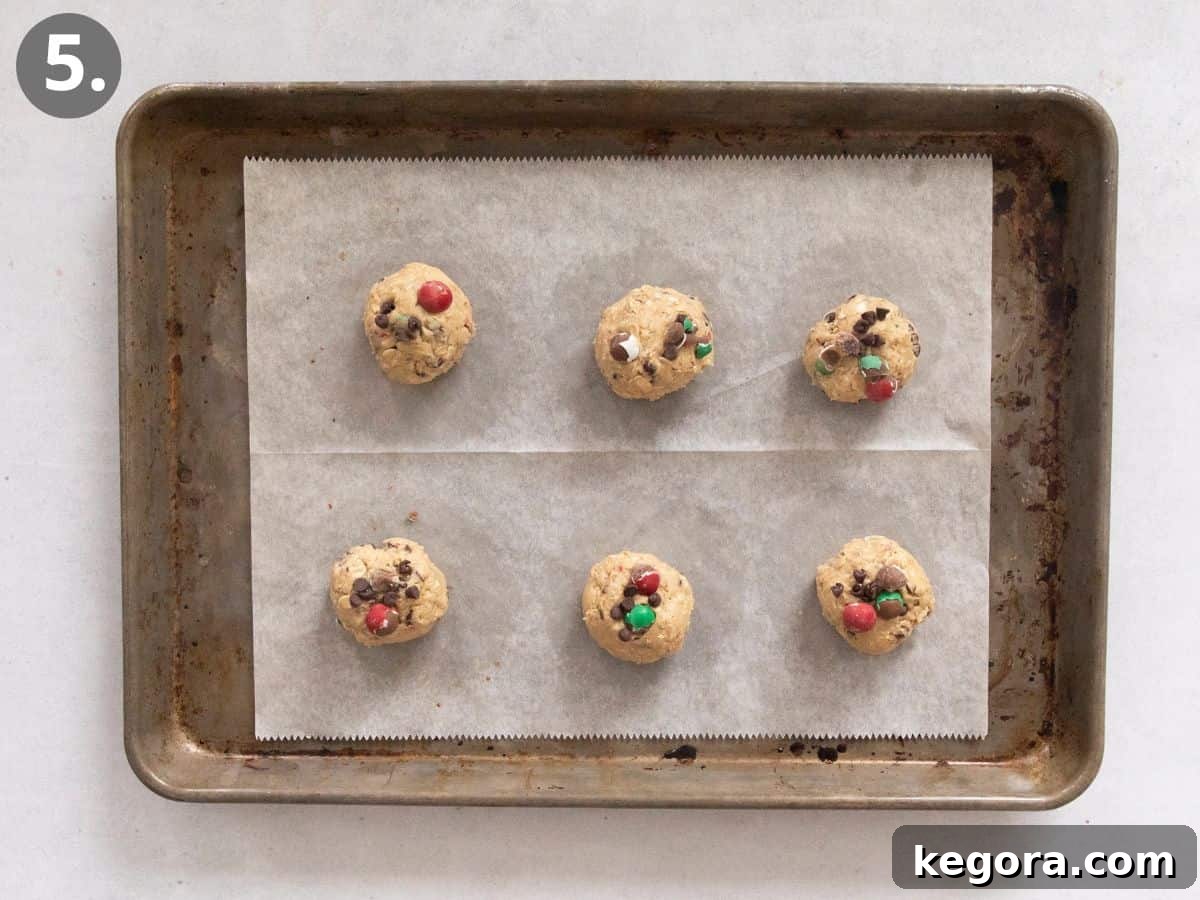
Step 3: Bake to Golden Perfection and Cool. Once your dough has sufficiently chilled and your oven is preheated to 350°F (175°C), it’s time to shape and bake! Using a cookie scoop or two spoons, portion the dough into uniform round balls, approximately 2 tablespoons each. Arrange them on a baking sheet lined with parchment paper or a silicone baking mat, ensuring they are spaced about 2 inches apart to allow for proper spreading without merging. Bake for 11-13 minutes, keeping a close eye on them. The tell-tale sign of readiness is when the edges turn a beautiful golden brown and appear set, while the centers still look slightly soft and puffy. Don’t be tempted to overbake; the middles will continue to set as they cool on the baking sheet, ensuring that coveted soft and chewy texture. Remove the baking sheets from the oven and let the cookies cool on the sheets for about 5 minutes before carefully transferring them to a wire rack to cool completely. This initial cooling on the hot tray helps them firm up without becoming brittle. Once cooled, these delightful cookies are ready to be devoured and enjoyed – happy baking!
Tips for Gluten-Free Cookie Success
- Accurate Measuring: Especially with gluten-free flours, precise measuring is crucial for consistent results. Use a kitchen scale for flour, if possible, for the most accuracy. If you don’t have a scale, use the “spoon and level” method: spoon flour into a measuring cup and level off with a straight edge, rather than scooping directly from the bag, which can pack too much flour.
- Room Temperature Ingredients: Ensure butter, coconut oil, and eggs are at proper room temperature (softened but not melted for fats; not cold for eggs). This allows for better emulsification of ingredients and a smoother, more uniform dough, leading to a superior cookie texture and even baking.
- Don’t Skimp on Chilling: As mentioned earlier, chilling the dough is paramount for these cookies. It prevents excessive spreading, deepens flavor, and ensures an ideal chewy texture. If your kitchen is particularly warm, or if you prefer a thicker cookie, you might even consider chilling the dough longer than the minimum specified.
- Customize Your Mix-ins: Feel free to experiment and make these cookies uniquely yours! While Cadbury Mini Snowballs are divine, you could also try chopped white chocolate, other types of nuts (if not nut-free), dried cranberries, or even a dash of peppermint extract or orange zest for an extra festive touch. Just ensure the total quantity of mix-ins remains similar.
- Storage Solutions: For optimal freshness, store your baked cookies in an airtight container at room temperature. They will retain their wonderful flavor and deliciously chewy texture for up to 5 days, making them perfect for sharing throughout the week or packing in lunchboxes.
MORE GLUTEN-FREE CHRISTMAS COOKIES TO LOVE
Gluten-Free Ginger Snaps
Gluten-Free White Chocolate Cranberry Oatmeal Cookies
Gluten-Free Iced Oatmeal Cookies
Gluten-Free Peppermint Sour Cream Sugar Cookies
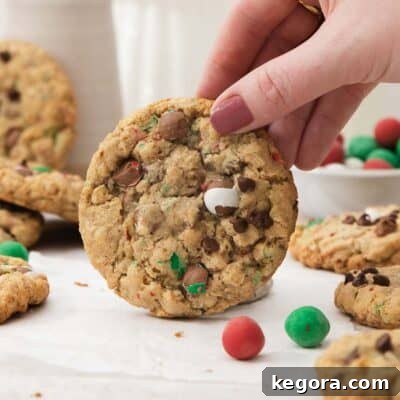
Gluten-Free Cadbury Snowball Cookies: The Ultimate Holiday Treat!
Each cookie promises crisp edges, a wonderfully chewy center, and an irresistible combination of gooey chocolate and a subtle, delightful crunch from the snowballs. They are utterly irresistible and perfect for sharing (or not!).
Comments
Ingredients
Dry Ingredients
- 1½ cups (225g) high-quality gluten-free measure-for-measure flour blend
- ¼ cup (25g) almond flour (super-fine)
- ¾ teaspoon kosher salt
- ½ teaspoon baking soda
Wet & Mix-in Ingredients
- ½ cup (113g) unsalted butter, at room temperature
- ¼ cup (56g) coconut oil, at room temperature (softened, not liquid)
- 1 cup (213g) light brown sugar (packed)
- ½ cup (100g) granulated sugar
- 2 large eggs
- 2 teaspoons pure vanilla extract
- 2¼ cups (191g) certified gluten-free old fashioned rolled oats
- 1 cup (200g) crushed Cadbury Mini Snowballs
- ½ cup (90g) mini chocolate chips
Instructions
-
In a medium bowl, thoroughly whisk together the gluten-free flour blend, almond flour, kosher salt, and baking soda. Set aside, ensuring an even distribution of ingredients.
-
In the bowl of a stand mixer fitted with a paddle attachment (or using a hand mixer), cream together the softened butter, coconut oil, brown sugar, and granulated sugar on medium-high speed until the mixture is light, fluffy, and visibly pale, about 2-3 minutes. This step is crucial for incorporating air into your cookie dough.
-
Add the large eggs one at a time, mixing well after each addition until fully incorporated. Then stir in the pure vanilla extract. Remember to scrape down the sides and bottom of the bowl frequently to ensure all ingredients are well combined.
-
With the mixer running on low speed, slowly add the dry ingredients to the wet ingredients. Mix until just combined, being careful not to overmix, which can lead to a tough cookie texture. Scrape down the sides and bottom of the bowl again, and give it one final quick mix to ensure full incorporation.
-
Gently fold in the certified old-fashioned rolled oats, the crushed Cadbury Mini Snowballs, and the mini chocolate chips until they are evenly distributed throughout the dough. Avoid overmixing once the add-ins are introduced.
-
Cover the bowl tightly with plastic wrap and refrigerate the cookie dough for at least 1 hour. For richer flavor and improved texture, you can chill the dough for up to 3 days. This crucial step helps prevent spreading during baking.
-
When ready to bake, preheat your oven to 350°F (175°C). Line large baking sheets with parchment paper or silicone baking mats to prevent sticking.
-
Scoop the cookie dough into uniform round balls, using about 2 tablespoons of dough per ball. Place them on the prepared baking sheet, ensuring they are spaced approximately 2 inches apart to allow for proper spreading during baking.
-
Bake for 11-13 minutes, or until the edges are beautifully golden brown and set, but the centers still appear slightly soft. Remember, the cookies will continue to firm up as they cool on the baking sheet.
-
Remove the baking sheets from the oven and allow the cookies to cool on the sheets for 5 minutes before carefully transferring them to a wire rack to cool completely. Enjoy your freshly baked gluten-free Cadbury Snowball cookies – they are worth the wait!
Chef’s Notes & Customization Tips
Dairy-Free Adaptation: To make these festive cookies suitable for a dairy-free diet, simply substitute the unsalted butter with your favorite dairy-free stick butter alternative (ensure it’s designed for baking, not just a spread). For the mix-ins, use dairy-free mini chocolate chips. In place of Cadbury Mini Snowballs, which typically contain dairy, you can use additional dairy-free chocolate chips, or crushed dairy-free peppermint candies for a different but equally festive crunch!
Nut-Free Version: If you need to make these cookies entirely nut-free, it’s an easy adjustment! Omit the almond flour completely and substitute it with an additional ¼ cup of your chosen gluten-free measure-for-measure flour blend. Always double-check ingredient labels to ensure all components, especially chocolate chips and candy, are free from nuts or nut cross-contamination if allergies are severe.
Making Ahead & Freezing Dough: This cookie dough is perfect for meal prepping your holiday baking! You can prepare the dough up to 3 days in advance and store it tightly covered in the refrigerator. If the chilled dough becomes too firm to scoop easily, let it sit at room temperature for about 15-30 minutes until it’s workable. For longer storage, portion the dough into balls and freeze them in an airtight container or freezer bag for up to 1 month. When ready to bake from frozen, simply add an extra 1-2 minutes to the suggested baking time – no need to thaw beforehand!
Storage of Baked Cookies: Once baked and completely cooled, store your delightful cookies in an airtight container at room temperature. They will retain their wonderful flavor and deliciously chewy texture for up to 5 days, making them perfect for sharing throughout the week, gifting, or simply enjoying with a cup of coffee.
Freezing Baked Cookies: To extend their shelf life and have treats on hand whenever a craving strikes, baked cookies can also be frozen! Once completely cooled, arrange them in a single layer on a baking sheet and freeze until solid. Then, transfer the frozen cookies to an airtight freezer-safe container or bag, separating layers with parchment paper to prevent sticking. They can be stored for up to 1 month. To enjoy, simply thaw them at room temperature for 15-30 minutes, and they’ll be as good as freshly baked.