
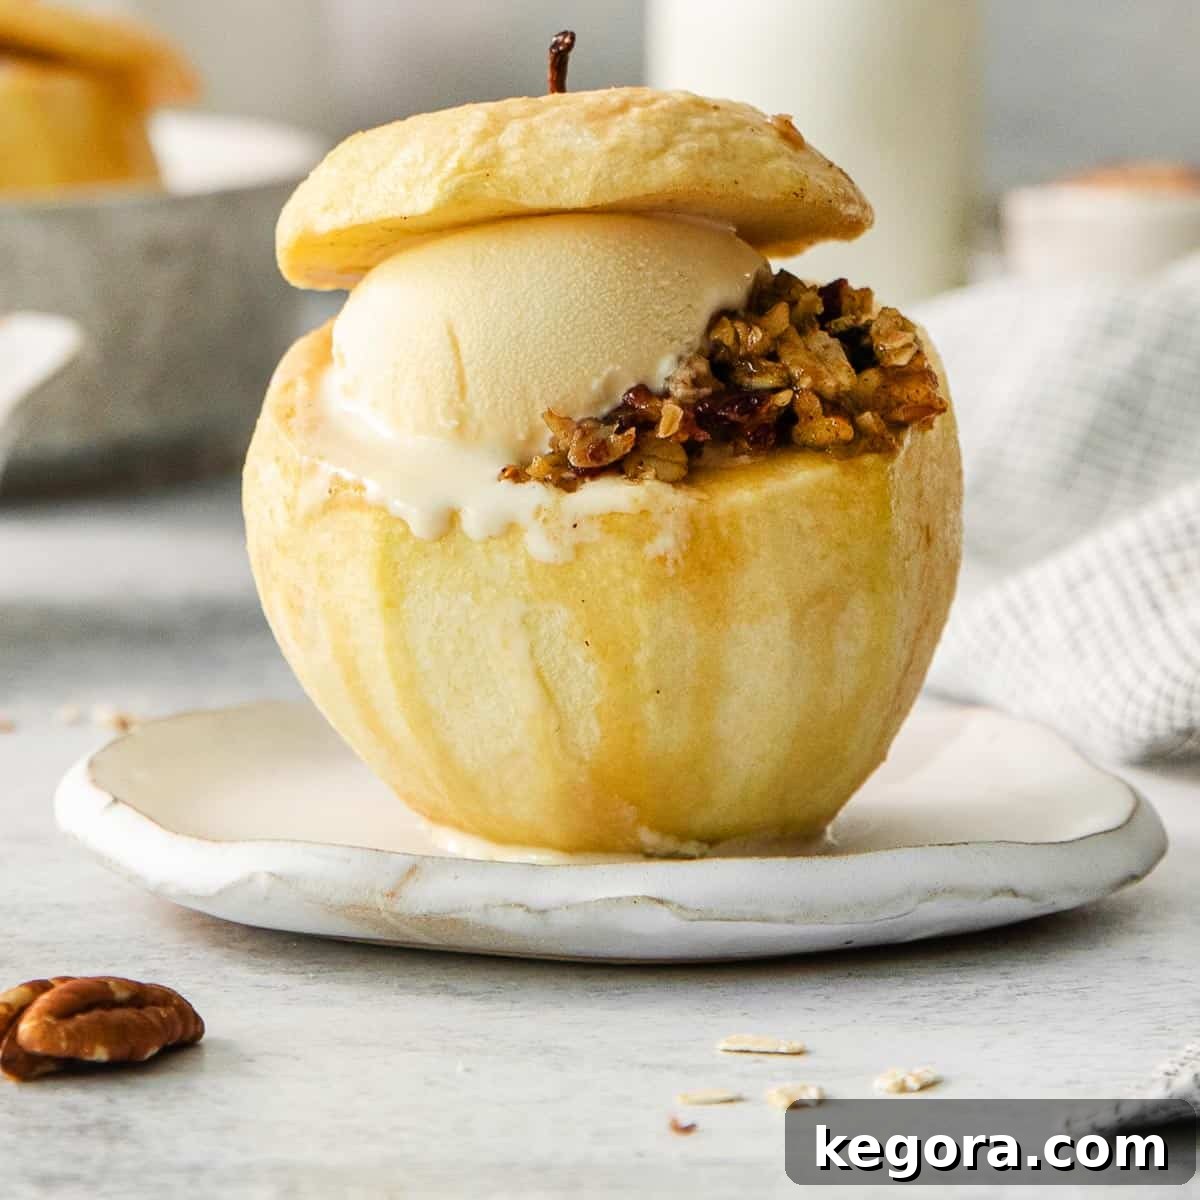
Easy Gluten-Free Baked Apples with Pecan-Oat Filling & Maple Sauce – A Perfect Fall Dessert
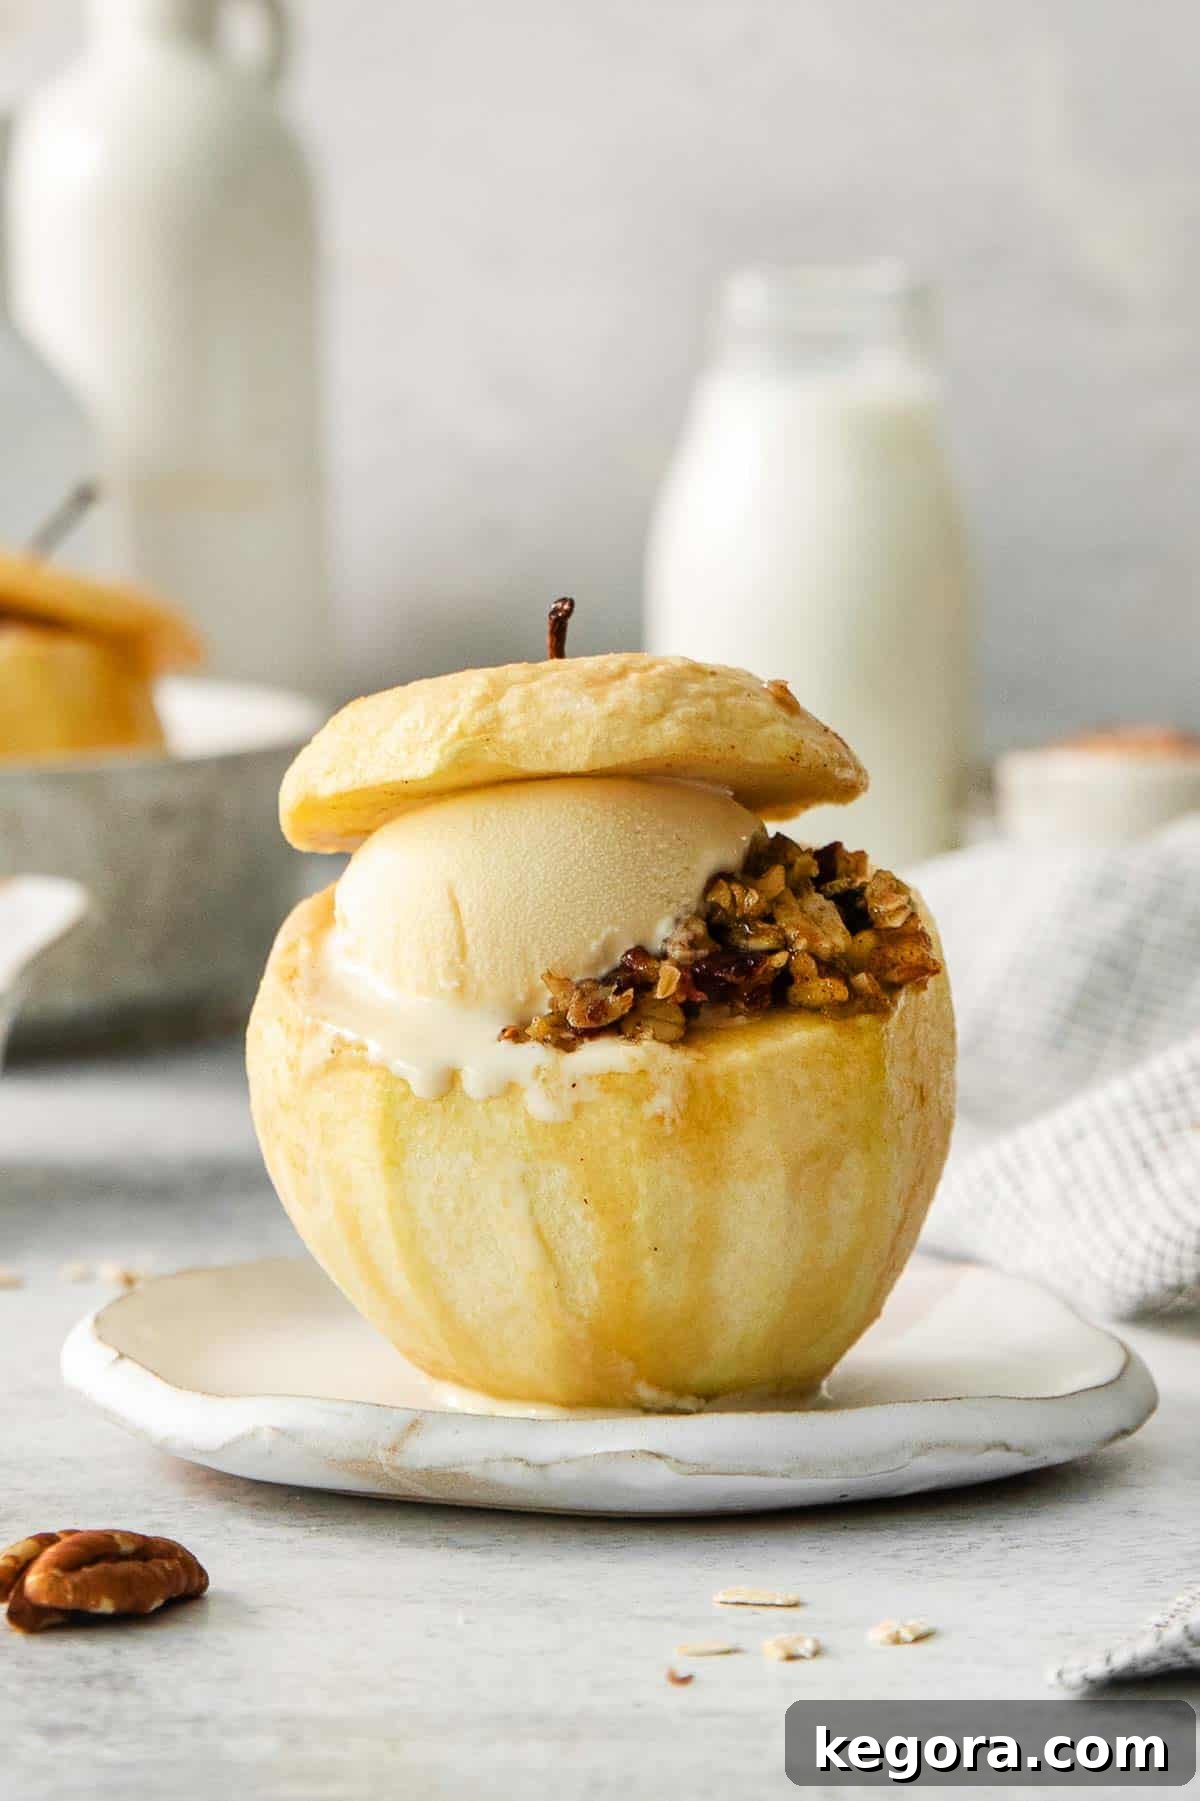
As autumn leaves begin to turn and the air grows crisp, nothing quite captures the essence of the season like fresh, sweet apples. While classic apple desserts like cobblers, crisps, and pies are always beloved, sometimes a simpler, more elegant treat is desired. That’s where these delightful Baked Apples come in! They offer all the comforting flavors of fall without the need for a crust or intricate dough prep. Imagine tender, juicy apples generously filled with a heartwarming medley of brown sugar, oats, and pecans, then beautifully crowned with creamy vanilla ice cream and a luscious maple sauce. It’s a truly special autumn dessert that’s not only easy to prepare but also naturally gluten-free.
This recipe transforms humble apples into a sophisticated yet straightforward fall delight. It’s designed for those moments when you crave something warm, sweet, and satisfying, but don’t want to spend hours in the kitchen. With minimal effort, you can create an impressive dessert that tastes like it came straight from a gourmet bakery. The blend of textures – the soft baked apple, the slightly chewy filling, the crunchy pecans, and the melting ice cream – creates an unforgettable experience. Plus, the aromatic spices and bright orange zest infuse every bite with an incredible depth of flavor that truly embodies the spirit of autumn.
Why You’ll Love These Baked Apples
These baked apples aren’t just a dessert; they’re an experience. Here’s why this recipe will become your new fall favorite:
- Effortless Elegance: This dessert looks incredibly impressive, making it perfect for fall gatherings, holiday meals, or simply a cozy night in. Despite its sophisticated appearance, it’s remarkably simple to prepare, requiring minimal hands-on time.
- Naturally Gluten-Free: For those with gluten sensitivities or anyone looking for lighter options, this recipe is a dream come true. By using certified gluten-free oats, you ensure a safe and delicious treat for everyone.
- Harmonious Flavor Profile: The magic truly happens with the rich combination of ingredients. Softened butter, vibrant orange zest, and a blend of warm spices like cinnamon and nutmeg work together to enhance the natural sweetness and tartness of the apples, creating a complex and utterly delicious flavor.
- The Ultimate Topping Experience: A scoop of velvety vanilla ice cream melting over the warm apple, paired with a generous drizzle of homemade maple sauce, takes this dessert from delicious to absolutely divine. The contrast of hot and cold, creamy and crunchy, is simply irresistible.
- A Lighter Alternative: If you’re looking for a dessert that feels indulgent but isn’t overly heavy, these baked apples are ideal. They provide the comfort of a traditional apple dessert without the dense crust or excessive richness.
Top Tips for Perfect Baked Apples
Achieving perfectly baked apples is simple with a few key considerations:
- Apple Selection is Crucial: Opt for firm, tart apple varieties that hold their shape well during baking. Granny Smith apples are an excellent choice, offering a bold, tangy flavor that beautifully balances the sweetness of the filling. Other great options include Honeycrisp, Pink Lady, or Braeburn. Avoid softer, mealier apples like Red Delicious, as they tend to become mushy.
- To Peel or Not to Peel? I always recommend peeling the apples beforehand. This ensures a uniformly soft and enjoyable bite, eliminating any tough skin that might detract from the tender texture of the baked fruit.
- Don’t Skip the Orange Zest: This small addition makes a big difference! Fresh orange zest introduces a bright, citrusy note that beautifully complements the warm spices and prevents the dessert from being overly sweet. Its aromatic oils awaken the palate and elevate the overall flavor.
- Toast Your Pecans: Briefly toasting the pecans before chopping and adding them to the filling deepens their nutty flavor and adds a delightful crunch. You can do this quickly in a dry skillet over medium heat or in the oven while it preheats.
- Basting for Best Flavor: Regularly basting the apples with the maple sauce during baking is essential. This infuses them with rich maple flavor and helps create a lovely caramelized exterior, ensuring every part of the apple is infused with deliciousness.
If you’re an apple enthusiast, you might also love exploring other gluten-free apple recipes like our gluten-free apple crisp, a comforting gluten-free apple crumble recipe, a delightful gluten-free apple cake, and our fluffy gluten-free apple muffins. Each offers a unique way to savor the season’s bounty.
xoxo Erin
Featured Comment
From Jess: “These were absolutely fantastic and I cannot thank you enough for sharing your expert tips and tricks! I loved these apples so much!“
Read 3 more comments
For more delightful dessert inspirations, you might also enjoy these recipes for poached pears in apple cider, our versatile homemade apple compote, or another version of our dairy-free gluten-free apple crisp.
Key Ingredients You’ll Need for Baked Apples
Creating these sensational baked apples starts with choosing high-quality ingredients. Here are some detailed notes on the key components of this recipe. Find the exact measurements in the recipe card below.
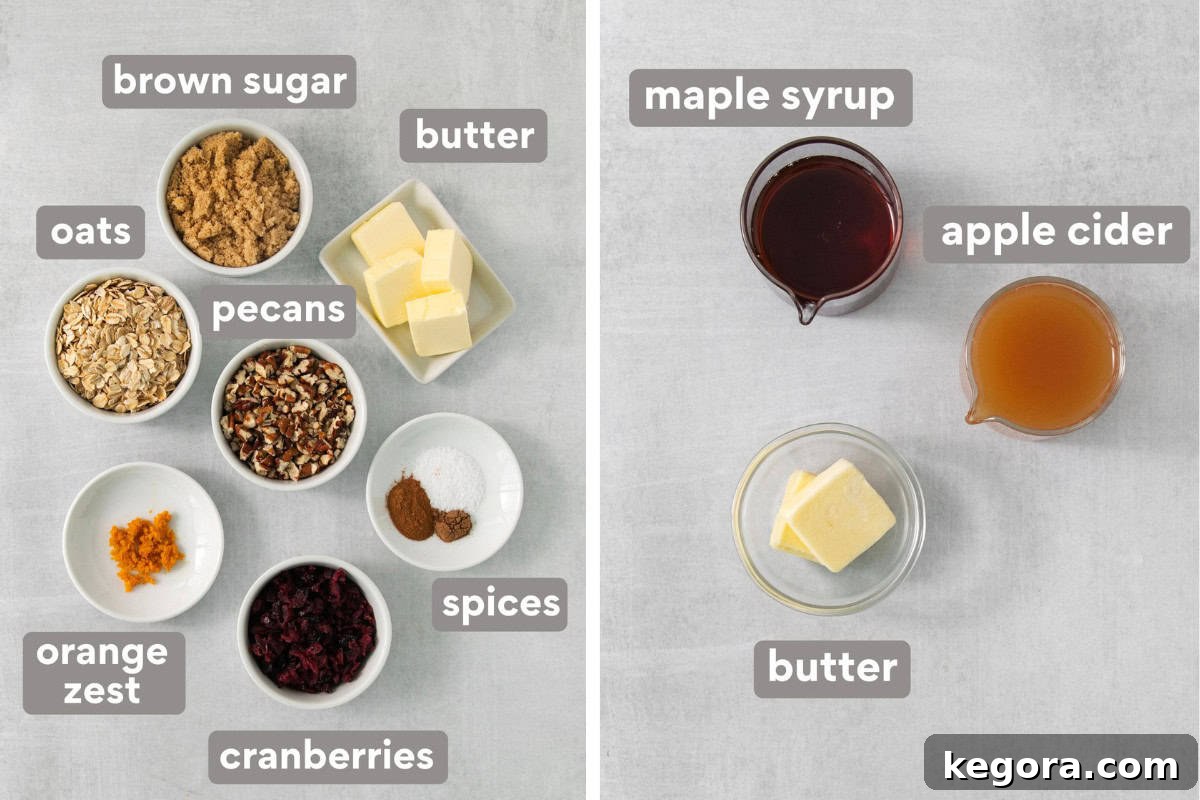
- Apples: As mentioned, Granny Smith apples are my top recommendation for their tartness and firm texture, which ensures they hold up beautifully during baking without becoming mushy. If you prefer a slightly sweeter baked apple or can’t find Granny Smiths, other excellent firm varieties include Honeycrisp, Pink Lady, or Braeburn.
- Pecans: These provide a wonderful nutty flavor and a satisfying textural contrast to the soft apples. For the best flavor, toast your pecans lightly before chopping them. This simple step unlocks their full aromatic potential. If you’re short on time, many grocery stores offer pre-chopped, toasted pecans. For a nut-free version, simply substitute with an equal amount of additional oats.
- Cranberries: Finely chopped dried cranberries add a delightful burst of tartness and a chewy texture to the filling. They complement the apples and spices perfectly. If you’re mindful of sugar intake, unsweetened dried cranberries are a great alternative. You can also experiment with other dried fruits like raisins or chopped apricots.
- Orange Zest: This ingredient is a true game-changer! Fresh orange zest introduces a bright, citrusy aroma and flavor that cuts through the richness of the butter and sugar, balancing the spices beautifully. Don’t be tempted to skip this; it truly elevates the dish.
- Oats: Rolled oats bind the filling together and add a wholesome texture. If you need this recipe to be strictly gluten-free, ensure you use certified gluten-free rolled oats. Regular oats may contain traces of gluten due to cross-contamination during processing.
- Maple Syrup: The sauce is where high-quality maple syrup shines. I always advocate for real, Grade A maple syrup for its rich, complex flavor. Artificial syrups simply won’t deliver the same depth and natural sweetness that makes this sauce so incredible.
- Butter: Both in the filling and the sauce, butter adds richness and helps create that irresistible caramelized flavor. Use softened butter for the filling to ensure it blends smoothly.
- Brown Sugar: This adds a deep, molasses-like sweetness and helps create a wonderfully moist and tender filling.
- Cinnamon & Nutmeg: These classic fall spices are essential for that warm, comforting aroma and taste. Feel free to adjust the quantities to your preference or add a pinch of allspice or ginger for extra warmth.
- Apple Cider: Used in the sauce, apple cider adds another layer of apple flavor and helps create a thin, flavorful liquid for basting. Choose unsweetened, natural apple cider for the best results.
Expand your repertoire of gluten-free apple desserts with our recipes for gluten-free apple galette, a moist gluten-free applesauce cake, irresistible gluten-free apple cider donuts, and a classic gluten-free apple pie recipe. You might also enjoy these festive gluten-free white chocolate cranberry cookies.
How to Make Delicious Baked Apples: A Step-by-Step Guide
Creating these impressive baked apples is easier than you think! Follow this simple overview to guide you through the process. For the full, detailed instructions and measurements, please refer to the recipe card below.
1. Prepare Your Apples: The Foundation of Flavor
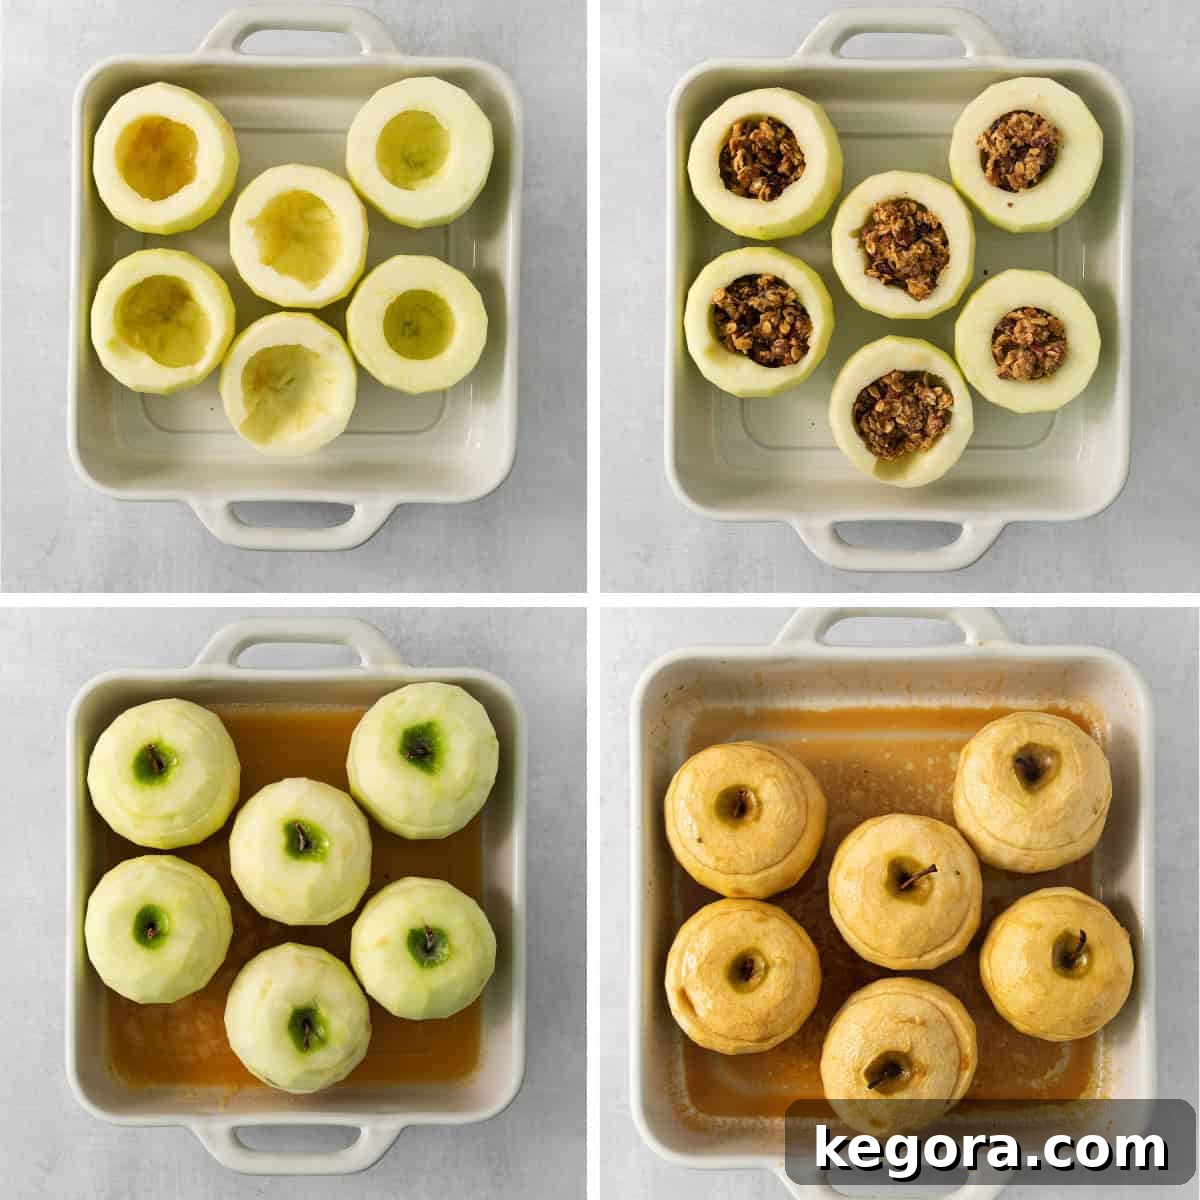
Start by preheating your oven to 375°F (190°C) and lightly greasing a 9×13 inch baking dish. Choose a dish that comfortably fits all 6 apples without them touching, allowing for even baking. To ensure your apples sit flat and stably in the dish, carefully shave a thin slice off the bottom (blossom end) of each apple. Next, cut off the top ½ inch from the stem end of each apple and set these “caps” aside – you’ll use them later as little lids. Finally, peel the apples entirely for a smooth, tender texture. Then, using a melon baller or a small paring knife, carefully core each apple, creating a nice well about 1½ inches deep. Be cautious not to cut all the way through to the bottom. Once cored, place the prepared apples into your baking dish.
2. Craft the Irresistible Filling
In a medium bowl, combine all the filling ingredients: softened butter, brown sugar, finely chopped dried cranberries, toasted and finely chopped pecans, gluten-free rolled oats, fresh orange zest, salt, ground cinnamon, and ground nutmeg. Mix everything together thoroughly until it’s well combined and forms a moist, fragrant mixture. Spoon this delicious filling generously into each cored apple, packing it in firmly and mounding any extra on top for an abundant look. Once filled, place the reserved apple tops back onto each apple like charming little hats, which helps to steam the apples and keep the filling moist.
3. Bake to Golden Perfection
In a separate small bowl, whisk together the ingredients for the delectable maple sauce: melted butter, real maple syrup, and apple cider. Pour this aromatic sauce evenly into the baking dish, around the base of the apples. Place the dish in your preheated oven and bake for approximately 35-40 minutes. The key to rich flavor and a beautiful glaze is regular basting: every 10 minutes, gently spoon the sauce from the bottom of the dish over the tops of the apples. This not only keeps them moist but also helps them caramelize beautifully. If the sauce begins to thicken too much during baking, simply add a few tablespoons of extra apple cider to thin it out. The apples are perfectly done when they can be easily pierced with a toothpick or a small knife, but still maintain their shape and aren’t mushy.
4. Serve and Savor
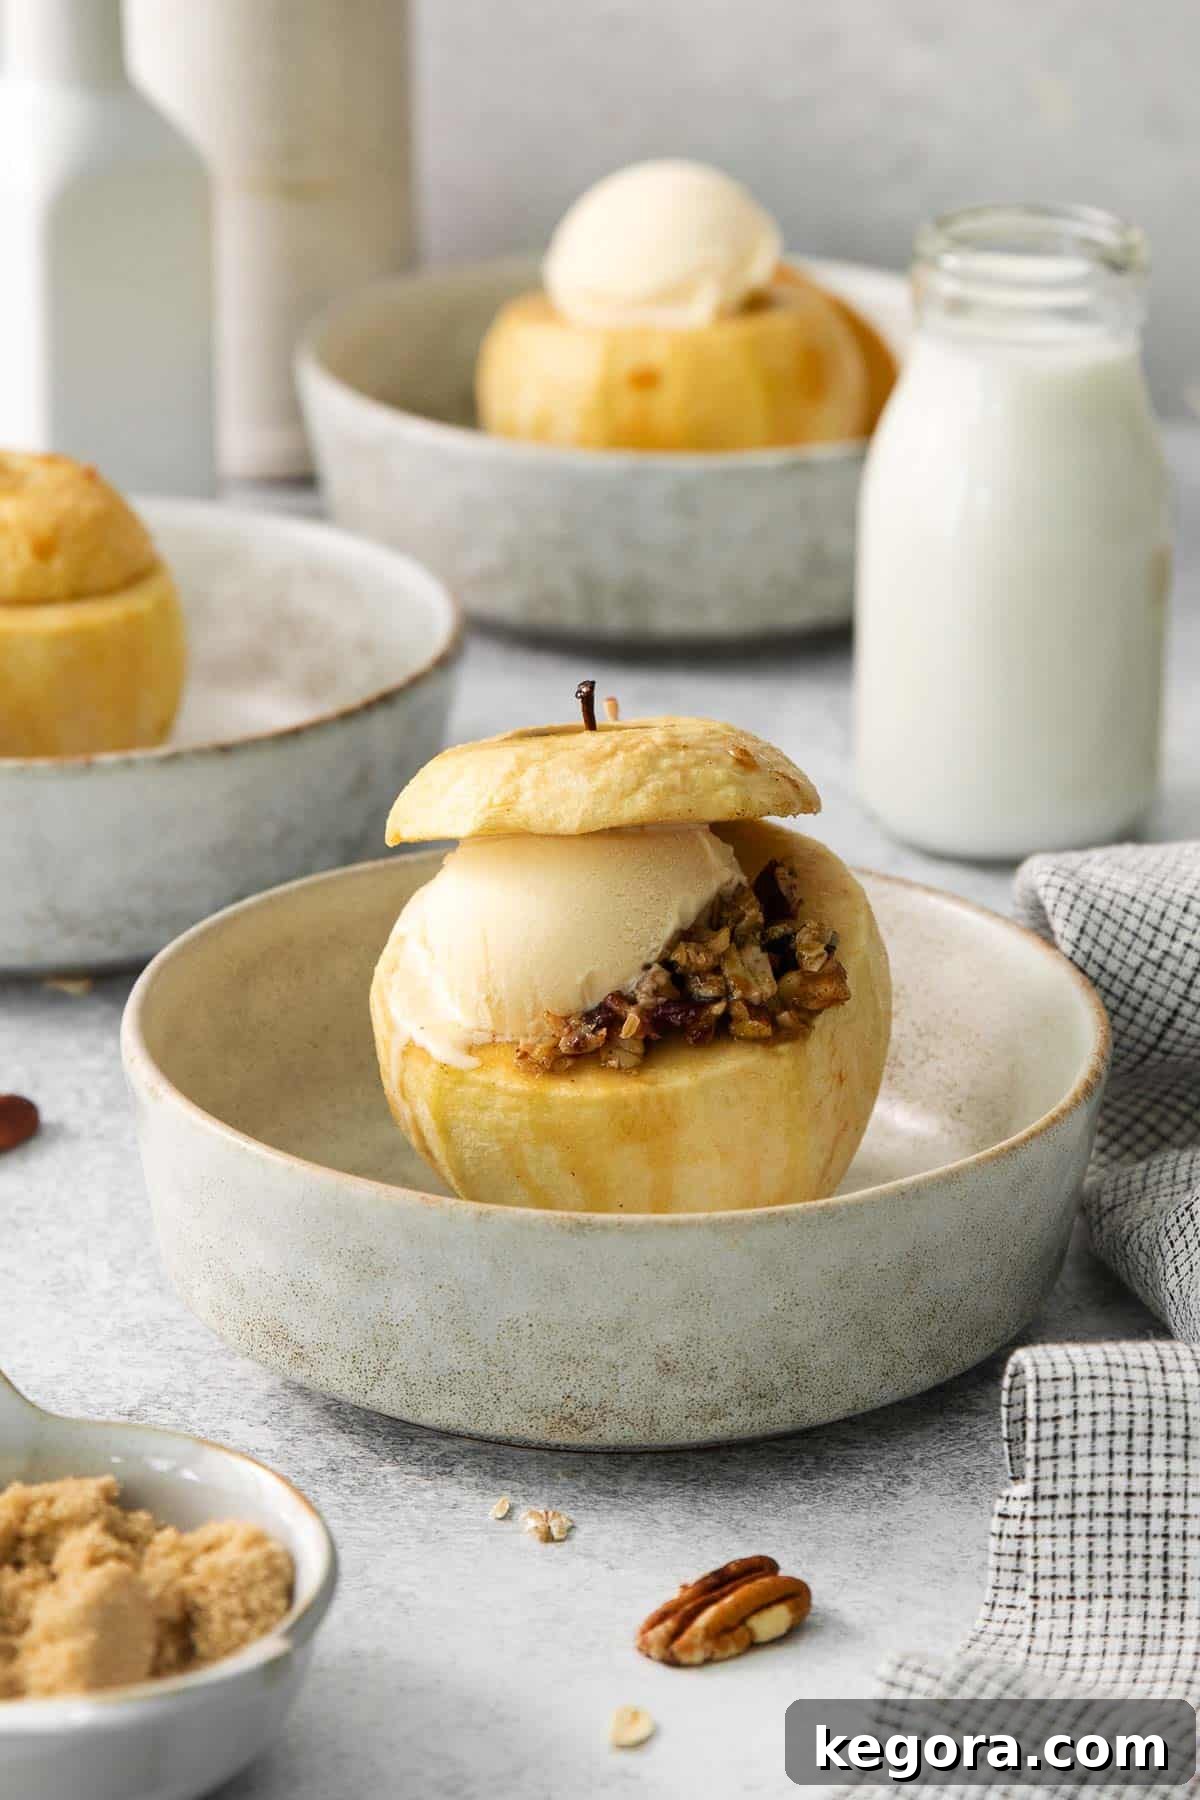
Once baked to perfection, remove the apples from the oven. Let them cool slightly for a few minutes before serving. Spoon a generous amount of the warm, caramelized maple sauce over each apple. For the ultimate indulgence, add a large scoop of premium vanilla ice cream right on top, allowing it to slowly melt into the warm apple and sauce. The contrast of warm apple and cold, creamy ice cream is simply heavenly. These baked apples are best enjoyed warm, allowing all the wonderful flavors and textures to truly shine. Enjoy this comforting and elegant fall dessert!
Recipe Card: Baked Apples (Gluten-Free!)
Baked Apples (Gluten-Free!)
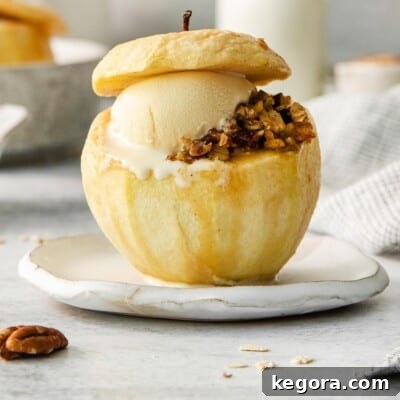
These warm, juicy baked apples are filled with brown sugar pecan filling, then topped with a scoop of vanilla ice cream and caramel sauce. It’s the perfect EASY fall dessert!
Author: Erin Collins
Prep Time: 20 mins
Cook Time: 40 mins
Total Time: 1 hr
Servings: 6 servings
View Comments
Print Recipe
Ingredients
For the Apples:
- 6 large Granny Smith apples
For the Filling:
- 4 tablespoons butter, softened
- ⅓ cup brown sugar
- ⅓ cup dried cranberries, finely chopped
- ⅓ cup toasted pecans, finely chopped
- ⅓ cup gluten-free rolled oats
- 1 teaspoon orange zest
- ½ teaspoon salt
- ½ teaspoon ground cinnamon
- ¼ teaspoon ground nutmeg
For the Sauce:
- 2 tablespoons butter, melted
- ⅓ cup maple syrup
- ½ cup apple cider
Instructions
- Preheat the oven to 375°F (190°C). Lightly grease a 9×13 inch baking dish, or any dish that can fit 6 apples without them touching.
PREPARE THE APPLES
- Shave a thin slice off the bottom (blossom end) of 6 apples to allow them to sit flat. Cut top ½ inch off the stem end and set aside for topping the apples later.
- Peel the apples completely.
- Core the apples using a melon baller or a small paring knife. (A melon baller often works best for a clean well!) Be careful not to cut all the way through to the bottom. The opening should be about 1½ inches wide. Place the prepared apples in the baking dish.
MAKE THE FILLING
- In a medium bowl, mix together the softened butter, brown sugar, dried cranberries, toasted pecans, gluten-free rolled oats, orange zest, salt, ground cinnamon, and ground nutmeg until well combined.
- Spoon the filling generously inside each apple, packing it in and mounding any extra on top. Top each filled apple with the reserved apple caps.
BAKE THE APPLES
- In a small bowl, whisk together the melted butter, maple syrup, and apple cider for the sauce. Pour this sauce into the baking dish around the apples.
- Bake for 35-40 minutes, basting the apples with the sauce every 10 minutes to infuse flavor and promote caramelization. The apples are done when they can be easily poked with a toothpick but still hold their shape. (If the sauce gets too thick, add a few tablespoons of extra apple cider.)
- Serve the warm apples immediately, topped with a spoonful of the delicious maple sauce and a scoop of vanilla ice cream. Enjoy!
Notes
- Gluten-Free: Always ensure you use certified gluten-free rolled oats to keep this recipe suitable for a gluten-free diet.
- Dairy-Free: To make this recipe dairy-free, simply substitute the butter in both the filling and the sauce with your preferred dairy-free butter alternative.
- Nut-Free: If you need a nut-free option, replace the ⅓ cup of pecans with an additional ⅓ cup of gluten-free rolled oats. This will maintain texture and absorbency in the filling.
- To Make Ahead: You can prepare the apples and filling in advance. Core and peel the apples, then stuff them with the prepared filling. Cover the filled apples and refrigerate for up to 4 hours before baking. Prepare the maple sauce just before you’re ready to bake, then proceed with the baking instructions.
- To Store Leftovers: Store any leftover baked apples in an airtight container in the refrigerator for up to 3 days. To reheat, warm them in the oven at 375°F (190°C) for 10-15 minutes, or gently microwave until heated through.
- Freezing: Freezing is generally not recommended for baked apples, as it can significantly alter the texture of the apples, making them mushy upon thawing. It’s best enjoyed fresh or stored in the fridge for a few days.
Nutrition
Calories: 376kcal | Carbohydrates: 61g | Protein: 2g | Fat: 16g | Saturated Fat: 8g | Polyunsaturated Fat: 2g | Monounsaturated Fat: 5g | Trans Fat: 0.5g | Cholesterol: 30mg | Sodium: 292mg | Potassium: 318mg | Fiber: 6g | Sugar: 49g | Vitamin A: 453IU | Vitamin C: 9mg | Calcium: 55mg | Iron: 1mg
This post was originally published in September 2023. It was updated with new photos, expanded instructions, and enhanced tips in October 2025 to bring you the best possible recipe experience.