
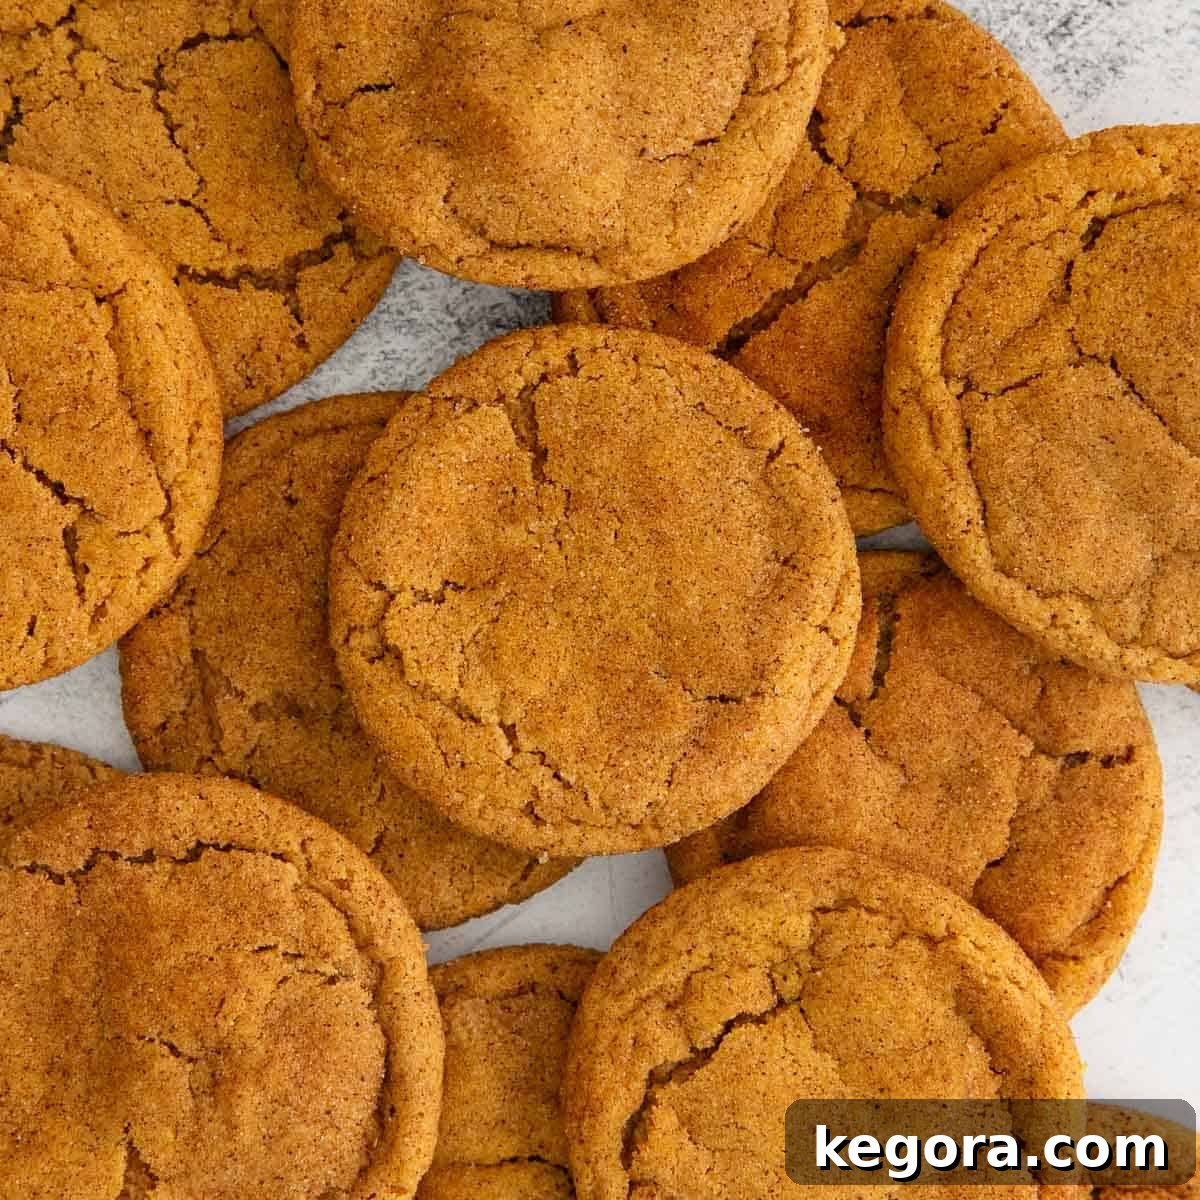
Erin’s Ultimate Chewy Gluten-Free Pumpkin Snickerdoodles: A Fall Favorite
Welcome to my kitchen! If you’ve been on the hunt for the **perfect gluten-free pumpkin cookie**, one that delivers an incredible chewiness rather than a crumbly, cake-like texture, then your search ends here. I’m thrilled to share my carefully crafted recipe for **chewy gluten-free pumpkin snickerdoodles**, designed to be a standout treat for the autumn season and beyond. This recipe transforms traditional pumpkin cookies into something truly special, featuring rich brown butter, classic pumpkin spice, and that coveted soft, chewy center with crisp, golden edges.
My culinary journey led me to perfect this recipe, ensuring every bite is a delightful experience. Through dedicated testing and a few unique techniques, I’ve managed to create a **gluten-free cookie** that rivals any traditional bakery offering. You’ll find these cookies are not only **naturally gluten-free** but also packed with a depth of flavor that will make them an instant hit with everyone, regardless of dietary preferences.
Erin’s Recipe Rundown at a Glance
- Texture: Prepare for pure delight! These cookies are gloriously **chewy**, never cakey, boasting beautifully crisp golden edges and irresistibly gooey centers. The secret lies in a few key steps that enhance their delightful chew.
- Taste: Experience the harmonious blend of quintessential **pumpkin spice flavors**—cinnamon, nutmeg, ginger, and cloves—perfectly complemented by the deep, nutty, and slightly caramelized notes of **rich brown butter**. It’s a taste profile that truly embodies the essence of fall.
- Ease: While this recipe does involve a couple of extra steps compared to a basic cookie, rest assured, they are incredibly straightforward and well worth the effort. **Following the instructions meticulously** is paramount to achieving these amazing results. Each step is designed to contribute to the unique texture and flavor.
- Top Tips: My number one, non-negotiable tip for achieving that signature chew is to **pat the pumpkin puree dry** before incorporating it into the dough. This crucial step removes excess moisture, preventing a cakey outcome. Additionally, I exclusively **use egg yolks** instead of whole eggs, which further enhances the chewy texture and richness.
- Recommended Gluten-Free Flour: For consistently excellent results, I highly recommend and personally use **King Arthur Flour Gluten-Free Measure-for-Measure Flour** for these snickerdoodles. Its reliable blend ensures optimal texture and structure.
- Would I Make These Again? Absolutely, without a doubt! These cookies encapsulate my vision of the quintessential **gluten-free pumpkin cookie**. They are a staple in my autumn baking repertoire.
xoxo erin
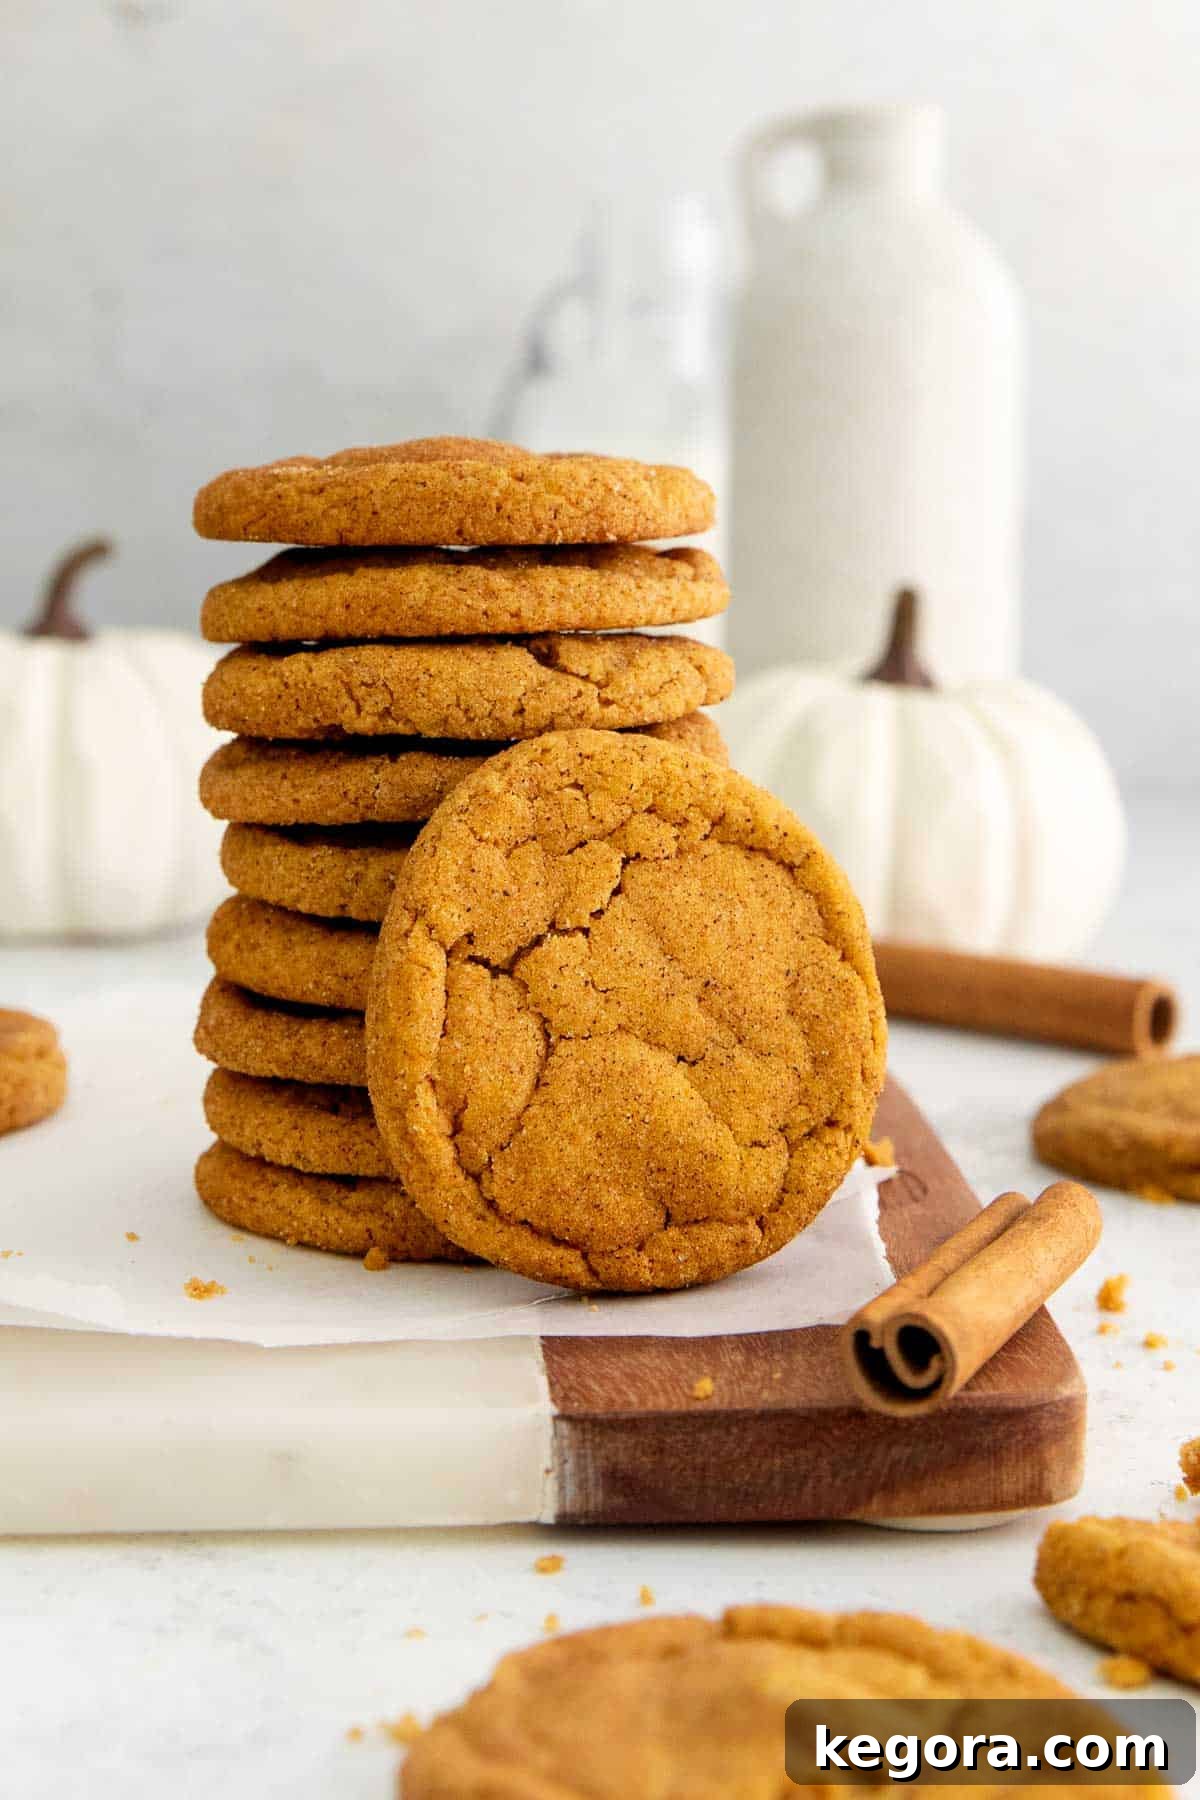
For years, I’ve enjoyed my go-to recipe for gluten-free pumpkin chocolate chip cookies. They were good, but I always envisioned a **pumpkin cookie that was distinctly chewy rather than overtly cakey**. This aspiration drove me to develop a recipe that truly delivers on that promise. The journey involved experimenting with various ratios and techniques, leading to the two pivotal methods that make these cookies truly exceptional.
Thanks to the innovative approach of **patting the pumpkin puree dry** to remove excess moisture and the strategic choice of **using only egg yolks** for richness and elasticity, these cookies achieve an unparalleled chewiness. Each bite is infused with the warm, comforting notes of brown butter and the vibrant, aromatic blend of pumpkin spice, creating a truly memorable autumnal treat. This isn’t just another pumpkin cookie; it’s *the* **chewy gluten-free pumpkin snickerdoodle** you’ve been dreaming of.
To experience the best possible outcome with these **decadent gluten-free pumpkin snickerdoodles**, it’s crucial to **follow this recipe carefully**. The slight extra effort in preparation guarantees a reward of unbelievably delicious cookies. I’m confident that once you taste these perfectly spiced, wonderfully chewy delights, they will become an indispensable part of your fall baking traditions year after year.
Rave Reviews: Hear What Others Are Saying!
From Jordan: “I made these a while ago for my friends at school and everyone LOVED them. I made them again per request for work today – multiple people told me they don’t like pumpkin but I convinced them to try these anyway and they LOVED them. I made a double batch and they were gone within an hour! I cannot recommend this recipe enough!”
Read 91 more comments
Table of Contents: Your Guide to Perfect Pumpkin Snickerdoodles
- Erin’s Ultimate Chewy Gluten-Free Pumpkin Snickerdoodles
- Erin’s Recipe Rundown at a Glance
- Key Ingredients You’ll Need
- Step-by-Step Guide: How to Make Gluten-Free Pumpkin Cookies
- Expert Tips: Storage, Make Ahead, & Freezing Instructions
- Can these gluten-free pumpkin cookies be made dairy-free?
- Can I use pumpkin pie spice instead of individual spices?
- Why is drying the pumpkin puree essential?
- Common Questions for Baking Gluten-Free Pumpkin Snickerdoodles
- More Delightful Gluten-Free Pumpkin Recipes
- Full Recipe: Chewy Gluten-Free Pumpkin Snickerdoodles
Key Ingredients You’ll Need for the Best Chewy Pumpkin Snickerdoodles
Success in baking these **irresistibly chewy gluten-free pumpkin snickerdoodles** starts with understanding your ingredients. Below, you’ll find detailed notes on some of the key components that contribute to the unique texture and rich flavor of this recipe. For precise measurements, please refer to the complete recipe card further down the page.
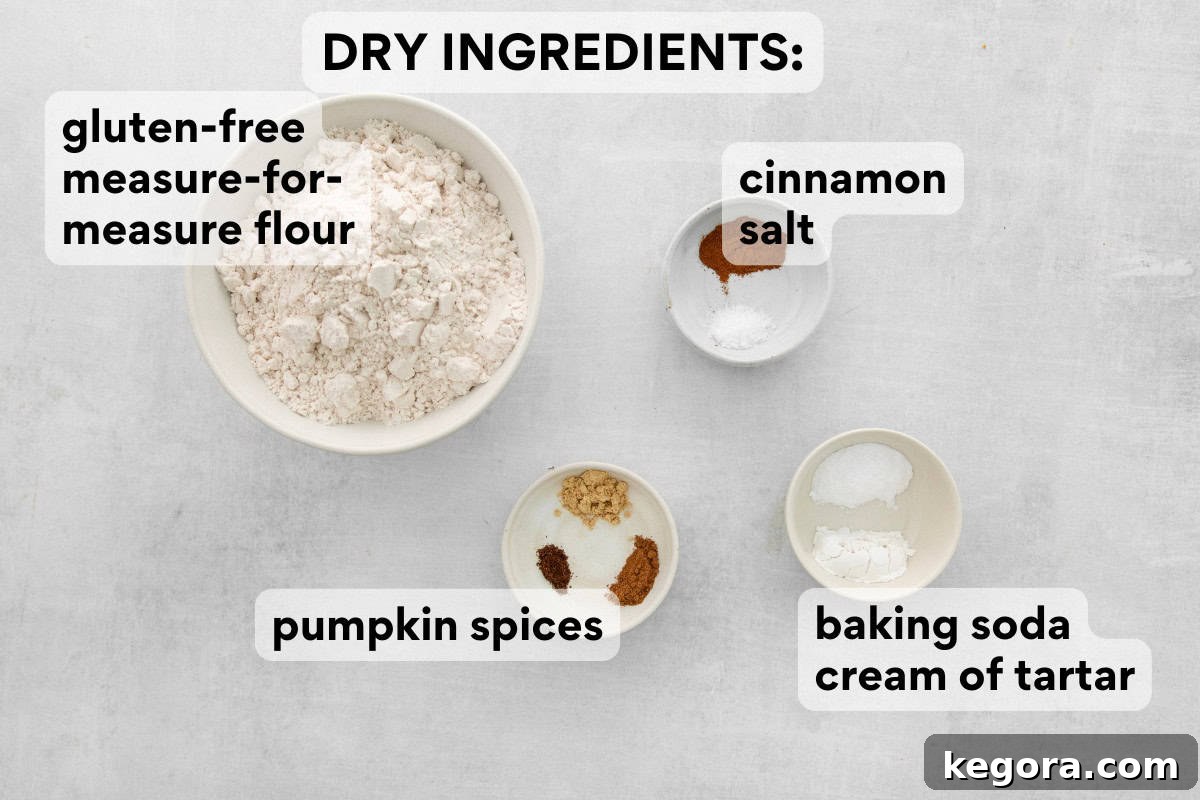
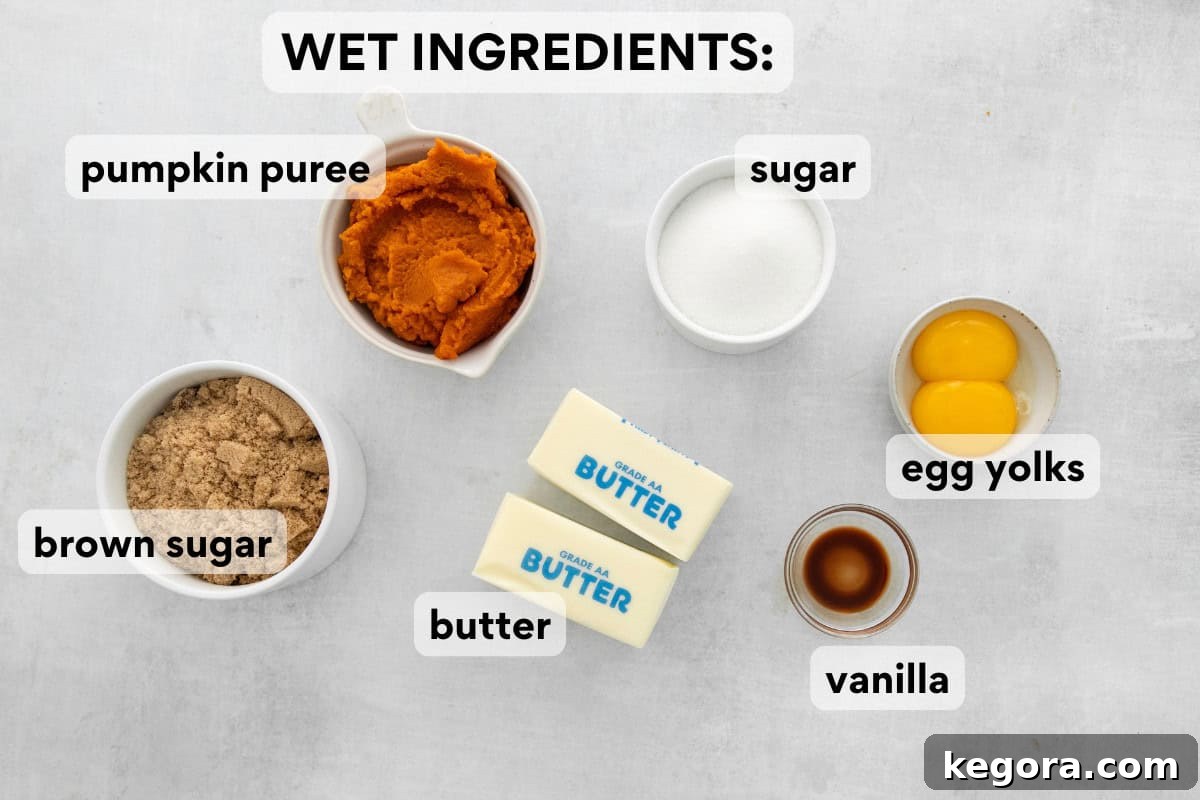
- Gluten-Free Flour: The foundation of any **gluten-free baked good** is a quality flour blend. For superior results, I strongly advocate for a high-quality, measure-for-measure **gluten-free flour blend that explicitly contains xanthan gum**. Xanthan gum is vital for providing structure and elasticity in the absence of gluten, which is essential for a chewy cookie texture. My top recommendation is King Arthur Flour Gluten-Free Measure-For-Measure Flour, as it consistently performs beautifully in this recipe. Alternatively, I’ve also achieved excellent results with **Bob’s Red Mill Gluten-Free 1:1 Baking Flour**, which is another reliable choice for **gluten-free baking**. Ensure your chosen blend is fresh and stored properly.
- Brown Butter: This ingredient is a game-changer! Often, **gluten-free baked goods** can sometimes lack a certain depth of flavor. **Brown butter**, also known as beurre noisette, is the secret weapon here. By gently cooking butter until the milk solids toast and turn golden, it develops a profoundly nutty, subtly toasted, and almost caramelized flavor. This complex aroma cannot be replicated by regular melted butter and adds an incredible richness that elevates these **pumpkin snickerdoodles** from good to extraordinary. It’s a simple technique that yields remarkable flavor payoff.
- Egg Yolks: This is a deliberate choice for achieving the perfect texture. It is absolutely crucial to use **only egg yolks** (discarding the whites) in this recipe. Egg yolks are rich in fat and emulsifiers, contributing significantly to the tender, chewy, and rich texture we’re aiming for in these cookies. Including egg whites would introduce too much protein and moisture, leading to a lighter, fluffier, and undesirably cakey texture, which is precisely what we want to avoid for a truly **chewy pumpkin cookie**.
- Pumpkin Puree: The type and preparation of your pumpkin puree are vital. For the most consistent and best results, I recommend using **Libby’s Pumpkin Puree** and ensuring it’s at **room temperature** before use. Most importantly, do not skip the step of spreading the pumpkin puree on a plate and **patting it dry** with paper towels to remove excess moisture. Pumpkin puree is naturally very watery, and this drying step is foundational for preventing cakey cookies and ensuring a dense, chewy texture. Always double-check that you are using 100% pure pumpkin puree, not canned pumpkin pie filling, which contains added sugars and spices that will alter the recipe’s balance.
- Spices (Cinnamon, Nutmeg, Ginger, Cloves): These warming spices are the heart of **pumpkin spice flavor**. Using individual spices allows you to control the exact balance, resulting in a vibrant and authentic taste. Freshly ground spices, if possible, will always yield the most aromatic results, creating that signature cozy fall feeling in every bite.
- Sugars (Granulated and Brown Sugar): The combination of granulated sugar and brown sugar is strategic. Granulated sugar contributes to crisp edges and sweetness, while brown sugar, with its molasses content, adds moisture, chewiness, and a subtle caramel note that beautifully complements the brown butter and pumpkin spice.
Step-by-Step Guide: How to Make Perfect Chewy Gluten-Free Pumpkin Snickerdoodles
Creating these **delightfully chewy gluten-free pumpkin snickerdoodles** is a rewarding process, and each step plays a vital role in achieving their exceptional texture and flavor. Below is a detailed overview of the recipe. For comprehensive instructions and exact measurements, please refer to the complete recipe card at the bottom of this article.
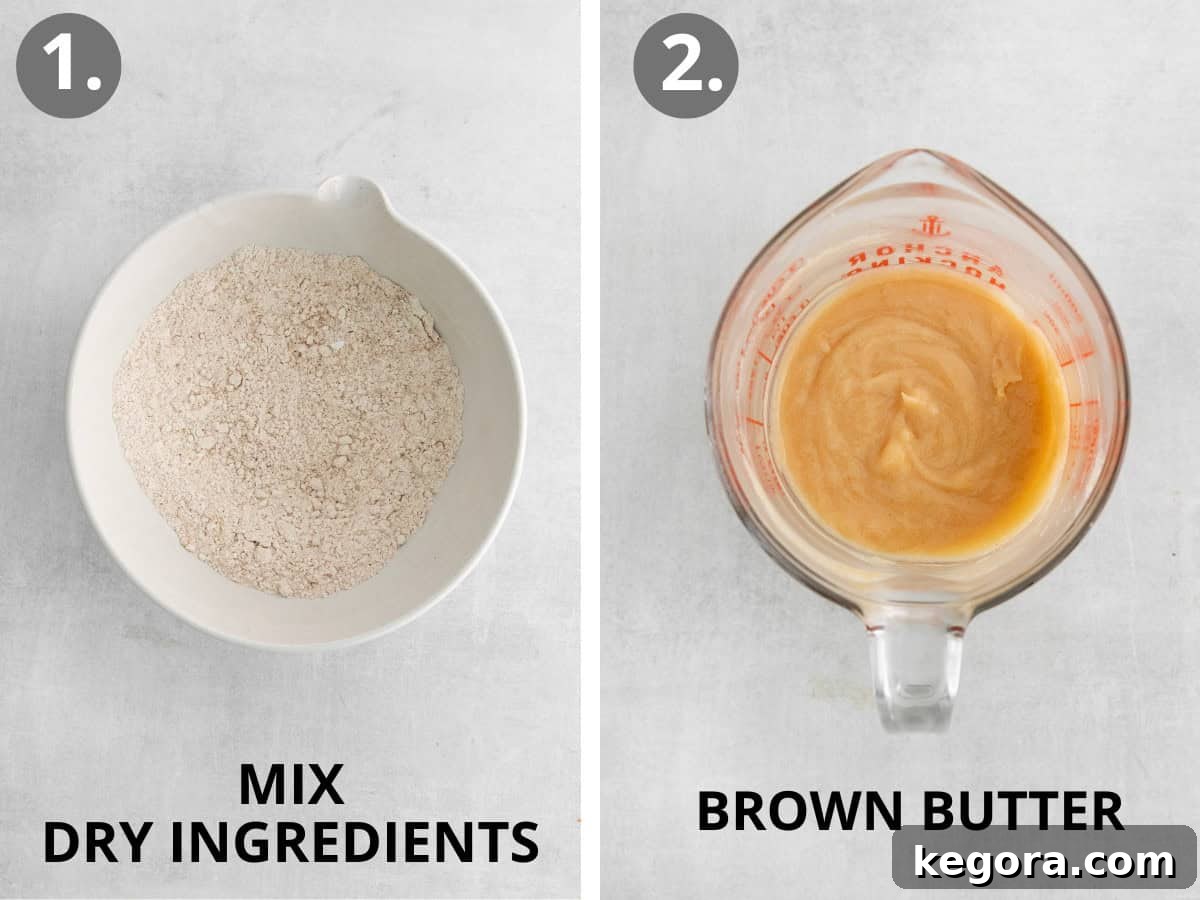
Step 1: Whisk Together Your Dry Ingredients
Begin by combining all the dry ingredients in a medium-sized bowl. This includes your chosen **gluten-free measure-for-measure flour**, baking soda, cream of tartar, kosher salt, ground cinnamon, nutmeg, ginger, and cloves. Whisk them thoroughly until they are evenly distributed. Proper mixing at this stage ensures consistent leavening and spice distribution throughout your **chewy pumpkin snickerdoodles**.
Step 2: Master the Art of Browning Butter
Browning the butter is a crucial step that infuses these cookies with an unmatched nutty, caramelized flavor. Don’t rush this process; it’s where much of the magic happens for these **brown butter pumpkin cookies**.
- Melt the butter: Place 1 cup of butter in a medium skillet over medium-low heat. Stir it occasionally to ensure even melting.
- Watch for foam: As the butter melts, it will begin to foam. This is the milk solids separating. Once foaming begins, start stirring continuously. This prevents the milk solids from burning at the bottom of the pan.
- Observe the color and aroma: The butter will transition from a bright yellow to a beautiful golden brown. You’ll notice a distinct, fragrant, and nutty aroma. This is your cue! Immediately remove the skillet from the heat to stop the cooking process and prevent burning.
- Cool the brown butter: Promptly pour the hot brown butter into a separate medium bowl or a heat-proof glass measuring cup. This halts the browning process. Now, place the bowl in the refrigerator, stirring it every 15-20 minutes, until it cools down. The ideal temperature for use is between 70-75°F (21-24°C) – cool enough but still liquid. This cooling step is essential for the cookie dough’s consistency and ultimate chewy texture.
If you love the flavor of brown butter, you might also enjoy these gluten-free snickerdoodles, which also feature this delicious ingredient!
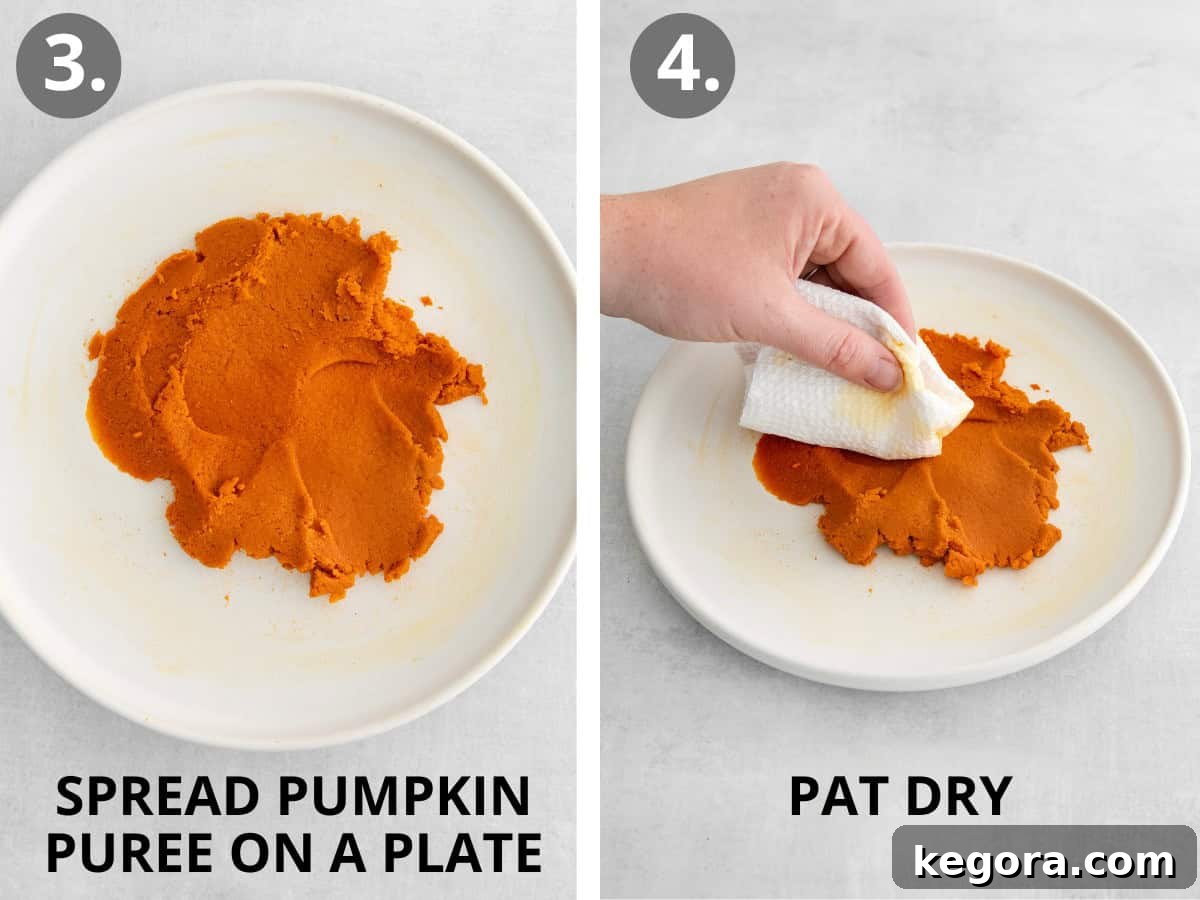
Step 3: “Dry” the Pumpkin Puree for Ultimate Chewiness
This is arguably the most critical step for achieving that desired **chewy texture** in your **gluten-free pumpkin cookies**. Pumpkin puree contains a high amount of moisture, which, if not reduced, would result in cakey cookies. To counteract this, spread the pumpkin puree thinly onto a clean plate. Using several layers of paper towels, gently but firmly pat the pumpkin puree dry. Continue this process, replacing paper towels as they become saturated, until the pumpkin puree takes on a thicker, playdough-like consistency. This step ensures your cookies remain chewy and dense, not fluffy.
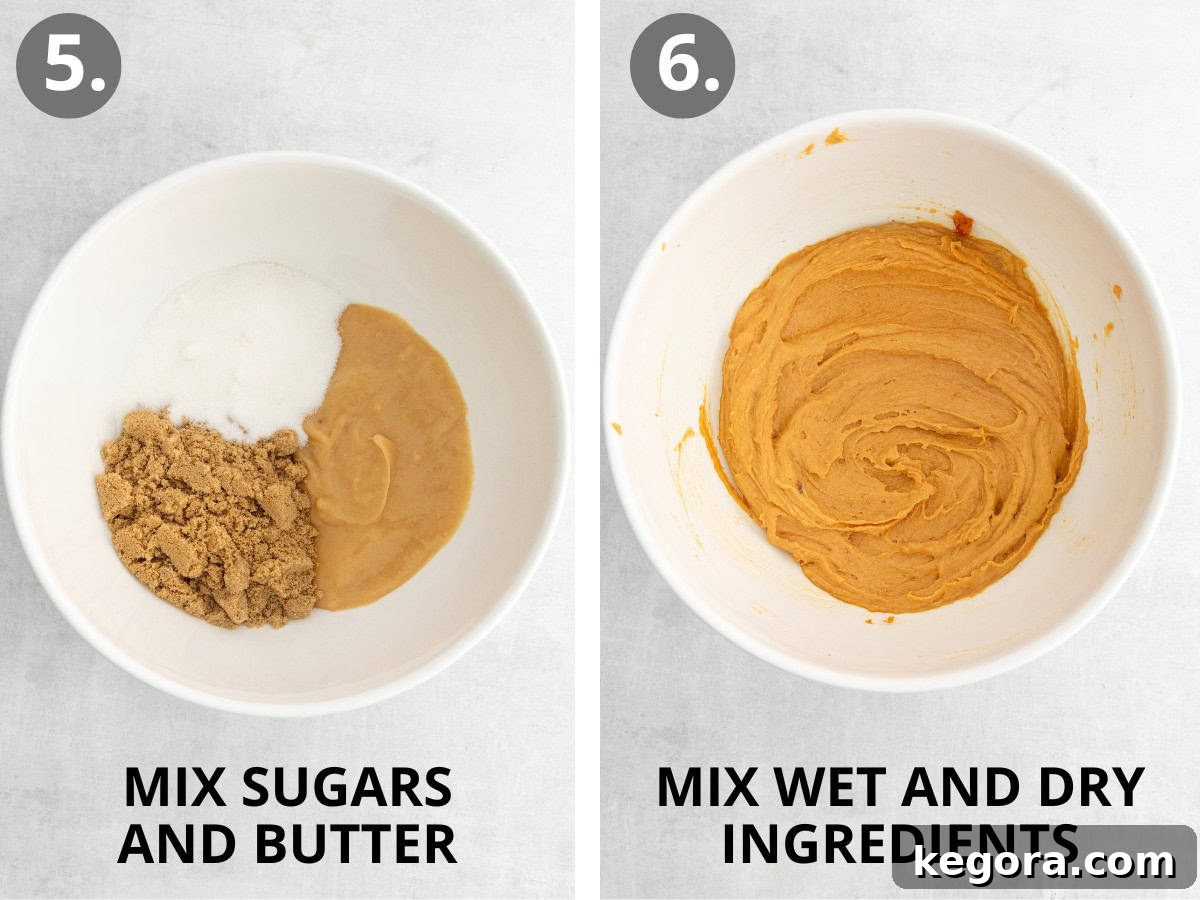
Step 4: Combine Wet and Dry Ingredients to Form the Dough
In a large mixing bowl, combine the granulated sugar and brown sugar. Pour in the cooled brown butter and whisk for about a minute until thoroughly combined and smooth. Next, whisk in the egg yolks (remember, no whites!) and vanilla extract, followed by the “dried” pumpkin puree. Mix until the wet ingredients are smooth and creamy. Gradually add your whisked dry ingredients to the wet mixture. Use a rubber spatula to gently fold and mix until everything is just combined. Avoid overmixing, as this can lead to a tougher cookie, even with gluten-free flour. You’ll have a soft, pliable dough perfect for your **chewy gluten-free pumpkin snickerdoodles**.
Step 5: Chill the Dough for Enhanced Flavor and Texture
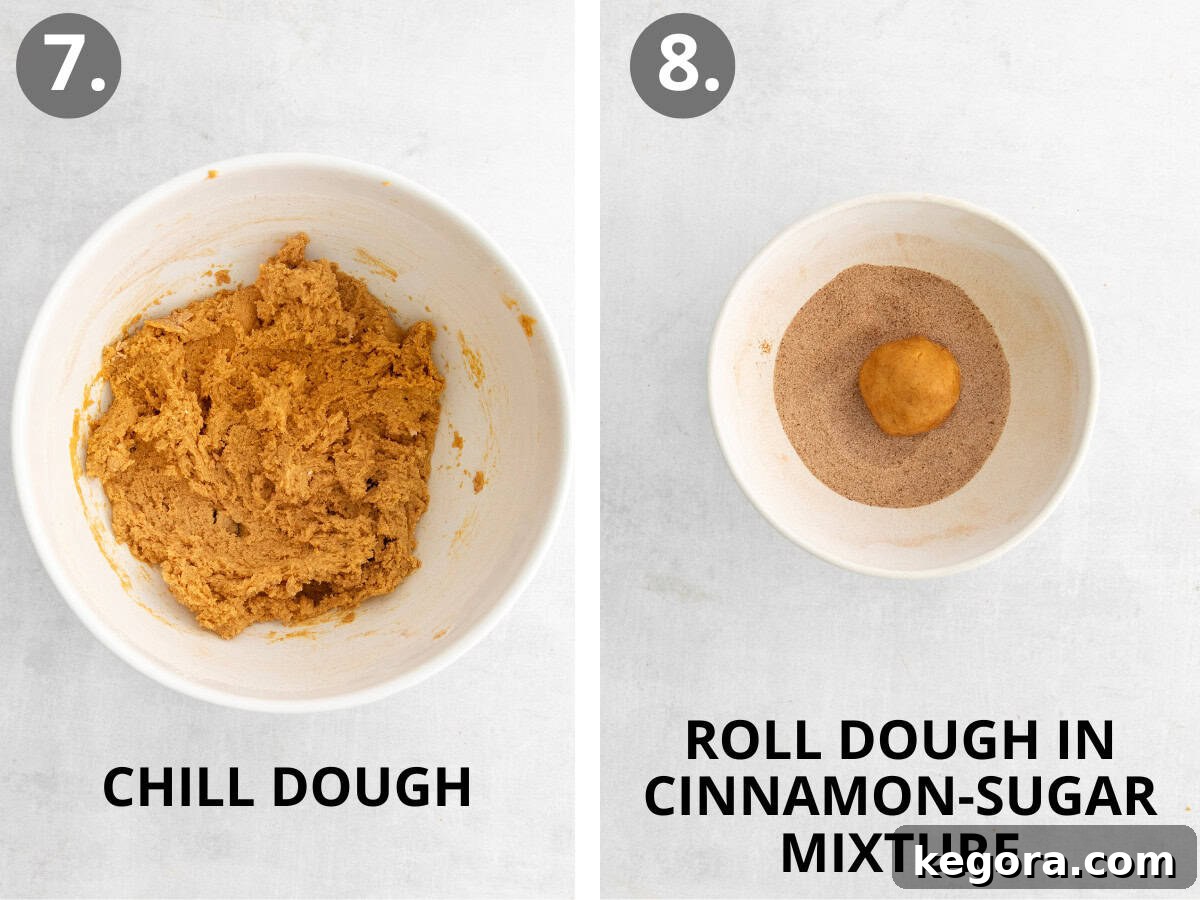
Once your dough is mixed, cover the bowl tightly and chill it in the refrigerator for a minimum of 20 minutes. This chilling period is beneficial for several reasons: it allows the gluten-free flour to fully hydrate, prevents the cookies from spreading too much during baking, and deepens the flavors, especially the brown butter and pumpkin spice. For an even more profound flavor and easier handling, you can chill the dough for up to 3 days if you’re preparing it in advance.
Step 6: Prepare and Bake Your Delicious Pumpkin Snickerdoodles
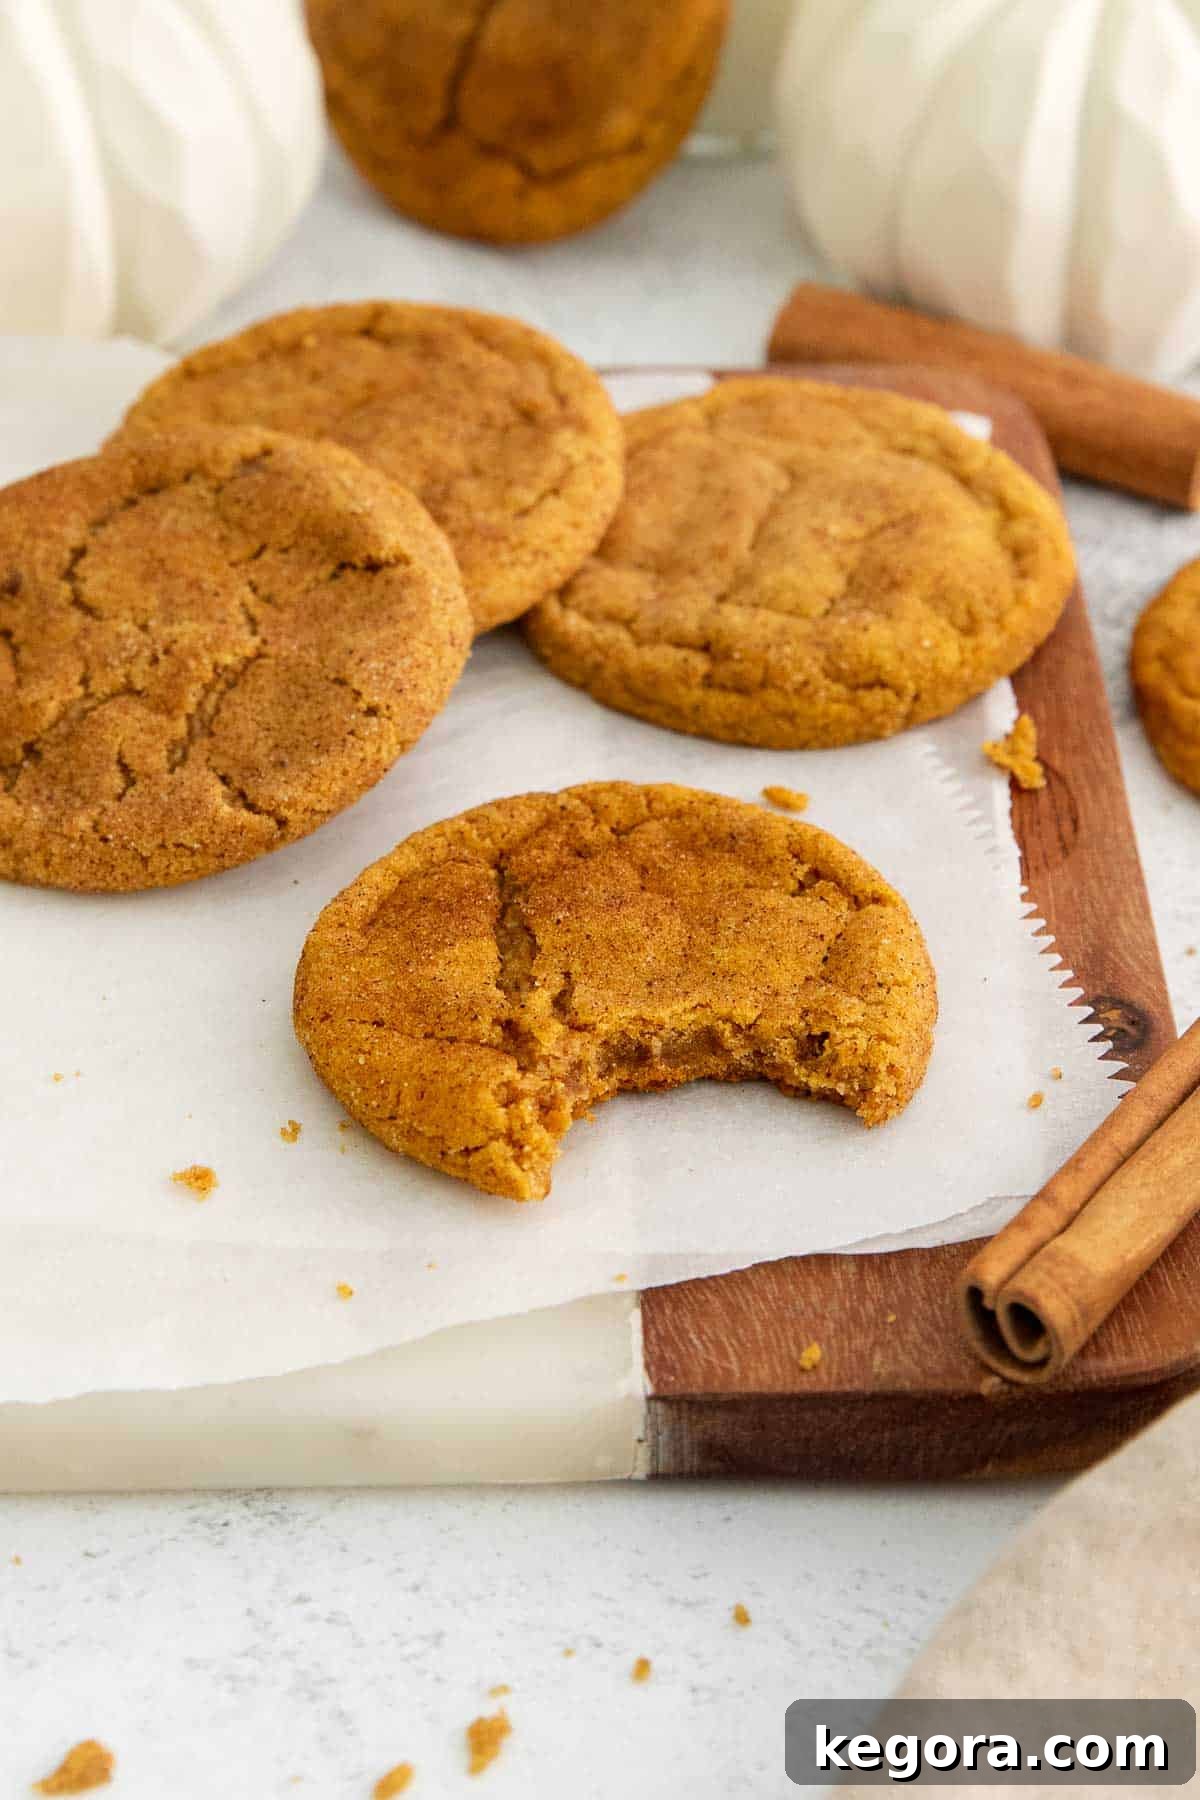
While the dough chills, preheat your oven to 350°F (175°C) and line large baking sheets with parchment paper or silicone baking mats. In a small, shallow bowl, mix together the granulated sugar and ground cinnamon for the signature snickerdoodle coating. Once the dough is chilled, scoop it into uniform round balls, aiming for about 1½ tablespoons per cookie. Roll each dough ball until it’s smooth, then toss it generously in the cinnamon-sugar mixture, ensuring an even coating. Place the coated dough balls on your prepared baking sheets, leaving about 3 inches of space between each to allow for spreading. Bake the cookies for 10-12 minutes, or until the edges are beautifully golden brown, but the centers still appear soft and slightly underbaked. This ensures a wonderfully gooey interior. Remove from the oven and let them cool on the baking sheet for 5 minutes before transferring them to a wire rack to cool completely. Enjoy your homemade **chewy gluten-free pumpkin snickerdoodles**!
Expert Tips: Storage, Make Ahead, and Freezing Instructions for Convenience
These **chewy gluten-free pumpkin snickerdoodles** are best enjoyed fresh, but with a few smart strategies, you can savor their deliciousness for longer or prepare them in advance. Here’s how to store, make ahead, and freeze your cookies and dough effectively:
To Store Baked Cookies:
Once completely cooled, place your **gluten-free pumpkin cookies** in an airtight container. Store them at room temperature for up to 5 days. To maintain their soft, chewy texture, you can even place a slice of bread in the container; the cookies will absorb moisture from the bread, helping them stay soft. Just remember to replace the bread every couple of days.
To Make Ahead (Dough):
This recipe is perfect for preparing in advance! Follow the recipe instructions as usual, up to the point of chilling the dough. Instead of chilling for just 20 minutes, cover the bowl tightly and refrigerate the dough overnight, or for up to three days. When you’re ready to bake, simply remove the dough from the fridge, let it sit at room temperature for about 10-15 minutes (if it’s too firm), and then proceed with rolling in the cinnamon-sugar coating and baking as per the instructions. The extended chill time often deepens the flavors, making for an even more exquisite **chewy pumpkin snickerdoodle** experience.
To Freeze Baked Cookies:
Baked cookies freeze exceptionally well. Once they are fully cooled, arrange them in a single layer on a baking sheet and flash freeze for about 30 minutes to an hour until firm. Then, transfer the frozen cookies to a freezer-safe airtight container or a heavy-duty freezer bag, separating layers with parchment paper to prevent sticking. They can be stored in the freezer for up to 2-3 months. To enjoy, simply thaw them at room temperature, or warm them briefly in the microwave for a fresh-from-the-oven feel.
To Freeze Cookie Dough Balls:
Freezing raw cookie dough is a fantastic way to have fresh, warm **gluten-free pumpkin snickerdoodles** on demand! Scoop the dough into individual balls, as if you were ready to bake them. Place these dough balls on a small baking sheet or plate lined with parchment paper, ensuring they don’t touch. Pop the sheet into the freezer until the dough balls are completely solid, which typically takes about 1-2 hours. Once frozen, transfer the solid dough balls into a freezer bag or an airtight container, pressing out any excess air to prevent freezer burn. Label the bag with the date. When you’re ready to bake, there’s no need to thaw! Simply remove the desired number of frozen dough balls, roll them in the cinnamon-sugar coating, and place them on a prepared baking sheet. Add an extra 1-2 minutes to the standard baking time, and you’ll have freshly baked **chewy gluten-free pumpkin cookies** whenever a craving strikes!
Can these gluten-free pumpkin cookies be made dairy-free?
Absolutely! You can easily adapt these **chewy gluten-free pumpkin snickerdoodles** to be dairy-free. Simply substitute regular butter with your favorite high-quality melted dairy-free butter alternative. When making this substitution, you will skip the steps for browning the butter, as dairy-free butter alternatives typically do not brown in the same way due to their different fat and protein composition. Just melt the dairy-free butter and use it in the recipe as you would the cooled brown butter. Follow all other instructions as usual, and you’ll still achieve a wonderfully chewy and flavorful **dairy-free pumpkin cookie** that everyone can enjoy!
Can I use pumpkin pie spice instead of the individual spices?
Yes, you can certainly use a pre-made **pumpkin pie spice blend** as a convenient substitute for the individual cinnamon, nutmeg, ginger, and cloves listed in this recipe. While the exact balance of flavors might be slightly different from my specific blend, it will still yield delicious results. As a general guideline, use 1½ teaspoons of pumpkin pie spice as a direct substitute for the combined individual spices called for in the recipe. This is a great shortcut, especially if you don’t have all the individual spices on hand, ensuring your **gluten-free pumpkin snickerdoodles** still taste like fall.
Why is drying the pumpkin puree essential for chewy cookies?
This is one of the most crucial techniques for achieving the desired texture in these **chewy gluten-free pumpkin snickerdoodles**! Pumpkin puree is inherently very moist, containing a significant amount of water. If this excess moisture is not removed, it will hydrate the flour too much, causing the cookies to spread excessively and result in a soft, fluffy, and distinctly cakey texture – which is the opposite of the dense, chewy cookie we’re aiming for. By **patting the pumpkin puree dry**, you concentrate its flavor and reduce the water content, making it behave more like a solid ingredient rather than a liquid. This ensures your cookies are delightfully thick, perfectly chewy, and hold their shape beautifully, truly setting them apart from other pumpkin cookie recipes.
Common Questions for Baking Gluten-Free Pumpkin Snickerdoodles
Baking gluten-free can sometimes lead to questions. Here are answers to a few common queries you might have while making these **chewy gluten-free pumpkin snickerdoodles**:
- My cookies spread too much! What happened? Over-spreading can be due to several factors. Ensure your brown butter was adequately cooled to the specified temperature (70-75°F / 21-24°C) before mixing. Warmer butter will cause more spread. Also, thoroughly drying the pumpkin puree is critical; if it’s too wet, it adds excess moisture, leading to thin cookies. Lastly, make sure your oven temperature is accurate; an oven that runs too cool can also cause spreading. And don’t skip chilling the dough!
- Why are my cookies still cakey? This almost always points back to moisture content. The key steps to preventing cakey cookies are thoroughly drying the pumpkin puree and using only egg yolks. If your cookies are cakey, double-check that you removed as much moisture as possible from the pumpkin and that you didn’t accidentally include any egg whites.
- Can I use a different gluten-free flour blend? While I recommend King Arthur and Bob’s Red Mill for consistency, other 1:1 gluten-free baking blends that contain xanthan gum may work. However, results can vary greatly between brands. If trying a different blend, be prepared that the texture might be slightly different. Avoid using single-ingredient flours like almond or coconut flour unless the recipe is specifically designed for them.
- What if I don’t have cream of tartar? Cream of tartar helps activate the baking soda and gives snickerdoodles their signature tangy flavor and soft texture. While essential for traditional snickerdoodles, you can substitute it. For every 1 teaspoon of cream of tartar, you can use 2 teaspoons of white vinegar or lemon juice. This will provide the necessary acidity, though the flavor might be slightly altered.
Discover More Delicious Gluten-Free Pumpkin Recipes
If you’ve fallen in love with these **chewy gluten-free pumpkin snickerdoodles**, you’re likely a fan of all things pumpkin! Here are more of my favorite **gluten-free pumpkin recipes** to keep your autumn baking exciting and flavorful. Explore these delightful treats that are perfect for any occasion:
- Oat Flour Pumpkin Pancakes
- Pumpkin Creme Brulee
- Gluten-Free Pumpkin Roll
- Gluten-Free Pumpkin Whoopie Pies
- Gluten-Free Pumpkin Cake
- Gluten-Free Pumpkin Muffins
Average Rating: 4.93 out of 5 stars from 27 votes
Chewy Gluten-Free Pumpkin Snickerdoodles
Erin Collins
20 mins
10 mins
2 hrs
2 hrs 30 mins
18 cookies
My absolute best tip for these cookies is to **pat the pumpkin puree dry** to eliminate extra moisture, guaranteeing that wonderful chewy texture. Plus, these cookies are infused with rich brown butter and authentic pumpkin spice for an incredibly flavorful experience!
Comments
Print Recipe
Ingredients
Dry Ingredients
- 1 ½ cups (225g) gluten-free measure-for-measure flour
- 1 teaspoon baking soda
- 1 teaspoon cream of tartar
- ½ teaspoon kosher salt
- ½ teaspoon ground cinnamon
- ¼ teaspoon ground nutmeg
- ¼ teaspoon ground ginger
- ⅛ teaspoon ground cloves
Other Cookie Ingredients
- 1 cup (226g) butter
- ⅔ cup (150g) Libby’s Pumpkin Puree
- ½ cup (100g) granulated sugar
- ⅔ cup (142g) brown sugar
- 2 large egg yolks
- 2 teaspoons vanilla extract
Cinnamon Sugar Coating
- ½ cup (100g) granulated sugar
- 1½ teaspoons ground cinnamon
Instructions
-
In a medium bowl, whisk together the gluten-free flour, baking soda, cream of tartar, salt, cinnamon, nutmeg, ginger, and cloves. Ensure all dry ingredients are well combined.
-
Melt the butter in a medium skillet over medium-low heat, stirring occasionally to prevent scorching.
-
Once the butter is fully melted and begins to foam, stir continuously. This helps the milk solids brown evenly without sticking. The butter will quickly change from yellow to a rich golden brown and emit a distinct nutty aroma. Immediately remove the skillet from the heat and pour the browned butter into a small bowl or glass measuring cup to stop the cooking process.
-
Place the browned butter in the refrigerator to cool down. Stir it every 20 minutes for approximately 45-60 minutes. The butter needs to be cool, but still in liquid form, to achieve the correct cookie texture. Aim for a temperature between 70-75°F (21-24°C) before using.
-
Meanwhile, prepare the pumpkin puree. Spread the measured pumpkin out onto a clean plate in a thin layer. Using paper towels, firmly pat the pumpkin dry to absorb as much liquid as possible. This process will take several minutes and likely several changes of paper towels. Continue until the pumpkin reaches a thick, playdough-like consistency and measures about ⅓ cup or 65-70 grams. This step is critical for chewy cookies!
-
In a separate medium bowl, combine the granulated sugar and brown sugar. Pour in the cooled brown butter and whisk for 1 minute until thoroughly combined and smooth. Then, whisk in the egg yolks, vanilla extract, and the “dried” pumpkin puree until the mixture is smooth and creamy.
-
Using a rubber spatula or a wooden spoon, gradually add the dry ingredients to the wet mixture. Mix until everything is just well-combined. Be careful not to overmix the dough.
-
Cover the bowl of dough and place it in the refrigerator to chill for a minimum of 20 minutes while your oven preheats. This chilling period helps the flavors meld and prevents excessive spreading. The dough can also be made up to 3 days in advance and stored in the fridge.
-
Preheat your oven to 350°F (175°C). Line large baking sheets with parchment paper or silicone baking mats.
-
In a small, shallow bowl, mix together the granulated sugar and cinnamon for the cookie coating.
-
Scoop the chilled cookie dough into uniform round balls, using about 1½ tablespoons of dough per ball. Roll each dough ball between your palms until it’s smooth, then toss it generously in the cinnamon-sugar coating until evenly coated. Place the coated dough balls on the prepared baking sheet, ensuring they are spaced about 3 inches apart to allow for spreading.
-
Bake for 10-12 minutes, or until the edges of the cookies are beautifully golden brown, but the centers still appear soft and slightly underbaked. This ensures a wonderfully chewy and soft interior.
-
Remove the baking sheets from the oven and allow the cookies to cool on the sheet for 5 minutes. This firming-up period helps prevent them from breaking. After 5 minutes, carefully transfer the cookies to a wire rack to cool completely. Enjoy your perfect chewy gluten-free pumpkin snickerdoodles!
Notes
Dairy-Free Adaptation: To make these snickerdoodles **dairy-free**, simply omit the steps for browning the butter. Instead, use an equal amount of melted dairy-free butter substitute. Please note that dairy-free butter alternatives do not brown like traditional dairy butter.
The Importance of Rest Time: A minimum 20-minute rest period for the dough is beneficial for two reasons: it allows the flavors to develop more fully, and it gives the **gluten-free flour** sufficient time to properly hydrate, which is crucial for the final texture. For even more flavorful and easier-to-handle cookies, consider refrigerating the dough for a longer period, up to 3 days.
Freezing Cookie Dough for Future Treats: You can easily **freeze cookie dough balls** to bake fresh cookies later. Simply scoop and roll the dough into balls, then freeze them solid on a baking sheet before transferring them to a resealable freezer bag. When ready to bake, there’s no need to thaw—just roll in cinnamon-sugar and add an extra 1-2 minutes to the standard bake time.
Nutrition Information (per cookie)
|
Carbohydrates: 28g
|
Protein: 2g
|
Fat: 11g
|
Saturated Fat: 7g
|
Polyunsaturated Fat: 1g
|
Monounsaturated Fat: 3g
|
Trans Fat: 0.4g
|
Cholesterol: 49mg
|
Sodium: 211mg
|
Potassium: 66mg
|
Fiber: 2g
|
Sugar: 20g
|
Vitamin A: 1758IU
|
Vitamin C: 0.4mg
|
Calcium: 27mg
|
Iron: 1mg
The innovative method for patting the pumpkin dry, crucial for these **chewy pumpkin cookies**, was inspired by the excellent techniques shared by Cambrea Bakes!
I hope you thoroughly enjoy baking and savoring these **chewy gluten-free pumpkin snickerdoodles**. They truly are a delightful addition to any fall gathering or a cozy treat for yourself. Happy baking!