
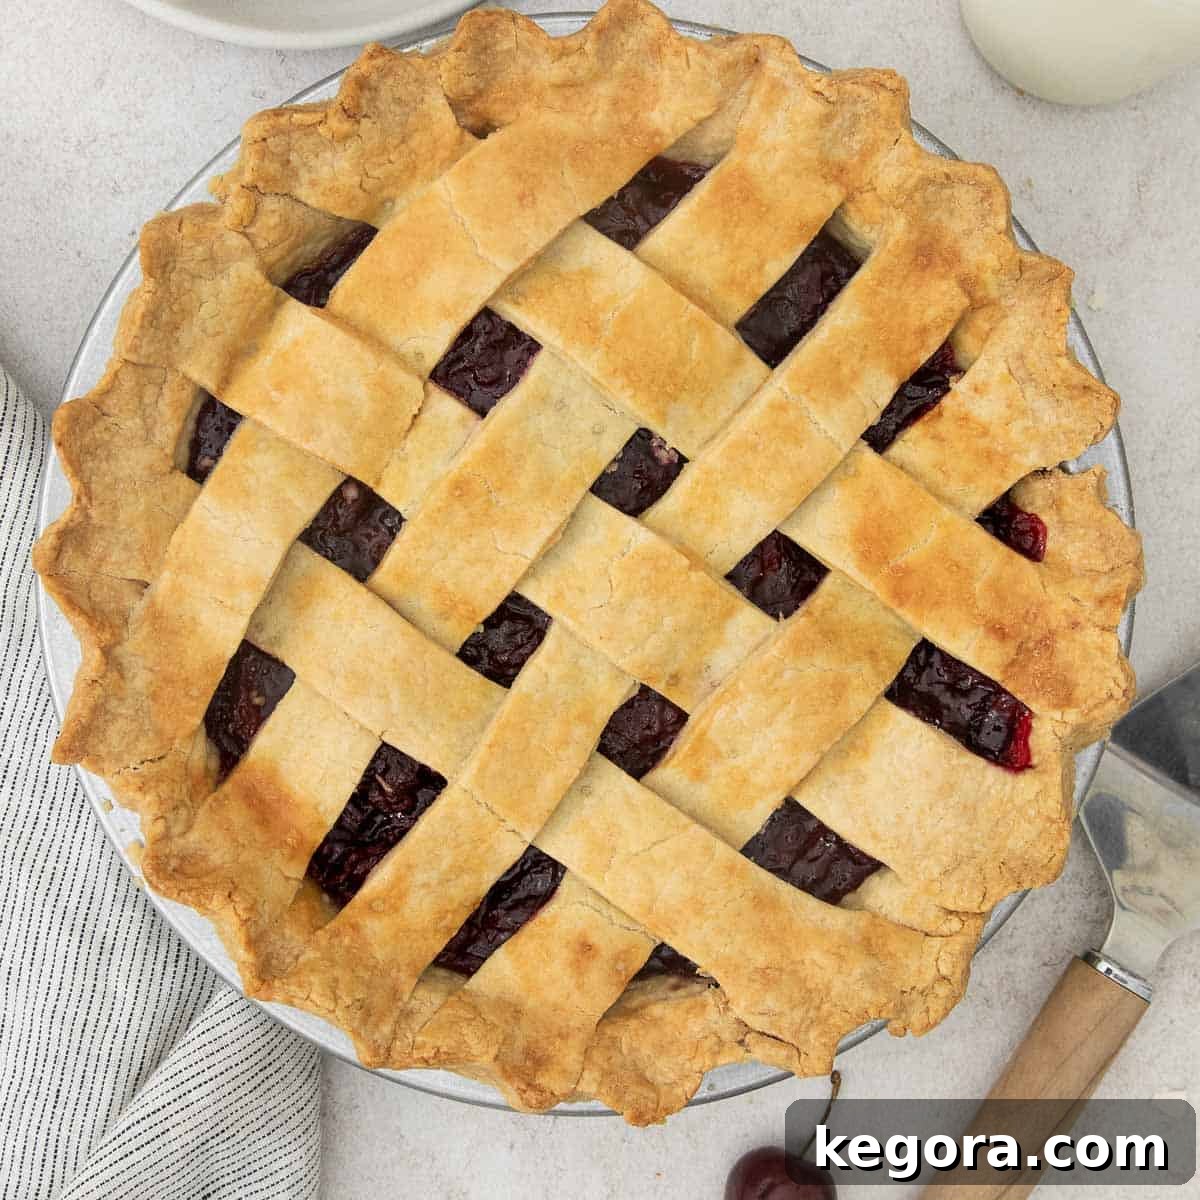
Irresistible Gluten-Free Cherry Pie: A Homemade Delight
Welcome to the ultimate guide for crafting a truly exceptional Gluten-Free Cherry Pie. This isn’t just any pie recipe; it’s a meticulously developed creation designed to bring you the nostalgic comfort of a classic cherry pie, but entirely gluten-free and bursting with unparalleled flavor. Say goodbye to crumbly, bland gluten-free crusts and overly sweet, watery fillings. This recipe promises a homemade masterpiece that will impress even the most discerning palates.
Erin’s Recipe Rundown: Why This Pie Shines
Here’s a quick overview of what makes this particular Gluten-Free Cherry Pie recipe a standout. It’s a testament to the fact that gluten-free baking can be just as, if not more, delicious and satisfying than its traditional counterparts.
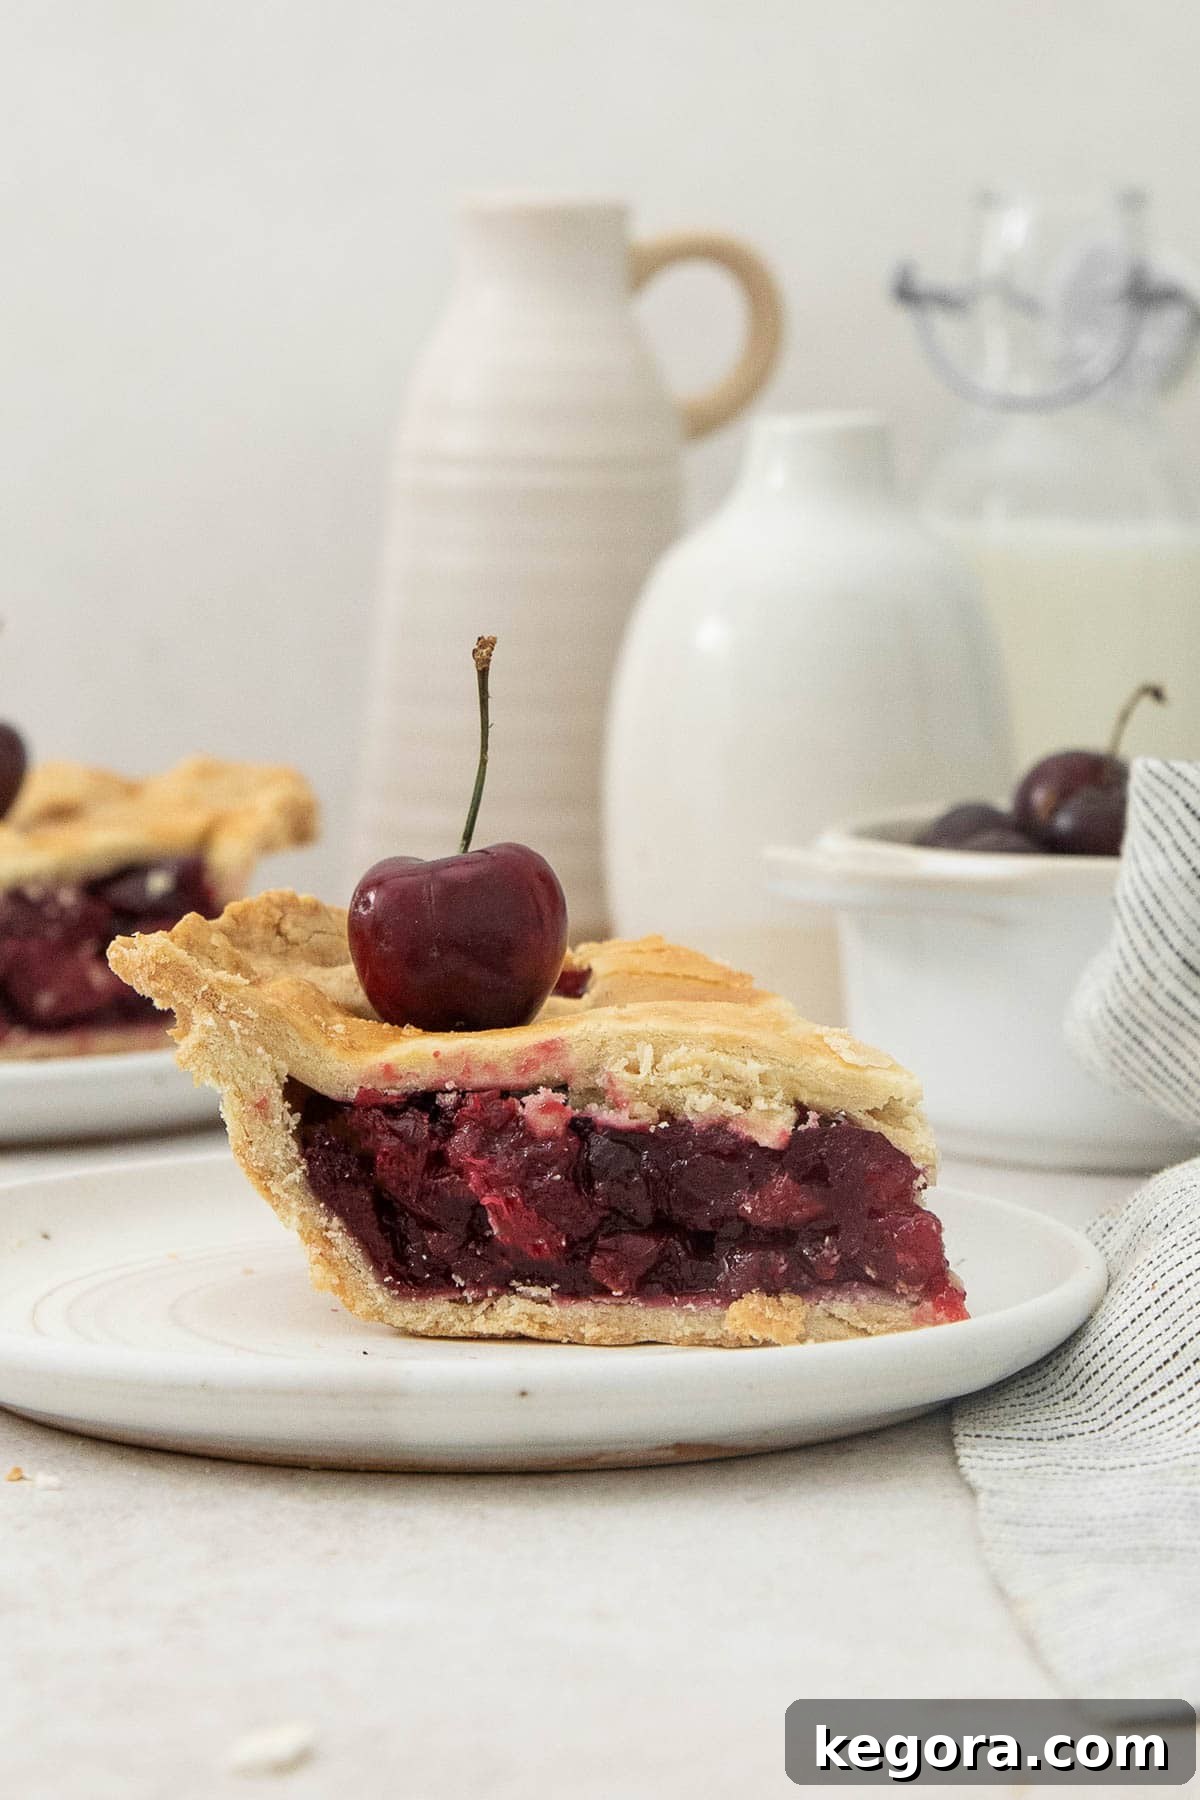
- Texture: Prepare for an experience of pure textural bliss. Each bite offers a wonderfully flaky, golden-brown crust that provides the perfect contrast to a perfectly set, yet luxuriously juicy, cherry filling. The bottom crust holds up beautifully, staying crisp even under the generous layers of fruit.
- Taste: A symphony of flavors awaits. The rich, buttery notes of the golden crust beautifully complement the vibrant, sweet-tart burst of the cherry filling. A delicate hint of almond extract elevates the cherry flavor, creating a depth that is both comforting and sophisticated. It’s a taste that screams summer, tradition, and pure indulgence.
- Ease: While making a pie from scratch might seem daunting, especially a gluten-free one, this recipe is designed to be entirely “doable” for home bakers of all skill levels. We break down every step, from preparing the dough to assembling the lattice top, with clear instructions and helpful photos. With a little patience and our detailed guidance, you’ll find yourself confidently baking bakery-quality pies.
- Top Tips: Two crucial tips will transform your pie-making experience. Firstly, always pre-cook the cherry filling. This essential step prevents a soggy bottom crust by reducing excess moisture, ensuring every slice boasts a firm, crisp base. Secondly, never skip the egg wash! It’s the secret to achieving that coveted golden, glossy finish, giving your homemade pie that irresistible, professional bakery-style appeal.
- Would I make this again?: Absolutely, without a doubt! This Gluten-Free Cherry Pie has become a beloved staple. It’s a recipe I return to time and time again because it consistently delivers on flavor, texture, and visual appeal. The secret lies in my foolproof gluten-free pie crust, which guarantees a perfectly crisp double crust every time. You’ll be adding this to your regular baking rotation!
xoxo erin
Featured Comment
From Wendy: “This pie is PERFECT. I truly could not believe how good this is – 5 stars is not enough! Thank you!!!”
6 more comments
Mastering Your Gluten-Free Cherry Pie: Expert Tips for Success
Achieving the perfect gluten-free cherry pie is all about attention to detail. These expert tips will guide you through the process, ensuring a crisp crust, perfectly set filling, and a beautiful presentation. Follow these secrets to baking success:
- Invest in a Cherry Pitter: This seemingly simple gadget is an absolute game-changer when working with fresh cherries. While I don’t typically advocate for a kitchen full of single-use tools, a cherry pitter is genuinely worth the small investment. It makes the tedious task of pitting cherries quick and mess-free, allowing you to enjoy the process (and the fruit!) even more. My kids even love using it for snacking – they swear it makes the cherries taste better!
- Pre-Cook the Filling Before Baking: This is a non-negotiable step for any fruit pie, especially for gluten-free crusts. Pre-cooking the cherry filling on the stovetop ensures it thickens properly before baking. This prevents the filling from releasing too much liquid into the bottom crust during baking, which is the primary cause of a soggy pie bottom. The result? A perfectly crisp base that holds its integrity with every slice.
- Don’t Skip the Egg Wash: For that truly professional, bakery-fresh look, an egg wash is indispensable. Brushing the top crust with an egg wash (a whisked egg with a touch of water and salt) before baking creates a beautifully golden, shiny finish. It also contributes to a slightly crispier texture on the top crust, elevating the overall sensory experience. Without it, your pie might emerge from the oven looking pale and less vibrant.
- Choose a Metal Pie Pan: While ceramic or glass pie plates can be aesthetically pleasing, a metal pie pan is superior for conducting heat efficiently. This even heat distribution is crucial for ensuring your bottom crust bakes thoroughly and achieves that coveted golden-brown crispness. Dark metal pans tend to work best.
- Bake on a Pizza Steel (If Possible): For the ultimate crispy bottom crust, consider baking your pie on a preheated pizza steel. A pizza steel or stone provides an intense burst of direct heat from below, mimicking the conditions of a professional oven. This extra thermal mass helps to rapidly set and crisp the bottom crust, preventing it from becoming doughy or underbaked.
- Start High, Then Lower the Temperature: Employing a two-stage baking temperature is a clever technique for perfect pies. Begin baking at a higher temperature (e.g., 400°F) for the initial 15-20 minutes. This initial blast of heat helps to quickly set the crust and encourages a beautiful golden-brown color. Subsequently, reduce the oven temperature (e.g., to 375°F) for the remainder of the baking time. This allows the pie filling to gently cook through and thicken without over-browning or drying out the delicate crust.
Gluten-Free Cherry Pie
Erin Collins
1 hour
50 minutes
1 hour
15 minutes
3 hours
5 minutes
8 servings
This gluten-free cherry pie truly has it all! Experience the joy of a flaky, crisp bottom crust, a thick and intensely juicy cherry filling, and a visually stunning, picture-perfect golden lattice top. This recipe redefines gluten-free baking, proving that classic desserts can be enjoyed by everyone without compromise.
My top tips for achieving this level of perfection? Always utilize my tried-and-true gluten-free pie crust recipe and make sure to pre-cook the delectable filling. These two steps are key to creating an exceptionally crisp, golden bottom crust that stands up to the rich fruit filling!
Comments
Want to save this amazing recipe for later? Just enter your email address below, and we’ll send it straight to your inbox! You’ll also receive our weekly newsletter with new delicious gluten-free recipes.
Ingredients
Gluten-Free Pie Crust
- 1 cup (226g) butter, frozen until solid
- 4 tablespoons (48g) shortening, frozen until solid
- 3 cups (450g) gluten-free measure-for-measure flour
- 2 teaspoons granulated sugar
- 1 teaspoon kosher salt
- 1 large egg
- 1 tablespoon white vinegar
Cherry Pie Filling
- 5 cups (794 to 850g) pitted sweet, dark cherries, some halved and some quartered (you’ll start with around 2 pounds whole fruit)
- 2 tablespoons fresh lemon juice from 1 large lemon
- ¼ teaspoon almond extract
- ¾ cup (150g) granulated sugar
- ½ teaspoon kosher salt
- ¼ cup cornstarch
- ¼ cup water
Egg Wash
- 1 large egg
- 1 tablespoon water
- pinch of kosher salt
- sanding sugar optional
Instructions
For the Gluten-Free Pie Crust:
-
For the best results, ensure your butter and shortening are completely frozen solid before you begin. This is a critical step for achieving a flaky gluten-free crust.
-
In a large mixing bowl, combine the gluten-free measure-for-measure flour, granulated sugar, and kosher salt. Whisk these dry ingredients together thoroughly to ensure they are well combined.
-
In a small measuring cup, crack the large egg and add the white vinegar. Whisk vigorously until the mixture is completely smooth and uniform. Then, add enough ice-cold water until the total volume reaches ½ cup. Whisk again to fully incorporate. This unique egg-vinegar mixture is a secret to tenderizing the gluten-free dough and should be refrigerated until ready for use.
-
Using the large holes of a box grater, grate the solid frozen butter directly into the bowl of dry ingredients. Gently toss the grated butter with the flour mixture to coat each piece, preventing clumping.
-
Repeat the grating process with the frozen shortening, adding it to the flour and butter mixture. Lightly toss again to ensure the shortening pieces are also well coated.
-
Begin adding the liquid mixture: Drizzle 1 tablespoon of the chilled egg-vinegar mixture over the flour and fat blend. Using a rubber spatula, gently stir and toss the ingredients. The goal is to distribute the moisture evenly without overworking the dough. Continue adding the liquid, 1 tablespoon at a time, stirring gently after each addition, until the dough just begins to clump together in larger pieces. You’ll likely use about 10 tablespoons at this stage.
-
Transfer the partially formed dough to a clean bowl. Use your hands to gently gather and knead the dough until it comes together into a cohesive mass. You may need to press it firmly a few times to encourage it to unify. If the dough feels excessively dry and won’t hold together, add another tablespoon of the egg-vinegar mixture, but be cautious not to add too much liquid. The dough should be moist enough to stick together when pressed, but it should not be sticky to the touch.
-
Turn the dough out onto a lightly floured surface. Briefly gather it with your hands, pressing any loose crumbs into the main ball to form a smooth, unified dough.
-
Gently divide the dough in half. Shape each half into a flat disc, approximately 1 inch thick. Wrap both discs tightly in plastic wrap to prevent drying. Refrigerate for at least 1 hour, or up to 2 days, to allow the fats to firm up and the flour to hydrate fully.
For the Cherry Filling:
-
In a heavy-bottomed saucepan or a Dutch oven, combine your prepared pitted sweet, dark cherries (ensuring a mix of halved and quartered pieces for varied texture), fresh lemon juice, granulated sugar, kosher salt, cornstarch, and water. Stir all the ingredients together well.
-
Place the pan over medium heat. Stir the mixture frequently as it gradually warms and the cherries begin to release their natural juices. Once the mixture comes to a gentle bubble, reduce the heat to medium-low and allow it to simmer for approximately 10 minutes. Continue stirring often during this time, until the filling visibly thickens and develops a beautiful, glossy sheen.
-
Remove the pan from the heat. Stir in the almond extract, which enhances the cherry flavor without overpowering it. Allow the filling to cool completely to room temperature before you use it to assemble your pie. This cooling step is vital for ensuring the filling sets properly during baking and prevents a soggy crust.
To Roll Out & Assemble:
-
If your pie dough has been refrigerated for longer than 1 hour, remove one disc from the refrigerator and let it sit at room temperature for about 15 minutes. This allows it to soften slightly, making it easier to roll without cracking.
-
Place one disc of dough on a lightly floured pastry mat or a silicone baking mat. Roll the dough into a uniform circle, approximately 12 inches in diameter. Gluten-free pie crusts can be a bit more delicate than traditional ones, so don’t be alarmed if the edges start to split or break. Simply press them back together gently with your fingers as you roll. Patience is key here!
-
Carefully transfer the rolled dough into a 9-inch pie plate. You can use your pastry mat to help flip it over. Gently ease the dough into the contours of the pan, ensuring it fits snugly without stretching. Trim any excess dough from the edges using scissors, leaving about a ½ inch overhang.
-
Pour the completely cooled cherry filling into the prepared bottom crust. Spread the filling evenly across the pie plate, making sure it reaches the edges.
-
Roll out the second disc of dough into another 12-inch circle. Using a sharp knife or a pastry wheel, cut the dough into strips, about ½ to ¾ inch wide, for your lattice top. Carefully arrange these strips over the filling in your desired lattice pattern. Once the lattice is formed, gently press the edges of the strips onto the bottom crust to seal them. Trim any excess dough from the edges and crimp or shape the crust as desired for a beautiful finish.
-
For an extra golden and appealing finish, lightly brush the top crust of your assembled pie with milk or a prepared egg wash (see next step for full egg wash instructions).
-
Place the entire assembled pie into the freezer for 15 minutes to 1 hour, or until it is thoroughly chilled and firm. This crucial step helps prevent the crust from shrinking and losing its shape during baking, and contributes to a flakier texture.
-
While the pie chills, position a pizza steel or thick baking stone in your oven. This will act as a heat conductor to ensure a perfectly crispy bottom crust. Preheat your oven to 400°F (200°C) with the pizza steel inside, allowing it to heat thoroughly.
For the Egg Wash & Baking:
-
In a small bowl, whisk together the remaining large egg, 1 tablespoon of water, and a pinch of kosher salt to create your egg wash. This mixture will give your pie that coveted golden, shiny crust.
-
Remove the chilled pie from the freezer. Using a pastry brush, gently and evenly brush the entire top crust, including the lattice and edges, with the prepared egg wash. If desired, sprinkle a generous amount of sanding sugar over the top for extra sparkle and a delightful crunch.
-
Carefully place the assembled pie directly onto the preheated hot pizza steel in your oven. Bake at 400°F (200°C) for an initial 20 minutes. Without opening the oven door, reduce the temperature to 375°F (190°C) and continue baking for another 30 to 40 minutes. The pie is done when the crust is beautifully golden brown, and the cherry filling is visibly bubbling through the lattice, indicating it’s thoroughly cooked and thickened.
-
Once baked, remove the pie from the oven. Resist the temptation to slice it immediately! It is absolutely crucial to allow the pie to cool completely before slicing, typically about 4 to 6 hours. This extended cooling period ensures the filling has ample time to fully set, preventing a runny mess when you cut into your glorious Gluten-Free Cherry Pie.
Notes for Perfection
To Make-Ahead: Both the pie filling and the dough can be prepared up to 2 days in advance, offering fantastic flexibility for your baking schedule. Wrap the dough discs tightly in plastic wrap and store the cooked cherry filling in an airtight container in the refrigerator until you’re ready to assemble and bake.
To Store: After baking, allow the pie to cool completely at room temperature. This is essential for the filling to properly set. Once cooled, store the pie loosely covered. It will maintain its freshness and quality for 1 day at room temperature or up to 4 days when stored in the refrigerator.
To Freeze: For longer storage, you can easily freeze this delicious pie. Once the pie has cooled completely, wrap the entire pie (or individual slices) securely in plastic wrap, followed by a layer of aluminum foil. It can be frozen for up to 3 months. When you’re ready to enjoy, thaw the pie overnight in the refrigerator before serving. You can gently reheat slices in the oven for a “freshly baked” experience.
Nutrition
Calories: 573kcal | Carbohydrates: 70g | Protein: 7g | Fat: 32g | Saturated Fat: 17g | Polyunsaturated Fat: 3g | Monounsaturated Fat: 9g | Trans Fat: 2g | Cholesterol: 102mg | Sodium: 635mg | Potassium: 218mg | Fiber: 6g | Sugar: 32g | Vitamin A: 824IU | Vitamin C: 7mg | Calcium: 55mg | Iron: 2mg
Essential Ingredients for Your Gluten-Free Cherry Pie
Crafting this phenomenal Gluten-Free Cherry Pie relies on a few key ingredients, each playing a vital role in achieving its perfect texture and rich flavor. Understanding these components will help you create a truly exceptional dessert. You can find the exact measurements and full ingredient list on the recipe card below.
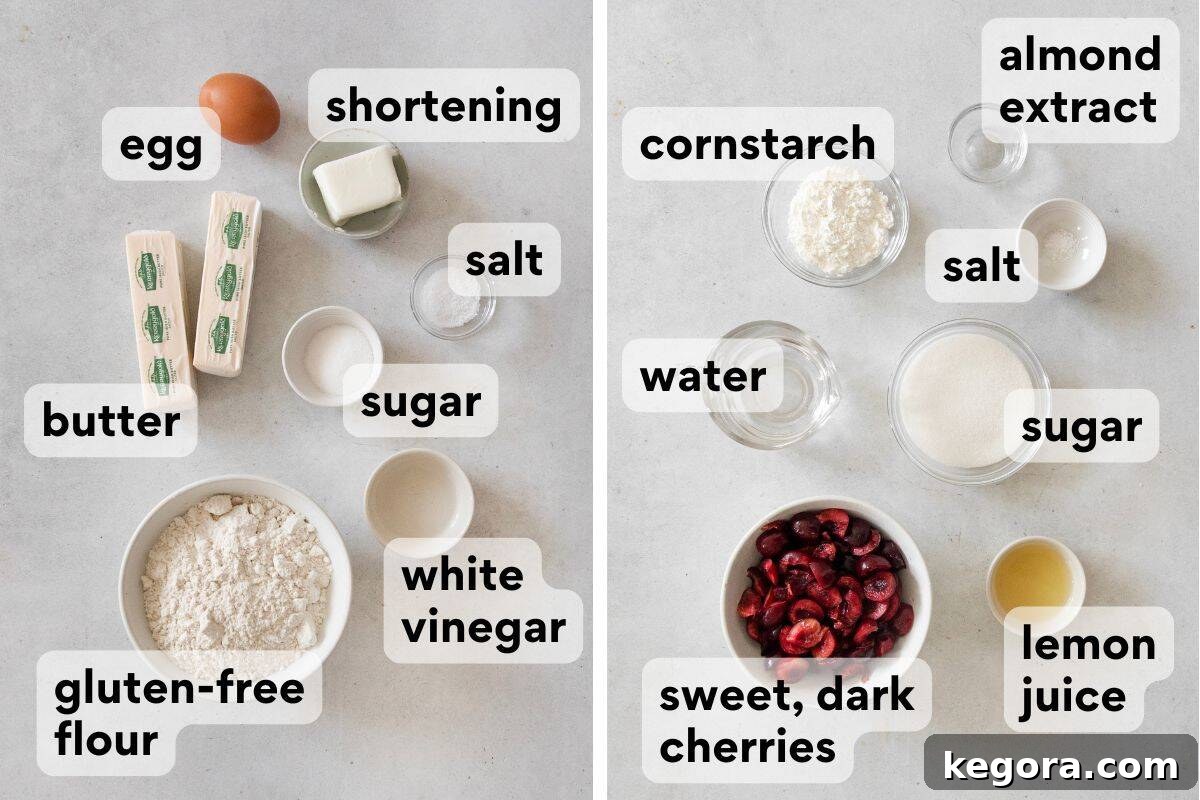
- Gluten-Free Flour: The foundation of our crust! It’s crucial to use a high-quality gluten-free measure-for-measure flour blend that already contains xanthan gum. This ensures the dough has enough structure and elasticity, mimicking traditional flour. My personal favorite is this specific gluten-free flour blend, which consistently delivers excellent results. For the most accurate and consistent pie crust, I highly recommend measuring your flour by weight using a reliable kitchen scale.
- Butter & Shortening: These fats are the magic behind a truly flaky crust. Make sure both are thoroughly frozen before you begin. As these cold fats melt in the hot oven, they release steam, creating distinct layers and pockets of air within the dough, resulting in that wonderfully flaky texture we all crave. This crust primarily uses butter for its rich, superior flavor, with just a touch of shortening added to enhance the dough’s workability and help it hold its beautiful shape.
- Egg & Vinegar: This might sound like an unusual combination for pie crust, but it’s a brilliant trick I learned from my Grandma’s cherished pie crust recipe! The added protein from the egg helps the gluten-free crust achieve a gorgeous golden-brown hue during baking, and contributes to its overall structure. The vinegar also plays a subtle but important role, tenderizing the dough and ensuring a more delicate crumb.
- Cherries & Almond Extract: The star of the show! You can use either dark sweet cherries or a delightful combination of dark sweet and Rainer cherries for a nuanced flavor. The key is to pit them thoroughly. To truly elevate the cherry flavor profile and add a touch of sophistication, I adore pairing them with a hint of almond extract. Just remember, almond extract is potent, so a little goes a very long way to achieve that perfect balance!
The Secret to a Perfect Gluten-Free Pie Crust
Creating a truly remarkable gluten-free pie crust was a significant labor of love. Many gluten-free crusts fall short, often ending up crumbly, tough, or simply lacking that buttery, flaky quality of a traditional pie. My determination was to develop a recipe that was not only genuinely buttery and irresistibly flaky but also robust enough to hold its shape beautifully once baked. After countless hours of testing, experimenting with different flours, fat ratios, and techniques, I finally arrived at this recipe – THE gluten-free pie crust that meets every expectation.
What makes this crust so special? Its unique composition allows for intricate details like a stunning lattice-work top, which is often a challenge with more fragile gluten-free doughs. It handles well, rolls out smoothly (with a little patience!), and bakes up to a golden perfection. More importantly, it forms the ideal, sturdy, and flavorful base for a luscious, gooey, and fruity filling – just like in this incredible cherry pie. Every single bite is pure fruit pie heaven, proving that going gluten-free doesn’t mean sacrificing deliciousness or texture.
Step-by-Step Guide: How to Make Gluten-Free Cherry Pie
Embark on your journey to bake the most delicious Gluten-Free Cherry Pie with this detailed overview. Each step is designed to guide you effortlessly through the process, ensuring a successful and delightful baking experience. For the complete, precise instructions and measurements, remember you can always jump directly to the recipe card below.
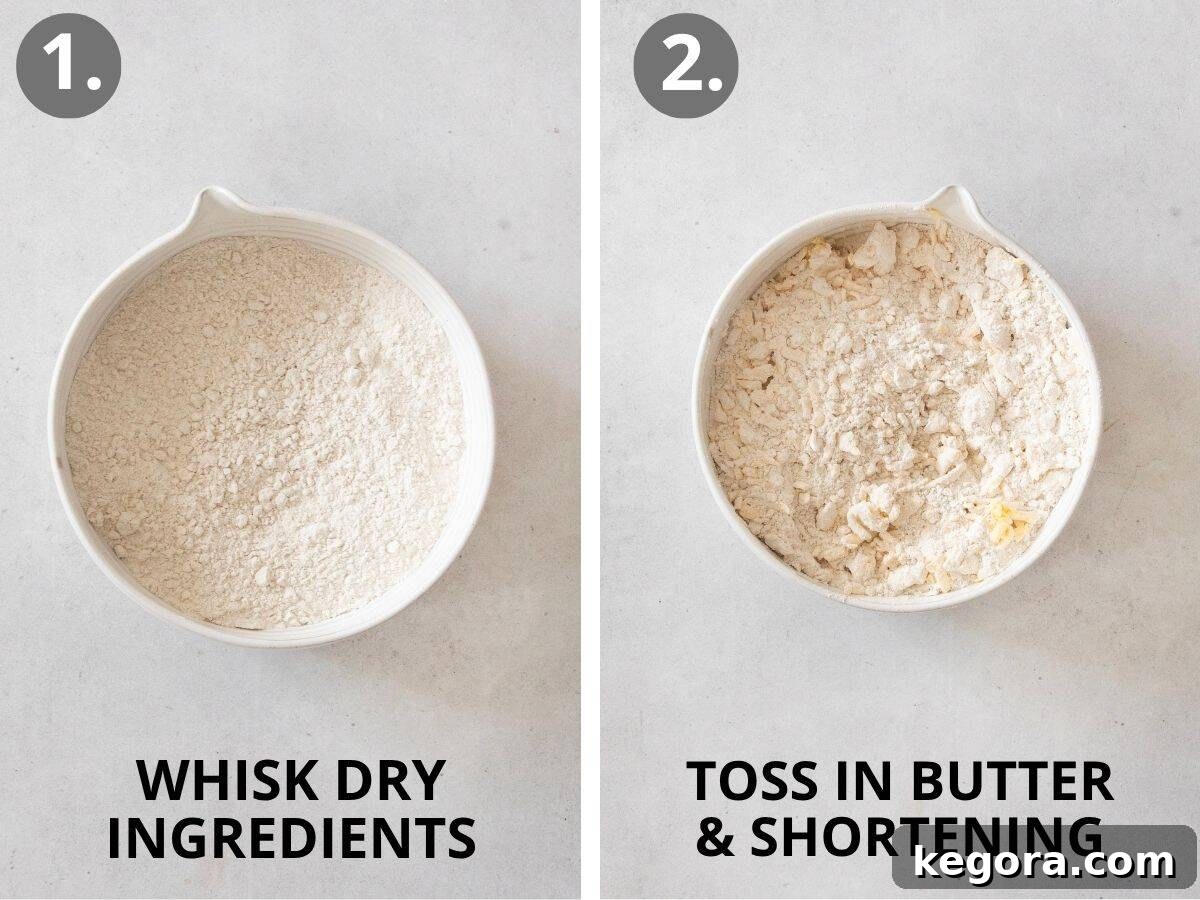
A little planning goes a long way with this crust! To ensure your pie-making process flows smoothly without any delays, begin by freezing your butter and shortening well in advance. Simultaneously, prepare the unique egg-vinegar mixture and refrigerate it so it’s perfectly chilled and ready when needed. This readiness is key to maintaining the cold temperature crucial for a flaky crust.
Through extensive testing, I’ve discovered that grating the frozen butter and shortening directly into the dry ingredients, then gently tossing them to coat, yields the absolute best texture for this gluten-free crust. This method outperforms using a food processor, as it creates perfectly sized pieces of fat that contribute to optimal flakiness without overworking the dough.
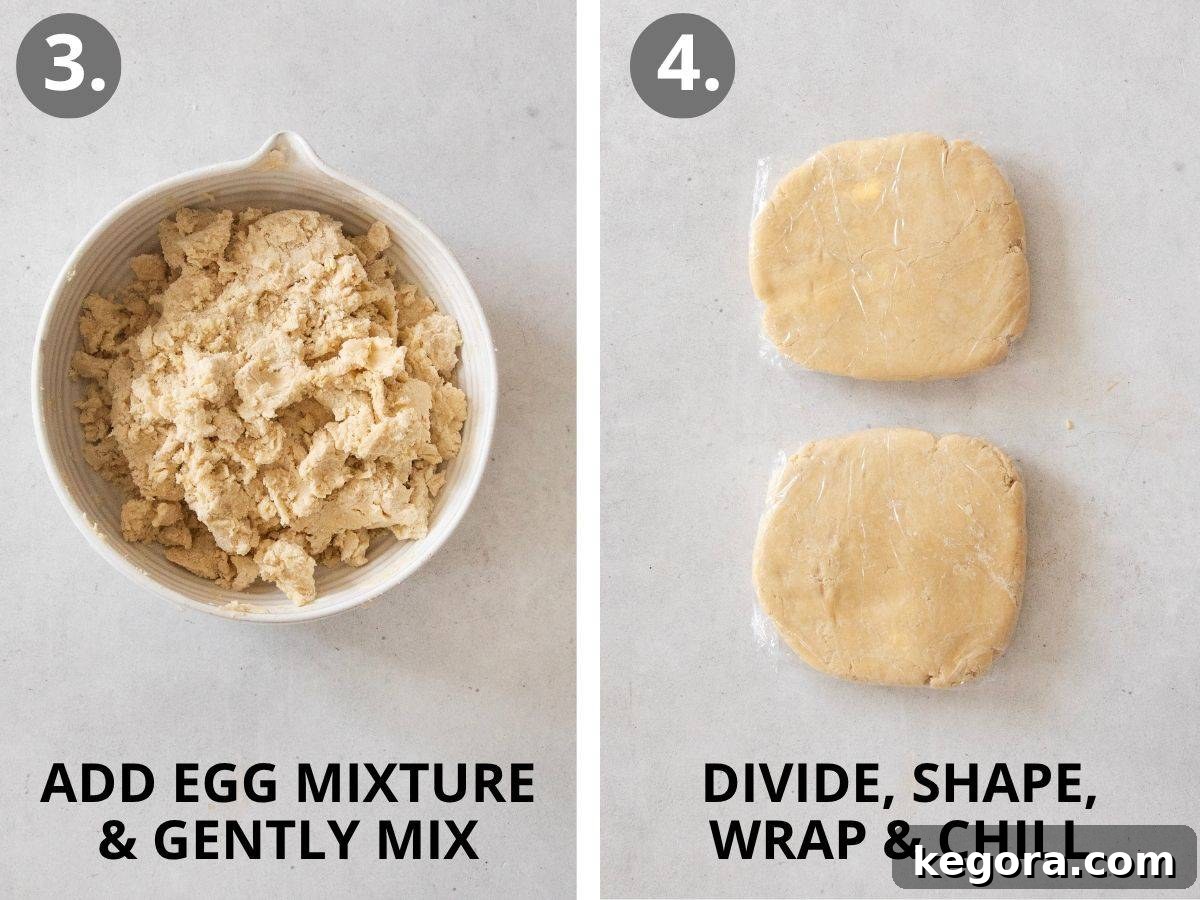
When incorporating the liquid, exercise caution to avoid adding too much moisture to your dough. Drizzle the egg-vinegar mixture just 1 tablespoon at a time over the flour and butter combination. Use a rubber spatula to gently stir and toss the ingredients after each addition, ensuring the moisture is distributed evenly. You’ll notice the mixture gradually starting to come together into distinct large clumps – this is your cue.
At this point, switch from the spatula to your hands to gently knead the dough the rest of the way. The ideal dough consistency will be just moist enough to hold together firmly when pressed, but it should never feel sticky. Once achieved, turn the dough onto a lightly floured surface. Gather it and form it into a cohesive ball, pressing in any loose bits. Then, gently divide the dough in half, shape each half into a uniform disc, wrap them tightly in plastic, and refrigerate for at least one hour to chill thoroughly.
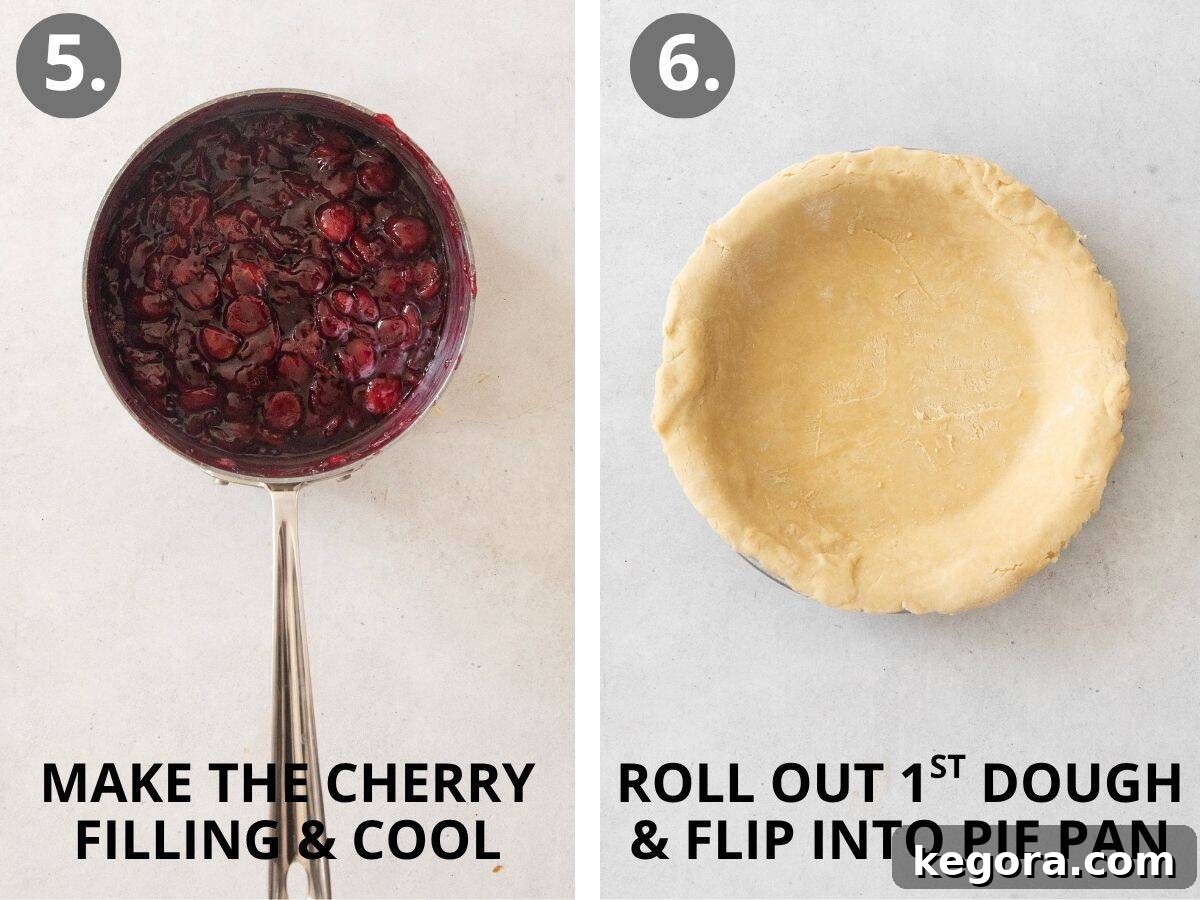
Before you begin cooking the filling, make sure all your fresh cherries are thoroughly pitted and, for better texture, some are halved and some quartered. Start the filling on medium heat, stirring consistently. This initial warmth helps the cherries to begin releasing their delicious juices. Once the mixture reaches a gentle bubble, reduce the heat to medium-low and continue to simmer. This slower cook, combined with frequent stirring, is essential for the filling to thicken beautifully and develop that desirable glossy finish without scorching.
When it’s time to roll out your dough, if it has been in the refrigerator for longer than an hour, let it sit at room temperature for about 15 minutes. This brief resting period makes the dough more pliable and easier to work with. Remember that gluten-free pie crust requires a bit more patience and gentle handling compared to traditional dough. Roll it out slowly and deliberately. If you notice any small splits or breaks on the edges, don’t worry – this is completely normal for gluten-free dough! Simply press the dough back together with your fingers. Once you’ve successfully transferred it to the pie pan, you can neatly trim and shape the edges for a tidy finish.
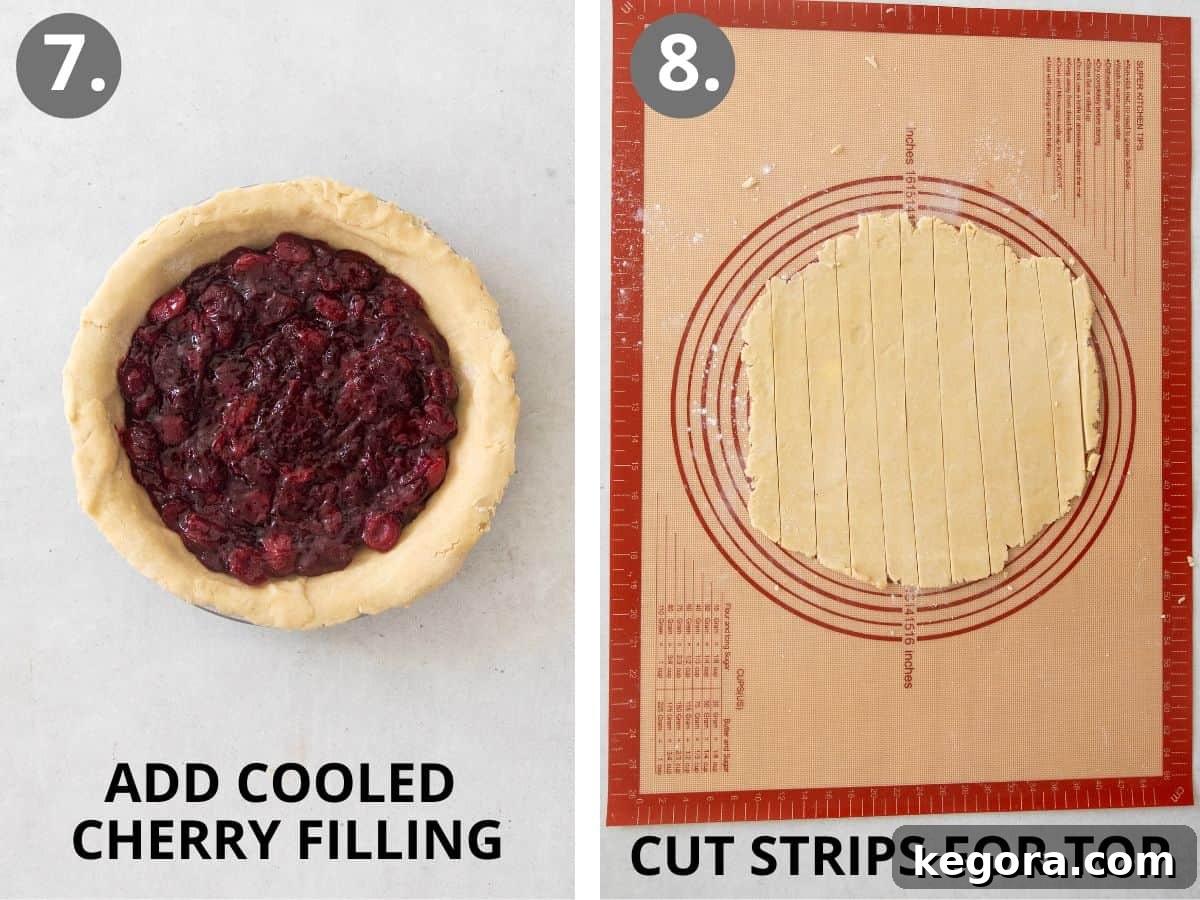
One of the fantastic advantages of this recipe is that there’s no need to par-bake the bottom crust! Thanks to the pre-cooked, thickened cherry filling, you can confidently pour the completely cooled filling directly into the raw bottom dough. This streamlines the process and ensures a perfect set without extra steps.
For your beautiful lattice top, roll out the second disc of dough into a 12-inch circle. I find it easiest and most efficient to use a sharp knife or a dedicated pastry wheel to cut the dough into uniform strips. Aim for strips that are about ½ to ¾ inch wide; this size makes them sturdy enough to work with for intricate lattice patterns while still creating an elegant appearance.
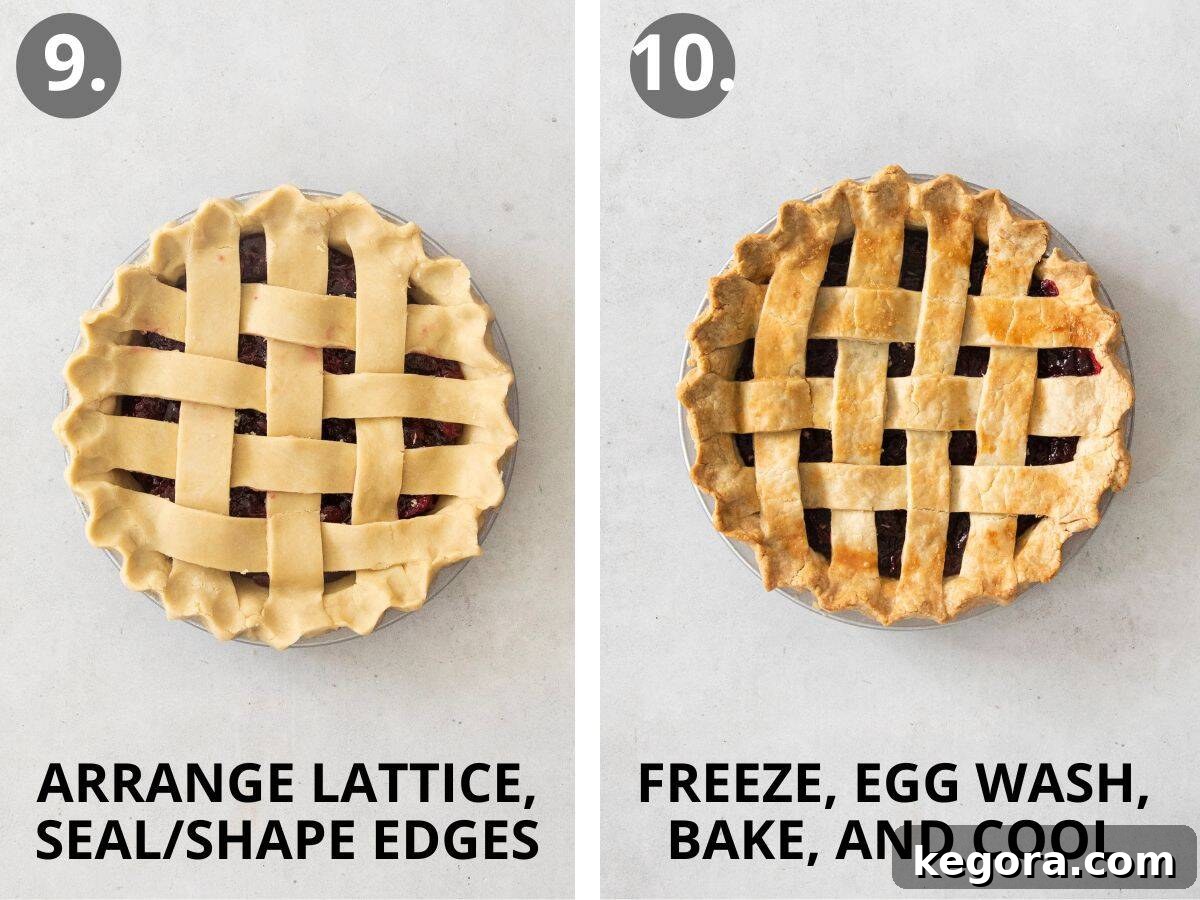
Even a simple lattice pattern can look incredibly impressive and elevates the presentation of your homemade pie! After arranging your dough strips, don’t forget to gently press the edges where the lattice meets the bottom crust to create a secure seal. This ensures a cohesive top crust and prevents the filling from bubbling over excessively. Trim away any excess dough and then take a moment to shape the edges as desired – a decorative crimp can add that perfect finishing touch.
Before the pie enters the oven, place the raw, assembled pie in the freezer for at least 15 minutes (or up to an hour). This thorough chilling and firming of the crust is a vital step to prevent shrinkage and help the pastry maintain its flaky texture during baking. Once chilled, apply the egg wash (and optional sanding sugar) to the top crust for a beautiful golden sheen. To achieve both a perfectly crisp, well-baked bottom crust and a tender, flavorful filling, employ two expert techniques: firstly, place the pie directly onto a preheated pizza steel (or baking stone) for intense bottom heat; and secondly, initiate baking at a higher oven temperature, then reduce it to allow for even cooking without burning the crust.
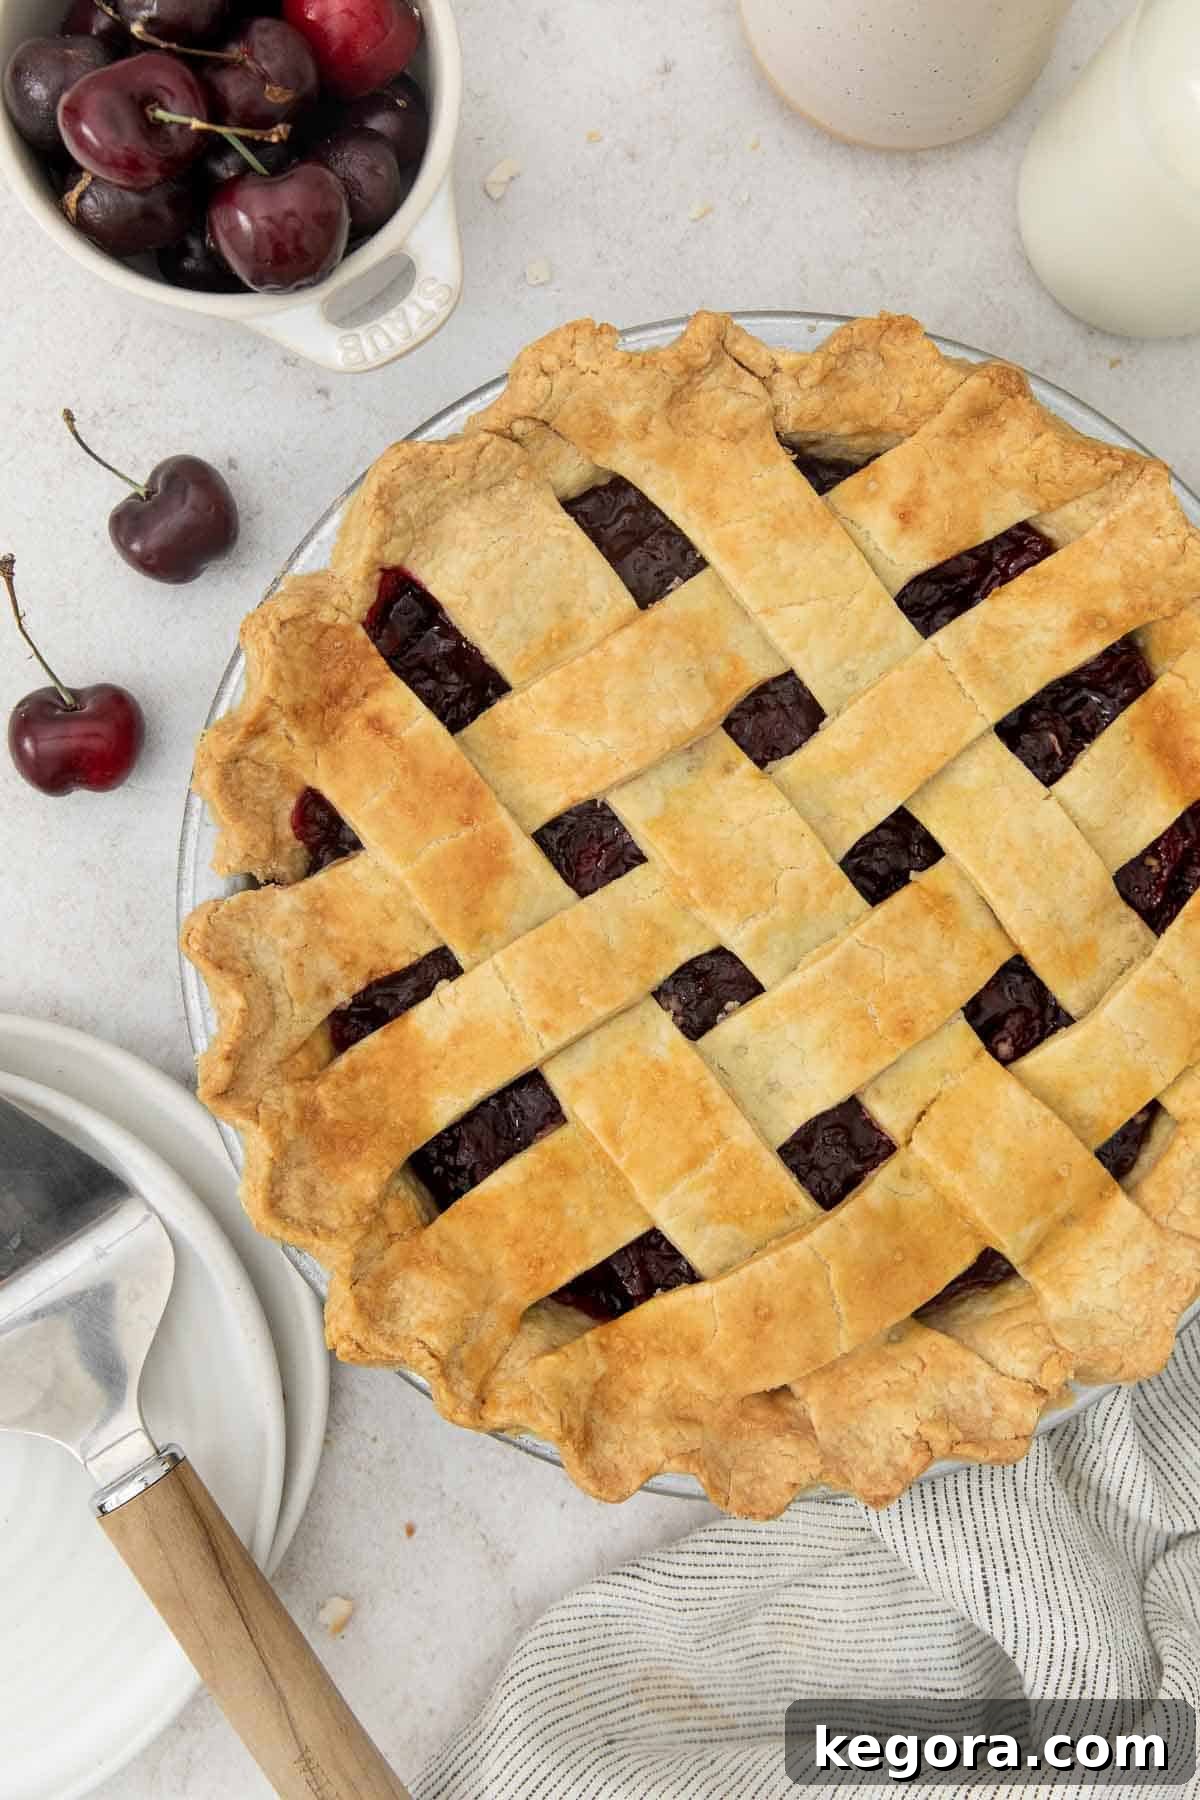
The final step, though perhaps the hardest, is crucial: resist the temptation to slice into your freshly baked pie immediately! Allow it to cool completely for at least 4-6 hours. This extended cooling period is absolutely essential for the filling to fully set, ensuring clean, beautiful slices every time. Once cooled, you’ll be rewarded with one beautifully delicious, perfectly set, Gluten-Free Cherry Pie!
Explore More Gluten-Free Pie Recipes!
If you’ve fallen in love with this Gluten-Free Cherry Pie, you’re in for a treat! My collection of gluten-free pie recipes is designed to bring you all the classic flavors and textures you adore, without any gluten. From creamy custards to zesty fruit fillings, there’s a pie for every occasion and every craving. Discover your next favorite dessert below:
- Gluten-Free Coconut Cream Pie
- Gluten-Free Buttermilk Pie
- Gluten-Free Lemon Cream Pie
- Gluten-Free Key Lime Pie
- Dairy-Free Banana Cream Pie
- Gluten-Free Chocolate Pie
- Gluten-Free Peanut Butter Pie