
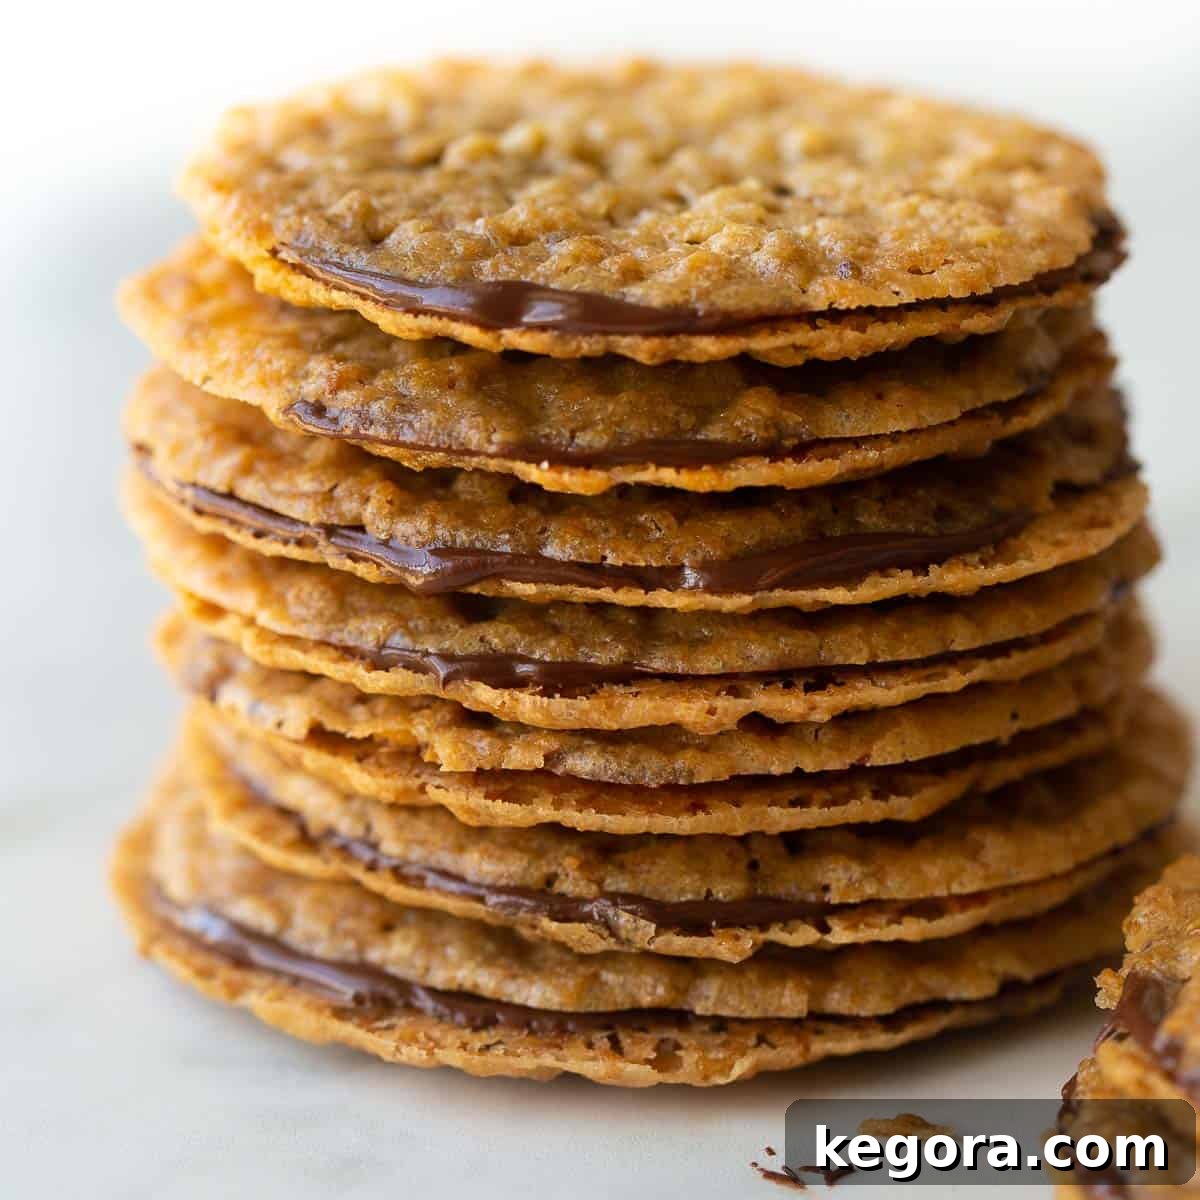
Indulge in the delicate allure of these Lace Cookies – a symphony of crispness, buttery richness, and irresistible flavor! This simple recipe guides you to create perfectly thin, golden cookies that practically melt in your mouth. Elevate their decadence by layering them with luscious dark chocolate, transforming each bite into a gourmet experience. Naturally gluten-free, these stackable beauties are ideal for holiday gift-giving, impressing guests, or simply treating yourself any time of year.
If your sweet tooth yearns for more delightful cookie adventures, be sure to explore these Chocolate Coconut Cloud Cookies. For an even wider array of ideas to satisfy every dessert craving, browse all my Gluten-Free Desserts.
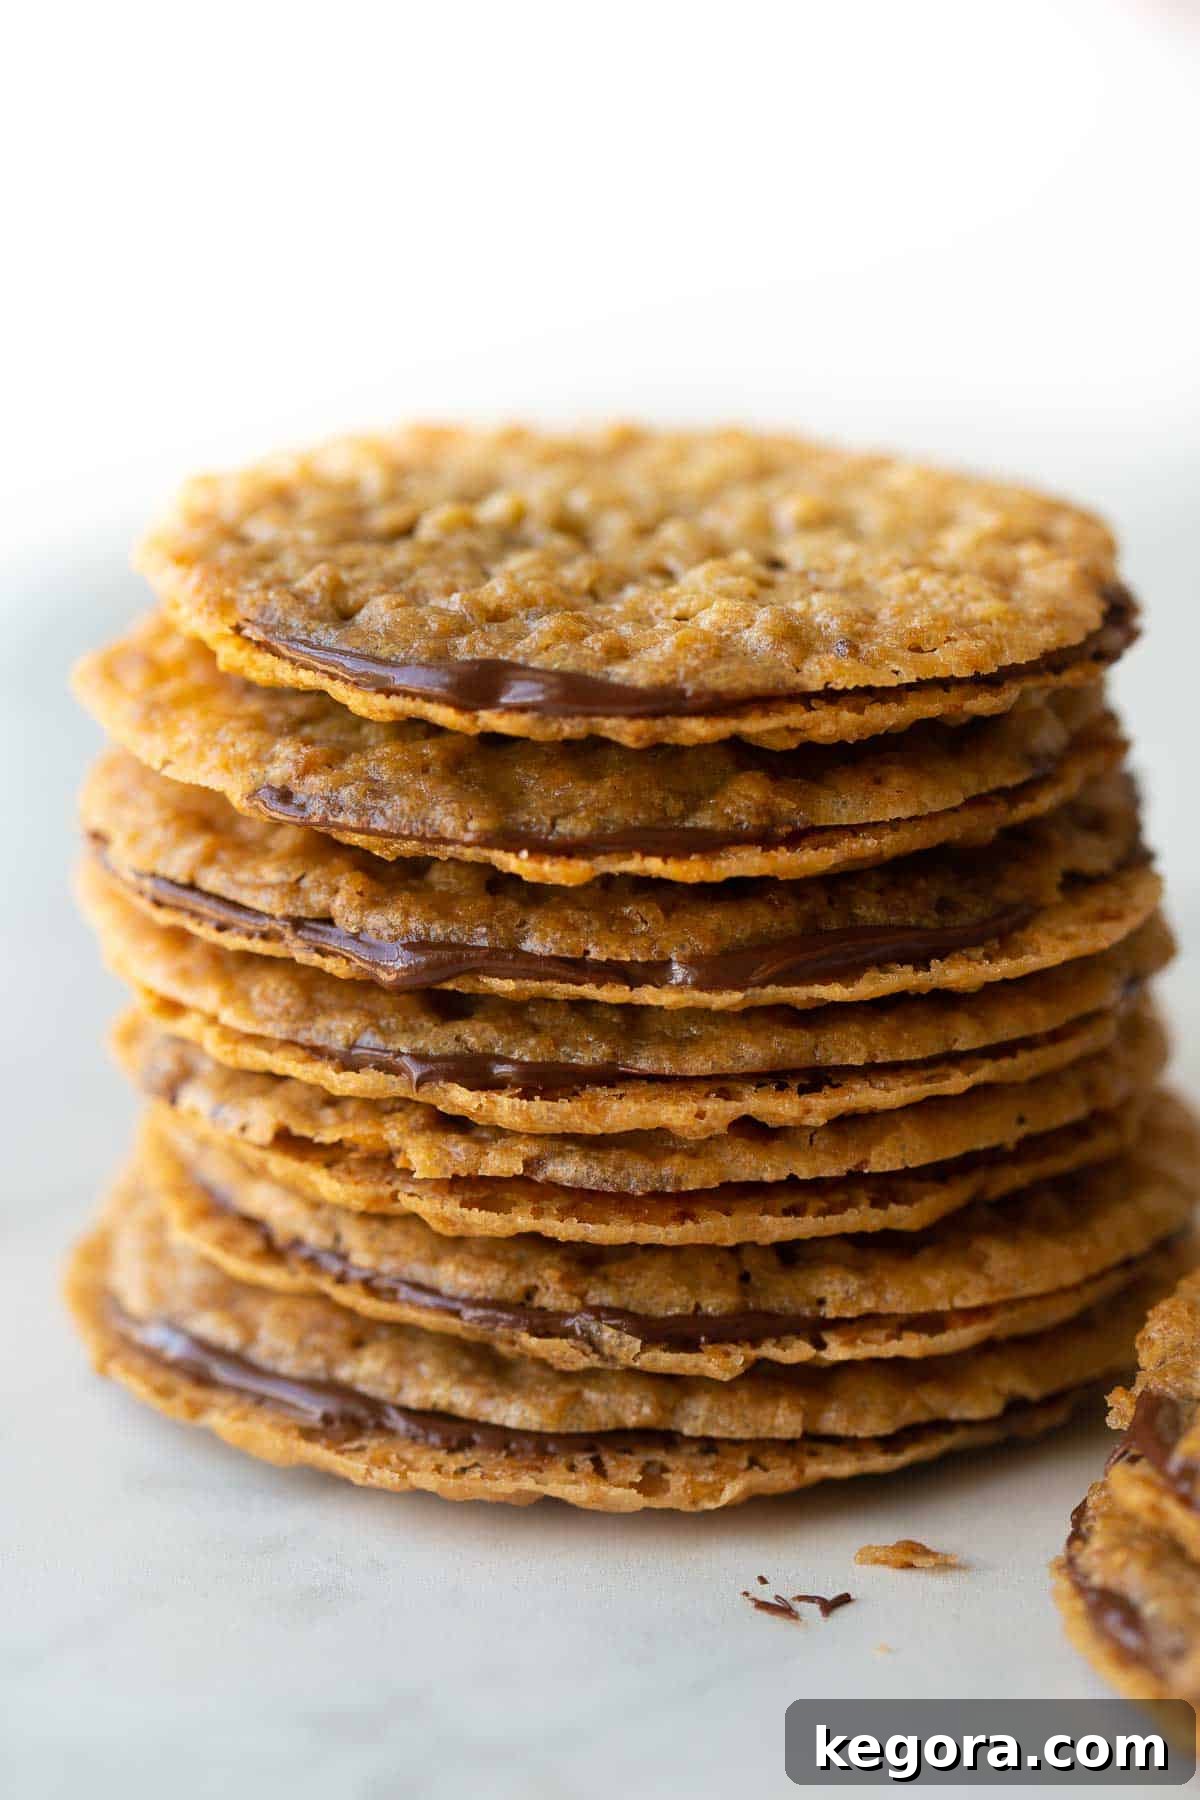
Irresistible Lace Cookies: A Guide to Delicate Perfection
Lace cookies have long held their place as a cherished holiday classic, and for good reason! These exquisite treats are celebrated for their remarkably thin, buttery, and crispy texture, making them utterly addicting from the very first bite. What truly sets them apart, however, is their inherent elegance – a sophisticated charm that belies their surprising ease of preparation. While they look like they’ve been meticulously crafted in a high-end bakery, the truth is, anyone can master this simple recipe.
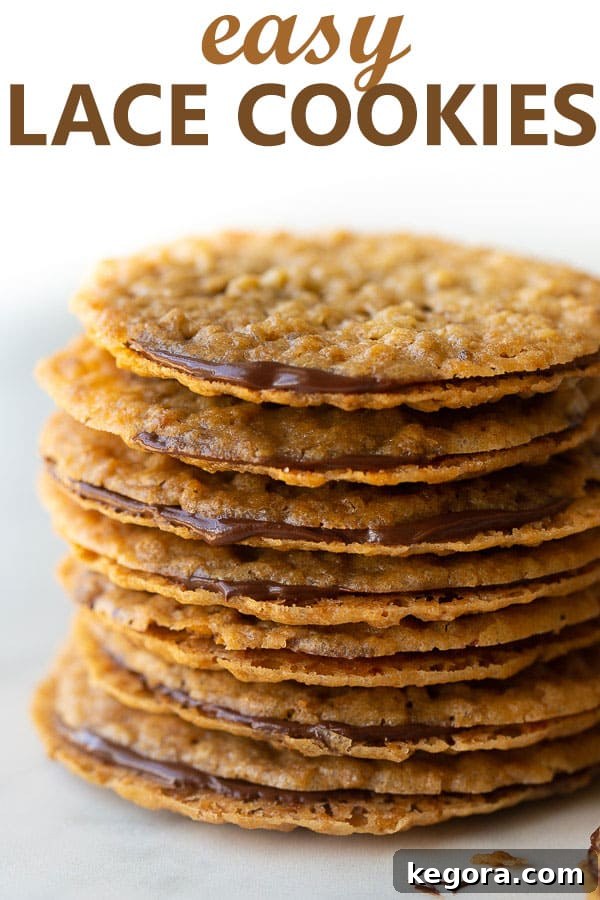
Their delicate structure and rich flavor profile make them a perfect companion to a warm cup of coffee or tea, an elegant addition to any dessert platter, or a thoughtful, homemade gift. Beyond their enchanting taste, these cookies offer incredible versatility, especially when layered with a touch of melted dark chocolate. The addition of chocolate not only enhances the flavor but also provides a lovely contrast in texture, creating a truly unforgettable experience.
If you enjoy the comforting taste of oats in your desserts, you might also like these gluten-free oatmeal cream pies – another beloved classic reimagined for a gluten-free diet.
What Exactly Makes a Lace Cookie So Special?
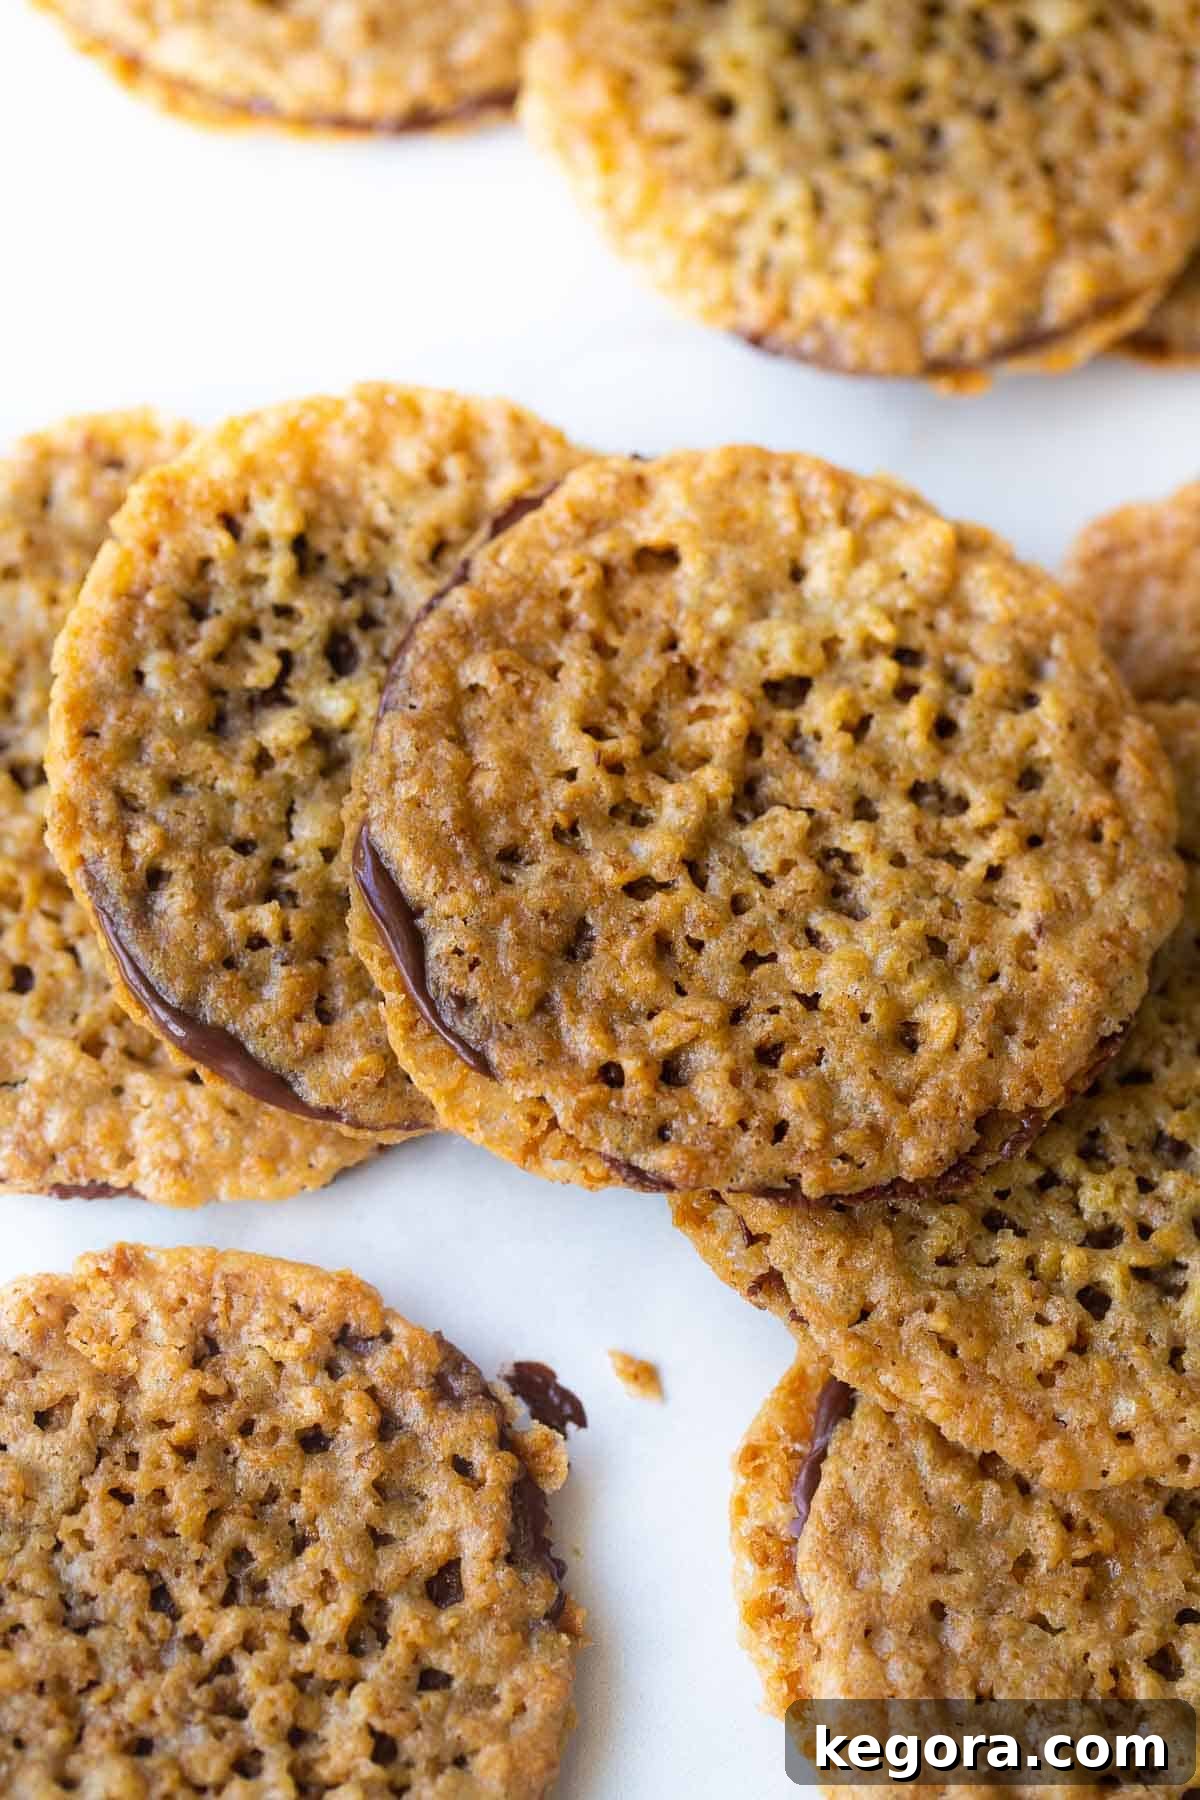
Lace cookies are aptly named for their signature delicate, almost translucent appearance, reminiscent of intricate lace. This unique characteristic is achieved through a specific balance of ingredients and baking technique, allowing the butter and sugar to caramelize and spread thinly across the baking sheet. Traditionally, these cookies are crafted from a handful of basic ingredients: butter, sugar, and salt, often complemented by a binder and sometimes a leavening agent. Depending on the recipe, you might find variations that incorporate oats, a small amount of flour, or even finely ground nuts to enhance texture and flavor.
My preferred method for creating the ultimate lace cookie involves the use of quick oats. I find that quick oats contribute an unparalleled texture – finely distributed yet distinct, allowing for that quintessential lacy pattern to emerge beautifully. For those following a gluten-free lifestyle, I highly recommend using certified gluten-free quick oats. However, if gluten is not a concern, any standard quick oats will yield equally delicious results. The key is to avoid larger rolled oats, as they won’t create the same delicate, spread-out texture that gives lace cookies their signature look and feel.
The Magic of Brown Butter in Lace Cookies
One of the secret weapons in this lace cookie recipe is brown butter, also known as beurre noisette. This simple technique takes plain melted butter and transforms it into a nutty, aromatic elixir that deeply enriches the flavor profile of the cookies. The process involves gently cooking butter until its milk solids caramelize, creating a complex, toasted flavor that adds an extra layer of sophistication to the final product. It’s a quick step that adds immense depth, making these cookies stand out even more.
How to Masterfully Create Your Own Lace Cookies
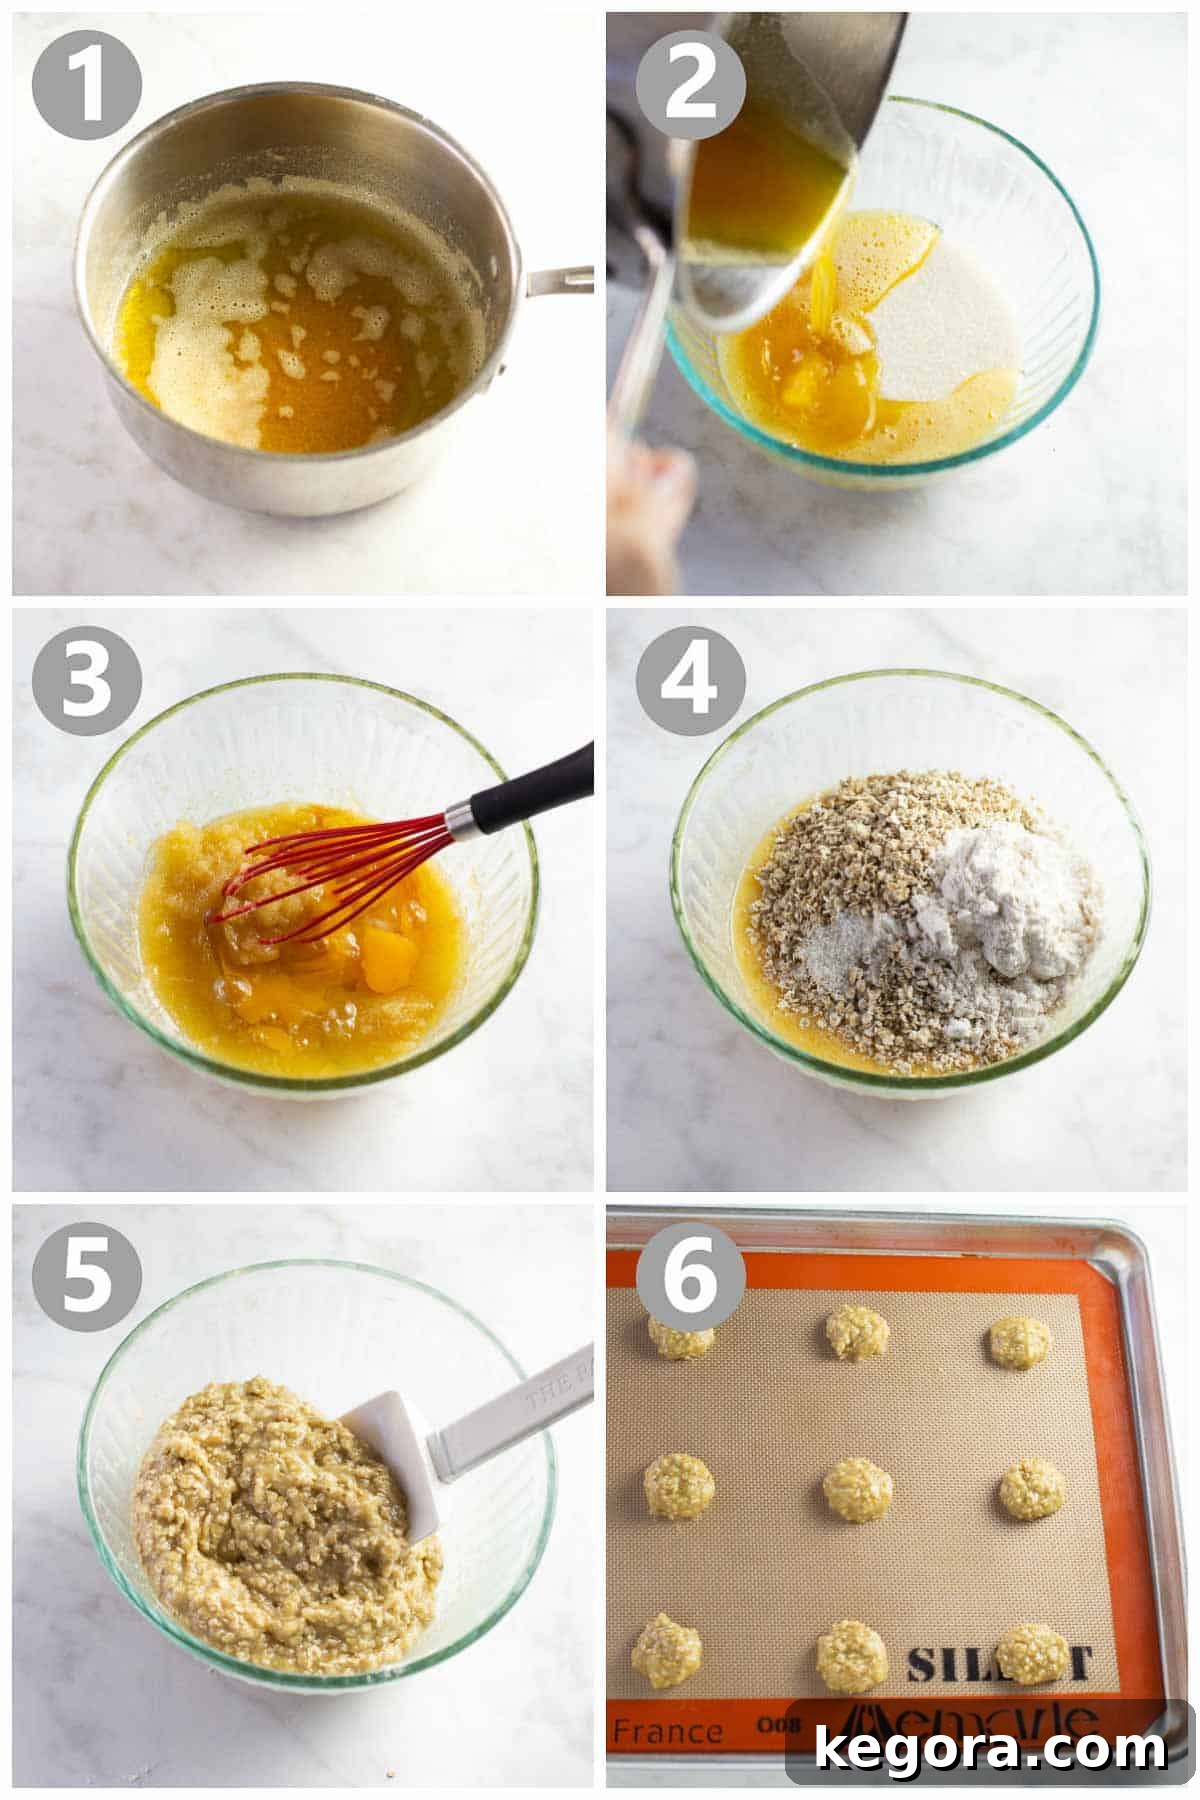
Crafting these delicate lace cookies is a straightforward process, broken down into a few easy steps. The key is to pay attention to detail, especially when browning the butter and portioning the dough. Here’s a quick overview of the method:
- Brown the butter: This initial step is crucial for developing a rich, nutty foundation for your cookies.
- Combine wet ingredients: Pour the warm brown butter over the sugar and whisk until beautifully combined.
- Integrate egg and vanilla: Add the egg and vanilla extract, whisking until the mixture becomes perfectly smooth and emulsified.
- Add the dry ingredients: Gently fold in the quick oats, gluten-free flour, and salt.
- Mix thoroughly: Using a spatula, combine all ingredients until a cohesive dough forms. Be careful not to overmix.
- Portion and bake: Scoop small, precise portions (1 teaspoon each) onto a lined baking sheet, ensuring ample space between them. Then, bake to golden, lacy perfection!
Adding the Decadent Dark Chocolate Layer
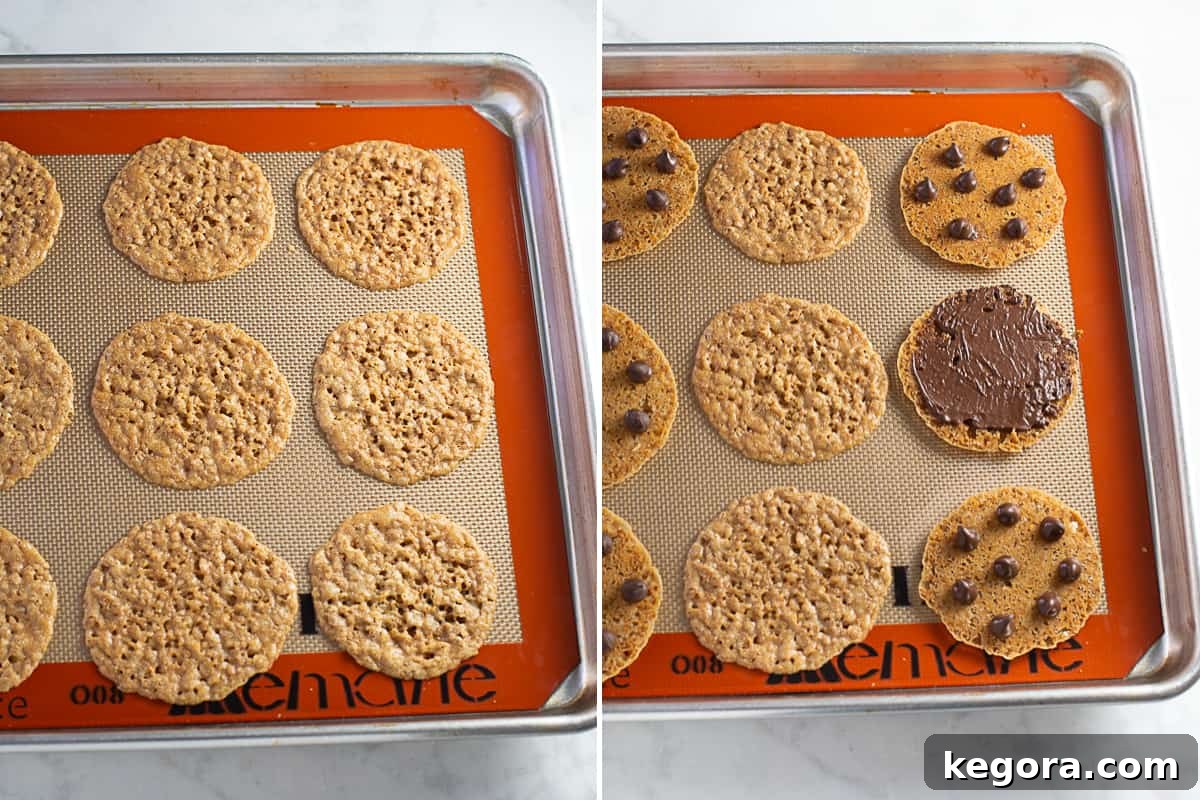
Once your lace cookies emerge from the oven, their transformation isn’t quite complete. For that extra layer of indulgence and stability, we add a dark chocolate filling. After baking, allow the cookies to cool on the baking sheet for just 2-3 minutes. This brief cooling period helps them firm up slightly, making them easier to handle without breaking.
Next, carefully flip six of the cookies over using a small, flexible spatula (this one is fantastic for delicate tasks!). Generously top each flipped cookie with a handful of good quality dark chocolate chips. The residual heat from the baking sheet will work its magic, gently melting the chocolate into a luscious pool. If your kitchen is particularly cool and the chocolate isn’t melting as quickly as desired, simply pop the baking sheet back into the warm oven for about 1 minute. Be watchful, as you only want to soften the chocolate, not bake it!
Once melted, use the back of a spoon or a small offset spatula to gently spread the chocolate into a smooth, even layer. Immediately place another lace cookie on top, creating a delicate sandwich. Transfer these beautiful chocolate-layered cookies to a cooling rack to allow them to cool completely. As the chocolate solidifies, it will act as a delicious “glue,” holding the two cookies together and adding a wonderful textual contrast.
Expert Tips for Achieving Perfectly Thin, Crispy Lace Cookies Every Time
While lace cookies are surprisingly easy to make, a few key techniques can elevate your baking from good to absolutely outstanding. Follow these expert tips to ensure your cookies are consistently thin, perfectly crispy, and utterly delicious:
- Embrace the Brown Butter: This step is non-negotiable for superior flavor. Browning the butter adds a deep, nutty, and complex aroma that plain melted butter simply cannot replicate. You’re already melting the butter, so taking an extra 2-3 minutes to brown it is an investment that pays huge dividends in taste. Watch carefully as the butter foams, then turns golden brown, releasing a fragrant, toasty scent.
- Opt for Quick Oats: The type of oats you use significantly impacts the cookie’s texture. Quick oats are essential for achieving that characteristic delicate, even, and lacy spread. Their smaller, more finely cut structure allows them to blend seamlessly into the dough and create those beautiful, intricate patterns as they bake. Larger rolled oats, while delicious in other recipes, will result in a chunkier, less refined cookie that won’t spread as thinly or evenly.
- Precision in Portioning is Key: Lace cookies are notorious for spreading considerably during baking. To prevent them from merging into one giant cookie sheet, it is absolutely vital to use no more than 1 teaspoon of dough per cookie. Furthermore, ensure you leave generous spacing – at least 2.5 to 3 inches – between each dollop of dough on your baking sheet. This allows each cookie ample room to spread out and develop its delicate, lacy edges without touching its neighbors.
- Invest in a Silpat Baking Liner: For effortless removal and perfect results, a nonstick silpat liner or high-quality parchment paper is highly recommended. These cookies are extremely thin and delicate when warm, and they can easily stick to an unlined or poorly greased baking sheet, making them prone to breaking during transfer. A silpat liner guarantees easy release, preserving the integrity of their beautiful lacy structure.
- Leverage Melted Chocolate for Structure and Flavor: Beyond its undeniable deliciousness, the melted dark chocolate filling serves a practical purpose. As the chocolate cools and solidifies, it acts as a binder, helping to hold the two delicate cookie halves together. This added structural integrity makes them much sturdier and less prone to breakage, particularly if you plan on stacking them, packaging them for gifts, or transporting them to a gathering. Plus, the combination of crispy oat and rich chocolate is simply divine!
- Cooling Patience is a Virtue: Resist the urge to move the cookies immediately after removing them from the oven. Allow them to cool on the baking sheet for 2-3 minutes. During this time, they will firm up sufficiently to be handled with a spatula without crumbling. Moving them too soon will likely result in broken cookies.
Frequently Asked Questions About Lace Cookies
How should I properly store these delicate Lace Cookies?
To maintain their signature crispness and extend their freshness, store your lace cookies in an airtight container or a resealable bag at room temperature. They will remain wonderfully crispy and delicious for up to 4 days. Their robust shelf life and resistance to becoming soggy make them an excellent choice for holiday cookie exchanges, thoughtful homemade gifts, or simply for enjoying over several days.
Can I freeze Lace Cookies to enjoy later?
Absolutely! Lace cookies freeze beautifully, allowing you to prepare them in advance or save a batch for future cravings. Place them in a single layer in a resealable freezer bag or an airtight container, separating layers with parchment paper to prevent sticking. They can be frozen for up to 3 months. When freezing, choose a spot in your freezer where they won’t be easily crushed or broken by other items. Or, better yet, find a secret spot where they won’t be discovered and devoured too quickly!
What if my cookies aren’t spreading enough?
If your lace cookies aren’t spreading into their characteristic thin, lacy discs, several factors could be at play. Ensure your butter was thoroughly browned and melted, as cold or solid butter will hinder spreading. Also, make sure your oven temperature is accurate; a slightly too-cool oven can prevent adequate spreading. Lastly, confirm you are using quick oats, not rolled oats, as quick oats are key to their delicate texture and spread. Overmixing the dough can also develop too much gluten (if using regular flour), making them less prone to spread. For gluten-free flour, ensure it’s a 1:1 blend designed for baking.
Can I make these cookies without the chocolate layer?
Certainly! While the dark chocolate layer adds a wonderful touch of decadence and helps with structural integrity, these lace cookies are incredibly delicious on their own. If you prefer them plain, simply omit the chocolate chips and allow the baked cookies to cool completely on a wire rack before storing.
Are there any variations I can try with this recipe?
While the classic chocolate-layered lace cookie is perfect, you can absolutely get creative! Consider adding a pinch of cinnamon or a tiny dash of finely ground ginger to the dry ingredients for a subtle spice note. For a different texture, you could sprinkle a few finely chopped nuts (like pecans or almonds) on top of the melted chocolate before adding the second cookie. Another idea is to drizzle melted white chocolate over the finished cookies for an elegant contrast.
If you’re looking for more delicious gluten-free cookie recipes to add to your repertoire, you may want to try these other fantastic options:
- Gluten-Free Pizzelle
- Gluten-Free Oatmeal Scotchies
- Flourless Peanut Butter Cookies
- Gluten-Free Christmas Cookies
We love hearing from you! If you try this recipe, please be sure to leave a comment below and share your experience. Your feedback helps us and other bakers!
Lace Cookies (Gluten-Free) Recipe Card
A simple recipe for crispy, buttery Lace Cookies that everyone will love! Layer them with some dark chocolate for extra decadence.
Yields: 18 cookies
Prep time: 20 minutes
Cook time: 15 minutes
Total time: 35 minutes
Ingredients
- 1/2 cup butter
- 1 cup granulated sugar
- 1 egg
- 1 teaspoon vanilla extract
- 1 cup gluten-free quick oats
- 1/4 cup gluten-free 1:1 baking flour
- 1/2 teaspoon salt
- 12 oz dark chocolate chips (for layering)
Instructions
- Preheat your oven to 350°F (175°C). Line a baking sheet with a silpat liner or parchment paper. This is essential for easy cookie removal.
- In a small saucepan, melt the butter over medium heat. Continue to cook, whisking constantly, until the butter begins to foam. Keep whisking as the milk solids at the bottom of the pan turn golden brown and the butter emits a rich, nutty aroma. Immediately remove from heat to prevent burning.
- In a medium-sized mixing bowl, add the granulated sugar. Pour the hot brown butter over the sugar, making sure to scrape all the browned bits from the bottom of the saucepan into the bowl. Whisk until well combined. Add the egg and vanilla extract, then whisk until the mixture is smooth and fully incorporated.
- Add the quick oats, gluten-free flour, and salt to the wet ingredients. Using a spatula, gently mix until all the dry ingredients are just combined and no streaks of flour remain. Be careful not to overmix.
- Drop the cookie dough by level teaspoonfuls onto your prepared baking sheet. Ensure there is ample space, about 2.5 to 3 inches, between each cookie, as they will spread significantly during baking. You should comfortably fit about 10-12 cookies per standard baking sheet.
- Bake for 12-14 minutes, or until the edges of the cookies turn a beautiful golden brown and appear lacy. Remove the baking sheet from the oven and let the cookies cool on the pan for 2-3 minutes. This brief cooling period allows them to firm up slightly before handling.
- While still warm on the baking sheet, use a small, flexible spatula to carefully flip over half of the baked cookies (e.g., 6 cookies if you baked 12). Sprinkle 10-12 dark chocolate chips onto each flipped cookie. The residual heat from the pan will melt the chocolate. If it doesn’t melt readily, place the baking sheet back in the warm oven for just 1 minute.
- Once the chocolate is melted, spread it gently into a thin, even layer using the back of a spoon or a small offset spatula. Carefully place an un-flipped cookie on top of each chocolate-covered cookie, creating a sandwich. Transfer the finished chocolate-layered lace cookies to a wire cooling rack to cool completely. As the chocolate sets, it will help bind the cookies together.
- Store your cooled lace cookies in an airtight container or a resealable bag at room temperature for up to 4 days to maintain their crispness. For longer storage, they can be frozen in a resealable bag for up to 3 months. Enjoy your delicate and delicious lace cookies!
Notes
- Brown butter gives these cookies an extra delicious flavor. Brown butter gives these cookies a nutty aroma and flavor. You have to melt the butter anyway, and browning it only takes 2 extra minutes. It is well worth the effort!
- Use quick oats instead of rolled oats. Quick oats give these cookies a nice, even texture. Since rolled oats are larger, they won’t make as delicate of a cookie.
- Only use 1 teaspoon dough per cookie. Trust me when I say these cookies spread a lot! You’ll want to be sure to only use 1 teaspoon dough per cookie and to give the cookies plenty of space for spreading during baking.
- Use a silpat baking liner. A nonstick silpat liner is very helpful for making these cookies. The cookies will easily come off a lined pan, but may stick to an unlined pan.
- Melted chocolate will help hold these cookies together. Melted chocolate is not only delicious, it also solidifies as it cools and helps hold these cookies together. I recommend layering the lace cookies with chocolate if you’re planning on bringing them somewhere.
Nutrition Information (per cookie)
Please note that these values are estimates and can vary based on specific ingredients and preparation methods.
- Calories: ~210 kcal
- Carbohydrates: ~28g
- Protein: ~2g
- Fat: ~10g
- Saturated Fat: ~6g
- Cholesterol: ~25mg
- Sodium: ~126mg
- Potassium: ~25mg
- Fiber: ~1g
- Sugar: ~23g
- Vitamin A: ~213 IU
- Vitamin C: ~0.1mg
- Calcium: ~27mg
- Iron: ~0.5mg