
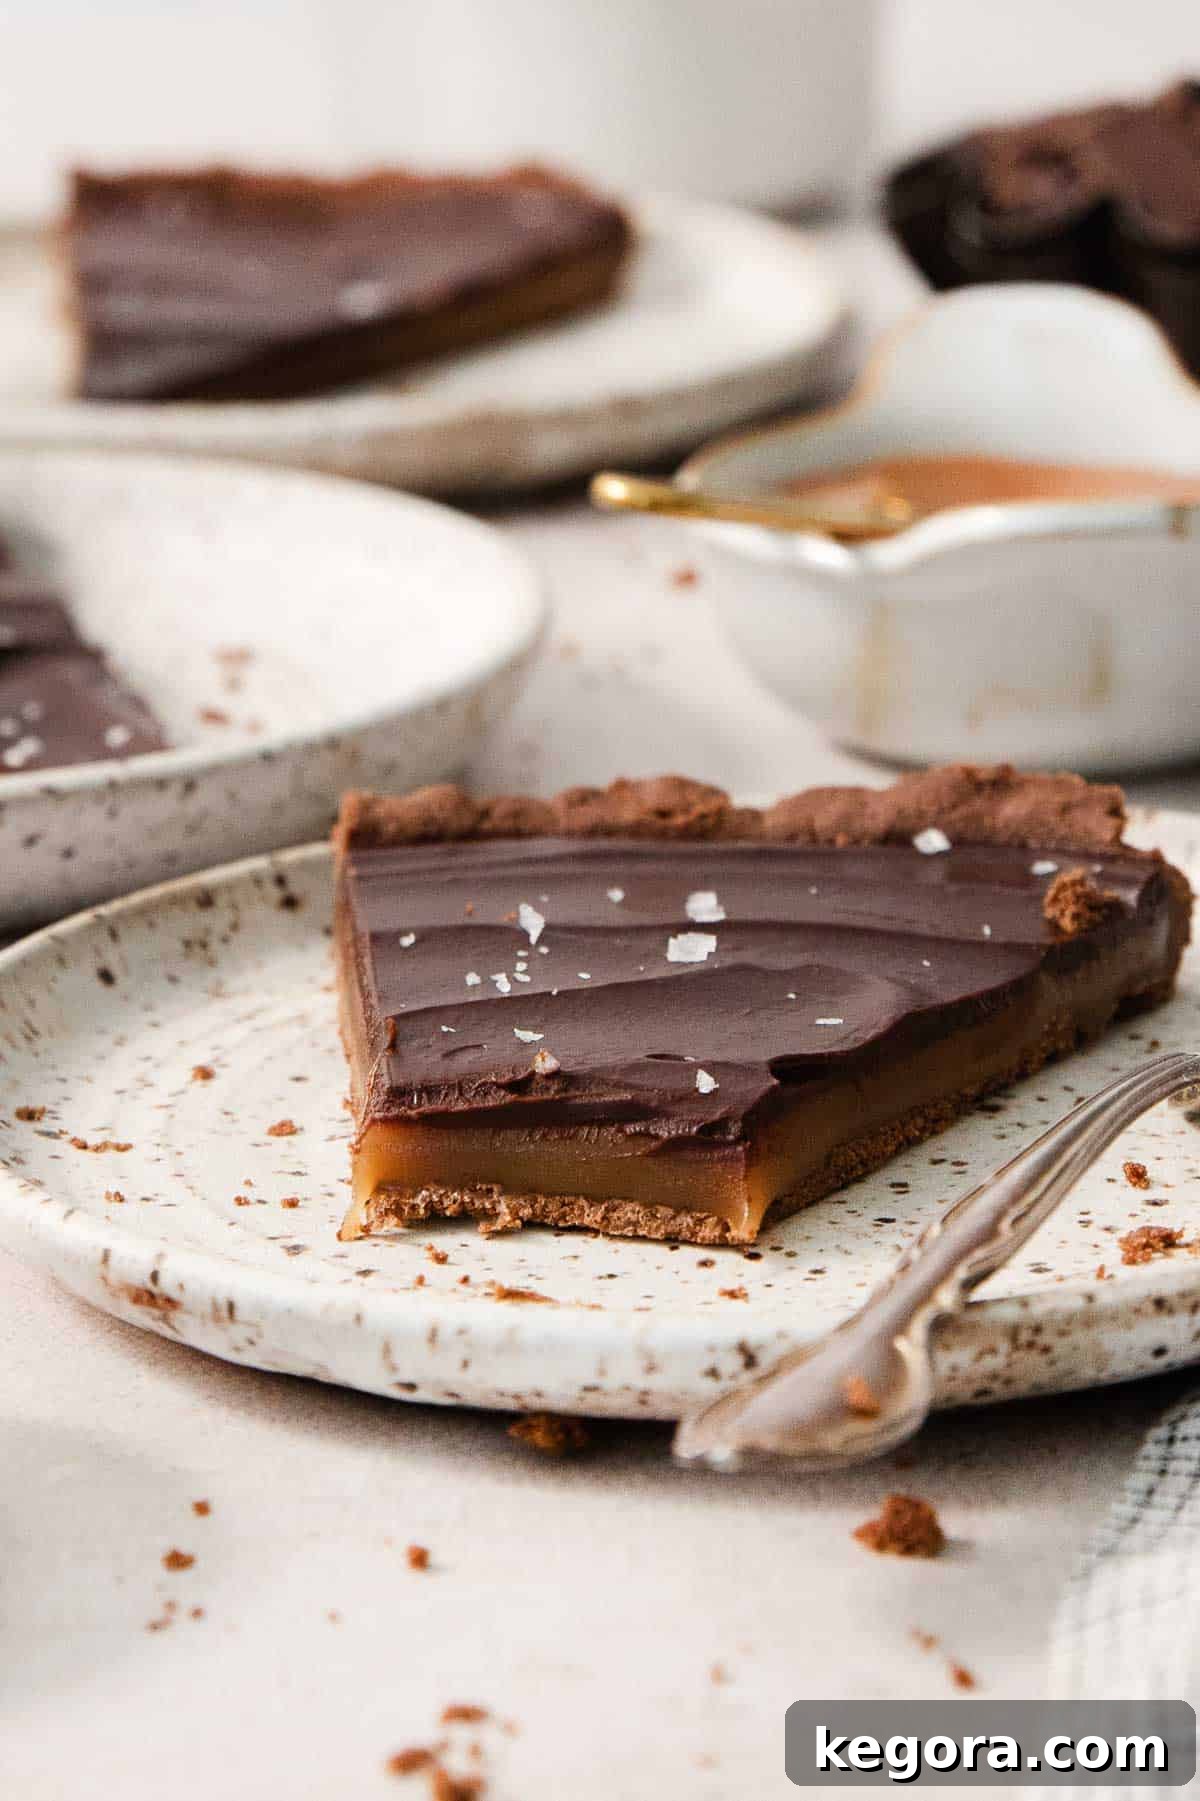
This gluten-free chocolate caramel tart is a true masterpiece of dessert artistry, featuring a rich, buttery gluten-free chocolate shortbread crust, a luscious layer of homemade, soft-set caramel, and a dazzling pour of smooth chocolate ganache. It’s an utterly decadent creation, designed to impress and delight at any special occasion, from elegant dinner parties to intimate holiday celebrations.
For those who appreciate rich chocolate desserts and crave gluten-free options, this tart is a dream come true. If you’re looking to explore more chocolatey delights, you might also enjoy these dark chocolate pots de crème, a sophisticated flourless chocolate torte, or a comforting gluten-free chocolate pudding.
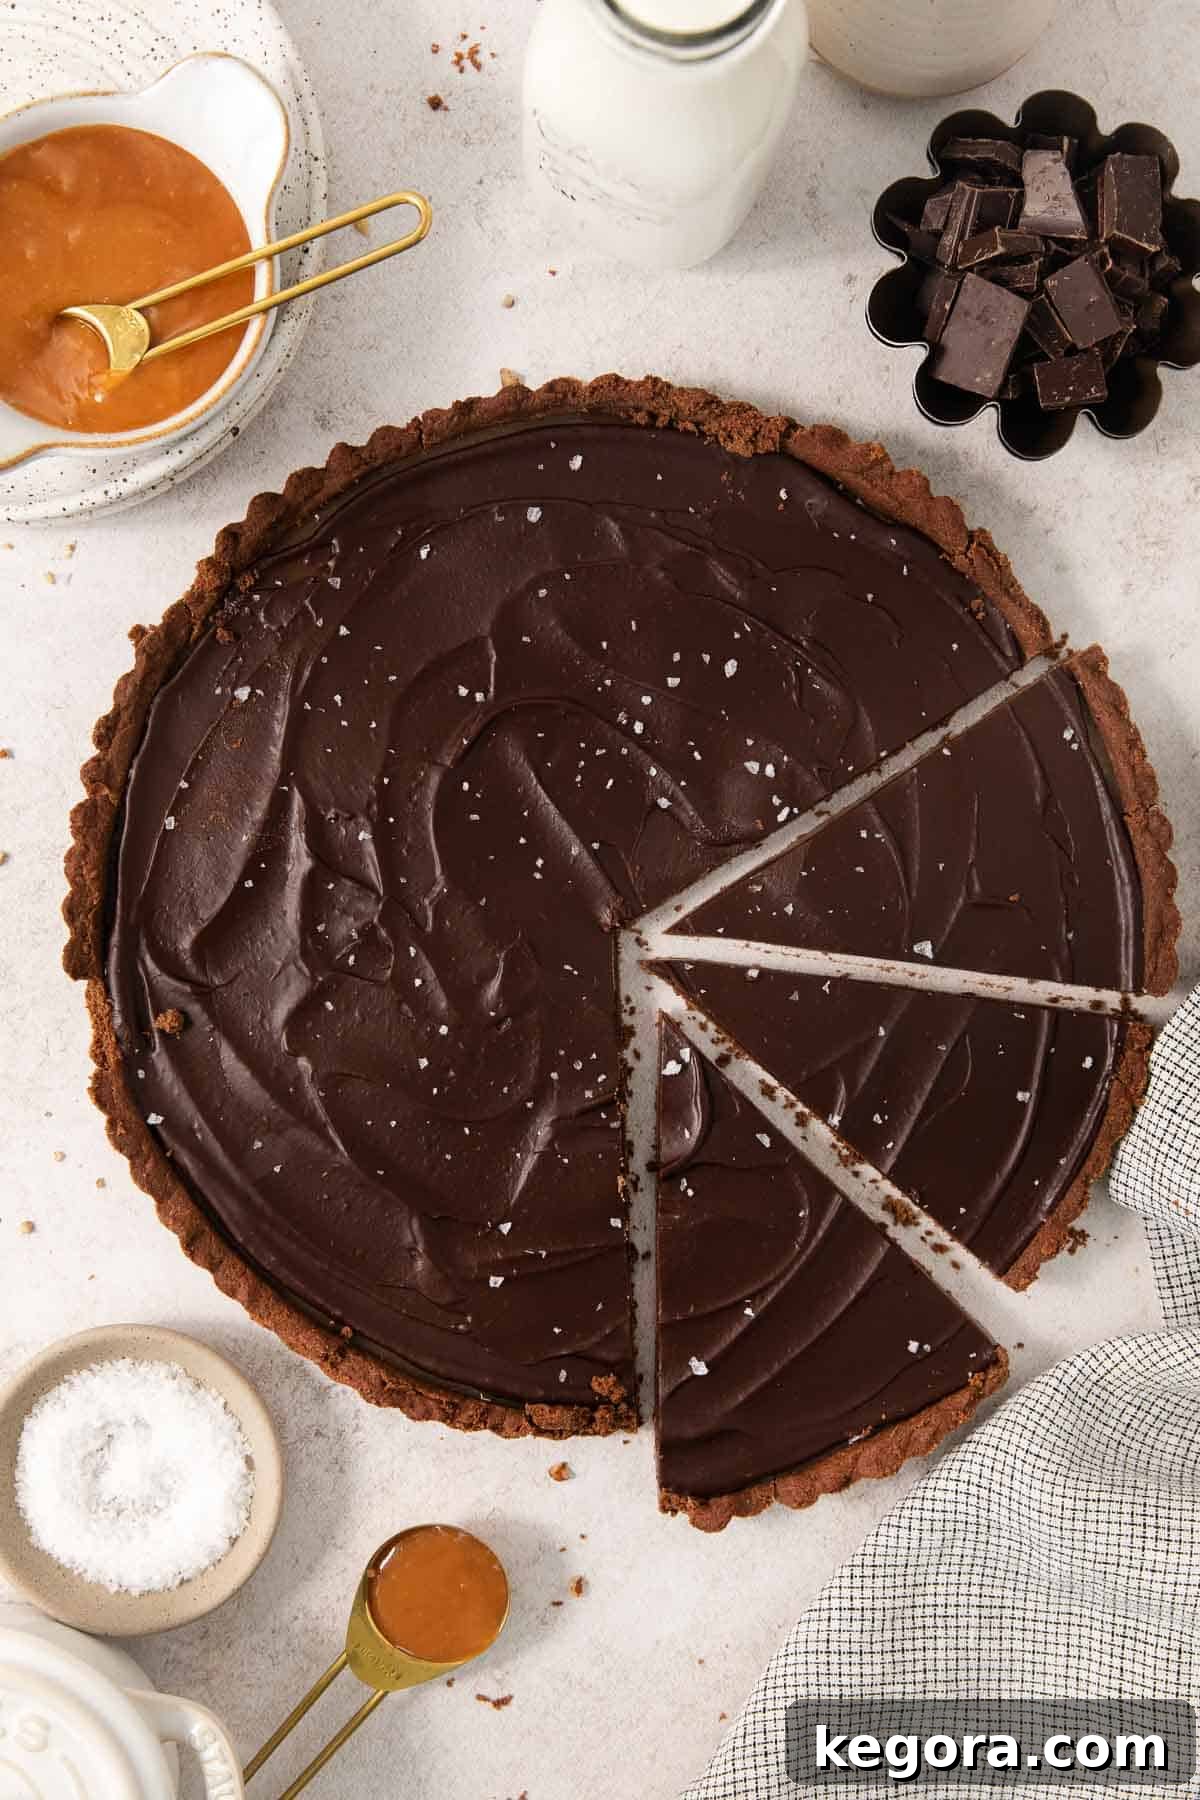
The Ultimate Gluten-Free Chocolate Caramel Tart: A Decadent Delight
Are you yearning for a dessert that truly makes a statement? Something deeply satisfying, exquisitely rich, and yet entirely gluten-free? Look no further than this magnificent Gluten-Free Chocolate Caramel Tart. This recipe transforms simple ingredients into an extraordinary treat, perfect for when you want to create a truly memorable culinary experience.
At the heart of this tart lies a time-honored caramel recipe, cherished from my Grandma’s church cookbook, now adapted to pair perfectly with a crisp chocolate shortbread crust and an opulent chocolate ganache. It’s more than just a dessert; it’s an edible celebration, making it an ideal choice for romantic Valentine’s Day dinners, sophisticated dinner parties, or marking significant anniversaries. The subtle sprinkle of flaky sea salt on top adds a delightful counterpoint, enhancing the rich sweetness with a touch of savory elegance.
Why This Gluten-Free Chocolate Caramel Tart Will Become Your Favorite
- Unforgettable Flavor and Texture: This tart is a symphony of contrasting textures and harmonious flavors. The crisp, slightly bitter chocolate shortbread provides the perfect foundation for the gooey, buttery homemade caramel, which in turn is crowned with a smooth, rich chocolate ganache. Each bite offers a delightful interplay of chewy, crisp, and creamy, making for an incredibly satisfying dessert experience.
- Effortlessly Elegant for Special Occasions: While impressive in appearance and taste, this tart is surprisingly manageable to make. Its stunning layered presentation instantly elevates any event, making it the quintessential dessert for grand holidays, intimate celebrations, or any moment that calls for something truly special. Impress your guests and loved ones without the stress.
- Generous Portions for Sharing: Designed to serve a crowd, this tart is perfect for gatherings of all sizes. Whether it’s a family reunion, a festive holiday meal, or a casual get-together with friends, this dessert ensures everyone gets to enjoy a generous slice of heaven. It’s a wonderful way to share joy and deliciousness.
- Gluten-Free Perfection: For those with gluten sensitivities or dietary preferences, finding truly decadent gluten-free desserts can be a challenge. This recipe proves that gluten-free baking can be just as, if not more, delicious than its traditional counterparts. The chocolate shortbread crust is tender, crumbly, and utterly delicious, providing a fantastic base without compromise.
Essential Ingredients for Your Gluten-Free Chocolate Caramel Tart
Crafting this exquisite tart begins with selecting high-quality ingredients. While the recipe is straightforward, the nuances of your chosen components will truly shine through in the final product. Here’s a closer look at the key players, forming the backbone of this delightful treat, especially the chocolate gluten-free shortbread crust.
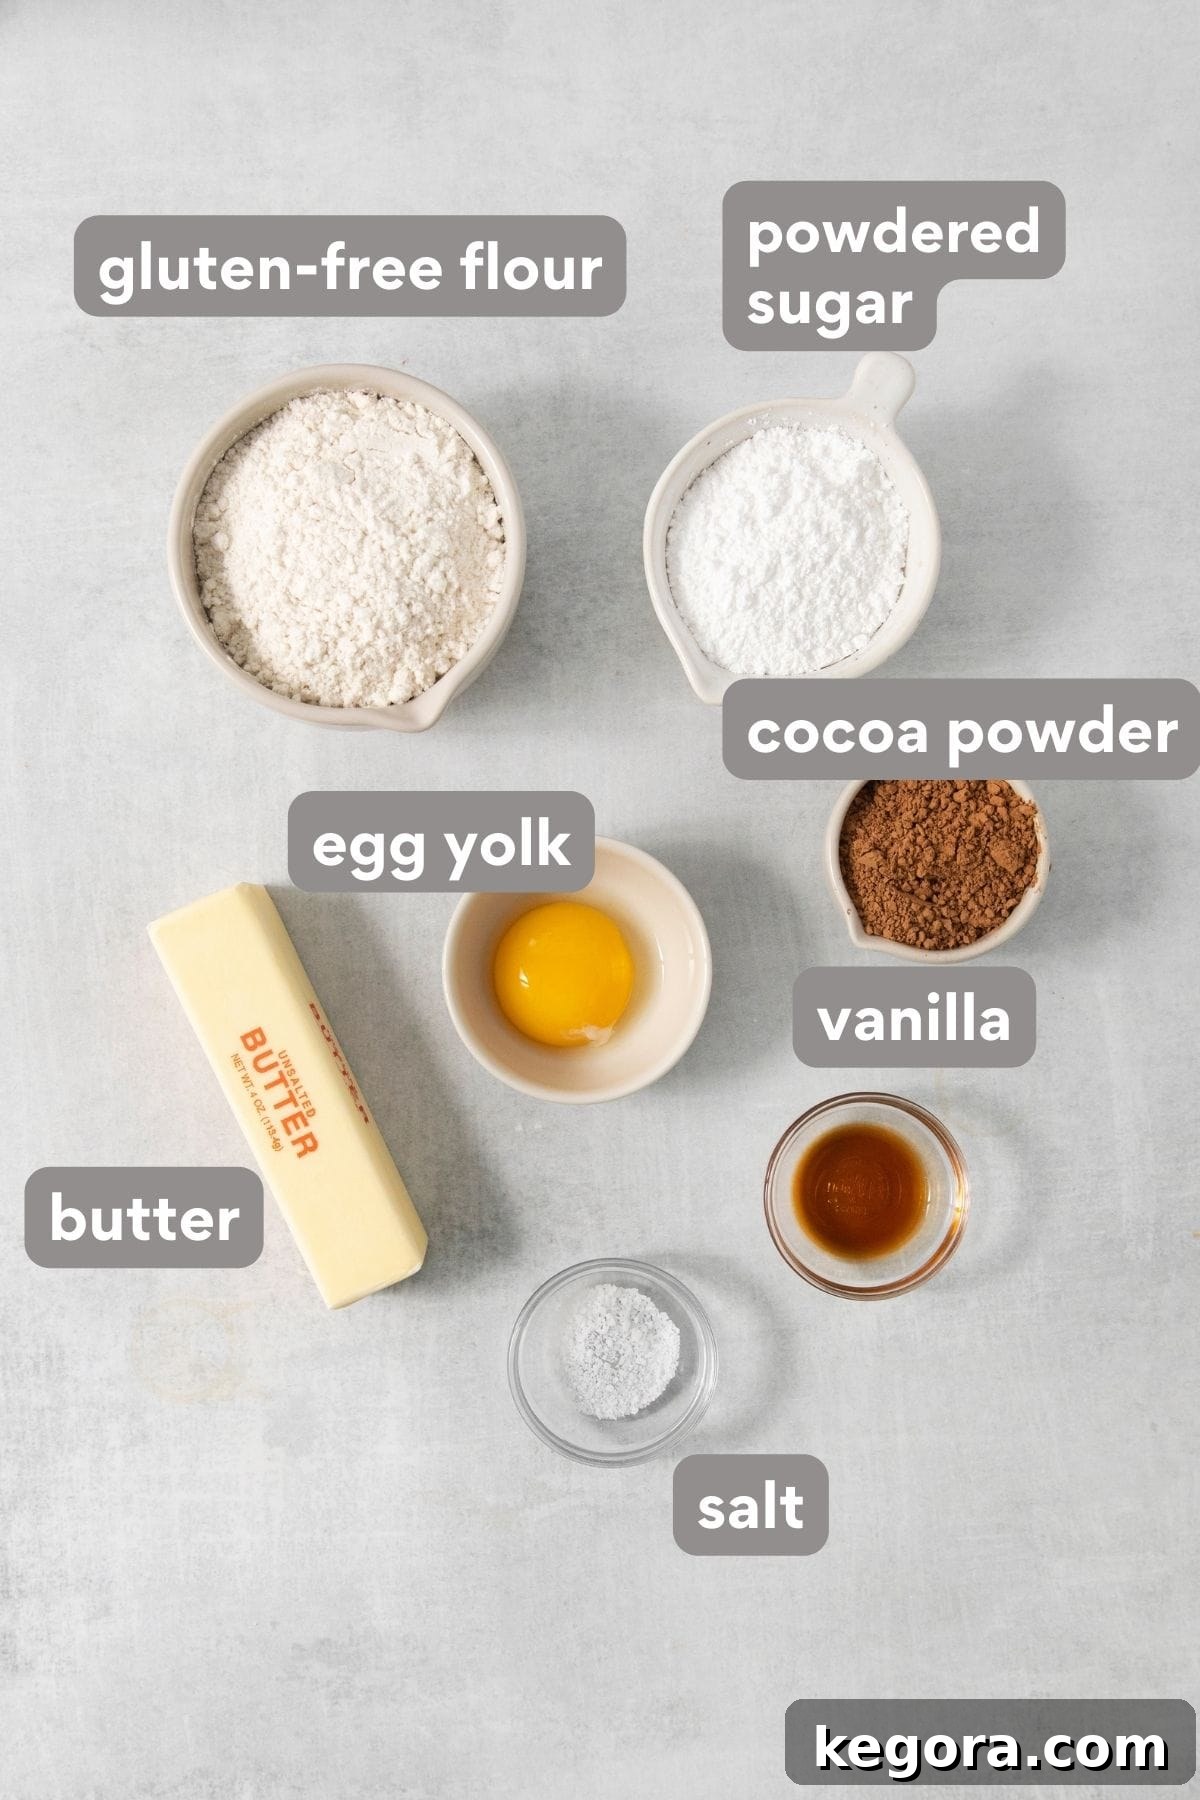
- Gluten-Free Flour Blend: The foundation of our flaky crust. For unparalleled results, I highly recommend King Arthur Gluten-Free Measure-for-Measure Flour. Its consistent performance ensures a tender, crumbly crust that holds its shape beautifully. As an excellent alternative, Bob’s Red Mill Gluten-Free 1:1 Baking Flour also works wonderfully, providing a similar texture and reliability. Using a high-quality blend designed for 1:1 substitution is crucial for success in gluten-free baking.
- Premium Cocoa Powder: The secret to a deeply flavored chocolate crust. Do not skimp on quality here. An unsweetened, Dutch-processed cocoa powder, such as Ghirardelli, will impart a rich, dark color and an intense chocolate flavor without adding extra sweetness, balancing the caramel beautifully. This ensures your chocolate notes are profound and not just an afterthought.
- Quality Butter: Butter is more than just a fat in this recipe; it’s a flavor enhancer. Using salted butter can add a subtle depth that complements both the chocolate and caramel, creating a more complex flavor profile. Ensure your butter is at room temperature – this is vital for proper creaming with sugar, resulting in a smooth, workable dough and a tender crust. Unsalted butter can also be used, just add a pinch more salt to the recipe.
- Granulated Sugar & Powdered Sugar: Granulated sugar forms the base of our exquisite caramel, contributing to its fundamental structure and sweetness. Powdered sugar in the crust ensures a finer texture and helps achieve that melt-in-your-mouth shortbread quality.
- Corn Syrup: A crucial ingredient for preventing crystallization in the caramel, giving it that wonderfully smooth, pliable texture without becoming grainy. It’s the secret to achieving that perfect soft-set chewiness.
- Evaporated Milk: This richer, creamier milk product contributes significantly to the caramel’s luxurious consistency and deep flavor. Adding it gradually and precisely helps maintain the caramel’s smooth texture during the cooking process.
- Good Quality Chocolate (for Ganache): For the ganache, opting for a high-quality semisweet or bittersweet chocolate (chopped or chips) will make all the difference. The better the chocolate, the silkier and more intense your ganache will be, providing a truly luxurious topping.
- Heavy Cream: Paired with chocolate, heavy cream creates the rich, velvety ganache that crowns our tart. Its high-fat content ensures a glossy, stable topping that sets beautifully.
- Flaky Sea Salt: An optional but highly recommended finishing touch. A sprinkle of flaky sea salt enhances all the flavors, offering a delightful sweet-and-salty contrast that truly elevates the tart.
Crafting Your Gluten-Free Chocolate Caramel Tart: A Step-by-Step Guide
Creating this show-stopping dessert is an enjoyable process that yields incredibly rewarding results. Follow these detailed steps to ensure each layer of your tart is perfect.
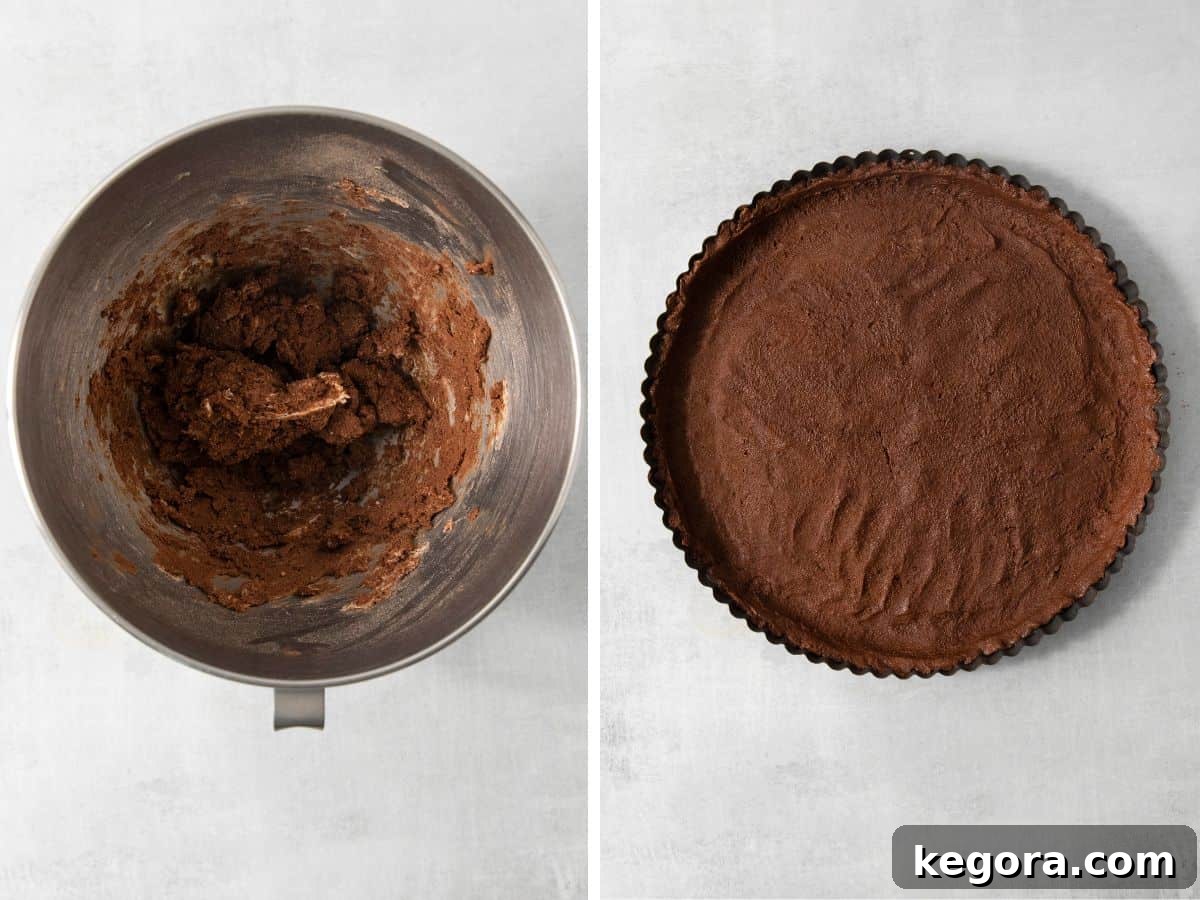
Part 1: The Decadent Chocolate Shortbread Crust
The foundation of our tart is a rich, crumbly gluten-free chocolate shortbread crust. Its robust flavor and tender texture provide the perfect contrast to the sweet caramel.
- Prepare Your Workspace and Oven: Begin by preheating your oven to 350 degrees F (175 degrees C). Lightly grease a 9-inch tart pan with a removable bottom. A standard 9-inch pie plate can also be used if a tart pan isn’t available, though the presentation will differ slightly.
- Cream the Butter: In the bowl of a stand mixer fitted with the paddle attachment, or using a handheld electric mixer (you can even mix by hand for a good arm workout!), add your softened butter. Beat until it’s smooth and creamy, which usually takes about 1-2 minutes. This aeration step is key for a tender crust.
- Combine Wet Ingredients and Dry Flavorings: To the creamed butter, add the powdered sugar, high-quality cocoa powder, salt, and the single large egg yolk. Mix until all ingredients are just combined. The egg yolk helps bind the dough and adds richness.
- Incorporate Gluten-Free Flour: Gradually add the gluten-free measure-for-measure flour blend. Mix on low speed for 2-3 minutes until the dough comes together and forms a cohesive ball. Be careful not to overmix, which can lead to a tough crust.
- Form the Crust: Gently crumble the chocolate shortbread mixture evenly over the bottom of your prepared tart pan. Using your fingertips or the flat bottom of a glass, press the dough firmly and evenly up the sides and across the bottom of the pan. Ensure an even thickness for uniform baking.
- Blind Bake the Crust: Bake the crust for 18-20 minutes, or until the edges are lightly golden and the crust feels set. Remove it from the oven and let it cool completely on a wire rack before proceeding.
- Crucial Freezing Step: This step is non-negotiable for success! Place the cooled crust in the freezer for 20-30 minutes before you even begin making the caramel. A thoroughly chilled, almost frozen crust will prevent the hot caramel from making the crust soggy or causing it to crumble when poured. Have it ready to go the moment your caramel reaches its target temperature.
Part 2: The Silky, Soft-Set Caramel Layer
This caramel, passed down through generations, is the star of the show. Achieving its perfect soft-set texture requires precision and patience, but the result is absolutely worth it.
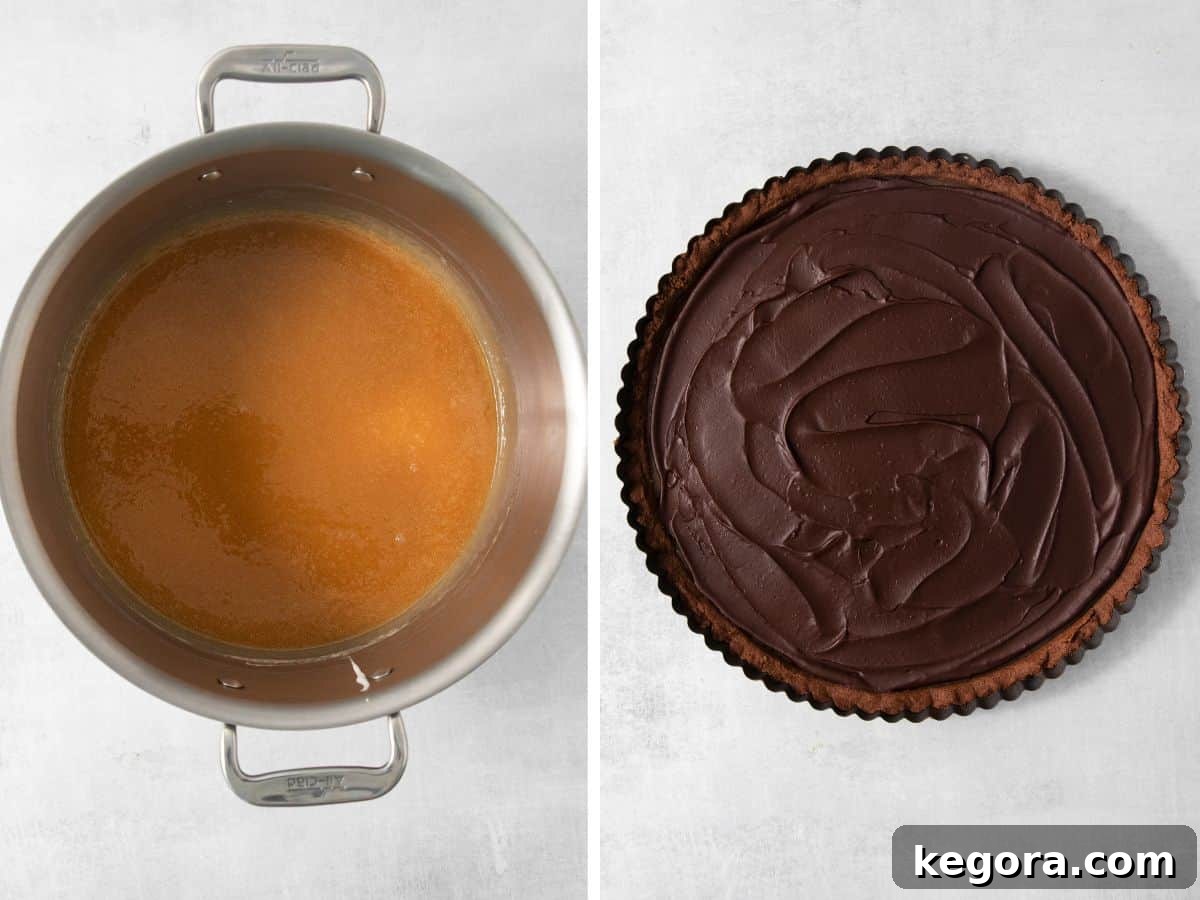
- Melt the Initial Caramel Ingredients: In a large, heavy-bottomed pot (stainless steel is ideal for even heat distribution and preventing sticking), combine the granulated sugar, butter, corn syrup, and salt. Cook over medium heat, stirring occasionally, until the butter melts and the sugar dissolves.
- Bring to a Gentle Boil: Once the mixture comes to a boil, begin adding the evaporated milk. This is a critical step: add the milk very slowly, a little at a time, over a period of about 5 minutes. This gradual addition prevents the caramel from seizing and keeps the mixture at a consistent temperature, ensuring a smooth, lump-free caramel.
- Achieve the Perfect Temperature: After all the evaporated milk has been incorporated, insert a reliable candy thermometer into the mixture. Continue to cook, stirring frequently, until the caramel reaches precisely 238°F-240°F (114°C-116°C). Do NOT let the temperature exceed 240°F! Even a few degrees higher will result in a chewy, hard caramel rather than the desired soft, melt-in-your-mouth texture. It will take approximately 15 minutes of simmering after the milk is added. For accuracy, I highly recommend double-checking the temperature with a quick-read instant thermometer as it approaches the target range.
- Pour Immediately: The moment your caramel reaches 238-240°F, remove it from the heat and immediately pour it into your prepared, frozen chocolate shortbread crust. Work quickly and carefully, as hot caramel is very sticky.
- Set the Caramel: Place the tart in the refrigerator to chill for 1-2 hours, or until the caramel is completely set and no longer warm or sticky to the touch. This firm base is essential for the ganache layer.
Part 3: The Glossy Chocolate Ganache Topping
A luxurious, easy-to-make chocolate ganache provides the perfect finishing touch, adding an extra layer of chocolatey richness and a beautiful sheen.
- Prepare the Chocolate: Place your good quality chopped semisweet or bittersweet chocolate (or chocolate chips) in a small or medium heatproof bowl.
- Heat the Cream: In a microwave-safe container or a small saucepan on the stove, heat the heavy cream until it just begins to simmer around the edges. Do not let it come to a rolling boil.
- Combine and Rest: Pour the hot cream directly over the chopped chocolate. Let the mixture sit undisturbed for 1-2 minutes. This allows the heat from the cream to gently melt the chocolate.
- Stir to Emulsify: After resting, gently stir the mixture from the center outwards until the chocolate is completely melted and the ganache is glossy, smooth, and uniform.
- Apply and Chill: Carefully pour and spread the warm ganache evenly over the set caramel layer. Return the tart to the refrigerator to chill for at least 30 minutes, or until the chocolate ganache is fully set and firm to the touch.
- Finishing Touch: For an enhanced flavor profile, sprinkle the top of the tart with a pinch of flaky sea salt just before serving. This optional step adds a gourmet touch and balances the sweetness beautifully.
Serving Your Decadent Tart
Presentation is key for such a beautiful dessert. Follow these tips for perfect slices:
- Keep Chilled: Maintain the tart’s structure by keeping it refrigerated until just before serving.
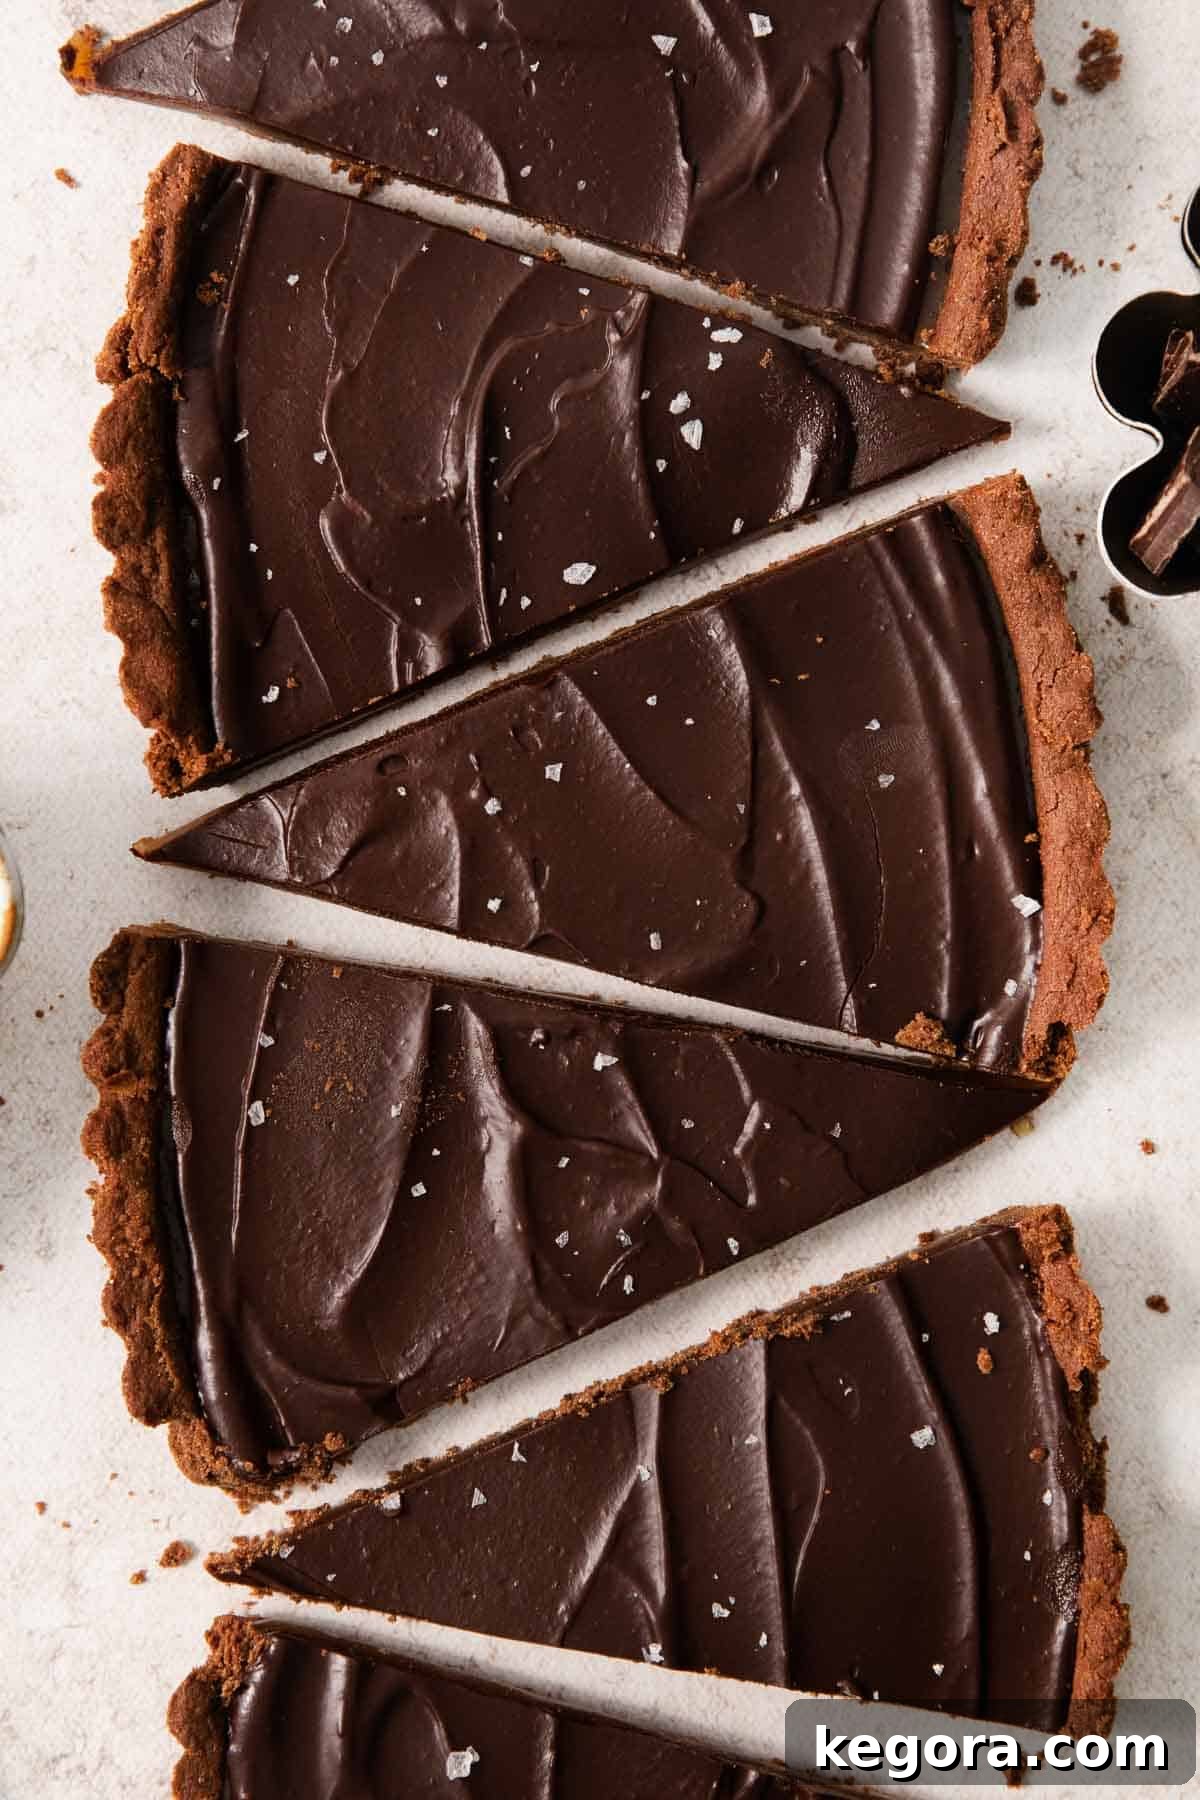
- Achieve Clean Slices: For perfectly neat, even slices, heat a long chef’s knife under hot running water for a few seconds. Wipe the blade completely dry with a clean towel, then make a clean slice through the tart. Repeat this heating and wiping process for each slice to prevent sticking and ensure pristine edges.
- Enjoy! Serve and savor this delightful gluten-free chocolate caramel tart. It’s truly a labor of love that tastes even better than it looks.
Storage Instructions for Your Gluten-Free Chocolate Caramel Tart
To preserve the freshness and exquisite taste of your tart, cover it tightly with plastic wrap or place it in an airtight container. Store it in the refrigerator for up to five days. For the best texture and flavor, allow the tart to sit at room temperature for about 15-20 minutes before serving, which helps soften the caramel slightly.
Expert Tips for a Flawless Gluten-Free Chocolate Caramel Tart
Achieving perfection with this tart is easier than you think with these key tips:
- The Importance of a Frozen Crust: This is arguably the most crucial tip for a successful tart. Placing the baked chocolate shortbread crust in the freezer for 20-30 minutes before pouring in the hot caramel creates a thermal barrier. This prevents the hot caramel from “melting” or softening the crust upon contact, ensuring your tart maintains its crisp, defined base. It also helps the caramel set faster and more evenly.
- Mastering Caramel with a Candy Thermometer: Precision is paramount when making caramel. A reliable candy thermometer is your best friend here. The specific temperature range of 238°F-240°F (114°C-116°C) is critical for achieving that signature soft-set, chewy caramel. Going even slightly above this range can result in a hard, brittle caramel, while falling short will yield a runny, unstable layer. Invest in a good thermometer and trust its reading.
- The Secret to Impeccable Slices: For a presentation worthy of this decadent dessert, achieving clean, even slices is essential. The trick is to heat your long chef’s knife under hot running water, then wipe it completely dry. The warm, dry blade will glide through the chocolate ganache and caramel without sticking or dragging, creating beautiful, sharp edges. Repeat this process for every slice to maintain perfection.
- Embrace Flaky Sea Salt: While optional, a light sprinkle of flaky sea salt truly transforms this tart. The delicate salinity cuts through the sweetness of the caramel and chocolate, enhancing the depth of flavor and creating a sophisticated sweet-and-salty contrast that is incredibly addictive.
- Room Temperature Butter and Egg Yolk: For the crust, ensuring your butter and egg yolk are at room temperature allows for proper emulsification and mixing, leading to a smooth, cohesive dough and a tender, uniform crust.
- Patience with Chilling: Each chilling step—after the caramel and after the ganache—is important. Rushing these steps can lead to layers that don’t set properly, making slicing difficult and affecting the overall texture and stability of the tart.
Explore More Gluten-Free Chocolate Delights
If you’ve fallen in love with this chocolate caramel tart, you’ll be thrilled to discover other delectable gluten-free chocolate recipes designed to satisfy your sweet cravings:
- Gluten-Free Chocolate Cupcakes
- Dairy-Free Chocolate Fondue
- Gluten-Free Chocolate Mousse Cake
- Gluten-Free Brownies
- Oat Flour Brownies
- Gluten-Free Chocolate Lava Cake
Gluten-Free Chocolate Caramel Tart
Author: Erin Collins
Prep Time: 25 mins
Servings: 8
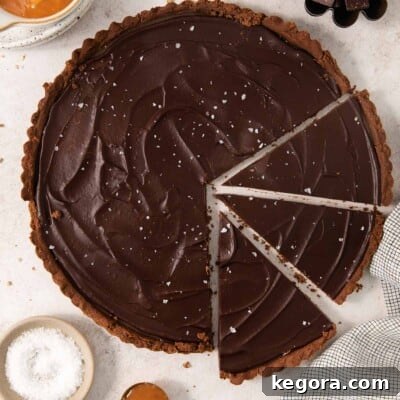
This gluten-free chocolate caramel tart is decadent and indulgent, with layers of chocolate shortbread, caramel, and ganache! It’s the perfect dessert for special occasions or dinner parties!
Comments
Ingredients
For the Crust:
- ½ cup (113g) butter, softened to room temperature
- ⅓ cup (40g) powdered sugar
- ¼ cup (24g) cocoa powder
- ¼ teaspoon salt
- 1 large egg yolk
- ½ teaspoon vanilla extract
- 1 cup (150g) gluten-free measure-for-measure flour
For the Caramel:
- 1 cup (200g) sugar
- ¼ cup (57g) butter
- ¼ cup (80g) corn syrup
- ¼ teaspoon salt
- ¾ cup (180ml) evaporated milk
For the Ganache:
- ½ cup (85g) semisweet or bittersweet chopped chocolate or chocolate chips (use a good quality)
- ⅓ cup heavy cream
- Flaky salt for sprinkling (optional)
Instructions
Make the Crust:
- Preheat the oven to 350 degrees F (175°C). Lightly grease a 9-inch tart pan. (You can also use a 9-inch pie plate).
- In the bowl of a stand mixer fitted with the paddle attachment or in a bowl using a handheld electric mixer (or just mixing by hand), add the butter. Mix until smooth, about 1-2 minutes. Add the powdered sugar, cocoa powder, salt, egg yolk and mix to combine. Add the gluten-free flour and mix for 2-3 minutes until the dough comes together.
- Crumble the mixture over the bottom of the tart pan. Press evenly up the sides and into the bottom of the pan.
- Bake the crust for 18-20 minutes. Remove from the oven and let cool.
Make the Caramel:
- Place the crust in the freezer before you start making the caramel. (It should be frozen for 20-30 minutes before adding the caramel.) A cold crust holds up better when you add the hot caramel. Remove it from the freezer and have it ready to go just before the caramel is up to temperature, so you can pour the caramel into the cookie crust immediately after it reaches 238°F (114°C).
- Melt the sugar, butter, corn syrup, and salt together in a large, heavy-bottomed pot over medium heat. (A stainless steel pot works best for this caramel to prevent scorching).
- Once the mixture comes to a boil, add the evaporated milk a little at a time, taking 5 minutes to add the milk. This slow addition helps maintain a smooth consistency.
- Once all the milk is added, use a candy thermometer and bring the mixture to 238°F-240°F (114°C-116°C). Do not let it get any hotter! Even a few degrees hotter will make the caramel chewy instead of soft. (This will take another 15 minutes or so of simmering!) It is highly recommended to double-check the temperature with an instant-read thermometer as it comes to temperature.
- Immediately pour the caramel into the prepared, frozen crust.
- Refrigerate until the caramel is set and no longer warm, 1-2 hours.
Make the Ganache:
- For the ganache, place the chocolate in a small or medium bowl. Heat the cream (in the microwave or on the stove) until simmering. Pour the hot cream over the chocolate. Let the mixture sit for 1-2 minutes to allow the chocolate to melt. Stir to combine until the chocolate is glossy and smooth.
- Spread the ganache evenly over the set caramel. Chill until the chocolate is set and is no longer melty/soft, typically 30-60 minutes. Sprinkle the tart with flaky salt if desired.
- Keep refrigerated until serving. For neat, even slices, run a long chef’s knife under hot water, wipe dry, and slice (repeating as needed to get clean slices). Enjoy!
Notes
- Freeze the crust: Place the baked crust in the freezer for 20-30 minutes before making the caramel. This ensures the crust remains firm and prevents it from becoming soggy when the hot caramel is poured in.
- Use a candy thermometer: A candy thermometer is crucial for caramel perfection. Aim for 238°F-240°F (114°C-116°C). Exceeding this temperature will result in a hard, rather than soft, caramel.
- For neat, even slices: Dip a long chef’s knife in hot water and wipe it dry before each slice. This technique ensures clean cuts through the layers.
Nutrition Information
Values are approximate per serving (8 servings per tart):
- Calories: 484 kcal
- Carbohydrates: 61g
- Protein: 4g
- Fat: 27g
- Saturated Fat: 17g
- Polyunsaturated Fat: 1g
- Monounsaturated Fat: 6g
- Trans Fat: 1g
- Cholesterol: 88mg
- Sodium: 319mg
- Potassium: 163mg
- Fiber: 3g
- Sugar: 48g
- Vitamin A: 767 IU
- Vitamin C: 1mg
- Calcium: 99mg
- Iron: 1mg