
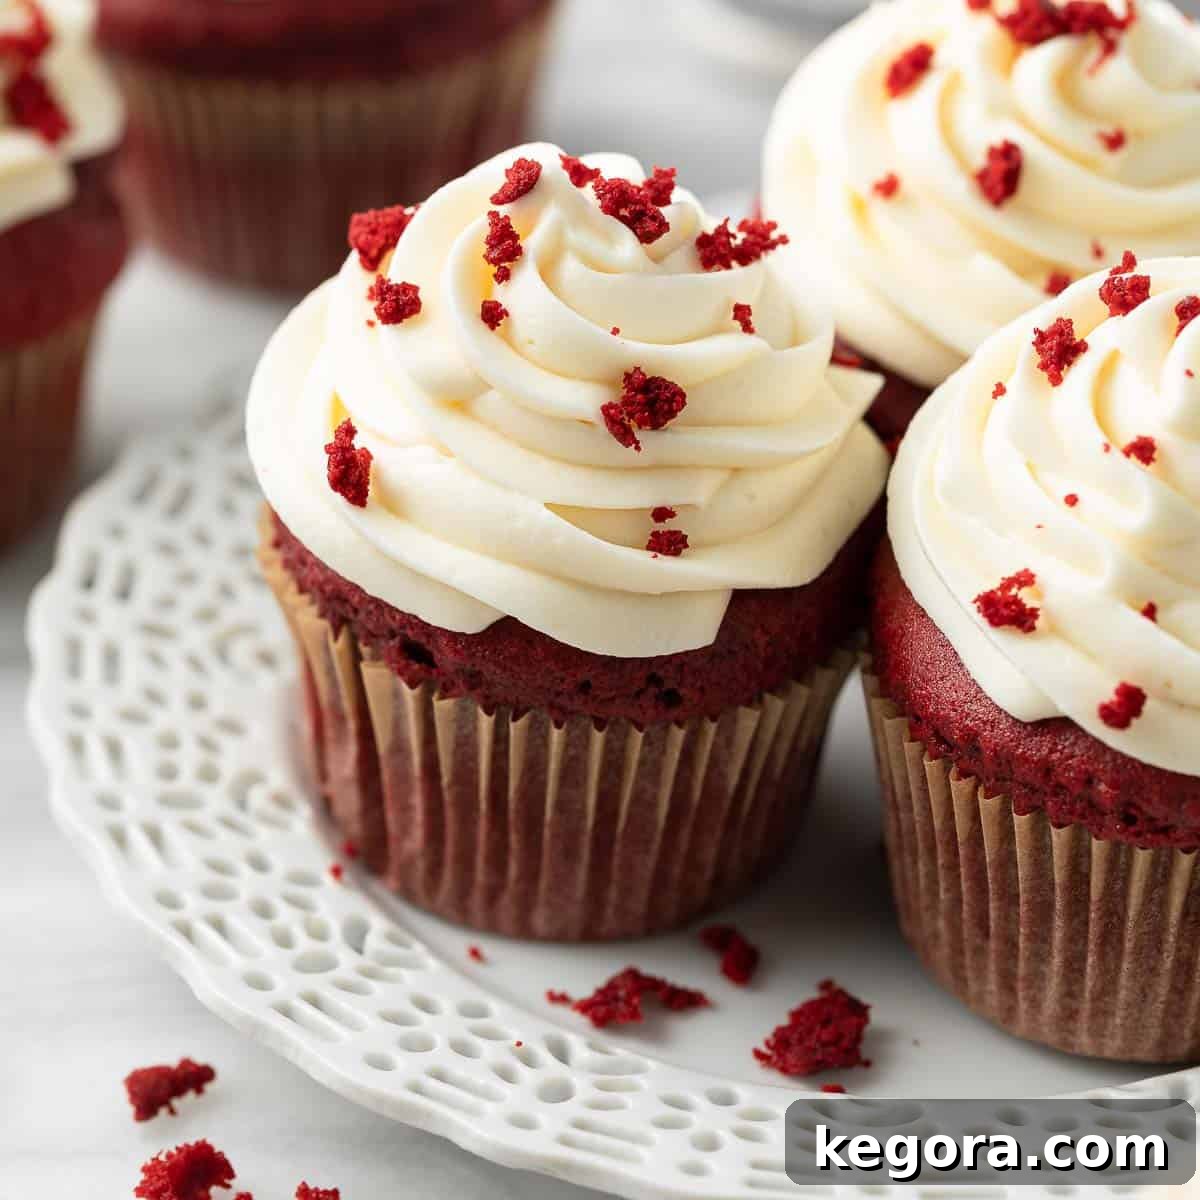
Irresistibly Fluffy Gluten-Free Red Velvet Cupcakes with Cream Cheese Frosting
Craving the classic indulgence of red velvet cupcakes but need them to be gluten-free? You’ve come to the perfect place! These gluten-free red velvet cupcakes are not just good; they’re incredibly light, exquisitely fluffy, and utterly fool-proof. Our unique secret lies in a special combination of sour cream and oil, coupled with a simple whipping technique that guarantees a perfect batch every single time. Prepare to fall in love with these moist, tender treats, crowned with luscious cream cheese frosting.
If you’re a fan of red velvet, don’t miss our equally delightful gluten-free red velvet cake for a full-sized celebration. Or, explore other gluten-free delights like these rich gluten-free chocolate cupcakes.
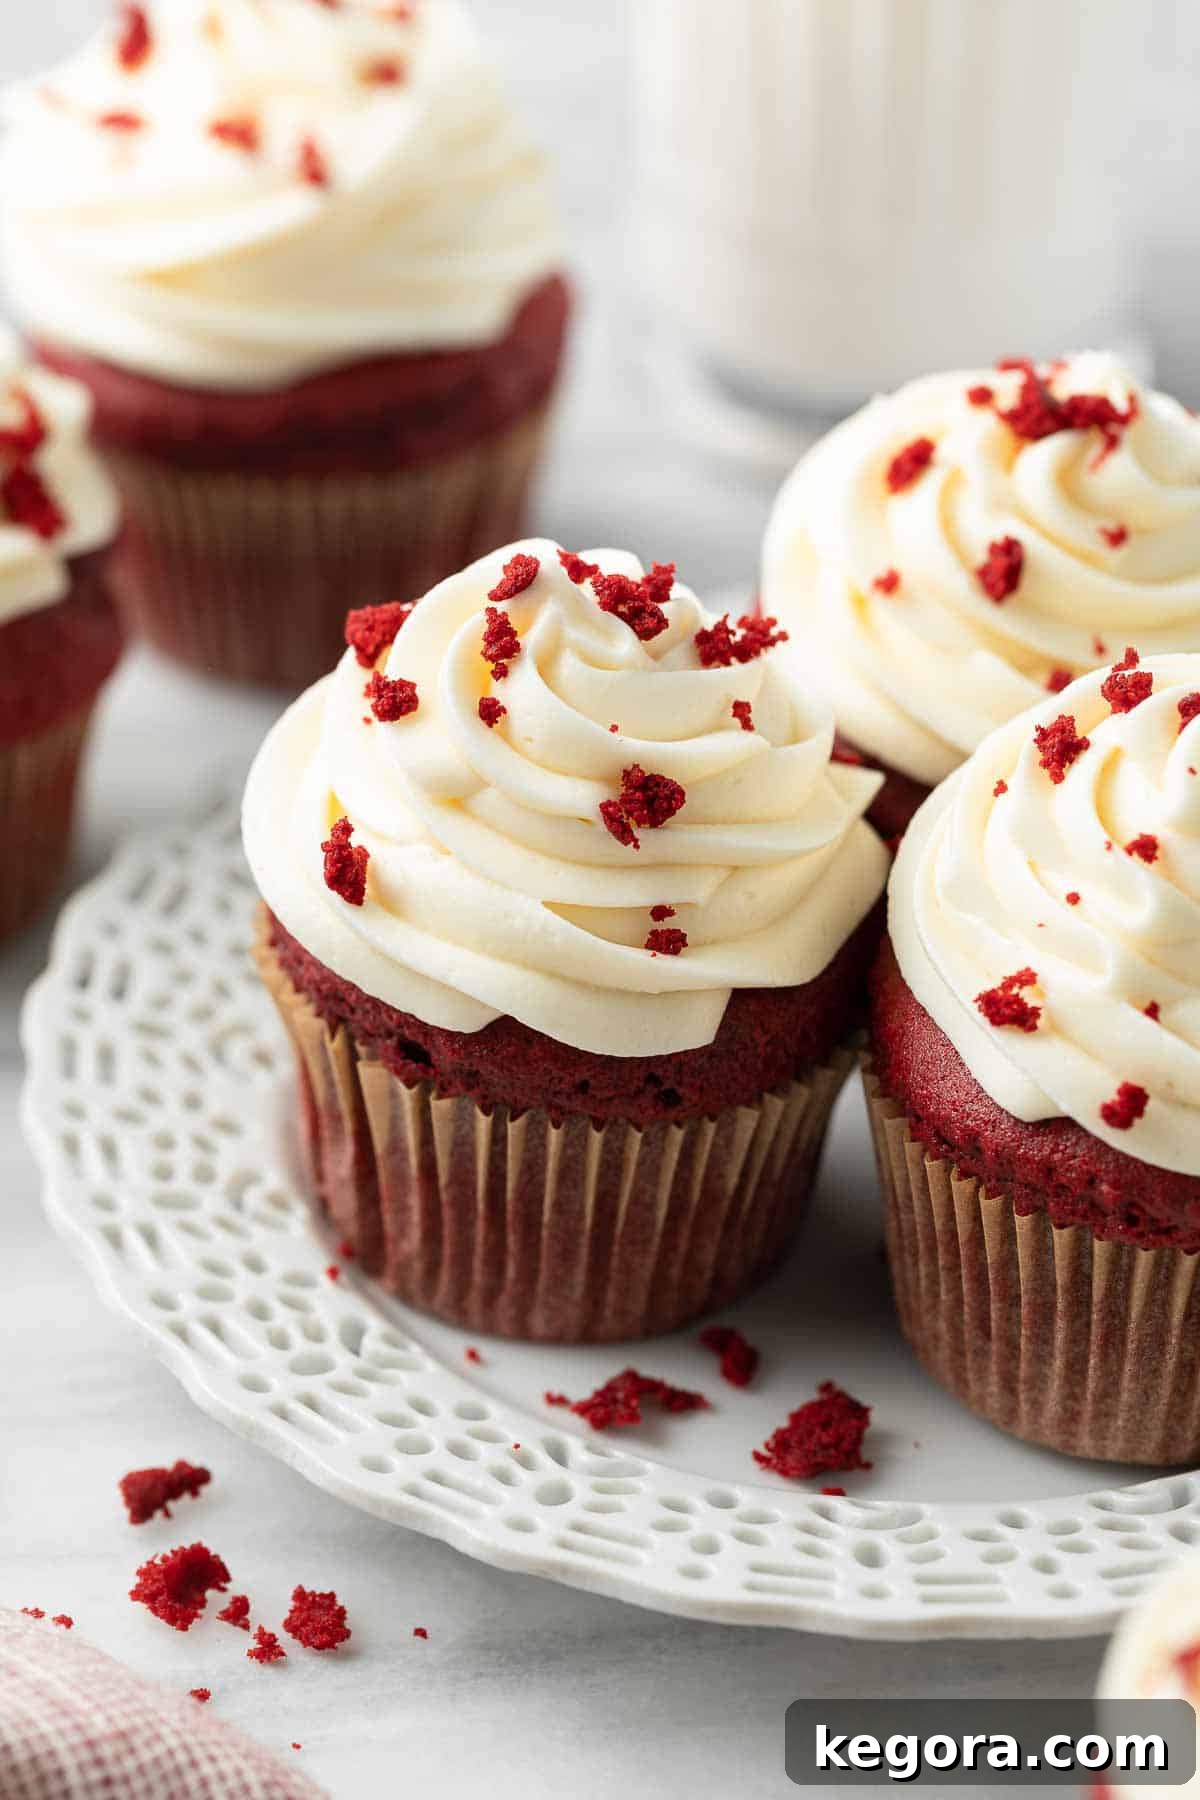
The Secret to Unforgettable Gluten-Free Red Velvet Cupcakes
The quest for the perfect gluten-free cupcake often ends in disappointment – dry, crumbly, or dense textures are common pitfalls. But my secret weapon ensures these red velvet beauties defy all expectations: skip the butter and embrace the magic of sour cream and oil! This powerful duo works wonders, imparting incredible moisture and tenderness without weighing down the delicate crumb. Unlike butter, which can sometimes make gluten-free flour clump and result in a denser texture, oil and sour cream create a beautifully fine and airy structure.
Beyond the fats, the technique of whipping the batter plays a crucial role. This simple step incorporates air, making the cupcakes exceptionally light and fluffy, truly mimicking the texture of your favorite bakery treats. Once you try this method, you’ll be convinced there’s no other way to achieve such delightful gluten-free cupcakes!
These vibrant red velvet cupcakes are perfect for any occasion that calls for a touch of elegance and deliciousness. They are an absolute showstopper for Valentine’s Day, but they also shine as a festive treat for birthday parties, holiday gatherings, or simply when you need a little something special.
Why You’ll Adore This Gluten-Free Red Velvet Cupcake Recipe
- Unrivaled Richness and Moisture: Our unique combination of sour cream and oil replaces traditional butter, resulting in a profoundly moist and tender cupcake. This fat blend is superior for gluten-free baking, preventing dryness and ensuring a delightful, melt-in-your-mouth experience.
- Incredibly Light and Airy Texture: The method of whipping the batter is key to achieving that signature delicate, fluffy texture. This step incorporates essential air, creating cupcakes that are wonderfully soft and never dense or gummy.
- A Festive Visual Masterpiece: The striking, deep red hue of these cupcakes makes them visually stunning. They are an ideal dessert for special occasions like Valentine’s Day, Christmas, or any celebration where a pop of vibrant color is desired, effortlessly adding a touch of elegance to your dessert table.
- Completely Fool-Proof: Designed with ease in mind, this recipe is incredibly forgiving. Even if you’re new to gluten-free baking, you can confidently follow these steps to achieve perfect results every time.
Essential Ingredients for Flawless Gluten-Free Red Velvet Cupcakes
Crafting the perfect gluten-free red velvet cupcake begins with understanding the role each ingredient plays. Here’s a closer look at the key components that ensure these cupcakes are moist, flavorful, and beautifully red:
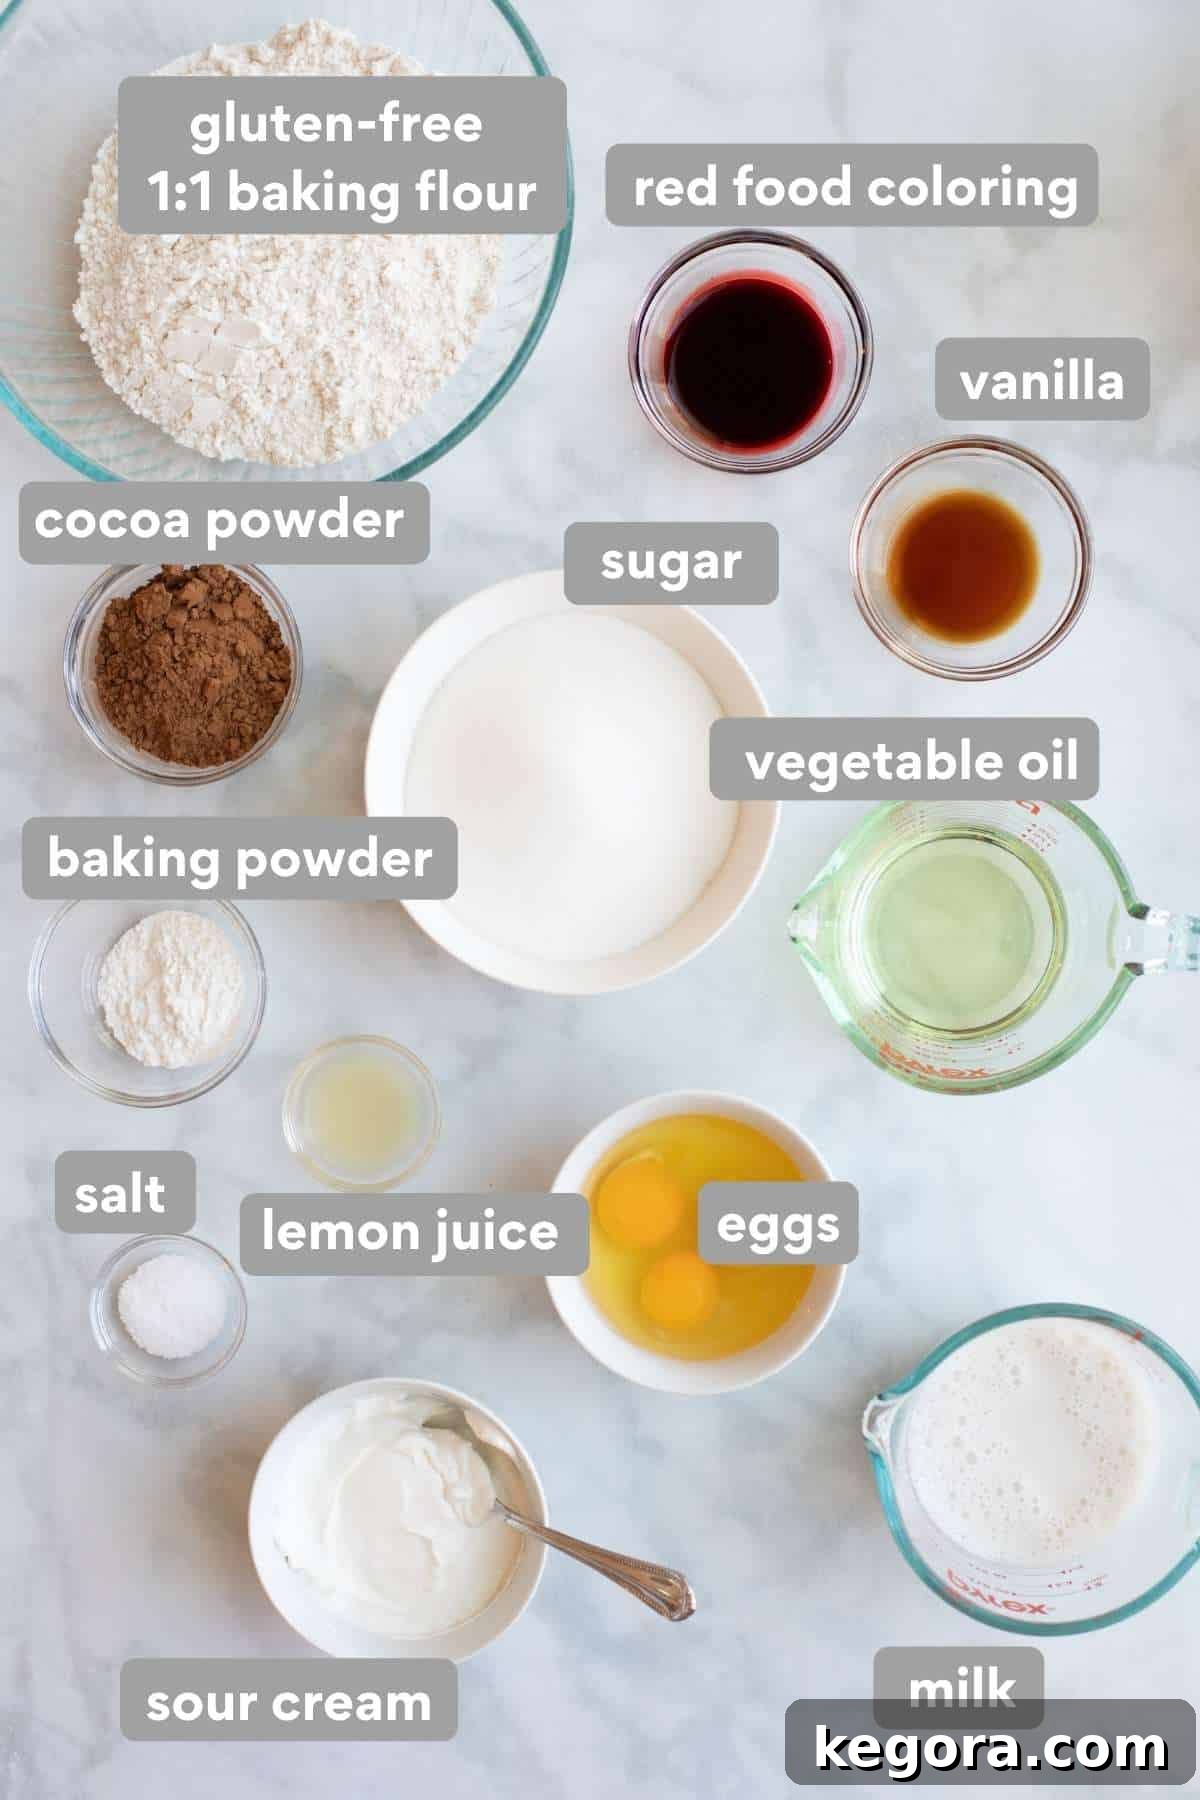
- Gluten-Free 1:1 Baking Flour: The foundation of any great gluten-free baked good is a quality flour blend. For these red velvet cupcakes, a high-quality 1:1 gluten-free flour blend is crucial. These blends are specifically formulated to replace wheat flour cup-for-cup and typically contain xanthan gum, which provides the necessary structure and elasticity that gluten usually offers. This prevents your cupcakes from being crumbly or falling apart. Many bakers find King Arthur Gluten-Free Measure-for-Measure Flour to be an excellent choice for consistent results in cupcakes.
- Sour Cream and Oil: This powerful combination is our secret weapon for unparalleled richness and tenderness. Unlike solid fats like butter, liquid oil coats gluten-free flour particles more effectively, leading to a much moister and more tender crumb. Sour cream adds an extra layer of moisture, a delightful tang that complements the red velvet flavor, and its acidity helps tenderize the cake even further. You can use neutral-flavored vegetable oil or melted coconut oil.
- Lemon Juice: Often overlooked, a touch of lemon juice is a secret ingredient for tenderizing the crumb in many baked goods, including red velvet. Its acidity reacts with the baking soda, creating a lighter texture and also enhancing the vibrant red color of the cocoa powder. This is the same principle used in our popular gluten-free pumpkin bread.
- Natural Cocoa Powder: For an authentic red velvet flavor and color, natural cocoa powder is preferred over Dutch-processed. Brands like Guittard or Ghirardelli offer a lighter brown color and higher acidity. This acidity is key as it reacts with the baking soda and red food coloring to create that iconic vibrant red hue and contributes to a wonderfully tender crumb. The chocolate flavor in red velvet is subtle, not dominant like in a traditional chocolate cake.
- Red Food Coloring: To achieve the signature deep, rich red that defines red velvet, a high-quality red food coloring is essential. Gel food coloring provides a much more intense and vibrant color than liquid or natural food colorings, without adding excess moisture.
- Sugar, Eggs, Vanilla Extract, Baking Powder, Salt, Milk: These standard baking ingredients play their traditional roles in providing sweetness, structure, leavening, and overall flavor balance. Ensure your eggs are at room temperature for better emulsification and a smoother batter.
Pro Tip for the Perfect Red Hue
For the most stunning and vibrant red velvet color, I highly recommend using a high-quality gel food dye. My go-to brands are Americolor “Red Red” or “Super Red” (available here). While you can use liquid red food coloring (approximately 1 ounce), the gel variety yields a much richer, deeper red. If you omit the food coloring entirely, your cupcakes will still taste delicious, but they will have a pale brownish hue rather than the iconic red.
Step-by-Step Guide to Baking Irresistible Gluten-Free Red Velvet Cupcakes
Creating these delightful gluten-free red velvet cupcakes is a straightforward process that yields fantastic results. Follow these steps for perfectly moist and fluffy treats:
1. Prepare Your Workspace: Begin by preheating your oven to 350°F (175°C). Line a 12-count muffin pan with cupcake liners. For extra assurance against sticking, lightly grease the inside of each liner with cooking spray. This small step helps the cupcakes release effortlessly once baked.
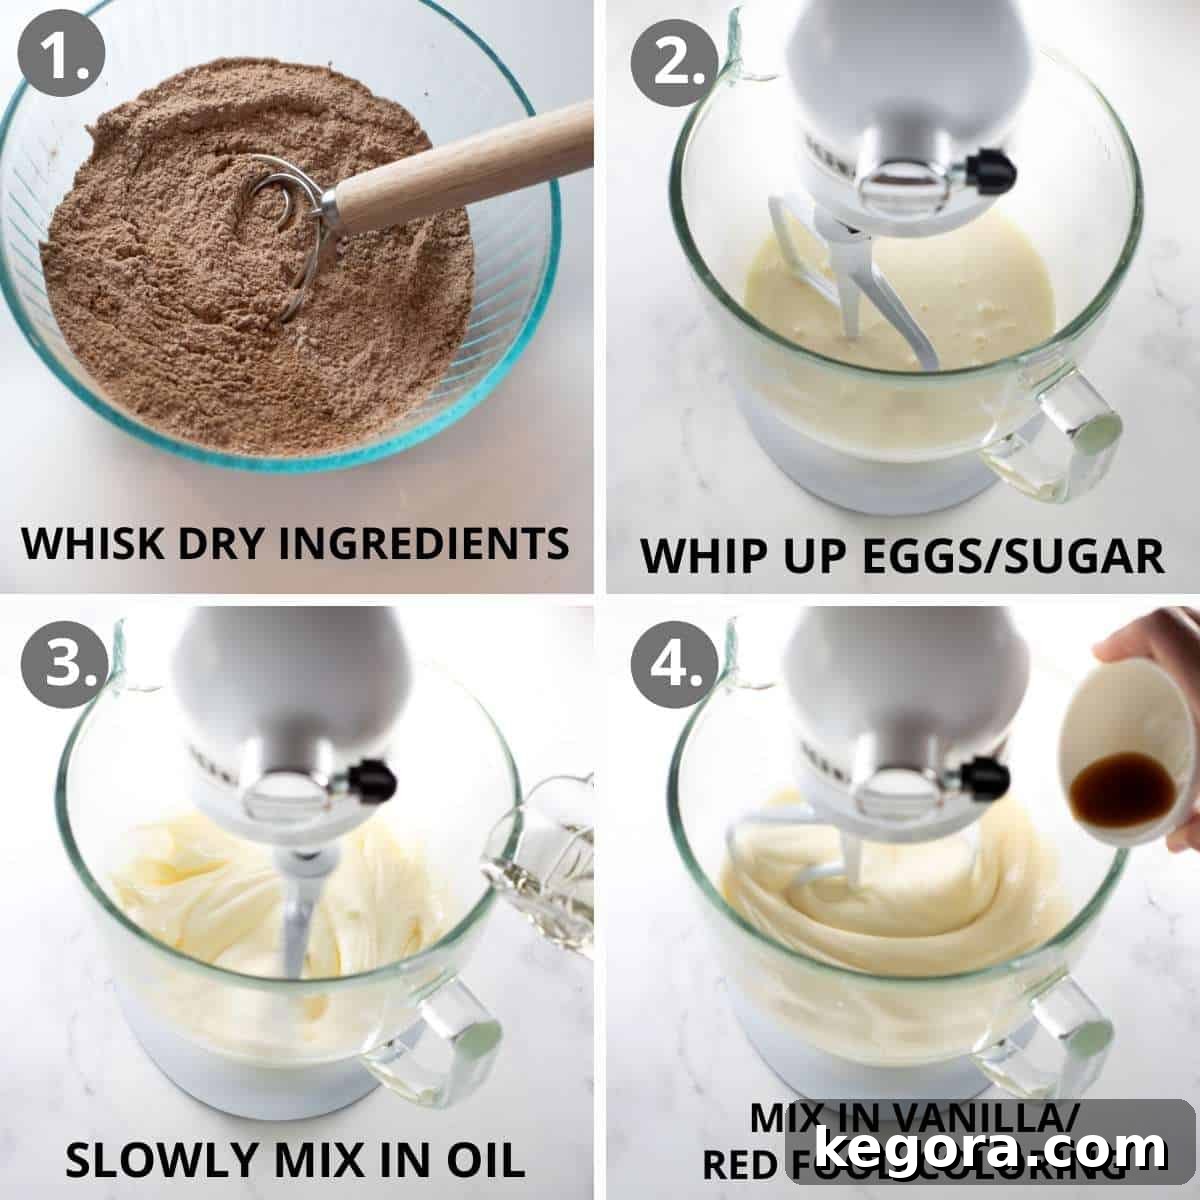
2. Combine Dry Ingredients: In a large mixing bowl, whisk together your gluten-free 1:1 baking flour, cocoa powder, baking powder, and salt. Whisking ensures these ingredients are thoroughly combined and evenly distributed, preventing pockets of leavening agents or salt in your finished cupcakes.
3. Prepare the Wet Ingredients: In a separate large mixing bowl, or the bowl of a stand mixer fitted with the paddle attachment, add the eggs and granulated sugar. Whip these on medium-high speed for a full 3 minutes. This crucial step aerates the mixture, making it light and fluffy, which contributes significantly to the final cupcake texture. With the mixer still running on low speed, slowly drizzle in the vegetable oil. It’s important to add the oil gradually to maintain the air incorporated into the eggs and sugar. Finally, mix in the vibrant red food coloring, fragrant vanilla extract, and the tenderizing lemon juice until fully combined.
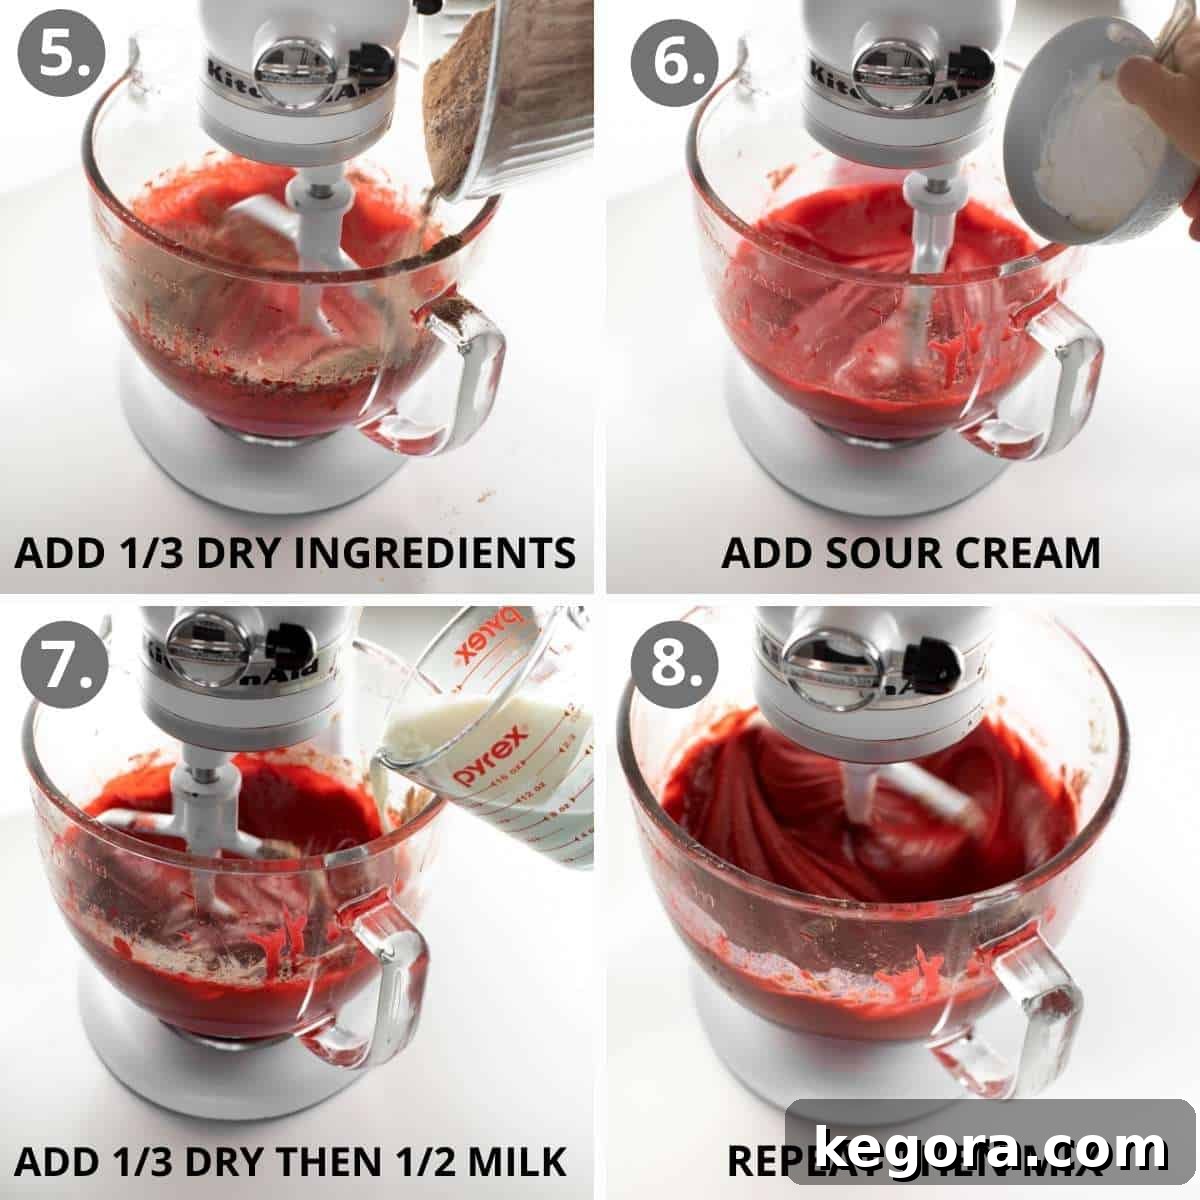
4. Incorporate Wet and Dry Ingredients Alternately: With your mixer on low speed, add approximately one-third of the dry ingredient mixture to the wet ingredients. Mix just until it’s incorporated. Next, add the sour cream and mix until just combined. Follow with another one-third of the dry ingredients, mixing again until blended. Then, add half of the milk, followed by the remaining one-third of the dry ingredients. Finish by adding the rest of the milk and mix gently until the batter is completely smooth and cohesive, taking care not to overmix. This alternating method allows the gluten-free flour to absorb moisture evenly, preventing a gummy texture.
Recipe Tip: The Art of Alternating
The alternating addition of dry and liquid ingredients is a classic baking technique that is especially beneficial for gluten-free recipes. It helps the flour absorb into the batter more uniformly, creating a smoother consistency and preventing overmixing, which can lead to a tougher texture even without gluten.
5. Bake to Perfection: Carefully pour the cupcake batter into the prepared muffin tin, filling each liner about three-quarters of the way full. Bake for 22-25 minutes, or until a wooden toothpick inserted into the center of a cupcake comes out clean. Be mindful not to overbake, as this can lead to dry cupcakes. Once baked, remove the muffin pan from the oven and let the cupcakes cool in the pan for about 5 minutes. Then, transfer them to a wire rack to cool completely before moving on to the frosting stage.
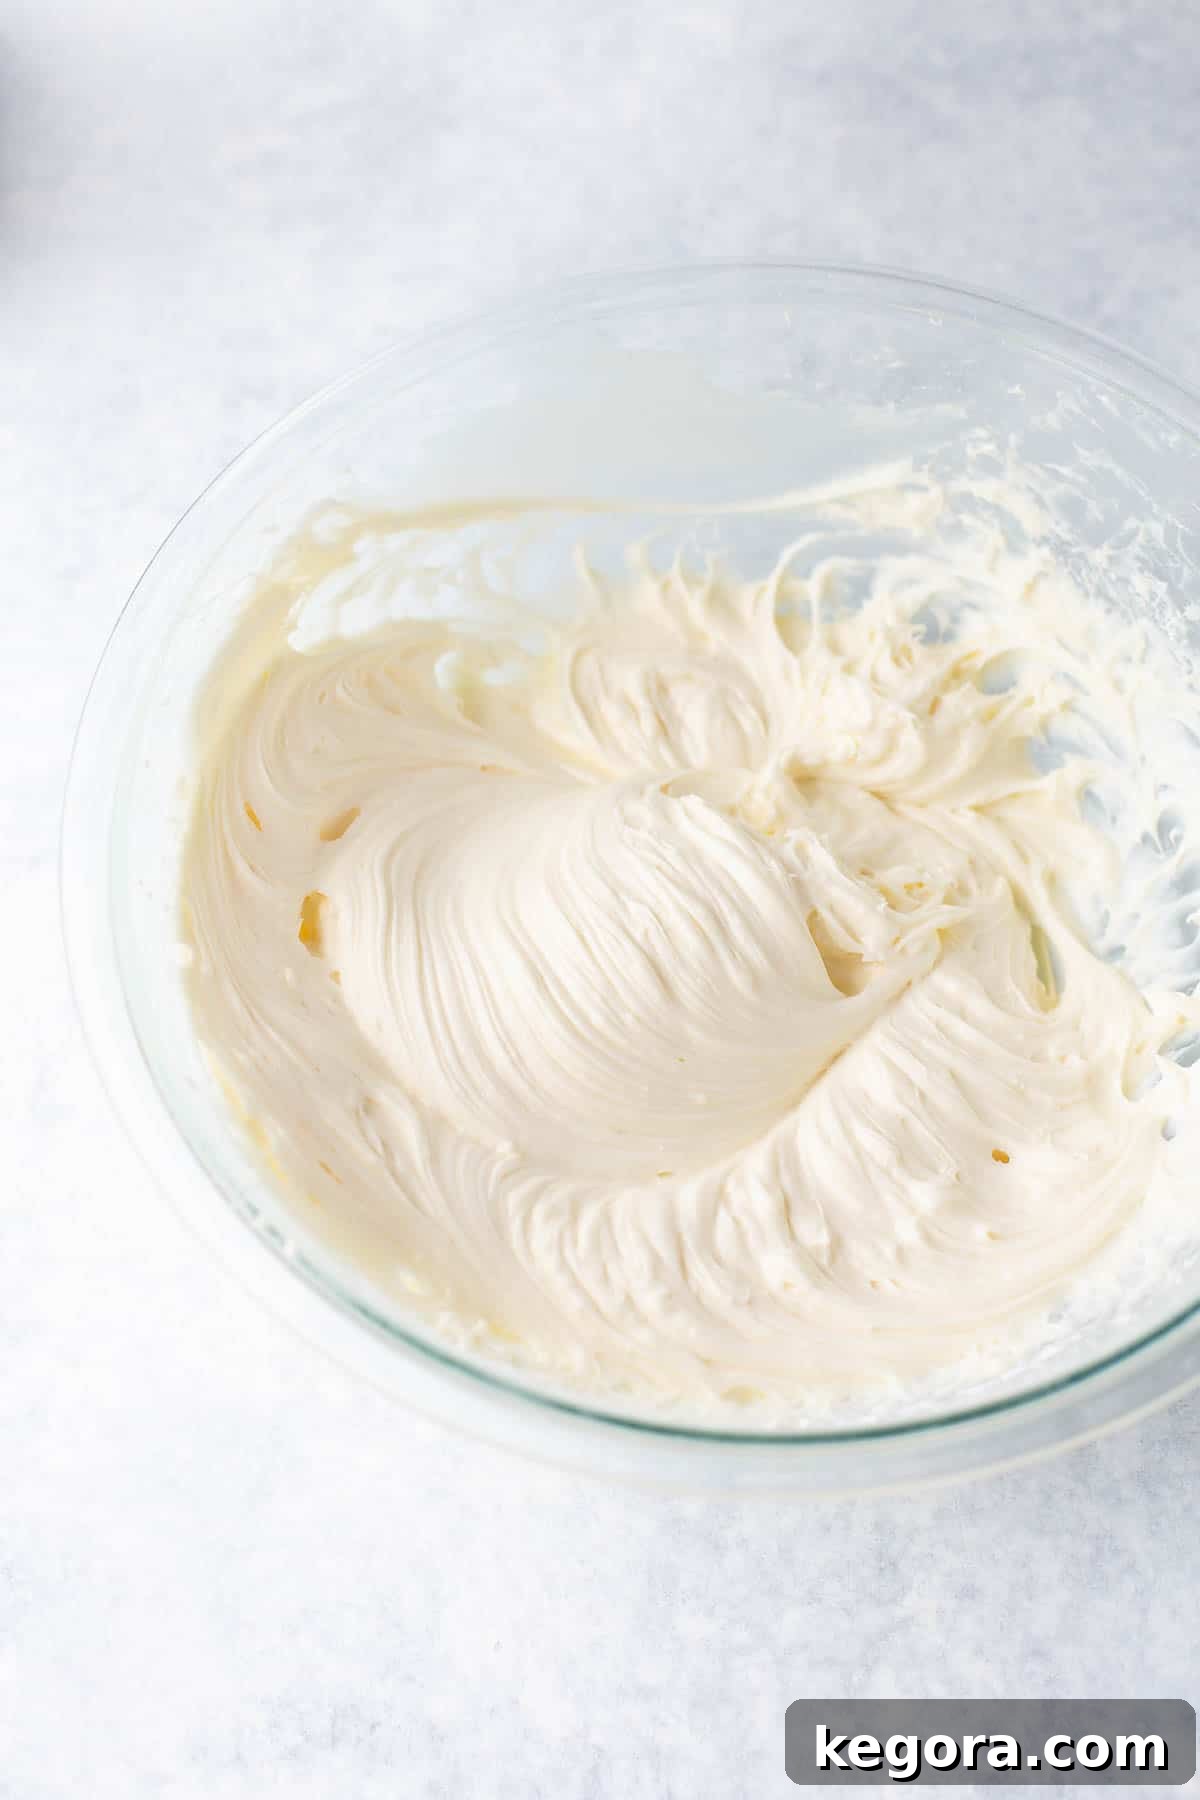
6. Prepare the Tangy Cream Cheese Frosting: While your cupcakes cool, it’s time to make the iconic cream cheese frosting. In a medium bowl, using either a hand mixer or a stand mixer, beat together the softened butter and softened cream cheese until the mixture is smooth and fully combined, with no lumps. Gradually add the powdered sugar, a pinch of salt, and vanilla extract. Start beating on low speed to avoid a cloud of sugar, then increase to high speed and beat for about three minutes, or until the frosting is incredibly light, creamy, and fluffy. Scrape down the sides and bottom of the bowl periodically to ensure everything is mixed evenly, then beat for another 30 seconds. Transfer the frosting to a piping bag fitted with your favorite star tip and generously swirl it on top of each cooled cupcake. A sprinkle of red velvet cake crumbs makes for a beautiful finishing touch!
Storage and Freezing Instructions
Ensuring your delicious gluten-free red velvet cupcakes stay fresh and delightful is key. Here’s how to properly store and freeze them:
To Store: Cupcakes adorned with cream cheese frosting are best kept refrigerated due to the dairy content of the frosting. Place your frosted cupcakes in an airtight container to prevent them from drying out and absorbing any refrigerator odors. Store them in the fridge for up to 3-4 days. For the best flavor and texture, remove them from the refrigerator about 1-2 hours before serving to allow them to come closer to room temperature, softening the frosting and enhancing the cupcake’s moisture.
To Freeze: If you plan to enjoy these cupcakes at a later date, it’s best to freeze the unfrosted cupcakes. Allow the baked cupcakes to cool completely. Individually wrap each cupcake tightly in plastic wrap, then place them in an airtight freezer-safe container or a heavy-duty freezer bag. This double layer of protection helps prevent freezer burn. Unfrosted cupcakes can be stored in the freezer for up to three months. When you’re ready to enjoy, thaw them at room temperature for a few hours, then frost as desired.
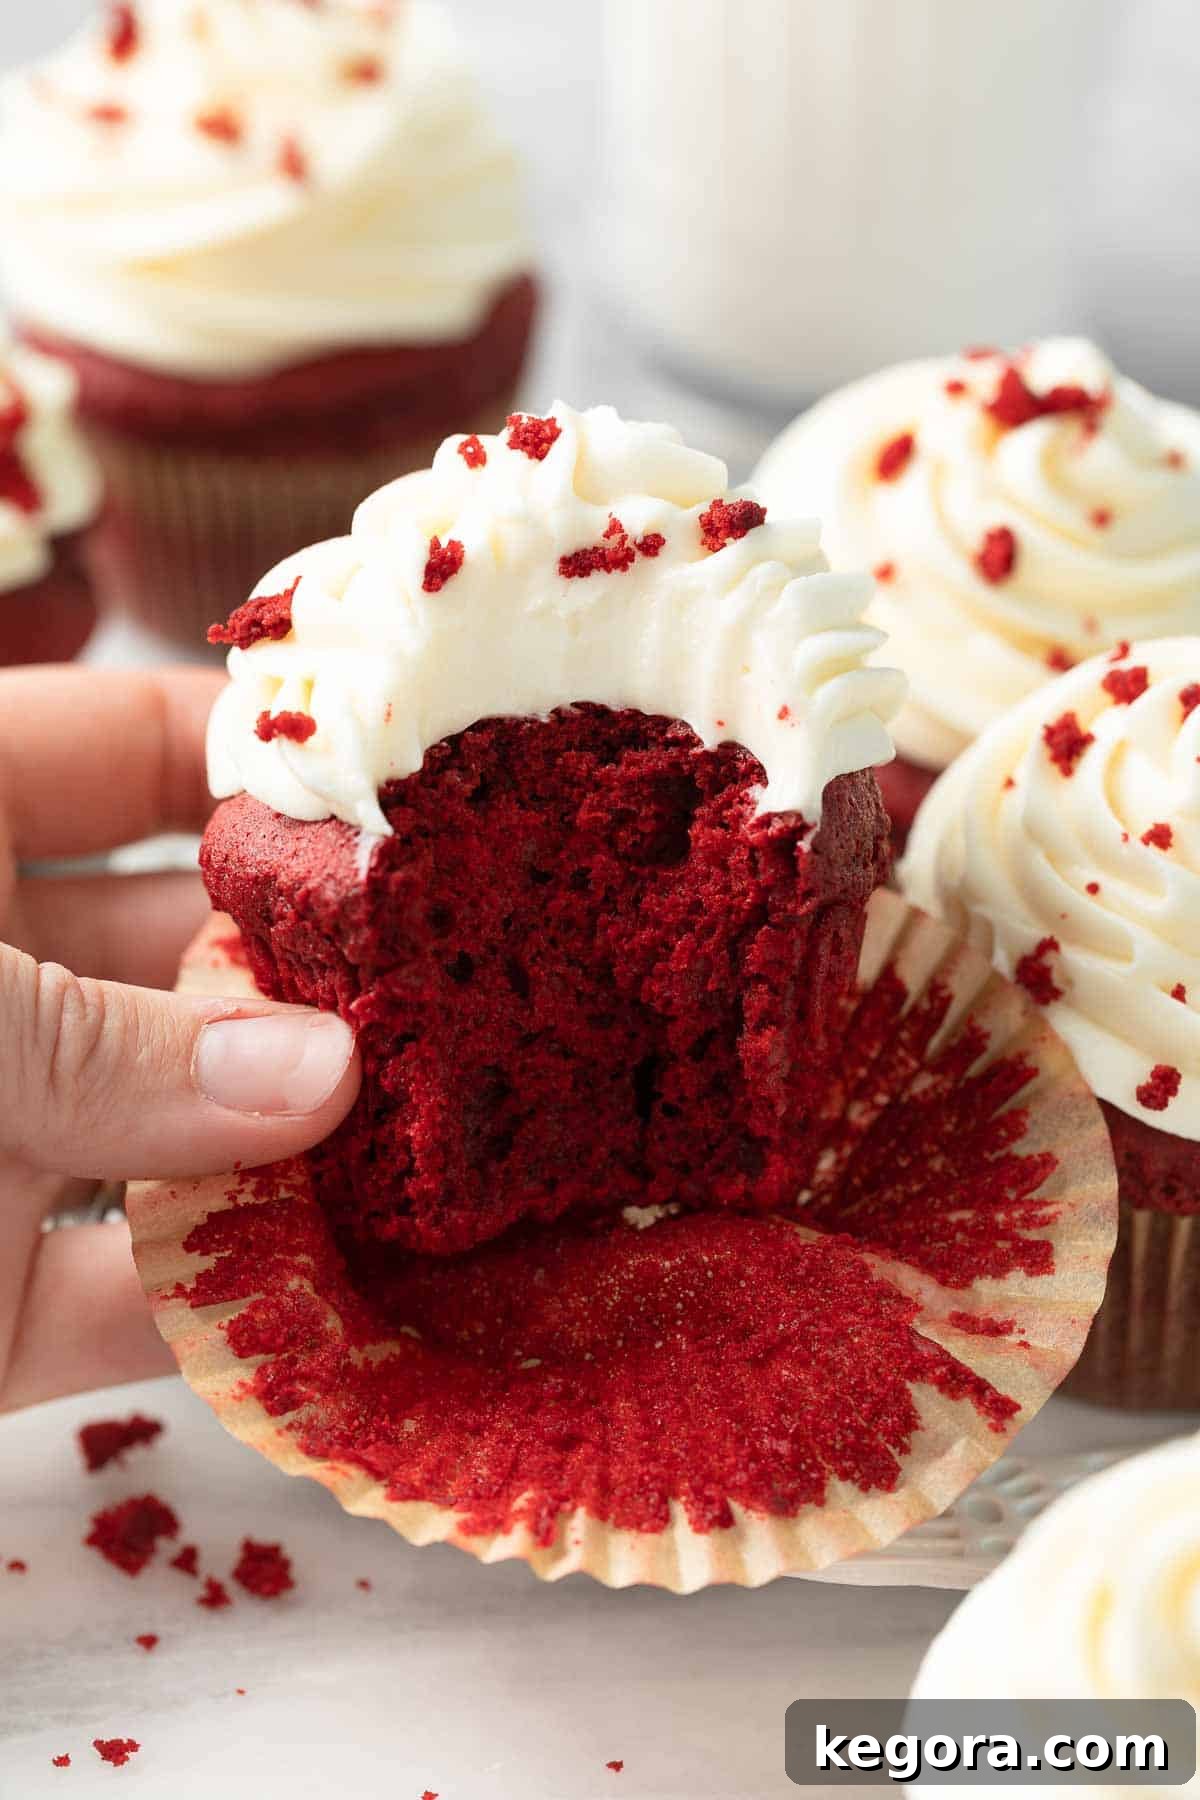
Expert Tips for Gluten-Free Red Velvet Cupcake Success
Achieving bakery-quality gluten-free red velvet cupcakes is easier than you think with these expert tips:
- Embrace Sour Cream and Oil for Supreme Moisture: While butter is beloved, for gluten-free red velvet, the combination of sour cream and oil truly excels. Butterfat can sometimes lead to a denser crumb when interacting with gluten-free flours. Oil, being liquid, coats flour particles more efficiently, resulting in a lighter, exceptionally tender, and moist crumb. This is a game-changer for gluten-free baking!
- Whip Your Batter for Unbeatable Fluffiness: Don’t skip the step of whipping the eggs and sugar until light and fluffy. This process incorporates vital air into the batter, which translates directly into airy, cloud-like cupcakes. This aeration is essential for achieving that desirable light texture, especially in gluten-free baking where gluten isn’t present to trap air.
- Grease Your Cupcake Liners: To ensure every cupcake releases cleanly from its paper liner without sticking or tearing, lightly spray the inside of each liner with cooking oil. This simple trick prevents your beautifully baked cupcakes from falling apart when unwrapping.
- The Magic of Lemon Juice for Tenderness: A small amount of lemon juice isn’t just for flavor balance; it actively tenderizes the crumb. Its acidity interacts with the leavening agents and cocoa powder, contributing to a softer texture and also enhancing the red color development. It’s a subtle but powerful addition.
- Ensure Room Temperature Ingredients: For both the cupcakes and the frosting, make sure your cold ingredients like eggs, sour cream, butter, and cream cheese are at room temperature. This allows them to emulsify better, creating a smoother, more uniform batter and a perfectly creamy frosting without lumps.
- Avoid Overmixing the Batter: Once you start adding the dry ingredients, mix only until just combined. Overmixing gluten-free flour blends can still lead to a tougher texture, even without gluten. A light hand ensures the cupcakes remain tender.
More Delicious Gluten-Free Baking Inspirations
If you’ve enjoyed these red velvet cupcakes, you’ll love exploring other incredible gluten-free recipes:
- Gluten-Free Vanilla Cupcakes
- Flourless Chocolate Torte
- Gluten-Free Pumpkin Cupcakes
- Gluten-Free Carrot Cake
- Gluten-Free Blueberry Muffins
- Gluten-Free Vanilla Cake
- Gluten-Free Funfetti Cupcakes
Gluten-Free Red Velvet Cupcakes
Ingredients
DRY INGREDIENTS:
- 1 ¼ cups gluten-free 1:1 baking flour (190 grams, I use King Arthur Gluten-Free Measure-for-Measure Flour)
- 3 tablespoons cocoa powder (20 grams)
- 1 1/2 teaspoons baking powder
- 1/2 teaspoon salt
OTHER INGREDIENTS:
- 1 cup sugar (200 grams)
- 2 eggs
- 1/4 cup vegetable oil (50 grams)
- 1 tablespoon red food coloring
- 1 1/2 teaspoons vanilla extract
- 1/2 teaspoon lemon juice
- 1/4 cup sour cream (60 grams, regular or light)
- 1/2 cup milk (125 grams, I use 2%)
FOR THE CREAM CHEESE FROSTING:
- ½ cup (1 stick) butter softened (113g)
- 8 oz cream cheese softened (brick-style, not spreadable, 226g)
- 1 teaspoon vanilla extract
- Pinch of salt
- 3 cups powdered sugar (390g)
Instructions
MAKE THE CUPCAKES:
- Preheat the oven to 350°F (175°C). Line a 12-count muffin pan with cupcake liners. Lightly grease the liners with cooking spray.
- In a medium bowl, whisk together the gluten-free flour, cocoa powder, baking powder, and salt.
- In the bowl of a stand mixer, add the eggs and sugar. Whip on medium-high speed for 3 minutes, until light and fluffy. With the mixer running on low, slowly drizzle in the oil. (You want to do this slowly so you don’t lose the air that you’ve mixed in.) Mix in the red food coloring, vanilla, and lemon juice.
- With the mixer on low, add ⅓ of the dry ingredients. Mix until incorporated. Add the sour cream and mix to combine. Add another ⅓ of the dry ingredients and continue to mix. Add ½ of the milk followed by the last ⅓ of the dry ingredients. Add the remaining milk and stir until totally combined. (You want to add the dry ingredients alternately with liquid ingredients so the flour absorbs into the batter.)
- Pour the batter into each cup to fill ¾ of the way up. Bake for 22-25 minutes, until a toothpick inserted into the center of each cupcake comes out clean.
- Let the cupcakes cool in the pan for 5 minutes. Then transfer them to a wire rack to cool completely before frosting.
MAKE THE CREAM CHEESE FROSTING:
- Using a hand or stand mixer, beat together the softened butter and cream cheese until combined and smooth. Add the powdered sugar, salt, and vanilla.
- Beat on low speed, then switch to high for about three minutes or until light and creamy. Scrape down the sides and bottom of the bowl, then mix for another 30 seconds or so to ensure uniformity.
- Transfer the frosting to a piping bag fitted with a star tip and pipe large dollops on top of each completely cooled cupcake.
Notes
- Cocoa powder: It’s best to use natural cocoa powder like Guittard or Ghirardelli for red velvet cake. The lighter brown color results in a more vibrant red cake, and the higher acidity reacts with the baking soda to create a more tender crumb.
- Red Food Coloring: If you want an intensely red cake, you’ll want to use red gel food coloring, rather than natural or liquid food coloring. I use Americolor “red red” or “super red”. You can also use 1 oz liquid red food coloring, but I prefer the gel linked above for vibrancy.
MAKE IT DAIRY-FREE: To make these cupcakes dairy-free, simply substitute dairy-free sour cream (such as Kite Hill) and unsweetened almond milk for the regular sour cream and milk.
Nutrition
Frequently Asked Questions About Gluten-Free Red Velvet Cupcakes
While both cakes contain cocoa, red velvet has a distinctly lighter chocolate flavor compared to a rich chocolate cake, using only a small amount of cocoa powder. The signature of red velvet lies in its unique balance of ingredients. It incorporates more acidic components, such as sour cream, lemon juice, or vinegar, which react with the natural cocoa powder and baking soda. This reaction not only contributes to the tender crumb but also subtly enhances the reddish tones, which are then amplified by red food coloring. The flavor profile of red velvet is often described as a delicate blend of chocolate and vanilla with a slight tang.
A bitter taste in red velvet can typically be attributed to an imbalance of leavening agents. Too much baking powder, or mistakenly using baking soda instead of baking powder (or vice-versa in incorrect ratios), can create an unpleasant bitter undertone. Red velvet is meant to be a harmonious blend of light chocolate, vanilla, and a hint of tang, resulting in a rich, nuanced flavor. Always measure your leavening agents precisely to avoid this common issue.
No, red food coloring is primarily for aesthetic appeal and does not alter the flavor of red velvet cake. Its purpose is to enhance the natural reddish hue that results from the chemical reaction between the acidic ingredients (like buttermilk or sour cream and lemon juice) and natural cocoa powder. Without artificial coloring, your red velvet cake would still have the same delicious, subtly chocolatey, tangy flavor, but its color would be a more subdued reddish-brown. One added benefit of omitting the food coloring is avoiding the potential for your tongue to turn red!
Absolutely! To adapt this recipe for a dairy-free diet, simply substitute the regular sour cream with a high-quality dairy-free sour cream alternative (brands like Kite Hill work wonderfully). For the milk, you can use any unsweetened dairy-free milk, such as almond milk, soy milk, or oat milk. The cream cheese frosting can also be made dairy-free by using dairy-free butter and dairy-free cream cheese alternatives.
To make these gluten-free red velvet cupcakes, you’ll need standard baking equipment: a 12-cup muffin tin, paper cupcake liners, a large mixing bowl for dry ingredients, a separate large mixing bowl (or the bowl of a stand mixer) for wet ingredients, a whisk, an electric hand mixer or stand mixer with a paddle attachment, measuring cups and spoons, and a wire cooling rack. For the frosting, a piping bag with a star tip is optional but recommended for a professional finish.