
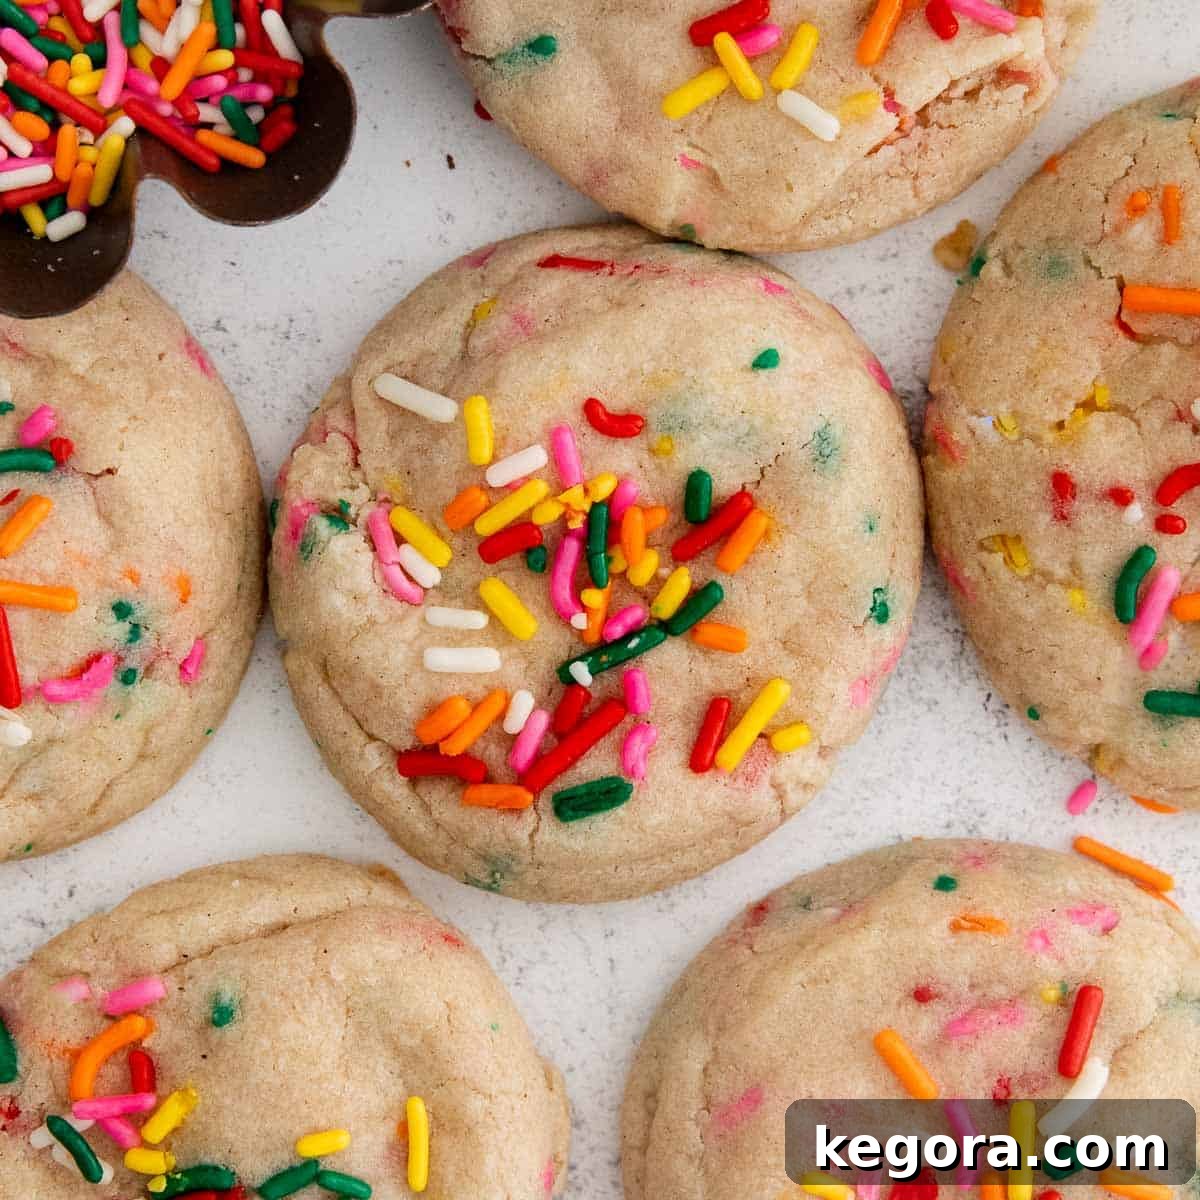
Irresistibly Easy Gluten-Free Funfetti Sugar Cookies

Welcome to a world where gluten-free baking meets effortless joy! These Funfetti Sugar Cookies aren’t just delicious; they’re a celebration in every bite, designed to bring smiles without the fuss of traditional sugar cookie recipes. Forget the rolling pins and cookie cutters – these are simple drop cookies that deliver on both flavor and fun. I’m Erin, and I’m thrilled to share this foolproof recipe that has quickly become a top favorite in my kitchen.
Erin’s Recipe Rundown: A Quick Look
Curious about what makes these cookies so special? Here’s a brief overview:
- Texture: Prepare for a delightful experience of perfectly soft and wonderfully chewy cookies. Each bite offers a satisfying tenderness that melts in your mouth.
- Taste: These cookies are a symphony of deliciously sweet and rich, buttery flavors, beautifully complemented by the playful burst of sprinkles. They evoke nostalgic memories of classic childhood treats.
- Ease: This is truly an easy, beginner-friendly cookie recipe! Designed for simplicity, you won’t need any special skills or complicated equipment to achieve stellar results.
- Top Tip: The secret to their perfect shape and texture lies in chilling the dough. Chilling for at least 2 hours is absolutely essential to prevent the cookies from spreading too much during baking, ensuring they retain their delightful chewiness.
- Recommended GF Flour: For the best possible texture and consistency, I highly recommend using a high-quality gluten-free measure-for-measure flour that specifically contains xanthan gum. This ingredient is key for binding and achieving that ideal chew. This is my personal favorite brand for consistent results.
- Would I make these again? Without a doubt, absolutely! These convenient drop cookies make it incredibly easy to enjoy vibrantly fun sugar cookies without all the extra work typically associated with many sugar cookie recipes. They’re a game-changer!
xoxo erin

This comprehensive guide to gluten-free funfetti sugar cookies was originally published in April 2023 and has been thoughtfully updated with fresh photos and improved instructions in March 2025 to provide you with the best possible baking experience.
Why These Gluten-Free Funfetti Cookies Are a Must-Try
This gluten-free cookie dough has a magical way of reminding me of those classic store-bought slice-and-bake cookies we all loved as kids. But let me tell you, these homemade versions are even better! The rich, buttery flavor combined with the tender, chewy texture is simply irresistible, and knowing they’re made from scratch adds an extra layer of satisfaction.
These gluten-free funfetti sugar cookies are not only incredibly delicious but also surprisingly easy to prepare. Say goodbye to the hassle of rolling pins and intricate cookie cutters. These unfrosted cookies stand proudly on their own, offering all the delightful taste of classic sugar cookies but without the painstaking effort. They are the perfect solution for busy bakers or anyone looking for a quick yet impressive dessert. Plus, the vibrant sprinkles bring an instant party to any plate!
(P.S. If you’re specifically searching for an amazing gluten-free cut-out cookie recipe that requires a rolling pin, you absolutely must try these gluten-free sugar cookies for perfect shapes and festive decorating.)
Featured Comment: Real Bakers, Real Love
From Theresa: “I am not over exaggerating when I say these cookies saved the day. I had to whip up a GF dessert without going to the store today and these turned out so whimsical, fun, and deeeelish! After cooking and baking GF for 20 years, it’s such a relief to find Erin’s recipes that are consistent GF wins! I haven’t made a dud yet! Thank you!!”
Read 49 more comments
Table of Contents
- Irresistibly Easy Gluten-Free Funfetti Sugar Cookies
- Erin’s Recipe Rundown: A Quick Look
- Why These Gluten-Free Funfetti Cookies Are a Must-Try
- Key Ingredients You’ll Need
- How to Make These Gluten-Free Funfetti Sugar Cookies: Step-by-Step
- Make-Ahead, Storage & Freezing Instructions
- Can these gluten-free funfetti sugar cookies be made dairy-free?
- Is it necessary for me to chill the dough for at least 2 hours?
- Can I use different kinds of sprinkles?
- Expert Tips for Perfect Gluten-Free Funfetti Sugar Cookies
- More Gluten-Free Cookie Recipes You’ll Love
- Gluten-Free Funfetti Sugar Cookies (EASY!) Recipe Card
Key Ingredients You’ll Need for Irresistible Funfetti Cookies
Creating these delightful gluten-free funfetti sugar cookies requires a few key ingredients. Each plays a vital role in achieving that perfect chewy texture and sweet, buttery flavor. Here are some important notes on what you’ll need. For the exact measurements, please jump to the full recipe card below.

- Gluten-Free Flour: This is the foundation of our cookies. I cannot stress enough the importance of using a high-quality gluten-free measure-for-measure flour blend that explicitly contains xanthan gum. Xanthan gum is crucial in gluten-free baking as it acts as a binder, mimicking the elasticity of gluten, which ensures your dough holds together beautifully and the baked cookies have a desirable chewy consistency. It prevents crumbling and dry textures.
- Butter: This recipe calls for a generous amount of butter, and for good reason! Butter is indispensable for imparting richness, crucial moisture, and an incredible depth of flavor that defines a classic sugar cookie. I personally prefer using salted butter to balance the sweetness. To ensure your cookies maintain their shape and don’t spread too much, it’s absolutely critical to properly chill the dough, allowing the butter to firm up within the mixture.
- Egg: A single large egg, ideally at room temperature, serves several purposes. It acts as a primary binding agent, holding all the ingredients together, and contributes essential moisture, which helps create these wonderfully chewy drop sugar cookies. Room temperature eggs also emulsify better with the butter and sugar, leading to a smoother, more uniform dough.
- Buttermilk: Buttermilk is a secret weapon in baking, known for adding an incredible tenderness and lightness to baked goods. It reacts with the baking powder to create a softer crumb and more delicate texture, resulting in the perfect chew. For those needing a dairy-free option, you can easily substitute with unsweetened almond milk mixed with 1 tablespoon of vinegar (allow to sit for 5 minutes before using). You can also make your own buttermilk by adding vinegar or lemon juice to regular milk.
- Sprinkles: These cookies simply wouldn’t be “funfetti” without their vibrant burst of sprinkles! They add visual appeal and a delightful crunch. Make sure to choose sprinkles that are certified gluten-free if you require them to be. These are my favorite certified gluten-free sprinkles available on Amazon, ensuring both safety and vibrant color.
If you’re a fan of these easy treats, you might also enjoy making this festive gluten-free cookie cake or a quick, single-serving gluten-free funfetti mug cake.
How to Make These Gluten-Free Funfetti Sugar Cookies: A Simple Guide
Ready to bake some joy? Here’s a detailed, step-by-step overview of how to create these fantastic gluten-free funfetti sugar cookies. The process is straightforward, ensuring delicious results every time. For comprehensive, full instructions and exact measurements, please jump straight to the recipe card at the bottom of this post!

- Step 1: Combine Dry Ingredients. In a medium-sized mixing bowl, thoroughly whisk together your gluten-free flour blend, baking powder, and salt. Make sure these dry ingredients are well combined to ensure even leavening throughout your cookies. Once mixed, set this bowl aside for later use.
- Step 2: Cream Butter and Sugar. In a large mixing bowl, using either a hand mixer or a stand mixer equipped with a paddle attachment, cream together the softened butter and granulated sugar. Beat them on medium-high speed for approximately 1 minute until the mixture becomes light, fluffy, and pale in color. This process incorporates air, which contributes to the cookies’ tender texture.

- Step 3: Add Wet Ingredients. With your mixer still on high speed, add the large egg and vanilla extract to the creamed butter and sugar. Continue to beat for about 1 minute, until all ingredients are fully combined and the mixture is smooth. It’s a good practice to pause and scrape down the sides and bottom of the bowl periodically to ensure everything is evenly incorporated.
- Step 4: Incorporate Dry & Finishing Touches. Reduce your mixer speed to low. Gradually add the reserved dry ingredients into the wet mixture, mixing just until combined. Be careful not to overmix at this stage. Finally, gently mix in the buttermilk and, of course, the vibrant sprinkles! The resulting cookie dough will be noticeably thick and delightfully sticky – this is exactly the consistency we’re looking for.

- Step 5: Scoop and Chill the Dough. Using a cookie scoop (about 2 tablespoons per ball), portion out the dough and roll each portion into a smooth ball. For an extra festive touch, you can lightly dip the tops of each dough ball into additional sprinkles before placing them on a large plate or a parchment-lined baking sheet. Repeat this process until all the dough is used. Then, cover the dough balls tightly with plastic wrap and chill them in the refrigerator for a minimum of 2 hours, or up to 3 days. If you plan to chill them for longer than a few hours, transfer them to an airtight container to prevent them from drying out. This chilling step is non-negotiable for perfectly shaped cookies!
- Step 6: Bake to Golden Perfection. Preheat your oven to 350°F (175°C). Line two large, rimmed baking sheets with either silicone baking mats or parchment paper for easy cleanup and consistent baking. Arrange the chilled dough balls on the prepared baking sheets, ensuring they are spaced about 2 inches apart to allow for proper spreading. Bake for 10-12 minutes, or until the edges are lightly golden and the centers are just set. Once baked, let the cookies rest on the baking sheets for 5 minutes before carefully transferring them to a wire rack to cool completely. Then, it’s time to enjoy your perfectly baked, soft, and chewy gluten-free funfetti sugar cookies!
For a festive twist during the holiday season, don’t miss out on trying these delicious gluten-free Christmas cookies!
Make-Ahead, Storage & Freezing Instructions for Your Convenience
Planning ahead or managing leftovers is easy with these gluten-free funfetti sugar cookies. Here’s how to ensure they stay fresh and delicious:
To Make-Ahead: The beauty of this recipe is its flexibility! You can prepare the cookie dough balls, shape them, and chill them for up to 3 days before baking. This is perfect for parties or when you want freshly baked cookies on demand. For optimal freshness, especially if chilling for more than a few hours, I recommend storing the dough balls in an airtight container to prevent them from drying out or absorbing refrigerator odors.
To Store Baked Cookies: Once your delicious cookies have completely cooled to room temperature, transfer them to an airtight container. They will maintain their wonderful soft and chewy texture when stored at room temperature for up to 1 week. Keep them away from direct sunlight or heat to preserve their quality.
To Freeze Baked Cookies: For longer storage, these cookies freeze beautifully! After the cookies have fully cooled, arrange them in a single layer in an airtight freezer-safe container or a heavy-duty freezer bag. They can be frozen for up to 3 months. When you’re ready to enjoy them, simply thaw the cookies at room temperature for about 15-20 minutes. They’ll taste just like they were freshly baked!
Frequently Asked Questions: Your Baking Queries Answered
Can these gluten-free funfetti sugar cookies be made dairy-free?
Yes, absolutely! Making these cookies dairy-free is quite simple. Instead of regular butter, opt for your favorite brand of vegan butter. For the buttermilk substitute, use unsweetened almond milk and stir in 1 tablespoon of vinegar. Let this mixture sit for about 5 minutes until it slightly curdles, then use it as you would regular buttermilk. This simple swap ensures your cookies remain just as delicious and tender for those with dairy sensitivities.
Is it necessary for me to chill the dough for at least 2 hours?
Yes, the chilling time is not just a suggestion – it’s crucial for the success of this recipe! These cookies contain a good amount of butter, which is wonderful for flavor and texture. However, without adequate chilling, the butter will melt too quickly in the oven, causing the cookies to spread excessively thin and lose their desired chewy structure. Chilling allows the butter to harden, ensuring the cookies hold their shape, bake evenly, and achieve that perfect soft, chewy center. Don’t skip this step for the best results!
Can I use different kinds of sprinkles?
Definitely! One of the most fun aspects of these funfetti cookies is customizing them with different sprinkles. I absolutely love changing the sprinkles to match various holidays, seasons, or party themes. Just ensure that if you need the cookies to remain gluten-free, the sprinkles you choose are certified gluten-free. Otherwise, feel free to use any type of sprinkles you like – jimmies, nonpareils, or even themed shapes. These classic rainbow sprinkles are my favorite gluten-free sprinkles for vibrant color!

Expert Tips for Perfect Gluten-Free Funfetti Sugar Cookies Every Time
Achieving bakery-quality gluten-free funfetti sugar cookies is easier than you think with these expert tips:
- Embrace the Chill: To reiterate, chilling the cookie dough balls for at least 2 hours before baking is absolutely paramount to prevent over-spreading. This step solidifies the butter in the dough, allowing the cookies to hold their shape and develop that desirable chewy texture during baking. Patience here truly pays off!
- Choose Your Flour Wisely: The type of gluten-free flour you use makes a significant difference. I strongly recommend opting for a high-quality 1:1 gluten-free baking flour blend that specifically lists xanthan gum as an ingredient. Xanthan gum acts as a crucial binder, preventing the cookies from becoming crumbly and ensuring they have a lovely, cohesive, and chewy texture. This is my personal favorite brand for reliably excellent results.
- Seasonal Sprinkle Swaps: These cookies are fantastic for parties and celebrations throughout the year! Get creative by matching your sprinkles to the occasion. Think festive red and green for Christmas, charming red and pink for Valentine’s Day, pastel shades for Easter, or vibrant colors for birthdays. It’s an easy way to customize your treats and add a special touch to any event.
More Delicious Gluten-Free Cookie Recipes You’ll Love
If you’ve enjoyed these funfetti delights, be sure to explore more of my tried-and-true gluten-free cookie recipes:
- Almond Flour Sugar Cookies: A grain-free twist on a classic.
- Gluten-Free Lemon Cookies: Zesty and refreshing for a lighter treat.
- Gluten-Free Chocolate Chip Cookies: The ultimate comfort food, perfected.
- Gluten-Free Snickerdoodles: Cinnamon-sugar goodness in every soft bite.
- Gluten-Free Peanut Butter Cookies: Rich, nutty, and irresistibly chewy.
- Gluten-Free Monster Cookies: A loaded cookie packed with all your favorites.

Gluten-Free Funfetti Sugar Cookies (EASY!)
Erin Collins
15 mins
10 mins
2 hrs
2 hrs 25 mins
24 cookies
These easy gluten-free sugar cookies are perfectly SOFT and CHEWY! No rolling pin or cookie cutters required, making them incredibly simple to whip up for any occasion.
I have dozens of cookie recipes on my site, and this recipe is consistently in my top 5 favorites! They’re buttery, chewy perfection that everyone adores. Feel free to use any kind of holiday or celebratory sprinkles you like to customize them for any event!
Comments
Print Recipe
Ingredients
- 2 cups (300g) gluten-free measure-for-measure flour
- 1 1/2 teaspoons baking powder
- 1/2 teaspoon kosher salt
- 3/4 cup (170g) butter, softened
- 1 1/2 cups (300g) granulated sugar
- 1 large egg, room temperature
- 2 teaspoons vanilla extract
- 2 tablespoons buttermilk (or unsweetened almond milk + 1 tbsp vinegar for dairy-free)
- 1/2 cup (95g) sprinkles + more for topping
Instructions
- In a medium bowl, whisk together the gluten-free flour, baking powder, and salt until well combined. Set this mixture aside.
- In a large bowl, using either a hand mixer or a stand mixer with a paddle attachment, beat the softened butter and granulated sugar together on medium-high speed. Cream them for about 1 minute until the mixture is light and fluffy.
- Add the large egg and vanilla extract to the creamed mixture. Beat on high speed for approximately 1 minute, scraping down the sides and bottom of the bowl as needed to ensure all ingredients are thoroughly combined.
- Reduce the mixer speed to low. Gradually add the reserved dry ingredients to the wet mixture, mixing just until fully combined. Then, gently mix in the buttermilk and the colorful sprinkles. The dough should be thick and somewhat sticky.
- Scoop out large sections of dough (about 2 tablespoons each) and roll them into smooth balls. If desired, lightly dip the tops of the cookie dough balls into extra sprinkles for added flair. Place the dough balls onto a large plate or a baking sheet lined with parchment paper. Cover with plastic wrap.
- Chill the dough balls in the refrigerator for at least 2 hours, or for up to 3 days. For longer storage beyond a few hours, transfer them to an airtight container. This chilling step is essential to prevent spreading during baking.
- Once chilled, preheat your oven to 350°F (175°C). Line two large, rimmed baking sheets with silicone baking mats or parchment paper.
- Arrange the chilled cookie dough balls on the prepared baking sheets, ensuring they are spaced about 2 inches apart. Bake for 10-12 minutes, or until the edges are lightly golden and the centers are set.
- Allow the cookies to cool on the baking sheet for 5 minutes before carefully transferring them to a wire rack to cool completely. Serve and enjoy these wonderfully soft and chewy funfetti sugar cookies!
Notes
Gluten-Free Flour: For the best texture and to prevent crumbling, use a high-quality gluten-free measure-for-measure flour blend that contains xanthan gum. This is my top recommended brand!
Sprinkles: If you need certified gluten-free sprinkles, these are my favorite certified gluten-free sprinkles for vibrant color and safe baking.
Prevent Spreading: The most important tip for this recipe is to make sure you chill the dough balls for at least 2 hours before baking. This step is absolutely essential for achieving perfectly shaped cookies and preventing them from spreading too much in the oven.
To Make-Ahead: The cookie dough can be shaped into balls and chilled in the refrigerator for up to 3 days. Store them in an airtight container if you plan to chill them for more than a few hours.
To Store Baked Cookies: After the cookies have fully cooled, store them in an airtight container at room temperature for up to 1 week. They will retain their soft and chewy texture.
To Freeze Baked Cookies: For longer preservation, once cooled, store the cookies in an airtight container or a freezer bag and freeze for up to 3 months. Thaw them at room temperature for about 15-20 minutes before serving.
Nutrition
Calories: 151kcal | Carbohydrates: 23g | Protein: 1g | Fat: 7g | Saturated Fat: 4g | Polyunsaturated Fat: 0.3g | Monounsaturated Fat: 2g | Trans Fat: 0.2g | Cholesterol: 22mg | Sodium: 98mg | Potassium: 32mg | Fiber: 1g | Sugar: 16g | Vitamin A: 189IU | Calcium: 22mg | Iron: 0.4mg