
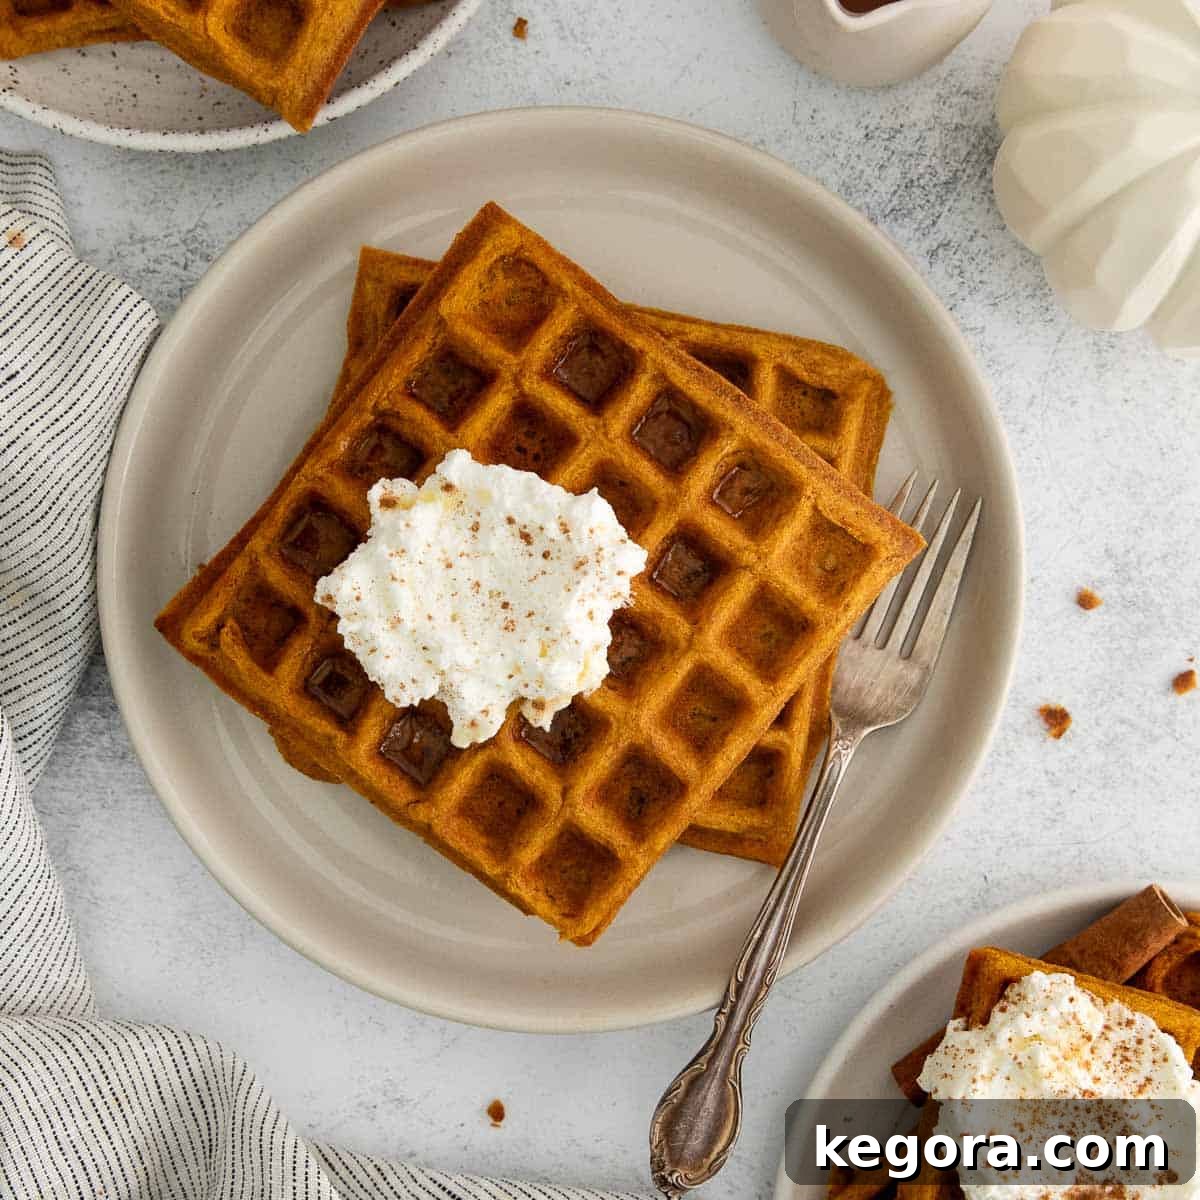
Irresistible Gluten-Free Pumpkin Waffles: Your Ultimate Fall Breakfast
As the crisp autumn air settles in and vibrant leaves paint the landscape, there’s an undeniable craving for all things pumpkin. While pumpkin bread and cookies are cherished classics, I’m always on the lookout for fresh, exciting ways to celebrate this beloved seasonal flavor. That’s why I’m thrilled to share my absolute favorite recipe for these incredibly delicious, light, and crispy gluten-free pumpkin waffles!
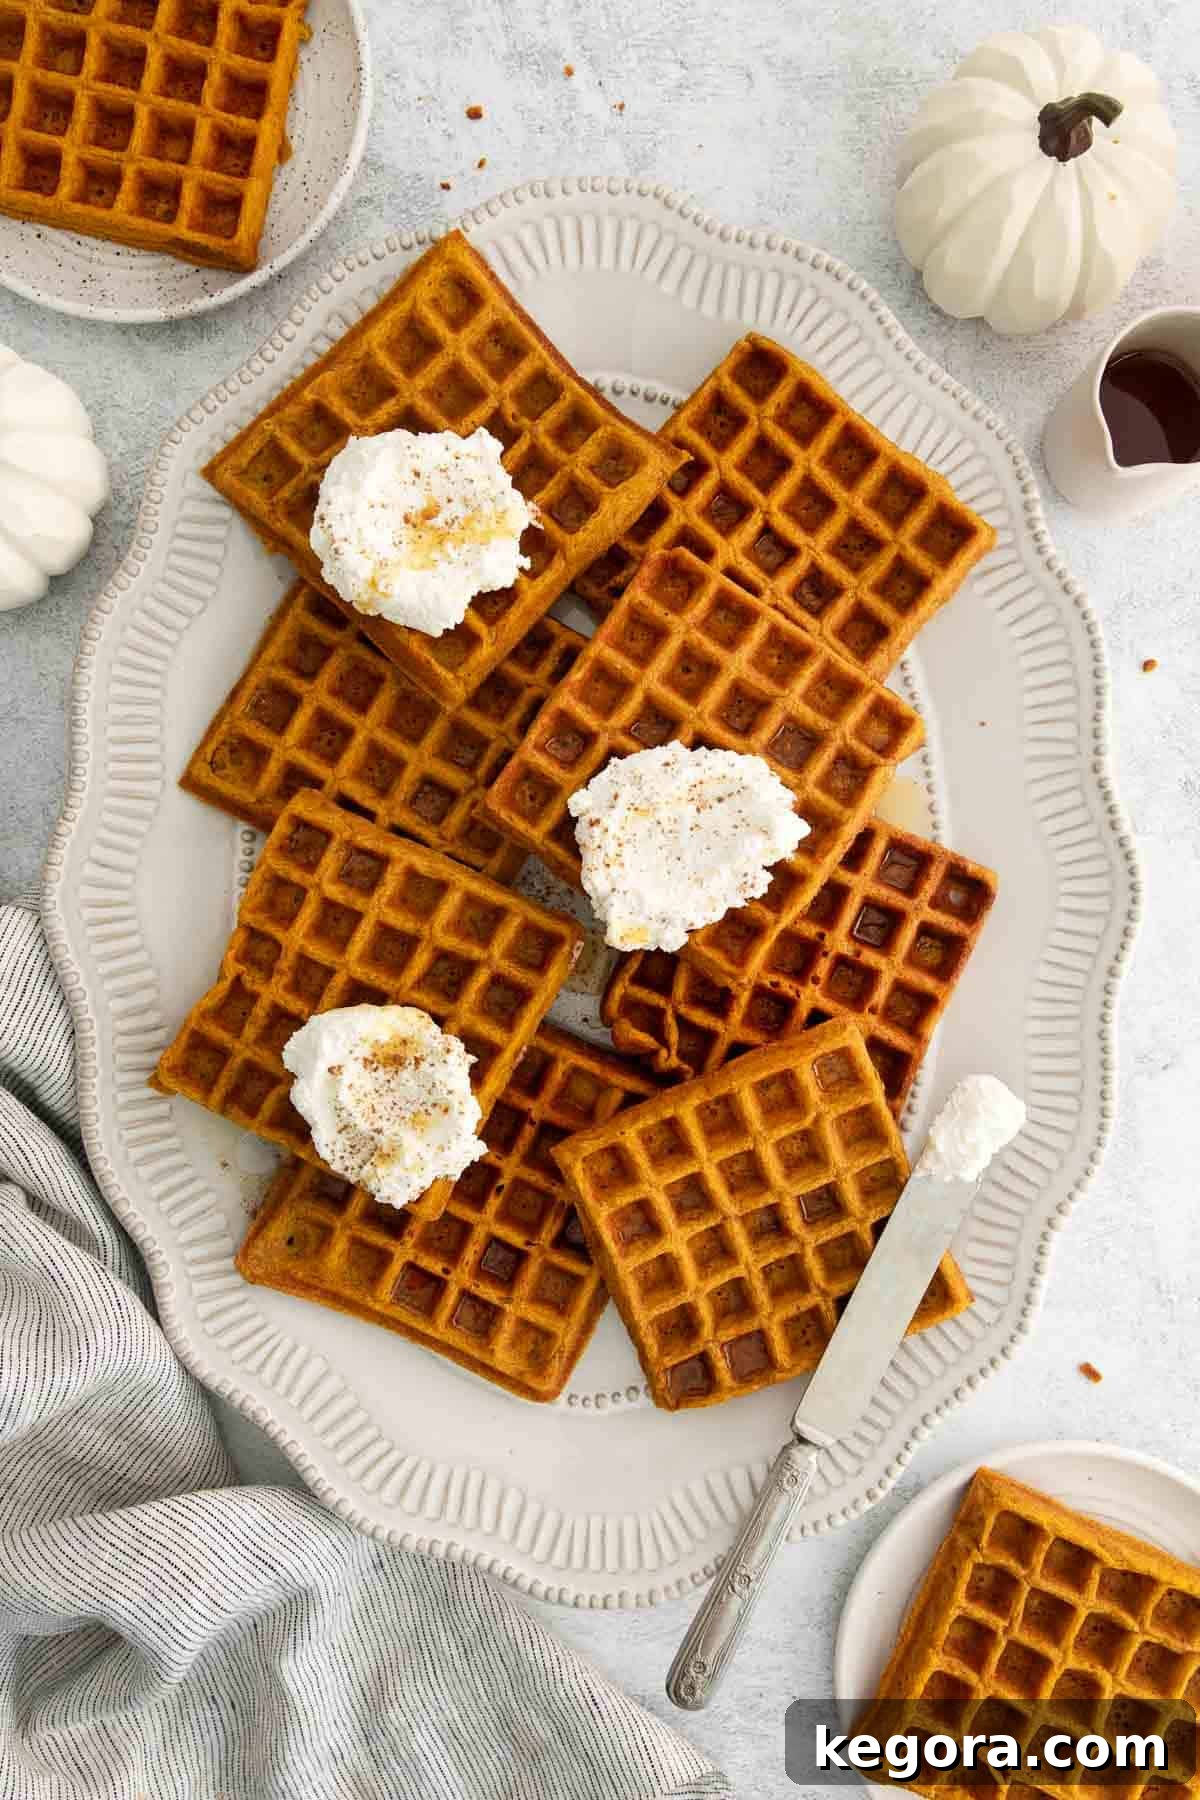
Forget the heavy, gummy texture often associated with gluten-free baking. This recipe delivers a truly exceptional waffle experience: a perfectly golden, crispy exterior yielding to a wonderfully fluffy interior, bursting with classic pumpkin spice notes, enriched by the subtle sweetness of maple syrup and brown sugar. It’s a delightful departure from typical fall treats and, best of all, incredibly simple to make. You’ll be enjoying a warm, homemade breakfast in just 15 minutes, making it ideal for busy mornings or a relaxed weekend brunch.
Why You’ll Fall in Love with These Pumpkin Waffles
These aren’t just any pumpkin waffles; they are specifically designed to bring joy and ease to your autumn mornings. Here’s why this recipe deserves a permanent spot in your fall rotation:
- Perfect Texture: We’ve cracked the code for gluten-free waffles that are genuinely light and crispy on the outside, with a soft, airy, and fluffy interior. No more dense or chewy disappointments!
- Authentic Fall Flavors: Each bite is a harmonious blend of warm pumpkin spice, subtly sweet brown sugar, and a rich hint of maple syrup, which is incorporated directly into the batter for an extra depth of flavor. It’s autumn in every mouthful.
- Effortlessly Simple: Despite their gourmet taste, these waffles are surprisingly easy to prepare. With minimal steps and common ingredients, you can have a batch ready in about 15 minutes of active prep time.
- Naturally Gluten-Free: Crafted with a reliable gluten-free flour blend, this recipe ensures everyone can enjoy a delightful pumpkin breakfast without compromise.
- Versatile & Customizable: Serve them with your favorite toppings – from a dollop of whipped cream to fresh fruit, extra maple syrup, or a sprinkle of toasted pecans. The possibilities are endless!
Expert Tips for Waffle Perfection
Achieving the ultimate waffle isn’t difficult, but a couple of key techniques can elevate your breakfast from good to extraordinary:
- Do Not Over-Mix the Batter: This is arguably the most crucial tip for any waffle or pancake recipe, especially with gluten-free flours. Overmixing develops gluten (even in gluten-free blends containing starches and gums that mimic gluten’s properties) and can lead to tough, dense waffles. Mix until the ingredients are *just* combined; a few small lumps are perfectly fine and even desirable for a tender crumb.
- Keep Waffles Warm and Crispy: To prevent your waffles from getting soggy while you cook the entire batch, preheat your oven to 200°F (95°C). Place a wire rack on a large baking sheet and transfer cooked waffles to the rack in the warm oven. The rack allows air to circulate, keeping them crisp and ready for serving all at once.
xoxo, Erin
Featured Comment
From Brenda: “This recipe is a keeper! Light and crispy not gummy like most gluten free waffles and pancakes. Thank you”
18 more comments
Essential Ingredients for Your Gluten-Free Pumpkin Waffles
Crafting the perfect gluten-free pumpkin waffle starts with understanding your ingredients. Below, you’ll find detailed notes on some key components that make this recipe shine. For the precise measurements and full ingredient list, please refer to the complete recipe card further down this page.
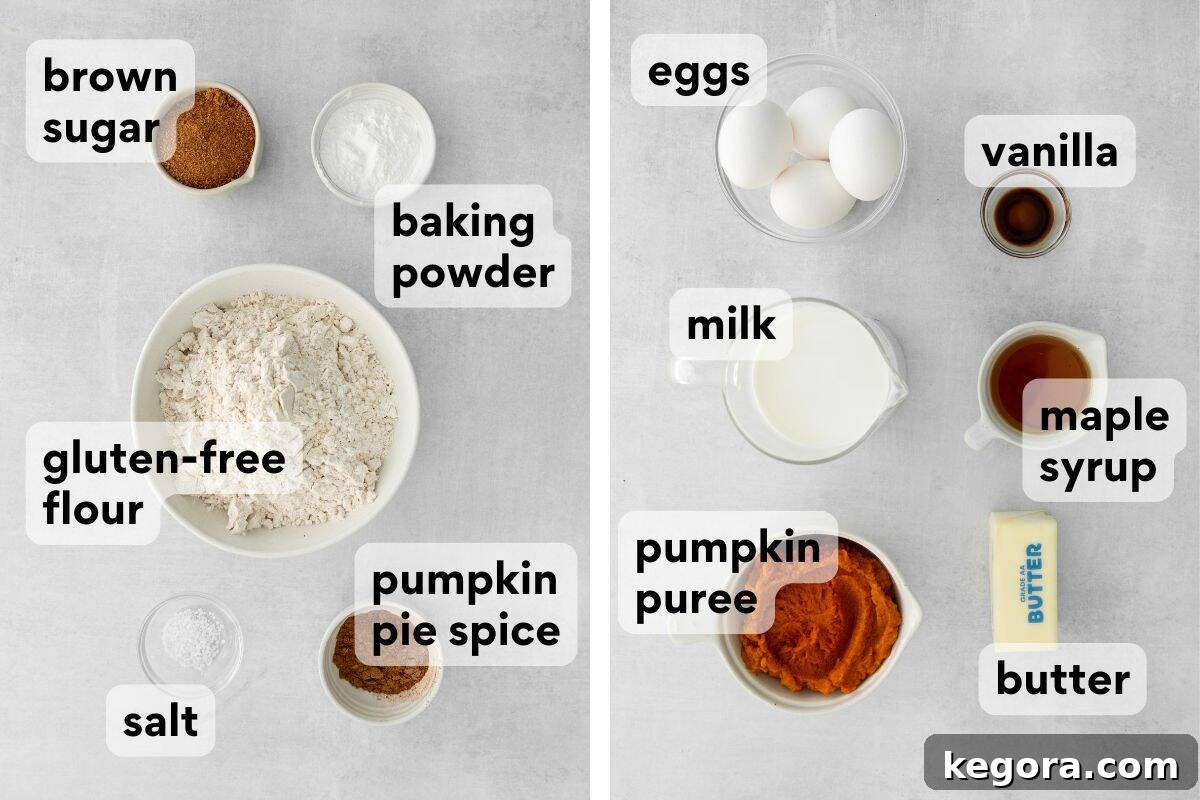
- Gluten-Free Measure-For-Measure Flour: The foundation of our gluten-free success. For the best texture and consistency, I highly recommend using a high-quality gluten-free flour blend that already contains xanthan gum. This gum acts as a binder, mimicking the elasticity of gluten, which is crucial for preventing crumbly baked goods. My personal go-to is King Arthur Flour Gluten-Free Measure-For-Measure Flour, which consistently delivers excellent results. Another fantastic option that I’ve used with great success is Bob’s Red Mill Gluten-Free 1:1 Baking Flour. Using a blend specifically designed for 1:1 substitution makes this recipe incredibly straightforward. Avoid single-ingredient gluten-free flours like almond or coconut flour unless you are experienced with gluten-free baking and know how to adjust for their unique properties.
- Pure Maple Syrup: While many waffle recipes rely solely on granulated sugar, incorporating maple syrup directly into the batter is a game-changer. It adds an incredible depth of flavor that complements the pumpkin and spices beautifully, creating a more complex and rich sweetness. Beyond taste, maple syrup also contributes to the waffles’ tender crumb and beautiful golden-brown color. Always opt for pure maple syrup for the best results, not pancake syrup, which is often high-fructose corn syrup with artificial flavors.
- Pumpkin Puree: This is where the true pumpkin magic happens! It’s absolutely vital to use pure pumpkin puree and *not* canned pumpkin pie filling. Pumpkin pie filling contains added sugars and spices that will alter the flavor profile and sweetness level of your waffles. Look for cans that clearly state “100% Pure Pumpkin” or “Pumpkin Puree” on the label. Libby’s brand is a widely available and reliable choice, but any quality pumpkin puree will work perfectly. If you’re feeling adventurous, you can even make your own pumpkin puree from scratch!
- Dark Brown Sugar: This provides a molasses-rich sweetness that pairs wonderfully with pumpkin and cinnamon, adding another layer of classic fall flavor. Its moist texture also contributes to the waffles’ tender interior.
- Baking Powder & Kosher Salt: These essential pantry staples ensure your waffles rise beautifully and have a balanced flavor. Baking powder gives them that desired lift and fluffiness, while a touch of salt enhances all the other flavors without making them taste salty.
- Pumpkin Pie Spice: The quintessential blend of cinnamon, nutmeg, ginger, and cloves that defines autumn. Feel free to adjust the amount to your personal preference for spice intensity, or even add a pinch of allspice or cardamom for a unique twist.
- Large Eggs: Eggs provide structure, richness, and help bind the ingredients together, contributing to the fluffy texture.
- Milk & Melted Butter: These wet ingredients add essential moisture and richness, creating a tender, flavorful batter. You can easily substitute dairy-free milk (like almond or oat milk) and vegan butter for a dairy-free version.
- Vanilla Extract: A splash of good quality vanilla extract always rounds out and enhances the other sweet and spicy flavors in any baked good.
How to Make These Delightful Gluten-Free Pumpkin Waffles
Making these gluten-free pumpkin waffles is a straightforward process, perfect for home cooks of all skill levels. Here’s a detailed overview of the steps involved to ensure your waffles turn out perfectly every time. For the precise measurements and full, printable instructions, remember to jump to the recipe card below!
1. Prepare Your Workspace & Waffle Holding Station
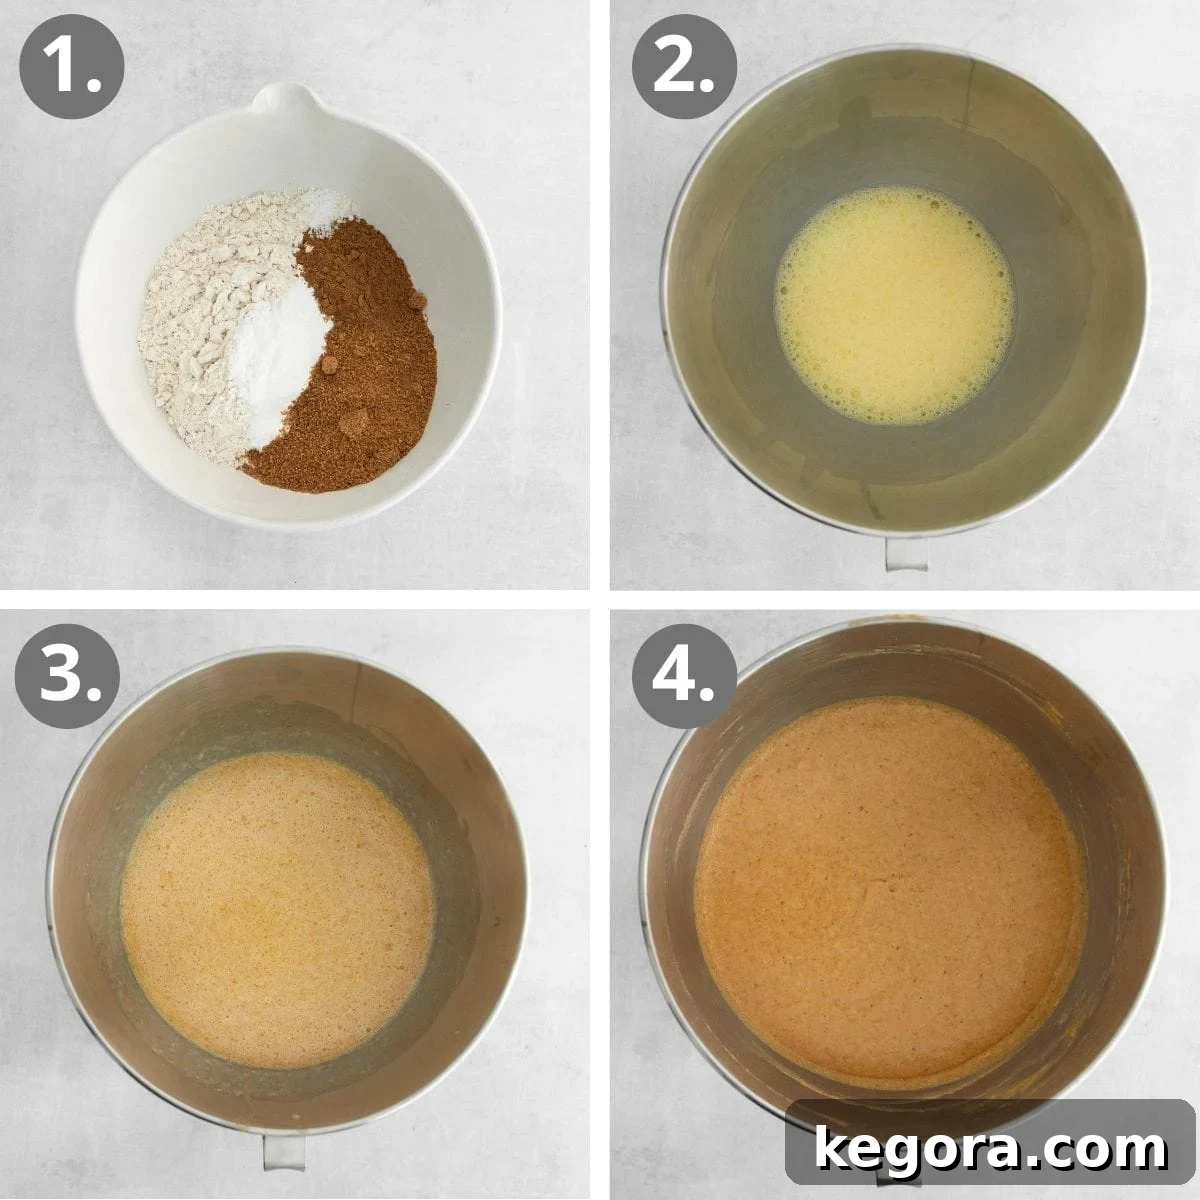
Before you begin mixing, take a moment to set up your cooking station. Preheat your oven to a low temperature, around 200°F (95°C). This warm environment will be crucial for keeping your cooked waffles perfectly warm and crisp while you finish the rest of the batch. Place a wire rack over a large baking sheet and slide it into the preheated oven. The wire rack ensures air circulates around the waffles, preventing them from becoming soggy.
2. Combine Dry Ingredients
In a medium-sized bowl, whisk together all your dry ingredients: the gluten-free flour blend, dark brown sugar, baking powder, kosher salt, and pumpkin pie spice. Whisking them thoroughly ensures that the leavening agents and spices are evenly distributed throughout the batter, leading to consistent flavor and rise in every waffle.
3. Mix Wet Ingredients Separately
In a separate, larger bowl (or the bowl of your stand mixer if using), crack the four large eggs. Beat them well for 1-2 minutes until they become light and fluffy. This aeration step adds extra lift and lightness to the waffles. Next, add the remaining wet ingredients: milk, pumpkin puree, melted butter, pure maple syrup, and vanilla extract. Beat everything on medium speed until all the wet ingredients are thoroughly combined and smooth.
4. Gently Combine Wet and Dry Mixtures
This is a critical step for waffle texture. Add the dry ingredient mixture to the wet ingredient mixture. Using your mixer on low speed or a spatula, mix until the ingredients are *just* combined. It’s important to avoid overmixing at this stage. A few small lumps are perfectly acceptable and even preferred, as overmixing can lead to tougher waffles. The batter will be thick, which is ideal for fluffy waffles.
5. Cook Your Waffles
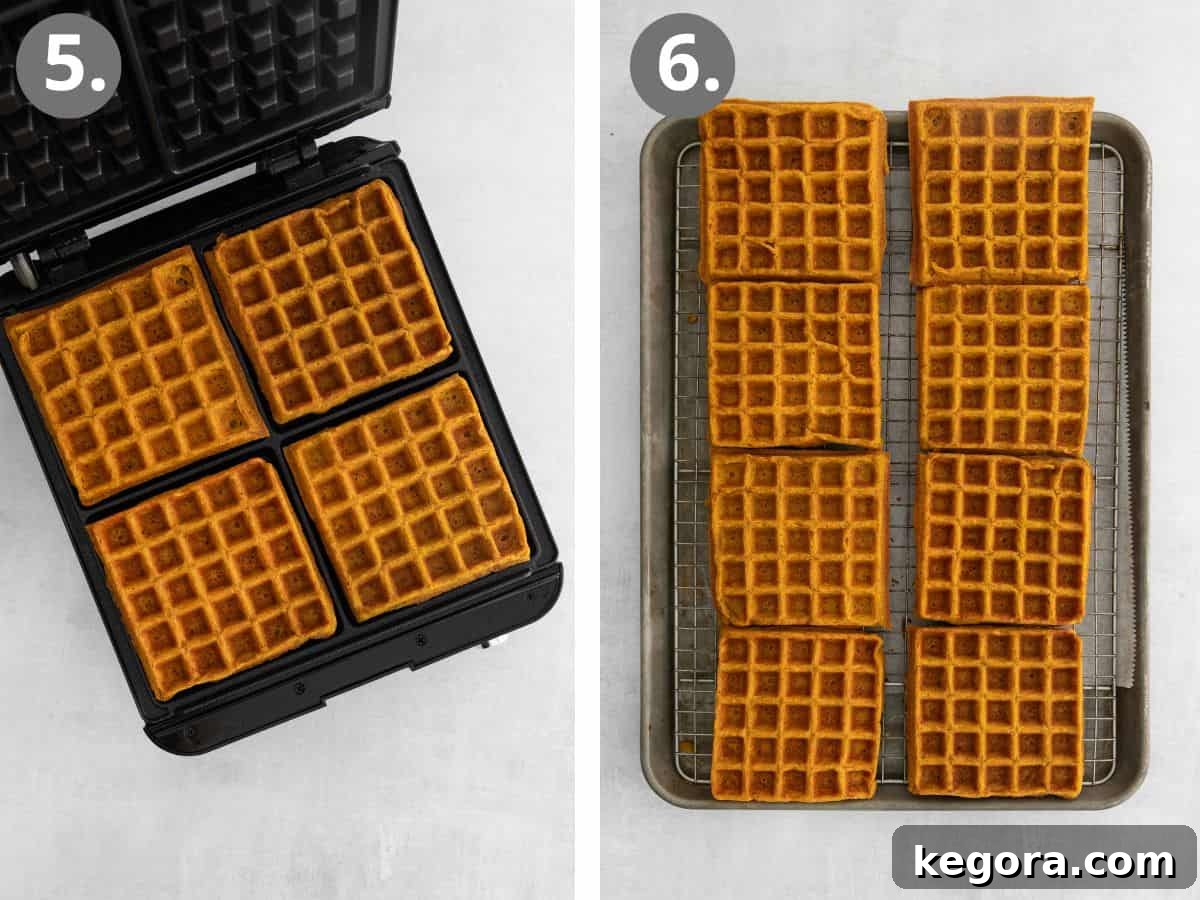
Preheat your waffle iron according to the manufacturer’s instructions. Once hot, lightly spray the grates with cooking spray to prevent sticking. Scoop the pumpkin waffle batter onto the hot waffle iron – the amount will depend on your specific waffle maker. Close the lid and cook until the waffles are golden brown and crisp, typically for 3-5 minutes, again, following your waffle maker’s guidelines. Modern waffle irons often have indicator lights or alarms to signal when waffles are done.
6. Serve Warm and Enjoy!
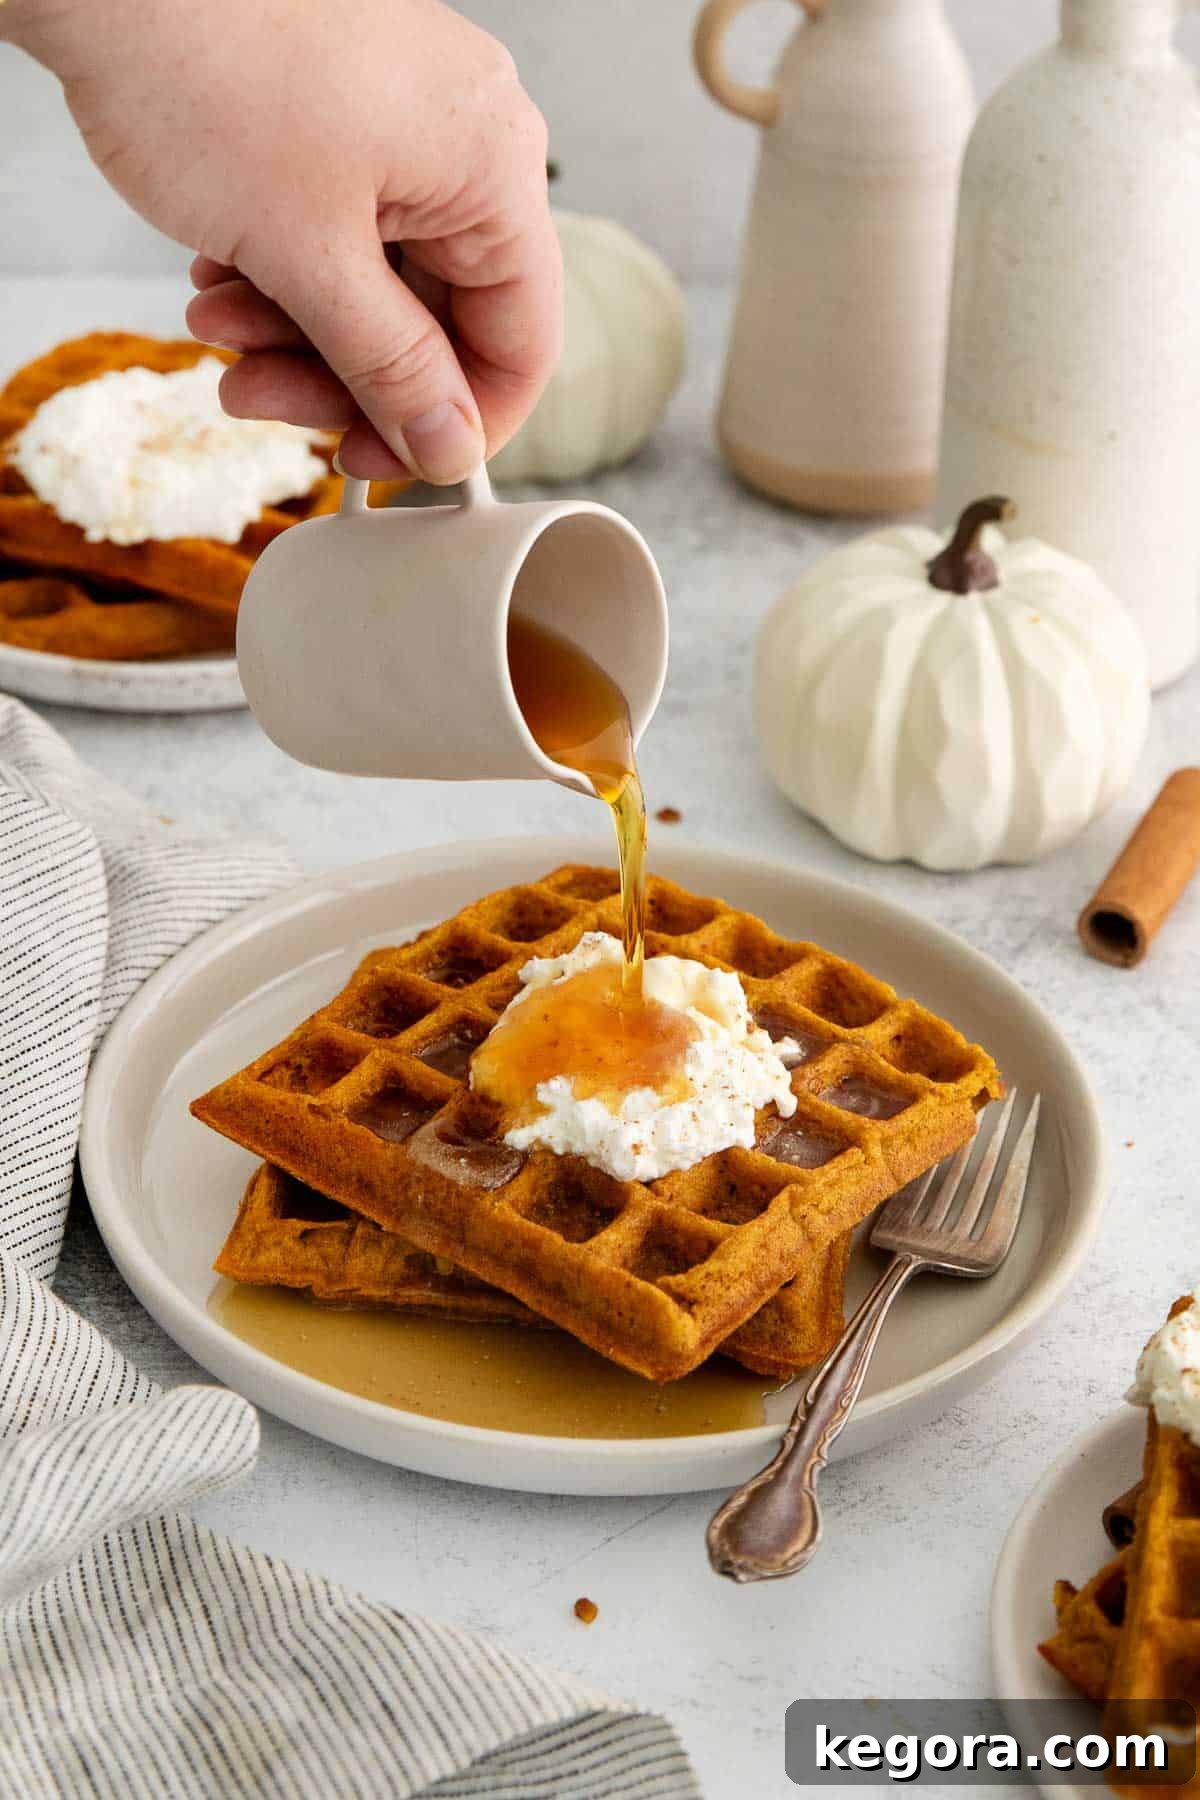
As each waffle finishes cooking, immediately transfer it to the wire rack in your warm oven to keep it hot and crispy. Continue cooking the remaining batter in batches. Once all your delicious gluten-free pumpkin waffles are ready, serve them immediately with your favorite toppings. A generous drizzle of maple syrup, a dollop of whipped cream, a sprinkle of cinnamon, or even some toasted nuts would be perfect. Enjoy the comforting flavors of fall!
More Gluten-Free Pumpkin Recipes to Savor
If you’re anything like me, once pumpkin season hits, you can’t get enough! If these delicious gluten-free pumpkin waffles have you craving more autumn-inspired treats, you’re in luck. Here are some of my other favorite gluten-free pumpkin recipes that are perfect for breakfast, dessert, or a cozy snack:
- The Best Gluten-Free Pumpkin Muffins: Soft, moist, and spiced just right, these muffins are a delightful grab-and-go option.
- Pumpkin Oatmeal Pancakes: A hearty and wholesome twist on classic pancakes, perfect for a filling breakfast.
- Pumpkin Protein Pancakes: Packed with protein and flavor, these are ideal for a post-workout breakfast or a lighter meal.
- Gluten-Free Pumpkin Pancakes: Another excellent pancake option for those who prefer them over waffles, equally fluffy and flavorful.
- Gluten-Free Pumpkin Bread: A timeless classic that’s wonderfully moist and fragrant, perfect for sharing (or not!).
- Gluten-Free Pumpkin Chocolate Chip Bread: Elevate your pumpkin bread with the irresistible addition of chocolate chips, sweetened naturally with maple syrup.
- Gluten-Free Pumpkin Donuts: A fun and indulgent treat, these donuts are baked to perfection and full of pumpkin spice.
Gluten-Free Pumpkin Waffles
Erin Collins
15
10
8 waffles
My top tips – Don’t over-mix the batter, and store cooked waffles in a warm oven on a cooling rack until ready to serve!
Comments
Video

Watch the full recipe video for these delicious Gluten-Free Pumpkin Waffles!
Ingredients
Dry Ingredients
- 1 ¾ cup (226g) gluten-free measure-for-measure flour
- ¼ cup dark brown sugar
- 2 tablespoons baking powder
- ½ teaspoon kosher salt
- 1 tablespoon pumpkin pie spice
Other
- 4 large eggs
- 1 ½ cups (360ml) milk
- 1 cup (226g) pumpkin puree
- ½ cup (113g) butter, melted
- ¼ cup maple syrup
- 2 teaspoons vanilla extract
Instructions
-
Preheat the oven to 200°F (95°C). Place a wire rack on a large baking sheet and set it aside in the warm oven.
-
In a medium bowl, whisk together the gluten-free flour, dark brown sugar, baking powder, salt, and pumpkin pie spice until well combined.
-
In the bowl of a stand mixer, or using a hand mixer, beat the eggs (no need to separate them) for 1-2 minutes until they are light and fluffy. Add the milk, pumpkin puree, melted butter, maple syrup, and vanilla extract. Beat on medium speed until all these wet ingredients are fully combined.
-
Gradually add the dry ingredients to the wet ingredients. Beat until the batter is *just* combined. Be careful not to over-mix; a few small lumps are fine.
-
Preheat your waffle iron according to its instructions. Once hot, lightly spray the inside grates with cooking spray, then scoop the batter into the waffle maker. Cook according to your waffle maker’s instructions until golden brown and crispy.
-
Serve the waffles immediately, or transfer them to the prepared wire rack on the baking sheet in the warm oven to keep them hot and crispy until you are ready to serve the entire batch. Enjoy with your favorite toppings!
Notes
Dairy-Free Option: To easily make these waffles dairy-free, simply substitute your favorite unsweetened dairy-free milk (such as almond milk, oat milk, or soy milk) for regular milk. For the melted butter, opt for a high-quality vegan butter substitute. These swaps will not significantly alter the taste or texture.
Egg-Free Option: For an egg-free version of these delicious waffles, you can successfully use egg substitutes. Flax eggs are a popular and effective choice: for each egg, mix 1 tablespoon of ground flaxseed meal with 3 tablespoons of water and let it sit for 5-10 minutes until it forms a gel-like consistency. This recipe requires 4 eggs, so you would need 4 tablespoons of flaxseed meal mixed with 12 tablespoons of water. Commercial egg replacers can also work well.
To Make Ahead: For the absolute freshest and crispiest waffles, it is always best to prepare the waffle batter right before you plan to cook and serve them. The leavening agents are most active when fresh.
To Store Leftovers: If you have any leftover waffles, allow them to cool completely to room temperature. Then, store them in an airtight container in the refrigerator for up to 3-5 days. To reheat, you can pop them in a toaster, toaster oven, or even back into your waffle iron for a few minutes until they are warm and crisp again.
To Freeze for Later: These gluten-free pumpkin waffles freeze beautifully, making them perfect for meal prepping quick breakfasts. Once the waffles have cooled completely, place them in a single layer on a baking sheet and flash freeze for about 30 minutes until solid. This prevents them from sticking together. Then, transfer the frozen waffles to an airtight freezer-safe bag or container, ensuring to squeeze out any excess air to prevent freezer burn. They can be stored in the freezer for up to 3 months. Reheat directly from frozen in a toaster, oven, or microwave until warmed through and crisped to your liking.
Nutrition
Carbohydrates: 39g |
Protein: 7g |
Fat: 16g |
Saturated Fat: 9g |
Polyunsaturated Fat: 1g |
Monounsaturated Fat: 4g |
Trans Fat: 0.5g |
Cholesterol: 118mg |
Sodium: 293mg |
Potassium: 507mg |
Fiber: 4g |
Sugar: 17g |
Vitamin A: 5316IU |
Vitamin C: 1mg |
Calcium: 249mg |
Iron: 2mg
This post was originally published in October 2024. It was thoroughly updated with new photos, expanded instructions, and enhanced content in September 2025 to bring you the best gluten-free pumpkin waffle experience.