
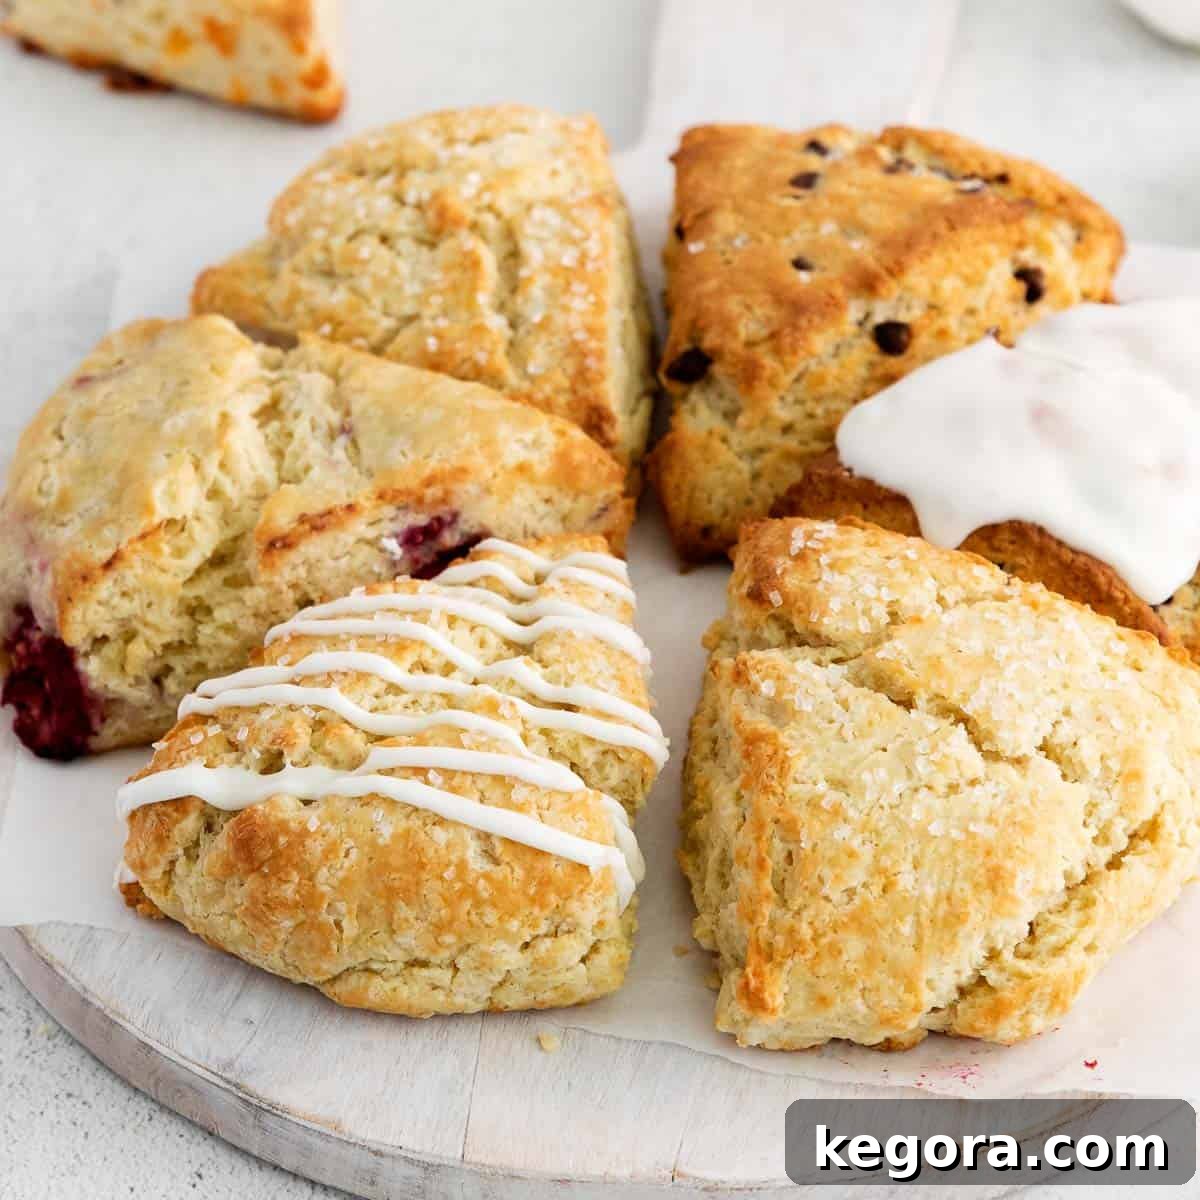
Unlocking the Perfect Gluten-Free Scones: Erin’s Master Recipe
Welcome to your ultimate guide for baking truly exceptional gluten-free scones! For anyone who has navigated the challenges of gluten-free baking, you know that achieving that perfect light, flaky texture can often feel like an elusive dream. But fear not! This master recipe, developed and perfected in my kitchen, is designed to deliver consistently delicious results every time. Say goodbye to dense, crumbly gluten-free baked goods and hello to bakery-quality scones that everyone will adore, whether they’re gluten-intolerant or not.
This comprehensive guide not only provides the core recipe but also delves into the science behind perfect gluten-free scones, offering crucial tips and endless customization ideas to inspire your culinary creativity. Get ready to impress your friends and family with these irresistible treats, suitable for any occasion, from a casual breakfast to an elegant afternoon tea.
Erin’s Gluten-Free Scone Recipe Rundown
Before we dive into the full recipe, here’s a quick overview of what makes these gluten-free scones truly stand out:
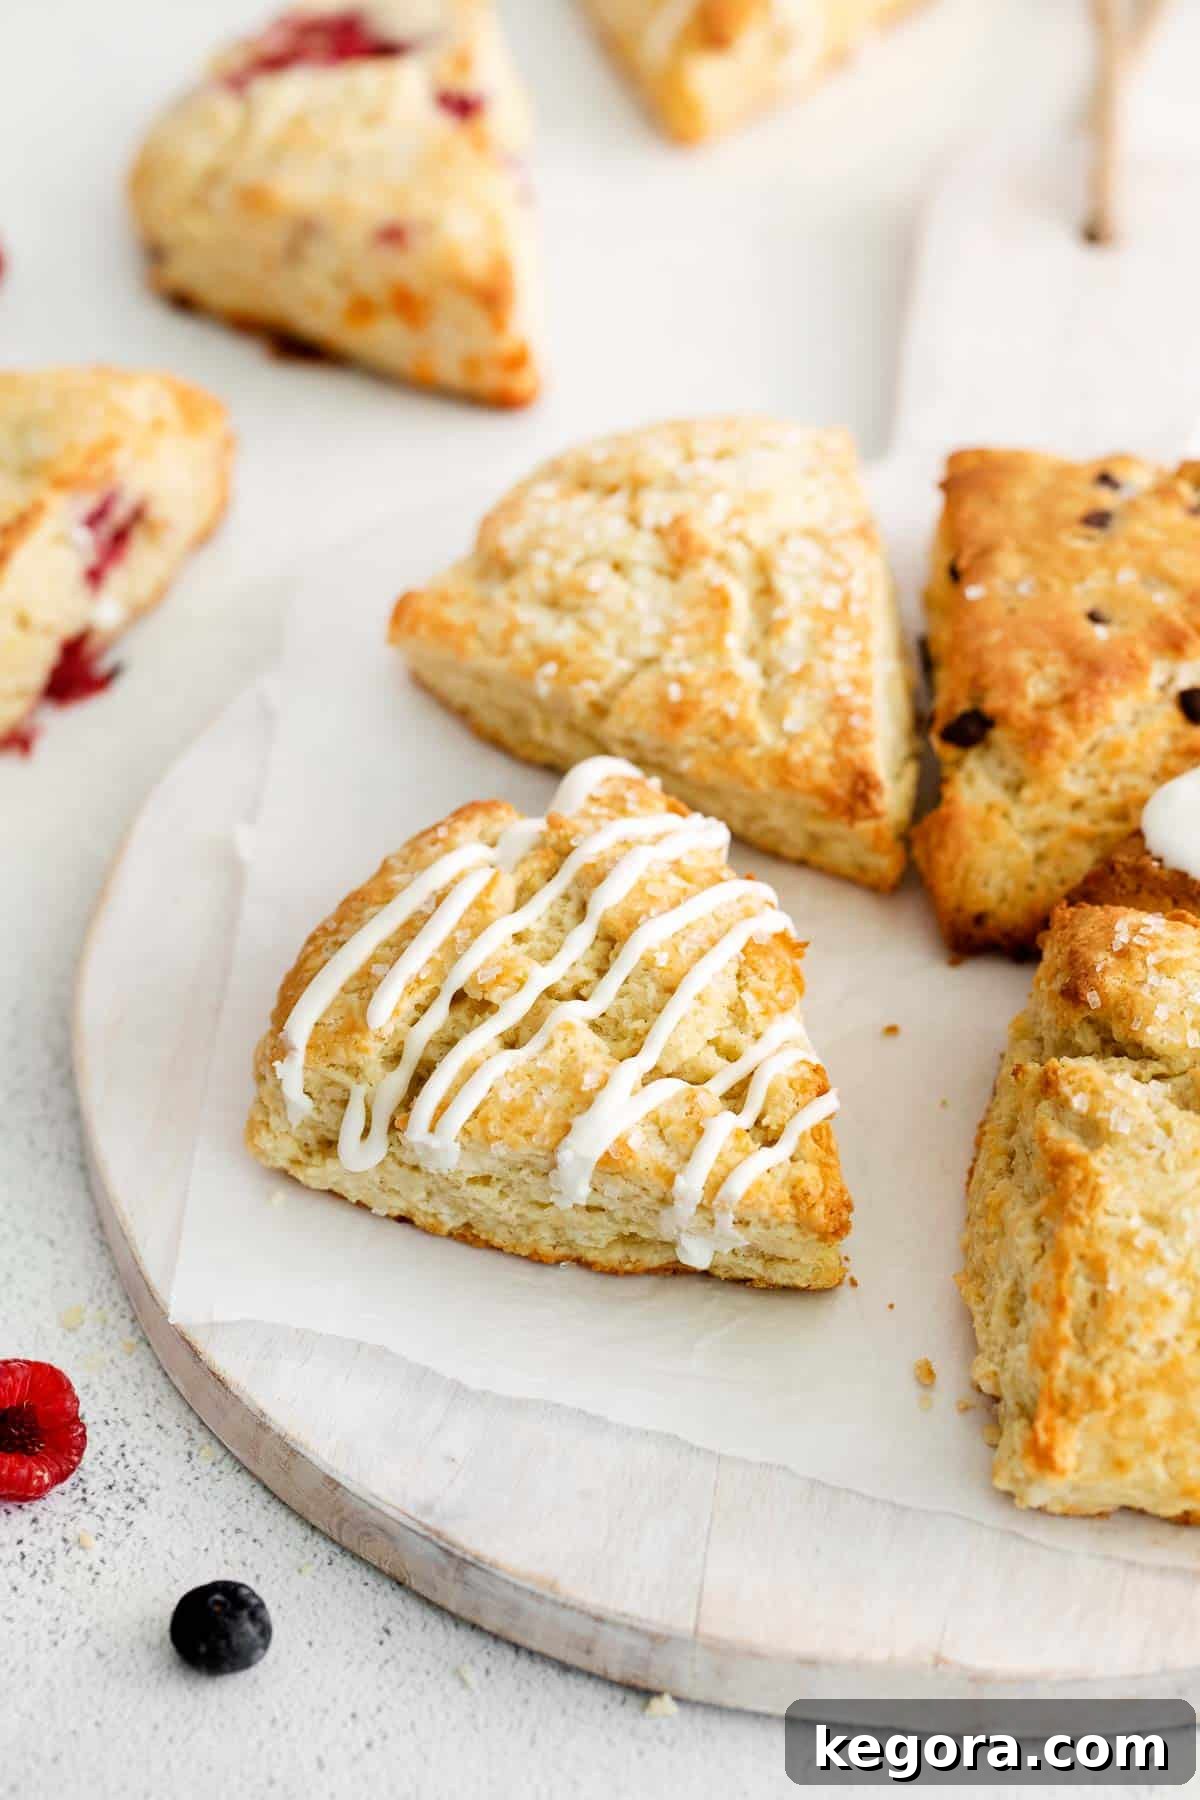
- Texture: Imagine a scone that is wonderfully light and incredibly flaky on the outside, yielding to a moist, tender interior. The secret lies in a meticulous process that guarantees those sought-after crisp, golden-brown edges. For an added touch of indulgence and a delightful textural contrast, a sprinkle of sanding sugar before baking creates an extra layer of crunch that elevates each bite.
- Taste: These scones boast a rich, deeply buttery flavor, enhanced significantly by the tang and moisture of sour cream. This ingredient is key to their luxurious taste and tender crumb. The beauty of this base recipe is its versatility; it serves as a perfect canvas for any flavors or mix-ins you desire, allowing you to tailor them to your personal preferences or seasonal ingredients.
- Ease: Don’t let the professional results intimidate you. This recipe is surprisingly straightforward and incredibly easy to follow, making it an excellent choice for beginners in gluten-free baking. Even seasoned bakers will appreciate its reliability and simplicity. We break down each step to ensure your success, even if it’s your first time baking scones.
- Top Tips: Achieving ultimate flakiness and a perfect rise comes down to two critical techniques: utilizing *frozen grated butter* and *chilling the dough* thoroughly. Grating the butter ensures even distribution and slower melting, which creates steam pockets for an airy texture. Freezing the dough for a minimum of 15 minutes (or even longer!) before slicing and baking is crucial for setting the butter and flour structure, leading to an incredibly flaky result that truly sets these scones apart.
- Recommended GF Flour: The quality of your gluten-free flour blend is paramount to the success of this recipe. It performs beautifully with various high-quality gluten-free flour blends. Look for a blend that specifically contains xanthan gum, as this ingredient mimics the binding properties of gluten, essential for structure in gluten-free baking. I personally achieve fantastic results with both King Arthur Flour Gluten-Free Measure-For-Measure Flour and Bob’s Red Mill Gluten-Free 1:1 Baking Flour. These blends are consistently reliable and deliver excellent texture.
- Would I make these again? Absolutely, without a doubt! This recipe has become my absolute go-to, my foundational scone recipe. Its adaptability means we frequently experiment with different varieties and mix-ins, making it a constant favorite in our home. You’ll find yourself returning to this recipe again and again for its consistent perfection.
xoxo erin
Featured Comment
From Christina: “I made these yesterday for a Mother’s Day High Tea, and they were fabulous! I was leery as so often gluten-free baked goods turn out so so, but these were scrumptious! Flaky on the outside and moist on the inside. Followed the recipe exactly minus any add-ins as I was serving them with whipped honey butter and blueberry compote. I will definitely be making these again and again!”
220 more comments
Table of Contents
- Erin’s Recipe Rundown
- Ingredients You’ll Need
- How to Make Gluten-Free Scones
- Gluten-Free Scone Variations
- Storage, Make-Ahead and Freezing Instructions
- Can I make these scones dairy-free?
- Do I have to refrigerate the dough, then freeze it? Can I just skip straight to the freezer?
- Why do scones need eggs?
- More Gluten-Free Recipes
- Gluten-Free Scones (Endless Mix-Ins!) Recipe
Are you ready to bake truly incredible scones that just so happen to be gluten-free? This recipe is a game-changer for anyone seeking a flawless, flaky, and flavorful scone experience without gluten. Unlike many gluten-free baked goods that can turn out dry or crumbly, this recipe consistently delivers light and tender results, earning rave reviews from both gluten-free and gluten-loving enthusiasts alike.
This isn’t just a recipe for gluten-free scones; it’s what I proudly consider a master scone recipe. Its brilliance lies in its fundamental structure, which allows for effortless customization. You can easily tailor it with your favorite mix-ins or glazes to create an endless array of delights, from classic gluten-free blueberry scones to indulgent gluten-free chocolate chip scones, or even sophisticated savory baked scones perfect for an appetizer. No matter which delicious variation you choose to explore, you are guaranteed to get truly amazing, bakery-style scones every single time. Let’s embark on this delightful baking journey!
Essential Ingredients for Perfect Gluten-Free Scones
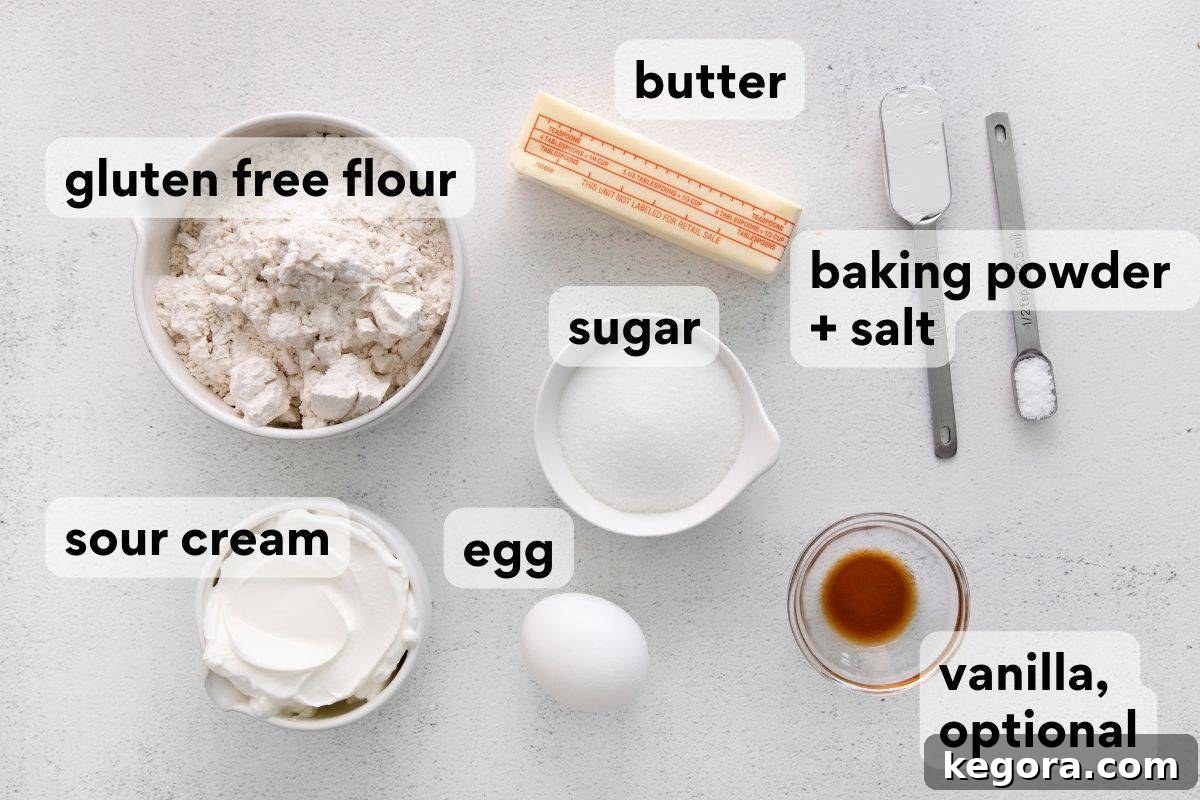
The success of these glorious gluten-free scones hinges on the quality and preparation of a few key ingredients. Below are some important notes and tips for selecting and handling each component. For the precise measurements and full instructions, please jump directly to the recipe card.
- High-Quality Gluten-Free Flour Blend: This is arguably the most crucial ingredient. For the best, lightest, and flakiest results, it is imperative to use a high-quality gluten-free flour blend that explicitly contains xanthan gum. Xanthan gum acts as a binder, providing the elasticity and structure that gluten usually offers, which is essential for preventing crumbly gluten-free baked goods. A well-balanced blend typically combines rice flour, tapioca starch, and potato starch. I consistently recommend King Arthur Flour Gluten-Free Measure-For-Measure Flour or Bob’s Red Mill Gluten-Free 1:1 Baking Flour. These blends are formulated to be swapped cup-for-cup with traditional wheat flour in most recipes, simplifying your baking process.
- Fresh Baking Powder: A generous tablespoon of baking powder is vital for these gluten-free scones to achieve their impressive rise and characteristic light, airy texture. Baking powder is a chemical leavener that reacts with moisture and heat to produce carbon dioxide gas, creating those wonderful pockets of air. Always ensure your baking powder is fresh for optimal results; an easy test is to mix a teaspoon with a quarter cup of hot water – if it bubbles vigorously, it’s good to go!
- Full-Fat Sour Cream: Sour cream is the unsung hero of this recipe, contributing immense richness, tenderness, and an exquisite moistness to the scones. Its acidity also works in conjunction with the baking powder, aiding in leavening. Beyond flavor, sour cream helps bind the dough, ensuring the scones hold their beautiful shape during baking and don’t spread excessively. If you don’t have sour cream, full-fat plain Greek yogurt or buttermilk can be suitable substitutes, though sour cream provides the richest taste and texture.
- Frozen Grated Butter: This is *the* secret weapon for creating truly light, incredibly flaky, and perfectly buttery scones. Using frozen butter ensures that it melts slowly as the scones bake, releasing steam and forming tiny air pockets throughout the dough. These internal air pockets are precisely what give scones their signature flaky layers and distinctively crisp edges. Do not substitute with softened butter, as it will simply mix into the dough, resulting in a denser, cake-like texture rather than the desired flakiness. Grating it makes it easier to incorporate and keeps it colder longer.
- Vanilla Extract & Granulated Sugar: The amounts of vanilla and sugar are flexible, allowing you to easily pivot between sweet and savory scones. For delightful sweet scones, we use ¼ cup of granulated sugar and a touch of vanilla extract to enhance the overall flavor profile. If you’re leaning towards savory, reduce the sugar to just 1 tablespoon (to balance flavors without making them sweet) and omit the vanilla extract entirely.
- Optional Mix-ins: This is where the fun truly begins, and your creativity can shine! The possibilities for mix-ins are genuinely endless. You can incorporate up to ½ cup of your favorite additions without compromising the dough’s structure. Think classic chocolate chips (mini ones work beautifully for even distribution), fresh or frozen berries (blueberries, raspberries), chopped nuts (pecans, walnuts), dried fruits (cranberries, currants), citrus zest, or even savory elements like shredded cheese and fresh herbs.
Once you master this base recipe, you might also enjoy exploring these delicious variations: gluten-free blueberry scones, gluten-free chocolate chip scones, and gluten-free cheese scones.
Step-by-Step Guide: How to Make Flawless Gluten-Free Scones
Baking these gluten-free scones is a straightforward and rewarding process. Following these basic steps meticulously will ensure you achieve light, flaky, and absolutely delicious results every single time. You can find the complete, detailed instructions with exact measurements in the recipe card located further down.
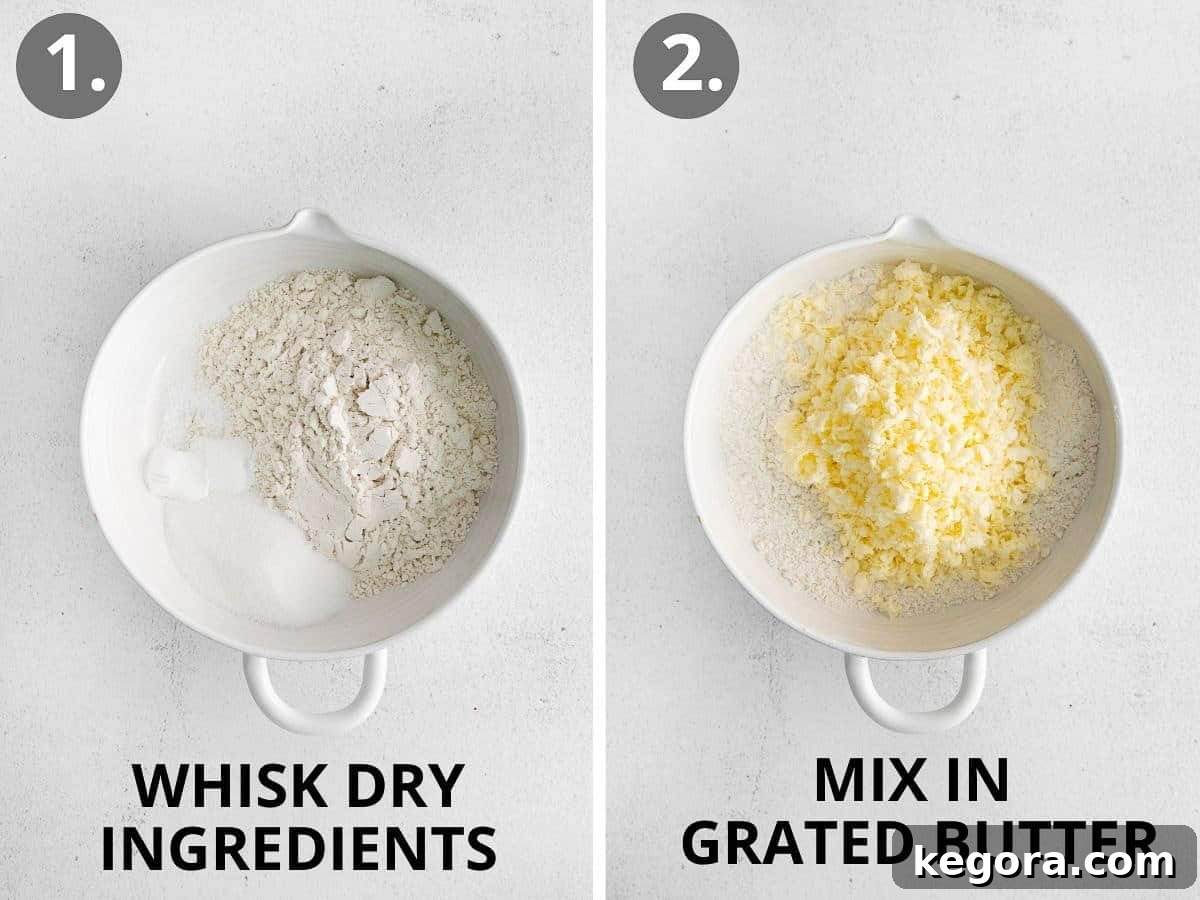
- Combine Dry Ingredients: In a large mixing bowl, meticulously whisk together your gluten-free flour blend, granulated sugar (or reduced sugar for savory), baking powder, and kosher salt. Thoroughly combining these dry ingredients is crucial. This step ensures that the leavening agent (baking powder) and salt are evenly distributed throughout the flour, guaranteeing an even rise and consistent flavor in every scone.
- Incorporate Frozen Butter: This is a key technique for flakiness. Grate the frozen butter directly into your bowl of dry ingredients using a box grater. Once grated, use a pastry cutter, two forks, or your fingertips to gently work the cold butter into the flour mixture. Mix until the butter pieces are about the size of small peas or coarse crumbs. The goal is to coat the butter with flour while keeping it as cold as possible. Avoid overworking the dough, as this can melt the butter and lead to tough scones. If using mix-ins, stir them in now until evenly distributed.
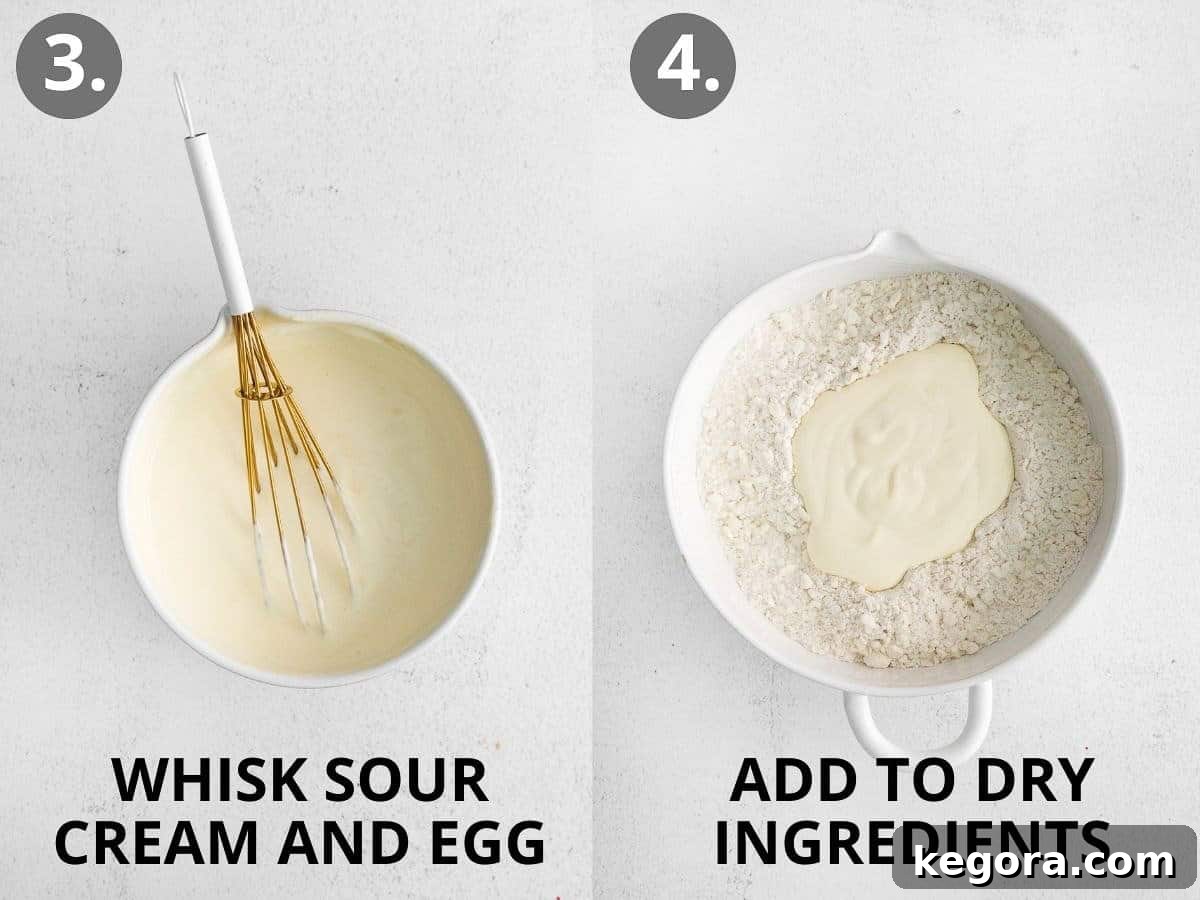
- Add Wet Ingredients: In a separate, smaller bowl, whisk together the sour cream, large egg, and vanilla extract (if making sweet scones). Once well combined, pour this wet mixture into the dry ingredients. Using a rubber spatula, gently fold and stir until just combined and no dry pockets of flour remain. The dough might appear a bit dry or shaggy at this stage, but don’t worry – this is completely normal! Gluten-free flour takes a little longer to fully hydrate, and the dough will continue to absorb moisture during the chilling process.
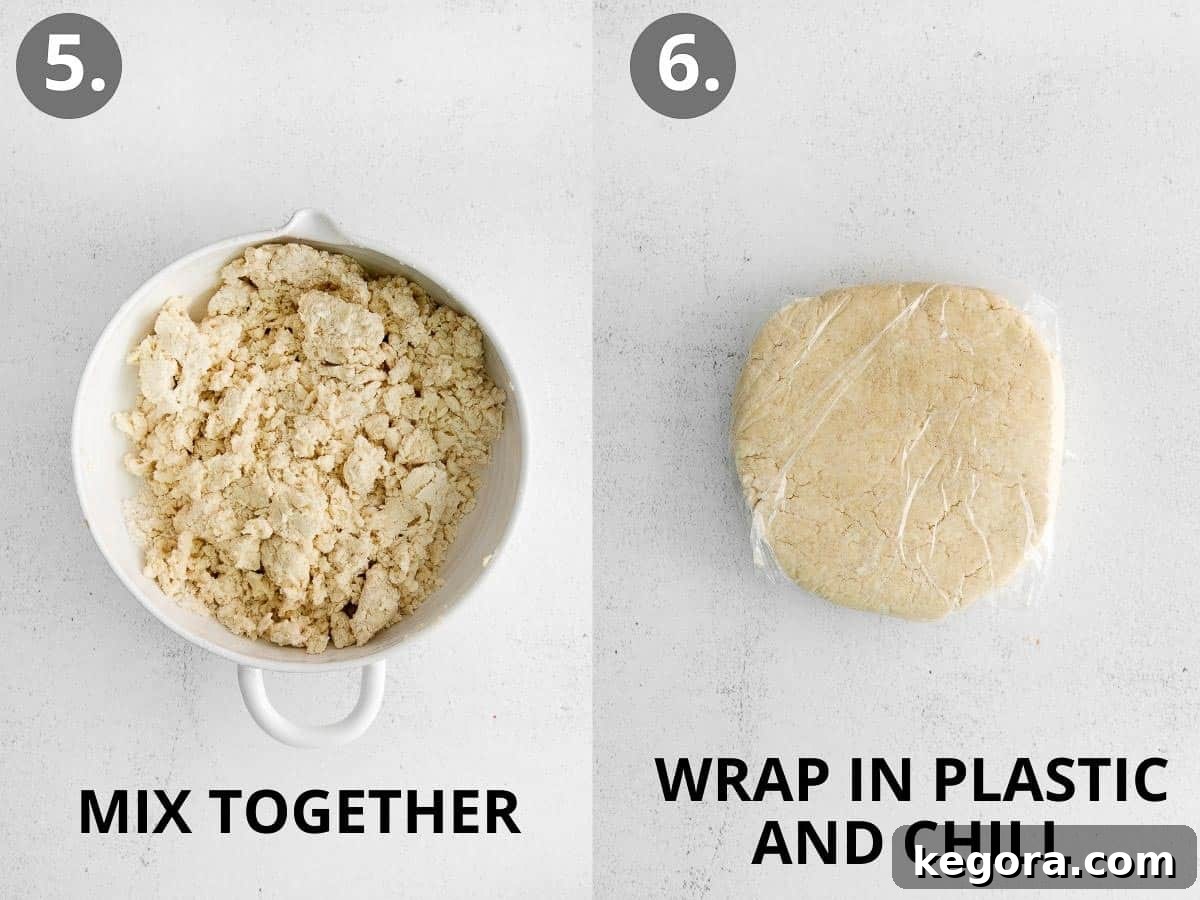
- Chill the Dough (Refrigerate then Freeze): This dual chilling process is absolutely critical for the ultimate scone texture. First, transfer the dough onto a large piece of plastic wrap. Using slightly wet hands (this prevents sticking), gently pat and shape the dough into a 6-inch round that is approximately 1 inch thick. Wrap the dough tightly in the plastic wrap and refrigerate for 20-30 minutes. This initial refrigeration period allows the gluten-free flour blend ample time to fully hydrate, resulting in a more tender scone. Following this, transfer the wrapped dough to the freezer for an additional 15 minutes. This quick freeze solidifies the butter, ensuring it creates those coveted flaky pockets when it hits the hot oven. You can even leave the dough in the freezer for up to 5 days, making these perfect for make-ahead baking.
- Preheat Oven & Prepare for Baking: While your dough is chilling, preheat your oven to a blazing 500°F (260°C). This high initial temperature is vital for giving the scones an immediate “oven spring,” causing them to puff up beautifully and develop those desirable crisp exteriors. Line a large baking sheet with parchment paper or a silicone baking mat to prevent sticking and ensure even baking.
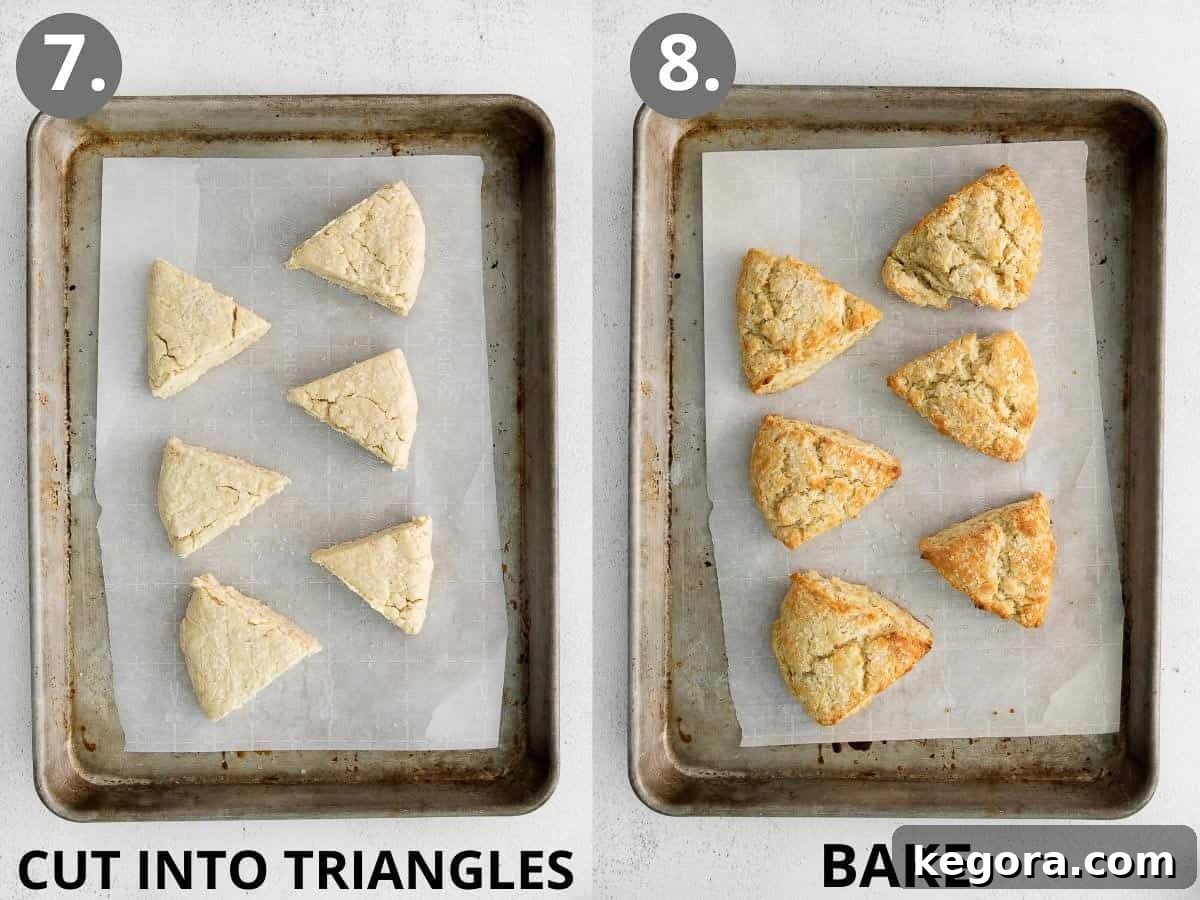
- Slice and Bake: After the dough has completed its chilling cycle (15 minutes in the freezer, or up to 5 days), carefully unwrap it. For perfectly clean cuts, lightly spray a sharp knife with cooking spray before slicing the round dough into 6 equal wedges. Arrange these wedges on your prepared baking sheet, leaving a little space between each scone. If you’re making sweet scones, now is the perfect time to sprinkle them generously with coarse or sparkling sugar for a beautiful presentation and extra crunch. Immediately place the baking sheet into the preheated 500°F oven, then *immediately* reduce the oven temperature to 425°F (220°C). This initial high heat shock creates a beautifully golden exterior while the reduced temperature allows the interior to cook through properly without burning. Bake for 12-14 minutes, or until the scones are gloriously golden brown on top and around the edges.
- Cool and Serve: Once baked to perfection, carefully remove the scones from the oven. Transfer them immediately to a wire rack to cool. Allowing them to cool for at least 20 minutes before serving is essential. This cooling period allows the internal structure of the scones to set, preventing them from collapsing and ensuring they are perfectly tender. Serve warm with your favorite toppings like clotted cream, jam, fresh fruit, or a simple glaze.
Gluten-Free Scone Variations: Unleash Your Creativity!

One of the most delightful aspects of this gluten-free scone recipe is its incredible adaptability. The robust base allows for countless customizations, ensuring you can create a unique scone for every mood or occasion. You can elevate the scones with a simple glaze, fold in vibrant mix-ins, or completely transform them from sweet to savory. Here are some of my absolute favorite ways to switch up these already delicious gluten-free scones, alongside new ideas to spark your culinary imagination!
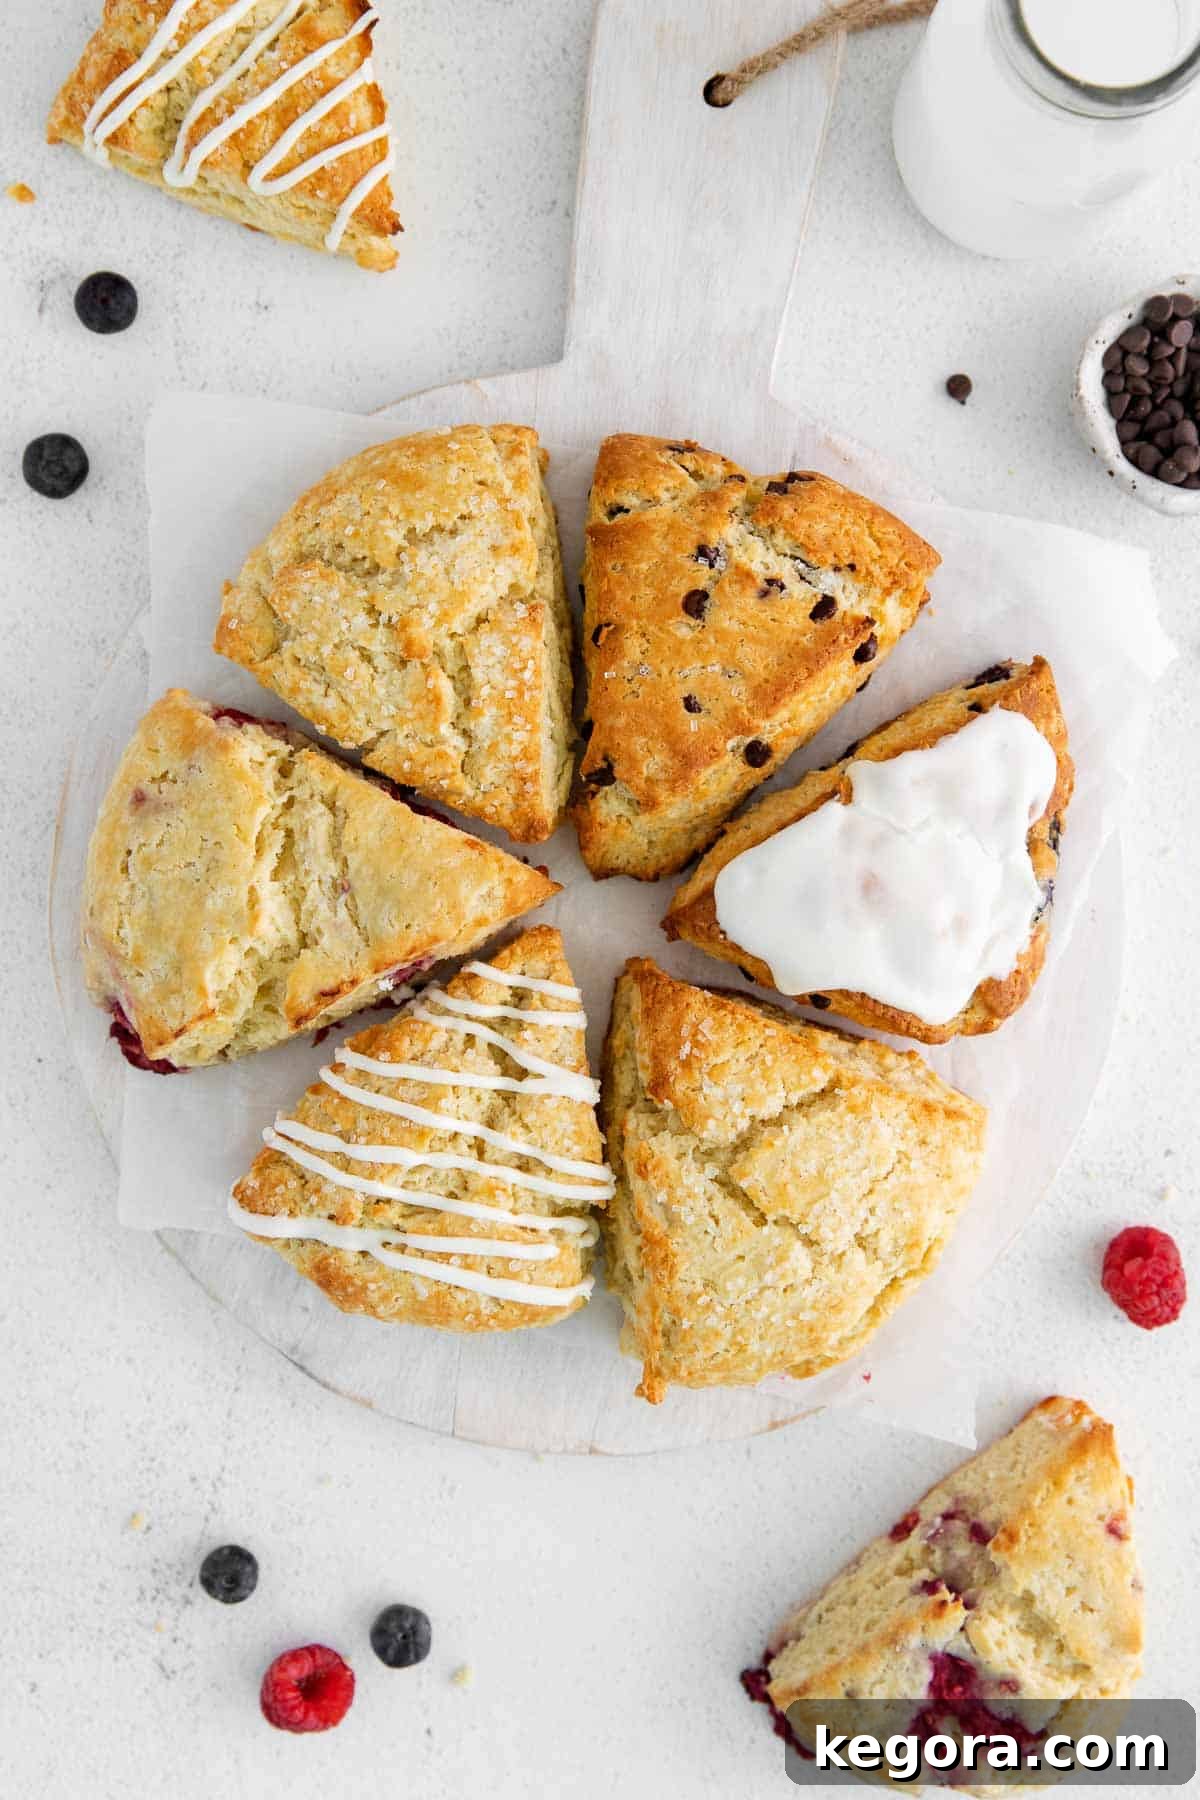
- Decadent Chocolate Chip Scones: For a universally loved treat, simply add ⅓ cup of mini chocolate chips to the dry ingredients along with the grated butter. Mini chips distribute more evenly and provide pockets of melted chocolate in every bite. Before baking, top with a generous sprinkle of sparkling sugar for a beautiful shimmer and extra crunch. Serve warm for ooey-gooey goodness.
- Bright Blueberry Lemon Scones: Infuse your scones with the vibrant flavors of summer by adding the zest and juice of 1 lemon (about 1 tablespoon of juice) and ½ cup of fresh or frozen blueberries (do not thaw if frozen) to the dough. After baking and cooling, create a simple yet elegant glaze by whisking together 1 cup of powdered sugar with 1 tablespoon of fresh lemon juice until smooth. Drizzle over the cooled scones for a burst of citrusy sweetness.
- Sweet Raspberry White Chocolate Scones: A delightful pairing that feels truly indulgent. Fold in ¼ cup of white chocolate chips and ⅓ cup of fresh or gently broken-up frozen raspberries into the dough. The raspberries provide a lovely tart contrast to the creamy white chocolate. For an extra touch, a light drizzle of melted white chocolate over the cooled scones can be beautiful.
- Tangy Cheddar Cheese Scones: For a savory delight, omit the vanilla extract and reduce the granulated sugar to just 1 tablespoon. Then, mix in 1 cup of sharp cheddar cheese (grated is best for even distribution). These are fantastic served warm with a slather of garlic chive butter after baking, or alongside a hearty soup or stew. Consider adding a pinch of cayenne pepper for a subtle kick!
- Cozy Cinnamon Raisin Scones: Perfect for a comforting breakfast. Add ⅓ cup of plump raisins (or golden raisins) and 1 teaspoon of ground cinnamon to the dry ingredients. You can also add a hint of nutmeg or cardamom for added warmth. Serve with a dollop of apple butter or cream cheese.
- Autumnal Maple Pecan Scones: Embrace fall flavors by adding ½ cup of chopped pecans and a teaspoon of maple extract to the dough. Once cooled, prepare a simple glaze with powdered sugar and maple syrup, then drizzle over the scones. A light sprinkle of cinnamon sugar before baking also adds to the autumnal feel.
- Herby Garlic & Parmesan Scones: For an intensely savory option, omit the vanilla and reduce sugar. Add ½ cup grated Parmesan cheese, 2 cloves minced garlic, and 1-2 tablespoons of finely chopped fresh herbs like rosemary or chives. These are divine served with savory dishes or as part of a bread basket.
Storage, Make-Ahead, and Freezing Instructions for Gluten-Free Scones
While these gluten-free scones are undeniably at their peak freshness and flakiness when enjoyed the day they are baked, sometimes you need to plan ahead or save some for later. Here’s how to properly store, prepare in advance, and freeze your delicious scones to maintain their quality:
Storage: Ideally, these gluten-free scones are best consumed on the same day they are baked to enjoy their optimal texture and freshness. However, if you have leftovers, they can be stored in an airtight container at room temperature for up to two days. To revive their texture, a quick warm-up in a preheated oven (around 300°F/150°C for 5-7 minutes) can bring back some of their crispness and warmth.
Make-Ahead Instructions (Freezing Unbaked Dough): This recipe is fantastic for preparing in advance, which is perfect for busy mornings or entertaining! After the dough has completed its initial rest in the refrigerator for 20-30 minutes and the subsequent 15-minute freeze, you can keep the unbaked, wrapped dough in the freezer for up to 5 days. When you’re ready to bake, simply take the frozen dough out of the freezer, slice it into wedges (as instructed in the recipe), and arrange them on your prepared baking sheet. You can bake these scones directly from the freezer without thawing, though you may need to add an extra 2-4 minutes to the baking time to ensure they are cooked through and golden. This method ensures you always have fresh, warm scones ready in under 20 minutes!
Freezing Baked Scones: If you’ve baked a large batch or want to save some for later enjoyment, these scones freeze beautifully once baked. First, ensure the gluten-free scones have cooled completely to room temperature. This is crucial to prevent ice crystals from forming and making them soggy. Once cool, wrap each scone individually in plastic wrap, ensuring it’s sealed tightly to prevent freezer burn. Then, place the wrapped scones into a freezer-safe bag, pressing out as much air as possible before sealing. They can be stored in the freezer for up to 2-3 months. To reheat, remove the desired number of frozen scones, unwrap them, and place them on a baking sheet. Reheat in a preheated oven at 350°F (175°C) for approximately 10-15 minutes, or until warmed through and the edges are crisp again. This method allows you to enjoy freshly warmed scones anytime!
Frequently Asked Questions About Gluten-Free Scones
Can I make these scones dairy-free?
Yes, absolutely! This recipe is quite adaptable for dairy-free diets. I have successfully made these scones dairy-free by simply swapping the traditional sour cream for a high-quality dairy-free sour cream alternative. Many brands now offer excellent plant-based sour creams (often made from coconut, cashew, or oat milk) that perform wonderfully in baking, providing the necessary tang, moisture, and richness without any dairy. Ensure your dairy-free sour cream is full-fat for the best texture. You would also need to ensure your butter substitute is a solid block of dairy-free butter (like Earth Balance sticks) and grate it when frozen, just as you would with regular butter. This substitution makes the recipe accessible to even more dietary needs without sacrificing flavor or texture.
Do I have to refrigerate the dough, then freeze it? Can I just skip straight to the freezer?
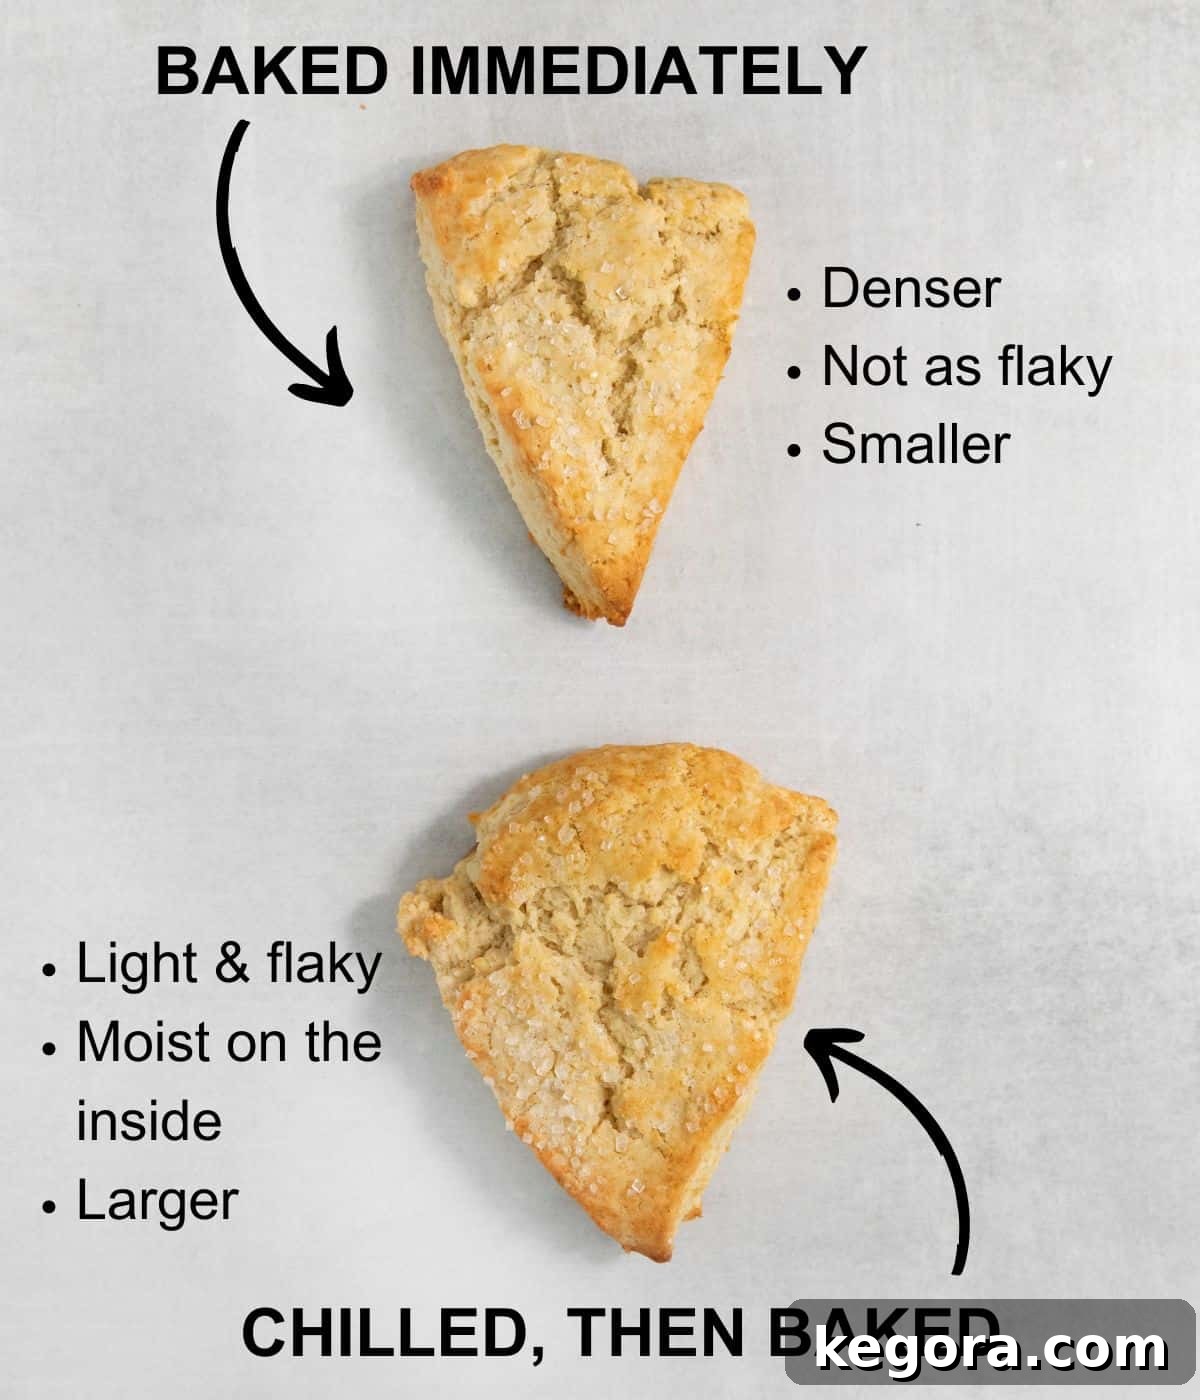
This is an excellent question, and the answer is yes, both chilling steps are crucial and serve distinct purposes for achieving the ideal gluten-free scone texture. Once the dough is mixed together, you’ll form it into a ball and wrap it tightly with plastic wrap, then refrigerate for 20-30 minutes, followed by freezing for 15 minutes. Here’s why both stages are non-negotiable:
- Refrigeration (20-30 minutes): The primary purpose of this initial refrigeration period is to allow the gluten-free flour blend sufficient time to fully hydrate. Unlike wheat flour, gluten-free flours tend to absorb moisture more slowly. Giving the dough 20-30 minutes in the refrigerator ensures that the flours properly absorb the liquid from the sour cream and egg. This hydration process prevents a dry, crumbly texture and results in a more cohesive, tender dough that handles better and bakes more uniformly.
- Freezing (15 minutes): After hydration, the 15 minutes in the freezer is vital for firming up the grated butter within the dough. When these super-cold butter pieces hit the hot oven, they create rapid steam pockets, which are essential for the scones’ signature lift, flakiness, and crisp edges. If you were to skip the freezer step, the butter might melt too quickly, leading to a denser, less flaky scone.
Both stages are meticulously designed to work together, ensuring that each component contributes optimally to the final light, flaky, and moist gluten-free scone. Skipping either step will result in a noticeable difference in the scone’s quality and texture.
Why do scones need eggs?
Eggs play several important roles in a scone recipe, especially in a gluten-free version where structure can be a challenge. First and foremost, eggs act as a powerful binder, helping the gluten-free dough come together and hold its shape. Without gluten to provide elasticity, eggs contribute significantly to the structural integrity of the scones, preventing them from falling apart. Additionally, eggs add a rich, deep flavor profile and contribute to a tender crumb. They also provide moisture and a touch of fat, which helps keep the scones from becoming dry. Finally, the egg’s protein helps create lift and a more even rise during baking, contributing to that desirable fluffy texture.
My gluten-free scones didn’t rise, what went wrong?
Several factors can impact the rise of your gluten-free scones. The most common culprits are typically related to the leavening agents or the butter. Firstly, ensure your baking powder is fresh and active – stale baking powder loses its leavening power. Secondly, the coldness of your butter and dough is paramount. If the butter melts too much during mixing or if the dough isn’t sufficiently chilled before baking, the steam production needed for rise will be compromised, leading to a flatter scone. Thirdly, avoid overworking the dough; excessive handling can warm up the butter and develop any potential gluten in your blend (though minimal in GF flours), resulting in a tougher texture and less rise. Lastly, make sure your oven temperature is accurate; an oven that isn’t hot enough will not give the scones the initial “oven spring” they need to puff up quickly. Following the cold butter and dough chilling steps precisely and using fresh baking powder are your best bets for a perfect rise!
Explore More Gluten-Free Baking Adventures
If you’ve enjoyed mastering these gluten-free scones, you’ll be thrilled to discover more delicious and reliable gluten-free recipes that deliver fantastic results every time. Expand your gluten-free baking repertoire with these tried-and-true favorites from my kitchen:
- Fluffy Gluten-Free Muffins (Master Recipe): A versatile recipe for perfectly moist muffins.
- The Best Gluten-Free Banana Bread: Rich, moist, and utterly delicious.
- Perfectly Chewy Gluten-Free Chocolate Chip Cookies: A classic comfort food, reimagined for gluten-free diets.
- Fudgy Gluten-Free Brownies: Indulgent, rich, and deeply chocolatey.
- The Best Gluten-Free Vanilla Cake: Light, airy, and perfect for celebrations.

Gluten-Free Scones (Endless Mix-Ins!)
Erin Collins
40
30
1 10
6 scones
The combination of grated frozen butter and rich sour cream are the secret tricks to baking the BEST gluten-free scones you’ll ever experience! Dive into this detailed guide for all the essential tips and techniques.
Comments
Video
(Video placeholder: A demonstration video showing the step-by-step process of making these flaky gluten-free scones would go here.)
Ingredients
- 1 ½ cups (240g) gluten-free 1:1 baking flour blend with xanthan gum
- ¼ cup (50g) granulated sugar reduce to 1 tablespoon for savory scones
- 1 tablespoon baking powder
- ½ teaspoon kosher salt
- 8 tablespoons (113g) unsalted butter frozen
- ⅓-½ cup mix-ins of choice e.g., chocolate chips, berries, nuts, dried fruit, cheese
- ⅔ cup full-fat sour cream
- 1 large egg
- 1 teaspoon vanilla extract omit for savory scones
- sparkling sugar for topping (optional)
Instructions
-
In a large mixing bowl, thoroughly whisk together the gluten-free flour, sugar (adjusted for sweet/savory), baking powder, and salt until well combined.
-
Grate the frozen butter using a box grater directly into the flour mixture. Using a pastry cutter, two forks, or your fingertips, cut the butter into the dry ingredients until the mixture resembles pea-sized crumbs.
-
If using mix-ins (chocolate chips, berries, etc.), gently stir them into the flour-butter mixture until evenly distributed.
-
In a separate medium bowl, whisk together the sour cream, egg, and vanilla extract (if using) until well combined.
-
Pour the sour cream mixture into the flour mixture. Using a rubber spatula, stir until just combined and no dry bits of flour remain. The dough may still look a bit dry; this is normal as gluten-free flour hydrates slowly.
-
Spread out a large piece of plastic wrap on a clean surface. Using wet hands, transfer the scone dough to the plastic wrap. Gently pat and shape the dough into a 6-inch round that is approximately 1 inch thick.
-
Wrap the dough tightly in plastic wrap and refrigerate for 20-30 minutes to allow the flour to hydrate. Then, transfer the wrapped dough to the freezer for 15 minutes (or up to 5 days if making ahead).
-
While the dough is chilling, preheat your oven to 500°F (260°C). Line a large baking sheet with parchment paper or a silicone baking mat.
-
Once chilled (after 15 minutes in the freezer, or when ready to bake if frozen longer), remove the dough from the freezer. Lightly spray a sharp knife with cooking spray and cut the dough into 6 equal wedges. Arrange the scones on the prepared baking sheet, leaving some space between them. If desired, sprinkle the tops with coarse or sparkling sugar.
-
Place the baking sheet with scones into the preheated oven. Immediately lower the oven temperature to 425°F (220°C). This initial hot temperature helps create a beautiful golden crust and promotes a good rise. Bake for 12-14 minutes, or until the scones are golden brown on top and cooked through.
-
Carefully remove the scones from the oven and transfer them to a wire rack. Let them cool for at least 20 minutes before serving, allowing the interior to set. Enjoy them warm!
Notes
- Gluten-Free 1:1 Baking Flour: For optimal results, I highly recommend using a high-quality gluten-free flour blend that is specifically labeled “1:1 baking flour” and contains xanthan gum. My top choices are King Arthur Flour Gluten-Free Measure-For-Measure Flour or Bob’s Red Mill Gluten-Free 1:1 Baking Flour. These blends are formulated to mimic the properties of wheat flour, ensuring excellent texture and structure in your baked goods.
- Sour Cream: Beyond its tangy flavor, sour cream is crucial for adding significant richness and moisture to these scones, preventing them from becoming dry. Its fat content also contributes to a wonderfully tender crumb, and its slight acidity helps activate the baking powder for a better rise.
- Frozen Grated Butter: This is a non-negotiable technique for achieving light, flaky, and buttery scones. Keeping the butter frozen and grated ensures that it melts slowly during baking, creating pockets of steam that result in those characteristic flaky layers and delightfully crisp edges. Warm butter will integrate too quickly and lead to a denser, more cake-like scone.
Recipe Notes & Success Tips:
- Endless Recipe Variations: This scone base is incredibly versatile! Feel free to customize it with your favorite mix-ins. Add anywhere from ⅓ to ½ cup of ingredients like mini chocolate chips, fresh or dried berries, chopped nuts, citrus zest, or shredded cheese and fresh herbs for savory options.
- The Importance of Resting & Freezing the Dough: Do not skip the chilling steps! Resting the dough for 20-30 minutes in the refrigerator allows the gluten-free flour to fully hydrate and absorb moisture, which is essential for a tender scone. The subsequent 15-minute freeze then solidifies the butter, which is crucial for maximizing flakiness and ensuring a beautiful rise in the oven. These steps are key to avoiding dry or dense scones.
- Baking Temperature Strategy: The initial high oven temperature (500°F) provides a powerful burst of “oven spring,” causing the scones to puff up quickly and develop a crisp exterior. Immediately reducing the temperature to 425°F allows the scones to cook through evenly without burning, resulting in a perfectly baked interior.