
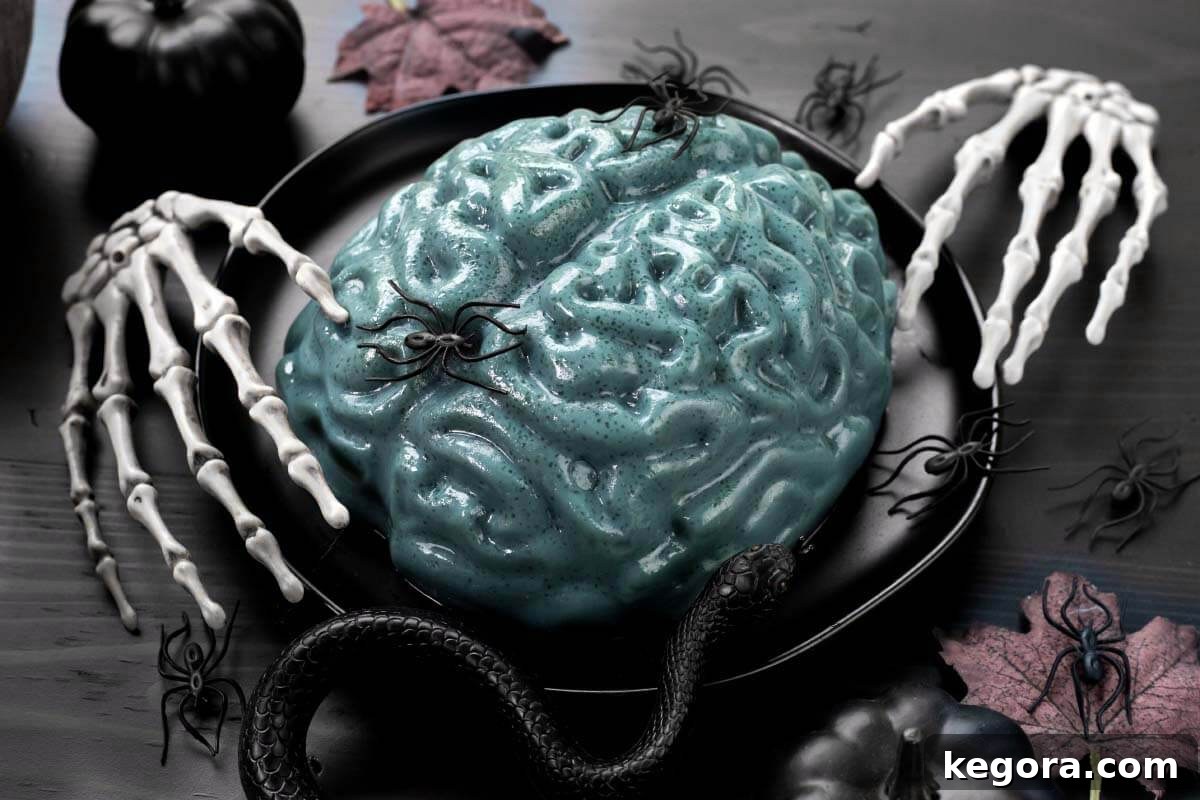
Get ready to amaze your guests with the most gruesome yet delicious dessert this Halloween! Our Halloween Jello Brain Recipe is the ultimate showstopper for any spooky gathering, whether it’s a themed party, a zombie apocalypse simulation, or simply a fun family treat. This easy-to-follow recipe helps you create a perfectly wobbly, deliciously creepy gelatin brain using a simple plastic or silicone mold. Forget bland desserts; this edible brain will be the talk of the town, satisfying both sweet cravings and a thirst for frightful fun. It’s not just a dessert; it’s an experience!
Why a Jello Brain is the Ultimate Halloween Treat
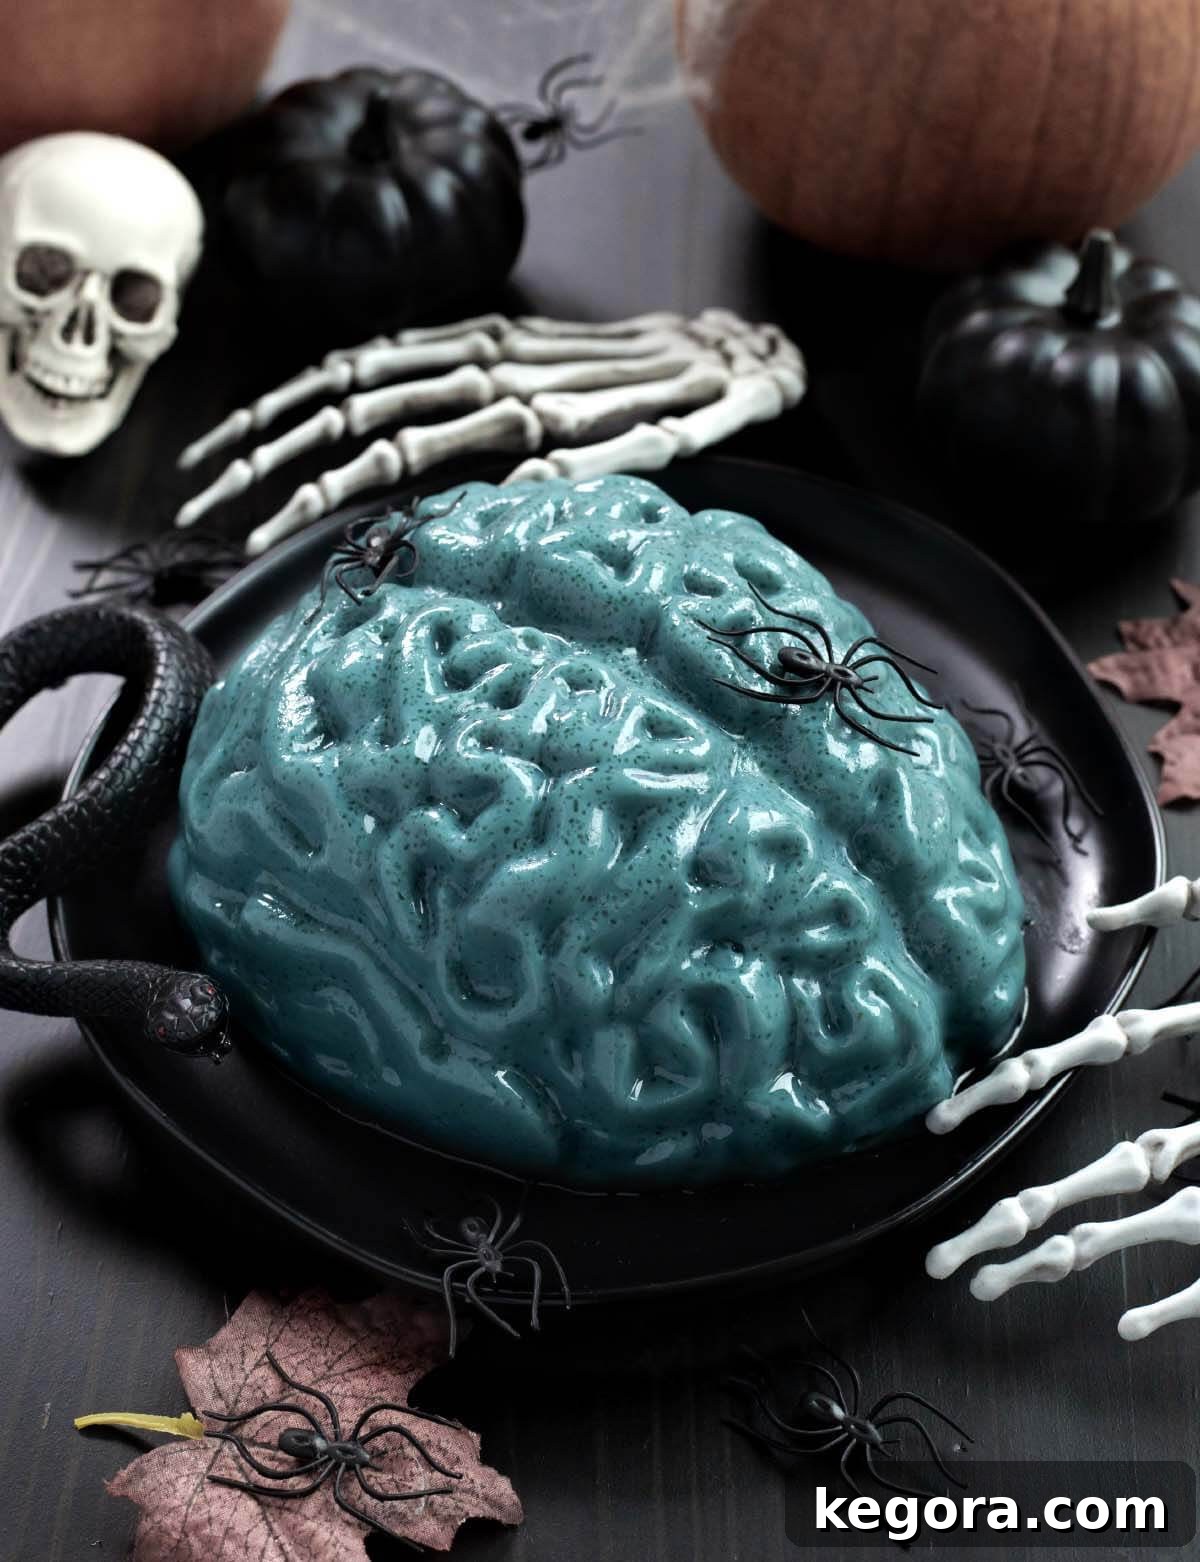
BRAAAAAAIIINNNNNNSSSS! Few things scream Halloween quite like a jiggly, grotesque brain sitting on a platter, waiting to be devoured. This iconic dessert taps into the primal thrill of the macabre, making it an instant hit for all ages. It’s perfect for adding a touch of horror to your dessert table without being overly complicated to prepare. If you’ve been looking for that one dish that perfectly embodies the spirit of October 31st, a homemade jello brain is your answer. It’s a fantastic conversation starter and a memorable centerpiece, guaranteed to elicit gasps and giggles in equal measure.
Our recipe uses classic Jell-O® style gelatin, ensuring a familiar taste and texture that everyone loves. The simplicity of the ingredients and steps means even beginner cooks can achieve impressive results. Imagine the delight (or fright!) on your guests’ faces as they encounter this realistic, yet entirely edible, brain. It’s not just a dessert; it’s a prop that plays a starring role in your Halloween festivities, perfect for those zombie enthusiasts or anyone who appreciates a deliciously eerie dish.
Finding the Perfect Brain Mold for Your Jello Masterpiece
To craft an impressive gelatin brain, the right mold is essential. These specialty molds are typically made from plastic or silicone and are designed to replicate the intricate folds and contours of a human brain. The good news is they are widely available, especially as Halloween approaches!
You can easily find a suitable brain mold at most party supply stores during the fall season. For convenience, online retailers like Amazon offer a vast selection, often with various sizes and styles to choose from. When selecting a mold, consider its capacity; a 6-cup mold, like the one we recommend, yields a substantial brain that’s perfect for a party. Silicone molds offer flexibility, making unmolding a breeze, while plastic molds are often more rigid and can sometimes require a bit more finesse. Whichever you choose, ensure it’s food-grade and durable enough to withstand the chilling process.
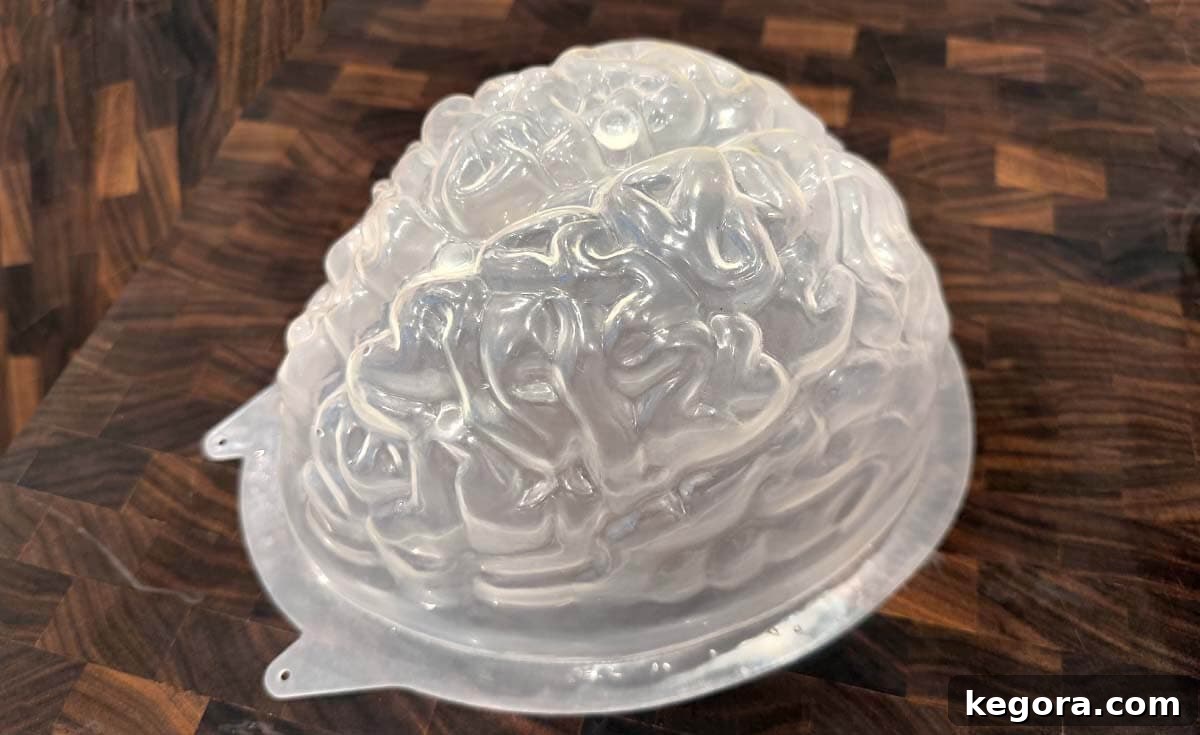
Click here to find the exact brain mold I use on Amazon. They offer a variety of styles and capacities, but my go-to mold holds about 6 cups, making a nicely sized edible brain.
Essential Ingredients for Your Spooky Jello Brain
Creating this eerie Halloween Jello Brain requires only a handful of common ingredients. The magic happens when these simple components combine to form a truly spectacular and unsettling dessert. Always remember to check the recipe card below for precise measurements to ensure your brain sets perfectly.
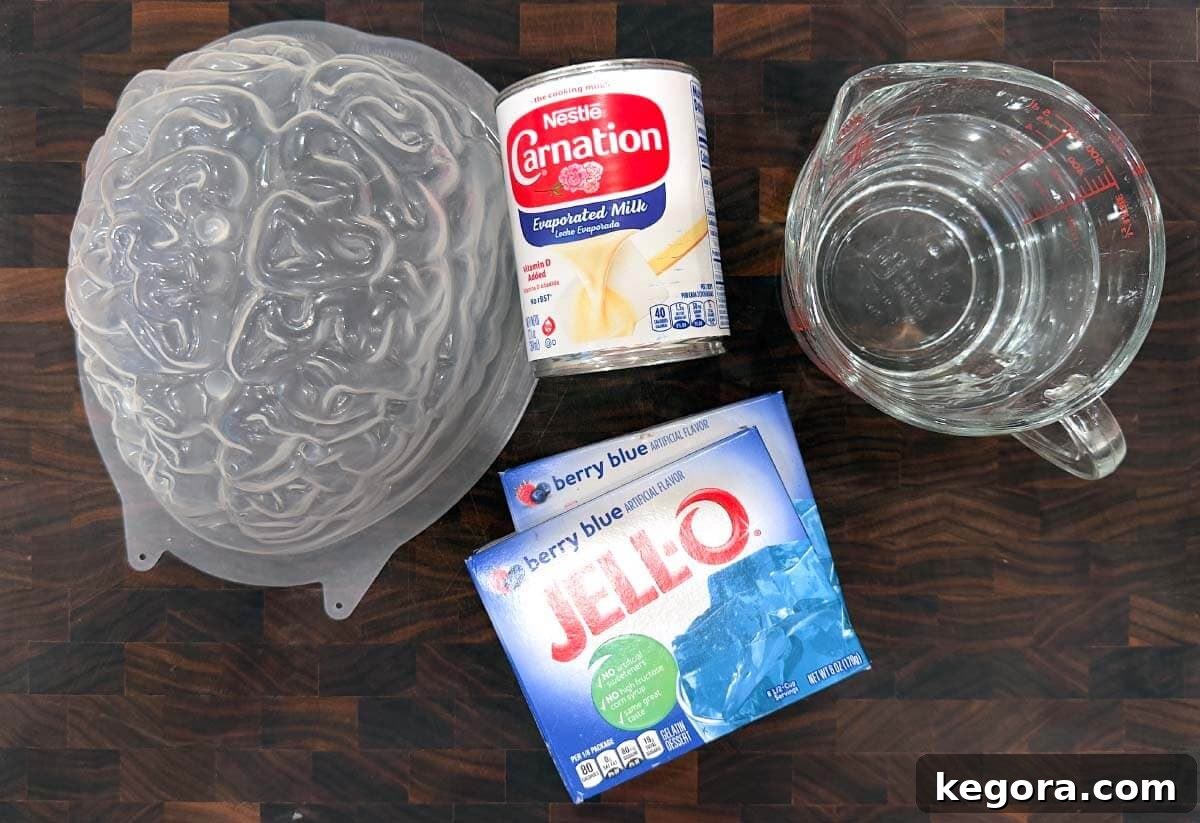
- 6-cup Plastic or Silicone Brain Mold: The star of the show! This will give your gelatin its iconic, eerie shape.
- 2 (6-ounce) Boxes of Flavored Gelatin (e.g., Jell-O®): The base of our brain. Peach, berry blue, or even a neutral flavor works wonderfully for customizing color.
- 1 (12-ounce) Can Evaporated Milk: This secret ingredient is crucial for giving the jello an opaque, creamy, and realistic “brain-like” texture.
- Water: You’ll need both boiling water to dissolve the gelatin and chilled water to help it set properly and cool quickly.
- Food Coloring (Optional): For truly customizing your brain’s hue. Think gruesome grey, monstrous green, or bloody red!
Does Evaporated Milk Need to Be Fat-Free?
While fat-free evaporated milk is generally recommended for this recipe, it’s not strictly mandatory. Here’s why we lean towards fat-free:
- Preventing Curdling: Milk with a higher fat content runs a greater risk of curdling when mixed with hot gelatin. While an interesting texture, it can interfere with the smooth, cohesive set of the gelatin.
- Texture and Appearance: Fat-free evaporated milk contributes to a smoother, more uniform opacity, which is ideal for achieving a realistic brain texture.
- Personal Experience: I’ve successfully used 2% fat evaporated milk in the past. It tasted and looked absolutely fine, though it sometimes resulted in interesting tiny speckles. The blue-grey brain you see pictured was, in fact, made with 2% evaporated milk, proving it can work without dire consequences! So, if fat-free isn’t available, don’t stress too much, but proceed with caution.
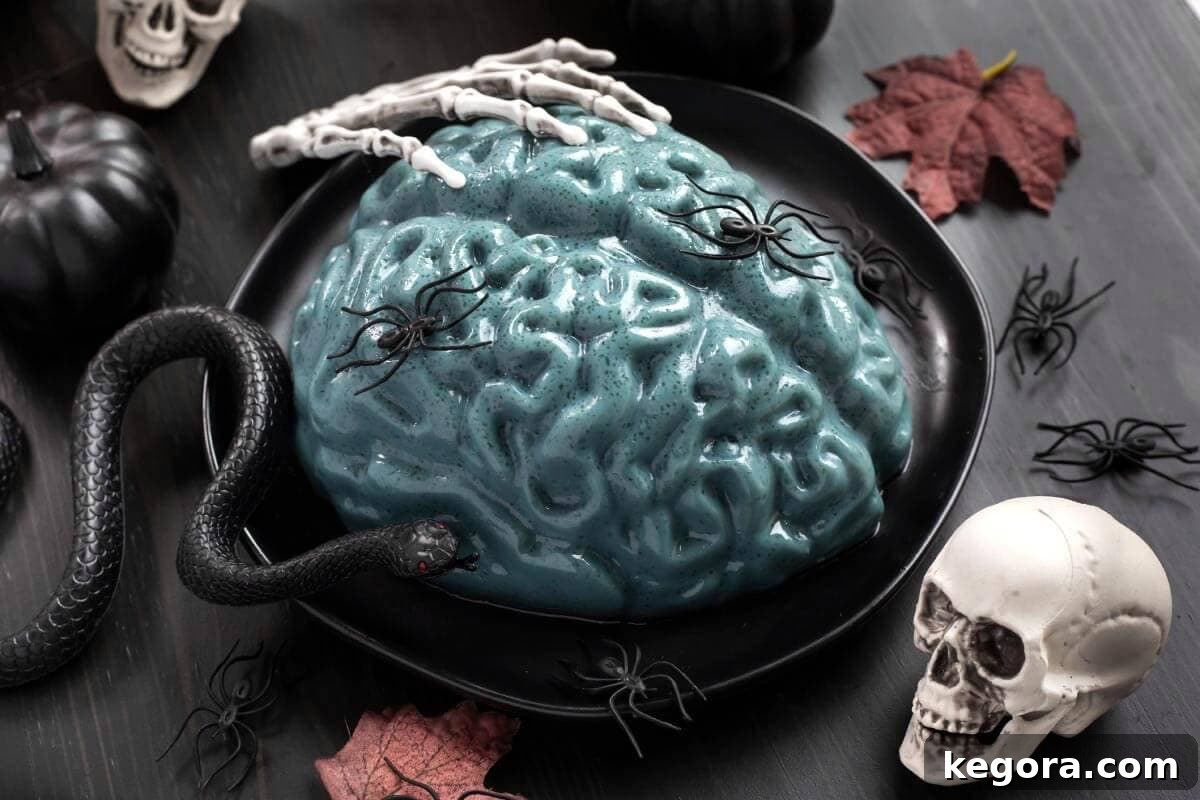
Make-Ahead Tip: One of the best features of this recipe is its make-ahead convenience! You can prepare your jello brain up to two days in advance. Simply keep it covered with plastic wrap in its mold in the refrigerator until you’re ready to serve. This frees up valuable time on Halloween day!
Step-by-Step: Crafting Your Spooky Jello Brain
Making your Halloween Jello Brain is incredibly simple and surprisingly satisfying. The process is straightforward, and the result is a delicious treat that looks impressively complex. Follow these steps for a perfectly creepy edible brain that tastes as good as it looks!
1. Prepare Your Workspace and Mold
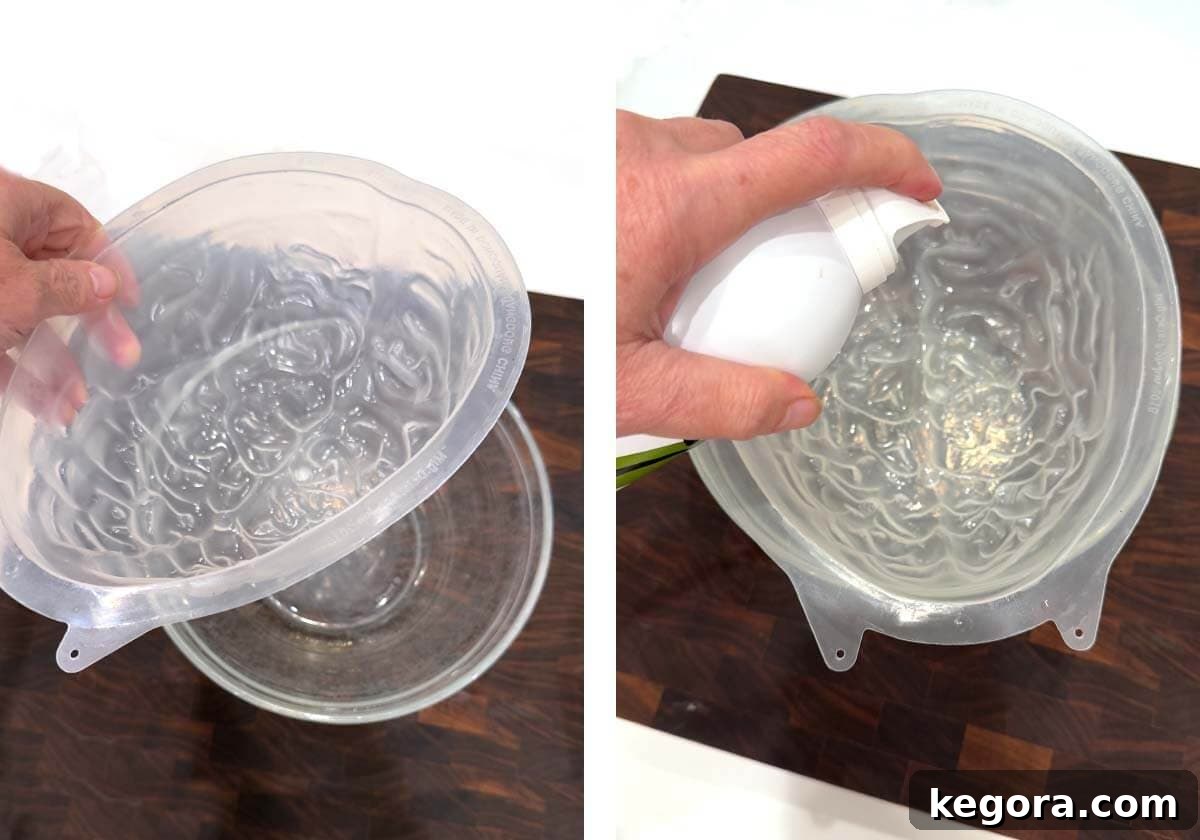
- First, gather all your equipment: measuring cups, a whisk, a large mixing bowl, and a sturdy bowl to hold your brain mold.
- Start a kettle or pot of water boiling, and ensure you have an equal amount of cold water measured out and ready.
- Thoroughly wash and dry your brain mold. A clean mold is crucial for a smooth, unblemished brain.
- Place the clean, dry brain mold into the sturdy bowl. This provides stability and prevents spills once filled.
- Lightly spray the inside of the mold with cooking spray. This tiny step is critical for easy unmolding later!
2. Mix the Gelatin Base
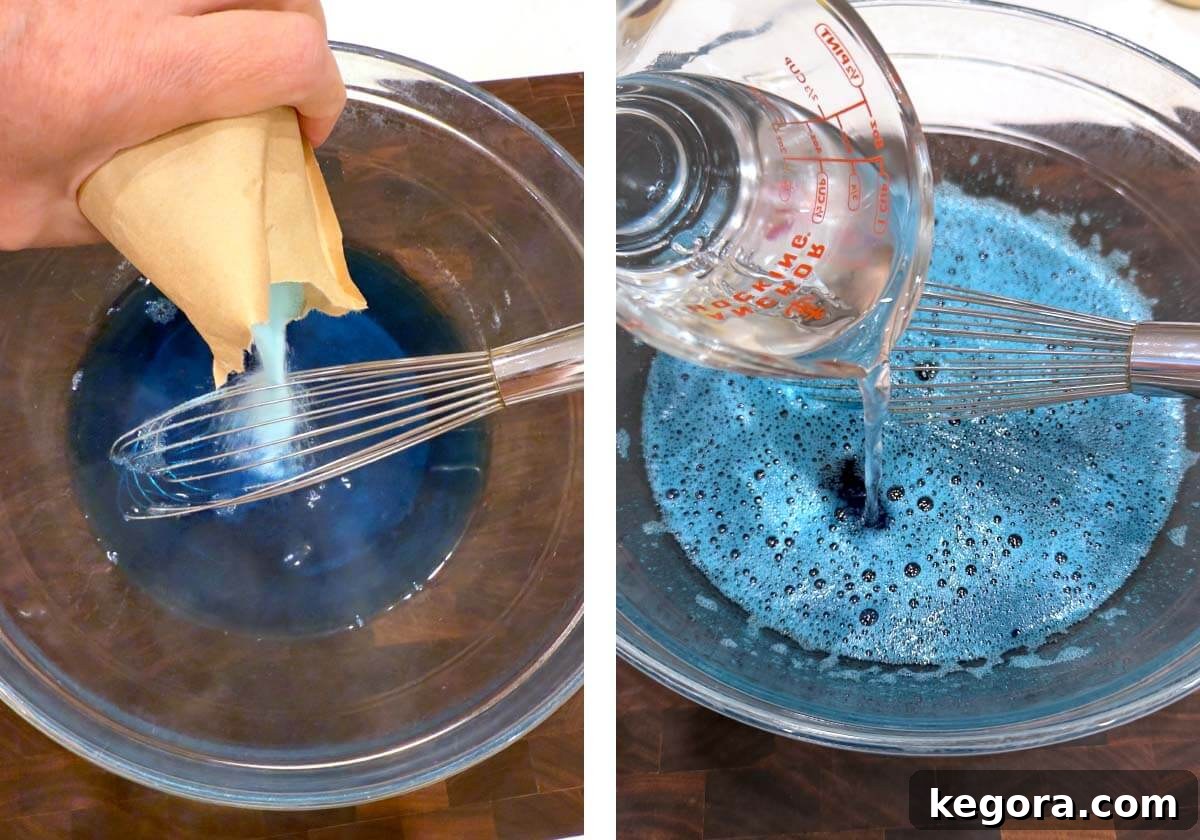
- In your large mixing bowl, combine the contents of the two Jell-O® boxes with the boiling water.
- Whisk vigorously and continuously for at least 2 minutes, or until the gelatin granules are completely dissolved. There should be no grainy residue.
- Next, whisk in the cold water. This helps to cool the mixture down, preparing it for the evaporated milk.
3. Add Creaminess and Color
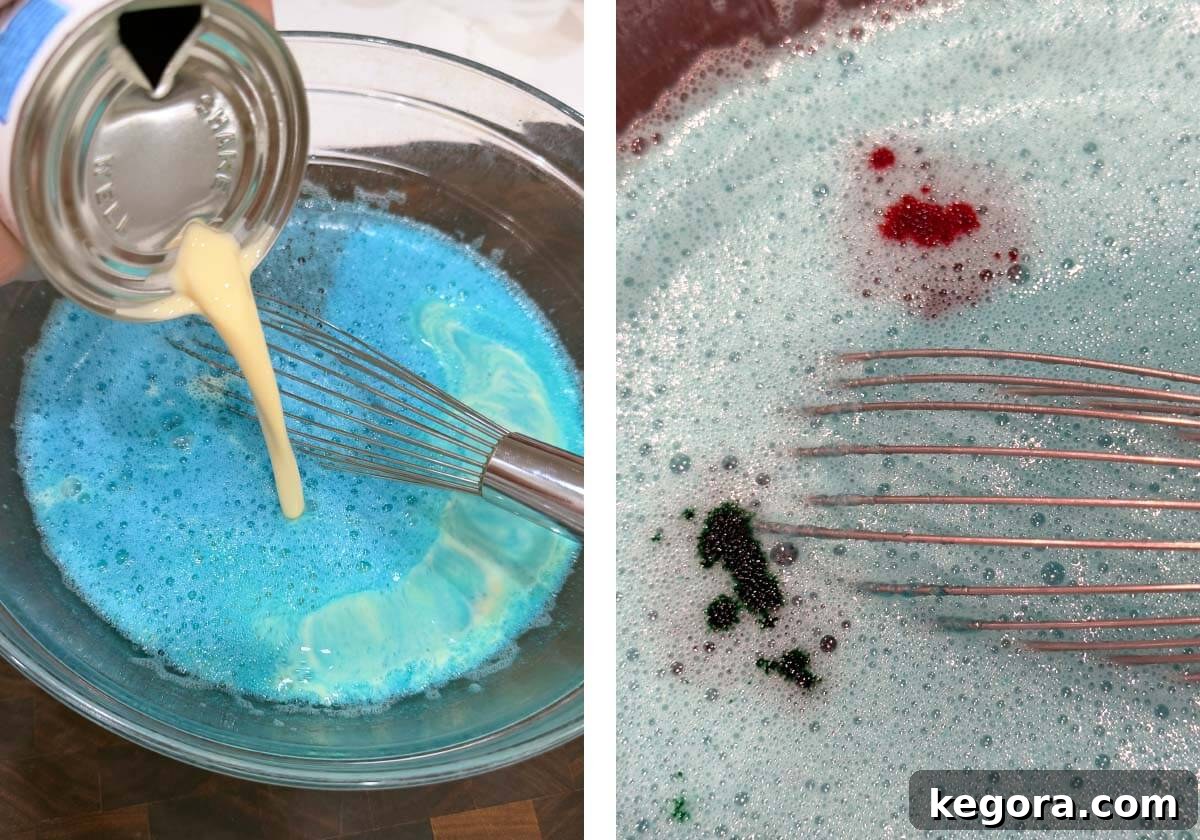
- Pour in the entire can of evaporated milk. This step is what transforms the transparent gelatin into an opaque, creamy liquid, essential for that realistic brain appearance.
- Whisk the mixture thoroughly until the evaporated milk is fully incorporated and the liquid is a uniform, milky color.
- If you’re using food coloring, add it now. Start with a few drops and gradually add more, whisking after each addition, until you achieve your desired hue.
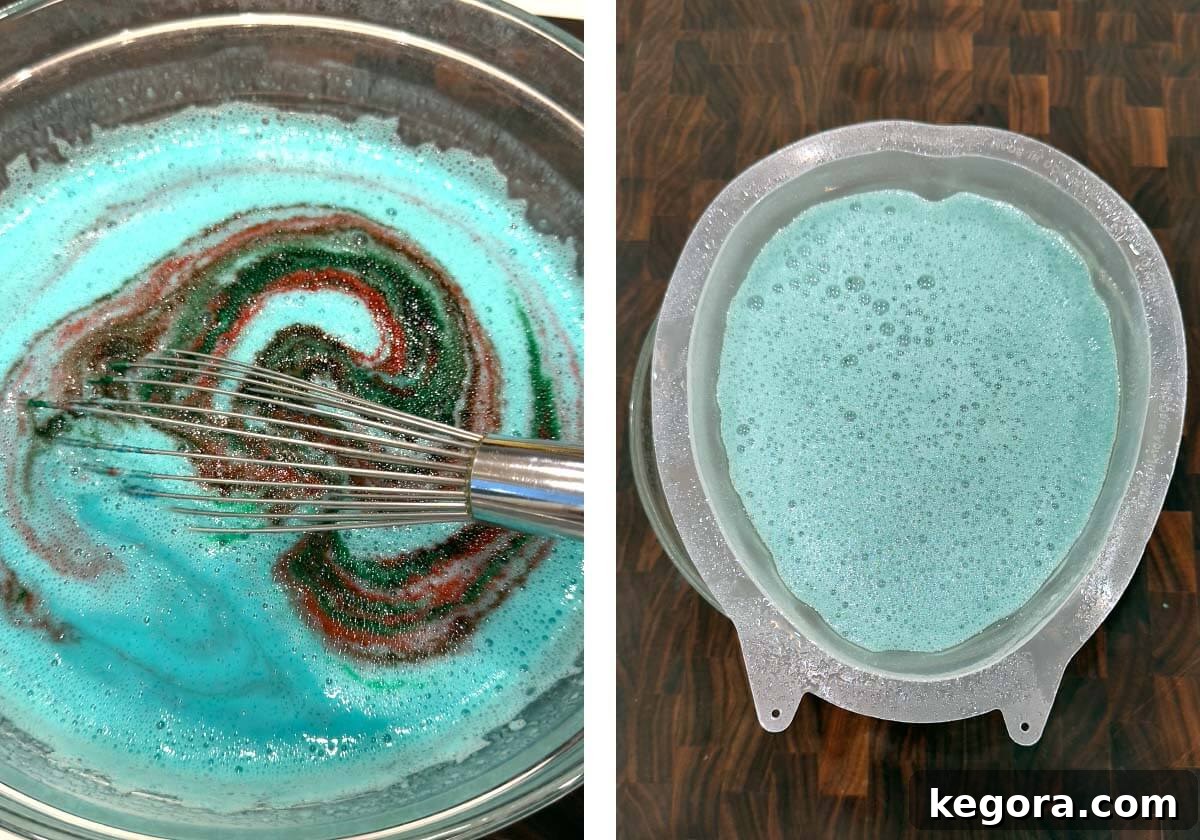
- Continue to whisk the food coloring until it’s evenly distributed. Adjust the color as needed, adding more drops if you want a deeper or more intense shade.
- Carefully pour the liquid jello mixture into your prepared brain mold, which should still be stable in its bowl.
- Note: My 6-cup mold wasn’t filled entirely to the very top, but it still yielded a perfectly sized, impressive brain. Don’t worry if it’s not overflowing; the zombies will surely approve!
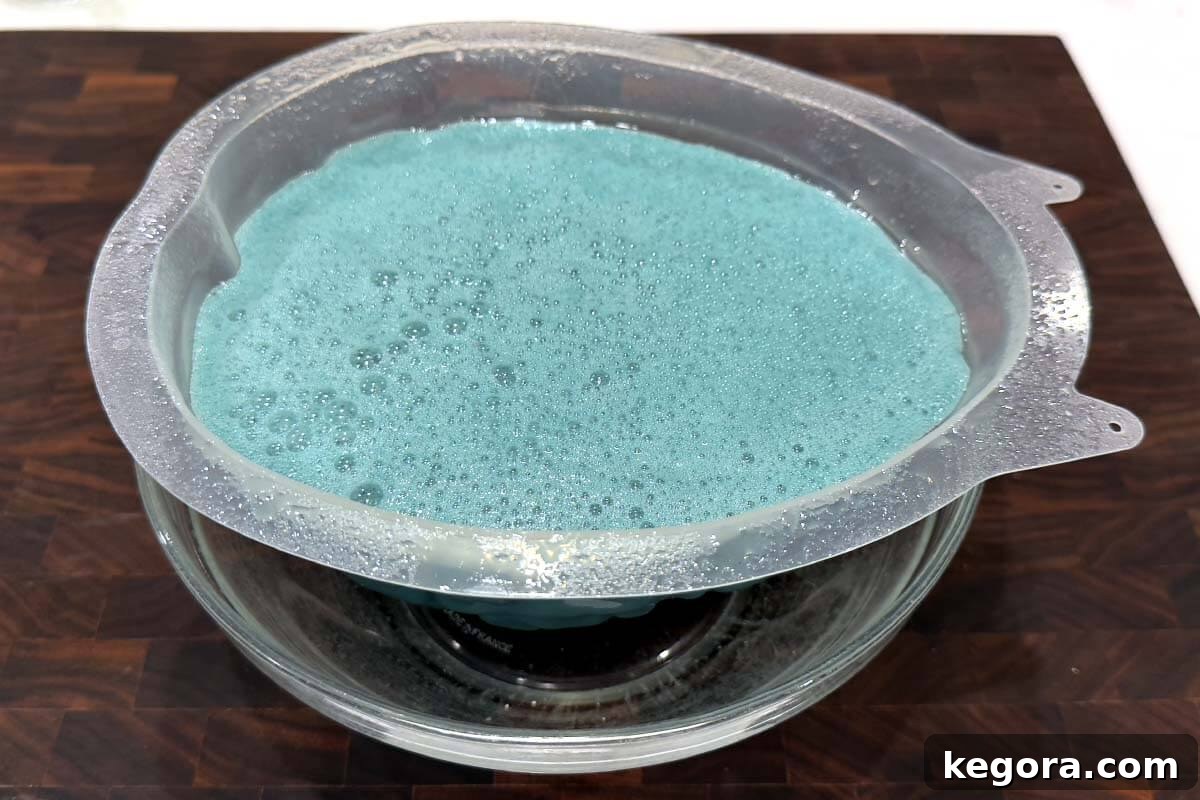
4. Chill and Unmold Your Masterpiece
- Carefully transfer the bowl with the filled brain mold to the refrigerator.
- Chill for at least 2 hours, or until the gelatin is completely firm and set. For best results and easier unmolding, chilling for 3-4 hours or even overnight is ideal.
- Once fully set, remove the mold from the fridge. Place a serving plate upside down over the mold.
- In one swift motion, invert the mold and plate together. The brain should easily release and plop onto the plate. If it doesn’t, gently jiggle the mold or briefly dip the bottom of the mold into warm water (just for a few seconds!) to loosen the edges. Repeat the plate/invert step. Do not over-warm, or your brain will melt!
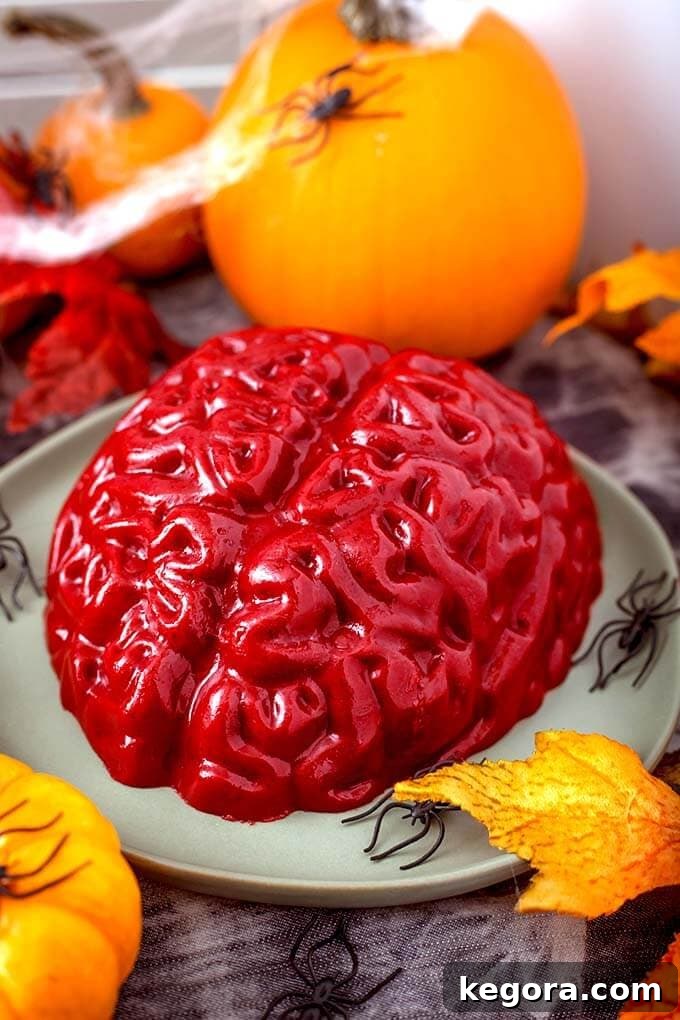
Coloring Your Jello Brain: From Grey Matter to Gory Red
One of the most fun aspects of making a jello brain is customizing its color. The evaporated milk creates an opaque base, making it incredibly receptive to food coloring. This allows you to achieve a wide spectrum of spooky hues, from classic grey matter to alien green or even a blood-splattered effect. The key is to add coloring gradually and mix well until you reach your desired shade.
Choosing the Best Jello Flavor for Your Brain’s Color
While any Jell-O® flavor can work, some are better suited for specific color outcomes. For a truly versatile base that easily takes on food dye, especially when aiming for unique colors like grey or green, a light-colored gelatin is best. The peach flavor gelatin is an excellent choice not only for its tasty, subtle fruit flavor but also because its pale color allows food dyes to shine through beautifully, especially once mixed with the opaque evaporated milk.
For the cool grey-blue brain pictured throughout this article, I used Berry Blue Jell-O® flavor. I achieved this specific shade by adding approximately 25 drops of red food coloring and 25 drops of green food coloring. Don’t be afraid to experiment with your own combinations; having fun with the colors is part of the creative process!
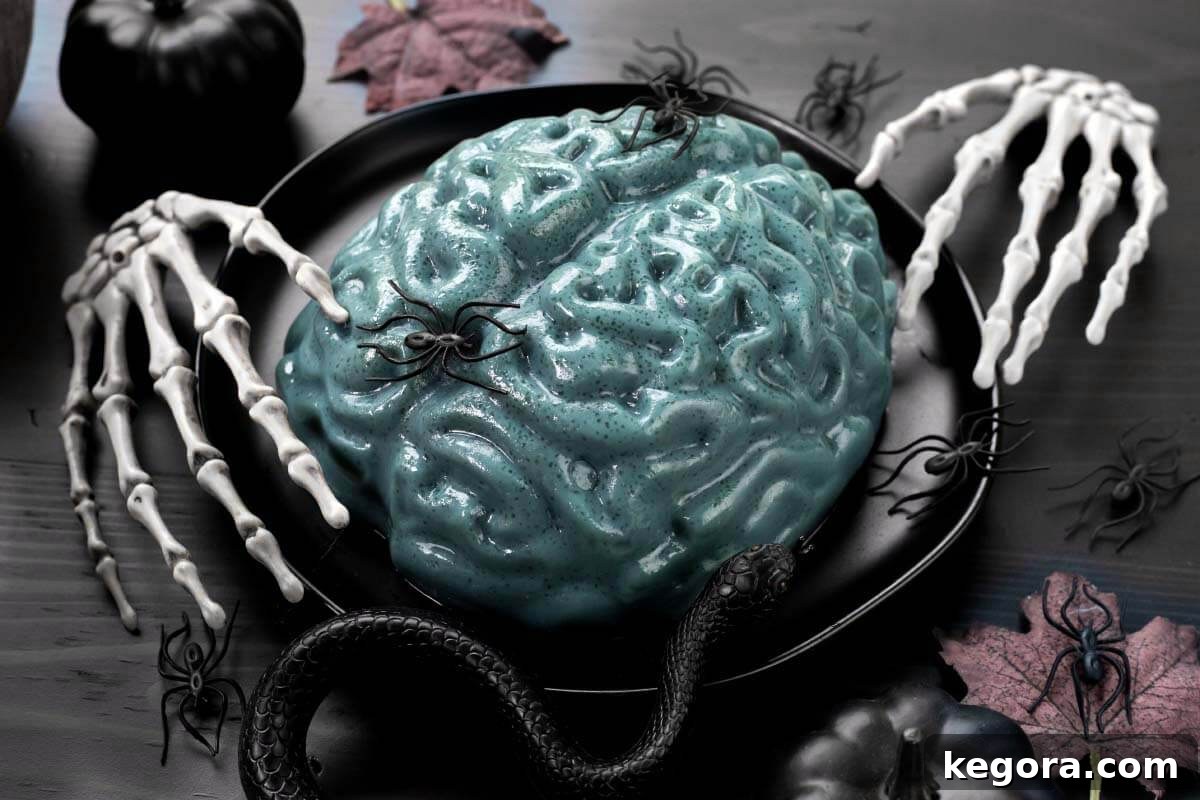
I Want My Brain to Be Grey!
Achieving a convincing grey brain is a popular choice for that classic spooky aesthetic. To get a true grey, you’ll need equal parts of red, green, and blue food coloring. Start with a small amount, perhaps 10 drops of each, and mix thoroughly. You might need to add up to 15 drops of each color, depending on the intensity you desire. Remember, the key is to add gradually and whisk well after each addition to ensure even color distribution.
Important Note: Always consider the starting color of your flavored gelatin. If you begin with a brightly colored Jell-O®, achieving a neutral grey can be more challenging. For the most controlled grey, a peach-flavored gelatin or even unflavored gelatin (though it might ‘taste like brains’ on its own!) works best, as its neutral base allows the food dyes to create the intended color without interference.
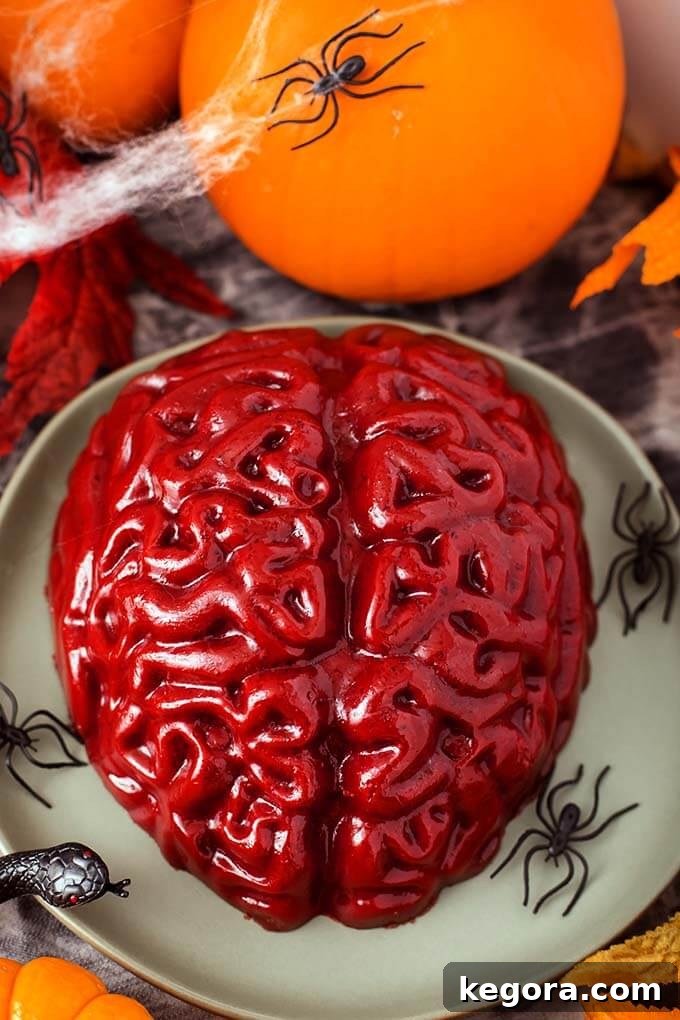
For instance, getting grey from strawberry jello is quite difficult; in such cases, it’s often better to embrace the existing red and simply add more to create a deliciously bloody brain effect!
Tips for a Perfectly Unmolded Jello Brain
- Grease the Mold Generously: Don’t skip the cooking spray! A light, even coating makes a huge difference in how easily the brain releases.
- Chill Thoroughly: Patience is a virtue here. A fully chilled and set brain (at least 2-4 hours, or overnight) will be much less likely to stick or tear during unmolding.
- Gentle Jiggle: Before inverting, gently pull the edges of the jello away from the mold with clean fingers to introduce some air. Then, give the mold a slight jiggle to feel if the jello has loosened.
- Warm Water Bath (Briefly!): If it’s really stuck, dip the bottom of the mold into a shallow pan of warm (not hot!) water for no more than 10-15 seconds. This loosens the outer layer just enough. Wipe the mold dry before inverting.
- Use a Flat Serving Plate: A flat plate provides a stable surface for the brain to land on.
Frequently Asked Questions About Halloween Jello Brains
- Can I use a different type of milk? Evaporated milk is crucial for the opaque, creamy texture. Regular milk or condensed milk will not yield the same results. Regular milk might curdle or create a much thinner, less brain-like consistency.
- How long does the Jello Brain last? Stored properly in an airtight container or covered with plastic wrap in the refrigerator, your jello brain will stay fresh for 2-3 days.
- Can I make a larger or smaller brain? Yes! Adjust the recipe proportionally based on your mold size. For a smaller mold, halve the recipe. For a larger mold, increase it by 1.5 or 2 times. Remember to adjust chilling time accordingly.
- What if my Jello doesn’t set? This usually happens if the water measurements are off, or if the gelatin wasn’t fully dissolved. Ensure your boiling water is hot enough and that you whisk thoroughly. Adding too much cold liquid can also dilute the gelatin’s setting power.
- Can I add “blood” or other spooky elements? Absolutely! For a gory effect, drizzle raspberry or cherry syrup over the unmolded brain just before serving. You can also embed gummy worms or plastic spiders for extra creepiness.
More Spooktacular Halloween Party Food Ideas!
Planning a full Halloween feast? A Jello brain is just the beginning! Explore our collection of other eerie and delicious recipes to complete your spooky spread.
- Browse the entire Halloween recipe collection here!
- Spooky Halloween Party Punch
- Halloween Witch Hat Cupcakes
- White Chocolate Halloween Ghosts
- Halloween Hot Dog Mummies
- Dark Chocolate Halloween Cookies
If you conjure up this incredible Halloween Jello Brain, we’d love to hear about it! Share your creations and let us know how it turned out by leaving a comment and a star rating below. Your feedback helps other spooky chefs!
Have a fun, safe, and deliciously creepy Halloween!
Complete Halloween Jello Brain Recipe Card
Halloween Jello Brain Recipe
By Sandy Clifton
This Halloween Jello Brain Recipe is perfect for a plastic or silicone brain mold, making a deliciously creepy gelatin brain for any Halloween party or zombie-themed event.
Chill Time: 3 hrs
Total Time: 3 hrs 15 mins
Servings: 5
Equipment
- 6-cup Plastic Brain Mold (or silicone)
- Medium Glass Bowl
- Whisk
- Liquid Measuring Cups
Ingredients
Main Ingredients
- 2 (6 oz) pkgs Flavored Gelatin (such as Jell-O®)
- 1 ¾ cups Boiling Water
- ⅔ cup Cold Water
- 1 (12 oz) can Evaporated Milk (fat-free, if possible)
Optional
- Food Coloring (red, green, blue for grey, or any desired color)
Instructions
Prep
- If using a new brain mold, wash it thoroughly with warm soapy water, then rinse and dry completely.
- Start a pot or kettle of water boiling for the gelatin mixture.
- Lightly spray the inside of the brain mold with cooking spray for easy release. Place the mold into a stable bowl to prevent tipping. Set aside.
Make the Jello Mixture
- In a large mixing bowl, combine the flavored gelatin with the boiling water. Whisk continuously until the gelatin is completely dissolved (about 2 minutes).
- Pour in the cold water and stir well to combine and cool the mixture slightly.
- Add the entire can of evaporated milk to the mixture. Stir well until it’s fully incorporated and the liquid is uniformly opaque.
Optional Coloring Step
- If you are using food coloring to customize your brain’s hue (e.g., for grey, green, or blue), add it now. Start with a few drops and whisk well after each addition until your desired color is achieved.
Add to the Mold
- Carefully pour the prepared jello mixture into the stabilized brain mold.
Chill
- Place the mold in the refrigerator and chill until the gelatin is completely set and firm, which takes at least 2 hours. For best results, chill for 3-4 hours or even overnight.
Serve
- To release the jello brain, gently shake the mold to loosen the edges. If it doesn’t easily release, briefly dip the bottom of the mold into warm water for 10-15 seconds.
- Place a flat serving plate over the mold and quickly invert them together. The brain should plop out onto the plate. If not, repeat the loosening steps.
- Decorate with extra “blood” (raspberry syrup), gummy worms, or plastic spiders for an extra spooky effect.
Notes
Make-Ahead
This jello brain can be prepared up to 2 days in advance. Keep it in its mold, covered with plastic wrap, in the refrigerator until ready to serve.
Nutrition
Calories: 89 kcal per serving (approximation)
Nutrition information is automatically calculated and should only be used as an approximation.
Additional Info
Course: Dessert
Cuisine: Holiday (Halloween)
Tried this recipe? Mention @simply_happy_foodie on Instagram!