
Erin’s Ultimate Gluten-Free Detroit-Style Pizza Guide

Welcome to my definitive guide for crafting the most incredible gluten-free Detroit-style pizza you’ll ever taste! This recipe isn’t just about avoiding gluten; it’s about elevating a classic to new heights of deliciousness and ensuring every bite is a memorable experience. Get ready to impress your family and friends with a pizza that boasts an irresistible thick crust, rich flavors, and the iconic caramelized edges that make Detroit-style pizza truly special.
Recipe Highlights & Why You’ll Love It:
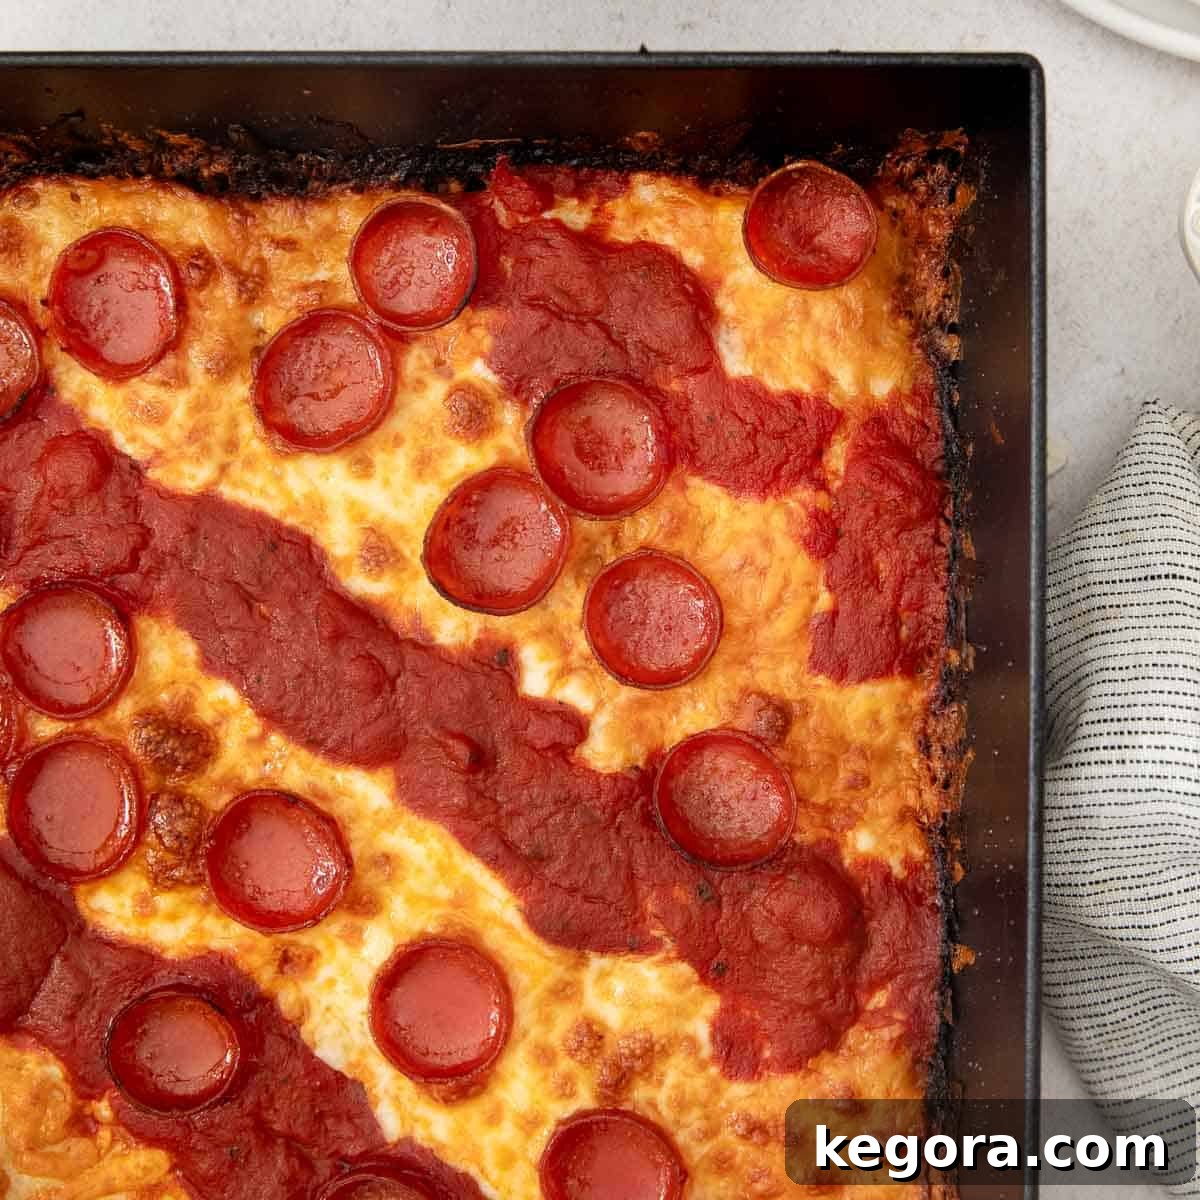
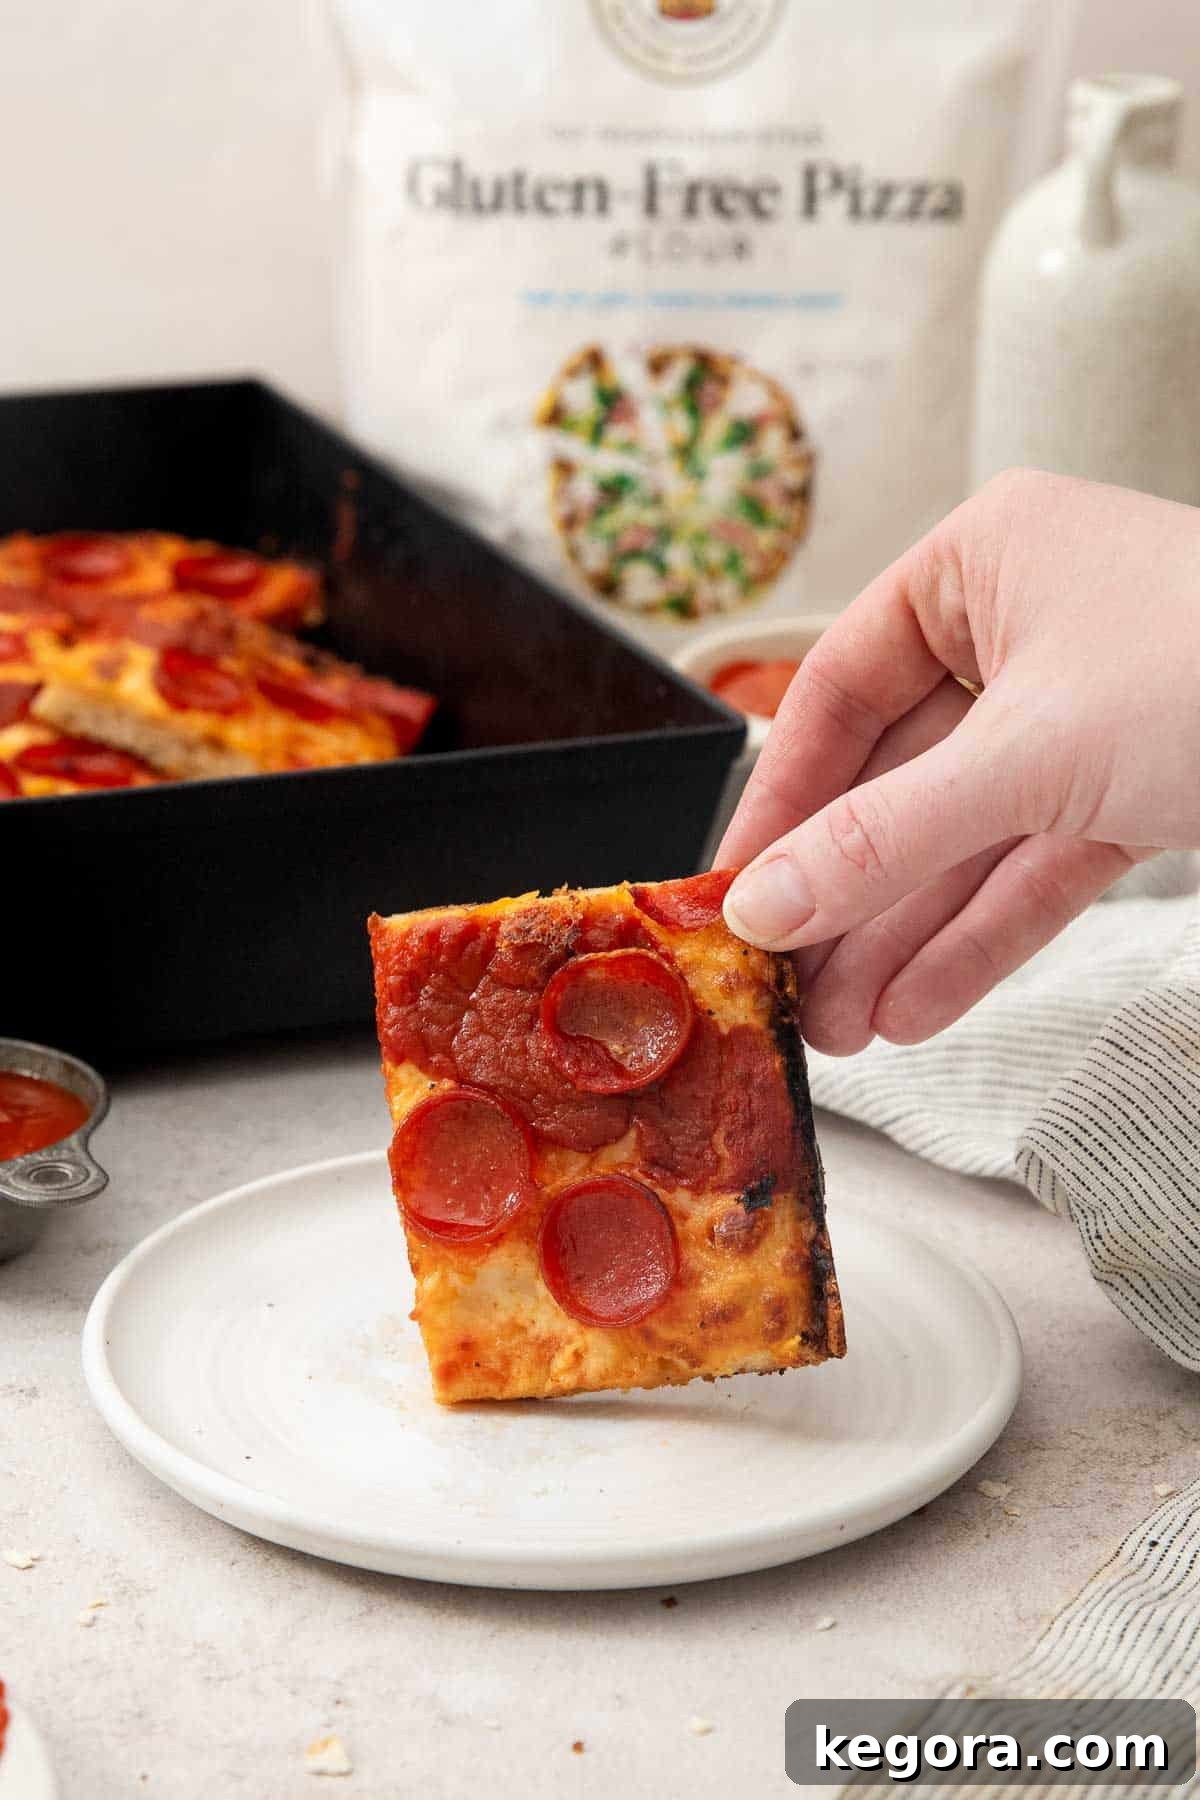
Texture: Prepare for a revelation! This pizza delivers a remarkably thick and airy crust that is both crisp on the outside and wonderfully pillowy on the inside. The true magic lies in the cheesy, caramelized edges, often referred to as “frico,” which provide a delightful crunch and intense flavor. And, of course, the signature sauce-on-top layering ensures the crust stays perfectly crisp, never soggy.
Taste: Each component contributes to a symphony of flavors. The savory gluten-free crust lays the foundation, beautifully complemented by the rich, gooey cheeses. The tangy pizza sauce provides a vibrant contrast, while salty, crispy pepperoni adds a layer of irresistible umami. It’s a perfectly balanced, deeply satisfying flavor combination that will have everyone reaching for another slice.
Ease: Don’t let the impressive results intimidate you – this is an surprisingly easy pizza recipe! While it does require some planning for the dough’s rising time, the hands-on steps are straightforward and beginner-friendly. The simple process makes it ideal for a fun family cooking activity or a relaxing weekend project, promising a delicious reward for your minimal effort.
Top Tips for Success: For authentic Detroit-style results, a Detroit-style pizza pan is a non-negotiable tool – it makes all the difference in achieving that characteristic deep-dish shape and crispy crust. Another secret to the perfect frico crust: use pre-shredded cheese for the edges. The anti-caking agents in pre-shredded cheese promote even melting and superior browning, leading to those coveted caramelized, crispy bits along the pan’s perimeter.
Recommended Gluten-Free Flour: This recipe has been meticulously developed and tested to work specifically with King Arthur Gluten-Free Pizza Flour. This particular blend has a unique composition that is crucial for achieving the desired thick, airy, and yet structured crust. Please note: no other gluten-free flour blend will yield the same exceptional results, so sticking to this recommendation is key for success.
Would I make this again? Absolutely, without a shadow of a doubt! This isn’t just a good gluten-free pizza; it is, hands down, the BEST gluten-free pizza I’ve ever had the pleasure of making or eating. It has earned its permanent spot in our regular rotation for family pizza night, and I’m confident it will become a cherished favorite in your home too!
xoxo erin
This post is sponsored by King Arthur Baking Company, a brand I trust and love for high-quality baking ingredients.
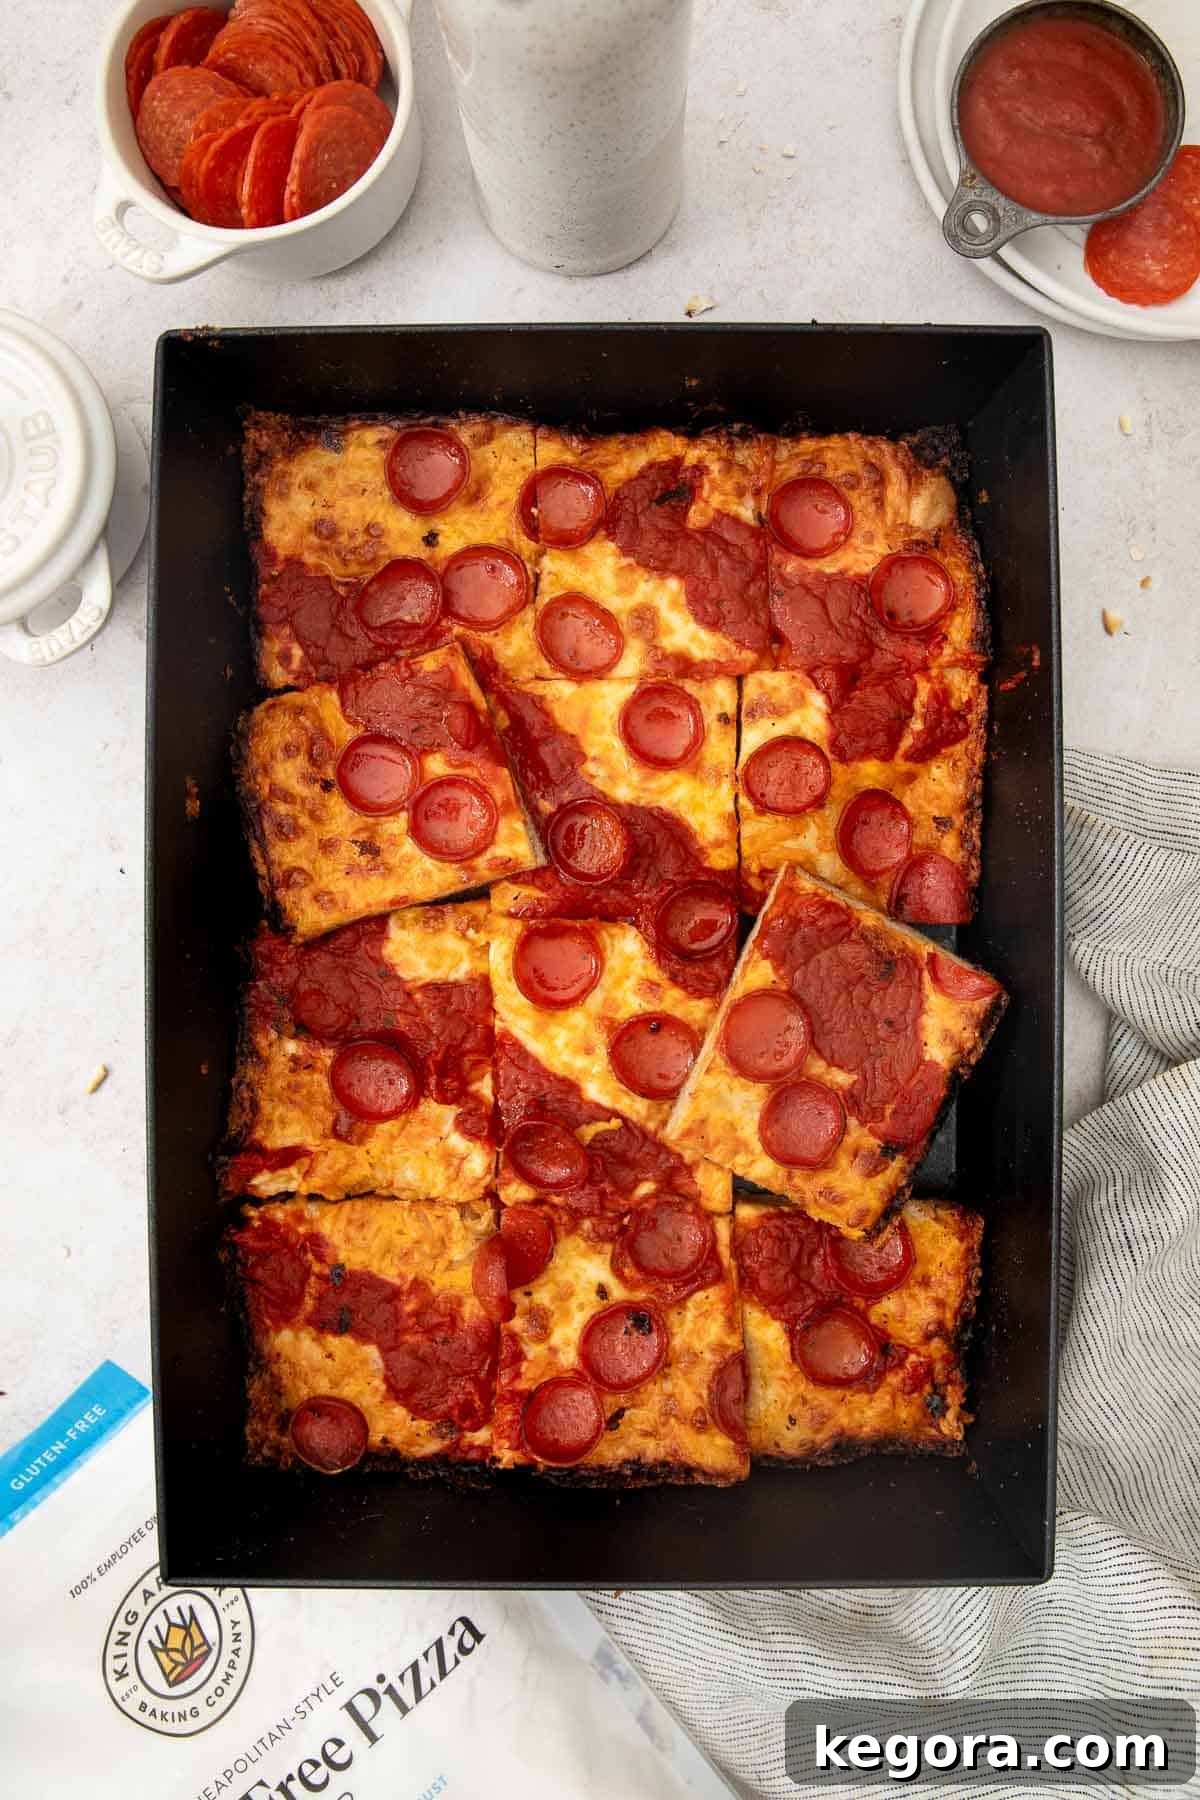
Detroit-style pizza is a beloved classic, known for its hearty rectangular crust, abundant cheese, and signature sauce stripes. This gluten-free version perfectly captures everything that makes the original so irresistible, while ensuring it checks all the boxes for a delicious and accommodating meal. I absolutely adore making this recipe for our bustling family pizza nights, and it’s always a resounding success when shared with friends at gatherings. It consistently receives rave reviews, proving that a gluten-free pizza can be every bit as satisfying and flavorful as its traditional counterpart!
The secret to this recipe’s phenomenal success lies largely with King Arthur Gluten-Free Pizza Flour. This specialized blend allows for the creation of a truly magnificent thick and cheesy crust that boasts an incredible contrast: wonderfully crisp and golden on the outside, yet incredibly light and pillowy soft on the inside. Once the crust is perfected, it’s generously topped with a delectable combination of gooey, perfectly melted cheese, a rich and savory tomato sauce, and crispy pepperoni for that ultimate texture and flavor punch. The result is an absolutely irresistible meal that will quickly become a household favorite.
Featured Comment
From Sherri: “Loved this recipe! I made it completely dairy free and it came out amazing. I used Daiya cheeses, so yummy!”
27 more comments
Table of Contents
- Erin’s Ultimate Gluten-Free Detroit-Style Pizza Guide
- Essential Ingredients for Your Gluten-Free Detroit-Style Pizza
- Step-by-Step Guide: Crafting Your Gluten-Free Detroit-Style Pizza
- Make-Ahead, Storage, & Freezing Tips
- Can This Gluten-Free Detroit-Style Pizza Be Made Dairy-Free?
- Why Pre-Bake the Crust Before Adding Toppings?
- Can I Customize My Gluten-Free Detroit-Style Pizza Toppings?
- More Delicious Recipes Using King Arthur Gluten-Free Flour
- Printable Gluten-Free Detroit-Style Pizza Recipe Card
Essential Ingredients for Your Gluten-Free Detroit-Style Pizza
Creating this outstanding gluten-free Detroit-style pizza starts with selecting the right ingredients. Here, I’ll provide detailed notes on some of the key components, explaining their role and why specific choices are recommended. For precise measurements, be sure to reference the full recipe card further down the page.
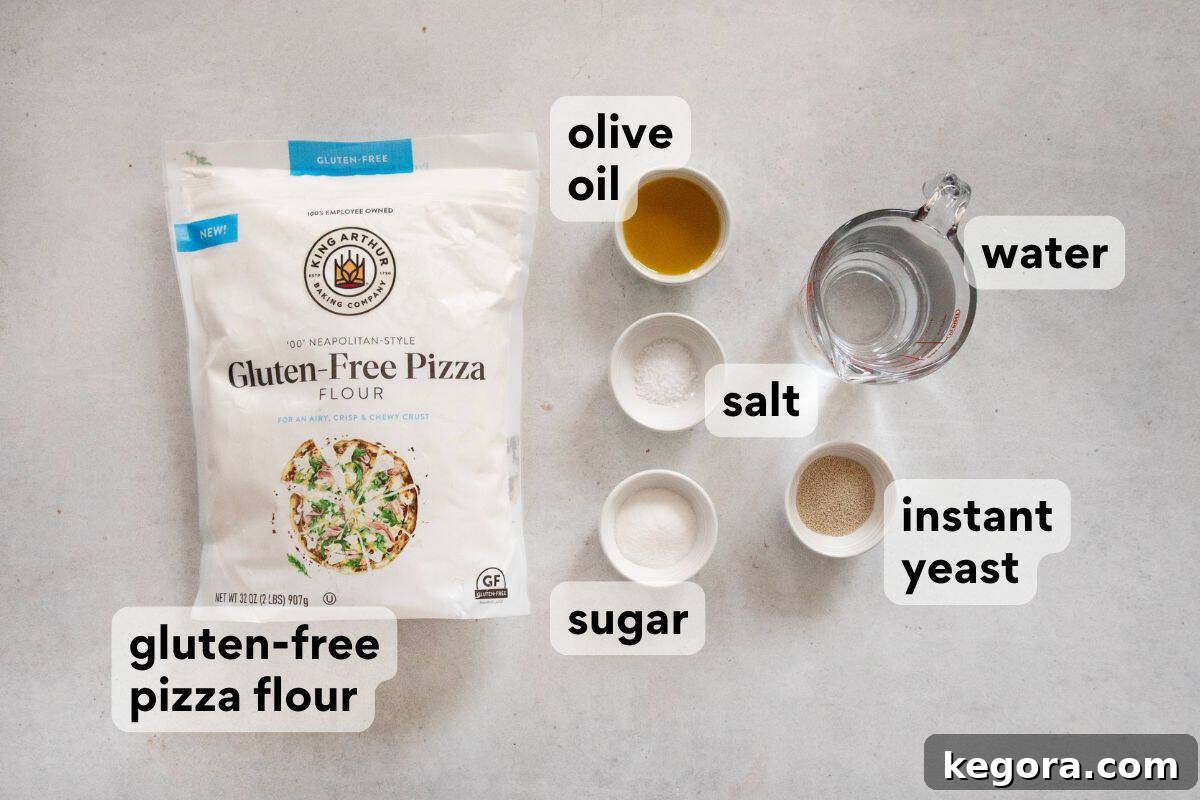
- Gluten-Free Pizza Flour: This is arguably the most critical ingredient for our recipe. The key to achieving that perfectly crisp, yet airy and tender crust is using King Arthur Gluten-Free Pizza Flour. Unlike many all-purpose gluten-free blends, this flour is specifically formulated for pizza, providing the ideal elasticity and structure needed for a robust and flavorful crust that holds up beautifully to toppings. Attempting to substitute with other gluten-free flour blends will likely result in a different, and less desirable, texture.
- Instant Yeast: Our crust relies on instant yeast to achieve its impressive rise and signature pillowy texture. Instant yeast is a fantastic choice for home bakers because it can be mixed directly into the dry ingredients without needing to be proofed in warm water first. This simplifies the dough-making process, making it quicker and more convenient. I personally prefer the reliability and consistent results of Saf instant yeast.
- Granulated Sugar: While a small amount, sugar plays a vital role. It acts as food for the yeast, helping to activate it and encourage a vigorous rise. Additionally, sugar contributes to the overall flavor balance of the crust and aids in browning, giving our pizza that beautiful golden hue.
- Kosher Salt: Salt is essential not only for flavor enhancement but also for controlling yeast activity and strengthening the gluten-free flour’s structure, contributing to a better dough consistency and final crust texture.
- Water: The liquid component, water, hydrates the flour and yeast, allowing the dough to form. The precise amount is crucial for the right dough consistency, ensuring it’s neither too sticky nor too dry.
- Olive Oil: Extra virgin olive oil is a cornerstone of this recipe. It infuses the crust with a rich, aromatic flavor and contributes significantly to the desirable texture. The oil helps keep the interior of the crust tender and soft, while also promoting a wonderfully crisp exterior, especially where it meets the hot pan. You’ll need some for the dough itself and an additional generous amount for oiling the pizza pan.
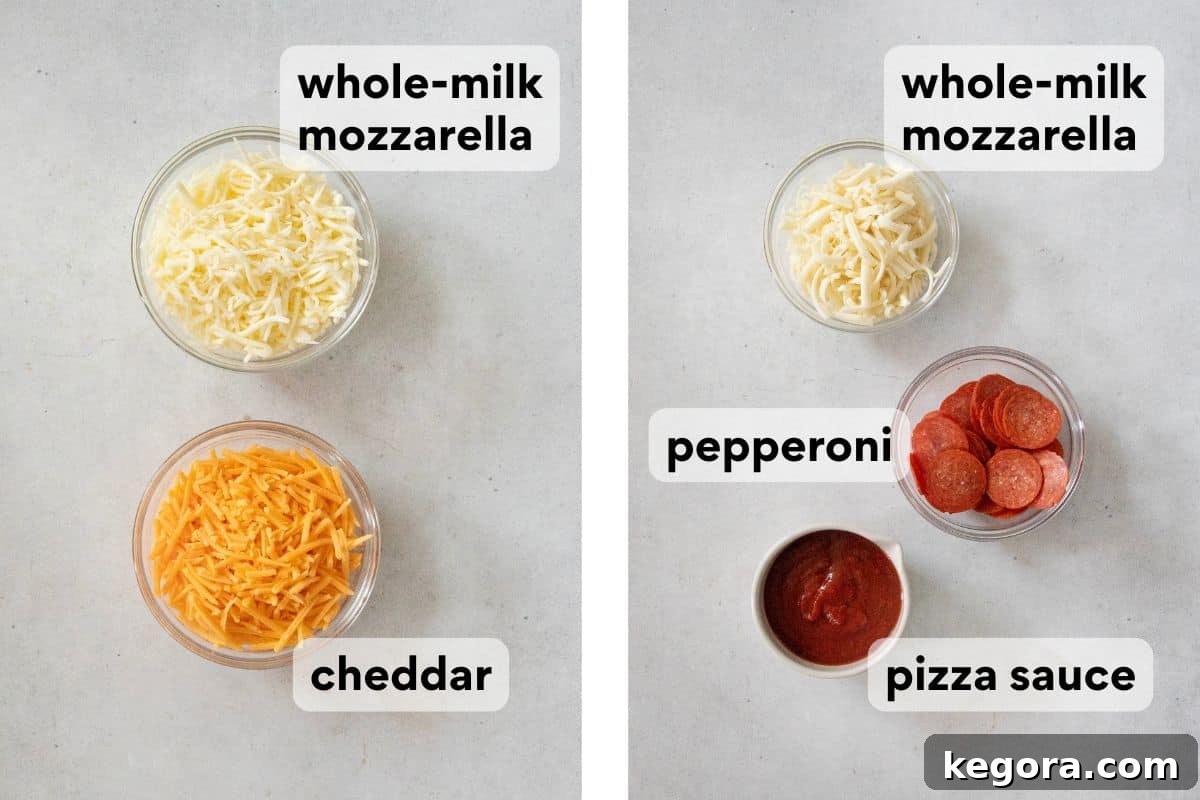
- Pre-Shredded Cheese (for the Frico Crust): While I typically advocate for shredding cheese fresh, for the signature crispy, caramelized “frico” crust around the edges of a Detroit-style pizza, pre-shredded mozzarella and cheddar are surprisingly superior. The anti-caking agents found in pre-shredded cheese actually help achieve more even melting and browning, creating that distinct, deliciously crunchy crust along the pan’s perimeter. This specific characteristic is essential for authentic Detroit-style pizza.
- Hand-Grated Low-Moisture Whole-Milk Mozzarella (for interior): For the interior of the pizza, where you want that classic gooey, stretchy cheese pull, hand-grated low-moisture mozzarella is excellent. It melts beautifully without releasing too much moisture. You could use more pre-shredded cheese here too, if preferred, but hand-grated often offers a slightly creamier melt.
- Pizza Sauce: The layering of sauce on top of the cheese is a hallmark feature of Detroit-style pizza. This technique isn’t just for aesthetics; it plays a practical role in keeping the crust crisp and preventing it from becoming soggy under the sauce. It also allows the vibrant, tangy flavor of the sauce to shine through with every bite.
- Thinly Sliced Pepperoni: Crispy, salty pepperoni is a classic topping for Detroit-style pizza. When baked, the edges curl and crisp up, releasing savory oils that infuse the pizza with incredible flavor. Feel free to adjust the quantity to your liking or omit it for a vegetarian option.
Step-by-Step Guide: Crafting Your Gluten-Free Detroit-Style Pizza
Making this gluten-free Detroit-style pizza is a rewarding experience, and following these steps will ensure a perfect result every time. This overview provides the essential actions; for the complete detailed instructions, including exact timings and quantities, please refer to the printable recipe card below!
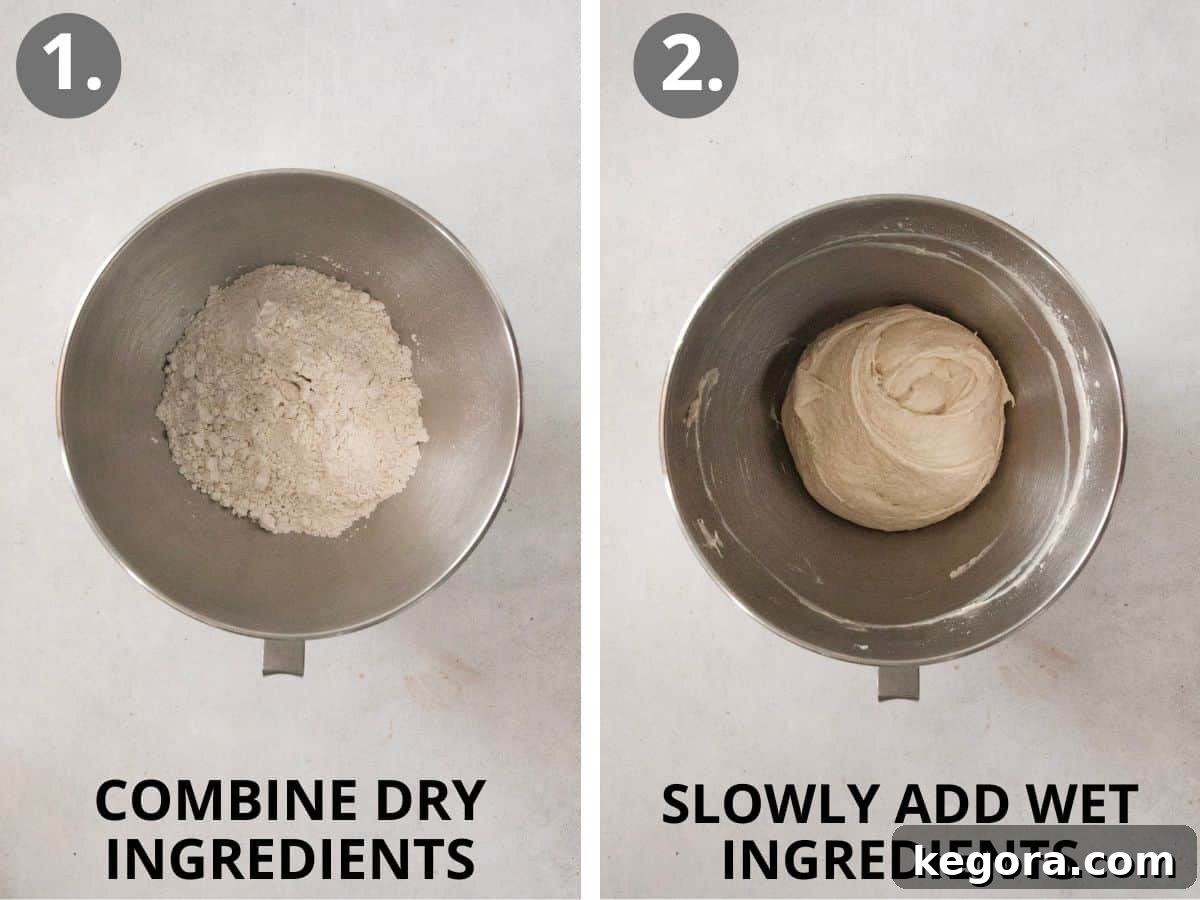
- Prepare the Dough in a Stand Mixer: Begin by combining all the dry ingredients – the specialized gluten-free pizza flour, sugar, instant yeast, and kosher salt – in the bowl of a stand mixer. Use the paddle attachment to ensure these ingredients are thoroughly mixed and evenly distributed. This initial step is important for consistent dough development and yeast activation.
- Combine Wet Ingredients and Mix: With the mixer running on low speed, gradually add the water and olive oil to the dry mixture. Once all the wet ingredients are incorporated, increase the mixer speed to medium-high and beat the dough for a full 5 minutes. The dough will have a unique consistency, resembling thick cookie dough rather than a traditional elastic bread dough. Don’t be alarmed by this; it’s exactly what we’re aiming for with gluten-free pizza dough. During mixing, use an oiled rubber spatula to periodically scrape down the bottom and sides of the bowl, ensuring all ingredients are well-combined and no dry pockets remain.
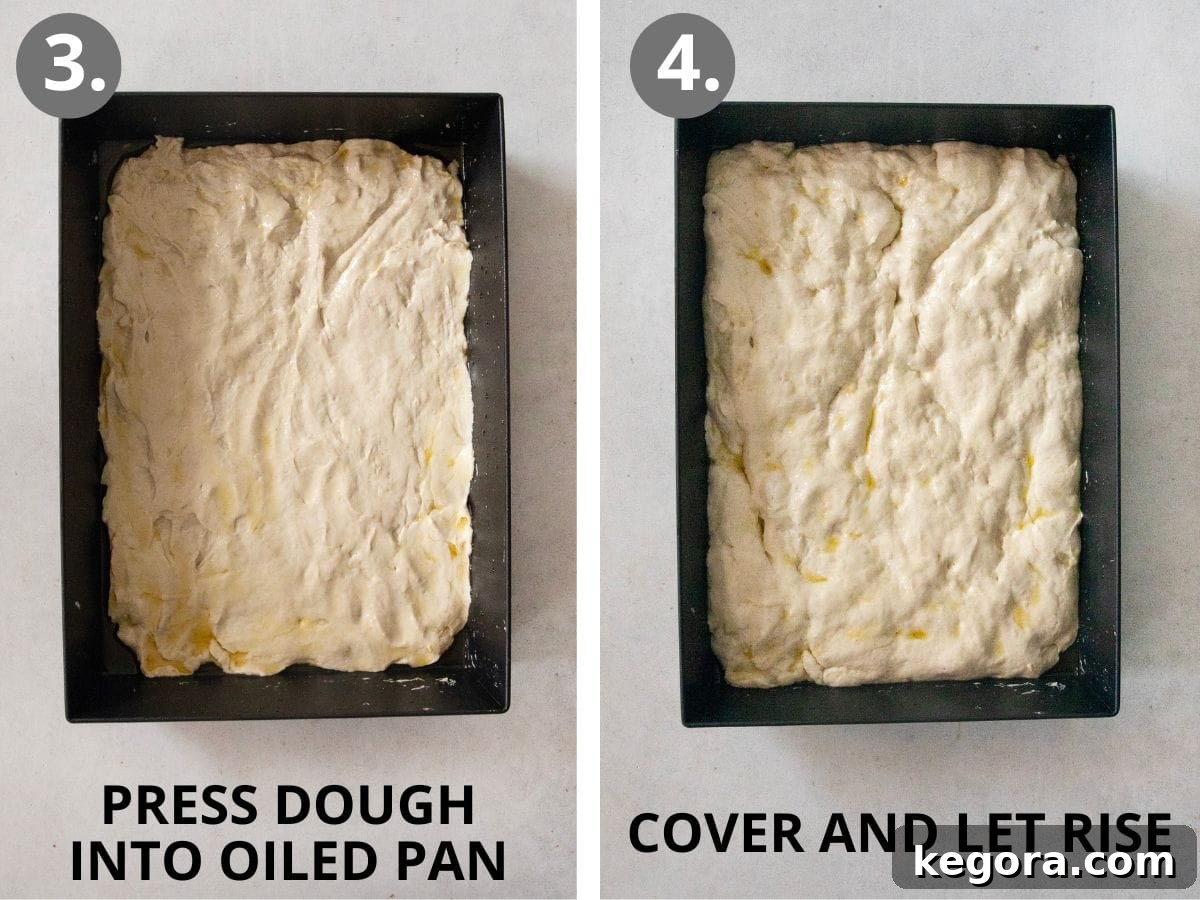
- Prepare the Pan and Press the Dough: Take your 10×14-inch Detroit-style pizza pan and generously oil the bottom and sides. This ample oiling is crucial for achieving the prized crispy, caramelized crust edges. Next, transfer the dough into the oiled pan and gently press it out into an even layer, ensuring it reaches all the way to the edges and corners. A well-distributed dough layer will ensure uniform cooking and that desirable rectangular shape.
- Cover and Allow to Rise: Once the dough is pressed into the pan, cover it tightly with plastic wrap. This prevents the dough from drying out during the rising process. Allow the dough to rise in a warm spot for approximately 90-120 minutes. This rising time allows the yeast to work its magic, developing flavor and creating that essential airy texture. About 30 minutes before the rising time is complete, place a pizza steel or stone in your oven and preheat the oven to a high temperature of 450°F (230°C). The preheated steel will provide intense, even heat from below, crucial for a perfectly crisp crust.
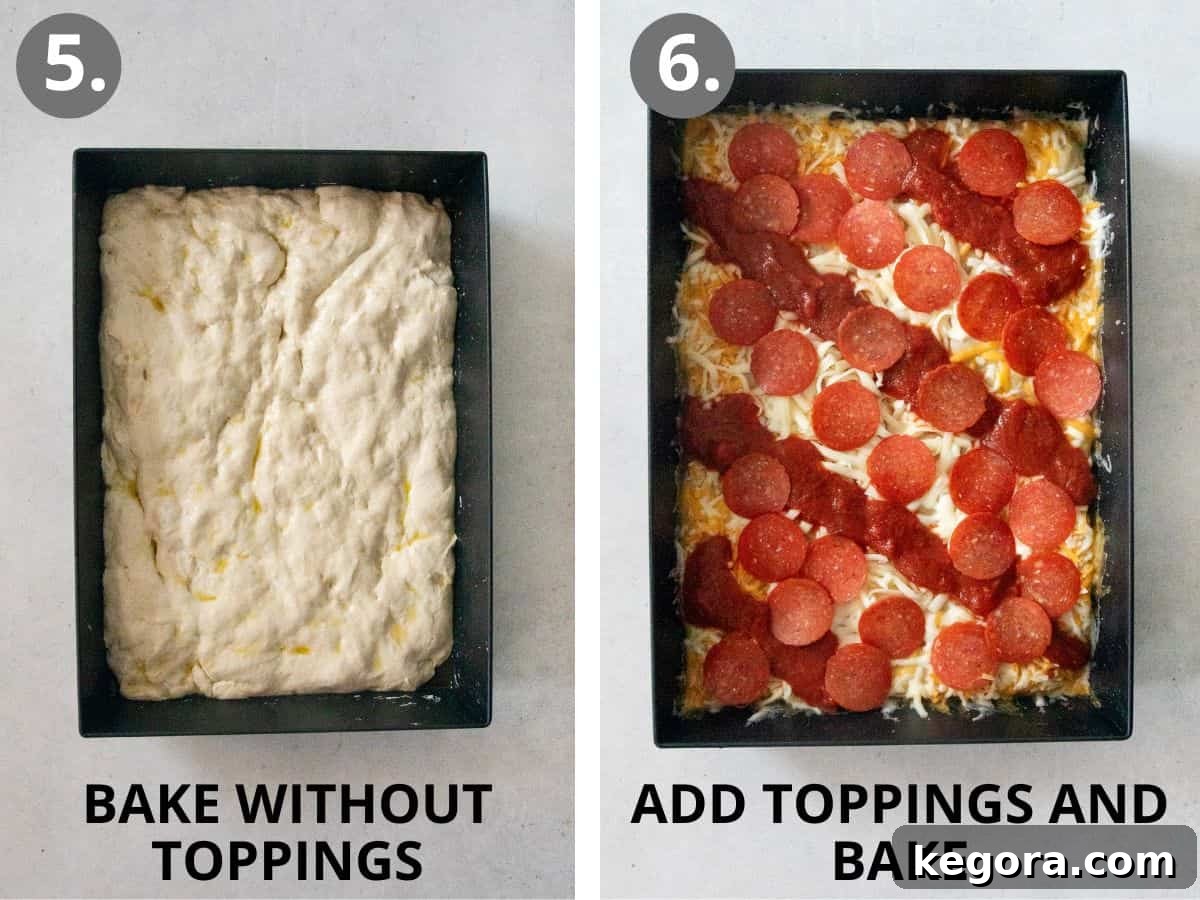
Pre-Bake the Crust Before Toppings: Carefully slide the Detroit-style pizza pan, with the risen dough, directly onto the preheated pizza steel in the oven. Bake the crust *without* any toppings for 10 minutes. This critical pre-baking step sets the crust, creating a firm foundation and preventing it from becoming soggy once the toppings are added. While the crust bakes, mix together your pre-shredded mozzarella and cheddar cheese. Once the partially baked dough comes out of the oven, immediately spread this mixed pre-shredded cheese generously around the perimeter of the pan, pressing it firmly into the sides. This is how you create the iconic frico crust!
Add Toppings and Final Bake: Now, sprinkle the hand-grated mozzarella evenly over the interior of the pizza, inside the cheese border. Then, in true Detroit-style fashion, pour lines of your favorite pizza sauce over the cheese. Finally, spread the thinly sliced pepperoni evenly across the entire pizza surface. Return the pizza pan to the oven, placing it back on the pizza steel. Bake for another 15-18 minutes, or until the cheese along the edges is beautifully caramelized and deeply golden brown, and the interior cheese is bubbly and melted. The irresistible aroma will fill your kitchen! Once baked, remove the pizza from the oven and allow it to cool for 5-10 minutes before slicing. This resting period allows the cheese to set slightly, making for cleaner cuts and preventing toppings from sliding off. Enjoy your magnificent homemade gluten-free Detroit-style pizza!
Make-Ahead, Storage, & Freezing Tips
Planning ahead or dealing with delicious leftovers is easy with this gluten-free Detroit-style pizza. Here’s how to manage your pizza for maximum enjoyment and convenience:
To Make-Ahead: The pizza dough can be prepared up to 1 day in advance. After pressing the dough into the oiled pan, simply cover it tightly with plastic wrap and refrigerate it. The slow, cold fermentation will actually enhance the flavor of the crust. The next day, remove the pan from the fridge and let it sit at room temperature for approximately 1 hour to allow the dough to warm up and complete its final rise before baking as directed.
To Store Leftovers: Any leftover pizza slices can be stored in an airtight container in the refrigerator for up to 3 days. This ensures the pizza retains its freshness and prevents it from drying out.
To Freeze for Later: This pizza freezes exceptionally well, making it perfect for meal prep or quick weeknight dinners. Wrap individual leftover slices tightly in plastic wrap, then an additional layer of aluminum foil, or store them in a freezer-safe airtight container. Freeze for up to 3 months. When you’re ready to enjoy, reheat the frozen slices in an oven preheated to 375°F (190°C) until heated through and the crust becomes crispy again, typically about 10-15 minutes. This method helps restore much of the original texture.
You might also enjoy exploring other gluten-free delights, such as this comforting dairy-free mac & cheese, perfect for a cozy meal.
Can This Gluten-Free Detroit-Style Pizza Be Made Dairy-Free?
Yes, you can certainly adapt this gluten-free Detroit-style pizza to be dairy-free, but with a few important considerations, especially regarding the cheese. You can absolutely use dairy-free cheese alternatives to top the pizza, spreading them generously over the sauce and crust. However, I would not recommend adding dairy-free cheese to form the “frico” crust along the pan’s perimeter. Dairy-free cheeses tend to melt and brown quite differently from traditional dairy cheeses; they often don’t achieve the same crispy, caramelized effect, which is a signature characteristic of authentic Detroit-style pizza. The texture of the frico might be significantly impacted, resulting in a less satisfying crust.
Why Pre-Bake the Crust Before Adding Toppings?
Pre-baking the dough, also known as blind baking, is a crucial step in achieving the perfect gluten-free Detroit-style pizza. This initial bake serves several vital purposes. First, it helps to set the crust and create a firm, sturdy base before the weight and moisture of the toppings are introduced. More importantly, it prevents the dough from becoming soggy, which can be a common issue with deep-dish pizzas or those with wetter toppings. By giving the crust a head start, you ensure it develops that wonderfully crisp and airy interior texture we’re aiming for. This step is key for moisture control and guarantees a delightful bite with every slice.
Can I Customize My Gluten-Free Detroit-Style Pizza Toppings?
Absolutely! While classic Detroit-style pizza often features pepperoni, one of the joys of making pizza at home is the freedom to customize. Feel free to unleash your creativity with a wide array of toppings. You can easily keep the pepperoni, remove it entirely for a vegetarian option, or add different kinds of cooked meats like sausage, bacon, or chicken. For vegetable lovers, consider adding thinly sliced mushrooms, bell peppers, onions, olives, or spinach. Fresh herbs like basil or oregano added after baking can also elevate the flavors. However, just be mindful of adding toppings with excessive moisture, such as fresh tomatoes or certain vegetables, as they could potentially impact the pizza’s overall texture and lead to a slightly less crisp crust. If using watery vegetables, consider pre-sautéing them to remove excess moisture.
More Delicious Recipes Using King Arthur Gluten-Free Flour
If you’ve loved working with King Arthur Gluten-Free Pizza Flour, you’ll be delighted to know its versatility extends to many other fantastic baked goods. This brand’s commitment to quality makes gluten-free baking a joy. Explore these other wonderful recipes that utilize King Arthur Gluten-Free Flour blends:
- Easy Soft Gluten-Free Dinner Rolls
- Pillowy Gluten-Free Naan Bread
- Buttery Gluten-Free Crescent Rolls
- Spiced Gluten-Free Hot Cross Buns
- Irresistible Gluten-Free Cinnamon Rolls
- Sticky, Sweet Gluten-Free Monkey Bread
- Fluffy Gluten-Free Sandwich Bread
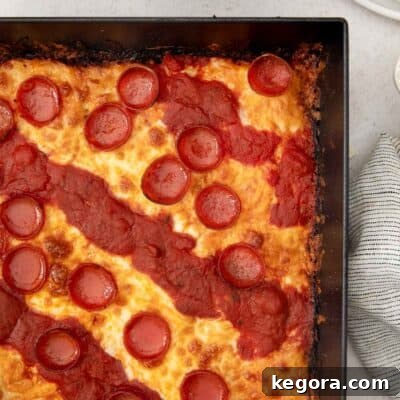
Gluten-Free Detroit-Style Pizza
Thanks to the exceptional quality and performance of King Arthur Gluten-Free Pizza Flour, this truly is the BEST gluten-free pizza I’ve ever had the pleasure of making or eating – it’s a game-changer for gluten-free pizza lovers!
IMPORTANT NOTE: For optimal results and the signature texture, this gluten-free Detroit-style pizza absolutely needs to be made with King Arthur Gluten-Free Pizza Flour. Standard gluten-free measure-for-measure flour blends will not provide the same structural integrity or desirable crust characteristics in this specific recipe.
Comments
Equipment
-
Detroit-Style Pizza Pan
-
King Arthur Gluten-Free Pizza Flour
-
Pizza Steel or Stone
Ingredients
Pizza Dough
- ▢ 1¾ cups (262g) King Arthur Gluten-Free Pizza Flour
- ▢ 1 tablespoon granulated sugar
- ▢ 2¼ teaspoons instant yeast
- ▢ 1 teaspoon kosher salt
- ▢ 1¼ cups (300ml) water
- ▢ 2 tablespoons olive oil plus more for generously oiling the pan
Cheese Crust (for Frico Edges)
- ▢ 4 ounces pre-shredded low-moisture whole-milk mozzarella
- ▢ 4 ounces pre-shredded cheddar cheese
Toppings
- ▢ 6 ounces hand-grated low-moisture whole-milk mozzarella (for the interior of the pizza)
- ▢ ¾ cup pizza sauce
- ▢ 3 ounces thinly sliced pepperoni
Instructions
-
In the bowl of a stand mixer fitted with the paddle attachment, add the gluten-free pizza flour, granulated sugar, instant yeast, and kosher salt. Mix on low speed to thoroughly combine the dry ingredients.
-
With the mixer still running on low, slowly pour in the water and 2 tablespoons of olive oil. Once incorporated, increase the speed to medium-high and mix continuously for 5 minutes. The dough will have a thick, cookie-dough-like consistency, which is perfectly normal for this gluten-free recipe.
-
Using an oiled rubber spatula, scrape down any dough clinging to the bottom and sides of the bowl. Mix again briefly to ensure all ingredients are uniformly combined.
-
Generously oil the bottom and sides of a 10×14-inch Detroit-style pizza pan. This heavy oiling is crucial for the crispy edges. Transfer the dough to the pan and press it into an even layer, making sure it extends all the way to the edges and corners.
-
Cover the pan tightly with plastic wrap and let the dough rise in a warm place for 90-120 minutes, or until visibly puffy.
-
Approximately 30 minutes before the dough’s rising time is complete, place a pizza steel or stone in your oven and preheat the oven to 450°F (230°C). This ensures the steel is piping hot for a crispy crust.
-
Carefully slide the pizza pan (with the risen dough) directly onto the preheated pizza steel and bake (without any toppings) for 10 minutes. This pre-baking step is vital for a non-soggy, crisp crust.
-
While the crust is pre-baking, combine the 4 ounces of pre-shredded mozzarella and 4 ounces of pre-shredded cheddar cheese in a bowl. Once the crust comes out of the oven, immediately spread this mixed cheese around the perimeter of the dough, pressing it firmly into the sides of the pan to create the “frico” crust.
-
Next, sprinkle the 6 ounces of hand-grated mozzarella cheese evenly over the inside of the pizza. Pour distinctive lines of the tomato sauce over the cheese. Finally, arrange the thinly sliced pepperoni evenly over the entire pizza.
-
Return the pizza to the oven (on the pizza steel) and bake for another 15-18 minutes, or until the edges are beautifully caramelized and deeply golden, and the interior cheese is golden and bubbly.
-
Remove the finished pizza from the oven and let it cool in the pan for 5-10 minutes before carefully removing, slicing, and serving. This resting period allows the cheese to set and makes for easier, cleaner slices. Enjoy!
Notes
Detroit-Style Pan Recommendation: For authentic Detroit-style pizza characteristics, particularly the deep-dish shape and caramelized edges, I highly recommend using a dedicated Detroit-style pizza pan. The specific heat distribution and non-stick properties of these pans are key.
Dairy-Free Adaptation: While you can successfully use dairy-free cheese alternatives for topping the pizza, I do not advise using them for the perimeter “frico” crust. Dairy-free cheeses typically melt and brown differently than dairy cheeses, which could negatively impact the signature caramelized texture of the crust edges.
Make-Ahead Dough Instructions: The pizza dough is versatile! You can prepare it up to 1 day in advance. After pressing it into the oiled pan, simply cover it with plastic wrap and refrigerate. On baking day, allow it to rise at room temperature for about 1 hour before proceeding with the baking steps.
Storing Leftovers: Any remaining slices of this delicious pizza can be stored in an airtight container in the fridge for up to 3 days. Ensure it’s sealed well to maintain freshness.
Freezing for Future Enjoyment: This pizza freezes beautifully! Wrap individual leftovers tightly in plastic wrap, then foil, or place them in an airtight freezer-safe container. It can be frozen for up to 3 months. To reheat, bake in an oven at 375°F (190°C) for 10-15 minutes, or until thoroughly heated and crispy again.