
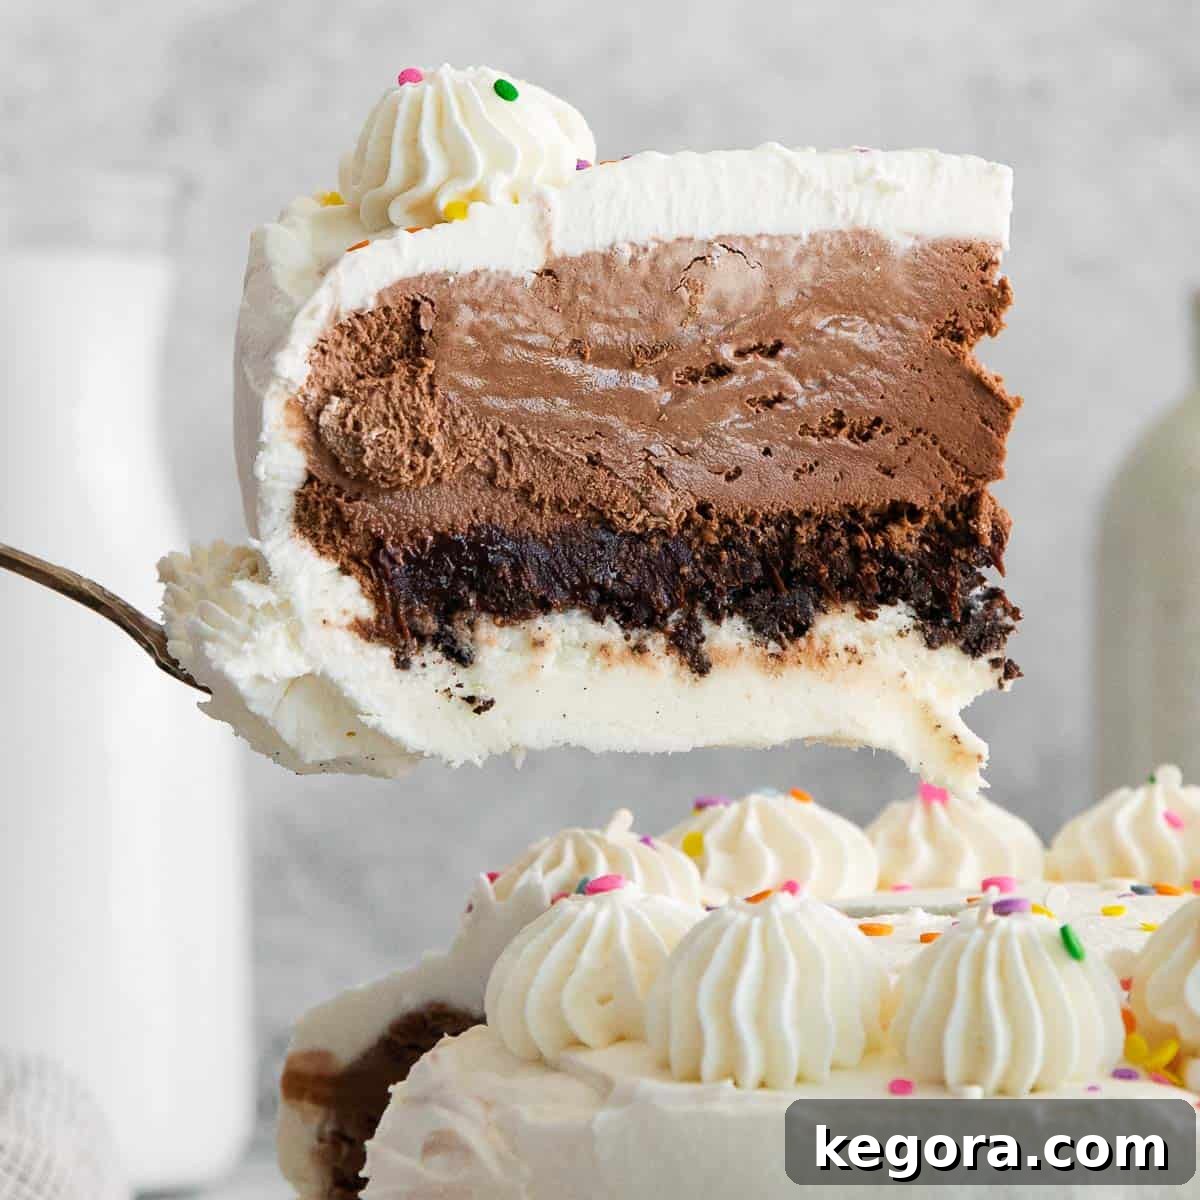
The Ultimate Homemade Gluten-Free Ice Cream Cake: A Decadent Delight for All
Prepare to be amazed at how incredibly simple it is to craft a show-stopping homemade gluten-free ice cream cake! This recipe lets you combine your favorite ice cream flavors into a delightful frozen dessert perfect for any celebration, especially during the warm summer months. It’s a nostalgic treat that promises to bring smiles to faces, and the best part? No one will ever guess it’s gluten-free!
Imagine layers of rich, creamy ice cream, complemented by a luscious chocolate fudge, and a satisfyingly crunchy cookie crust – all topped with a cloud of homemade whipped cream. This isn’t just a dessert; it’s an experience, echoing the beloved ice cream cakes of childhood, but reimagined to be safe and delicious for those with gluten sensitivities.
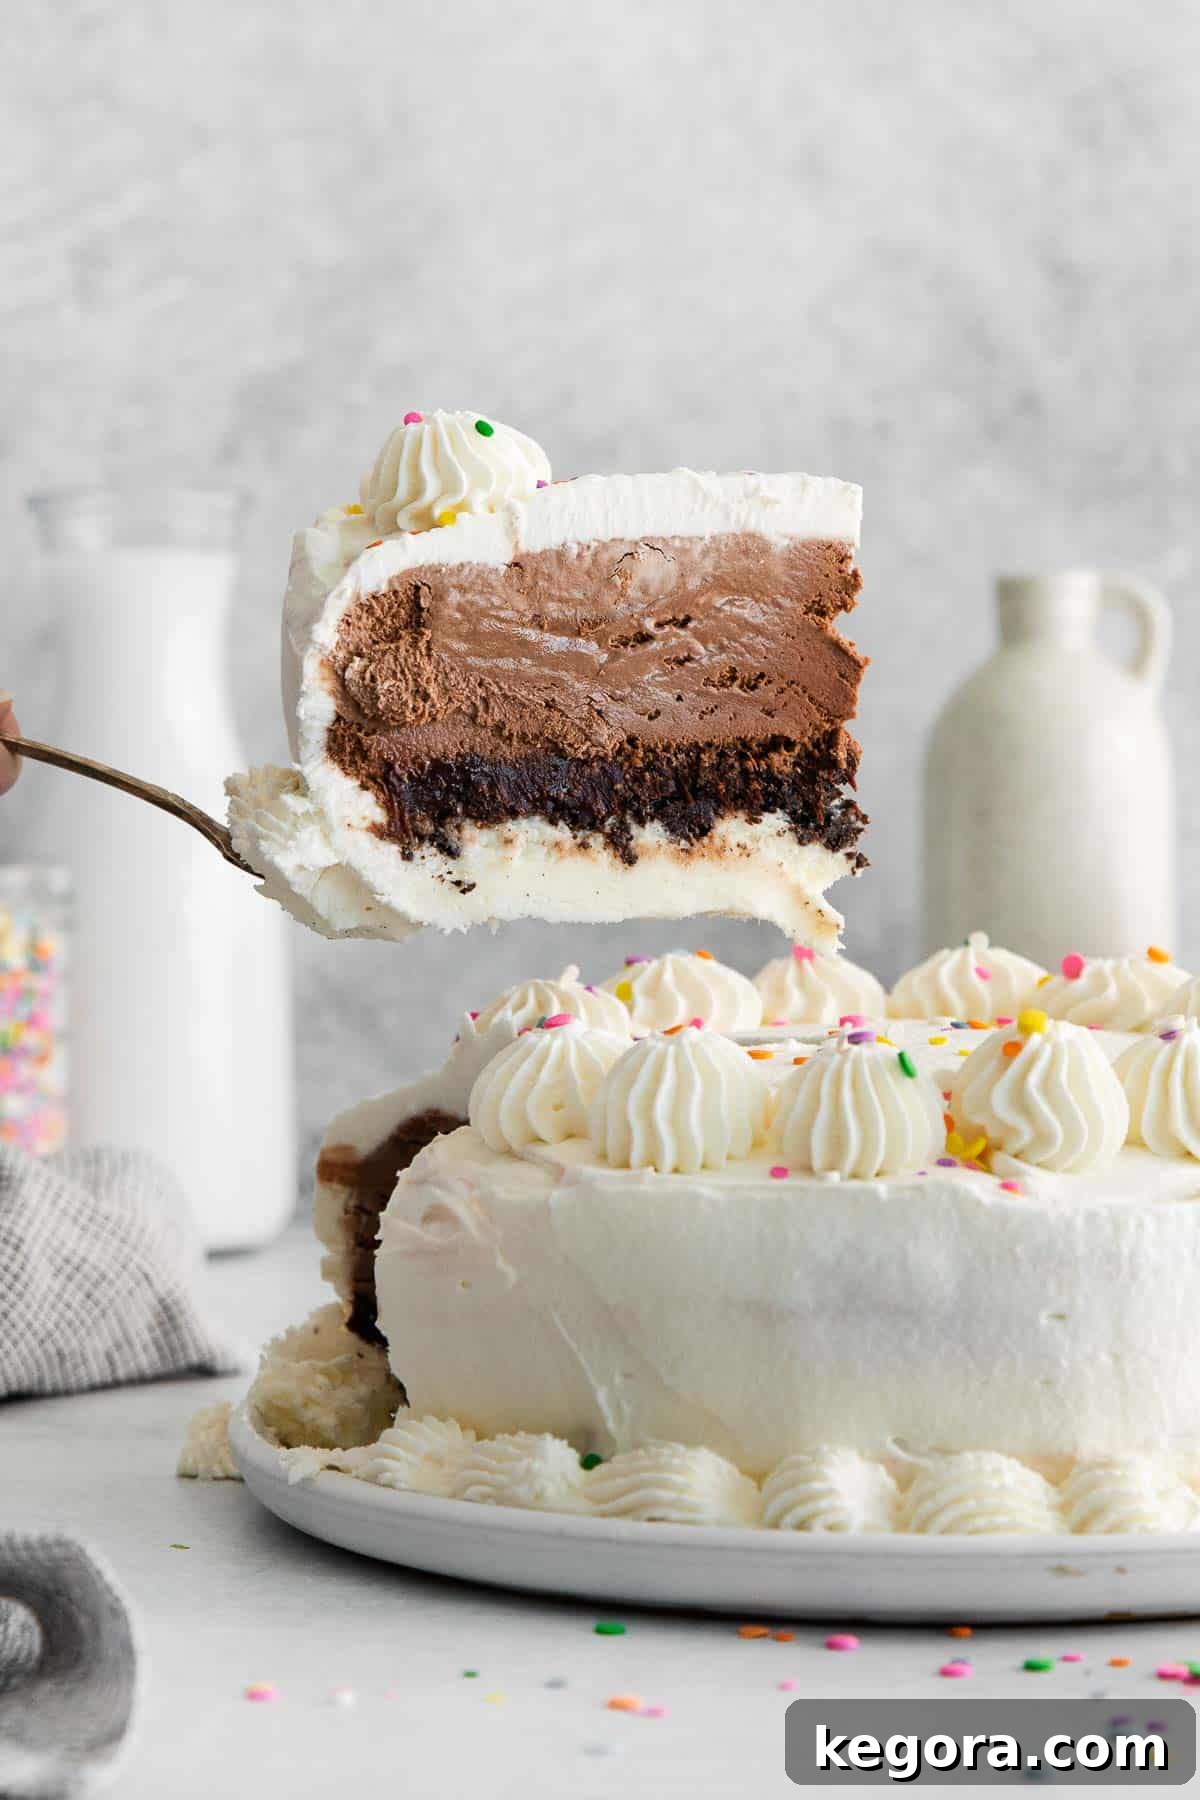
There’s a magical quality to ice cream cake that transcends age, instantly transporting you back to carefree childhood parties. It’s the perfect blend of cold, sweet, and fudgy, a truly playful dessert that brings pure joy. This particular gluten-free rendition captures all that fun and indulgence, consolidating the best elements of various desserts into one impressive, celebratory package. While it looks exceptionally elaborate, the assembly process is surprisingly straightforward, relying more on chilling time than complex baking techniques.
Forget the stress of baking a traditional cake from scratch or perfecting a complicated frosting. This recipe streamlines the process, focusing on assembling delicious, pre-made components into a layered masterpiece. The star layers—the fudgy chocolate and crispy cookie crunch—provide the perfect textural contrast to the smooth ice cream, while the light, airy whipped cream topping adds an elegant finishing touch. It’s the ideal dessert for birthdays, anniversaries, or simply a special weekend treat. Once you serve this, be prepared for rave reviews!
If you’re looking to expand your repertoire of impressive gluten-free desserts, consider trying a gluten-free chocolate mousse cake, a classic gluten-free vanilla cake, a silky gluten-free cheesecake, or a festive gluten-free birthday cake. You might also find our article on whether Oreos are gluten-free helpful for understanding ingredient choices.
Why You’ll Fall in Love with This Recipe
This gluten-free ice cream cake isn’t just another dessert; it’s a testament to how incredible gluten-free baking can be. Here are just a few reasons why this recipe will become a treasured favorite:
- Ideal for Any Celebration: Whether it’s a birthday, holiday, or special occasion, this cake brings a festive flair that guests will adore. It’s a wonderful way to ensure everyone, including those with dietary restrictions, can indulge in a truly special treat.
- Effortlessly Impressive: Despite its stunning appearance with distinct layers, this cake is remarkably easy to assemble, requiring minimal actual “baking” time. It’s perfect for dazzling your guests without spending hours in the kitchen.
- The Perfect Cool-Down Treat: Cold, creamy, and wonderfully fudgy, it’s the ultimate refreshing dessert for summer gatherings or any time you crave a chilly indulgence.
- No Traditional Baking Hassles: Say goodbye to flour, leavening agents, and oven thermometers. This recipe skips the traditional cake baking entirely, making it accessible even for novice bakers.
- Customizable to Your Taste: With endless possibilities for ice cream and topping variations, you can tailor this cake to suit any preference or theme, making it truly unique every time.
For more delicious inspiration, you might enjoy these easy vanilla ice cream recipes, delightful gluten-free chocolate cupcakes, or an elegant flourless chocolate torte.
Essential Ingredients for Your Gluten-Free Ice Cream Cake
Crafting this incredible ice cream cake relies on a handful of key ingredients, each playing a crucial role in creating its irresistible flavor and texture. Here’s a detailed look at what you’ll need to make this dessert truly shine:
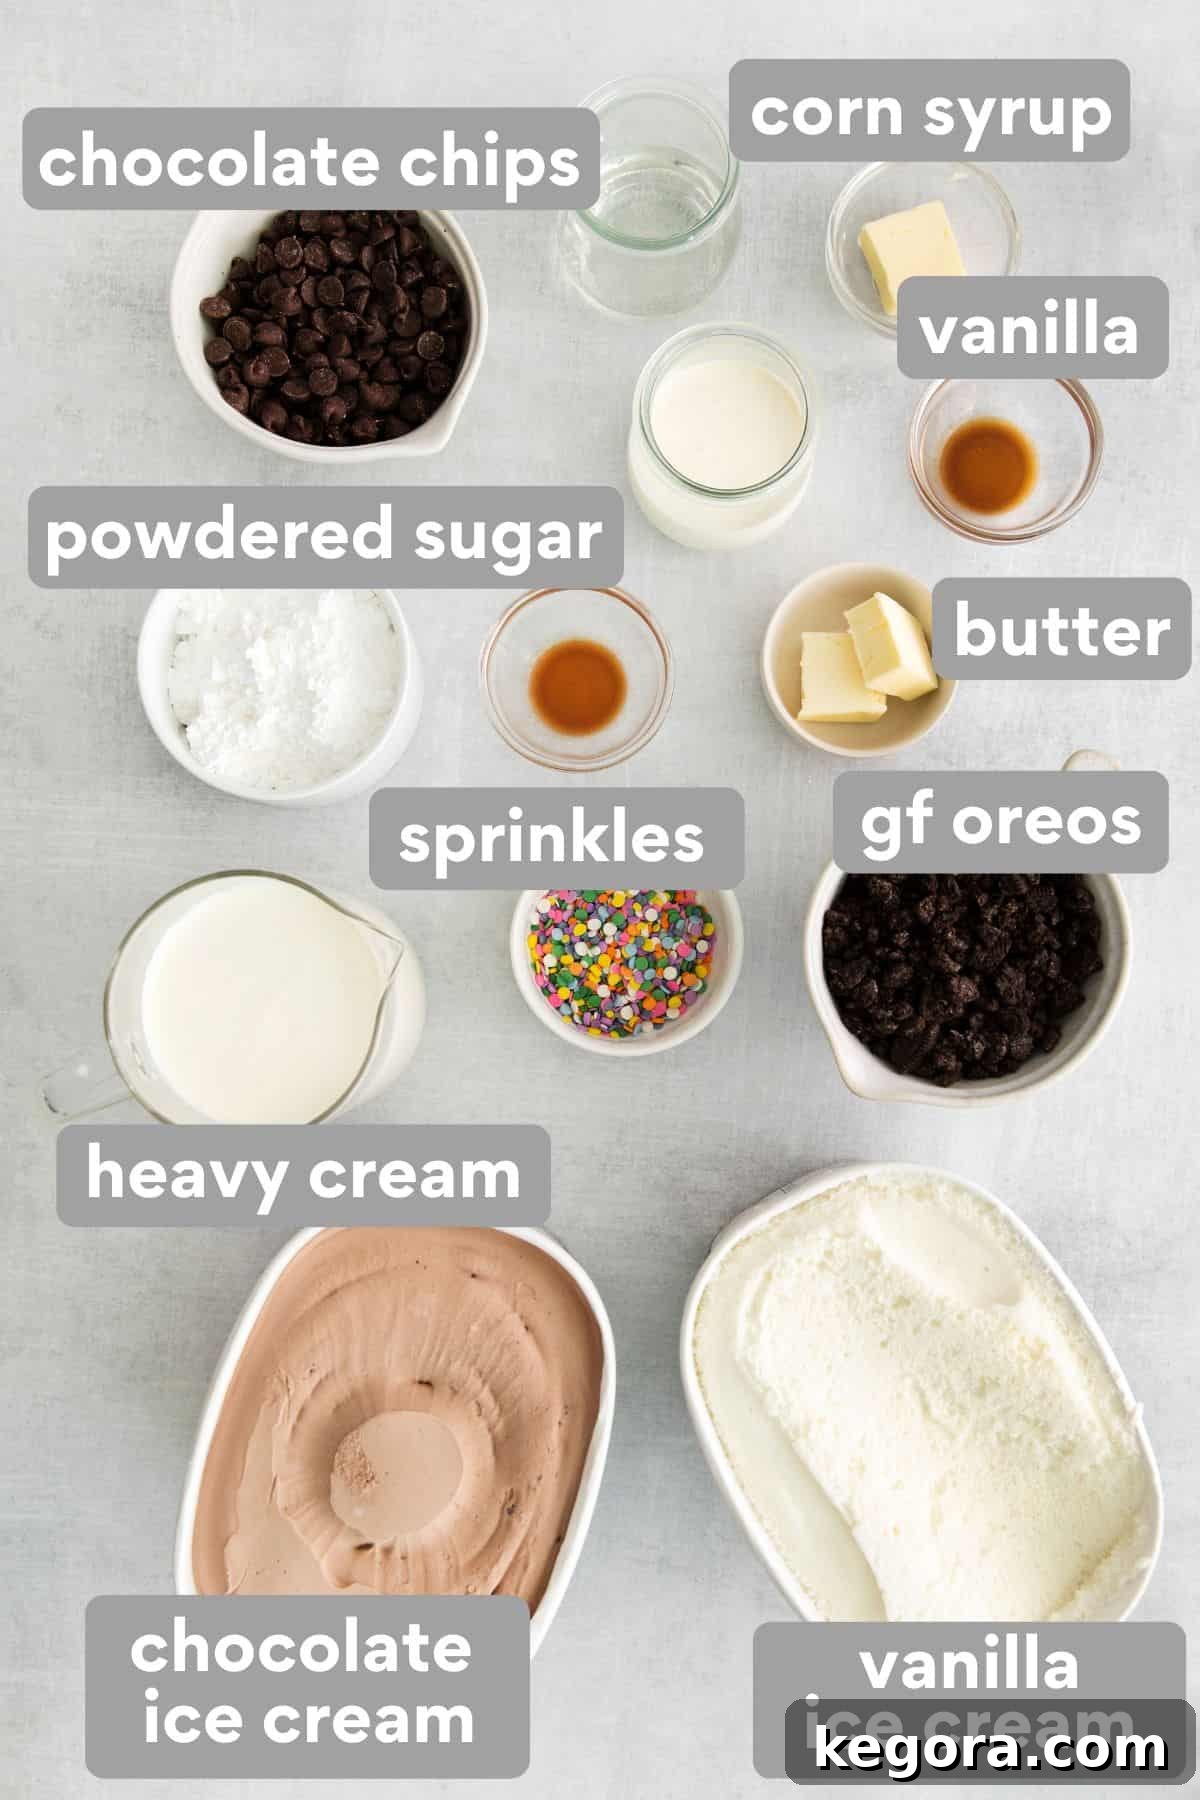
- Chocolate Chips: The quality of your chocolate chips significantly impacts the richness of the fudge layer. Opt for premium brands like Guittard or Ghirardelli for a truly luxurious and smooth chocolate sauce that elevates the entire cake.
- Light Corn Syrup: This ingredient is vital for achieving the perfect consistency in your chocolate fudge. It helps prevent crystallization, ensuring a wonderfully smooth, glossy, and pliable fudge that holds its shape without becoming brittle when frozen.
- Pure Vanilla Extract: For the fudge layer, pure vanilla extract adds a deep, aromatic complexity that complements the chocolate beautifully. Avoid imitation vanilla for the best flavor payoff.
- Powdered Sugar: Essential for a light, smooth, and fluffy homemade whipped cream. Powdered sugar (also known as confectioners’ sugar) dissolves easily, preventing a grainy texture, and often contains a touch of cornstarch that helps stabilize the whipped cream. Granulated sugar can be used in a pinch, but it won’t yield the same silky-smooth result.
- Unsalted Butter: Butter lends richness and acts as a binder, holding the gluten-free chocolate cookie crumbs together to form a sturdy and delicious crunch layer. Using unsalted butter allows you to control the overall saltiness of the cake.
- Festive Sprinkles: Sprinkles are a fun and easy way to add a pop of color and celebratory cheer to your ice cream cake. Choose colors that match your occasion or simply pick your favorites for a vibrant finish.
- Gluten-Free Chocolate Sandwich Cookies: This is a critical ingredient for the signature cookie crunch layer. It is absolutely essential to purchase certified gluten-free chocolate sandwich cookies (like gluten-free Oreos) to ensure the cake is safe for those with gluten dietary needs. Always double-check the packaging for a gluten-free label.
- Heavy Whipping Cream: Used for both the decadent chocolate fudge and the airy whipped cream topping, cold heavy whipping cream (with at least 36% milk fat) is non-negotiable for achieving rich flavors and stable textures. We highly recommend making fresh whipped cream over using store-bought alternatives like Cool Whip, as homemade provides superior taste and body.
- Gluten-Free Chocolate Ice Cream: Select your favorite brand of chocolate ice cream, ensuring it is clearly labeled as gluten-free. This layer provides a rich, classic foundation for your cake. Feel free to explore other gluten-free flavors if you wish to customize the recipe.
- Gluten-Free Vanilla Ice Cream: Just like with the chocolate, choose a high-quality vanilla ice cream that is verified gluten-free. Vanilla provides a beautiful contrast and classic flavor profile. The beauty of this recipe is its adaptability, so don’t hesitate to experiment with different gluten-free ice cream flavors like strawberry, mint, or coffee for a unique twist.
Crafting Your Incredible Gluten-Free Ice Cream Cake: Step-by-Step Guide
Making this layered ice cream cake is a delightful process that comes together easily with a little planning. Follow these detailed steps for a perfectly structured and utterly delicious dessert.
Step 1: Prepare the Crunchy Cookie Layer
The cookie crunch layer is a hallmark of classic ice cream cakes, providing a fantastic textural contrast to the smooth ice cream and fudge.
- Pro Tip: Before you begin preparing the cookie crunchies, remember to set out your chocolate ice cream (not the vanilla yet!) to soften at room temperature for about 20 minutes. This will make it much easier to spread into an even layer when it’s time to assemble the cake.
- Preheat your oven to 350°F (175°C). Line a standard baking sheet with parchment paper or a silicone baking mat to prevent sticking and ensure easy cleanup.
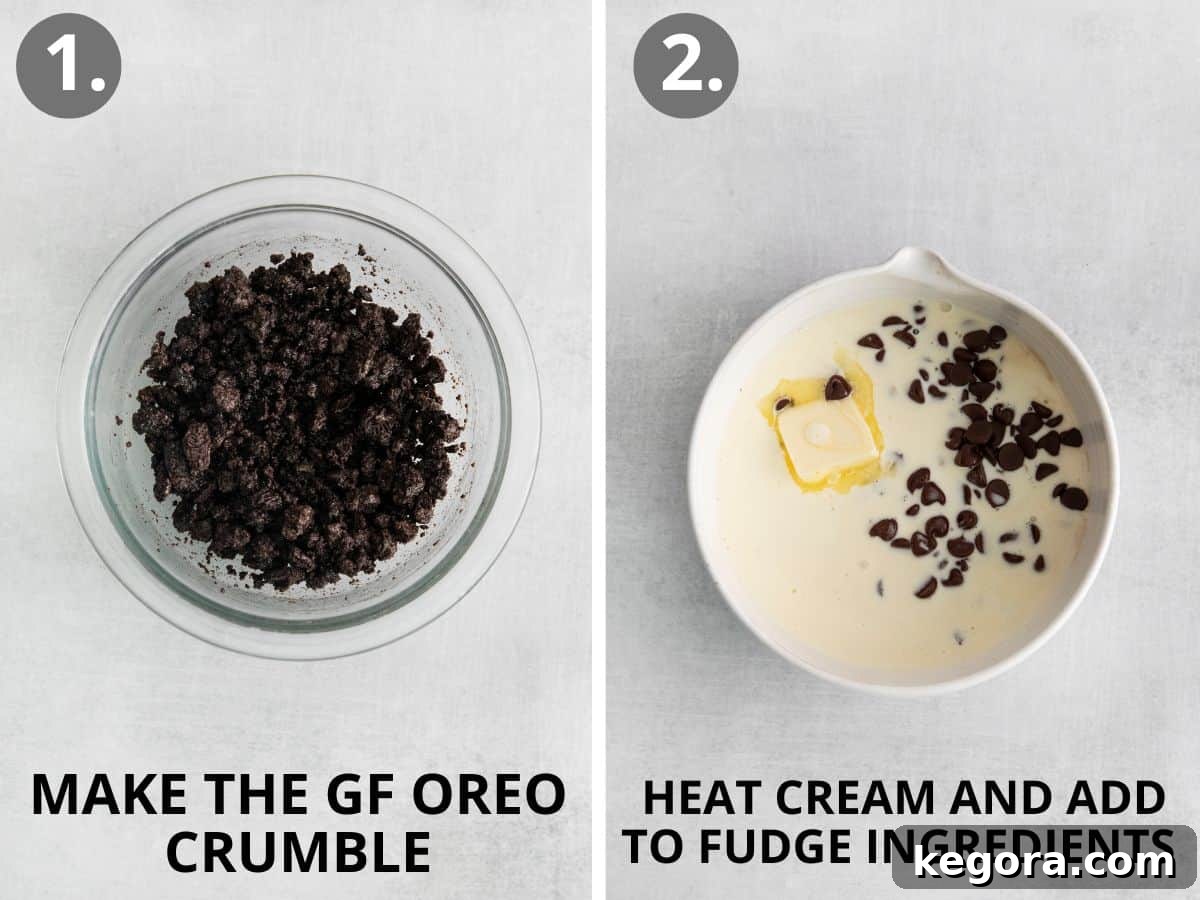
- In a small mixing bowl, combine the finely crushed gluten-free chocolate sandwich cookie crumbs with the melted butter. Stir thoroughly until the crumbs are uniformly moistened and resemble wet sand.
- Spread the buttered cookie crumbs evenly across the prepared baking sheet. Bake for 8-10 minutes. Baking the crumbs briefly helps to crisp them up and enhance their flavor, preventing them from becoming soggy in the frozen cake.
- Once baked, remove from the oven and allow the cookie crumbs to cool completely to room temperature. This is crucial for maintaining their crisp texture. Break up any larger clumps into smaller, bite-sized pieces and set aside.
This cookie crunch base can also be used for other delightful desserts, like this gluten-free Oreo cheesecake.
Step 2: Create the Rich Chocolate Fudge
This homemade chocolate fudge layer is incredibly rich and smooth, adding a decadent element to the cake that makes it truly special.
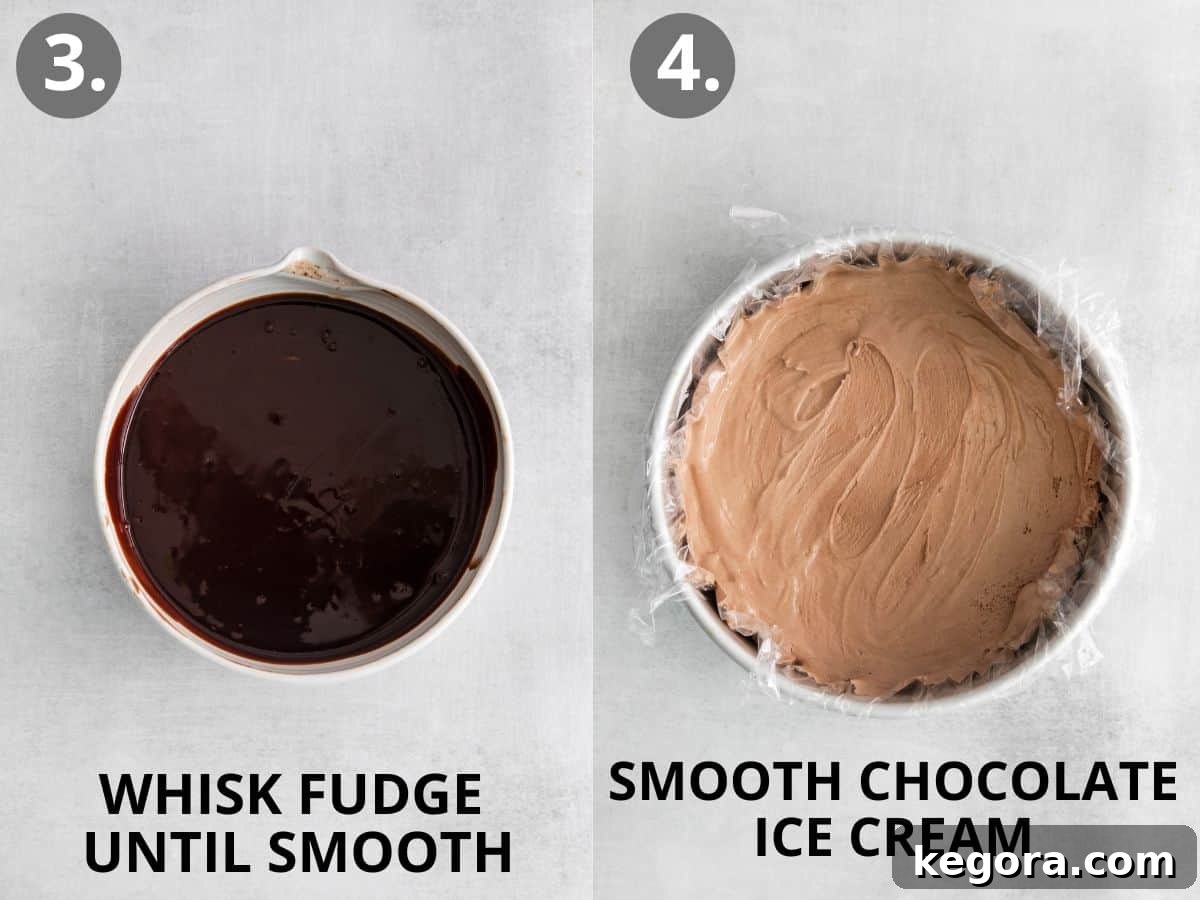
- In a medium-sized heatproof bowl, combine the chocolate chips, light corn syrup, one tablespoon of butter, vanilla extract, and salt.
- In a separate microwave-safe bowl or small saucepan, heat the heavy whipping cream until it just begins to boil, typically 45 seconds to 1 minute in the microwave. The cream should be hot enough to melt the chocolate but not aggressively boiling.
- Pour the hot cream directly over the chocolate chip mixture in the other bowl. Let it sit undisturbed for 2-3 minutes. This allows the heat from the cream to begin melting the chocolate.
- After resting, gently whisk the mixture until it is completely smooth and glossy, with no lumps of chocolate remaining. Set the finished chocolate fudge aside at room temperature to cool slightly. It should remain pourable but not scalding hot when you add it to the ice cream layer.
Step 3: Assemble Your Gluten-Free Ice Cream Cake
Now comes the fun part – layering! Precision and quick work will ensure beautiful, distinct layers.
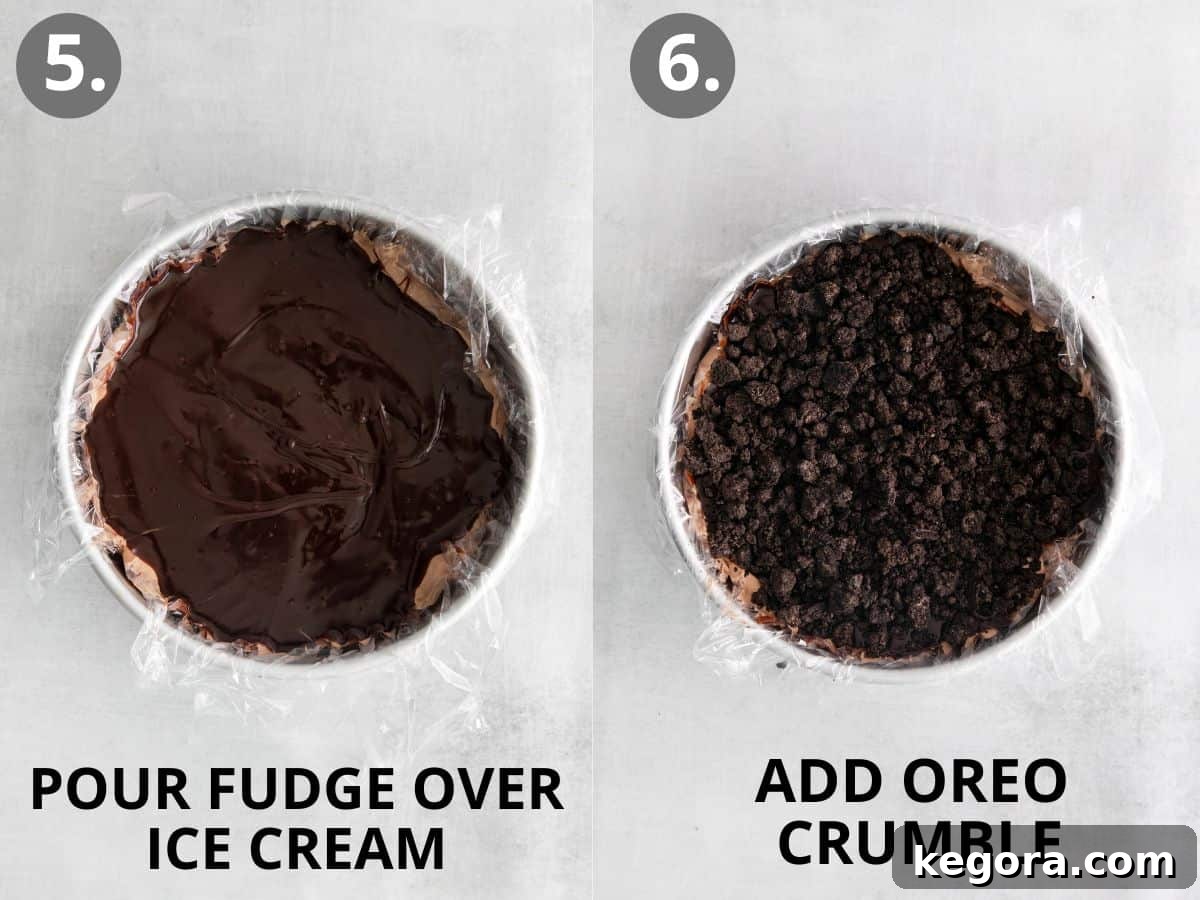
- Line an 8×3-inch round cake pan with a generous layer of plastic wrap, ensuring it covers the bottom and extends well over the sides of the pan. This overhang will be crucial for easily lifting the finished cake out later. An 8-inch springform pan can also be used as an alternative, eliminating the need for plastic wrap for removal.
- Carefully spread the softened chocolate ice cream into an even layer at the bottom of the prepared pan. For a thicker chocolate layer, use the entire 1.5-quart carton. If you prefer equally thick chocolate and vanilla layers, use approximately two-thirds of the container. Place the pan in the freezer for 30 minutes to allow the chocolate ice cream to firm up. While it freezes, remember to set out your vanilla ice cream to soften slightly.
- Once the chocolate ice cream layer is firm, remove the cake pan from the freezer. Pour the cooled chocolate fudge over the frozen chocolate ice cream and spread it into an even layer using an offset spatula. Immediately sprinkle the cookie crumbs generously over the fudge layer. Return the cake to the freezer for another 10 minutes to allow the fudge layer to set slightly, preventing it from mixing with the next ice cream layer.
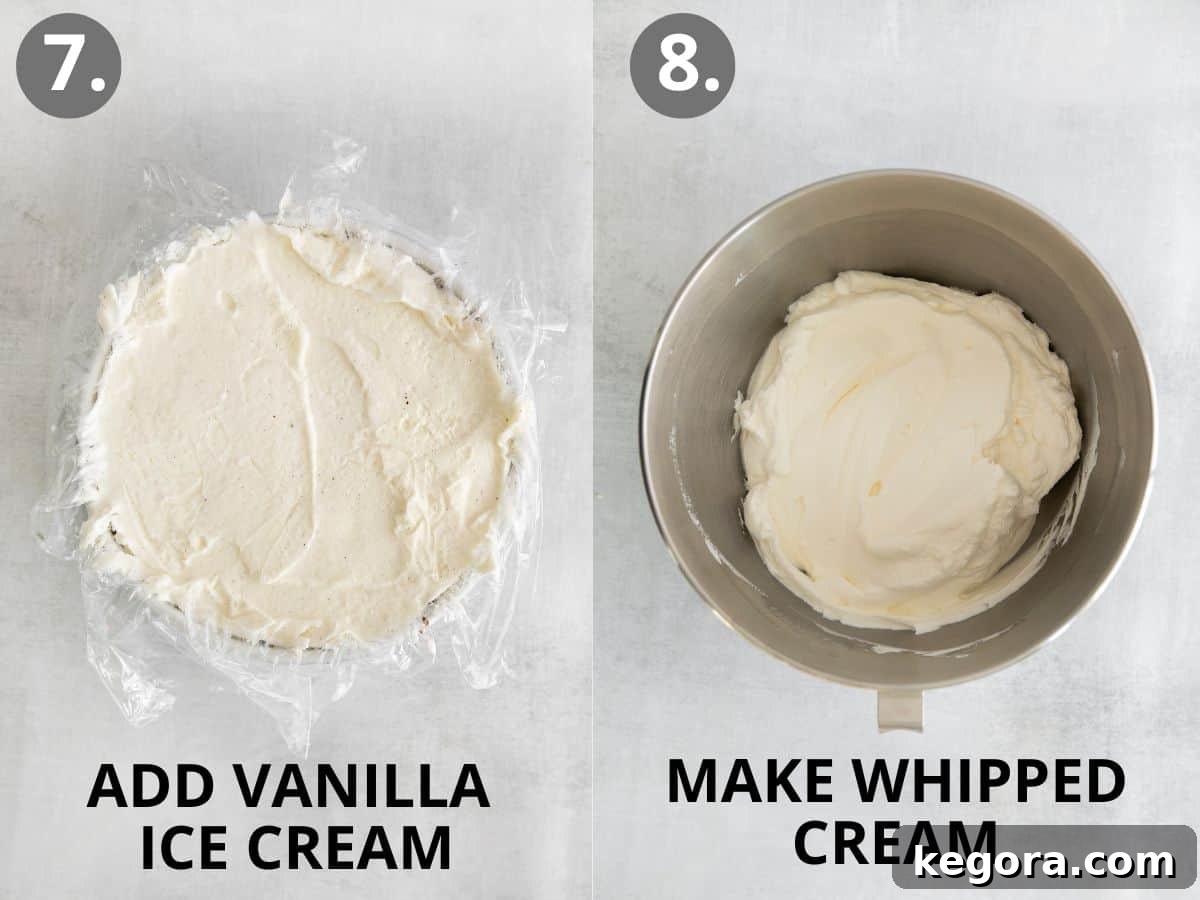
- Finally, spread the softened vanilla ice cream over the cookie crumbs, creating another smooth, even layer. You may not use the entire container, depending on your desired thickness. Return the cake to the freezer for at least 2-3 hours, or until it is completely firm. For best results and the easiest slicing, we highly recommend freezing it overnight.
Step 4: Craft the Fluffy Whipped Cream Topping
A homemade whipped cream topping adds a light, airy finish that beautifully contrasts the richness of the cake layers.
- In a large, chilled mixing bowl (preferably a metal bowl that has been in the freezer for 10-15 minutes), combine the cold heavy whipping cream, powdered sugar, and vanilla extract. The cold temperature of the bowl and cream is key to achieving stable, stiff peaks.
- Using an electric hand mixer or a stand mixer fitted with the whisk attachment, beat the mixture on high speed until stiff peaks form. Be careful not to overmix, as it can turn into butter. The whipped cream should hold its shape firmly.
- Once the cake is fully firm, carefully take it out of the freezer. Use the plastic wrap overhang to gently lift the frozen cake out of the pan and transfer it to your chosen serving platter.
Step 5: Decorate and Serve Your Masterpiece
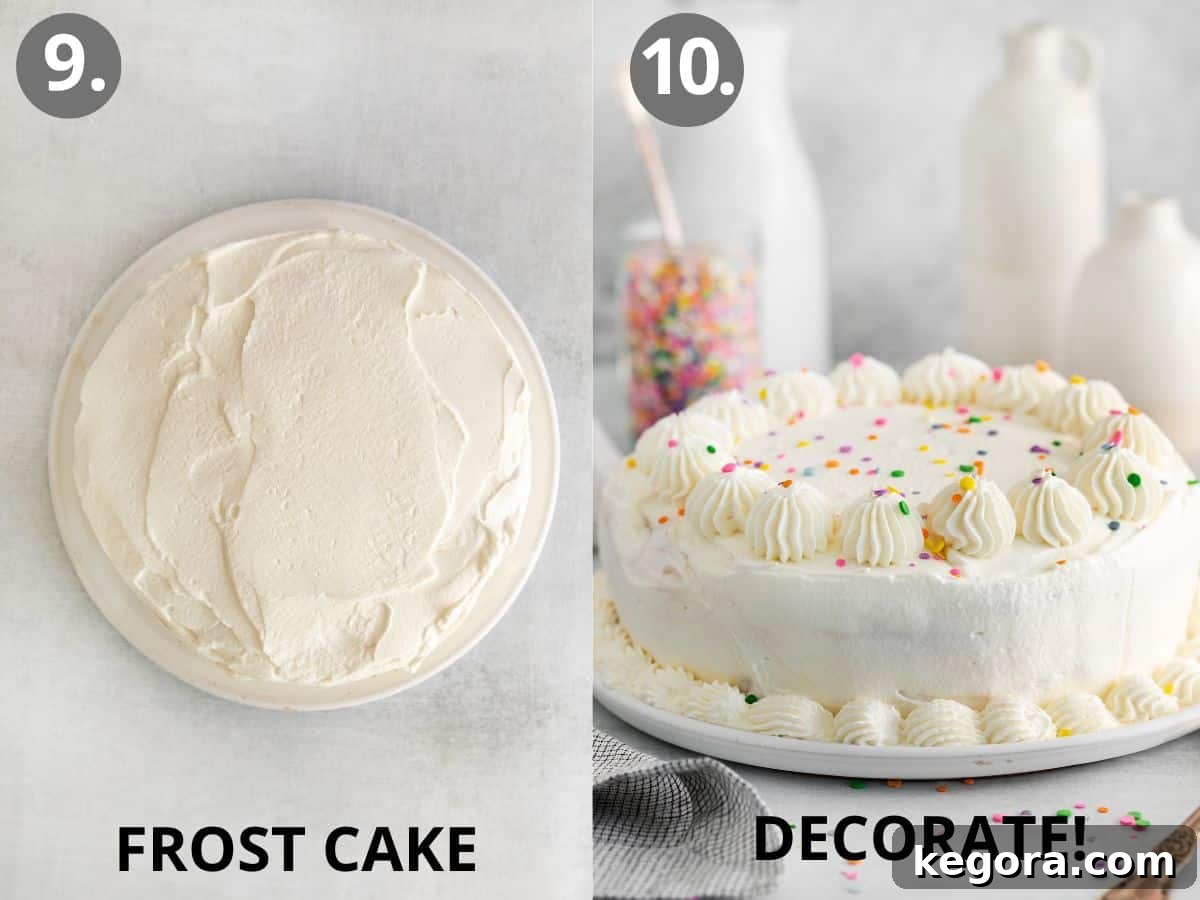
- Generously spread the freshly whipped cream frosting over the top and sides of the cake, creating a smooth, inviting finish. Get creative with your decorations! You can use an offset spatula for a rustic look, or pipe the whipped cream using a pastry bag and decorative tips for a more elegant presentation.
- Finish your cake with a vibrant scattering of sprinkles.
- Keep the completed cake in the freezer until you are ready to serve. Before slicing, remove the cake from the freezer and allow it to sit at room temperature for approximately 10 minutes. This brief thaw makes it much easier to cut into perfect slices. Enjoy your custom-made, delightful ice cream cake!
For another delightful and easy-to-make dessert, try this gluten-free peppermint Oreo pie!
Storage & Make-Ahead Instructions
One of the many benefits of an ice cream cake is its excellent make-ahead potential, making it a perfect choice for party planning without last-minute stress.
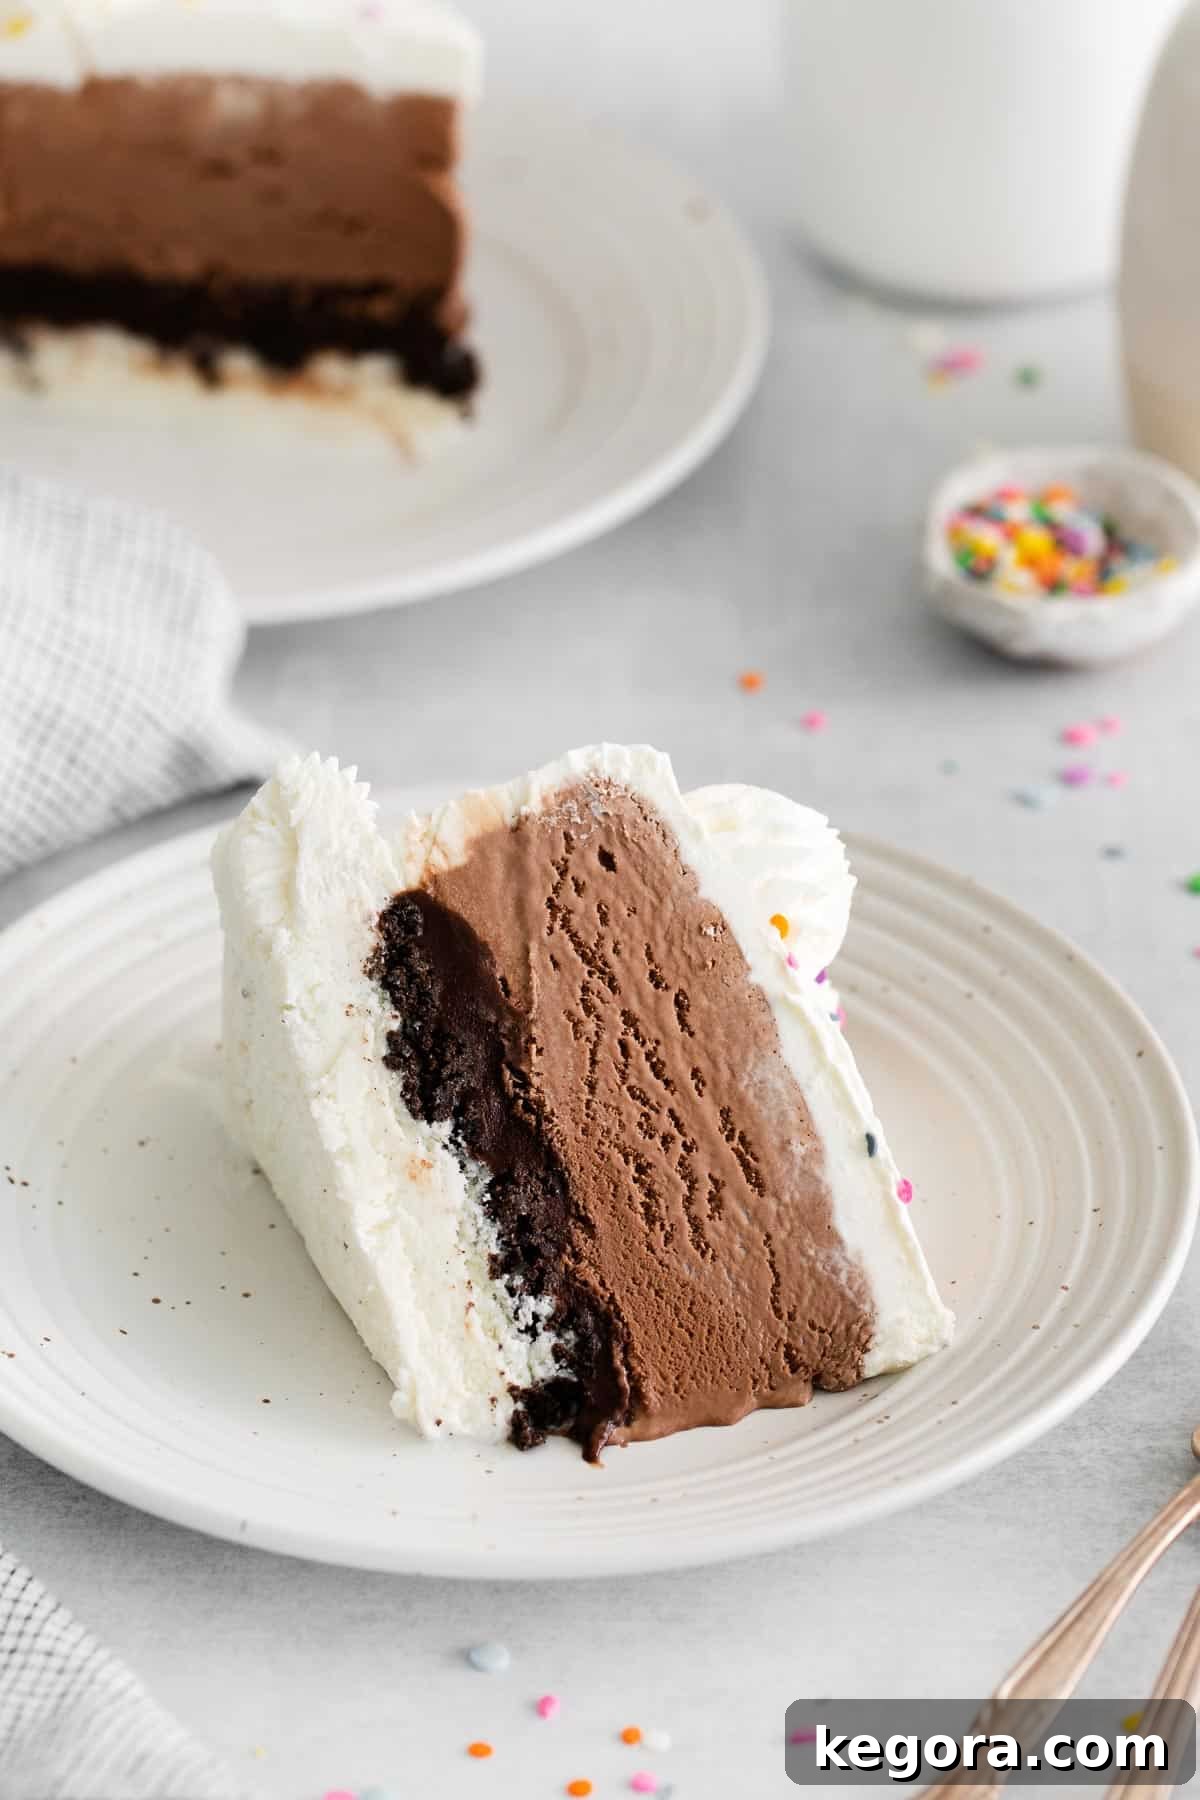
- Once fully assembled and frosted, the ice cream cake should be stored in the freezer until ready to serve. For optimal freshness and to prevent freezer burn, wrap the cake tightly with several layers of plastic wrap, or place it in an airtight freezer-safe container.
- Properly stored, this gluten-free ice cream cake will maintain its quality for up to 3 days in the freezer. Making it a day in advance is highly recommended, allowing ample time for all layers to firm up beautifully, which also makes for much cleaner slicing.
Frequently Asked Questions (FAQs)
Dairy Queen’s ice cream cakes are a popular choice, but it’s important to note that not all of them are gluten-free. Most of the pre-made cakes found in Dairy Queen freezers contain gluten, primarily due to the cookie crust and sometimes other mix-ins. However, some Dairy Queen locations may offer custom-ordered gluten-free ice cream cakes if requested in advance. It’s always best to contact your local store directly to inquire about their specific gluten-free options and ingredient sourcing to ensure safety.
Whether an ice cream cake contains gluten depends entirely on its ingredients. Many traditional ice cream cakes feature a cake base or cookie crumble made from wheat flour, which contains gluten. Additionally, some commercial ice creams may contain gluten in the form of cookie pieces, brownie bits, or other additives. For individuals following a gluten-free diet, it’s crucial to either carefully check the ingredient labels of any store-bought ice cream cake or, even better, prepare a homemade version using certified gluten-free components, like with this recipe.
The good news is that many ice cream brands offer delicious flavors that are naturally gluten-free or specifically certified gluten-free. A product labeled “certified gluten-free” ensures that its gluten content is below 20 parts per million (ppm), which is the standard safe threshold for most individuals with celiac disease. Popular brands that often have gluten-free options include Dryer’s/Edy’s, Ben & Jerry’s, Alden’s Organics, Straus Family Creamery, Breyer’s, and Blue Bell. However, it’s vital to remember that not every flavor from these brands is gluten-free. Always read the ingredient label carefully and look for clear “gluten-free” certifications or statements to confirm the product’s suitability for a gluten-free diet, as ingredients can change.
Expert Tips & Tricks for the Perfect Gluten-Free Ice Cream Cake
Elevate your ice cream cake game with these invaluable tips and tricks, ensuring every slice is a masterpiece:
- Invest in a Deep Cake Pan: For beautifully defined layers and an impressive height, I highly recommend using a deeper-than-standard 8×3-inch cake pan. The extra depth makes layering easier and creates a more visually appealing dessert.
- Alternative Pan Options: If a deep cake pan isn’t available, an 8-inch springform pan is an excellent alternative, allowing for easy removal without the need for plastic wrap. You can also use parchment paper instead of plastic wrap to line the pan; simply create a cross of two long strips to cover the bottom and sides.
- Customize Your Flavors: Don’t limit yourself to just chocolate and vanilla! This recipe is incredibly versatile. Feel free to swap out these traditional flavors for other gluten-free ice creams like strawberry, mint chip, coffee, or even cookie dough (ensure all mix-ins are gluten-free). Choose your favorite certified gluten-free ice cream brand, and you can’t go wrong!
- Shortcut for the Fudge Layer: Short on time? You can take a convenient shortcut by using a good quality store-bought hot fudge sauce for the chocolate layer. Just make sure it’s thick enough to spread and sets well when frozen.
- For Clean Slices, Heat Your Knife: To achieve neat, clean slices that don’t drag or tear the layers, dip a sharp knife into hot water before each cut. Wipe the blade dry, make your slice, and repeat the process for every piece. This technique warms the blade just enough to glide through the frozen cake effortlessly.
- Prevent Freezer Burn: When storing your cake for more than a few hours, ensure it’s wrapped exceptionally well. Use multiple layers of plastic wrap, followed by a layer of aluminum foil, or store it in an airtight freezer-safe cake carrier. This prevents ice crystals from forming and preserves the cake’s fresh taste and texture.
- Perfect Cookie Crushing: For uniform cookie crumbs, use a food processor. If you don’t have one, place the cookies in a sturdy Ziploc bag and crush them with a rolling pin or the bottom of a heavy pan until finely ground.
- Decoration Beyond Sprinkles: While sprinkles are fun, consider other garnishes. Chocolate shavings, a drizzle of extra fudge sauce (applied just before serving), fresh berries, or even gluten-free chocolate curls can add an extra touch of elegance.
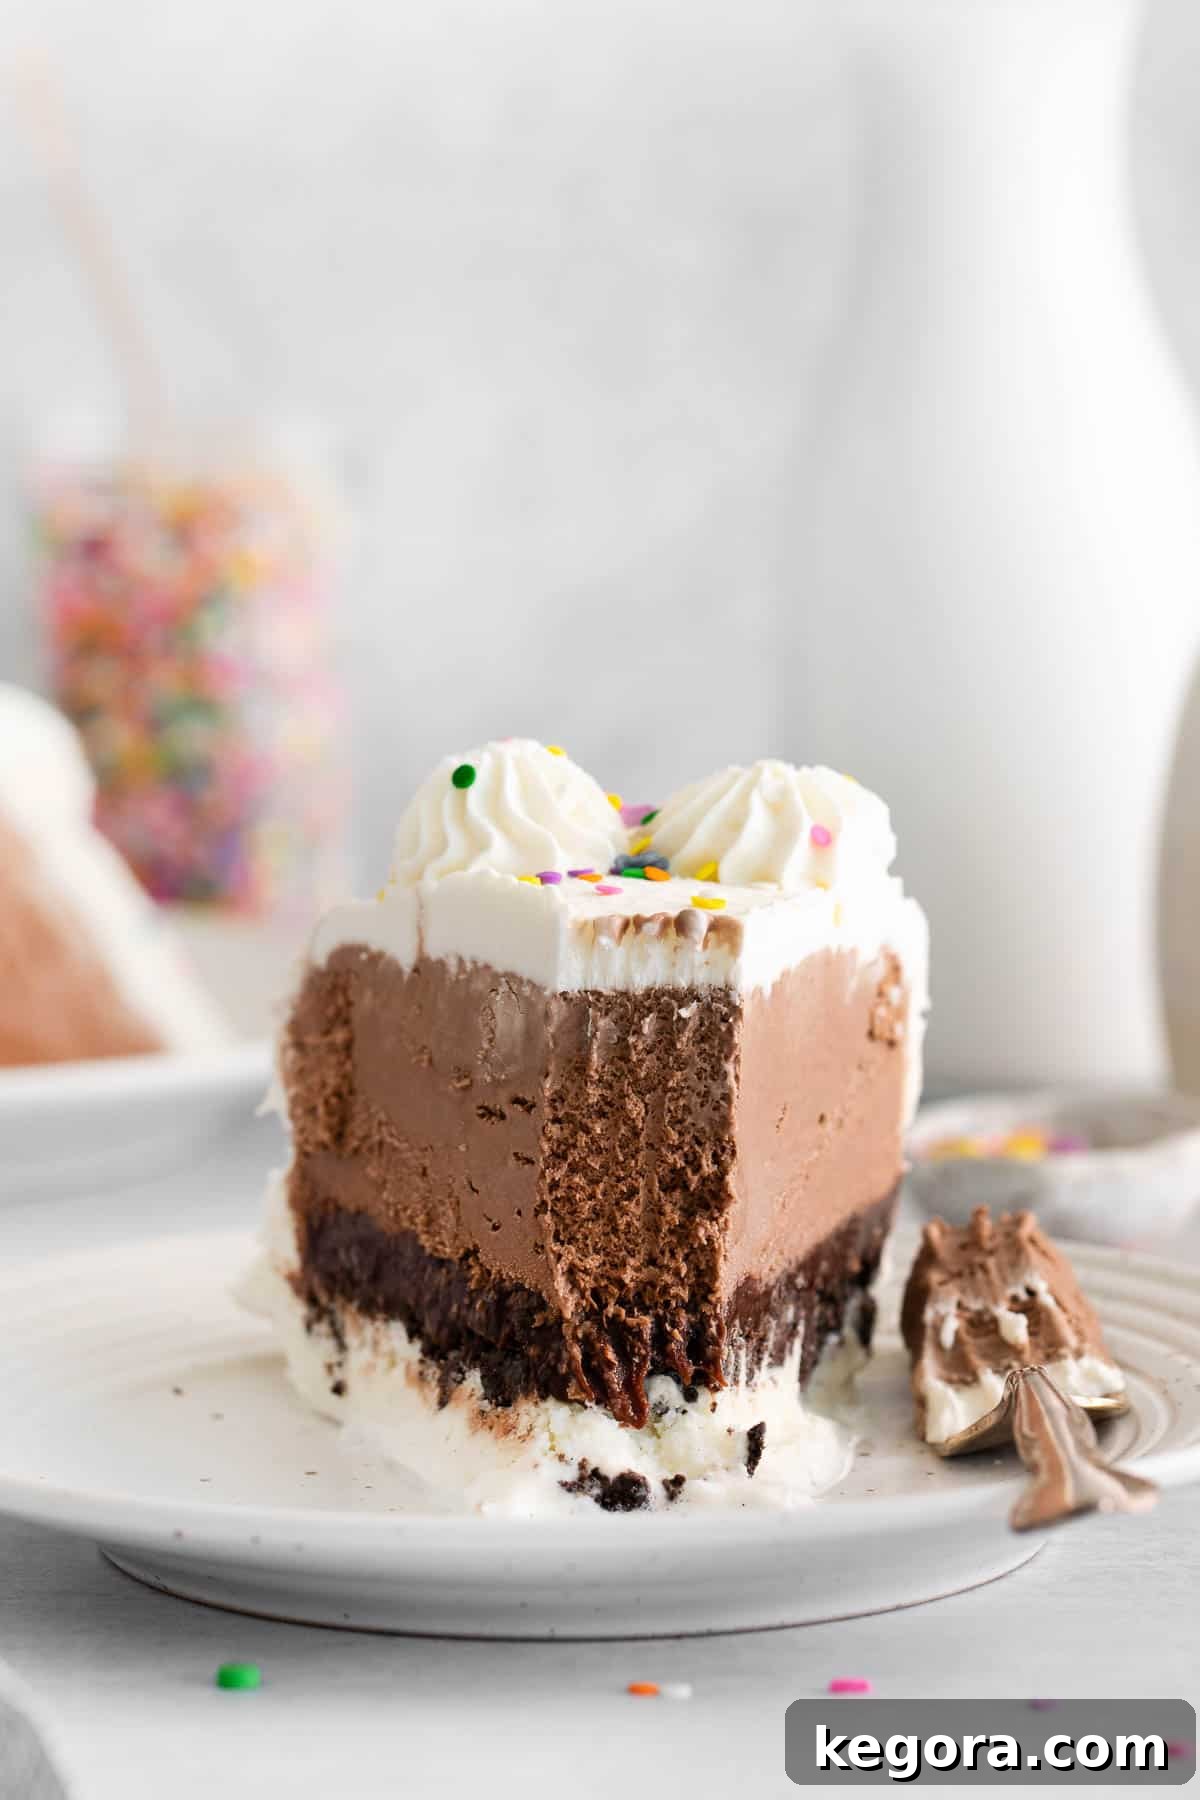
If you’re searching for a surefire way to impress friends and family on their birthday or any special occasion, this homemade gluten-free ice cream cake is unequivocally the answer! It’s delicious, beautiful, and accommodating for all your guests.
I truly hope you and your loved ones cherish this gluten-free ice cream cake recipe as much as my family and I do! If you give it a try, please be sure to leave me a comment and a rating below. I’d absolutely love to hear about your experience!
Gluten-Free Ice Cream Cake
You won’t believe how EASY it is to make a homemade gluten-free ice cream cake! Use your favorite ice cream flavors and make it all summer long or for birthday parties!
With a fudgy cookie-crunch filling, it’s just like the ice cream cake you ate growing up. Nobody will guess it’s gluten-free!
I recommend making this cake a day in advance so it has time to set in the freezer overnight.
Comments
Ingredients
Cookie Crunchies
- 1 cup gluten-free Oreo crumbs (130 grams, about 12 crushed Oreos)
- 2 tablespoons butter, melted
Chocolate Fudge
- 1 cup semi-sweet chocolate chips (170 grams)
- ¼ cup light corn syrup (85 grams)
- 1 tablespoon butter
- 1 teaspoon vanilla extract
- ¼ teaspoon salt
- 1/2 cup heavy whipping cream (120 ml)
Ice Cream Layers
- 1.5 quart container gluten-free vanilla ice cream
- 1.5 quart container gluten-free chocolate ice cream
Whipped Cream Topping
- 2 cups cold heavy whipping cream (480 ml)
- ¾ cup powdered sugar (100 grams)
- 1 teaspoon vanilla extract
- Sprinkles for topping
Instructions
- I highly recommend using a deeper than standard 8×3 cake pan to make this recipe! This is the pan I use.
Make the Cookie Crunchies
- TIP: Now is a good time to set out the chocolate ice cream (not the vanilla) so it can soften for 20 minutes before making the cake layers.
- Preheat the oven to 350 degrees F (175 C). Line a baking sheet with parchment paper or a silicone baking mat.
- In a small bowl, mix together the gluten-free Oreo crumbs and melted butter until well combined. Spread the crumbs evenly onto the prepared baking sheet. Bake for 8-10 minutes, then cool completely to room temperature. Break up any big clumps into smaller ones and set aside.
Make the Chocolate Fudge
- Add the chocolate chips, corn syrup, butter, vanilla and salt to a medium sized bowl.
- Microwave the heavy whipping cream for 45 seconds to 1 minute until just starting to boil. Pour the hot cream over the chocolate chips mixture. Let sit for 2-3 minutes, then whisk until smooth. Set aside at room temperature.
Make the Ice Cream Cake
- Line an 8×3 cake pan with a generous layer of plastic wrap to cover the bottom and sides of the pan. (You can also use an 8-inch springform pan.)
- Spread the softened chocolate ice cream into an even layer. (If you want a thicker chocolate layer use the whole carton. If you want even layers of chocolate and vanilla ice cream use ⅔ of the container.) Freeze for 30 minutes. Set out the vanilla ice cream to soften while the chocolate ice cream layer freezes.
- Remove the cake from the freezer. Spread the chocolate fudge in an even layer over the chocolate ice cream. Sprinkle the cookie crumbs over the fudge. Freeze for 10 minutes to set the fudge layer.
- Spread the softened vanilla ice cream into an even layer (you may not use all the ice cream) over the cookie crumbs. Freeze for 2-3 hours until firm.
Make the Whipped Cream Topping
- In a large mixing bowl, add the heavy whipping cream, powdered sugar and vanilla extract. Using a hand mixer, whip on high speed until stiff peaks form.
- Take the cake out of the freezer. Use the plastic wrap to lift the frozen cake out of the pan, and place on a serving platter.
- Frost the cake with the whipped cream and decorate as desired. The whipped cream can also be piped on top of the cake. Top with sprinkles.
- Freeze the cake until ready to serve (at least 4 hours, preferably overnight!). The cake will keep covered for up to 3 days in the freezer. Let sit at room temperature for 10 minutes before slicing. Enjoy!
Notes
RECIPE NOTES
- I highly recommend using a deeper than standard 8×3 cake pan to make this gluten-free cake!
- You can use parchment paper instead of plastic wrap to remove the cake from the pan, or use a springform pan instead.
- Feel free to swap out chocolate ice cream or vanilla ice cream for other gluten-free ice cream flavors. This cake would taste great with strawberry, mint, or coffee ice cream. Choose your favorite certified gluten-free ice cream brand and you can’t go wrong!
- Don’t have time to make the chocolate fudge layer? Take a shortcut and buy a good quality hot fudge sauce at the store.
- Dip a sharp knife in hot water to make it easier to cut and serve the cake, ensuring clean slices.
Nutrition
Calories: 148kcal | Carbohydrates: 16g | Protein: 1g | Fat: 9g | Saturated Fat: 6g | Polyunsaturated Fat: 0.3g | Monounsaturated Fat: 3g | Trans Fat: 0.1g | Cholesterol: 15mg | Sodium: 60mg | Potassium: 72mg | Fiber: 1g | Sugar: 14g | Vitamin A: 181IU | Vitamin C: 0.04mg | Calcium: 13mg | Iron: 1mg