
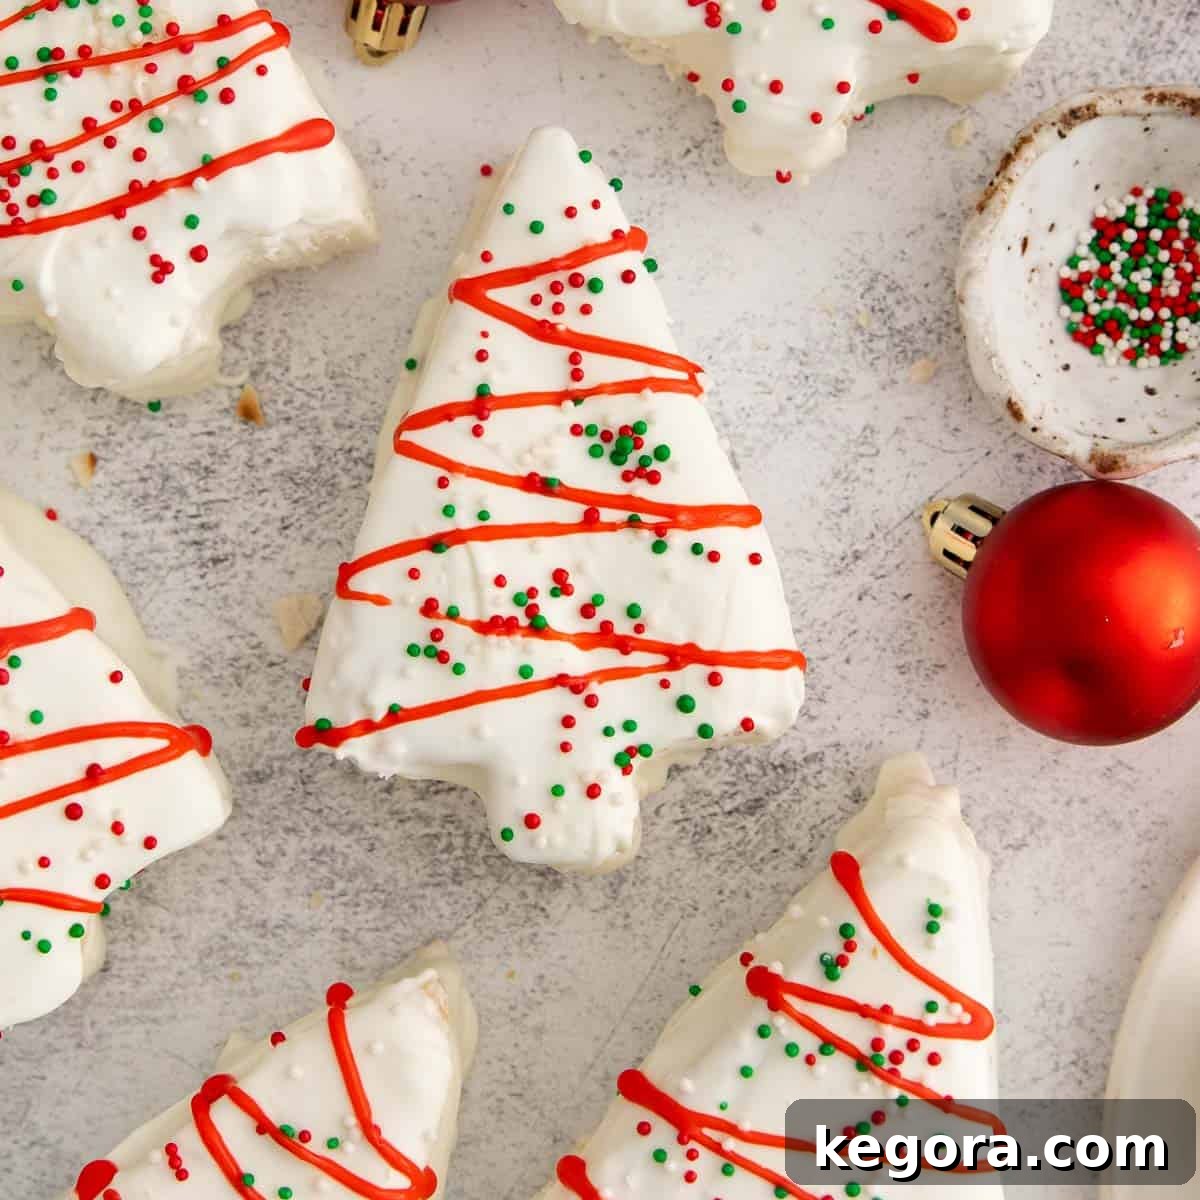
Gluten-Free Little Debbie Christmas Trees: Your Ultimate Holiday Recipe Guide
Erin’s Recipe Rundown
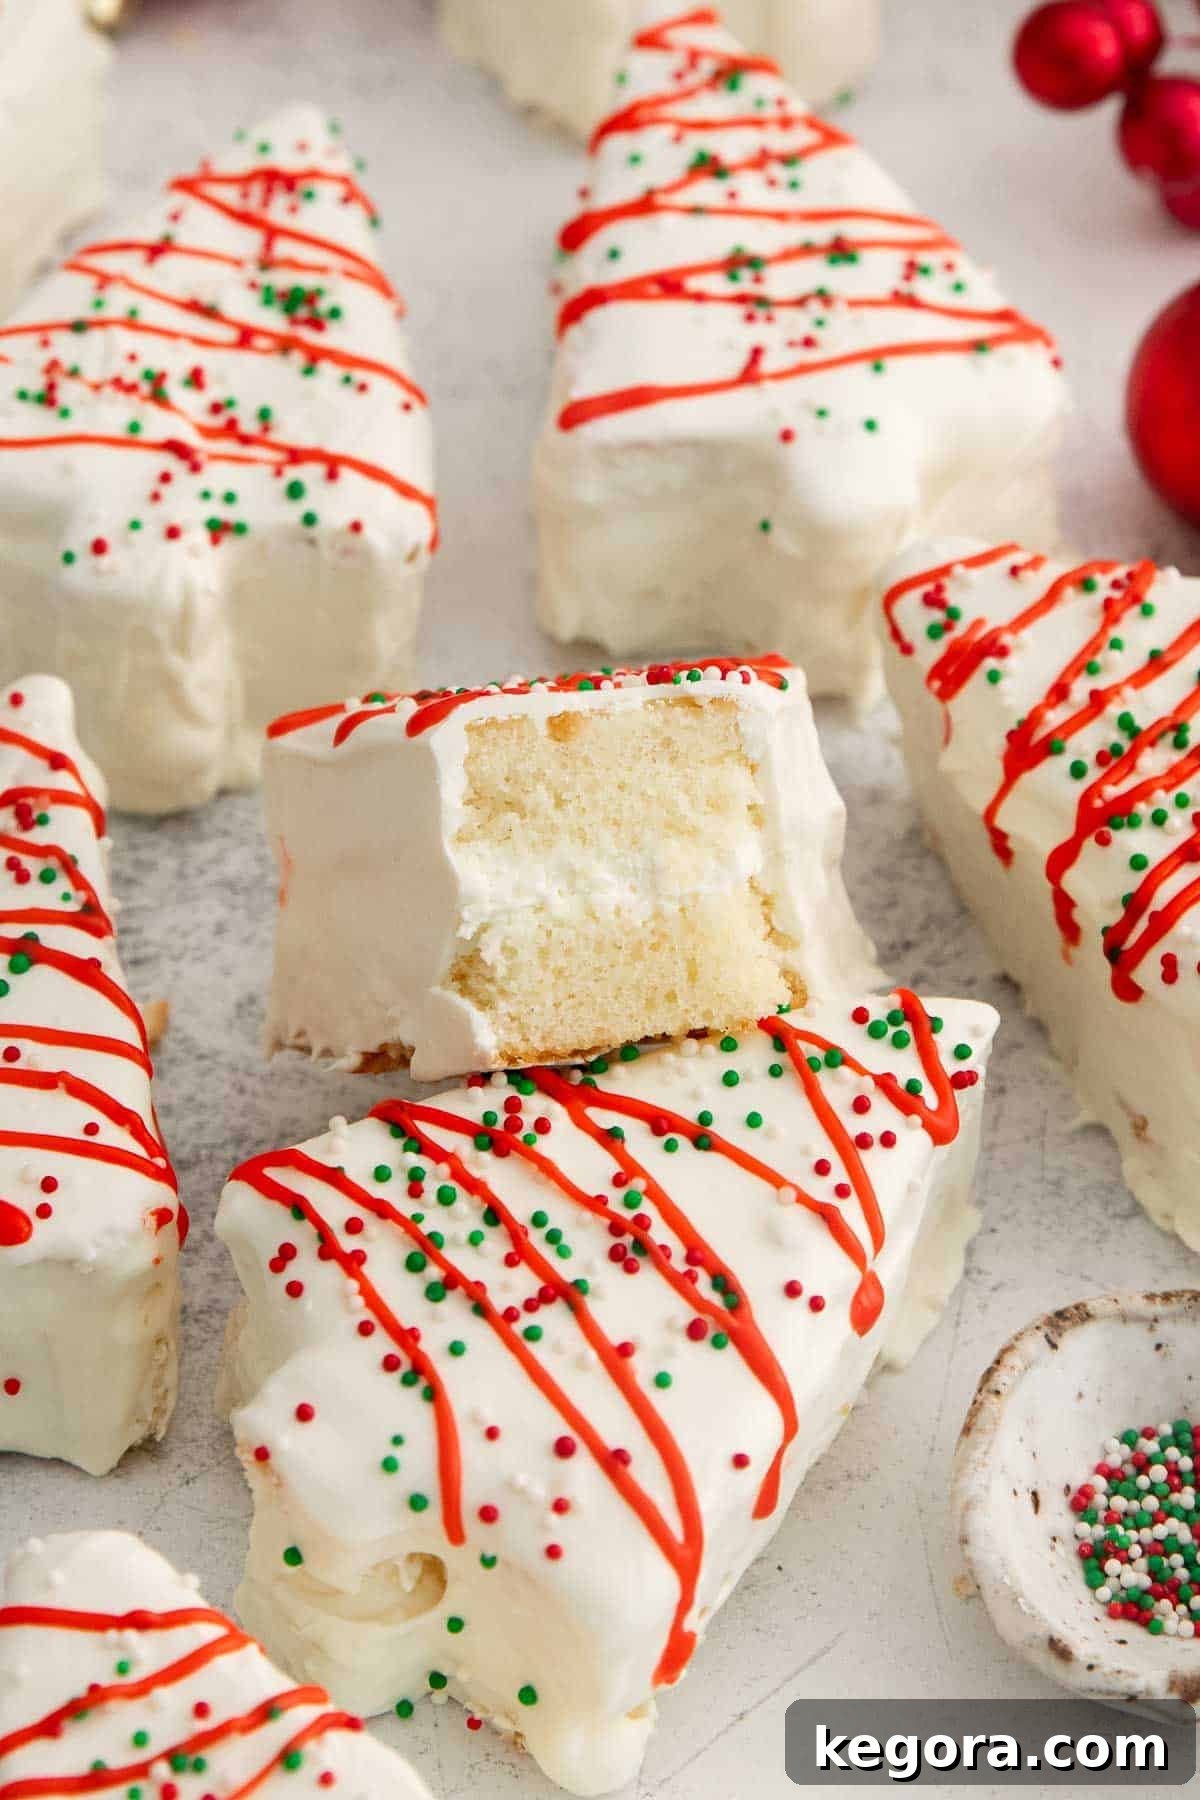
Texture: Prepare for a delightful experience! These festive treats boast a light, incredibly fluffy sponge cake base, perfectly complemented by a luscious, creamy filling. The entire cake is then enveloped in a crisp, sweet white chocolate coating, creating a harmonious blend of soft, smooth, and crunchy textures in every bite. It’s a truly satisfying sensation that mimics the classic treat, yet elevates it with homemade perfection.
Taste: A symphony of sweet vanilla takes center stage in these cakes, offering a comforting and familiar flavor profile that is utterly irresistible. This delightful vanilla essence is beautifully enhanced by the rich, creamy sweetness of the white chocolate coating, creating a perfectly balanced and indulgent taste that evokes pure holiday nostalgia. Each component works together to deliver a truly memorable and sweet experience.
Ease: You’ll be pleasantly surprised by how simple and enjoyable these are to create! Despite their adorable and intricate appearance, this recipe is designed to be easy and fun, making it a fantastic project for bakers of all skill levels. It’s an especially wonderful activity to involve children in, transforming baking into a festive family tradition filled with joy and delicious rewards.
Top Tip: For those iconic, perfectly dipped little trees, planning ahead is key! Allocate sufficient time to freeze the assembled cakes overnight, or for a minimum of 8 hours, before embarking on the white chocolate coating step. This crucial freezing period ensures the cakes are firm enough to handle and prevents them from crumbling, guaranteeing a smooth, even, and professional-looking coating that results in the cutest holiday treats imaginable!
Recommended GF Flour: To streamline your baking process, this recipe wisely incorporates the convenience of King Arthur Gluten-Free Yellow Cake Mix. This choice significantly simplifies preparation without compromising on flavor or texture. However, for those who prefer to bake from scratch, you have the option to use a double batch of my highly acclaimed Best Gluten Free Vanilla Cake recipe. For optimal results with the scratch recipe, I strongly recommend using Bob’s Red Mill 1:1 Baking Flour, known for its consistent performance in gluten-free baking.
Would I make these again? Absolutely, a resounding yes! These delightful gluten-free Christmas tree cakes are not only incredibly fun to prepare but also consistently yield an absolutely adorable and impressive outcome. During the holiday season, when stores are overflowing with tempting seasonal treats that often contain gluten, this meticulously crafted copycat recipe becomes a true lifesaver. It completely eliminates any feeling of missing out, allowing everyone to savor the festive spirit and indulge in these charming, delicious creations without worry. They are a staple for our holiday celebrations!
xoxo erin
For many, the holiday season brings a unique kind of joy, filled with festive traditions, twinkling lights, and, of course, an abundance of delicious treats. However, for those living gluten-free, this time of year can sometimes be tinged with a touch of longing, especially when iconic store-bought holiday specials, like the beloved Little Debbie Christmas Tree Cakes, hit the shelves. It’s hard to pass on those nostalgic snacks, year after year. But what if you didn’t have to? What if you could recreate that magic, gluten-free, right in your own kitchen?
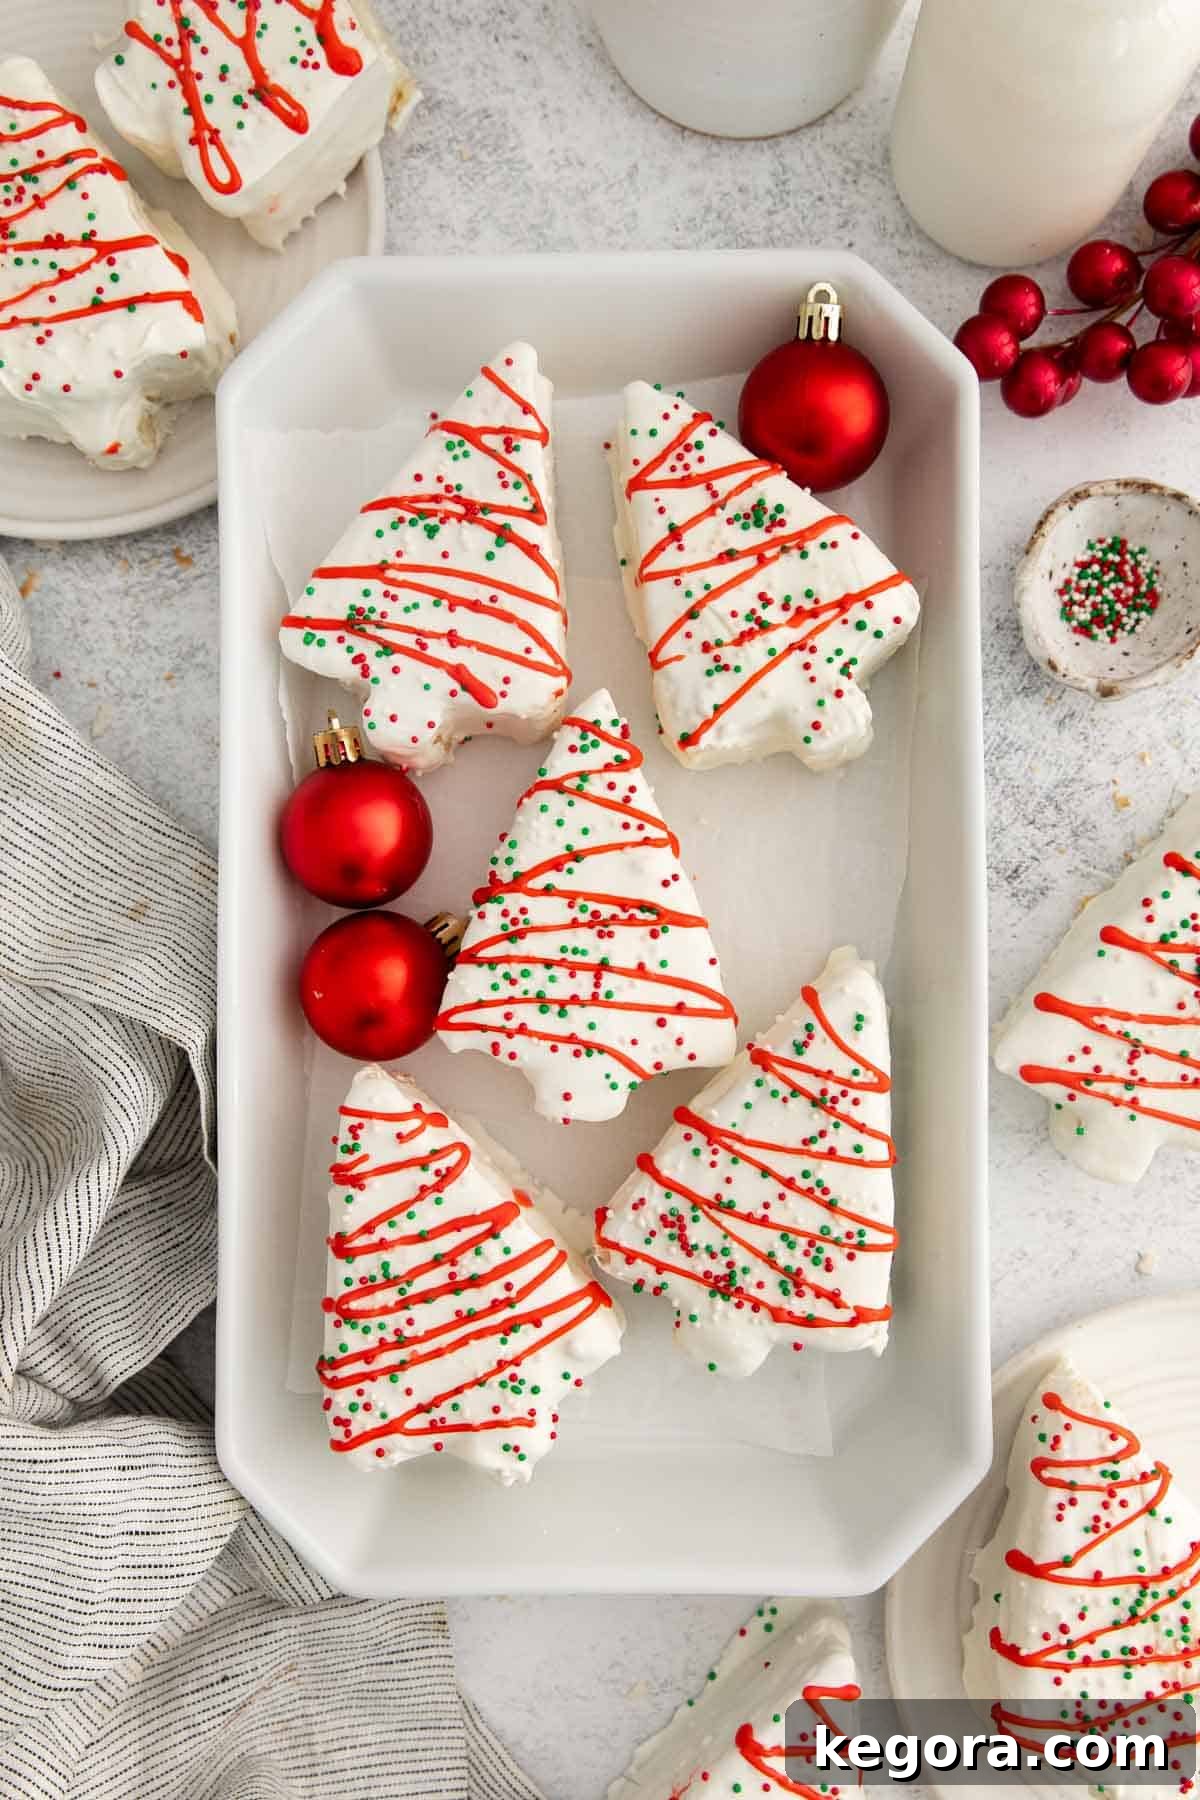
I’m thrilled to share that it is indeed easy to capture the enchanting essence of those classic Little Debbie Christmas Tree Cakes, completely free of gluten, using this incredible copycat recipe! These homemade delights feature the softest, most tender vanilla cake imaginable, paired with a miraculously fluffy and sweet whipped cream filling. The combination creates a treat that not only looks incredibly authentic but also delivers an identical, if not superior, taste and texture experience. You’ll be amazed at how much they resemble the original!
These adorable gluten-free Christmas tree cakes are perfect for any festive occasion. Imagine bringing a plate of these charming treats to your next holiday party – they’re guaranteed to be a conversation starter and a crowd-pleaser for all, gluten-free or not. Serve them as a fun, festive Christmas snack for your family, or make it a cherished holiday tradition by getting the kids involved in a family baking night. Watching their faces light up as they help cut, fill, and decorate these whimsical treats is a joy in itself. Everyone, from the youngest helper to the most seasoned guest, will absolutely adore these festive creations, making your holidays even sweeter and more inclusive.
Featured Comment
From Laura: “Made them for my two daughters and they turned out great! Wish it would post my picture!”
37 more comments
Table of Contents
- Erin’s Recipe Rundown
- Ingredients You’ll Need
- How to Make Gluten-Free Little Debbie Christmas Trees
- Make-Ahead/Storage/Freezing Instructions
- What should I do if I don’t have a tree cookie cutter?
- What can I do with the cake scraps after I cut out all of the trees?
- Why did my white chocolate coating crack?
- Can I add different flavors to the filling instead of vanilla?
- More Gluten-Free Holiday Desserts
- Gluten-Free Little Debbie Christmas Trees Recipe
Essential Ingredients for Your Gluten-Free Christmas Trees
Crafting these festive gluten-free Little Debbie Christmas trees requires a few key ingredients, each playing an important role in achieving that perfect texture and nostalgic flavor. Below are some detailed notes on what you’ll need and why it matters. For precise measurements, be sure to reference the comprehensive recipe cardat the end of this guide.
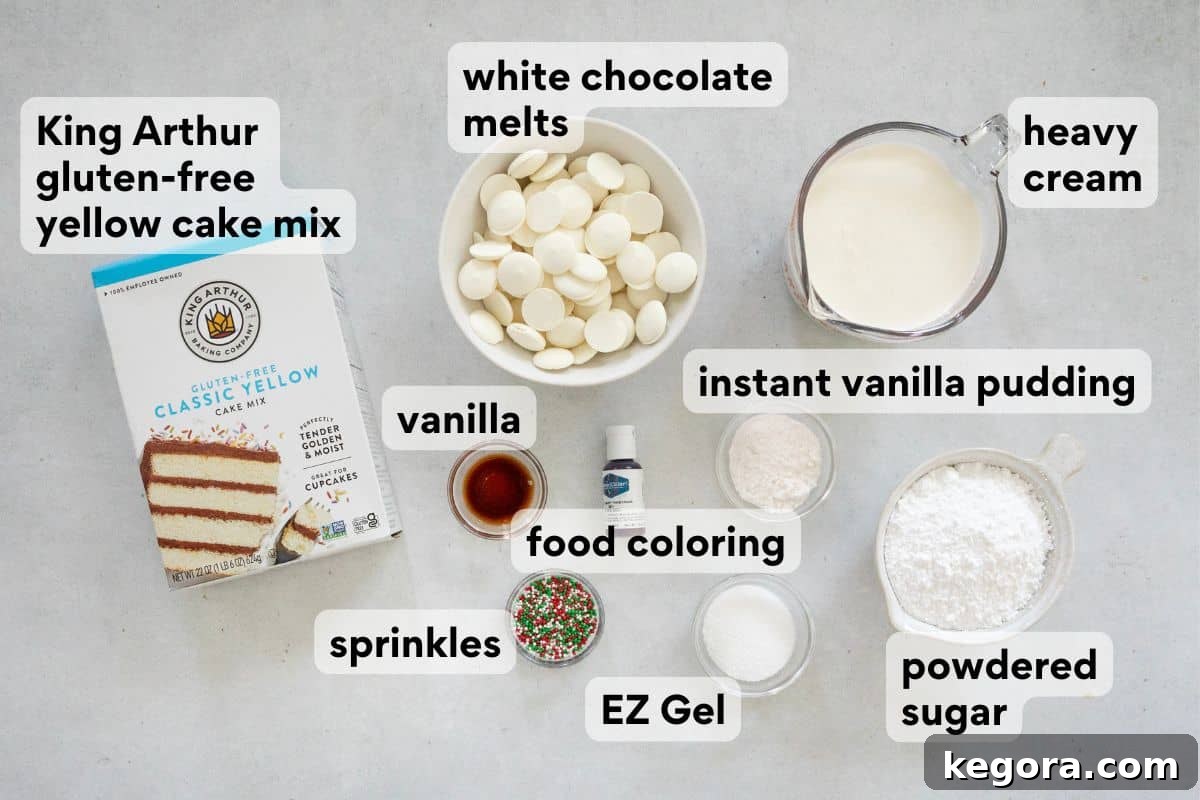
- Gluten-free yellow cake mix: This is your secret weapon for a convenient and delicious starting point! Using a high-quality boxed cake mix significantly reduces prep time, allowing you to focus on the fun decorating aspects. However, if you prefer a completely homemade approach and have a little extra time, a double batch of my tried-and-true Best Gluten Free Vanilla Cake recipe can be substituted for an equally delightful result. Ensure you follow the instructions for the mix carefully to achieve a tender, moist cake base.
- Heavy cream: The foundation of our incredibly light and fluffy whipped cream filling is heavy cream, and its temperature is critical. It’s absolutely essential to use very cold heavy cream. This isn’t just a suggestion; it’s the key to achieving those perfect stiff peaks that give the filling its airy, stable structure. Cold cream whips faster and holds its shape much better, preventing a deflated or runny filling.
- Powdered sugar: Beyond just sweetening the whipped cream, powdered sugar (also known as confectioners’ sugar) plays a dual role. Its fine texture ensures it dissolves seamlessly into the cream, resulting in a beautifully smooth and velvety filling, free of any grainy consistency. Furthermore, it acts as a stabilizer, helping the whipped cream maintain its volume and structure for longer periods, crucial for a filling that holds up between cake layers.
- EZ gel: This remarkable ingredient is a modified cornstarch thickener, specifically chosen for its ability to stabilize whipped cream. It’s a game-changer because it helps prevent the cream from deflating, ensuring your filling remains smooth, thick, and perfectly sandwiched between the two cake layers. It contributes to the filling’s lasting stability and creamy mouthfeel.
- Instant vanilla pudding: Another fantastic stabilizer for our whipped cream, instant vanilla pudding mix not only enhances the texture but also infuses the filling with an extra boost of sweet, comforting vanilla flavor. When selecting your pudding mix, be mindful of gluten content. Brands like Jell-O are generally considered safe as they typically contain no gluten-containing ingredients, but for absolute certainty, you can opt for brands explicitly labeled gluten-free, such as Simple Mixes.
- White chocolate melts: The signature crisp coating comes from white chocolate melts. I highly recommend using these white chocolate melts, which are certified to contain no gluten-containing ingredients, ensuring your treats remain safely gluten-free. Once melted and cooled, this chocolate forms a delightful, thin, and slightly crisp shell around each cake, adding an appealing texture contrast and a sweet finish.
- Decorations: This is where you bring the festive spirit to life! I achieve the iconic red ribbon detail by using Americolor Red Gel Food Coloring, which seamlessly blends into a small portion of melted white chocolate. Any good quality red food coloring will work effectively. To complete the classic holiday look, I like to adorn the cakes with vibrant red, white, and green nonpareils, scattering them while the white chocolate coating is still wet. Feel free to unleash your creativity and use any festive sprinkles or edible decorations that capture your holiday spirit!
Crafting Your Gluten-Free Little Debbie Christmas Trees: Step-by-Step
Embark on a delightful baking journey to create these charming gluten-free Christmas tree cakes. This section provides a clear overview of each step, ensuring you achieve perfect results every time. For comprehensive, detailed instructions and specific quantities, please remember to jump to the full recipe card located at the bottom of this page!
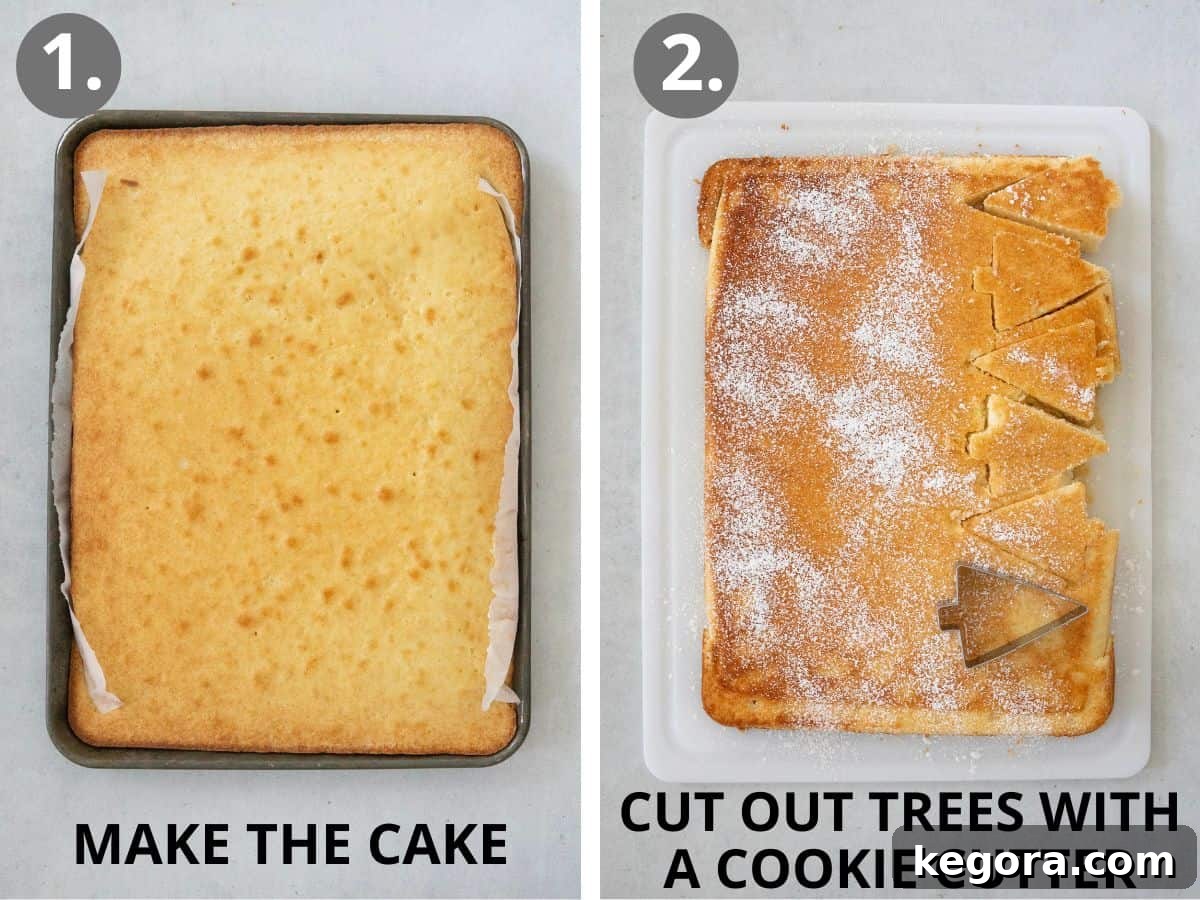
- Make the cake: Begin by preheating your oven to 350°F (175°C). Prepare a large, rimmed half-sheet pan by lining it meticulously with parchment paper and then giving it a generous spray with nonstick cooking spray. This dual approach ensures your cake will release perfectly without sticking. Next, prepare both boxes of gluten-free yellow cake mix according to the package instructions. I find it easiest to combine both mixes in one very large bowl, ensuring a uniform batter. Pour the batter evenly into your prepared pan, spreading it gently to the edges. Bake for approximately 30-35 minutes, or until a wooden skewer or toothpick inserted into the center comes out clean. This indicates the cake is fully cooked and perfectly moist. Crucially, allow the cake to cool completely on a wire rack before proceeding to the next step. A warm cake will be difficult to handle and cut cleanly.
- Cut the trees: Once your cake is entirely cool, lightly dust your clean work surface with powdered sugar. Carefully invert the cake onto this sugared surface. Gently peel away the parchment paper, then dust the top of the cake with a little more powdered sugar. This thin layer of sugar acts as a protective barrier, preventing the cake from sticking to your cookie cutter or hands. For the classic Little Debbie look, I recommend using a 4-inch (10 cm) tree cookie cutter. Press firmly to cut out as many tree shapes as possible, typically yielding around 15 individual trees from a standard half-sheet pan. Arrange these cutouts neatly on a separate baking sheet.
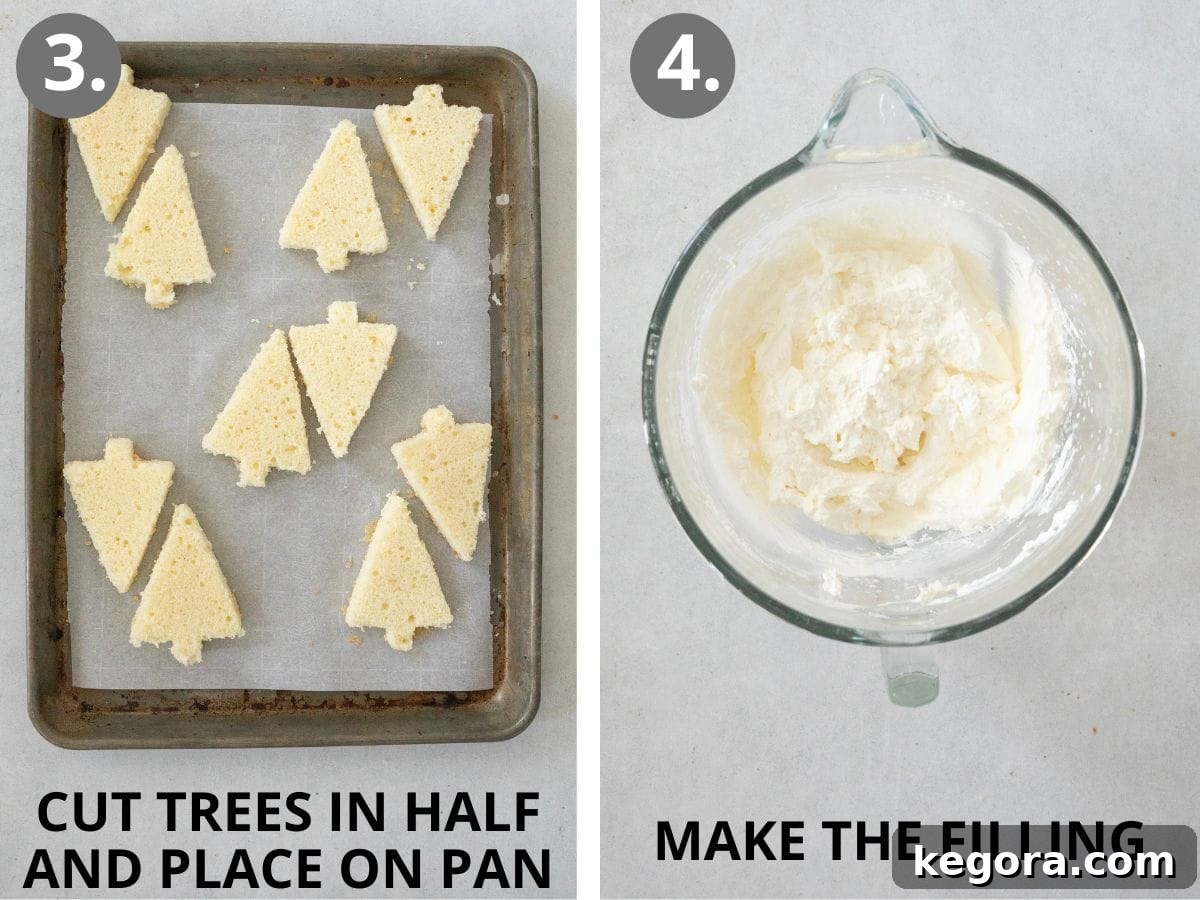
- Use a serrated bread knife: With careful precision, use a sharp serrated bread knife to slice each tree horizontally into two equal halves. This creates the top and bottom layers for our sandwich cakes. Arrange these cake halves back onto your lined baking sheet. To ensure they firm up nicely for filling, place the baking sheet with the cake halves into the refrigerator to chill while you prepare the delicious cream filling. This slight chill helps prevent the cake from tearing during assembly.
- In the bowl of a stand mixer: Now it’s time to create that signature fluffy filling! In the bowl of a stand mixer fitted with a whisk attachment, combine the very cold heavy cream, powdered sugar, EZ Gel, instant vanilla pudding mix, and pure vanilla extract. Start mixing on low speed to incorporate the ingredients, then gradually increase the speed to high. Beat the mixture vigorously until it transforms into stiff peaks, which should take approximately 2 minutes. The stiff peaks indicate a stable and airy whipped cream, perfect for our cake filling. Transfer this delightful filling into a large piping bag equipped with a round tip, ready for assembly.
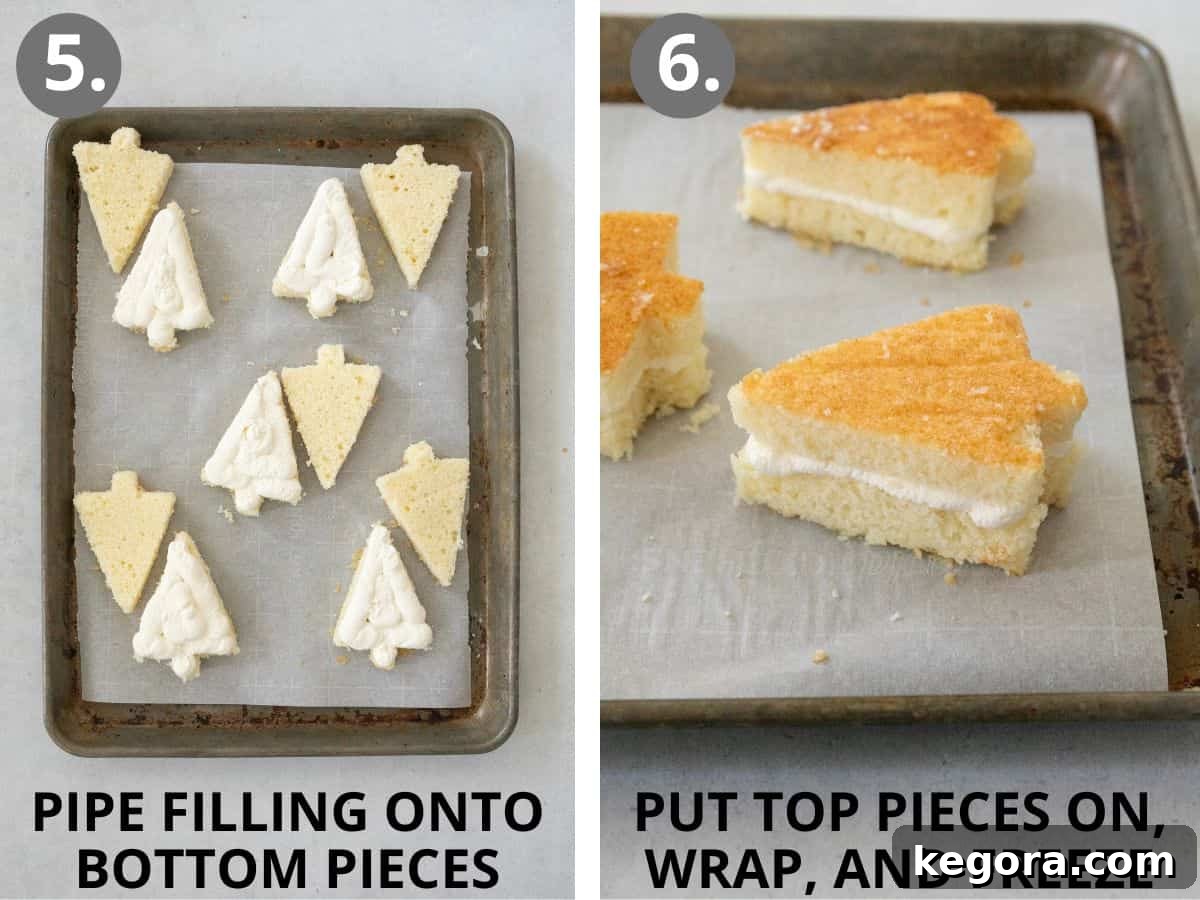
- Using a piping bag: Take one of your chilled bottom cake halves. Using your piping bag, carefully pipe the creamy filling onto its surface, ensuring you extend the filling all the way to the edges of the cake. This ensures every bite has that delightful creaminess. Aim for a generous but even layer of filling.
- Add tops, wrap, and freeze: Gently place the corresponding top half of the tree cake onto the piped filling. Press down very lightly, just enough for the cake to adhere to the filling without squishing it. If any filling oozes out the sides, use a small offset spatula to carefully smooth it away for a neat finish. Once all cakes are assembled on the baking sheet, wrap the entire pan tightly with plastic wrap. This prevents freezer burn and keeps the cakes fresh. Now for the crucial step: transfer the wrapped pan to the freezer and allow the cakes to freeze solid overnight, or for a minimum of 8 hours. This firm freezing is essential for easy dipping and to prevent the cakes from falling apart during the coating process.
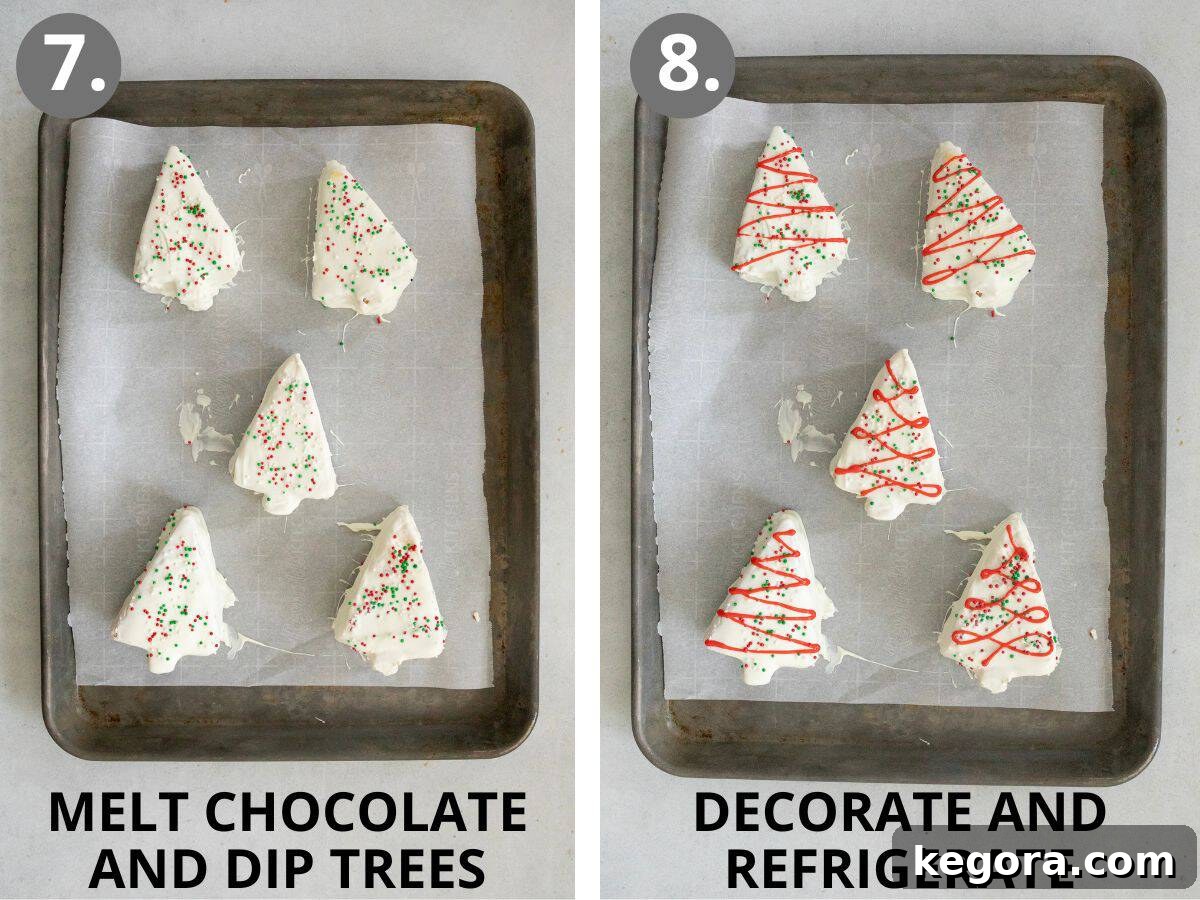
- In a heat-safe bowl: When your cakes are frozen solid and you’re ready to dip, prepare your white chocolate coating. Place the white chocolate melts into a heat-safe bowl. Set this bowl over a pot of barely simmering water, ensuring that the bottom of the bowl does not touch the water directly. Stir the chocolate frequently with a rubber spatula until it is completely melted and smooth. Once melted, carefully remove the bowl from the heat. Immediately, scoop out about 1/4 cup of the melted white chocolate into a small separate bowl and set it aside; this will be for your red decorations. Working quickly, take one frozen tree at a time and dip it entirely into the main bowl of melted white chocolate. Allow any excess chocolate to drip back into the bowl. An offset spatula can be helpful here to smooth the tops and sides, ensuring an even coating. Carefully place the dipped tree onto a clean, parchment-lined baking sheet. While the coating is still wet, generously sprinkle your festive nonpareils or sprinkles over the chocolate. Repeat this process swiftly with all the remaining trees.
- With the reserved chocolate: Now, turn your attention to the reserved 1/4 cup of white chocolate. Add 2 drops of red food coloring to it. If the chocolate has cooled and thickened, you can gently microwave it in short 15-second intervals, stirring after each, until it’s melted and smooth again. Continue adding red food coloring, a drop at a time, until you achieve your desired vibrant holiday red. Transfer this colored chocolate into a small piping bag (you can even use a Ziploc bag with a tiny corner snipped off). Pipe charming zig-zag patterns across the tops of all your dipped Christmas trees, mimicking the classic Little Debbie design. Once decorated, place the baking sheet with the trees back into the refrigerator. Allow them to chill until the white chocolate coating, including your decorative zig-zags, has completely set and hardened. Only then are they ready to be enjoyed!
Make-Ahead, Storage, and Freezing Instructions for Your Convenience
These Gluten-Free Little Debbie Christmas Trees are perfect for preparing in advance, making your holiday entertaining stress-free. Here’s how to ensure they stay fresh and delicious:
To Make-Ahead: The creamy filling can be prepared up to 1 day in advance. Simply store it in an airtight container in the refrigerator until you’re ready to assemble. For even earlier preparation, the assembled Christmas trees (cake and filling, without the white chocolate coating or decorations) can be frozen for up to 2 weeks. Make sure to wrap them tightly in plastic wrap to prevent freezer burn. When you plan to serve them, remember to account for enough time to thaw slightly, then coat and decorate the trees, allowing the coating to set completely in the fridge before presenting them.
To Store: Once fully decorated with their white chocolate coating and sprinkles, these charming trees can be stored in an airtight container in the refrigerator for up to 5 days. To prevent them from sticking together and to maintain their perfect appearance, it’s best to separate layers with sheets of parchment paper or wax paper.
To Freeze: For longer preservation, decorated trees can be frozen. Place them in a single layer in an airtight container, again separating layers with parchment or wax paper if stacking. They will keep well in the freezer for up to 1 month. When you’re ready to enjoy them, simply thaw the frozen trees in the refrigerator overnight. This slow thawing process helps maintain their texture and prevents condensation from forming on the chocolate coating.
What if I don’t have a tree cookie cutter?
No tree cookie cutter? No problem at all! The beauty of this recipe lies in its adaptability. While a tree shape certainly adds to the festive charm and nostalgic appeal of the Little Debbie original, it’s absolutely not essential for delicious results. You can confidently use any shaped cookie cutter you already own and love – stars, circles, squares, or even gingerbread men would be wonderfully festive. The flavor and delightful texture of your gluten-free cakes will remain exactly the same, regardless of their shape. If you’re truly set on the classic Christmas tree look but prefer not to invest in a new cookie cutter, you can also meticulously freehand cut tree shapes from the cake using a sharp knife. It might take a little more time and precision, but the outcome will still be adorable and perfectly delicious.
What can I do with the cake scraps after I cut out all of the trees?
After carefully cutting out all your perfect Christmas tree shapes, you’ll inevitably be left with some delicious cake scraps. Don’t let these go to waste – they’re far too tasty! First, try to maximize your yield by cutting as many trees as possible from the baked sheet. For the remaining scraps, there are several fantastic and easy ways to enjoy them. You can crumble them up and transform them into delightful cake pops – just mix with a little frosting, roll, and dip! Alternatively, these moist cake crumbles make an excellent topping for ice cream, adding a lovely texture and flavor to your favorite frozen dessert. Or, and perhaps the most tempting option, simply snack on them! They make the perfect little treat to nibble on while you’re busy decorating your beautiful Christmas tree cakes.
Why did my white chocolate coating crack, and how can I prevent it?
A common issue when coating cakes is the white chocolate cracking, which can be a little disheartening after all your hard work. This typically occurs for a couple of primary reasons. Firstly, if the chocolate layer applied to the cake is too thick, it becomes more brittle once it sets and is prone to cracking with any slight movement or temperature change. Secondly, a significant temperature difference between the frozen cake and the melted chocolate can also contribute to cracking as the chocolate cools and contracts too rapidly. To prevent this, ensure your chocolate coating is applied as thinly and evenly as possible. After dipping each frozen tree in the melted white chocolate, allow the excess coating to drip off thoroughly back into the bowl. Using an offset spatula can be incredibly helpful here to gently smooth any thicker areas on the top and sides, ensuring a consistent, thin layer. Additionally, ensuring your chocolate isn’t *too* hot can help; melt it just until smooth. By carefully managing the thickness and allowing proper dripping, you’ll achieve a flawless, uncracked coating every time.
Can I customize the filling by adding different flavors instead of vanilla?
Absolutely! While the classic vanilla filling is deliciously comforting and reminiscent of the original Little Debbie cakes, feel free to get creative and experiment with different flavor extracts to customize your holiday treats. The whipped cream base is incredibly versatile. Consider adding extracts like peppermint for a refreshing wintery twist, almond for a sophisticated nutty note, or even coconut for a tropical surprise. When introducing new extracts, it’s important to remember that many, especially peppermint and almond, tend to be significantly stronger and more potent than vanilla extract. To avoid overpowering your filling, I highly recommend adding them gradually, just a few drops at a time. Mix well and taste as you go, slowly building up the flavor intensity until you achieve your desired perfect balance. This allows you to tailor the taste precisely to your preferences and create unique variations for your holiday dessert spread.
Discover More Irresistible Gluten-Free Holiday Desserts
The holiday season is a time for indulgence, and a gluten-free diet shouldn’t mean missing out on any of the festive fun! If you’ve enjoyed making these delightful Gluten-Free Little Debbie Christmas Trees, you’ll love exploring these other incredible gluten-free holiday dessert recipes. From classic Yule logs to spiced gingerbread and refreshing peppermint treats, there’s something here to satisfy every sweet craving and make your celebrations truly special and inclusive. Dive in and discover your next favorite holiday bake!
- Gluten-Free Yule Log
- Gluten-Free Christmas Cookies
- White Chocolate Peppermint Rice Krispies Treats
- Gluten-Free Peppermint Oreo Pie
- Gluten-Free Gingerbread Cake
- Gluten-Free Gingerbread Cookies
- Gluten-Free Sticky Toffee Pudding Cake
Gluten-Free Little Debbie Christmas Trees Recipe
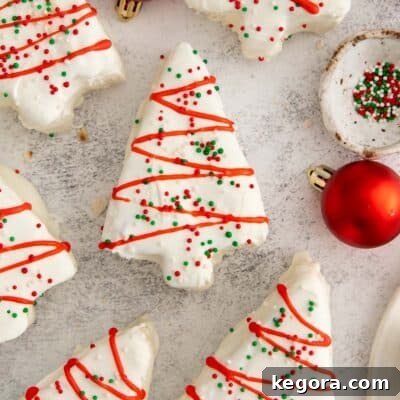
These delightful Gluten-Free Little Debbie Christmas Trees are a dream come true for holiday baking. They feature a tender, fluffy vanilla cake base, generously filled with a creamy, airy whipped topping, and then elegantly dipped in a crisp white chocolate coating. Adorned with festive sprinkles and a signature red drizzle, these are the cutest, most authentic gluten-free Christmas treats you can imagine!
For ultimate ease and convenience, I like to use a high-quality gluten-free vanilla cake mix for this recipe. However, if you prefer baking from scratch, you can certainly achieve equally wonderful results using a double batch of my beloved gluten-free vanilla cake recipe. Both methods yield an utterly delicious and festive treat perfect for sharing!
Comments
Ingredients
- 2 boxes King Arthur Gluten Free Yellow Cake Mix plus ingredients listed on the box for cake preparation
- 2 cups (480ml) very cold heavy cream
- ½ cup (60g) powdered sugar plus extra for dusting the cake
- 1 tablespoon EZ Gel
- 1 tablespoon instant vanilla pudding mix
- 2 teaspoons pure vanilla extract
- 2 pounds (907g) white chocolate melts
- Red food coloring
- Festive sprinkles
Instructions
-
Preheat your oven to 350°F (175°C). Line a large rimmed half-sheet pan with parchment paper, ensuring it covers the entire surface, then spray it generously with nonstick cooking spray to prevent any sticking.
-
Prepare both boxes of the gluten-free yellow cake mix according to the specific instructions provided on the box. For convenience, you can combine and mix both batches simultaneously in a very large mixing bowl. Once the batter is ready, spread it evenly into the prepared pan, ensuring an consistent thickness across the entire surface. Bake for 30-35 minutes, or until a cake tester or toothpick inserted into the center of the cake comes out completely clean. This ensures the cake is fully cooked through. Allow the cake to cool completely on a wire rack before you attempt to cut it, as a warm cake will be difficult to handle and may crumble.
-
Lightly dust your clean work surface with powdered sugar. Carefully invert the completely cooled cake onto the sugared surface. Gently remove the parchment paper from the bottom of the cake. Then, lightly dust the top of the cake with more powdered sugar. This step is crucial as the thin layer of powdered sugar helps prevent the cake from sticking to your cookie cutter and allows for cleaner cuts.
-
Using a 4-inch (10 cm) tree-shaped cookie cutter, firmly press down to cut out as many tree shapes as you can from the cake. With careful placement, you should be able to yield approximately 15 individual cake trees. Place these cutouts onto a clean, parchment-lined baking sheet.
-
Next, take a sharp serrated bread knife and meticulously cut each cake tree in half horizontally, creating a top and bottom layer for each. Arrange these split tree halves back onto the lined baking sheet. Place the baking sheet into the refrigerator to chill the cake layers while you prepare the filling. This chilling helps to firm up the cake, making it easier to handle and fill without tearing.
-
In the bowl of a stand mixer fitted with the whisk attachment, combine the very cold heavy cream, powdered sugar, EZ Gel, instant vanilla pudding mix, and pure vanilla extract. Start mixing on a low speed to gently combine all the ingredients. Once they are incorporated, increase the mixer speed to high and beat the mixture continuously until stiff peaks form. This process should take about 2 minutes, resulting in a light, airy, and stable whipped cream filling.
-
Carefully transfer the prepared fluffy filling into a large piping bag that has been fitted with a round piping tip. This will allow for precise and even application of the filling onto the cake layers.
-
Take one of the chilled bottom cake halves. Using the piping bag, pipe a generous, even layer of filling onto its surface, making sure to extend the filling all the way to the edges of the cake. This ensures a delightful creamy bite in every part of the finished treat. Gently place the corresponding top half of the tree cake onto the filling and press down very lightly, just enough to secure it without compressing the cake or squeezing out too much filling. If any filling does ooze out the sides, use a small offset spatula to carefully smooth it back into place for a neat appearance.
-
Once all the cakes are assembled and filled, wrap the entire baking pan tightly with plastic wrap. This is a crucial step for achieving the perfect coating later. Place the wrapped pan into the freezer and allow the cakes to freeze solid overnight, or for a minimum of 8 hours. This deep freeze ensures the cakes are firm enough to handle and dip without falling apart, and helps create a smooth, even chocolate shell.
-
When your Christmas trees are thoroughly frozen, it’s time to prepare the white chocolate coating. Add the white chocolate melts to a heat-safe bowl. Place this bowl over a pot of barely simmering water, ensuring that the bottom of the bowl does not directly touch the water. Stir the chocolate frequently with a rubber spatula until it has completely melted and is smooth and fluid. Once melted, carefully remove the bowl from the heat.
-
Immediately, scoop out approximately ¼ cup of the melted white chocolate and transfer it to a small, separate bowl. Set this bowl aside, as this portion will be used later for decorating the cakes with the signature red ribbon.
-
Working swiftly, one at a time, dip a frozen Christmas tree entirely into the main bowl of melted white chocolate. Allow any excess white chocolate to drip back into the bowl. An offset spatula can be very useful here for gently smoothing the top and sides of the trees, ensuring a thin, even, and consistent coating. Place the freshly dipped tree onto a clean, parchment-lined baking sheet. While the chocolate coating is still wet, immediately garnish it with your chosen festive sprinkles. Repeat this process quickly with all the remaining Christmas trees, ensuring each one is dipped and decorated before the chocolate sets.
-
Now, return to the reserved ¼ cup of melted white chocolate. Add 2 drops of red food coloring to it. If the chocolate has cooled and thickened, you can gently microwave it in 15-second intervals, stirring after each, until it is once again melted and smooth. Continue adding additional drops of red food coloring, one at a time, until you achieve your desired vibrant holiday red color. Transfer this colored red chocolate to a small piping bag (a sturdy Ziploc bag with a tiny corner snipped off works perfectly). Pipe charming zig-zag patterns across the tops of your dipped and sprinkled Christmas trees, mimicking the classic Little Debbie design.
-
Finally, place the decorated trees back into the refrigerator. Allow them to chill for a sufficient period until the white chocolate coating and the decorative red zig-zags have completely set and hardened. Once fully set, your beautiful and delicious gluten-free Little Debbie Christmas Trees are ready to be served and enjoyed!
Notes
Instant Vanilla Pudding Mix: When selecting your instant vanilla pudding mix, ensure it is gluten-free. Popular brands like Jell-O are generally considered free of gluten-containing ingredients, but for complete peace of mind, you can opt for brands explicitly labeled gluten-free, such as Simple Mixes. Always double-check ingredient labels to ensure suitability for a gluten-free diet.
White Chocolate Melts: For the iconic crisp coating, it’s important to use white chocolate melts that are confirmed to be gluten-free. I specifically recommend these white chocolate melts, as they do not contain gluten-containing ingredients, making them a safe and delicious choice for your festive treats.
To Make-Ahead: For optimal convenience during the busy holiday season, the creamy filling can be prepared up to 1 day in advance and stored in an airtight container in the fridge. For even longer planning, the assembled Christmas trees (cake and filling, prior to coating and decorating) can be frozen for up to 2 weeks. Remember to ensure that you coat and decorate the trees with ample time for the chocolate coating to set firmly in the fridge before you plan to serve them.
To Store: Once fully decorated, these charming Christmas trees can be stored in an airtight container in the refrigerator for up to 5 days. To maintain their pristine condition and prevent any sticking, it is highly recommended to separate layers of cakes with parchment paper or wax paper.
To Freeze: For extended enjoyment, your decorated Christmas trees can be frozen in an airtight container for up to 1 month. When you’re ready to indulge, simply thaw them overnight in the refrigerator. This gentle thawing process helps to preserve their delicate texture and ensures they are perfectly delicious when served.