

Erin’s Ultimate Gluten-Free White Chocolate Peppermint Pretzel Cookies

There’s something truly magical about the holiday season, and for me, it always comes with a craving for those iconic sweet-and-salty treats. One of my absolute favorite Christmas delights has always been white chocolate peppermint pretzels – the perfect blend of creamy, crunchy, minty, and salty bliss. This year, I set out to capture all those irresistible flavors in an extraordinary cookie, ensuring it’s not only delicious but also wonderfully gluten-free!
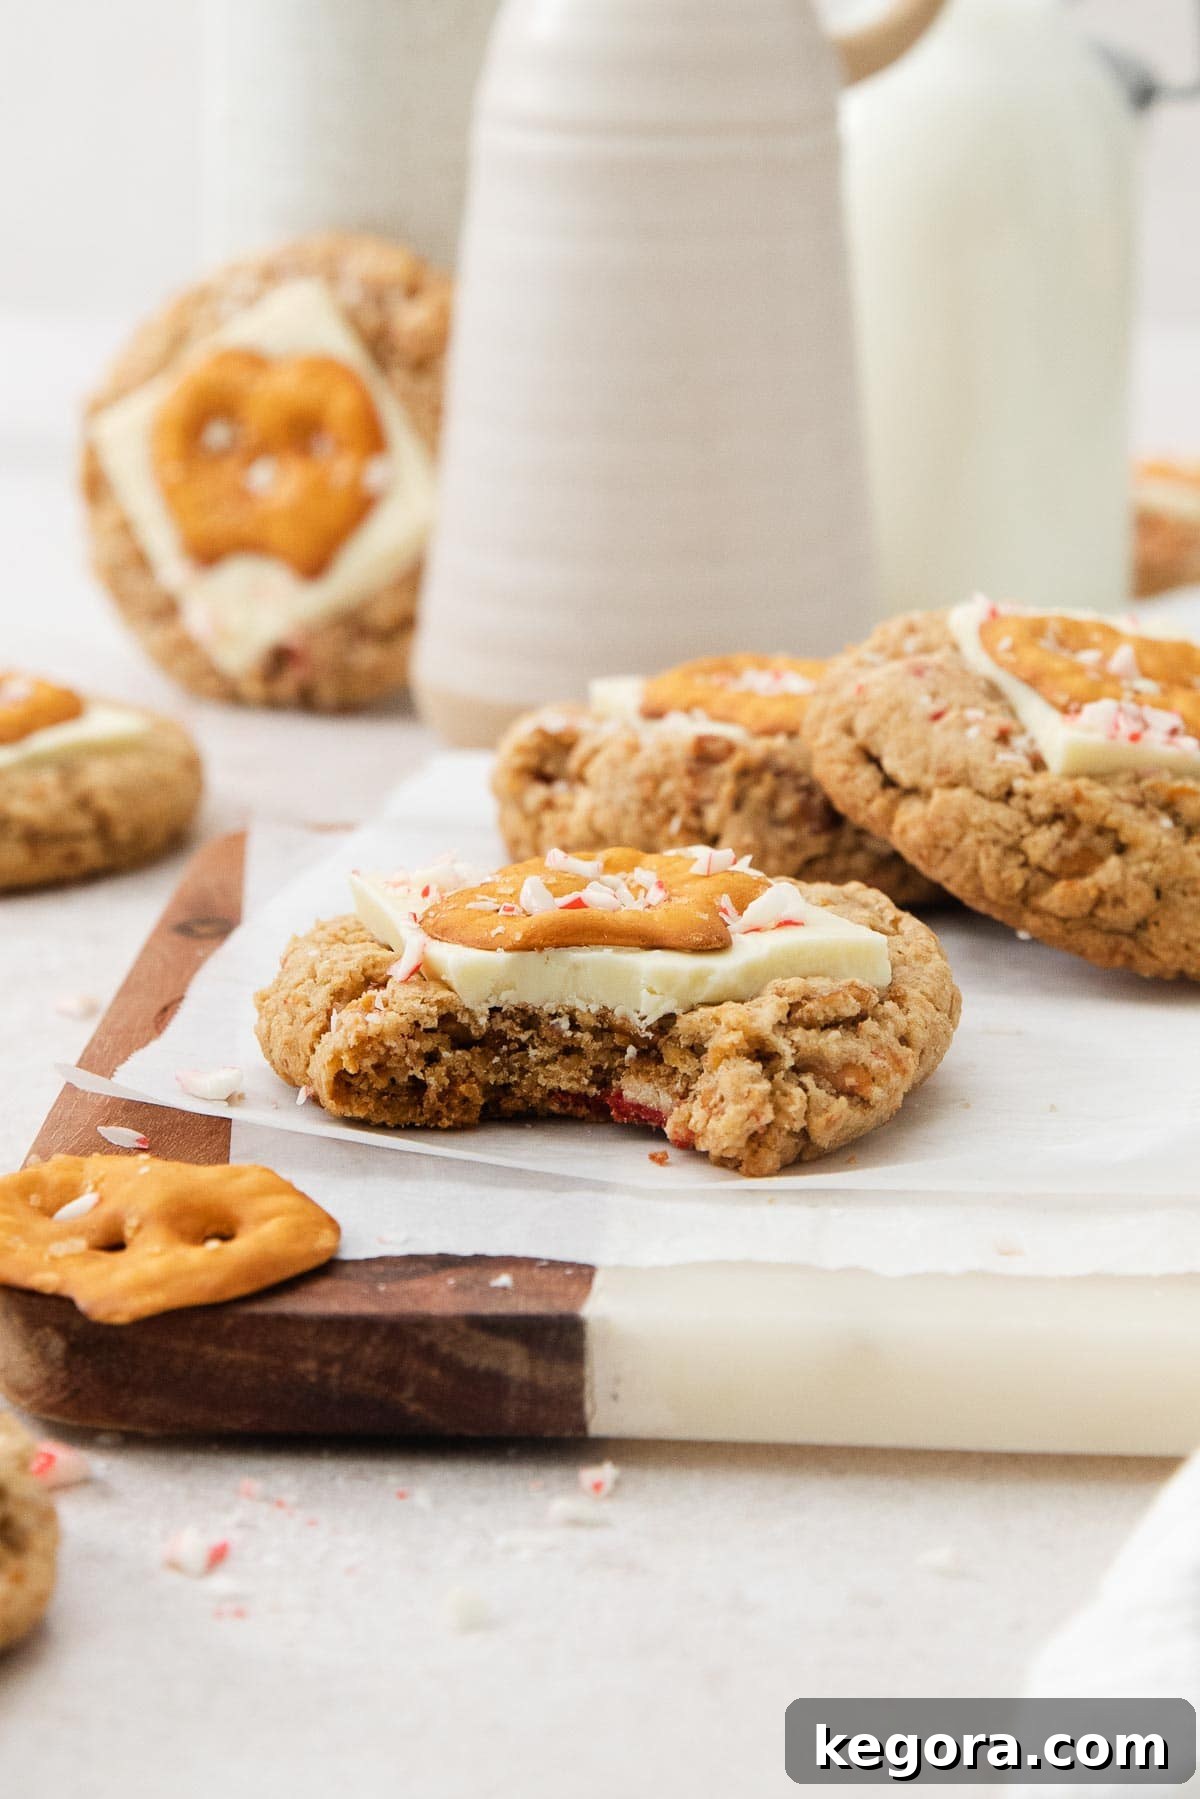
These Gluten-Free White Chocolate Peppermint Pretzel Cookies are a revelation. They perfectly encapsulate that beloved combination, offering a texture and flavor profile that stands out from your average holiday cookie. Imagine a soft, chewy cookie infused with the subtle saltiness of pretzels, studded with bursts of peppermint, and crowned with a luxurious layer of white chocolate and a crisp pretzel finish. Pure holiday perfection!
Why You’ll Absolutely Adore This Recipe
What makes these cookies so special? It all comes down to a secret ingredient: homemade pretzel flour. Yes, you read that right! By grinding gluten-free pretzel crisps into a fine flour, we create a unique base that imparts an incredible depth of flavor and a wonderfully complex texture to the cookies. This isn’t just about adding crushed pretzels on top; it’s about integrating that distinctive pretzel taste throughout the entire cookie, making it truly one-of-a-kind.
Beyond the innovative pretzel flour, these cookies are:
- Uniquely Flavorful: The harmony of sweet white chocolate, cool peppermint, and salty pretzels creates an addictive taste experience that keeps you coming back for more.
- Remarkably Textured: Expect a delightful combination of soft, chewy centers, slightly crispy edges, and the satisfying crunch of whole pretzel crisps and peppermint candy on top.
- Bakery-Quality Perfection: These aren’t just good homemade cookies; they look and taste like they came straight from a gourmet bakery, making them incredibly impressive for any occasion.
- Perfect for Gifting: Elegantly topped and visually appealing, they make thoughtful and delicious homemade gifts for friends, family, and neighbors.
- Ideal for Holiday Gatherings: Whether it’s a festive cookie exchange, a cozy family party, or a vibrant holiday celebration, these cookies are guaranteed to be a crowd-pleaser and a conversation starter.
- Effortlessly Gluten-Free: With the right ingredients, these cookies deliver on taste and texture without any compromise, making them accessible for those with gluten sensitivities.
Top Tips for Holiday Baking Success
Achieving bakery-quality cookies at home is simpler than you think with a few key techniques:
- Don’t Skip the Chill Time: This is perhaps the most crucial step! Chilling the dough for at least an hour (or up to three days!) allows the flavors to meld beautifully and, more importantly, prevents the cookies from spreading too much in the oven. The result is perfectly shaped, thicker cookies with that desirable chewy texture.
- Ingredient Quality Matters: Using high-quality ingredients, from your gluten-free flour to your white chocolate and peppermint, will elevate the final taste of your cookies.
- Accurate Measurements: Baking is a science! Use a kitchen scale for flour and other dry ingredients for the most accurate results, especially with gluten-free flour, which can vary in density.
Looking for more festive inspiration? Be sure to explore these other fantastic holiday treats from my kitchen:
- Peppermint Rice Krispie Treats
- Gluten-Free Chocolate Mint Cookies
- Rolo Pretzel Bites
- Gluten-Free Pretzel Bark
- Gluten-Free Sugar Cookies
xoxo erin

Essential Ingredients for Your Cookies
Crafting these delectable gluten-free white chocolate peppermint pretzel cookies requires a thoughtful selection of ingredients. Here are a few detailed notes on some of the key components to help you achieve the best results. You’ll find the exact measurements and full ingredient list in the recipe card below.
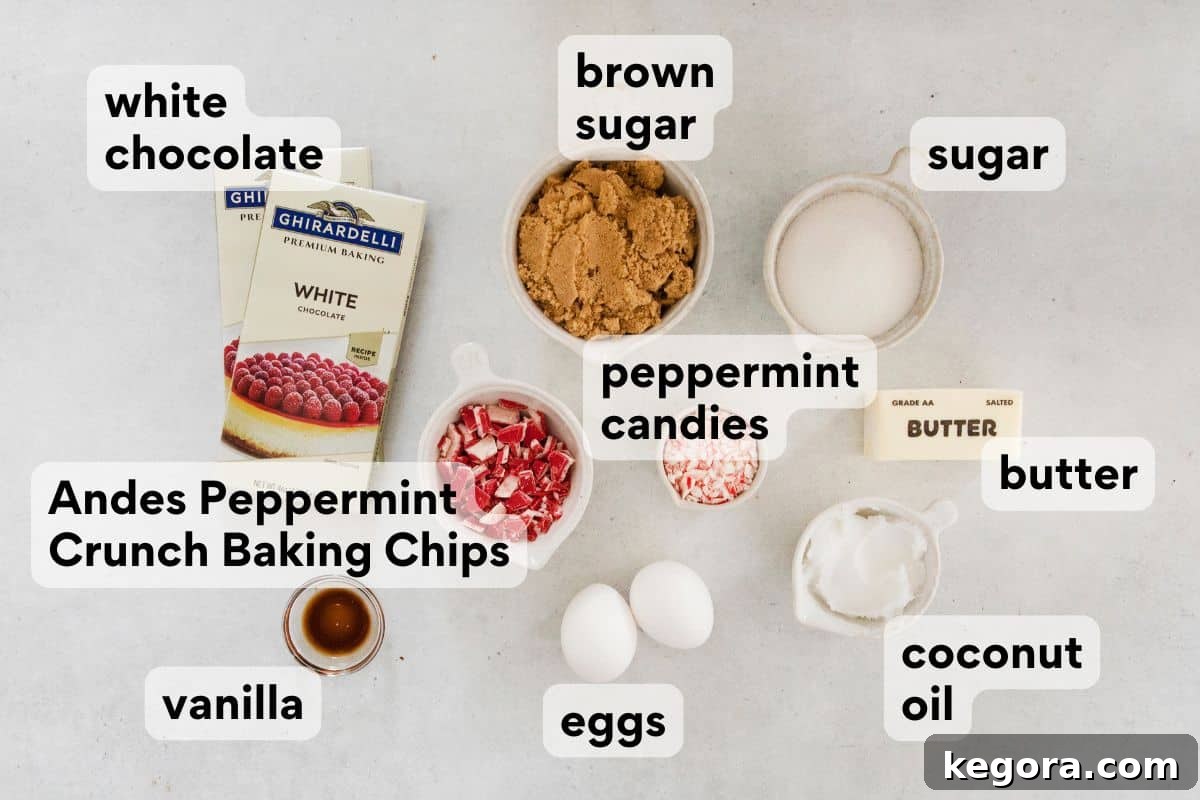
- Coconut Oil: While butter is a classic for cookies, incorporating coconut oil adds a lovely depth of flavor, enhances moisture, and contributes to that wonderfully soft and chewy texture we’re aiming for. Ensure it’s at room temperature (soft but not melted) for optimal creaming with the butter and sugars.
- Peppermint: For that signature minty sweetness, I highly recommend using Andes Peppermint Crunch Baking Chips or finely chopped Crunch Thins. This brand delivers a fantastic, balanced peppermint flavor that’s perfect for these cookies. For an extra festive touch and visual appeal, don’t forget to add some crushed peppermint candies on top of the melted white chocolate – it provides a beautiful color contrast and an extra burst of minty crunch.
- White Chocolate: The quality of your white chocolate makes a big difference here. Opt for high-quality white chocolate bars rather than baking melts or chips for the best topping. Bars melt more smoothly and provide a superior, decadent finish. Ghirardelli offers a rich, creamy white chocolate bar that I love, but feel free to use your favorite brand. You’ll be melting this down to spread over the warm cookies, so a good melting consistency is key.
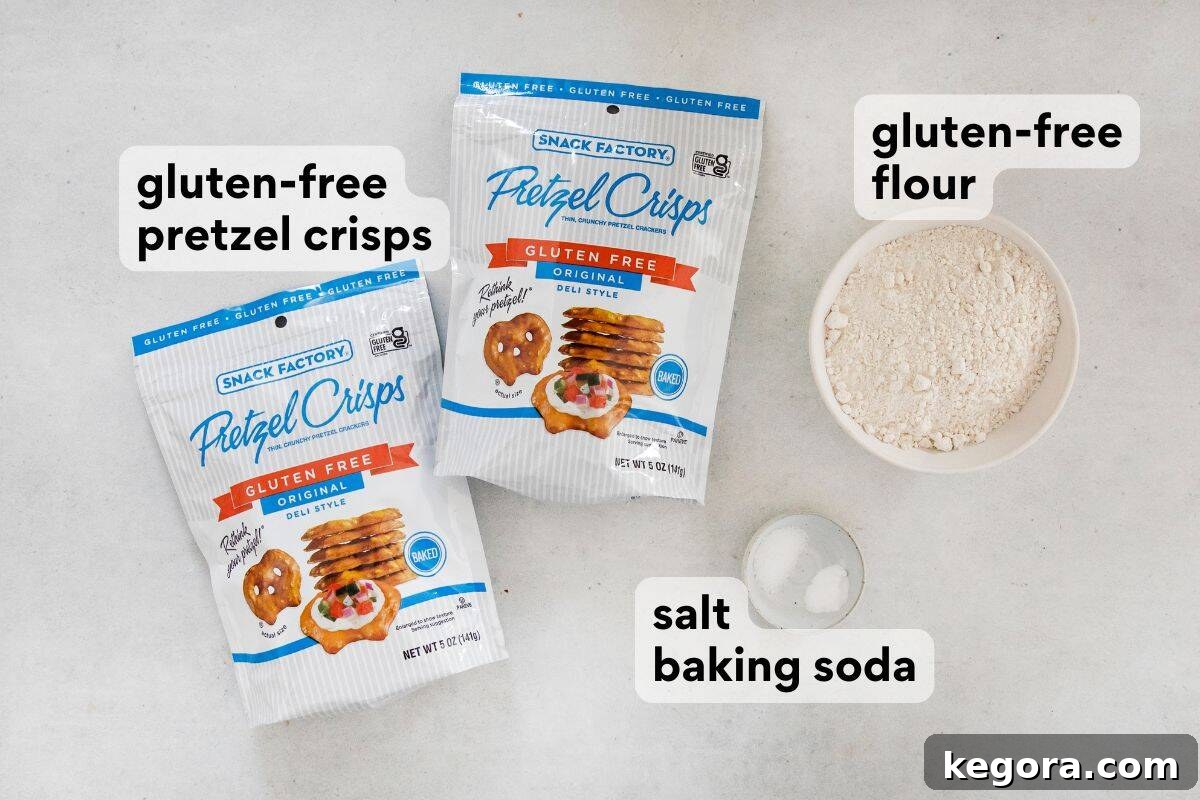
- Gluten-Free Flour Blend: The success of gluten-free baking often hinges on the right flour. Use a high-quality gluten-free measure-for-measure (or “cup-for-cup”) flour blend that explicitly states it contains xanthan gum. Xanthan gum is crucial for providing structure and elasticity in the absence of gluten. My go-to brand that consistently delivers excellent results is King Arthur Gluten-Free Measure for Measure Flour.
- Gluten-Free Pretzels: This is where the magic happens! You’ll need two bags of gluten-free pretzel crisps. I specifically recommend the “crisps” variety over twists or sticks because they grind down into a finer flour and the whole crisps provide the perfect flat surface for topping each cookie. Any brand of gluten-free pretzel crisps will work, so pick your favorite.
- Other Baking Staples: Don’t forget your everyday heroes like softened butter, rich brown sugar, granulated sugar for sweetness, large eggs, pure vanilla extract for warmth, kosher salt to balance the flavors, and reliable baking soda for the perfect rise and spread.
Key Kitchen Tools You’ll Need
To make these cookies a breeze to bake, gather the following:
- Food Processor: Essential for turning pretzel crisps into fine flour and chunky bits.
- Stand Mixer or Hand Mixer: For efficiently creaming butter, oil, and sugars, and combining the dough.
- Large Mixing Bowls: For combining wet and dry ingredients separately.
- Measuring Cups & Spoons: For accurate ingredient amounts.
- Baking Sheets: Sturdy sheets that won’t warp in the oven.
- Parchment Paper or Silicone Baking Mats: For non-stick baking and easy cleanup.
- Cookie Scoop (3-tablespoon size): Ensures uniformly sized cookies for even baking.
- Wire Cooling Rack: For proper cooling and setting of the cookies.
- Sharp Knife: For chopping white chocolate bars.
Crafting Your Gluten-Free White Chocolate Peppermint Pretzel Cookies
Embark on a delightful baking journey with this straightforward guide to creating the most incredible holiday cookies. Below is an overview of the steps; remember to refer to the comprehensive recipe card for precise instructions and measurements.
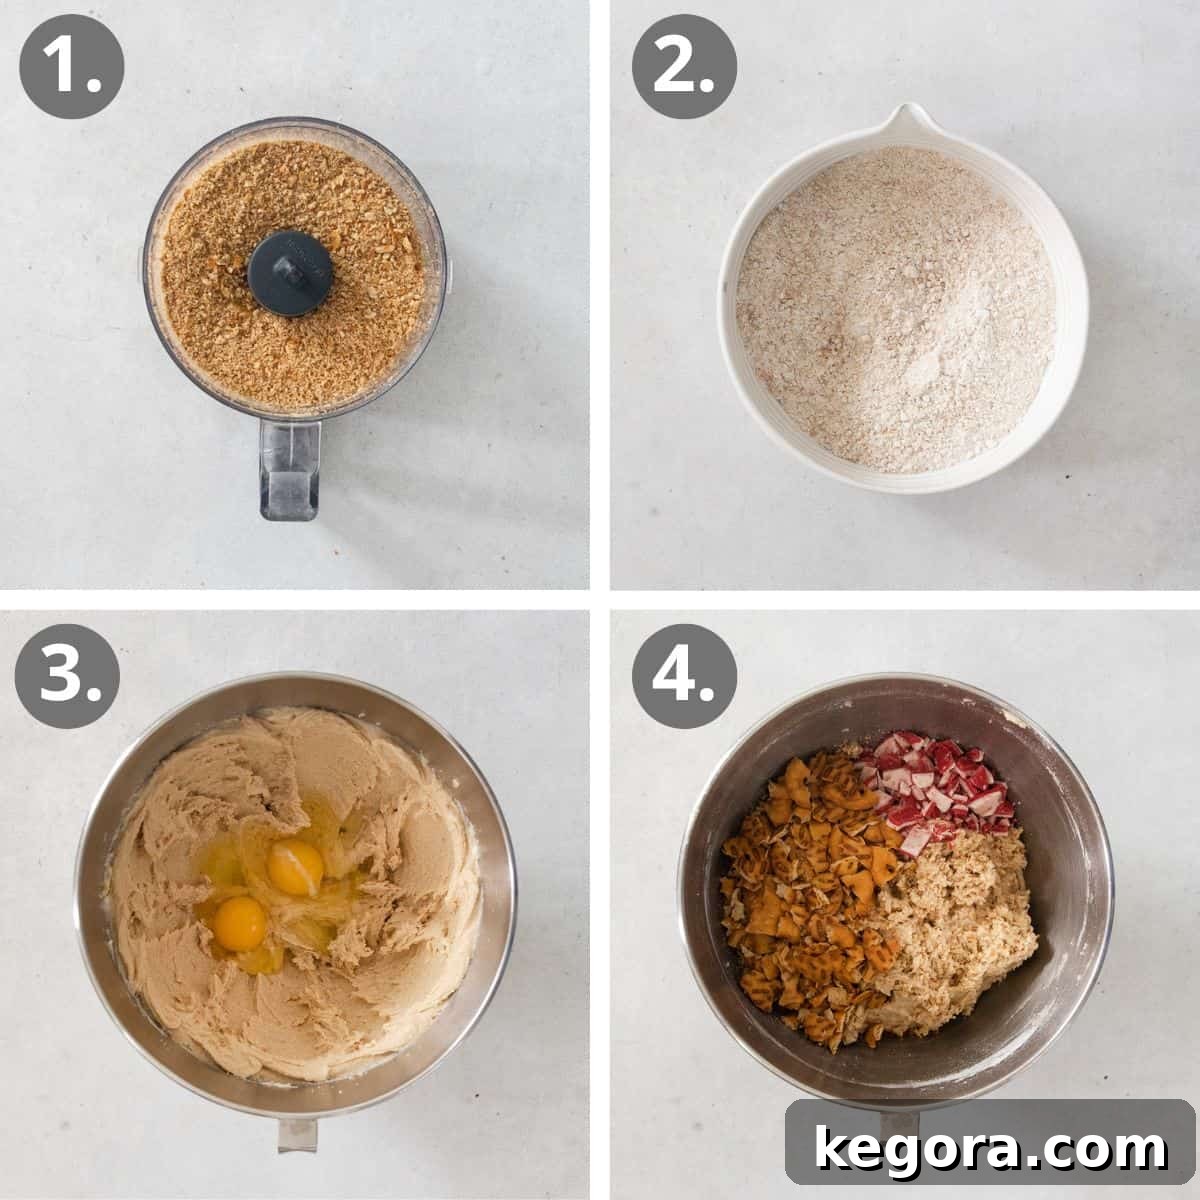
Step 1: Preparing the Pretzel Magic
The foundation of these cookies lies in our unique pretzel flour. Take one entire bag of gluten-free pretzel crisps and process them in a food processor until they transform into a fine, smooth flour. This is where that incredible, subtle salty flavor is born. From your second bag of pretzel crisps, carefully set aside about 20 whole crisps – these will be your gorgeous cookie toppers. Then, crush the remaining crisps from that second bag into larger, irregular chunks. This combination of fine flour and crunchy chunks provides an amazing textural experience. In a separate medium bowl, whisk together this homemade pretzel flour with your gluten-free measure-for-measure flour, kosher salt, and baking soda. This ensures all your dry ingredients are perfectly combined and evenly distributed.
Step 2: Whipping Up the Cookie Dough
In the bowl of a stand mixer fitted with a paddle attachment (or using a hand mixer), combine the softened butter, room-temperature coconut oil, rich brown sugar, and granulated sugar. Cream these together on medium-high speed for about 2-3 minutes until the mixture becomes light, fluffy, and noticeably pale. This creaming process incorporates air, which contributes to the cookies’ light texture. Next, beat in the eggs one at a time, followed by the vanilla extract, mixing until everything is well-combined. Be sure to scrape down the sides and bottom of the bowl periodically to ensure all ingredients are fully incorporated. Gradually add the prepared dry ingredient mixture to the wet ingredients, mixing on low speed until just combined. Overmixing at this stage can lead to tough cookies. Finally, gently fold in your pretzel chunks and the Andes Peppermint Crunch Baking Chips. Cover the bowl and refrigerate the dough for at least 1 hour, or ideally up to 3 days. This chilling period is non-negotiable for the best cookie shape and flavor development!
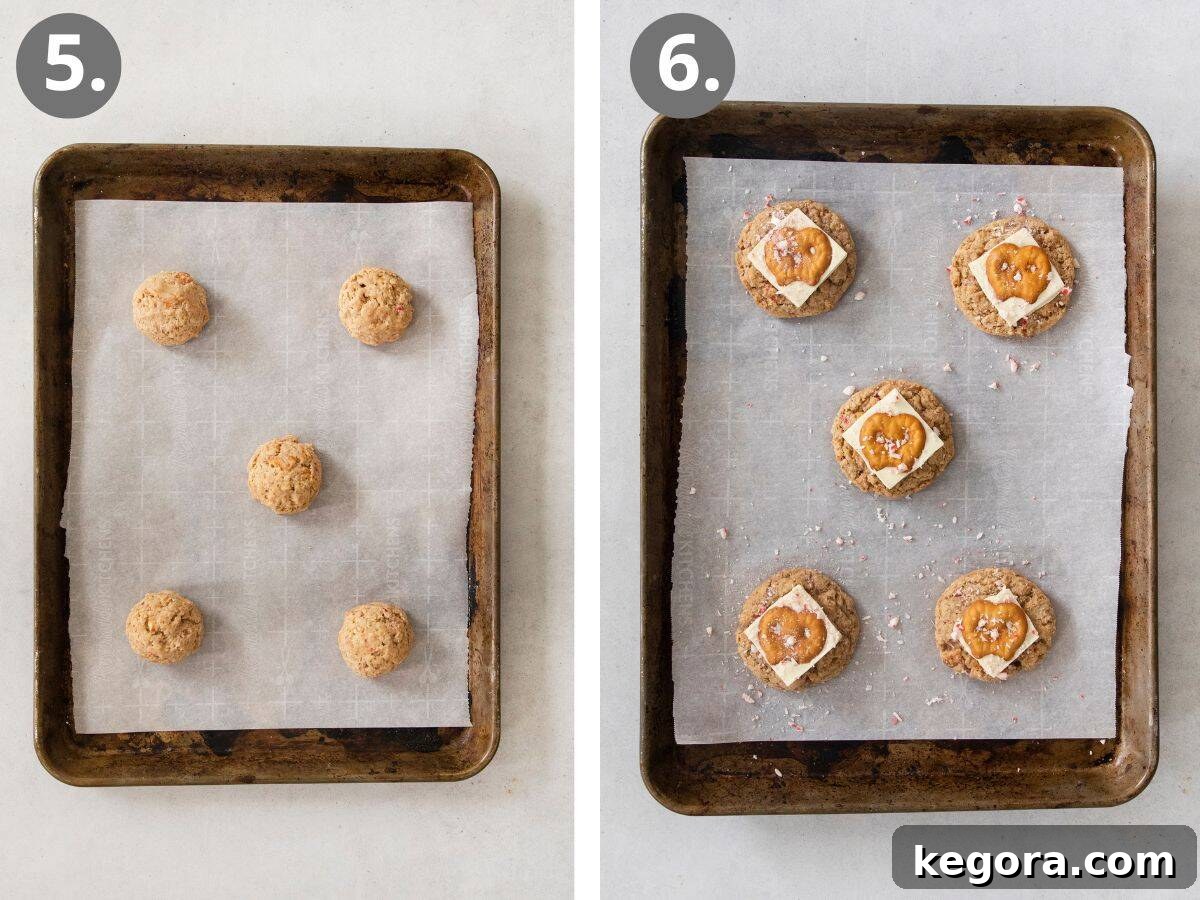
Step 3: Baking to Golden Perfection
Preheat your oven to 350°F (175°C) and line large baking sheets with parchment paper or silicone baking mats. Using a 3-tablespoon cookie scoop, form the chilled dough into uniform balls. Place them on your prepared baking sheets, ensuring they are spaced about 2 inches apart to allow for proper spreading. Bake for 11-13 minutes. You’ll know they’re ready when the edges are beautifully golden brown, but the centers still appear slightly soft and puffy. They will continue to set as they cool, so resist the urge to overbake!
Step 4: The Finishing Touch – White Chocolate & Peppermint
While your cookies are baking, prepare your white chocolate topping. Chop each of your two 4-ounce white chocolate bars into 8 equal pieces. As soon as the cookies emerge from the oven, piping hot, immediately place one piece of chopped white chocolate on top of each warm cookie. Return the baking sheets to the oven for just 1-2 minutes. This brief stint will allow the white chocolate to perfectly soften and begin to melt without fully spreading. Remove the cookies from the oven, and using the back of a spoon or a small offset spatula, gently spread the softened white chocolate into an even, glossy layer over each cookie. Work quickly! Immediately, while the chocolate is still wet, press one of your reserved whole pretzel crisps gently into the center of each cookie, and then generously sprinkle with the crushed peppermint candies. The warmth of the cookie and the melting chocolate will help these toppings adhere beautifully. Let the cookies cool on the baking sheets for about 10 minutes to set, then transfer them to a wire rack to cool completely. Enjoy the sweet, salty, and minty bliss!
MORE GLUTEN-FREE CHRISTMAS COOKIES TO LOVE
Gluten-Free Peppermint Meltaways
16 Gluten-Free Christmas Cookies to Bake This Season
Gluten-Free Chocolate Turtle Cookies
Christmas Tree Crispy Treats

Gluten-Free White Chocolate Peppermint Pretzel Cookies
These are big, unique bakery-style cookies that would be fun for holiday cookie exchanges, parties and more!
Comments
Ingredients
Dry Ingredients
- 2 5-ounce bags (283g) gluten-free Pretzel Crisps, divided
- 1½ cups (225g) gluten-free measure-for-measure flour
- 1 teaspoon kosher salt
- ½ teaspoon baking soda
Other
- ½ cup (113g) butter, at room temperature
- ¼ cup (56g) coconut oil, at room temperature
- 1 cup (213g) brown sugar
- ½ cup (100g) granulated sugar
- 2 large eggs
- 2 teaspoons vanilla extract
- ½ cup (70g) Andes Peppermint Crunch Baking Chips or chopped Andes Peppermint Crunch Thins
- two 4 ounce (113g) each white chocolate bars
- ¼ cup (43g) crushed peppermint candies
Instructions
-
In the bowl of a food processor, process 1 bag of the gluten-free Pretzel Crisps into a smooth flour. Open the remaining bag and set aside 20 whole Pretzel Crisps. Close the bag and crush the remaining Pretzel Crisps into large chunks.
-
In a medium bowl, whisk together the pretzel flour, gluten-free flour, salt and baking soda.
-
In the bowl of a stand mixer fitted with a paddle attachment, or using a hand mixer, cream together the butter, coconut oil, brown sugar and granulated sugar on medium-high speed until light and fluffy, about 2-3 minutes.
-
Add the eggs and vanilla and mix until well-combined. Scrape down the sides and bottom of the bowl.
-
With the mixer running on low, slowly add the dry ingredients to the wet ingredients and mix until well-combined. Scrape down the sides and bottom of the bowl, then mix again until fully incorporated. Stir in the pretzel chunks and Andes Peppermint Crunch Baking Chips.
-
Cover the bowl and refrigerate for at least 1 hour, or up to 3 days.
-
Preheat the oven to 350°F (175°C). Line large baking sheets with parchment paper or silicone baking mats.
-
Scoop the cookie dough into round balls, 3 tablespoons per ball. Place on the prepared baking sheet, about 2 inches apart.
-
Bake for 11-13 minutes, until the edges are golden brown but the centers are still soft.
-
Chop the white chocolate bars into 8 pieces per bar.
-
As soon as the cookies come out of the oven, place a piece of white chocolate on top of each cookie. Place the cookies back in the oven for 1-2 minutes to melt the chocolate. Remove from the oven and spread into an even layer and immediately top with a whole Pretzel Crisp and crushed peppermint candy.
-
Cool on the baking sheets for 10 minutes. Transfer to a wire rack to cool completely.
Recipe Notes & Tips for Success
Dairy-Free Variation: Easily adapt this recipe to be dairy-free by substituting dairy-free butter (ensure it’s a solid stick variety, not spread) and dairy-free white chocolate bars. For the peppermint chips, use dairy-free white chocolate chips and add a few drops of peppermint extract to the dough for flavor.
Nut-Free: These cookies are naturally nut-free, making them a safe and delicious option for those with nut allergies. Always double-check ingredient labels to confirm.
Make-Ahead Tips: The cookie dough is highly adaptable and can be prepared up to 3 days in advance. Simply cover the bowl tightly and refrigerate. If the dough becomes too firm to scoop after chilling, let it sit at room temperature for 10-15 minutes until it’s workable.
Storage: Once cooled completely, store these delightful cookies in an airtight container at room temperature. They will maintain their freshness and wonderful texture for up to 3 days.
Freezing Unbaked Dough: For future indulgence, you can freeze unbaked dough balls. Arrange them on a baking sheet, freeze until solid, then transfer to a freezer bag or airtight container. They’ll keep for up to 3 months. When ready to bake, place frozen dough balls on a prepared baking sheet and add a couple of minutes to the baking time.
Freezing Baked Cookies: Baked cookies can also be frozen in an airtight container for up to 2 months. Thaw them at room temperature before serving. Be aware that the crushed peppermint candies might lose some of their crispness during the freezing and thawing process, but the flavor will remain fantastic.
Nutrition Information (per cookie)
Frequently Asked Questions (FAQ)
Can I use regular all-purpose flour instead of gluten-free flour?
This recipe is specifically developed for gluten-free baking, relying on the properties of a gluten-free measure-for-measure blend containing xanthan gum. Substituting with regular all-purpose flour might alter the texture and consistency significantly. If you’re not gluten-sensitive, you can certainly try it, but the results may vary, and you might need to adjust liquid amounts slightly.
Is chilling the dough really necessary? Can I skip it?
While it might be tempting to skip the chilling step, I strongly recommend against it! Chilling the dough is crucial for several reasons: it prevents the cookies from spreading too much, helps the flavors meld, and results in a thicker, chewier cookie with better overall texture. A minimum of 1 hour is essential, but longer (up to 3 days) can even enhance the flavor.
What if I don’t have a food processor to make pretzel flour?
If you don’t have a food processor, you can still make these! Place the pretzel crisps in a large, sturdy zip-top bag and use a rolling pin or a heavy pan to crush them. For the “pretzel flour,” crush them as finely as possible. For the “pretzel chunks,” aim for larger, irregular pieces. It might take a bit more effort, but it’s definitely achievable.
Can I use white chocolate chips instead of bars?
While white chocolate chips can be used, I highly recommend using white chocolate bars for the topping. Bars contain more cocoa butter, which allows them to melt more smoothly and spread into a beautiful, even layer on top of the cookies. Chips often contain stabilizers that prevent them from melting as fluidly, potentially resulting in a less refined finish.
How do I prevent my cookies from spreading too flat?
The key factors for preventing flat cookies are: 1) ensuring your butter and coconut oil are at room temperature (not melted); 2) chilling your dough for the recommended time; 3) accurately measuring your flour; and 4) making sure your oven is preheated to the correct temperature. A cold baking sheet can also help if you are baking multiple batches.
Enjoy Your Holiday Baking!
These Gluten-Free White Chocolate Peppermint Pretzel Cookies are more than just a recipe; they’re an experience. They bring together beloved holiday flavors and textures in a way that’s both nostalgic and innovative. Whether you’re baking for a special occasion, sharing with loved ones, or simply treating yourself, these cookies are sure to become a cherished part of your holiday tradition. So go ahead, preheat your oven, gather your ingredients, and prepare to create some unforgettable edible magic. Happy baking!