
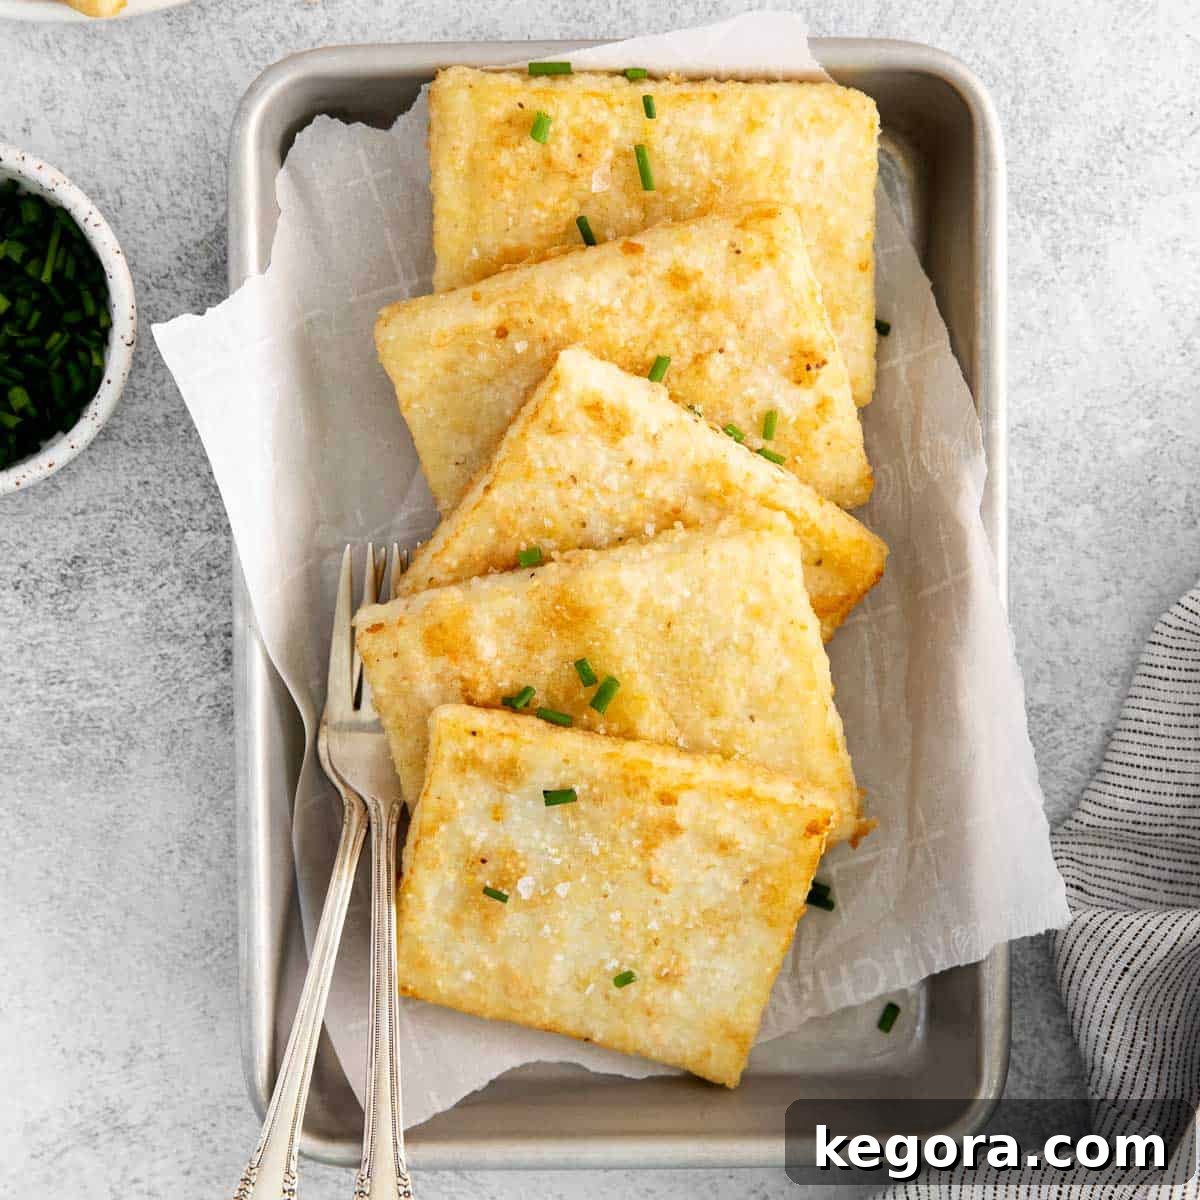
Crispy Southern Grit Cakes: Your Ultimate Guide to Flavorful Comfort Food
Welcome to Erin’s kitchen, where these incredible grit cakes are a **cherished staple**! If you’ve ever wondered how to elevate the humble Southern grit into something truly spectacular, you’ve come to the right place. These savory delights boast a perfect balance of crispy exterior and creamy, tender interior, making them an irresistible addition to any meal.
What makes them so special? Their **remarkable versatility**. While the foundational recipe is simple and satisfying, the possibilities for **flavor combinations** are endless. From classic cheesy comfort to a zesty Tex-Mex twist or even sophisticated gourmet pairings, grit cakes consistently impress. They’re not just a dish; they’re a canvas for culinary creativity.
Why These Grit Cakes Will Become Your New Favorite
Imagine a bite that delivers a satisfying crunch, followed by a meltingly soft and rich interior. That’s the magic of these grit cakes! They are incredibly beginner-friendly, offering a straightforward path to an impressive dish. This recipe transforms basic grits into an extraordinary culinary experience, perfect for breakfast, brunch, or as a unique side dish.
Beyond their delightful texture and rich flavor, these grit cakes are also a fantastic way to utilize leftover grits, minimizing food waste and maximizing deliciousness. They provide a hearty, comforting, and deeply satisfying meal that’s hard to beat.
Erin’s Top Tip for Unbeatable Crispiness
Achieving that coveted golden-brown, extra-crispy crust is simpler than you think! The secret lies in two crucial steps:
- Thorough Chilling: After cooking, spreading the grits thinly and chilling them completely in the refrigerator allows them to firm up. This solidification is essential for clean slicing and ensures the cakes hold their shape perfectly during frying. Skipping this step can lead to crumbly, difficult-to-handle cakes.
- Hot Oil is Key: Before introducing your perfectly chilled and floured grit cakes to the skillet, make sure your oil is adequately hot. This quick heat contact creates an immediate seal, resulting in a beautifully crisp crust without the cakes absorbing too much oil and becoming greasy. A sizzle when the first cake hits the pan is your cue that the oil is ready!
For more delicious and savory breakfast and brunch ideas, be sure to explore these other fantastic recipes: Grits and Eggs, Cream Cheese Grits, Gluten-Free Breakfast Burritos, and these delightful Breakfast Tacos.
xoxo Erin

Essential Ingredients for Perfect Grit Cakes
Crafting delicious grit cakes begins with selecting the right ingredients. While the recipe is relatively simple, focusing on quality will truly elevate your dish. Below are key notes on the ingredients you’ll need. For precise measurements, please refer to the comprehensive recipe card further down this page.
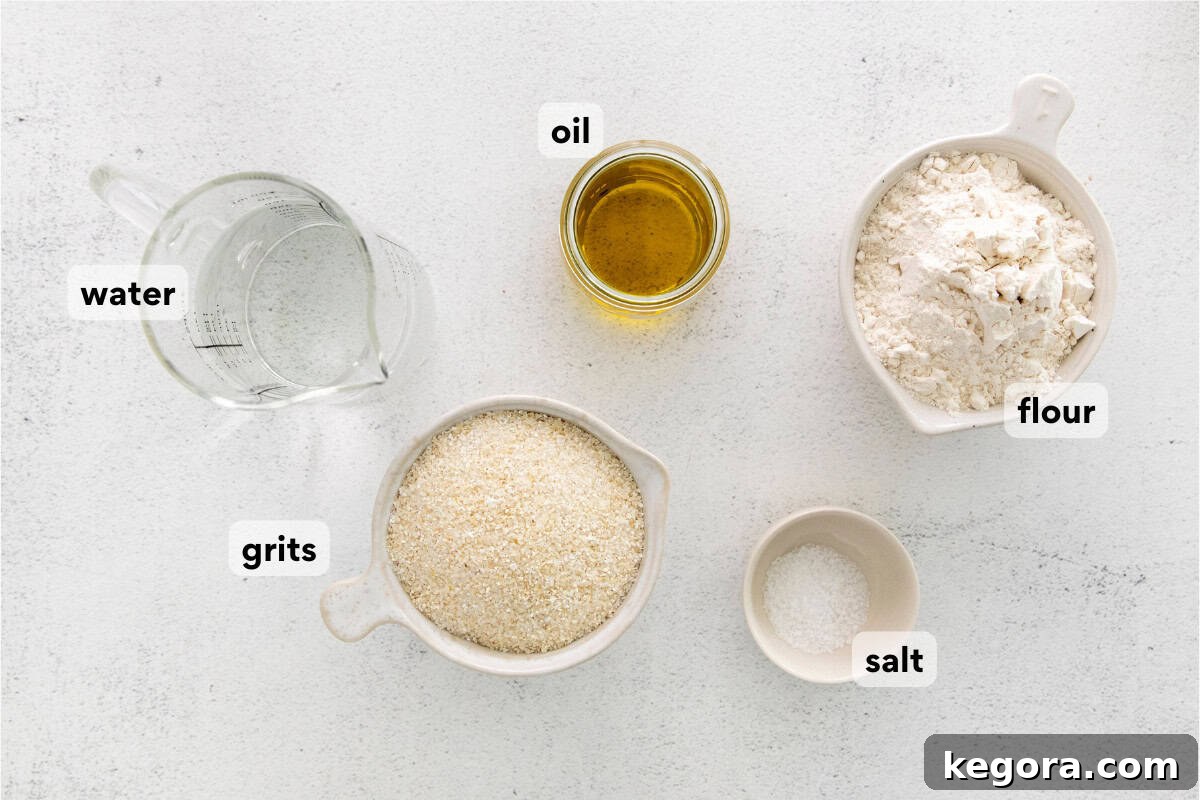
- Flour: This isn’t just for dredging; flour plays a critical role in creating that desirable crisp crust. It helps to dry out the surface of the chilled grits, forming a protective layer that browns beautifully when fried. You can confidently use standard all-purpose flour. For those with dietary restrictions, a high-quality, **gluten-free measure-for-measure flour** works perfectly as a 1:1 substitute, ensuring your grit cakes are accessible to everyone.
- Grits: Unsurprisingly, the quality of your grits directly impacts the final taste and texture of your grit cakes. For a superior flavor and consistency, we highly recommend the Palmetto Farms brand. When choosing grits, you’ll encounter different types:
- Stone-Ground Grits: These are less processed and retain more of the corn’s natural flavor and texture, offering a chewier, heartier grit. They take longer to cook but are worth the wait.
- Quick-Cooking Grits: These are partially processed, usually by being broken into smaller pieces, allowing them to cook much faster. They offer a smoother texture.
- Instant Grits: While convenient, these are highly processed and often lack the depth of flavor and satisfying texture needed for truly exceptional grit cakes. We recommend avoiding them for this recipe.
- Salt: In simple recipes like this, salt is not just an enhancer; it’s a foundational flavor builder. It brings out the inherent sweetness of the corn and balances the richness of the finished dish. Do not skip or skimp on the salt; it’s crucial for achieving that perfect savory profile. We recommend kosher salt for its clean taste and larger crystals.
- Water: The primary liquid for cooking grits. The ratio of water to grits is essential for the correct creamy consistency before chilling.
- Olive Oil: Used for frying, olive oil adds a subtle fruity note and helps achieve that irresistible golden, crispy crust. You can also use other high-heat oils like canola or vegetable oil.
Curious about dietary considerations? Discover more about whether grits are gluten-free in this informative article.
Step-by-Step Guide: How to Make Irresistible Grit Cakes
Creating these delightful grit cakes is a rewarding process. We’ll walk you through each step, from cooking the perfect batch of grits to achieving that ultimate crispy finish. For the complete, printable instructions, feel free to jump to the recipe card below!
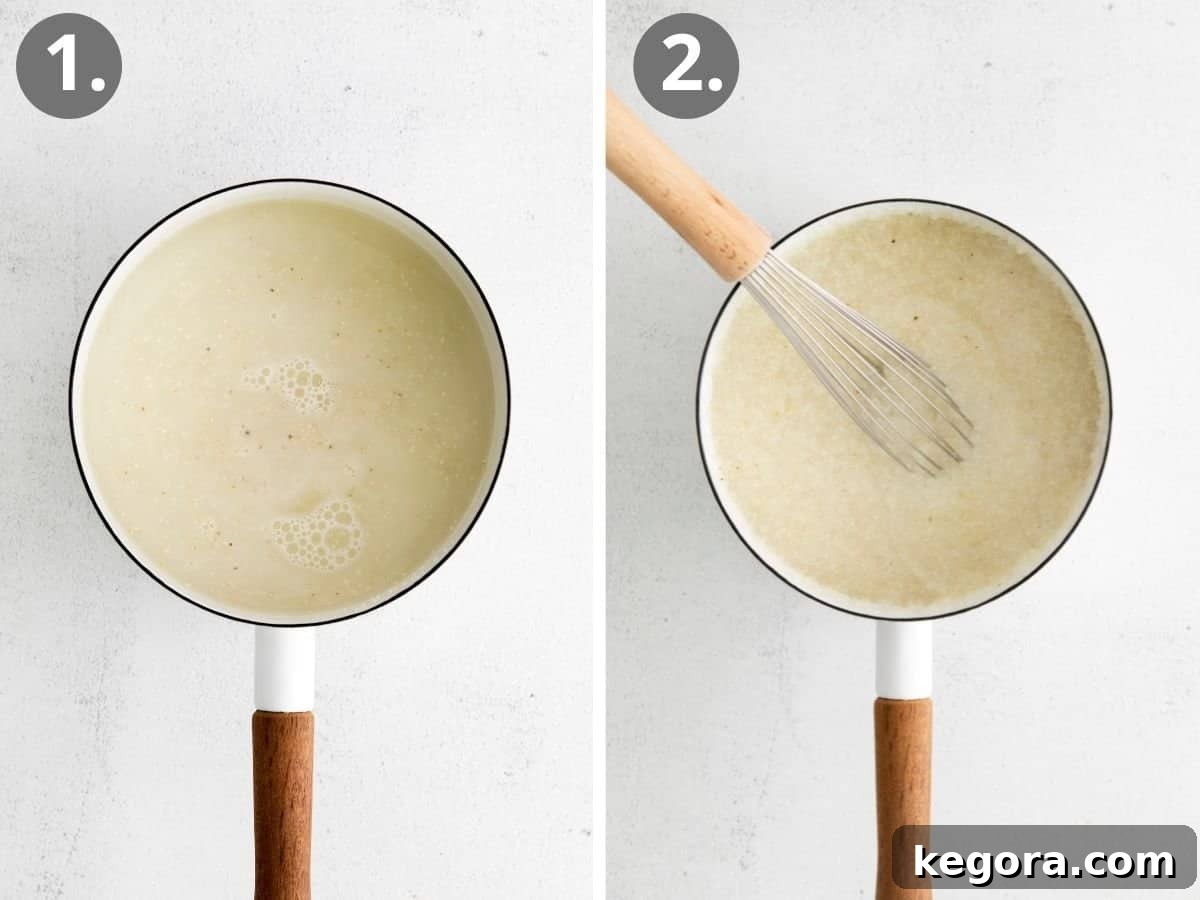
Preparing Your Grits: The Foundation of Flavor
The first step is cooking your grits to perfection. The method varies slightly depending on the type of grits you use:
- If using Stone-Ground Grits: Combine the water, grits, and salt in a medium saucepan. Bring the mixture to a rolling boil over medium-high heat. Once boiling, reduce the heat to low, cover the saucepan tightly, and let them simmer. Stone-ground grits require a longer cooking time, typically 20-25 minutes, to become tender and absorb all the liquid. Remember to stir occasionally to prevent them from sticking to the bottom and scorching.
- If using Quick-Cooking Grits: Start by bringing the water to a boil in your saucepan. Once boiling, slowly whisk in the quick-cooking grits and salt to prevent lumps. Reduce the heat to low, cover, and cook for about 5-7 minutes, or until the water is fully absorbed and the grits are creamy. Stir frequently.
- If using Leftover Grits: If you’re starting with previously cooked grits from your fridge, gently reheat them on the stovetop with a splash of water or milk until they are smooth and creamy again. This ensures a consistent base before moving to the next steps.
Chilling and Slicing for Structure
This stage is vital for achieving well-formed, crispy grit cakes:
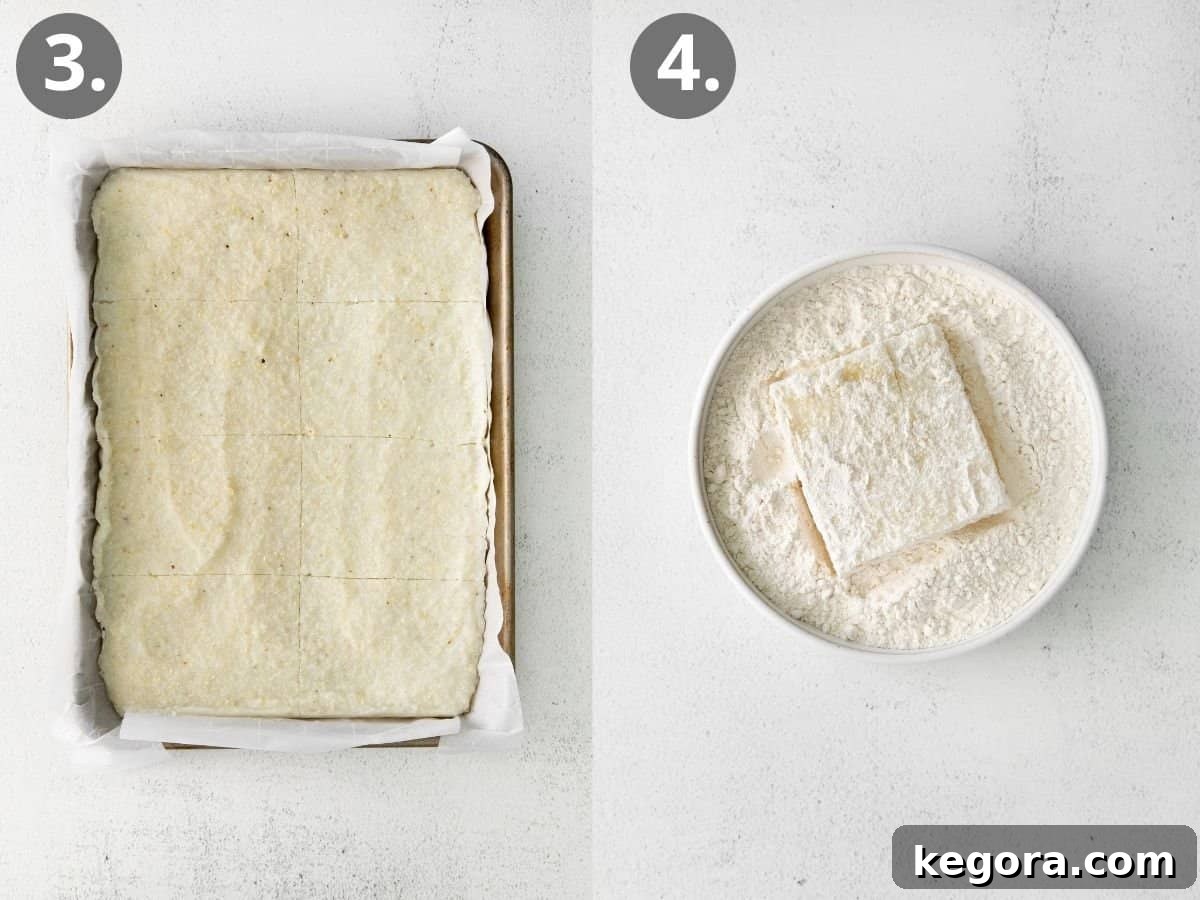
- Chill Time: Once your grits are cooked to a creamy consistency, immediately spread them into an even, approximately half-inch thick layer on a parchment paper or foil-lined pan (a quarter sheet pan works great). The lining should extend beyond the edges of the pan, creating “handles” to easily lift the solidified grits later. Refrigerate the grits for at least 1 hour, or until they are completely firm and set. This allows the cornstarch to fully gel, creating a stable block.
- Precise Slicing: Once thoroughly chilled, use the parchment or foil to carefully lift the entire slab of grits from the pan. Transfer it to a cutting board. Using a sharp knife, slice the grits into your desired shapes – squares, rectangles, or even rounds using a cookie cutter for a fancier presentation. Aim for uniform thickness for even cooking.
Dredging and Frying to Golden Perfection
Now for the exciting part – bringing out that beautiful crispiness:
- Dredge in Flour: Pour your all-purpose (or gluten-free) flour into a shallow bowl. Take each sliced grit cake and dredge it thoroughly in the flour, ensuring all sides are evenly coated. The flour provides the surface area needed for browning and crisping. Gently shake off any excess flour.
- Frying Time: Heat about 2 tablespoons of olive oil in a large, heavy-bottomed skillet (cast iron works wonderfully) over medium heat. The oil should be shimmering and hot, but not smoking. Carefully add a few grit cakes to the skillet, making sure not to overcrowd the pan. Overcrowding will lower the oil temperature, leading to soggy, rather than crispy, cakes.
- Cook to Golden Perfection: Cook each side of the grit cakes for 2-3 minutes, or until they develop a rich golden-brown color and are wonderfully crisp. Use tongs or a spatula to flip them gently. If you’re cooking in batches and the pan seems dry, add another tablespoon or two of oil before frying the next set of cakes.
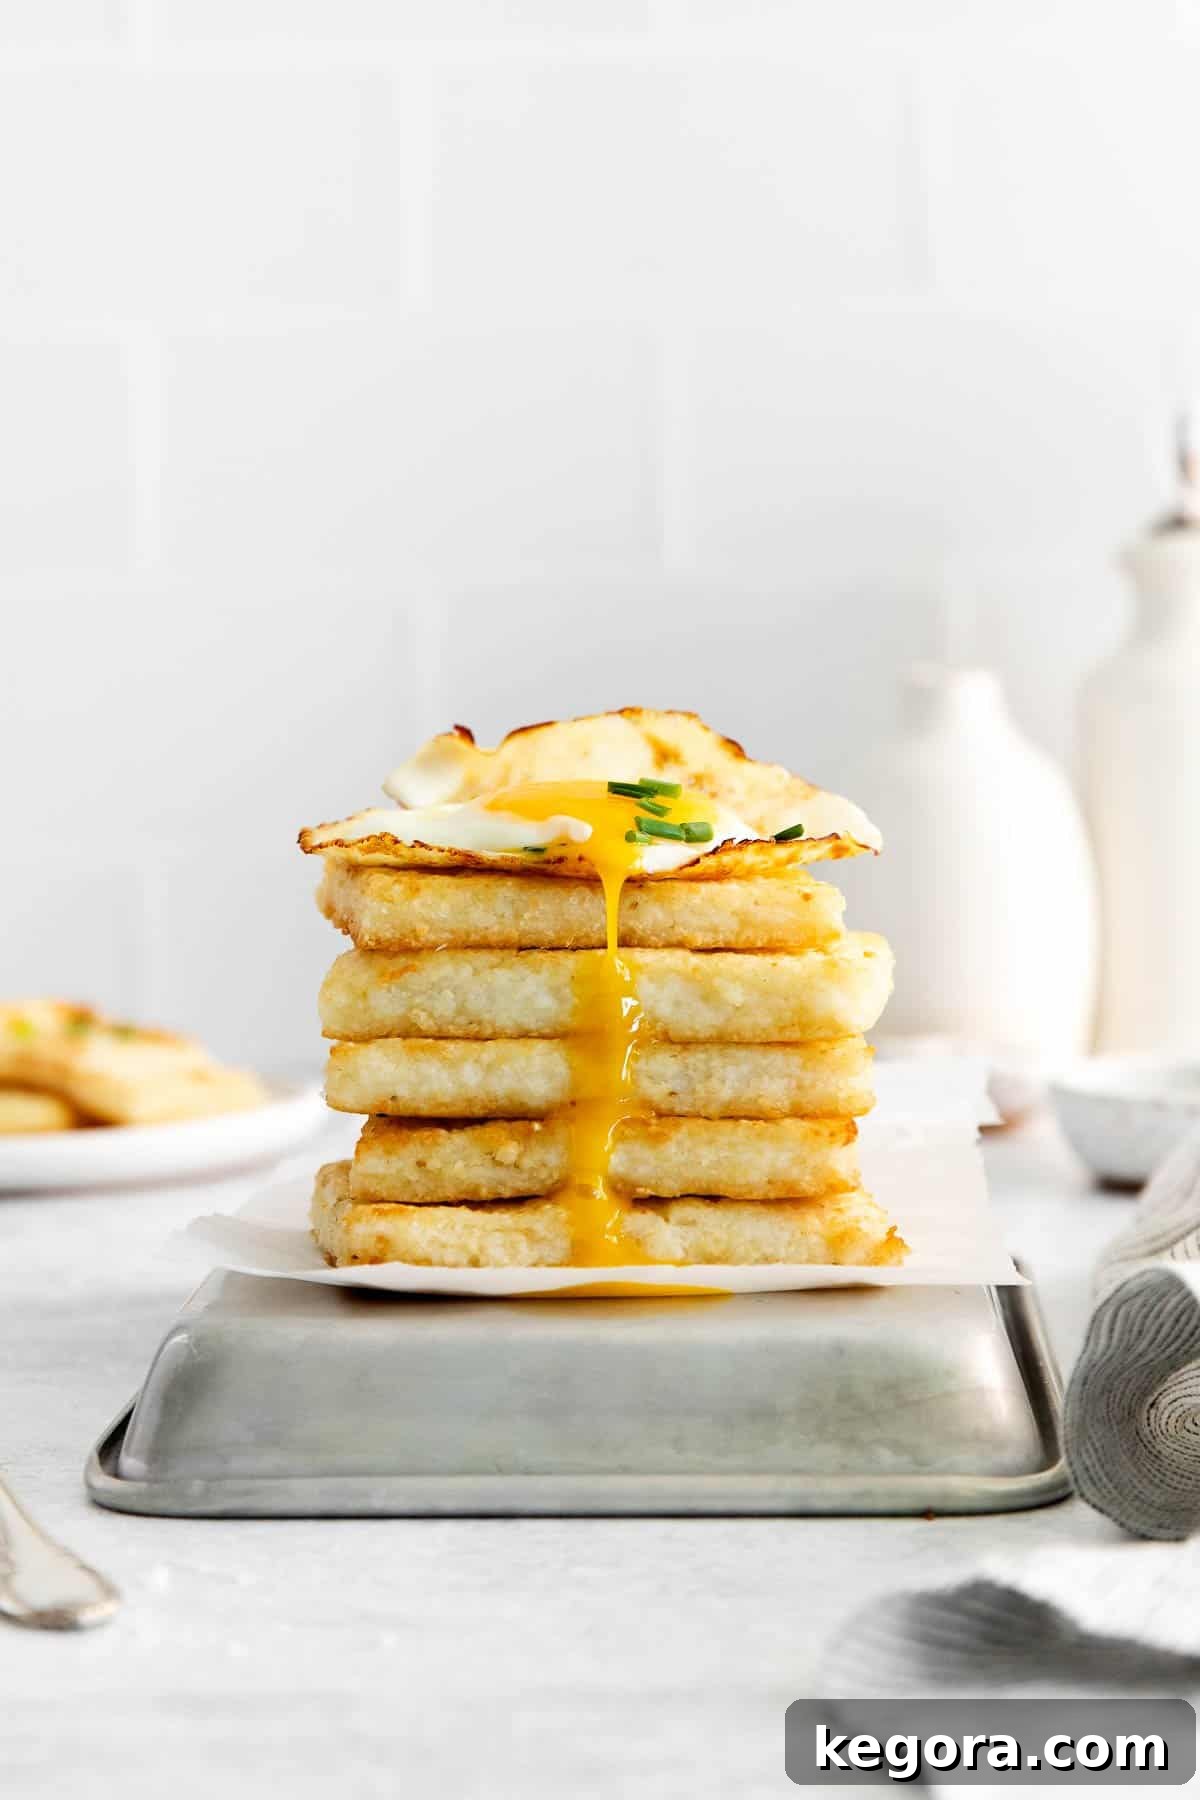
Once cooked, season your hot grit cakes with additional salt and freshly ground black pepper to taste. Serve them immediately and savor every crispy, creamy bite!
Easy Grit Cakes
Erin Collins
20 mins
15 mins
1 hr
4 servings
These crisp, savory grits cakes are a delicious way to use up leftover grits. They’re versatile and easy-to-make! Try this tasty twist on classic Southern grits!
Comments
Print Recipe
Want to save this recipe? Enter your email below to get it sent straight to your inbox, plus new recipes from us every week!
Ingredients
- 4 cups water
- 1 cup stone ground grits
- 1 teaspoon kosher salt
- 1 cup all purpose flour (or a 1:1 gluten-free flour substitute)
- ¼ cup olive oil (divided)
Instructions
- Line a quarter sheet pan with parchment paper or foil, ensuring it covers all sides with enough overhang to easily lift the grits out of the pan later.
- Add the water, grits, and salt to a medium saucepan. Place over medium-high heat and bring the mixture to a boil. Once boiling, reduce the heat to medium-low. Cover the saucepan and cook for 20-22 minutes, or until all of the water has been absorbed and the grits are creamy. Remember to stir the grits occasionally to prevent sticking and scorching.
- Remove the cooked grits from the heat and immediately spread them into an even layer (about ½ inch thick) in the prepared pan. Place the pan with the grits in the refrigerator to chill for at least 1 hour, or until they are completely firm and set. This is crucial for easy slicing and crispy cakes.
- Once fully chilled, use the parchment paper or foil to lift the solidified block of grits out of the pan. Transfer it to a clean cutting board and slice into your desired shapes and sizes (e.g., squares, rectangles, or rounds).
- Place the all-purpose flour (or gluten-free alternative) in a shallow bowl. Take a few of the sliced grit cakes and dip them into the flour, making sure to coat them evenly on all sides. Gently shake off any excess flour.
- Heat 2 tablespoons of olive oil in a large skillet (preferably cast iron) over medium heat. The oil should be shimmering and hot. Carefully add as many grit cakes as will fit into the skillet in a single layer, ensuring you do not overcrowd the pan.
- Cook the grit cakes for 2-3 minutes per side, or until they are beautifully golden brown and delightfully crisp. If frying in batches and the pan becomes dry, add the additional 2 tablespoons of oil before frying the remaining grit cakes (repeat steps 5-7 with the rest of the grits).
- Once fried, season the grit cakes with additional salt and freshly ground black pepper, to taste. Serve immediately as a satisfying breakfast, brunch item, or savory side dish. Leftovers can be stored as directed below.
Notes and Flavor Variations
Traditional Cheesy Grits: For a classic Southern twist, add 1 cup of shredded cheddar cheese to the cooked grits immediately after removing from heat, but before spreading them in the pan (Step 3). Stir until melted and fully incorporated.
Spicy Tex-Mex Grits: For a kick, add 1 cup of shredded Monterey jack cheese and 1 tablespoon of finely minced jalapeño (seeds removed for less heat, or left in for more) to the cooked grits after removing from heat, before spreading them in the pan (Step 3). Stir well.
“Elevated” Grits: To impart a gourmet flavor, stir in 1 cup of grated Parmesan cheese and 1 teaspoon of fresh minced thyme into the cooked grits after removing from heat, but before spreading them in the pan (Step 3).
Gluten-Free Option: This recipe is easily adaptable to be gluten-free. Simply use a high-quality, 1:1 gluten-free flour blend for dredging, such as **King Arthur Gluten-Free Measure for Measure Flour**.
Dairy-Free Option: These original grit cakes are naturally dairy-free, making them a fantastic option for those with dairy sensitivities or allergies.
To Make Ahead: You can prepare the grit cakes up to the point of slicing. Once the grits are fully set and sliced, arrange them in an airtight container or on a platter covered tightly with plastic wrap and store in the fridge for up to 2 days. When ready to cook, simply dredge them in flour and pan-fry as per the instructions.
To Store Leftovers: While grit cakes are undoubtedly best enjoyed fresh and hot, any leftovers can be stored in an airtight container in the refrigerator for up to 3 days. Reheat gently in a skillet or oven for best results.
To Freeze: For longer storage, allow the fried grit cakes to cool completely. Arrange them in a single layer on a baking sheet and freeze until solid (this usually takes 1-2 hours). Once frozen, transfer the cakes to a freezer-safe bag or an airtight container, separating layers with parchment paper to prevent sticking. They can be frozen for up to 2 months. To reheat from frozen, bake in an oven preheated to 375°F (190°C) until heated through and crisp (flipping halfway), or pan-fry on medium-low heat until warmed and crispy.
Nutrition Information (per serving)
Calories: 378kcal | Carbohydrates: 55g | Protein: 7g | Fat: 14g | Saturated Fat: 2g | Polyunsaturated Fat: 2g | Monounsaturated Fat: 10g | Sodium: 594mg | Potassium: 87mg | Fiber: 1g | Sugar: 0.3g | Vitamin A: 83IU | Calcium: 13mg | Iron: 2mg
This post was originally published in April 2022 and has been comprehensively updated with new photos, expanded instructions, and enhanced content in October 2025 to bring you the best possible grit cake recipe.