
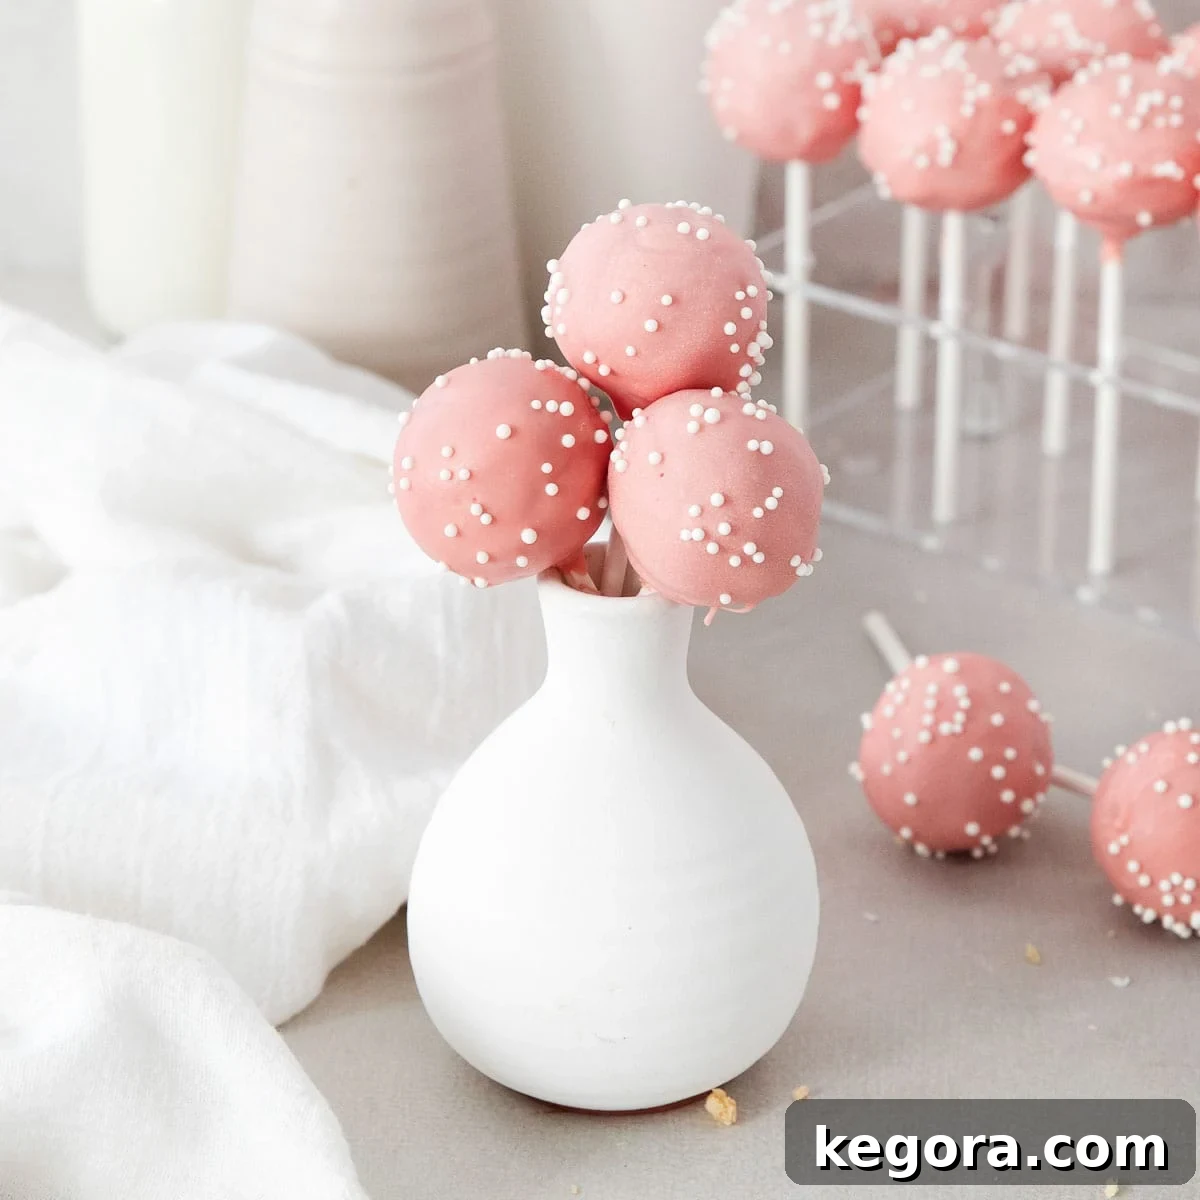
Easy Gluten-Free Starbucks-Style Cake Pops: A Delightful Homemade Treat
If your children, like mine, eagerly anticipate a cake pop from the Starbucks drive-through, then you understand the joy these tiny treats bring. My mission was to recreate that same magical experience at home, offering the beloved fun and flavor in a completely gluten-free version. This recipe ensures that everyone can enjoy these whimsical delights without dietary concerns.
To ensure this recipe is both delicious and approachable for home bakers, I’ve opted for a fantastic shortcut: a quality gluten-free box cake mix for the base. This choice guarantees consistent results and simplifies the baking process considerably. Through extensive testing, I experimented with various fillings, including a simple blend of powdered sugar and vanilla, and a richer, more traditional buttercream. The verdict was clear: a luscious, homemade buttercream provides the absolute best flavor and contributes significantly to the perfect, moist texture that makes these cake pops truly irresistible.
Another fantastic advantage of this recipe is its impressive freezer-friendliness. You can easily prepare a batch in advance, store them in the freezer, and have them readily available for any spontaneous craving or unexpected guest. This makes them a perfect make-ahead dessert for parties, lunchboxes, or simply a sweet moment for yourself.
Top Baking Tips for Perfect Cake Pops: For the most tender and easily moldable cake pops, it’s crucial not to overbake your cake. A slightly underbaked cake is actually preferable, as it yields a moister crumb. Additionally, for optimal texture and ease of mixing, incorporate the prepared buttercream filling into the cake crumbs while the cake is still warm from the oven. This warmth helps the cake absorb the buttercream more effectively, resulting in a perfectly cohesive and delicious cake pop mixture.
Happy baking, xoxo Erin
SHARE THIS DELICIOUS RECIPE WITH FRIENDS AND FAMILY!
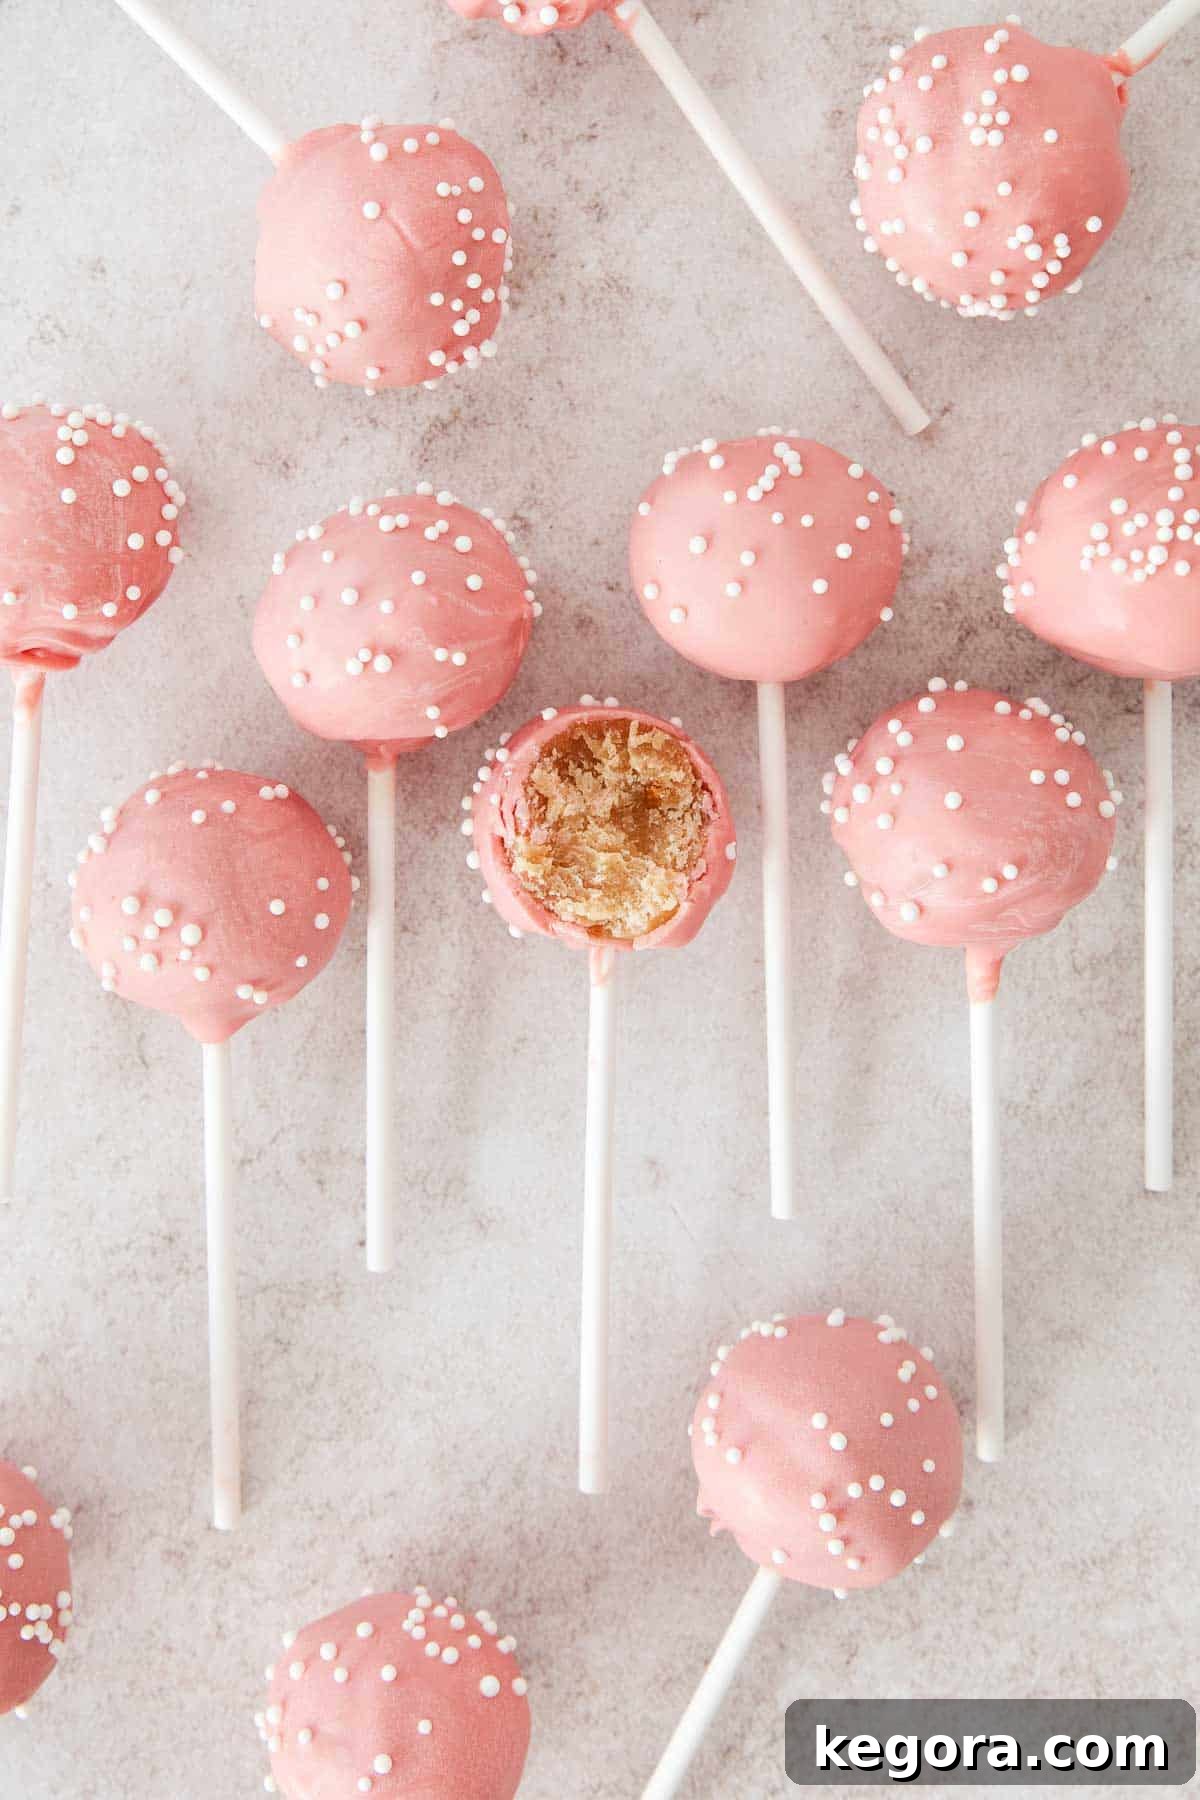
Essential Ingredients You’ll Need for Your Gluten-Free Cake Pops
Creating these delightful gluten-free cake pops starts with gathering the right ingredients. Each component plays a vital role in achieving the perfect flavor and texture. Below, you’ll find detailed notes on key ingredients, and for exact measurements, be sure to reference the comprehensive recipe card located at the bottom of this page.
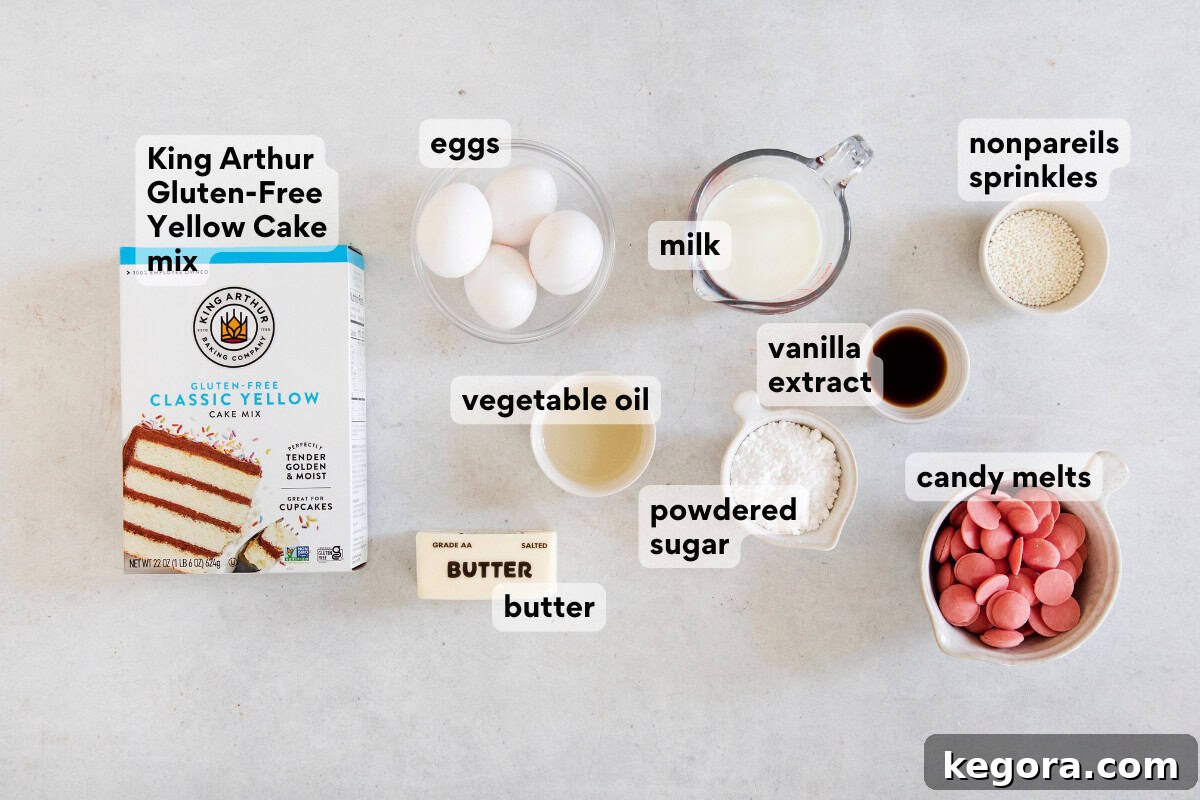
Key Ingredients for the Cake Base:
- Gluten-Free Cake Mix: This is the foundation of our easy cake pops. For consistent moistness and excellent workability, I highly recommend using King Arthur Gluten-Free Classic Yellow Cake Mix. Its superior quality ensures a cake that crumbles beautifully and forms smooth balls every time. While other gluten-free yellow cake mixes can be used, King Arthur provides a reliable and delicious result.
- Butter (Room Temperature): Contributes richness and tenderness to the cake. Ensure it’s softened for proper incorporation.
- Vegetable Oil: Adds additional moisture, making the cake crumb exceptionally soft.
- Large Eggs: Provide structure and bind the ingredients together, creating a well-risen and fluffy cake.
- Milk (Dairy or Plant-Based): Essential for the liquid component of the cake mix. Feel free to use your preferred dairy milk or a plant-based alternative like oat or almond milk to keep the recipe dairy-free.
For the Irresistible Buttercream Filling:
- Softened Butter: The creamy base of our flavorful buttercream. Room temperature is key for a smooth, whipped consistency.
- Powdered Sugar (Confectioners’ Sugar): Creates a silky-smooth frosting texture and the perfect level of sweetness.
- Heavy Cream or Milk: Used to achieve the ideal consistency for the buttercream, making it easy to mix into the cake crumbs.
- Vanilla Extract: Enhances the overall flavor profile, adding a warm, aromatic note that complements the yellow cake. Opt for pure vanilla extract for the best taste.
- Kosher Salt: A small pinch of salt effectively balances the sweetness of the buttercream, elevating all the flavors.
Dipping & Decorating Essentials:
- Candy Melts: To replicate the classic Starbucks cake pop aesthetic, light pink candy melts are essential. They melt smoothly, provide a vibrant color, and set quickly, creating a professional-looking finish. You can explore other colors for various themes or use tempered white chocolate for a different flavor profile.
- Sprinkles: White nonpareils sprinkles are the iconic choice for achieving that signature Starbucks look. However, feel free to get creative with other sprinkle types or colors to customize your cake pops for different holidays or celebrations.
- Cake Pop Sticks: These are indispensable for holding, dipping, and serving your cake pops. I find these cake pop sticks to be durable and just the right size.
- Cake Pop Stand: A dedicated cake pop stand makes the dipping and drying process incredibly convenient and mess-free. If you don’t own one, various household items can serve as excellent substitutes, such as a block of Styrofoam or floral foam, an inverted colander, a cardboard box with small holes, or tall glasses filled with rice or sugar to hold the sticks upright as the coating sets.
How to Make Gluten-Free Cake Pops: A Detailed Step-by-Step Guide
Crafting these fun and festive gluten-free cake pops is an enjoyable process that yields delicious results. Follow this comprehensive guide to achieve perfect cake pops every time. For a quick reference or to print, remember you can always jump directly to the recipe card at the end of the post!
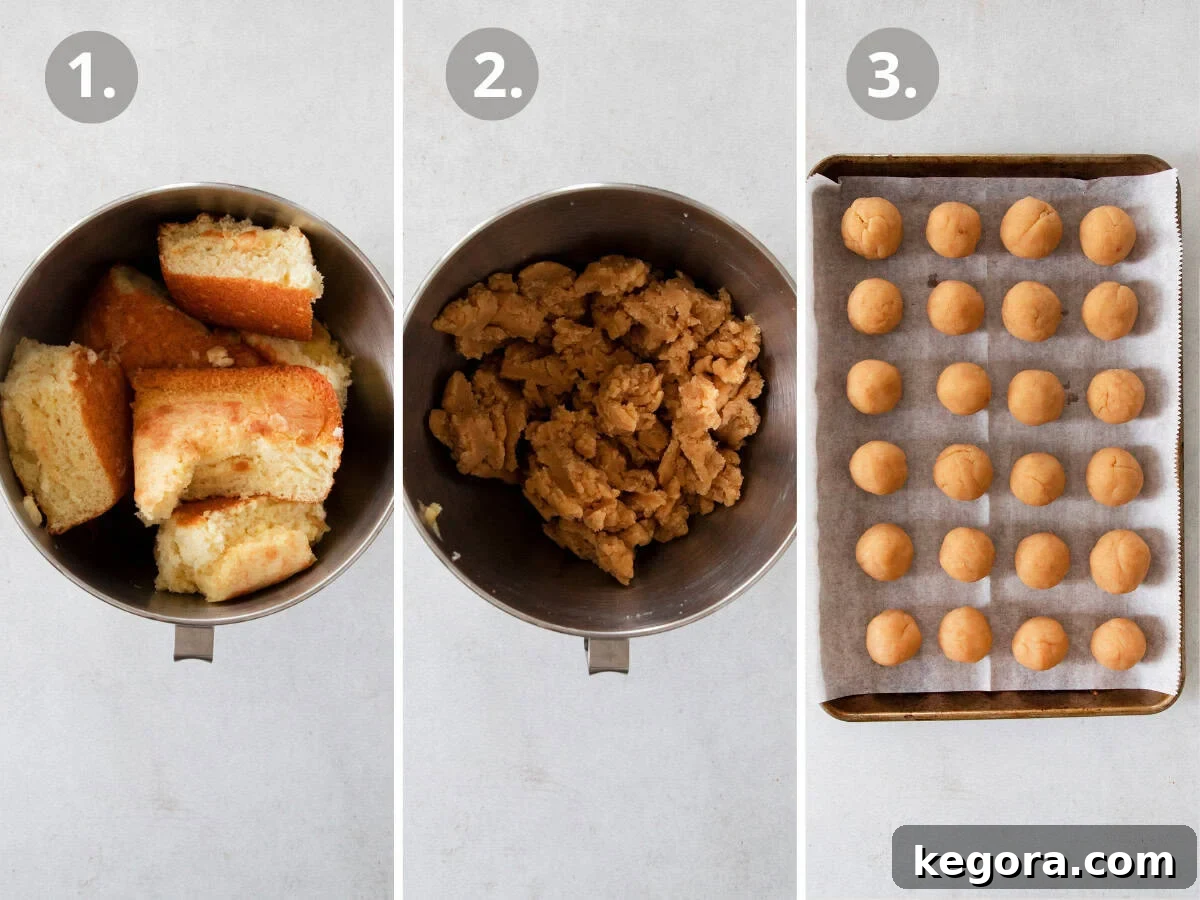
1. Bake the Perfect Cake Base:
Begin by preheating your oven to 350°F (175°C). Lightly grease two 8-inch round baking pans with cooking spray, then dust lightly with gluten-free flour to prevent sticking. Prepare your chosen gluten-free yellow cake mix by following the package directions precisely, using the butter, vegetable oil, eggs, and milk as instructed. Pour the batter evenly into the prepared pans and bake for approximately 22-26 minutes, or until a toothpick inserted into the center comes out clean. The key here is to avoid overbaking; a slightly underbaked cake retains more moisture, which is ideal for creating soft, pliable cake crumbs.
2. Crumble the Warm Cake:
As soon as your cakes are removed from the oven, transfer the warm cakes into the bowl of a stand mixer fitted with a paddle attachment. Mix on medium speed until the cake is completely crumbled into fine, uniform crumbs. Allow the crumbled cake to cool slightly while you prepare the buttercream, but it should still retain some warmth when you proceed to the next step.
3. Prepare the Velvety Buttercream:
In a separate medium-sized bowl, use a hand mixer to beat the room-temperature butter on medium-high speed for about 1 minute, until it becomes light and creamy. Gradually add the powdered sugar, heavy cream (or milk), vanilla extract, and kosher salt. Start mixing on low speed for about 30 seconds to gently incorporate the dry ingredients and prevent a cloud of sugar from forming. Then, increase the speed to medium-high and whip for an additional minute until the buttercream is smooth, fluffy, and well combined.
4. Combine and Form Cake Balls:
Add the freshly prepared buttercream to the slightly warm cake crumbs in your stand mixer. Continue mixing on medium speed for approximately 2 minutes. The mixture should become cohesive, moist, and easily hold its shape when pressed together. Once achieved, scoop out about 2 tablespoons of the mixture at a time. Roll each portion firmly between your palms to create smooth, compact cake balls. Place these balls onto a baking sheet lined with parchment paper. To ensure a smooth candy melt coating and prevent cracking, chill the cake balls in the freezer for about 15 minutes until they are firm but not frozen solid.
5. Melt the Candy Coating:
Pour your light pink candy melts into a narrow, microwave-safe mug. A narrow mug is ideal as it allows for deeper dipping and ensures a more even coating. Microwave the candy melts in short 30-second intervals, stirring thoroughly after each one, until the mixture is completely smooth and fluid. Be cautious not to overheat the candy, as excessive heat can cause it to seize and become thick or clumpy. Remember, the residual heat will continue to melt the candy as you stir, so err on the side of caution. If you plan to add food coloring (for custom colors), stir it in now until evenly distributed.
6. Assemble and Decorate Your Cake Pops:
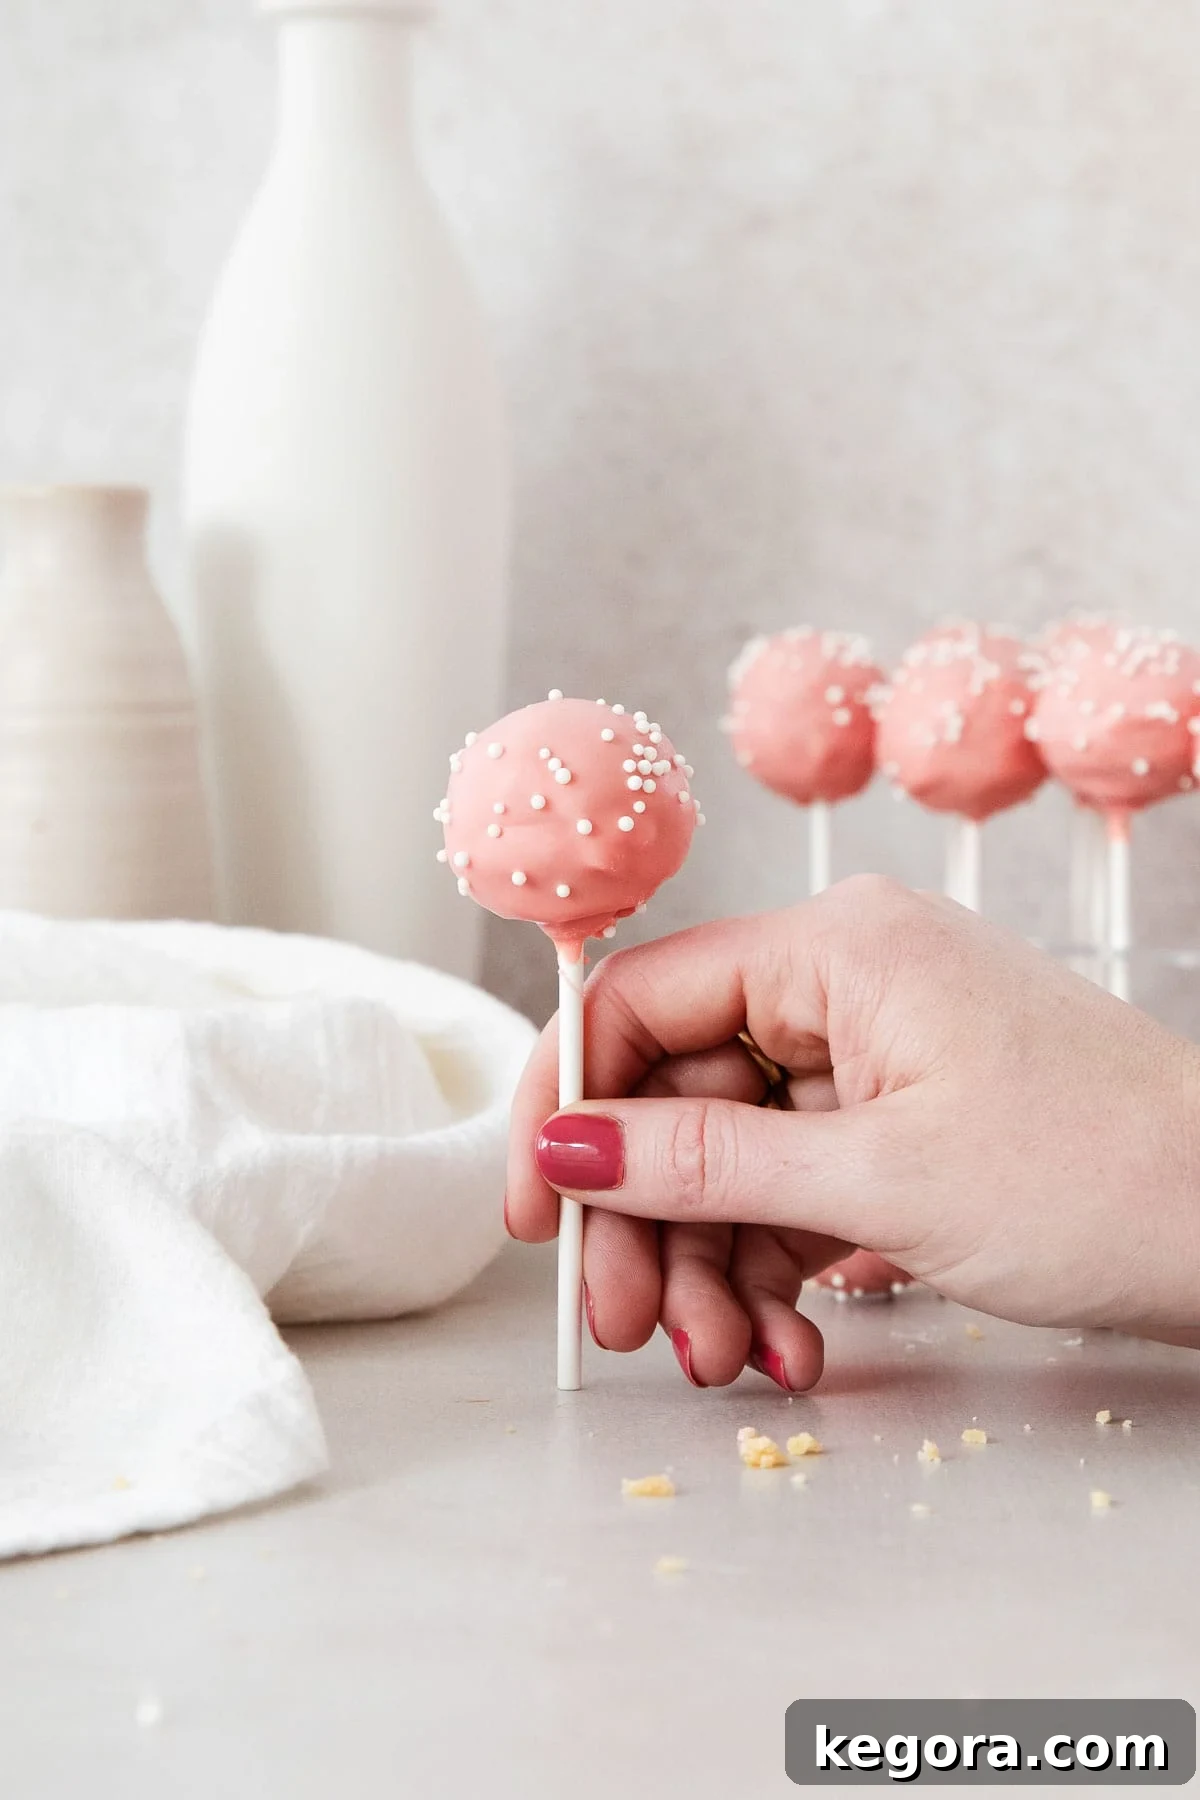
Retrieve the firm cake balls from the freezer. Dip just the very tip of each cake pop stick into the melted candy coating; this acts as an edible adhesive to securely attach the cake ball to the stick. Immediately insert the chocolate-dipped stick about halfway into the center of a cake ball. Next, fully submerge each cake pop into the melted candy coating. Lift the cake pop out, gently twisting it and lightly tapping the stick against the edge of the mug to remove any excess coating. Work quickly, as candy melts set fast.
While the candy coating is still wet, immediately adorn your cake pop with white nonpareils sprinkles or your chosen decorations. Finally, carefully place each decorated cake pop upright into a cake pop stand (or your chosen makeshift alternative). Allow them to set completely at room temperature or in the refrigerator until the coating is firm and dry before serving. This usually takes about 15-30 minutes.
Explore More Gluten-Free Baking Delights from Meaningful Eats
Loved these gluten-free cake pops? Discover more delicious and easy gluten-free recipes to try for every occasion!
The Best Gluten-Free Vanilla Cake Recipe
Delightful Gluten-Free Vanilla Cupcakes
Festive Gluten-Free Funfetti Sugar Cookies
Easy, Decadent Gluten-Free Chocolate Cake
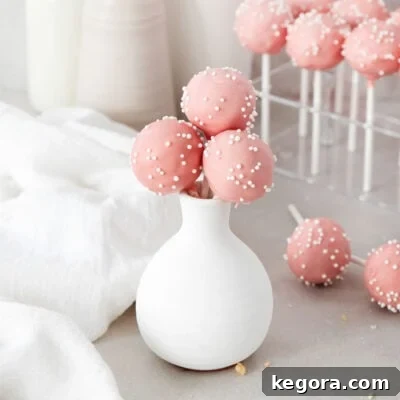
Gluten-Free Starbucks-Style Cake Pops (Easy Box Cake Mix Recipe)
Erin Collins
30 minutes
30 minutes
1 hour
28 cake pops
Craving the classic Starbucks cake pop experience but need a gluten-free option? Look no further! This simple and fun recipe guides you through making delectable gluten-free cake pops at home, utilizing an easy box cake mix base and a rich, homemade buttercream filling. Finished with a vibrant pink candy coating and festive sprinkles, these cake pops perfectly mimic the popular coffee shop treat, ensuring a delightful gluten-free indulgence for any occasion.
Leave a Comment
Print Recipe
Equipment
- 8-inch round baking pans (2)
- Stand mixer with paddle attachment (recommended) or hand mixer
- Mixing bowls (for buttercream)
- Parchment paper
- Baking sheets
- Narrow, microwave-safe mug or bowl (for candy melts)
- Cake pop sticks
- Cake pop stand or alternative (Styrofoam block, floral foam, etc.)
Ingredients
For the Gluten-Free Cake Base:
- 1 box King Arthur Gluten-Free Classic Yellow Cake Mix
- 8 tablespoons (113g) unsalted butter, at room temperature
- 2 tablespoons vegetable oil
- 4 large eggs
- ⅔ cup (160ml) milk (dairy or preferred plant-based alternative)
For the Homemade Buttercream Filling:
- ¼ cup (56g) unsalted butter, at room temperature
- 1 cup (150g) powdered sugar (confectioners’ sugar)
- 1 tablespoon heavy cream or milk
- 1 teaspoon vanilla extract
- ¼ teaspoon kosher salt
For Dipping & Decorating:
- Light pink candy melts (approximately 10-12 oz / 280-340g)
- White nonpareils sprinkles
Instructions
-
Preheat your oven to 350°F (175°C). Lightly grease two 8-inch round baking pans with cooking spray and dust lightly with gluten-free flour.
-
Prepare the gluten-free cake mix according to the package directions, using the specified amounts of 8 tablespoons room-temperature butter, vegetable oil, 4 large eggs, and ⅔ cup of milk.
-
Divide the cake batter evenly between the prepared pans. Bake for approximately 22-26 minutes, or until the cake is golden brown and a toothpick inserted into the center comes out clean. Be cautious not to overbake, as a slightly moist cake works best for cake pops.
-
Immediately after removing the cakes from the oven, transfer them to the bowl of a stand mixer fitted with the paddle attachment. Mix on medium speed until the warm cake crumbles into fine, even crumbs. Let the crumbled cake cool slightly while you prepare the buttercream (it should still be somewhat warm when combined).
-
Prepare the Buttercream: In a separate medium bowl, using a hand mixer, beat the ¼ cup of room-temperature butter on medium-high speed for about 1 minute until light and creamy. Gradually add the 1 cup of powdered sugar, 1 tablespoon of heavy cream/milk, 1 teaspoon of vanilla extract, and ¼ teaspoon of kosher salt. Mix on low speed for 30 seconds, then increase to medium-high speed and whip for another minute until the buttercream is smooth and fluffy.
-
Add the prepared buttercream to the slightly warm cake crumbs in the stand mixer. Continue mixing on medium speed for approximately 2 minutes, or until the mixture is thoroughly combined, moist, and holds its shape easily when pressed.
-
While the cake mixture is still warm and pliable, scoop out about 2 tablespoons at a time. Roll each portion firmly between your hands to form smooth, round cake balls. Place these balls onto a parchment-lined baking sheet.
-
Place the baking sheet with the cake balls into the freezer. Chill for about 15 minutes, or until the cake balls are firm but not completely frozen. This step helps prevent cracking during the dipping process.
-
Melt the Candy Melts: Transfer your light pink candy melts into a narrow, microwave-safe mug. Microwave in 30-second intervals, stirring thoroughly after each interval, until the candy melts are completely smooth and fluid. Be careful not to overheat to prevent seizing; stir well with residual heat.
-
Remove the firm cake balls from the freezer. Dip the tip of each cake pop stick into the melted candy coating, then immediately insert the stick about halfway into the center of a cake ball. This secures the cake ball to the stick.
-
Dip the entire cake pop into the melted candy coating, submerging it completely. Lift the cake pop out, gently twisting it and lightly tapping the stick against the edge of the mug to remove any excess coating.
-
Immediately after dipping, while the coating is still wet, decorate the cake pop with white nonpareils sprinkles or your preferred decorations.
-
Carefully place the decorated cake pops upright in a cake pop stand (or a suitable alternative). Allow them to set completely at room temperature or in the refrigerator until the coating is firm and dry before serving.
Recipe Notes & Tips for Success
Dairy-Free Option: To adapt this recipe for dairy-free consumption, simply substitute the butter and milk specified for both the cake mix preparation and the buttercream with your preferred high-quality dairy-free butter or margarine (ensuring it’s suitable for baking) and a plant-based milk (such as oat, almond, or soy milk).
Gluten-Free Assurance: This recipe is specifically formulated to be gluten-free by utilizing a certified gluten-free cake mix. For best results and consistent quality, my top recommendation remains the King Arthur Gluten-Free Classic Yellow Cake Mix.
Nut-Free Recipe: This recipe is naturally nut-free. However, if allergies are a significant concern, always double-check the ingredient labels of your specific gluten-free cake mix and candy melts to ensure they are also certified nut-free and processed in a nut-free facility.
Make-Ahead Convenience: The cake balls can be prepared up to three days in advance. Once rolled, store them in an airtight container in the refrigerator until you are ready to dip and decorate. This offers excellent flexibility for party planning or busy schedules.
Storage Recommendations: Once your cake pops are fully decorated and the candy coating has set, store them in an airtight container at room temperature for 3-4 days. For extended freshness, they can be refrigerated for up to a week. Be aware that refrigeration might cause a slight condensation on the candy coating when the pops are brought back to room temperature.
Freezing for Long-Term Storage: These cake pops freeze exceptionally well! After they are fully decorated and the coating is completely set, arrange them in a single layer on a baking sheet and freeze until solid. Once frozen, transfer them to a freezer-safe bag or an airtight container. They will maintain their quality for up to 2 months. To serve, simply thaw them at room temperature for an hour or two before indulging.
Preventing Cracks in Candy Coating: The most common culprits for cracked candy coating are extreme temperature differences between the cake ball and the coating, or the coating being too thick. Ensure your cake balls are thoroughly chilled (15 minutes in the freezer is perfect) but not frozen solid. Also, make sure your candy melts are fully liquid and smooth but not excessively hot. If the coating appears too thick, you can thin it by adding a tiny amount of shortening (like Crisco) or paramount crystals, a teaspoon at a time, stirring until you reach the desired flowing consistency.
Achieving a Smooth Dip: For the smoothest possible candy coating, work quickly once your cake pop is dipped. Gently tap the stick against the edge of your mug to allow any excess coating to drip off. Rotate the cake pop as you tap to ensure an even coating and prevent thick, uneven patches. Practice makes perfect!
Creative Customization Ideas: While the classic Starbucks pink and white is delightful, don’t hesitate to customize your cake pops! Experiment with different colored candy melts to match holiday themes or party palettes. You can also vary the sprinkles – try edible glitter, sanding sugar, or even finely chopped nuts (if not adhering to a nut-free diet). For an extra flavor twist, consider adding a drop of flavored extract (such as almond, peppermint, or lemon) to your buttercream filling.
Nutrition Information (Estimated Per Cake Pop)
Please note that this nutrition information is an estimate based on the ingredients listed and standard portion sizes. Actual values may vary significantly depending on specific brands, exact measurements used, and any optional additions or substitutions. This estimate is provided as a general guideline and should not be considered a substitute for professional nutritional advice.
- Calories: 48 kcal
- Carbohydrates: 2g
- Protein: 1g
- Fat: 4g
- Saturated Fat: 2g
- Polyunsaturated Fat: 0.2g
- Monounsaturated Fat: 1g
- Trans Fat: 0.1g
- Cholesterol: 33mg
- Sodium: 37mg
- Potassium: 20mg
- Sugar: 1g
- Vitamin A: 143 IU
- Calcium: 12mg
- Iron: 0.1mg