
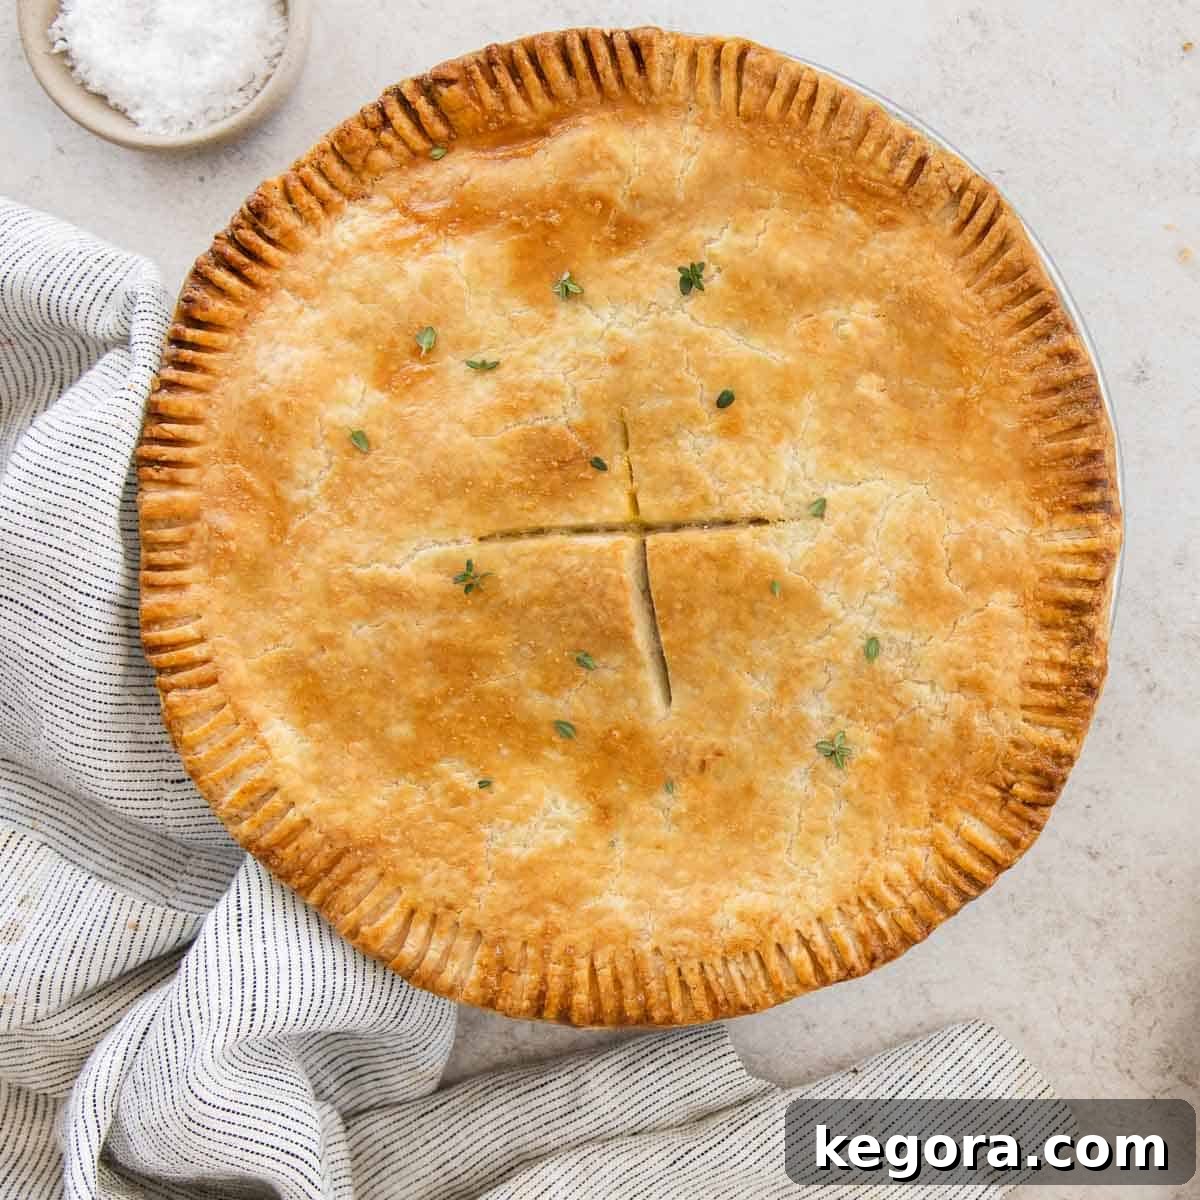
Homemade Gluten-Free Chicken Pot Pie: Your Ultimate Comfort Food Guide
I am absolutely thrilled to finally share my cherished recipe for homemade gluten-free chicken pot pie! Living in North Carolina, we only get to experience the magic of snow about once a year. Yet, every single time those flakes begin to fall, it has become a deeply comforting family tradition for us to gather and prepare this incredibly cozy, warming gluten-free chicken pot pie. It’s more than just a meal; it’s an experience, a ritual that brings warmth and joy to the heart of our home.
Over the years, I’ve perfected this recipe, and I’m eager to pass on all the invaluable tips and tricks I’ve discovered along the way. My goal is to empower you to recreate this culinary masterpiece successfully in your own kitchen. From mastering the art of a perfectly seasoned, creamy filling to the ingenious technique of rolling out the delicate gluten-free crust between sheets of plastic wrap for effortless handling, every detail is covered to ensure your success.
Why You’ll Fall in Love with This Gluten-Free Pot Pie
This isn’t just any chicken pot pie; it’s a revelation, especially for those navigating a gluten-free lifestyle. Here’s why this recipe will undoubtedly become a staple in your culinary repertoire:
- The Gluten-Free Sour Cream Pie Crust: Prepare to be amazed by a crust that defies all gluten-free expectations. It’s wonderfully buttery, exceptionally tender, and boasts an irresistible flaky texture, yet it remains remarkably sturdy enough to perfectly encase a generous, hearty filling. The secret ingredient, sour cream, not only adds richness but also provides a crucial elasticity that makes working with gluten-free dough a breeze.
- A Flavorful, Delectable Filling: What elevates this pot pie from good to extraordinary is the depth of flavor in its creamy filling. I insist on adding a splash of dry white wine, which deglazes the pan and introduces a subtle acidity and complex notes that deepen the savory profile. Coupled with an abundance of fresh herbs – think fragrant thyme, earthy sage, and aromatic rosemary – the filling sings with an unparalleled freshness and sophistication that will tantalize your taste buds.
- The Ultimate Comfort Food Experience: Imagine a cold, dreary day, transformed by the comforting aroma of a freshly baked pot pie wafting through your home. This dish is the epitome of comfort food, offering a wholesome, satisfying embrace that warms you from the inside out. It’s perfect for family dinners, holiday gatherings, or simply a cozy night in.
Mastering Your Gluten-Free Pot Pie: Essential Tips for Success
Achieving pot pie perfection, especially with a gluten-free twist, comes down to a few key techniques. These top tips are designed to ensure every bite is as delightful as you envision:
- Cool the Filling Thoroughly: This step is non-negotiable! Allowing the filling to cool completely before spooning it into the crust is paramount. A hot filling will steam the bottom crust, leading to a dreaded soggy result. Chilling ensures the crust maintains its crisp, flaky integrity.
- Pre-Bake Freeze for Crispness: For an exceptionally crisp bottom crust and overall flaky texture, don’t skip the brief freeze. Pop the assembled pie into the freezer for about 15-20 minutes just before baking. This re-chills the butter in the crust, preventing it from melting too quickly in the oven and allowing more steam to create those glorious layers.
- Employ a Pizza Steel for Superior Bottom Crust: This is my secret weapon for a truly golden and crisp bottom crust. Baking your chicken pot pie on a preheated pizza steel provides intense, even heat directly to the base of the pie dish. This thermal boost ensures the gluten-free crust cooks through beautifully, preventing any raw or doughy patches.
- Handle Gluten-Free Dough with Care (and Plastic Wrap): Gluten-free dough can be more delicate and prone to cracking than traditional wheat-based dough. Rolling it out between two sheets of plastic wrap is a game-changer. It prevents sticking, minimizes breakage, and makes transferring the crust to the pie plate much easier. Don’t be alarmed if it still cracks a little; simply press it back together with your fingers – it’s remarkably forgiving!
- Cook Your Vegetables Until Tender: Nobody enjoys crunchy vegetables in their pot pie! Dedicate sufficient time (8-10 minutes) to sautéing the onions, carrots, and celery until they are perfectly softened. This not only improves texture but also deepens their flavor, creating a sweeter, more robust base for your filling.
- Don’t Skimp on Seasoning: Taste your filling as you go and don’t hesitate to adjust the salt, pepper, and herbs. A well-seasoned filling is the heart of a delicious pot pie.
xoxo erin
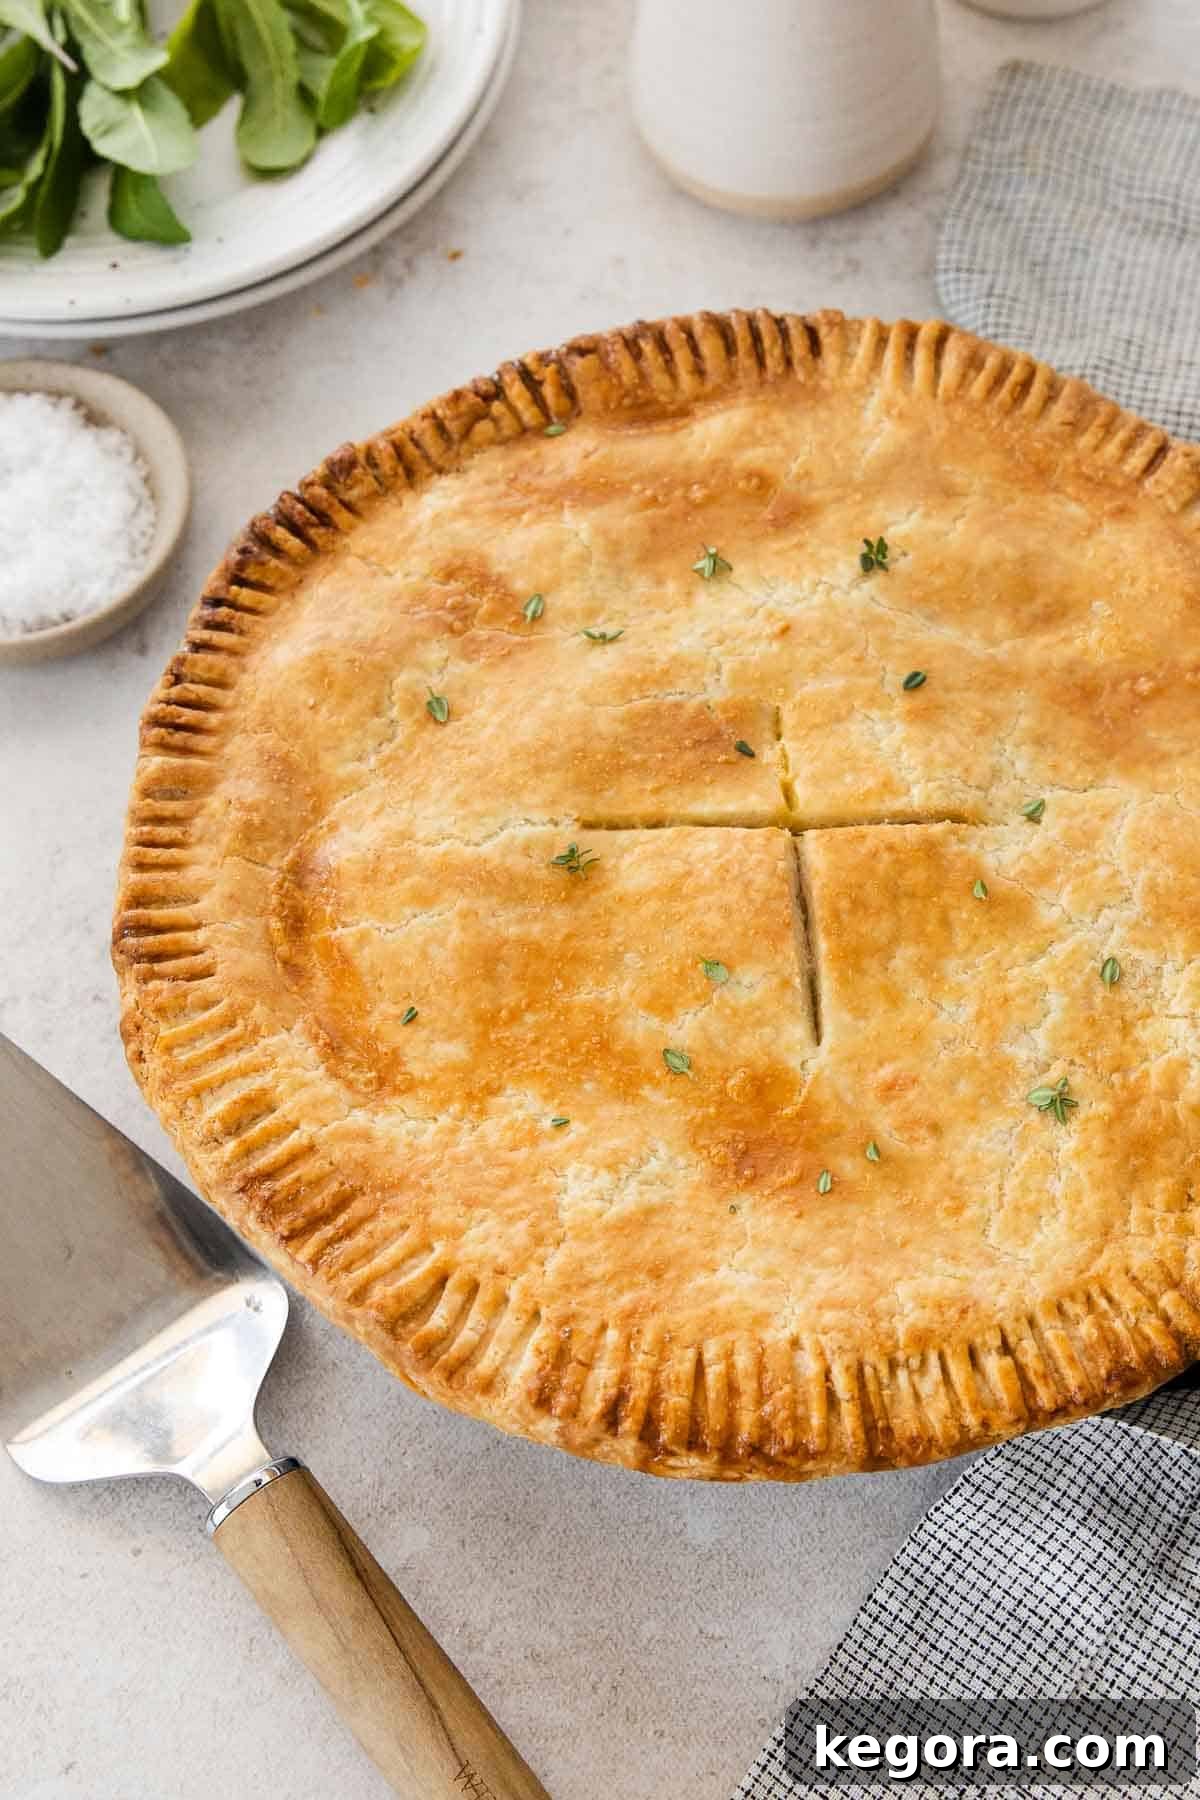
Key Ingredients for Your Gluten-Free Chicken Pot Pie
Let’s talk about the stars of this show – the essential ingredients that come together to create this incredible gluten-free chicken pot pie. Each component plays a vital role in achieving that perfect taste and texture. Jump to the recipe card below for precise measurements and quantities.
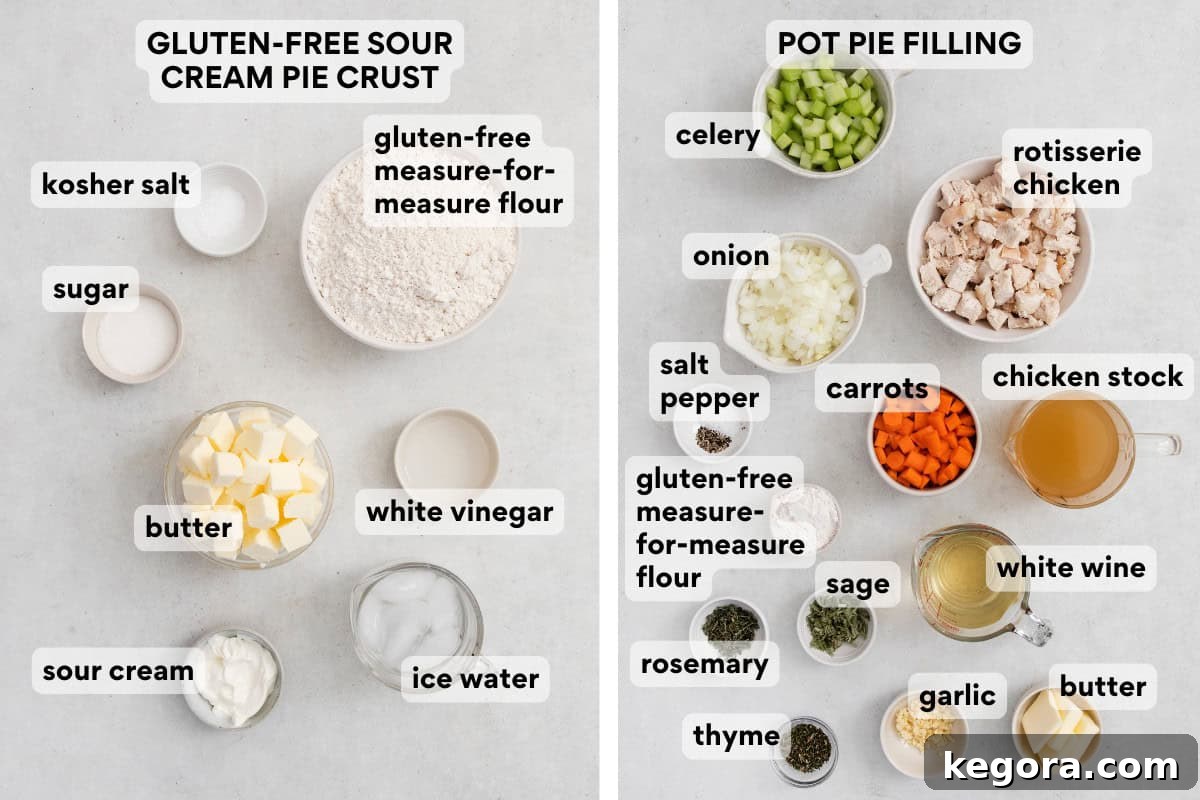
- Gluten-Free Flour Blend: The foundation of our flaky crust and thickened filling. It is crucial to use a high-quality, ‘measure-for-measure’ or ‘1-to-1’ gluten-free flour blend that already contains xanthan gum. This specific type of blend is formulated to mimic the properties of wheat flour, providing reliable structure and preventing a gummy texture. Brands like King Arthur or Bob’s Red Mill are often good choices for consistent results.
- Sour Cream: This is truly the secret ingredient for an unbelievably tender and flaky gluten-free pie crust. Unlike traditional pie crusts that rely solely on butter and water, sour cream adds a crucial element of fat and moisture, along with a touch of acidity. This combination not only enhances the richness of the dough but also helps the gluten-free flour bind together, making the dough much more pliable and easier to handle without becoming tough.
- Rotisserie Chicken: A brilliant shortcut that saves significant time without compromising on flavor. Using a pre-cooked rotisserie chicken means less prep work and guarantees tender, juicy chicken that’s already seasoned. I typically use the meat from a whole rotisserie chicken for this recipe, shredded into bite-sized pieces. If you prefer to cook your own, simply poach or bake about 3 cups of shredded chicken breast or thighs.
- Fresh Herbs: While dried herbs have their place, fresh herbs truly elevate this chicken pot pie to a gourmet level. The vibrant, aromatic essence of fresh thyme, sage, and rosemary infuses the filling with an incomparable brightness and depth of flavor that dried versions simply cannot replicate. If available, I highly recommend seeking out a “poultry herbs” fresh herb pack from your local market, which often contains a perfect blend.
- Dry White Wine: This ingredient is another game-changer that adds an incredible layer of complexity and depth to the pot pie filling. As the wine cooks, the alcohol evaporates, leaving behind concentrated flavor notes that perfectly complement the chicken and vegetables. A dry white wine, such as Sauvignon Blanc or Pinot Grigio, works best. If you prefer to omit alcohol, you can simply use an equal amount of additional chicken stock, though the flavor profile will be slightly different.
How to Craft Your Perfect Gluten-Free Chicken Pot Pie
Creating this delicious gluten-free chicken pot pie is a rewarding culinary journey. Here’s a detailed overview of the process, ensuring you’re set up for success from start to finish. For precise measurements and full step-by-step instructions, please jump to the comprehensive recipe card below!
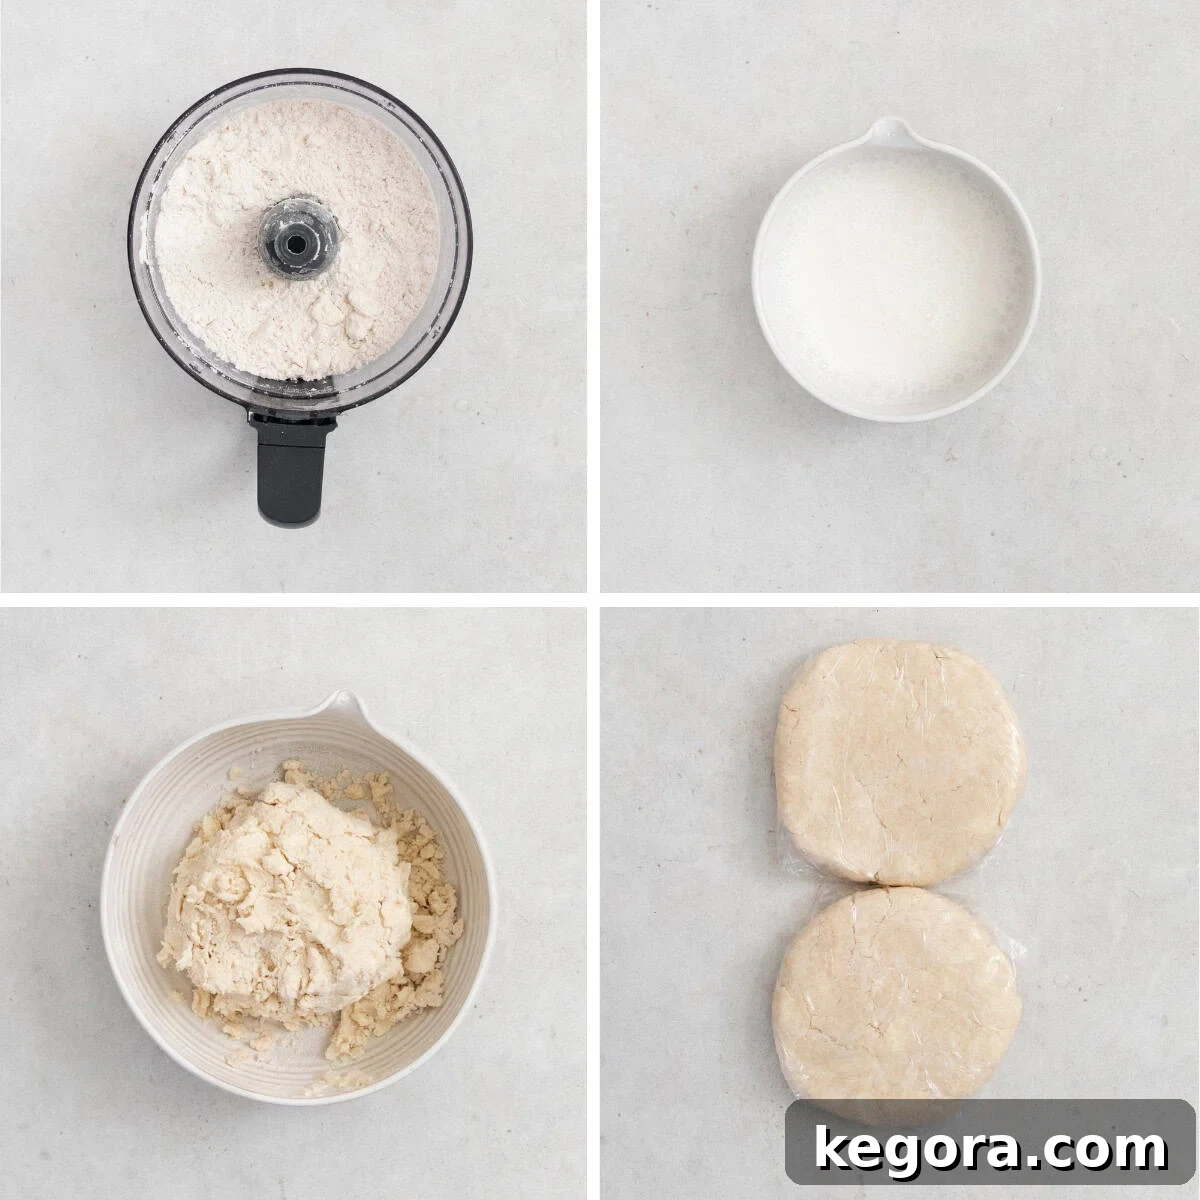
1. Preparing the Flaky Gluten-Free Sour Cream Crust
The secret to a truly outstanding pot pie lies in its crust. Begin by cutting your cold butter into small, uniform cubes and placing them in the freezer for about 10-15 minutes. This ensures the butter stays solid and creates those desirable flaky layers when baked. While the butter chills, whisk together the sour cream, distilled white vinegar (which adds tenderness), and ice water in a separate bowl, then refrigerate this mixture as well.
In your food processor, combine the gluten-free measure-for-measure flour, granulated sugar, and kosher salt, pulsing briefly to ensure they are well mixed. Add the frozen butter to the dry ingredients and pulse until the butter pieces resemble large peas. This is a crucial step for flakiness – avoid over-processing. Next, add the chilled sour cream mixture and pulse just until the dough begins to clump together. It might look crumbly at first, but resist the urge to add too much liquid. Transfer the dough to a bowl and gently knead it by hand. If it feels too dry, add ice water one tablespoon at a time, just enough until the dough comes together when pressed, but is not sticky. Divide the dough into two equal discs, wrap them tightly in plastic wrap, and refrigerate for at least one hour (or up to two days). Chilling is essential for the dough to firm up and become more manageable.
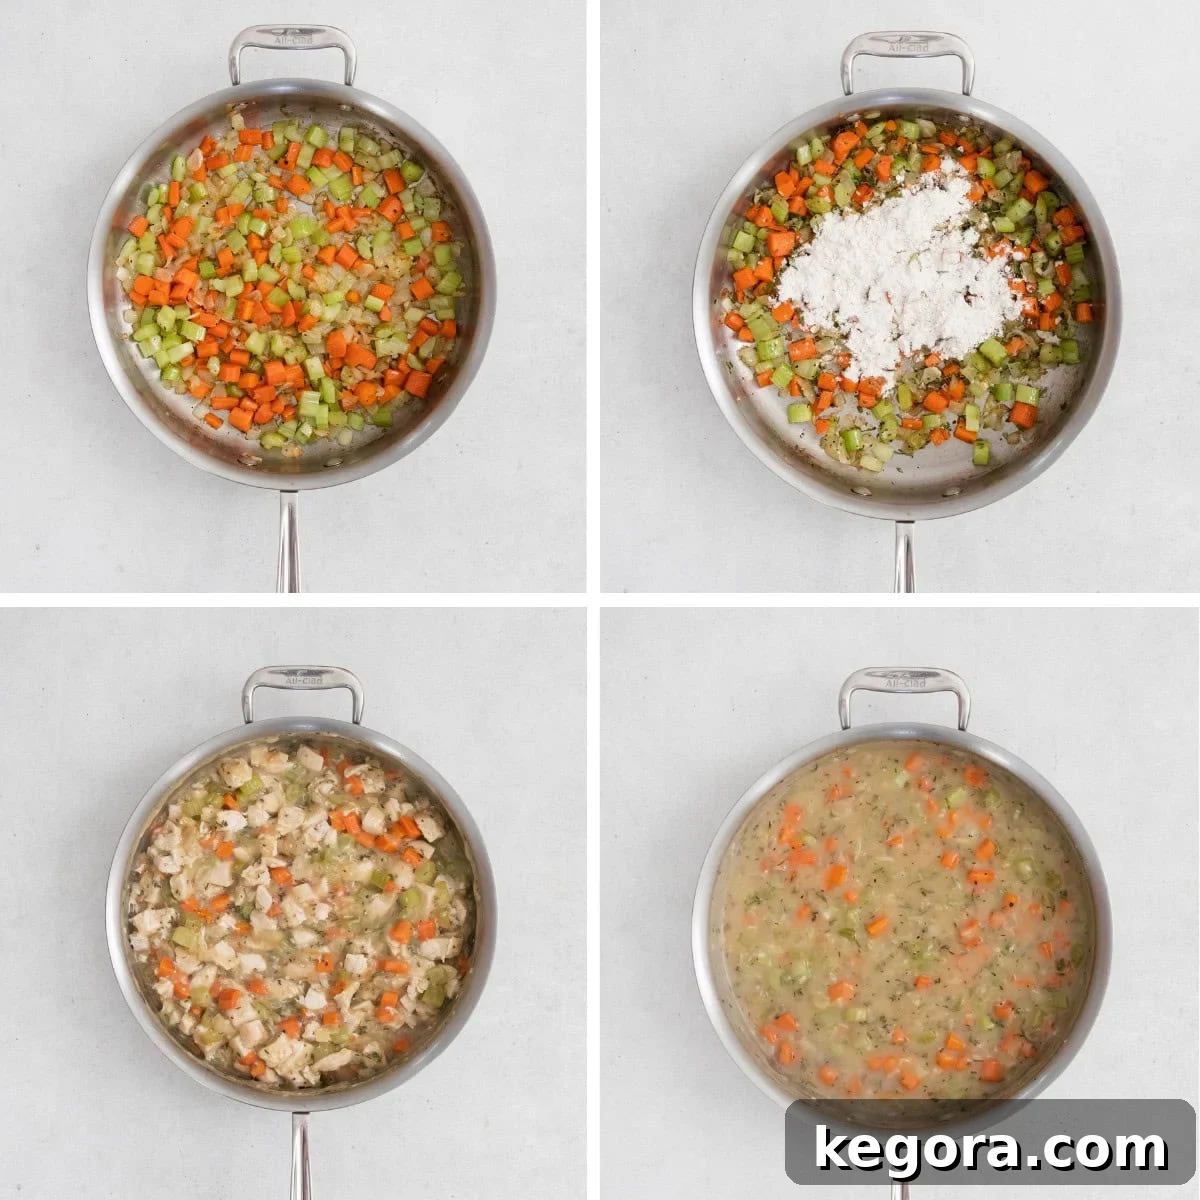
2. Crafting the Rich & Creamy Filling
While your pie crust chills, it’s time to create the heart of your pot pie. Melt butter in a large, sturdy skillet over medium heat. Add the diced yellow onion, carrots, and celery, seasoning them with salt and pepper. This is your most important opportunity to ensure the vegetables are perfectly tender – cook them for a full 8-10 minutes until they are wonderfully soft. We definitely want to avoid any crunchy surprises in our finished chicken pot pie!
Stir in the minced garlic and fresh herbs (thyme, sage, and rosemary) and cook for just one more minute until fragrant. Sprinkle the gluten-free flour over the vegetables and stir continuously for 1-2 minutes to create a roux; this step is crucial for thickening the filling and cooking off the raw flour taste. Slowly pour in the white wine, whisking vigorously to deglaze the pan and incorporate the wine smoothly. Let it simmer for a few minutes to allow the alcohol to cook off and the flavors to deepen. Then, gradually whisk in the chicken stock – continue whisking actively to ensure a smooth, lump-free sauce. Bring the mixture to a gentle simmer, allowing it to cook for 3-4 minutes until it becomes thick and bubbly, with a visibly rich consistency. Finally, fold in the shredded rotisserie chicken and taste the filling, adjusting the seasoning with more salt and pepper as needed. Remember, this is your chance to infuse the filling with maximum flavor! Once seasoned to perfection, transfer the filling to a separate bowl and chill it completely in the refrigerator. This step is vital for preventing a soggy bottom crust.
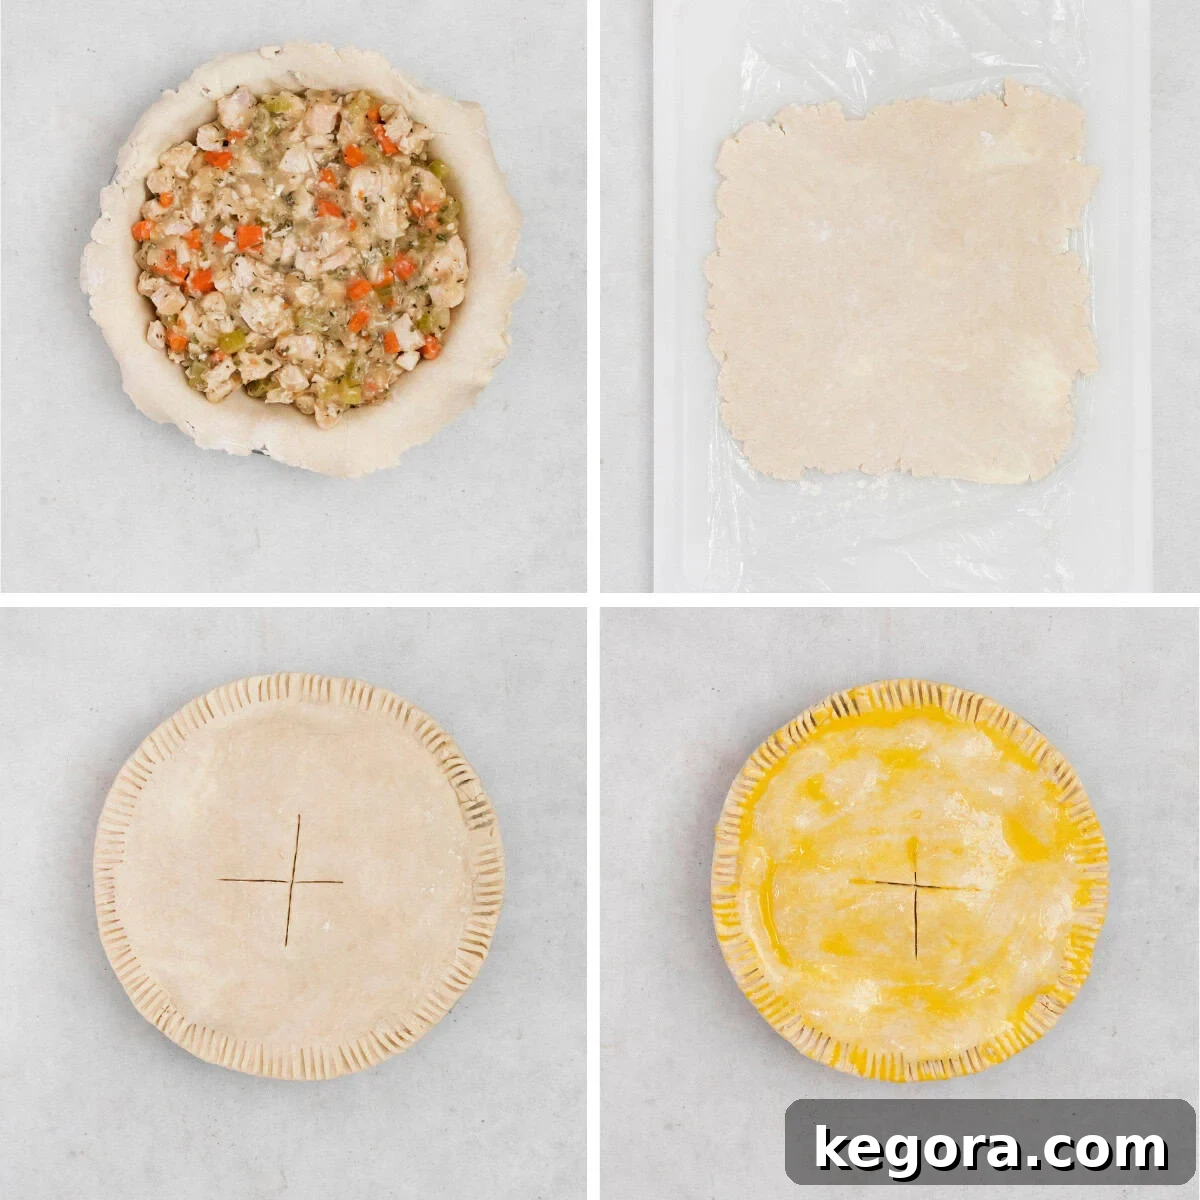
3. Assembling and Baking Your Pot Pie
Retrieve one disc of your chilled gluten-free pie crust. If it’s been in the fridge for more than an hour, let it sit at room temperature for about 15 minutes to soften slightly. Roll out the dough between two large sheets of plastic wrap to about ¼-inch thickness. As you roll, you might notice the gluten-free dough cracking – this is perfectly normal! Simply press the cracks back together with your fingers. Carefully remove the top plastic sheet, invert the crust into a 9-inch pie plate, and then gently peel off the remaining plastic. Ease the crust into the plate, ensuring an even layer, and then place it in the freezer while you prepare the top crust. This helps it firm up and hold its shape.
Now, roll out the second disc of dough using the same plastic wrap technique. Ensure your cooled filling is seasoned precisely to your liking before spooning it evenly into the bottom crust. Carefully transfer the second rolled crust over the filling, peel off the plastic, and trim any excess dough around the edges. Tuck the top crust under the bottom crust and crimp the edges decoratively with your fingers or a fork to seal the pie. Finally, use a sharp knife to cut a few vent slits in the center of the top crust; these allow steam to escape during baking, preventing the crust from puffing up excessively.
Place the entire assembled pie back into the freezer for a brief chill while your oven preheats to 400°F (200°C). For the best results – a beautifully crisp, golden bottom crust – I highly recommend placing a pizza steel into the oven as it preheats. This provides the intense, consistent heat needed for a perfect crust. In a small bowl, whisk together one large egg, a tablespoon of water, and a pinch of kosher salt to create an egg wash. Brush this mixture generously over the top of your pie; this will give it a gorgeous golden sheen as it bakes. Carefully transfer the pie dish directly onto the preheated pizza steel in the oven. Bake for 40-45 minutes, or until the crust is a deep golden brown and the filling is visibly bubbly. Once baked, remove the pie from the oven and allow it to cool for at least 10 minutes before slicing. This resting period allows the filling to set, making for cleaner slices and preventing a messy presentation. Slice, serve, and savor every comforting bite!
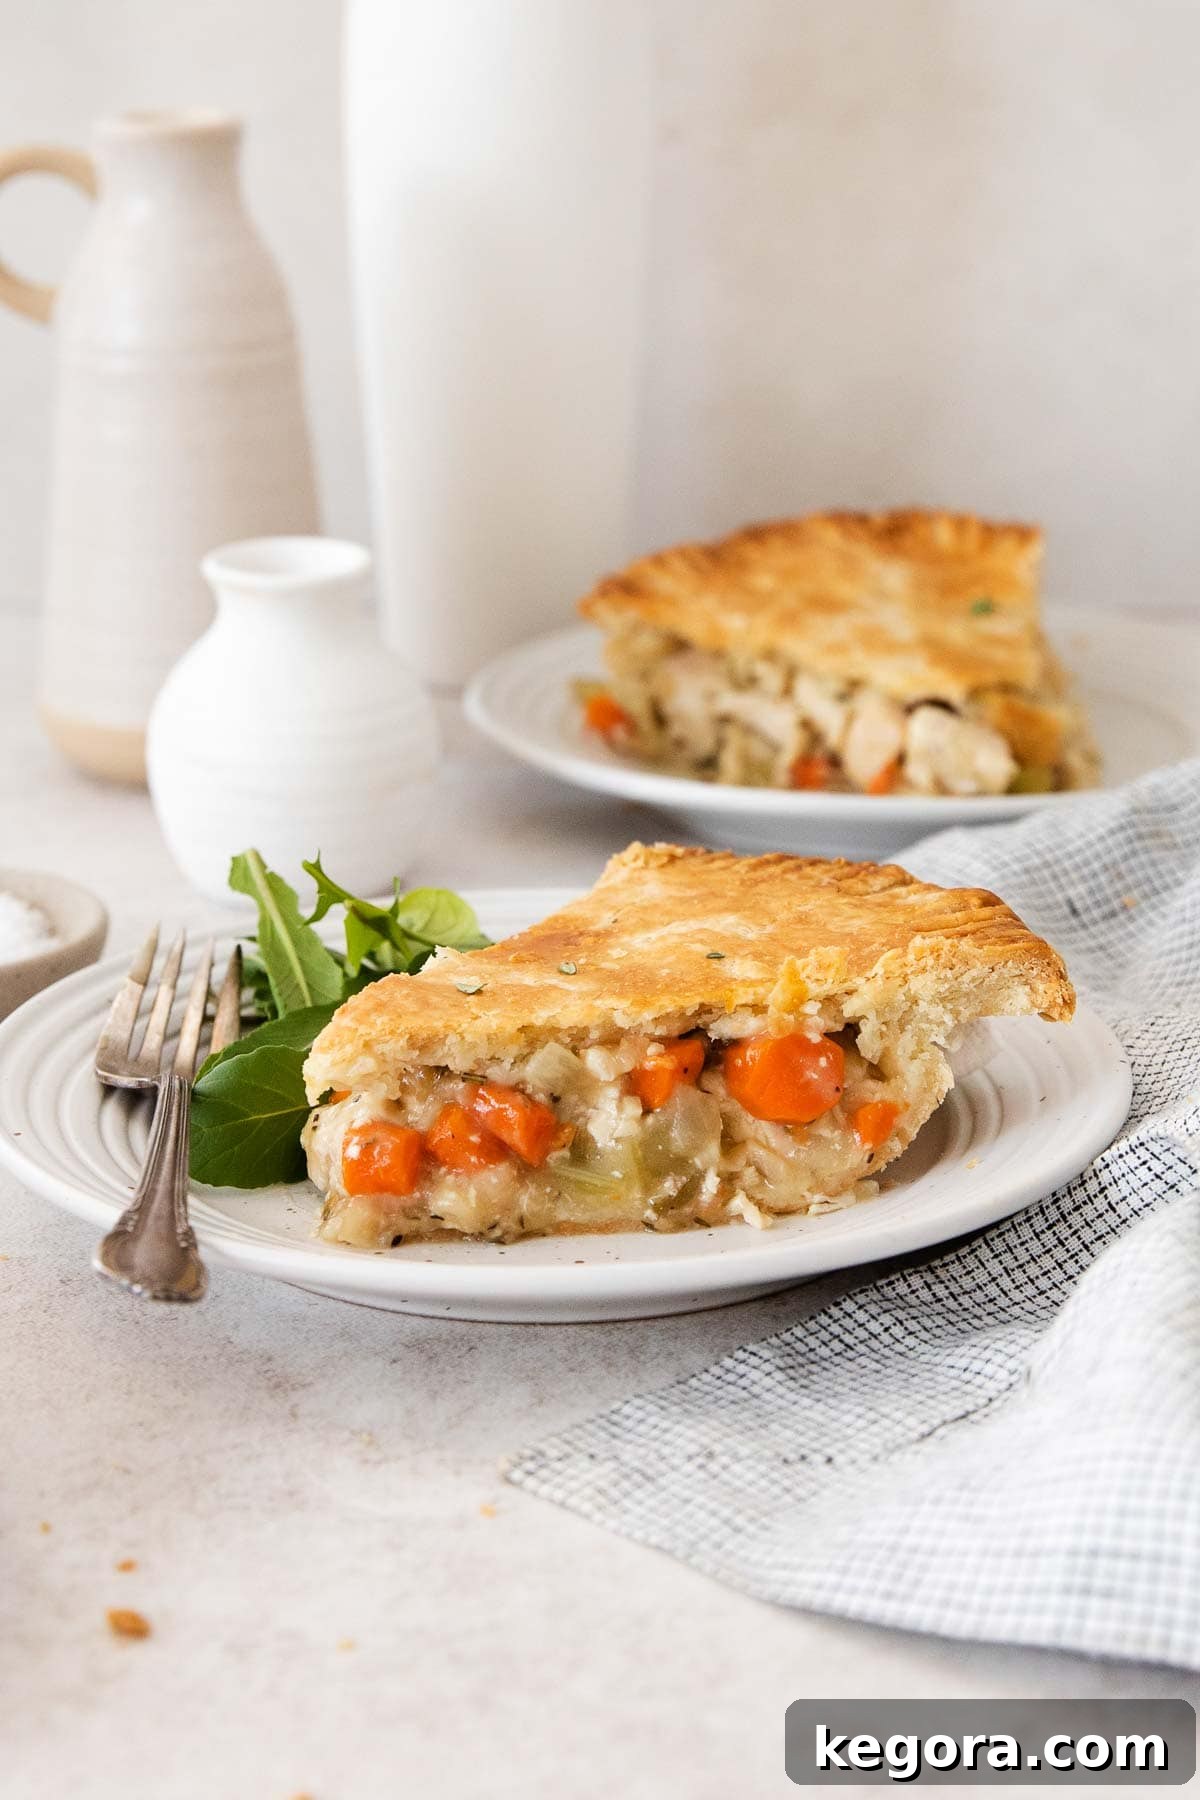

Homemade Gluten-Free Chicken Pot Pie with Sour Cream Pie Crust
It’s one of our family’s all-time favorite dinners, and I’ve learned a few tips along the way to help it turn out every time.
Comments
Ingredients
Gluten-Free Sour Cream Pie Crust
- 1 cup (226g) butter
- 2¼ cups (338g) gluten-free measure-for-measure flour
- 2 teaspoons granulated sugar
- 1 teaspoon kosher salt
- 2 tablespoons sour cream
- 3 teaspoons distilled white vinegar
- 5 –8 tablespoons ice water
Pot Pie Filling
- 1 cup (about 130g) diced yellow onion (about 1 medium onion)
- 1 cup (about 130g) diced carrots (about 2 medium carrots)
- 1 cup (about 110g) diced celery (about 3–4 stalks)
- 4 tablespoons (56g) butter
- 1 teaspoon kosher salt
- ½ teaspoon pepper
- 2 cloves garlic minced
- 1 tablespoon thyme leaves from about 3 sprigs; leaves only
- 1 tablespoon finely sliced sage from about 3 large leaves
- 1 teaspoon finely chopped rosemary from 1 sprig
- ¼ cup (37g) gluten-free measure-for-measure flour
- 1 cup (240ml) white wine
- 1½ cups (360ml) chicken stock
- 3 cups (about 420g) shredded rotisserie chicken
Egg Wash
- 1 large egg
- 1 tablespoon water
- pinch of kosher salt
Instructions
For the sour cream pie crust:
-
Cut the butter into ¼-inch pieces and freeze for 10–15 minutes.
-
In a small bowl, whisk together the sour cream, vinegar and 5 tablespoons of ice water until smooth; refrigerate until ready to use.
-
Add the gluten-free measure-for-measure flour, sugar and salt to a food processor and pulse to combine.
-
Scatter in the cold butter and pulse until the butter pieces are the size of large peas, about 10 pulses. Add the sour cream mixture and pulse until the dough begins to clump, about 10 more pulses.
-
Transfer the dough to a bowl and use your hands to knead it together. If the dough feels too dry, add another tablespoon or so of ice water—but don’t be tempted to add too much liquid! You may need to gather and firmly press it a few times until it comes together. The dough should be moist enough to hold together when pressed, but not sticky.
-
Turn out the dough onto a lightly floured surface. Gather it together with your hands, pressing any loose bits into the dough to form a cohesive ball.
-
Gently shape it into two equal discs about 1 inch thick each. Wrap the discs tightly in plastic wrap and refrigerate for 1 hour or up to 2 days.
Make the pot pie filling:
-
While the pie crust chills, make the filling. Melt the butter in a large skillet over medium heat. Add the onion, carrots, and celery. Season with the salt and pepper and cook until the vegetables soften, 8–10 minutes. Be sure to cook the carrots, onion and celery until fully softened. (Nobody wants crunchy veggies in their chicken pot pie!) Stir in the garlic, thyme, sage, and rosemary and cook 1 minute more.
-
Sprinkle the gluten-free measure-for-measure flour over the vegetables and stir to coat; cook 1–2 minutes. Slowly pour in the white wine while whisking constantly. Whisk in the chicken stock and continue stirring until creamy and smooth. Simmer for 3–4 minutes. The filling should look thick!
-
Stir in the chopped rotisserie chicken, and season with more salt and pepper if needed. (This is your chance to make the pie flavorful!) Refrigerate the filling until it is completely cool.
To roll out and bake:
-
If the dough has been in the refrigerator longer than 1 hour, let the dough sit at room temperature for 15 minutes before rolling.
-
Roll one dough disc between two large sheets of plastic wrap to ¼-inch thickness. Remove the top plastic sheet, flip the crust into a 9-inch pie plate, then peel off the remaining plastic. Gently ease it into the plate to make an even crust. Freeze the pie while rolling out the top.
-
Roll out the second disc between two sheets of plastic wrap to ¼-inch thickness. Season the filling with enough salt and pepper before adding it to the crust. Spoon in the cooled filling and spread into an even layer. Remove the top sheet, flip the dough over the filling, and peel off the last sheet. Trim any excess dough, then tuck the top crust under the bottom crust around the edges.
-
Crimp the edges with your fingers or a fork. Use a sharp knife to cut a few vent slits in the middle of the pie to help steam escape.
-
Place the whole pie in the freezer while the oven preheats. Place a pizza steel in the oven. Preheat the oven to 400°F. (Baking the gluten-free chicken pot pie on a pizza steel helps ensure the bottom crust gets nice and golden brown!)
-
In a small bowl, whisk together the egg, water and salt for the egg wash. Brush the top of the pie with the egg wash.
-
Bake the pie for 40-45 minutes until the crust is golden brown and the filling is bubbly.
-
Remove from the oven and let cool for 10 minutes before slicing. Slice and enjoy!
Notes & Pro Tips
Tips for Success:
- Dough Hydration: Use just enough ice water in the gluten-free pie crust to allow it to come together. Gluten-free dough can be tricky; it needs enough moisture to form a cohesive ball, but too much will make it sticky and difficult to roll. You’ll likely need to press it firmly by hand in a bowl after the food processor.
- Soft Vegetables are Key: Always ensure the carrots, onion, and celery are fully softened and slightly caramelized before moving on. This lengthy sautéing step (8-10 minutes) builds a crucial flavor base and prevents an unappealing crunchy texture in your finished pot pie.
- Season Liberally: Don’t forget to taste and adjust the seasoning of your filling before adding it to the crust. A flavorful filling makes all the difference!
- Rolling Gluten-Free Crust: It’s common for gluten-free pie crust to crack easily. Rolling it between two sheets of plastic wrap minimizes this, and any small cracks can typically be gently pressed back together as you work the dough into the pie plate.
- Crispy Bottom Crust: The pizza steel is highly recommended for achieving a truly crisp and golden brown bottom crust, thanks to its excellent heat conduction.
To Make Ahead:
Both the pie crust and the filling can be prepared in advance and stored separately. The dough discs can be made up to 2 days ahead and kept tightly wrapped in plastic in the refrigerator. The cooked filling can also be prepared 1-2 days ahead and stored in an airtight container in the fridge, ensuring it is completely cooled before storing. Assemble the pie just before baking for the freshest results.
To Store Leftovers:
Store any leftover slices of baked chicken pot pie in an airtight container in the refrigerator for 3–4 days. Reheat gently in the oven or microwave.
To Freeze:
You have a few options for freezing:
- Unbaked Pie: Assemble the entire pie as directed, then wrap it tightly with several layers of plastic wrap followed by aluminum foil. Freeze for up to 2 months. To bake, thaw overnight in the refrigerator, then bake as per instructions (you might need an extra 5-10 minutes if still very cold).
- Cooked Slices: Freeze individual cooked slices for up to 1 month. Wrap each slice tightly in plastic wrap and then foil. Reheat from frozen in a preheated oven at 350°F (175°C) until warmed through, about 25-35 minutes.
Nutrition
Carbohydrates: 35g |
Protein: 19g |
Fat: 33g |
Saturated Fat: 19g |
Polyunsaturated Fat: 2g |
Monounsaturated Fat: 9g |
Trans Fat: 1g |
Cholesterol: 136mg |
Sodium: 972mg |
Potassium: 423mg |
Fiber: 5g |
Sugar: 5g |
Vitamin A: 3723IU |
Vitamin C: 5mg |
Calcium: 73mg |
Iron: 2mg